
|
I was perusing the Quilt Index this week and came across this fantastic quilt top. Unfortunately it was never finished. 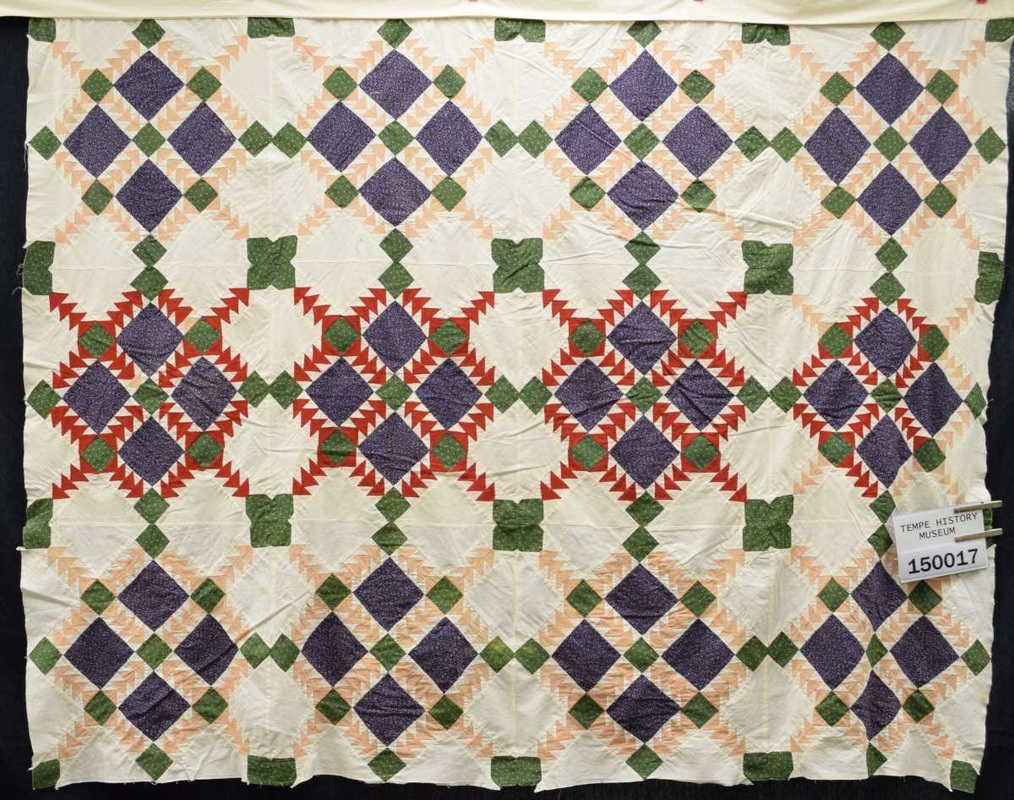 Tempe Museum Quilt found on Quilt Index There were limited facts about this quilt. Let me share what I learned.
Wouldn't you like to know more about the quilter? I spent some time looking in Block Base to see if I could find this quilt block. Alas, I could not locate it. Does anyone know the block name? I decided it was time to turn to Electric Quilt program to draft this block. Watch me draft the block and quilt in this weeks Electric Quilt tutorial and video. This one is done in Easy Draw. There were a few tricks to drafting the "on-point block" within the main block. Here is a close-up of the block, if you wish to try tracing the block for yourself. 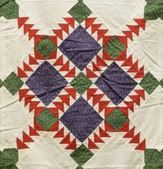 Tempe Museum Quilt Block Here is the final quilt drafted using Electric Quilt.  Electric Quilt Rendition of the Tempe Museum Quilt After a bit more playing, I realized the blocks really should be 20" finished size. Then the flying geese units ending up at a 1" x 2" finished size. Much more friendly to piece with today's tools. I've attached the rotary cutting chart and templates at the 20" size, if anyone wants to give this a shot. If you do so, please share photos of your project. I would love to see this pieced. Featured Product - It's a MysteryI am slowly adding digital copies of my piecing patterns to my website. This week I posted It's a Mystery. This was my first published quilt pattern and is still one of my favorite quilts to make. 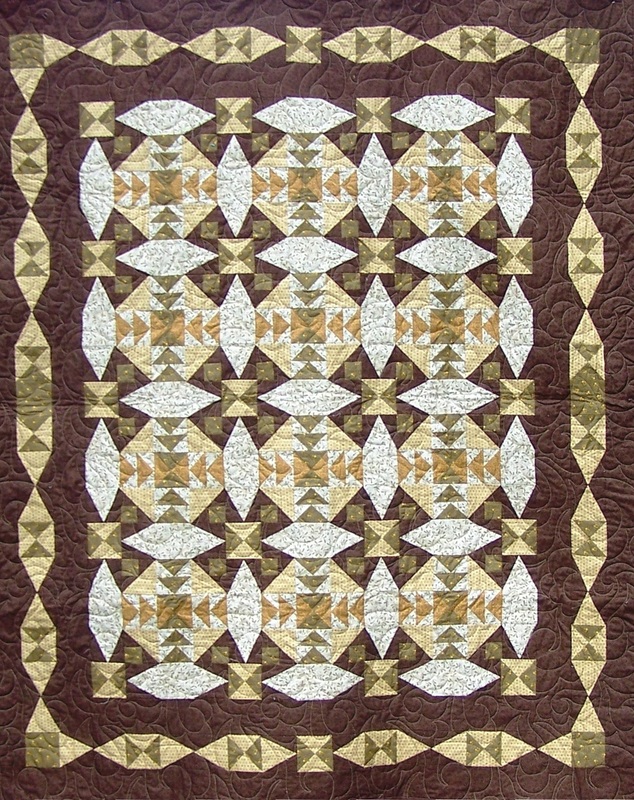 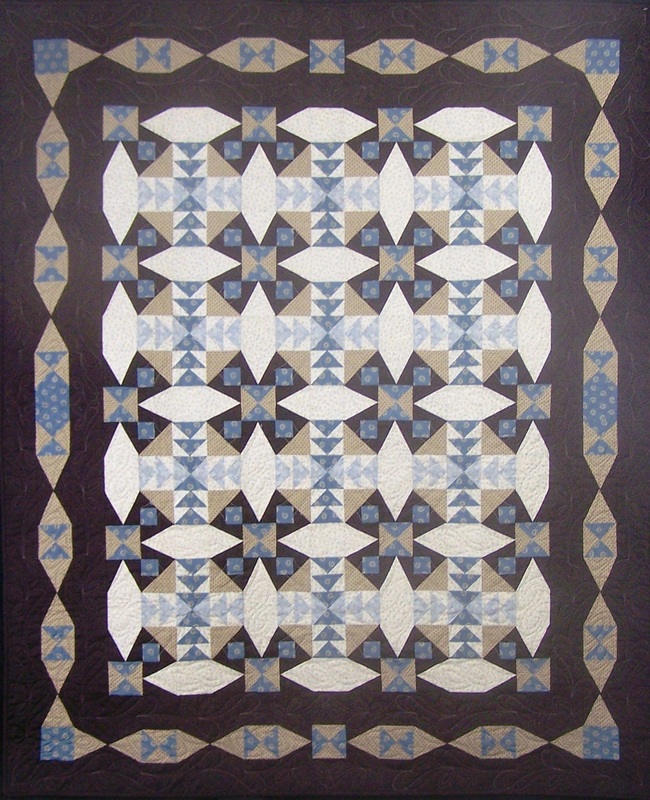 This quilt was originally designed for a mystery weekend – hence the name. This seemingly complex quilt is easier than it looks. Instructions provide for strip pieced and over-sized units that are cut down with the use of the recommended rulers from Deb Tucker’s Studio 180 Design. Three sizes are available: Lap 57 x 69 (shown), Twin 69 x 93 or Full 93 x 93 Purchase digital piecing pattern here. Purchase physical copy of pattern here. Happy quilting. Kari Sign up for my newsletter to stay current on what's happening in my studio and learn more quilting tips. As a thank you, I'll send you a FREE pattern for this small maple leaf quilt.
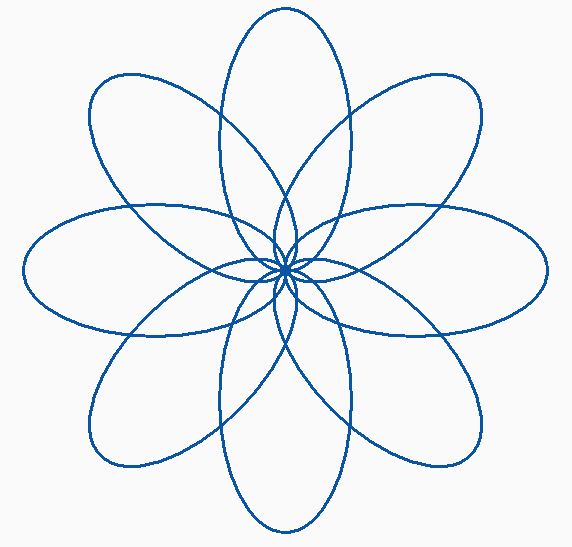
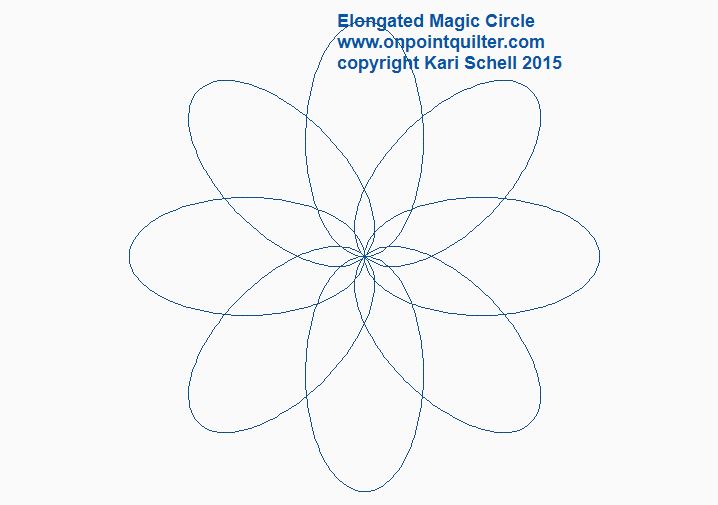
I've been obsessed with ellipses this week -- you know those elongated circles. I've been working on a new quilt (not quite yet ready to share it yet) that called for some modern quilting. I think these elongated circles really fit the bill.
They are so easy to create in Art and Stitch, since it is one of the standard shapes in the toolbar. Just drag and drop. I then did some fun playing with magic circle. Everything looked great.
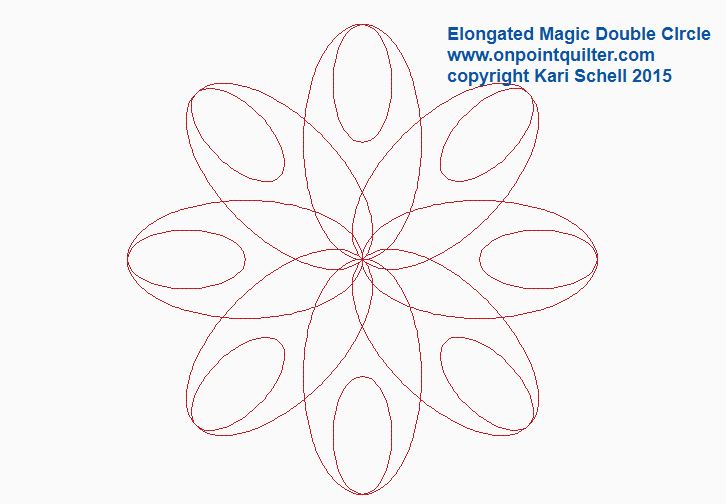
The challenge came when I wanted to connect everything up and make it continuous. I also wanted my lines to cross to ensure I didn't have gaps when quilting it out. I also didn't want to loose the "symmetrical" points when doing so. (Connect Objects was not my best friend for this exercise.) Let me share some valuable tips I learned when creating this design. Part 1 shows the drafting of the basic elongated magic circle. Part 2 shows the double elongated magic circle along with a tip from Loes on how to preserve my stitch out despite all those pesky points coming together in the center. Featured Product - Elongated Magic Circle Set (on sale for $5)After I finished these designs, I realized that many of you would probably like to have them for your own quilts. So I decided to offer the set of them for only $5 this week. This will provide you the files in formats for all major quilting systems.
Happy quilting. Kari Sign up for my newsletter to stay current on what's happening in my studio and learn more quilting tips. As a thank you, I'll send you a FREE pattern for this small maple leaf quilt. 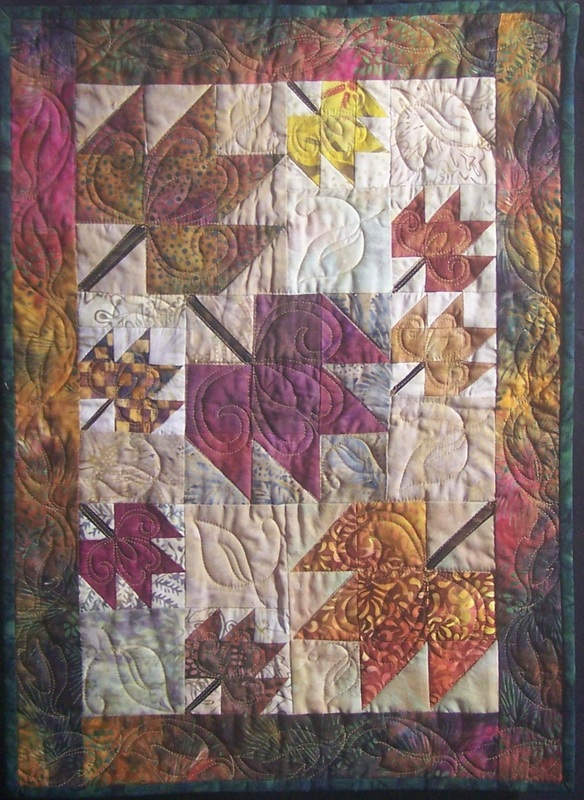 I received an e-mail this week from someone who was interested in larger version of Come Said the Wind. After a little bit of playing in Electric Quilt, I came up with a variation on the quilt that would work. I didn't change the size of the blocks, but just added more "borders" that repeated earlier elements in the quilt. The original quilt design is 33" x 33": 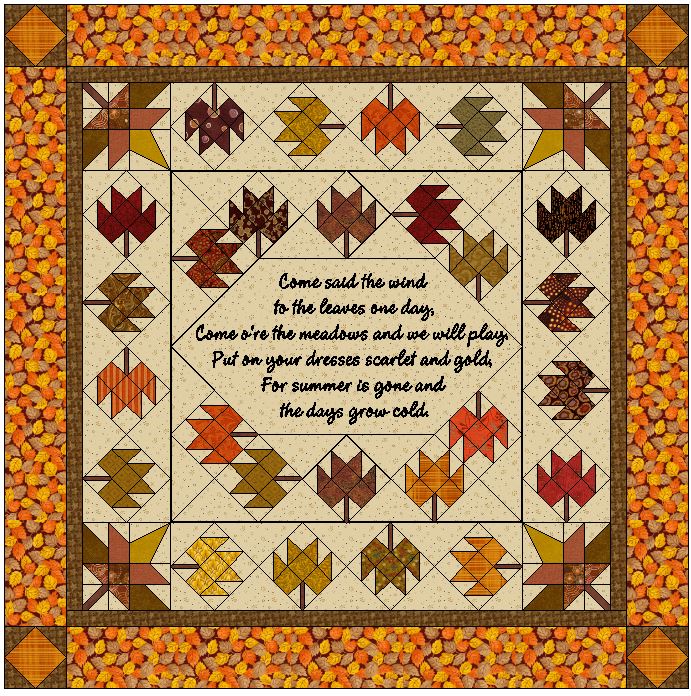 The lap size quilt design: 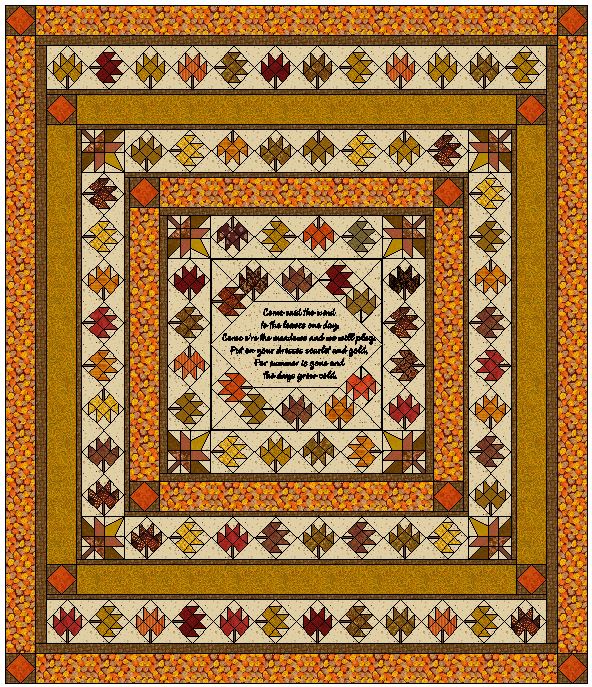 To get those on point maple leaf blocks to still work at a 3" finished size, I needed to add a 1/2 inch (finished size) border to the wall quilt before the next round of maple leaves. I then added another 1/2 inch border after that (which was necessary for the final rows of maple leaves to fit across the top and bottom). The solid borders are all 3" finished sizes. The final size of the adjusted quilt is 57-1/2" x 67". I hope this gives you enough information if you wish to make the lap quilt from the pattern. Please let me know if you have additional questions. I know this has probably inspired some of you to make this quilt. So I've decided to extend my Come Said the Wind Digital sale for another week. (Note that the instructions are for the two smaller quilts. However, you can easily modify these on your own for this throw quilt.) Featured Product - Come Said the Wind Pattern Digital BundleI've bundled the download version of Come Said the Wind and the two quilting designs. Extended for one week only, the bundle is on sale for $15 (that's 50% off the non-bundled prices). No digital longarm system -- there are also pdfs of the quilting designs that may be copied and resized. Best of all you can get started today with downloads of everything.
Also on sale this week are the two quilting designs for Come Said the Wind. Each of these are only $5 (a savings of 50%). Click on the photo to be directed to the purchase page.
Happy quilting. Kari Sign up for my newsletter to stay current on what's happening in my studio and learn more quilting tips. As a thank you, I'll send you a FREE pattern for this small maple leaf quilt.
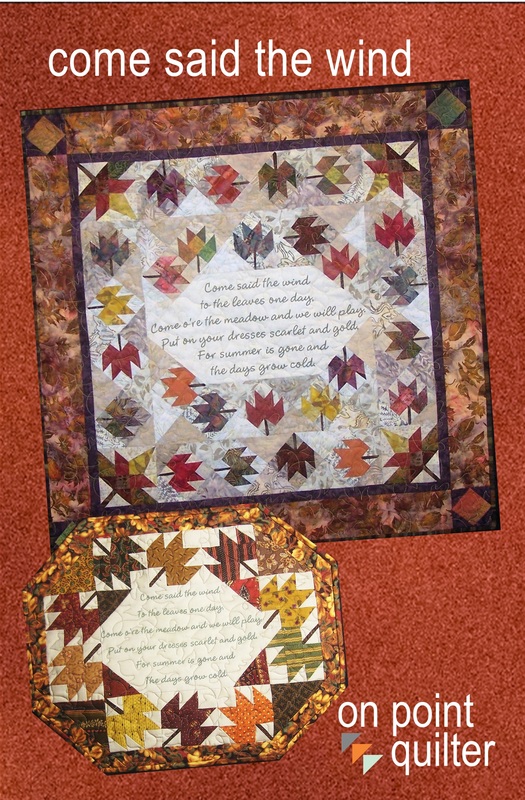
This weekend, we celebrate Labor Day. Although it isn't "officially autumn", it is the start of transitioning into the season. I don't know about you, but I am beginning to think about bringing out my fall themed quilts. Here is one of them.
Come Said the Wind by Kari Schell
When I originally released my Come Said the Wind pattern, I used a pantograph to quilt the large wall hanging. With the batik background, the quilting pretty much disappears, so that was probably a good choice at the time.
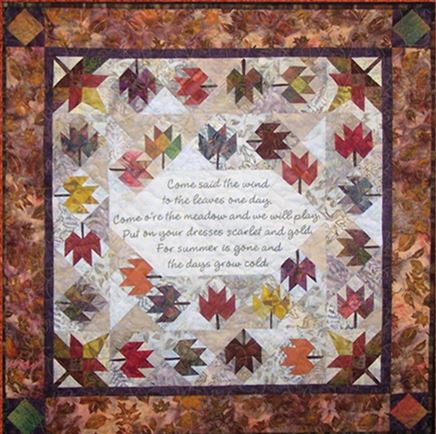
However, I am now quilting a customer's Come Said the Wind wall hanging. She did beautify embroidery for the verse and has a monochromatic background. It really called for custom quilting. So how did I approach quilting it? Step 1: Identify the custom quilting spaces. 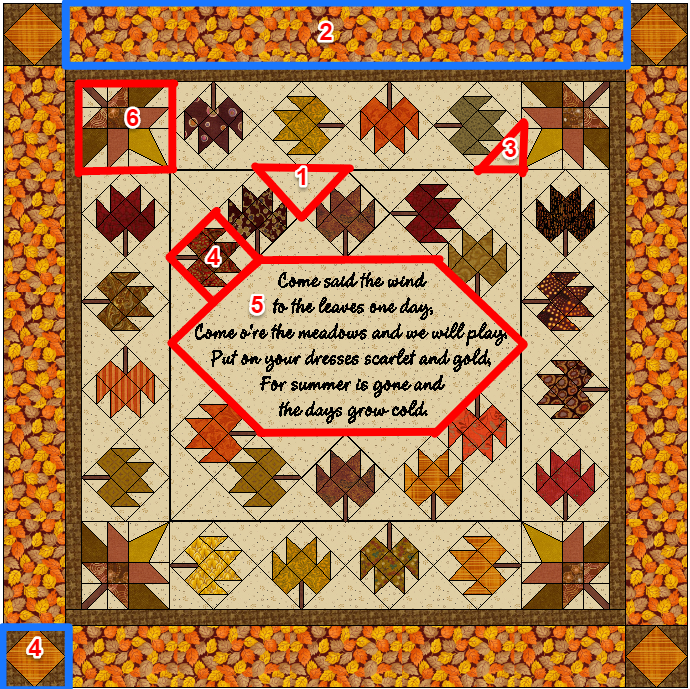
Step 2: Identify the quilting theme. This one was easy. Maple leaves and loops. I decided to add the loops as I wanted something really easy to freehand around the embroidery. Since I do very little freehand these days, it needed to be super simple.
Step 3: Find or design a core motif.

Step 4: Create designs for each of the quilting spaces around the motif.

I really liked the idea of a point to point triangle design. This will allow me to quickly whip around those small setting triangles. I can see using this one in other quilts as well.

Maple Leaf Border Quilting Design
The border design is repeatable (notice that the starts and stops are on the same plane). This could also be used as a pantograph.

Maple Leaf Border used as a pantograph, Shown with 25% offset.

This one came from Line Dancing, a book by Diana Phillips. Is is really a variation of continuous curves.
I also decided on some basic arcs for the pieced leaves.
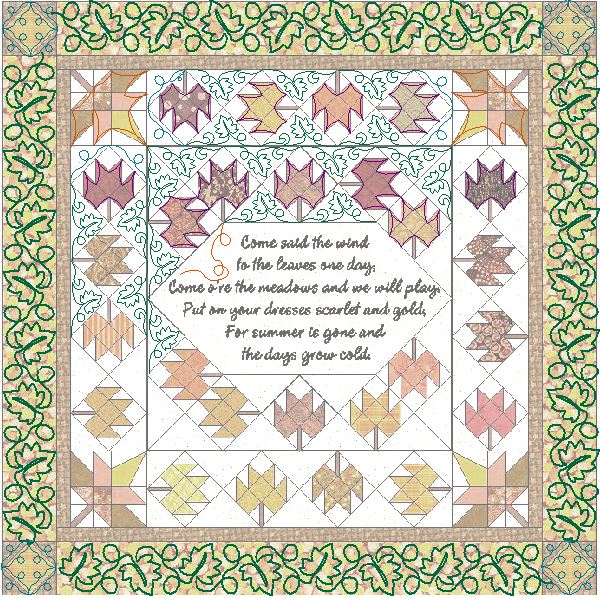
Step 5: Audition designs on a photo or drawing of the quilt. Since I have an Electric Quilt drawing of the quilt, I decided to use that. No need to square up photographs. :)
Step 6: Quilt it!
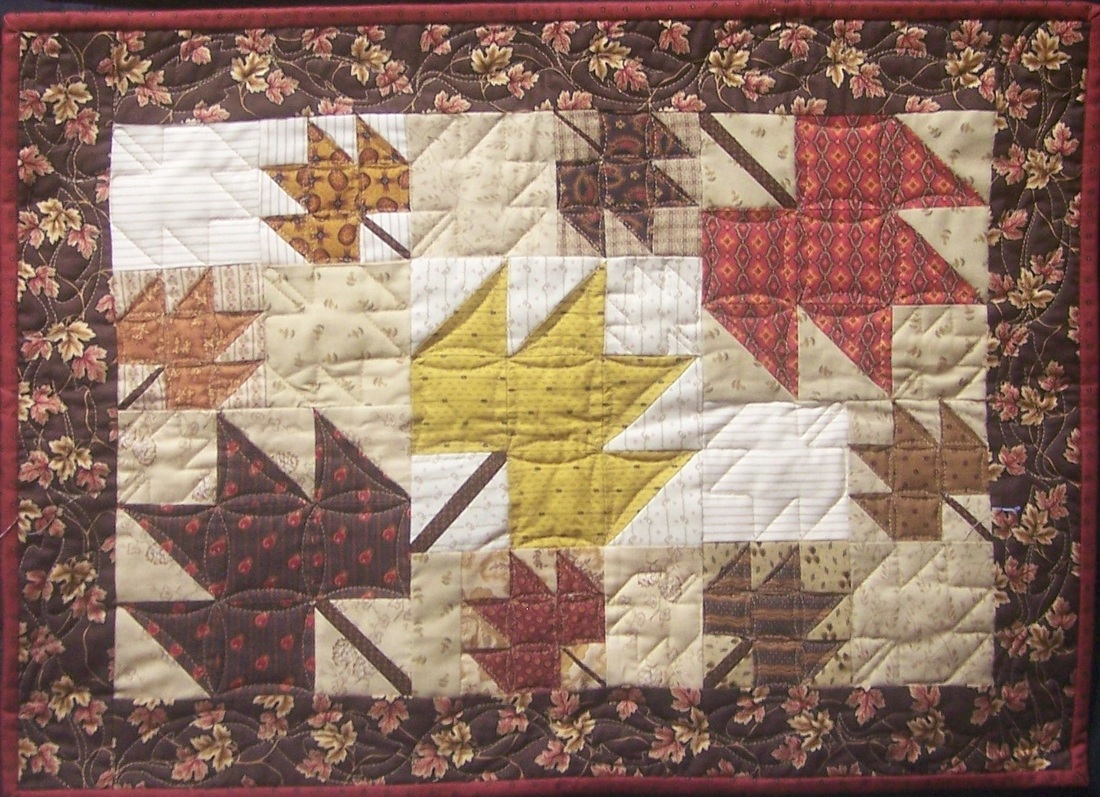
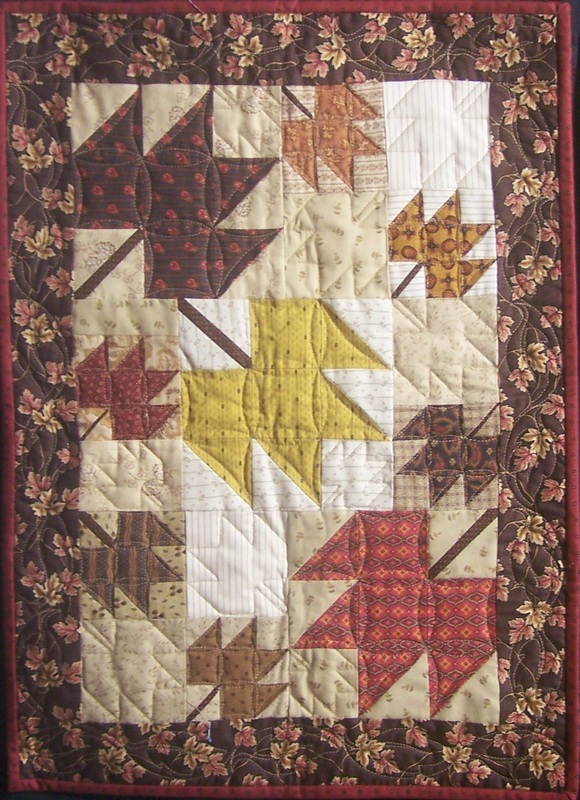
Here are some photos of Pat Cedar's finished quilt. For the leaves and the borders, I used a variegated thread in fall colors.
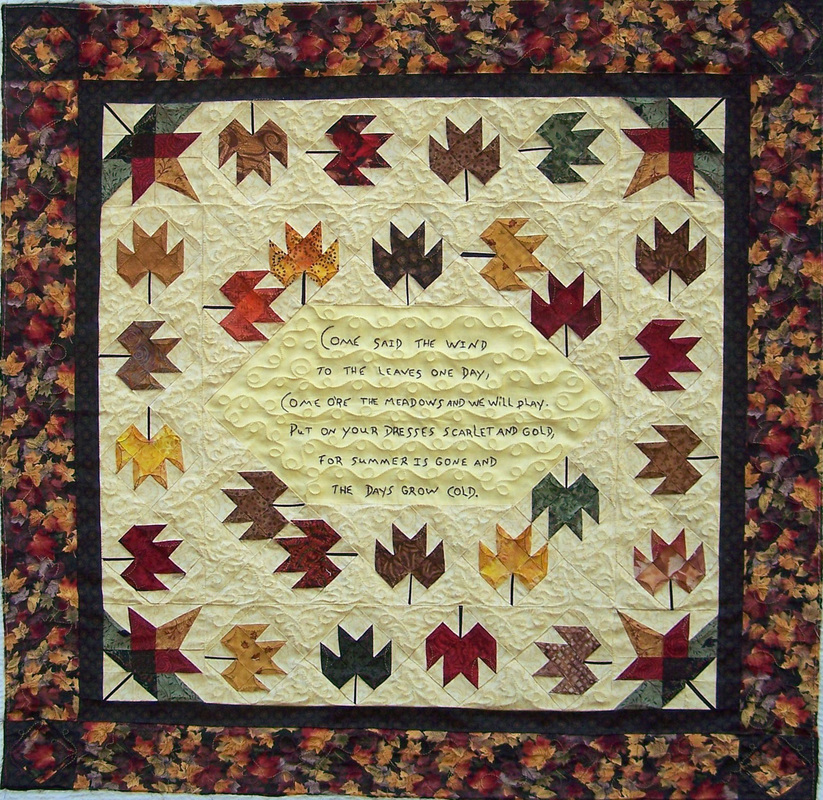
Pat Cedar's Come Said the Wind with Custom Quilting
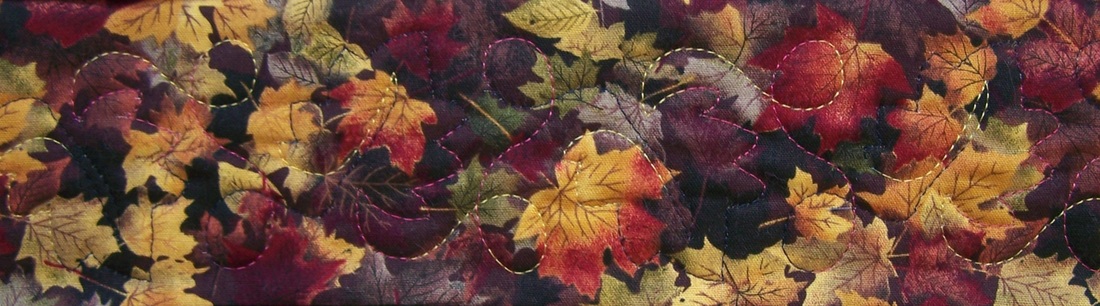
Come Said the Wind Border with Maple Leaf Border quilting Design
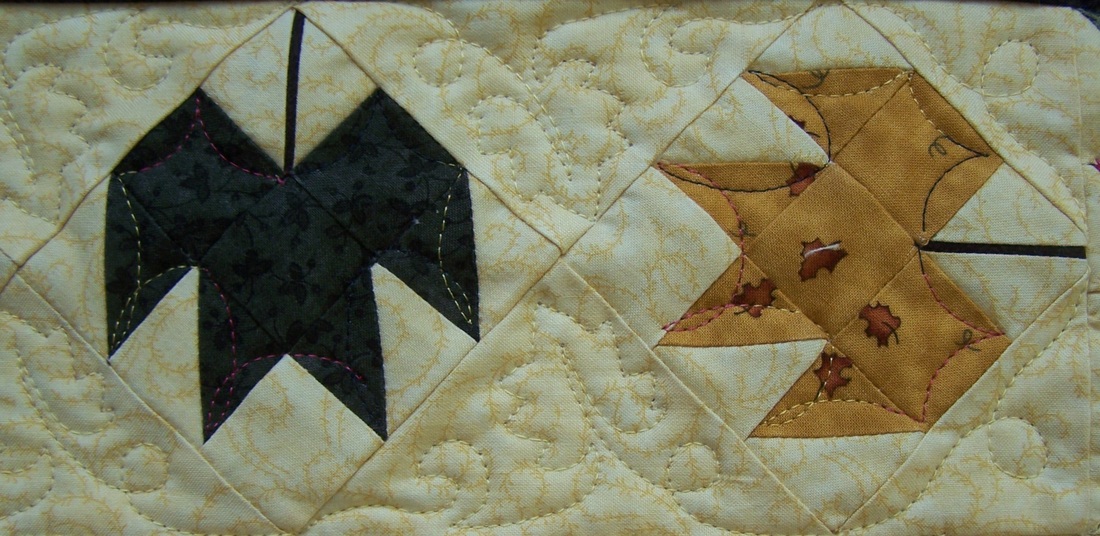
Come Said the Wind Quilting for Maple Leaf Block and Setting Triangles
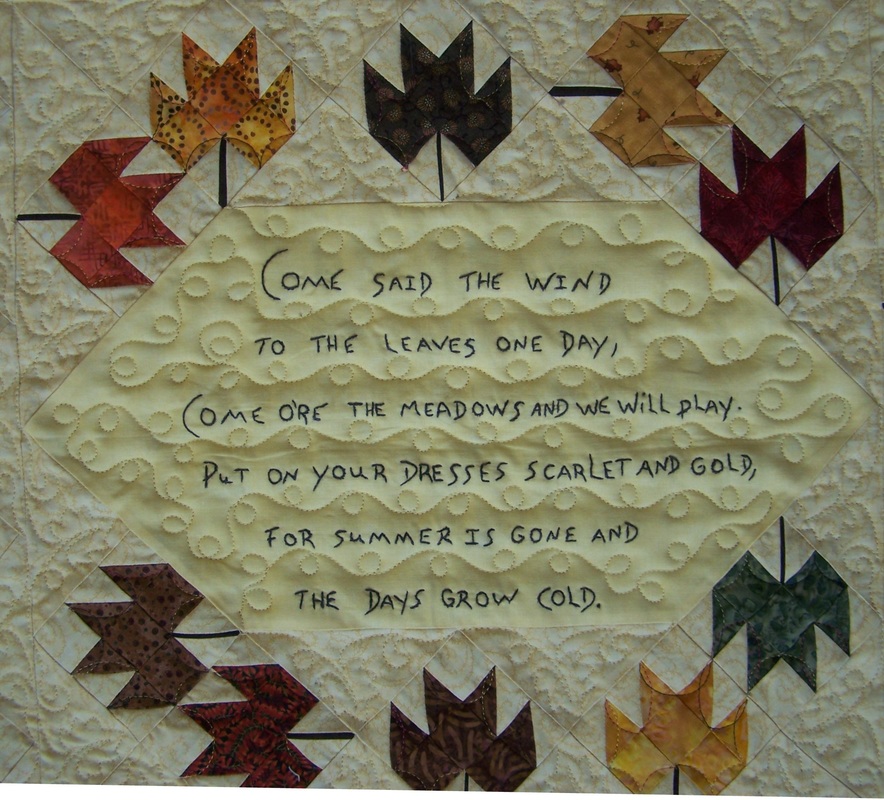
Come Said the Wind Embroidered Poem with Freehand Quilting
Featured Product - Come Said the Wind Pattern Digital Bundle
I've bundled the download version of Come Said the Wind and the two quilting designs. For this week only, the bundle is on sale for $15 (that's 50% off the non-bundled prices). No digital longarm system -- there are also pdfs of the quilting designs that may be copied and resized. Best of all you can get started today with downloads of everything.
Also on sale this week are the two quilting designs for Come Said the Wind. Each of these are only $5 (a savings of 50%). Click on the photo to be directed to the purchase page.
Happy quilting.
Kari Sign up for my newsletter to stay current on what's happening in my studio and learn more quilting tips. As a thank you, I'll send you a FREE pattern for this small maple leaf quilt.
|


Free guide available for newsletter subscribers


Kari SchellElectric Quilt Expert and Educator and Pattern Designer. Categories
All
Archives
July 2024
|


 RSS Feed