ON POINT QUILTER
  • Blog
  • About
  • EQ8 Training
    • Tech Know Quilters Electric Quilt 8 Membership Training
    • EQ8 Made Easy
    • Electric Quilt 8 Sneak Peek
  • Store
  • Contact
Picture

From EQ8 to T Shirt

5/18/2024


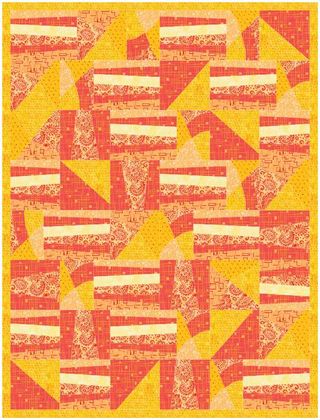
Tech Know Quilters Masters Challenge - Design Your Own T Shirt


​Many of us have made quilts designed from old T Shirts.  Maybe like this design from my T Shirt and Panel Quilt class.

​But what if we reversed the concept -- and took a quilt we designed in EQ8 and transferred it to a T Shirt?


Or create a design in EQ8 specifically for a T Shirt? 

Wouldn't that be super fun to wear to your next guild meeting?

Or your next quilt show?

​Everyone will be asking where you got your shirt. 
Picture
Custom Set Quilt Design from T Shirt and Panel Quilt Class in Tech Know Quilters

In this blog post I will inspire you with ideas developed by Tech Know Quilters Masters members who designed their own T Shirt in EQ (or used a T Shirt from the EQ library).  And then created a design for the T Shirt.

I will also walk you through the process of preparing your Electric Quilt 8 design for printing -- and will walk you through how to use VistaPrint to print your own T Shirt.

Quilty T Shirts Tech Know Quilters Masters Challenge

For this challenge, Tech Know Quilter Masters members started by either drafting their own shirt or using a shirt from the EQ library. 

In week 2, they found a design to add to their T Shirt. 

And then (if desired) they added text to their quilt. 

​I am hoping some decide to create their own personal T Shirt from their design.

I personally would love to wear any of them.
Picture
Julie Pedersen
Picture
Fran Heisey Oh my! I learned so much last month. I used a lot of it for the challenge.
Picture
Kristy Goodin Soard I chose to carry on with my word of the year with this challenge.
Picture
Brigitte Lee Recycling my old motifs.
Picture
Rhonda Goss
Picture
Zdenka Nemethova Inspired by Carolyn Friedlander Shirts Quilt pattern, just adjusted a bit to have a space for the design.
Picture
Lynne Maramieri My shirt block for this month's challenge. I rounded the neckline and made crazy patch fabric for the appliqué heart.
Picture
Connie Bradley Bobcik I decided to make a sweatshirt, just to challenge myself a little further. I had to do some thinking on this one!
Did you know that if you have received twelve months of Tech Know Quilter classes, you are eligible for the TKQ Masters program? 

​Send me a note, if you are interested in learning more about joining Masters.
Tell Me More About Joining TKQ Masters

From EQ8 to T Shirt

I decided to challenge myself to participate in the TKQ Masters Challenge as well.

I've been wanting to create a Tech Know Quilters T Shirt. 

I ended up with two designs and couldn't decide which one I preferred.
Picture
Tech Know Quilters T Shirt Quilt Design - Option 1 by Kari Schell
Picture
Tech Know Quilters T Shirt Quilt Design - Option 2 by Kari Schell
Let me walk you through the highlights on creating my design in EQ8.
  • Locate the T is for T-shirt block in the EQ8 Block library under ​03 Foundation Pieced >My ABC Quilt
  • Add to Sketchbook
  • Edit the block and delete the horizontal line at the bottom of the shirt.
  • Recolor the block.
Picture
T is for T-shirt
Picture
Modified T Shirt Block
  • Set up a New Quilt>Horizontal
  • # of Blocks 1 x 1
  • Size of Block 16 x 16
  • Delete the border
Picture
Layout Tab for Quilt
  • Place the modified T Shirt block on Layer 1
Picture
Design Tab - Layer 1
  • Select Layer 2​
  • Drag any blocks (they don't need to be applique motifs) on Layer 2  
  • I designed my own blocks for my T Shirt, but you could pick blocks from the EQ library.
  • Resize as desired.
  • Note that I colored the black in the block with the same fabric as the fabric used to color the t shirt.
Picture
Design Tab - Layer 2 Adding Designed Block
  • On Layer 2, use the Text tools to add the text
  • Pick a font installed on your computer
  • I used the 2Tech font from Dafont.com
  • ​Rotate and position the text on the t shirt
  • Add to sketchbook to save your quilt.
Picture
Design Tab - Text Tools
In my free video this week, I decided to share (as Paul Harvey would say) "the rest of the story".

While the design in EQ was great, I didn't want a quilt with the design -- but wanted an actual T Shirt.

I knew it would be fun to wear to retreats and quilt shows.

And I loved the fact that it is a one of a kind item.

The biggest challenge I needed to overcome was preparing a good design for printing.

And then finding a way to get it actually printed. 


Check out how I addressed both of these challenges.
You may have noticed in the video that I added a new piece of software to the mix. 

My original plan was to use a background remover app (such as remove.bg).  I use that app a lot, but the export was not large enough to create a crisp design.  ​
What is Inkscape?

Inkscape is a professional vector graphics editor for Windows, Mac OS X and Linux. It's free and open source. 

Inkscape can seem overwhelming to use when you open it for the first time. However you only need to use a few tools within Inkscape to clean up your T Shirt design exported from EQ -- so this really is a piece of cake.

​
You can download Inkscape here.  In the video I used version 1.3.2.
Picture
Link to Inkscape Website


​When I was looking for a way to get my shirt printed, I saw that VistaPrint https://www.vistaprint.com  was an option. 

I've used them in the past for postcards and business cards and have been impressed with their quality. 

They allow for purchases of single shirts, so I thought I would give it a try.

In the process, I realized my image should be at a dpi of at least 300.  (That was when I realized remove.bg wasn't going to work.)
It was much simpler than I thought.

I have placed an order for a few items with my design.   There were a few other items that looked appealing as well.  

I'll report back once the order arrives. 

​Until then, here is a screenshot of the preview of the shirt.
Picture
Preview of Vista Print Designed T Shirt
Do you have a favorite quilting T Shirt?  I would love to see pictures.  I've set up a separate post in the Learning EQ Facebook group for you to share.
From EQ8 to T Shirt Learning EQ Facebook Post
Picture
Happy quilting.

​Kari

Join the On Point Quilter weekly newsletter and receive regular tips and inspiration on using Electric Quilt 8 along with the  Free 12 Top
Tips for EQ8 video guide.
Picture

Window Die Cut Design - From EQ to a Handmade Card

6/10/2023

 
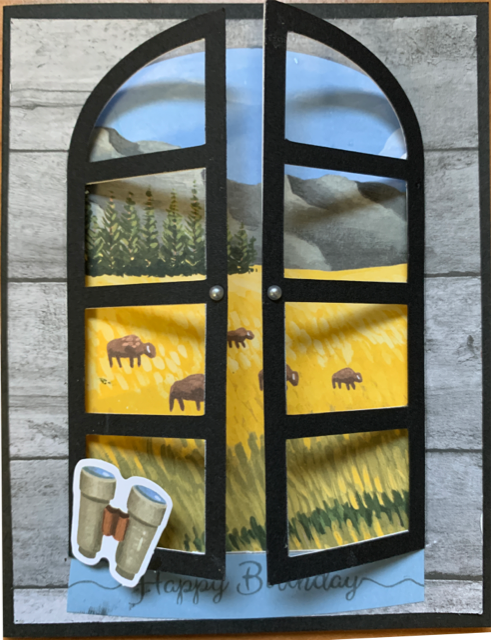
My latest hobby has been making my own greeting cards.  This week I came across a design that had a window frame that overlayed a landscape image.  I began thinking about how I could do something similar using Electric Quilt 8.  I wanted to be able to cut the design out on an electronic cutting system.  For me that meant incorporating Cricut Design Space and my Cricut Maker.
In the video, I will take you through my process.  At a high level:
  • The design was drawn as an applique motif in Electric Quilt 8.
  • In Electric Quilt, the design was printed to a pdf writer as an outline drawing.
  • The design was imported into Inkscape**, where fold lines were added and the design was converted and saved as an SVG.
  • The SVG image was uploaded to Cricut Design Space.  In Cricut Design Space the card base was created and merged with the frame design.
**What is Inkscape?

The extra piece of software I used for creating the SVGs is Inkscape.  Inkscape is a professional vector graphics editor for Windows, Mac OS X and Linux. It's free and open source. 

Inkscape can seem overwhelming to use when you open it for the first time. However you only need to use a couple of tools within Inkscape -- so this really is a piece of cake. You can download Inkscape here.

Inkscape will allow you to create an SVG file which may be used in any electronic cutting system (Cricut Design Space, Silhouette Studio, or Brother Canvas Workspace).

So what is an SVG file?  An SVG file is a graphics file that uses a two-dimensional vector graphic format.  Unlike raster formats such as JPG, GIF, and PNG, an SVG image remains crisp and clear at any resolution or size.  My Translation -- Much cleaner of an image than any trace in a cutting system.
The video is broken into three parts (in case you don't want to watch the entire video):
  • Part 1 (.33) Electric Quilt 8
  • Part 2 (4.17) Inkscape
  • ​Part 3 (7.00) Cricut Design Space

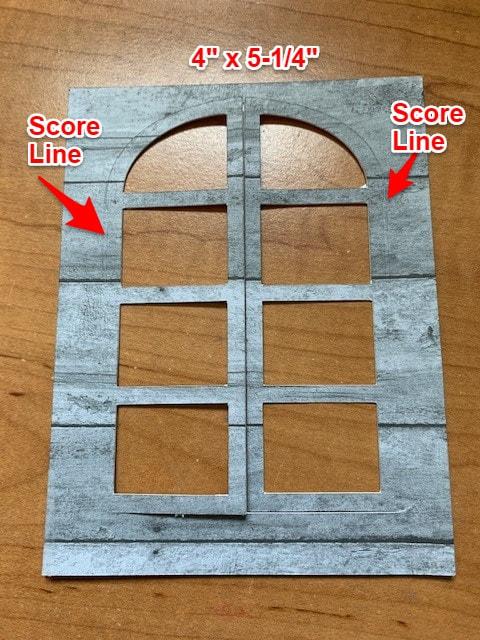
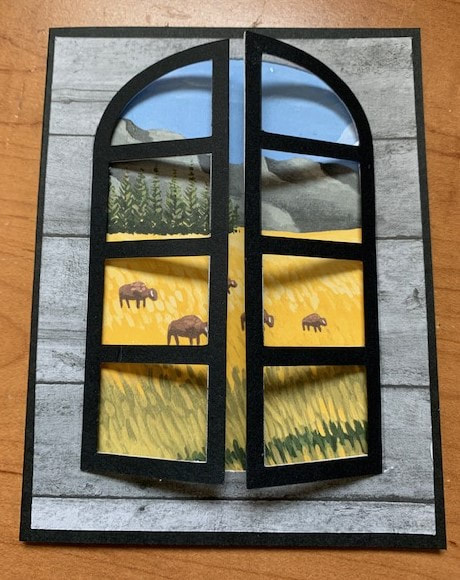
Window Card Construction

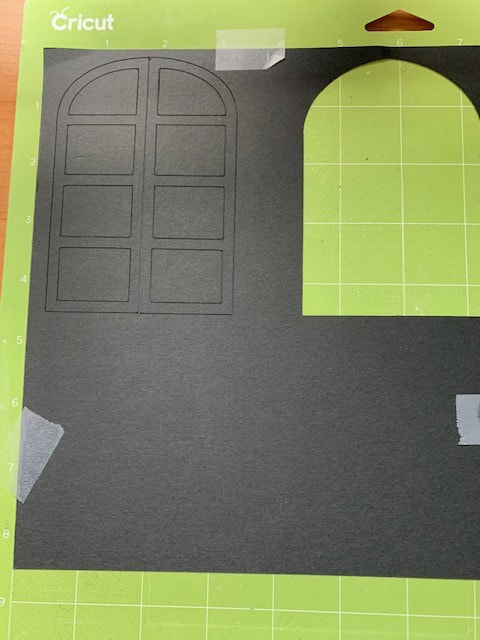
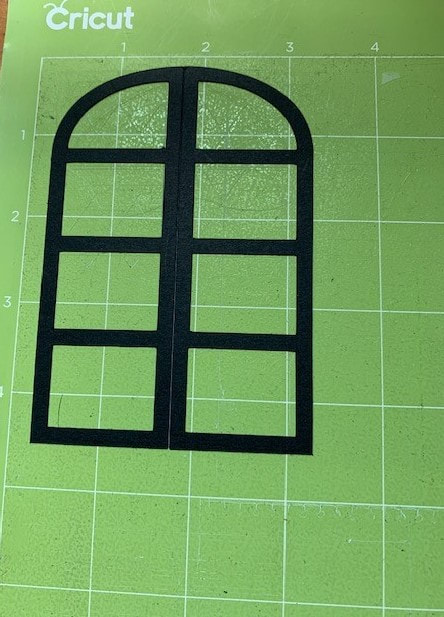
Step 1:  Cut out the Window Frame svg on your electronic cutting system.
Picture
Picture
Step 2:  Cut out the card front with the foldable window frame on your electronic cutting system.  I used the Cricut Maker to score the left and right edges and cut the rest of the SVG.
Picture
Picture
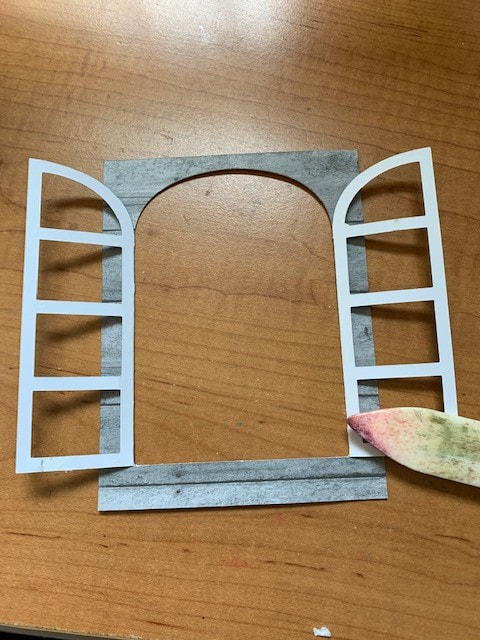
Step 3:  Fold back along score lines and press with a bone folder.
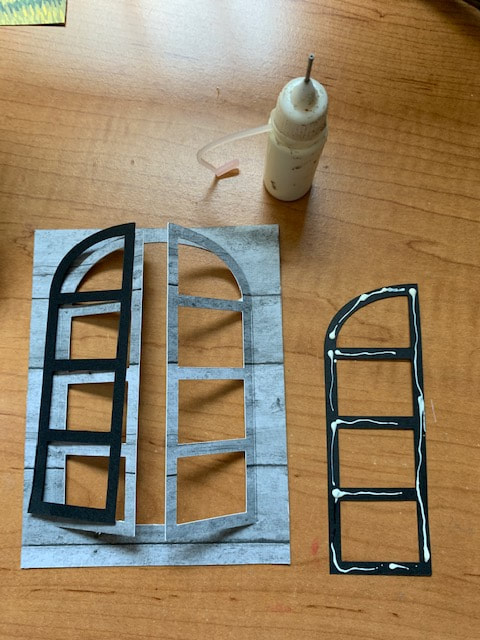
Step 4:  Glue black frames to card front.
Picture
Picture
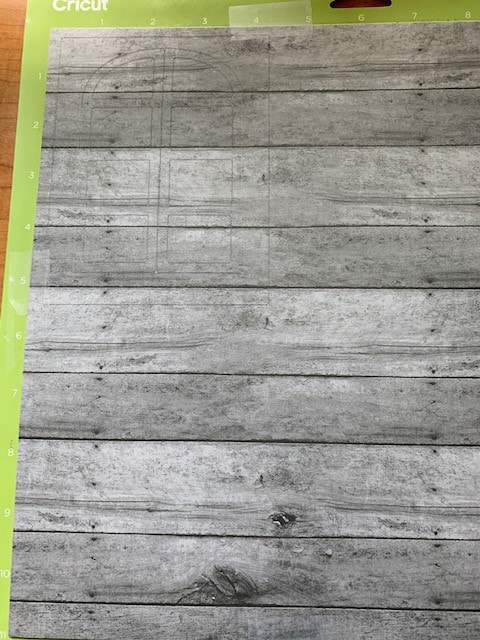
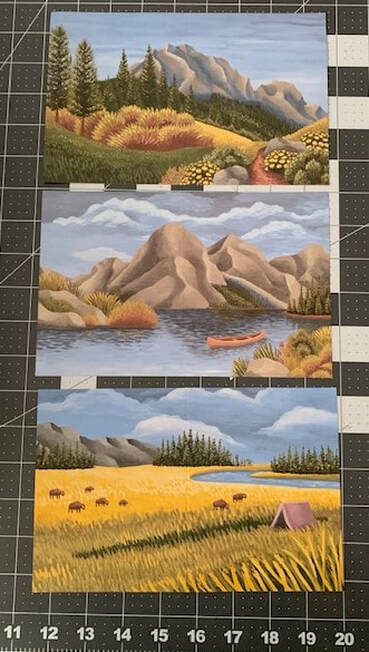
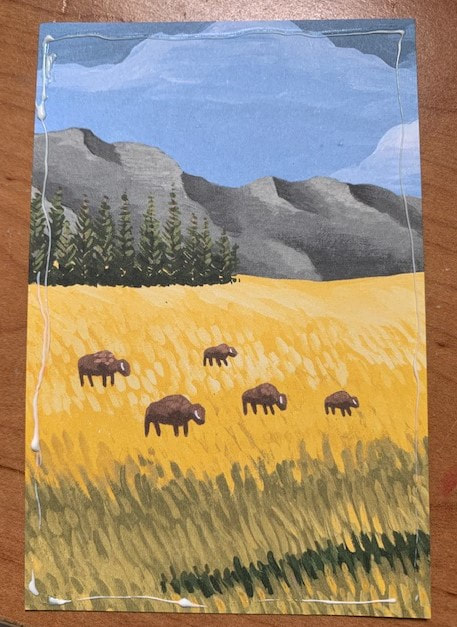
Step 5:  Select a background.  Trim to 3-1/4" x 4-3/4",  Glue to back of card front.  I was thinking that if you had a fun landscape photo from a trip, it might be nice to use that instead.
Picture
May 2023 Paper Pumpkin from Stampin Up card bases
Picture
Trimmed from Paper Pumpkin card base
Step 6:  Cut a card base using Black cardstock 8-1/2" x 5-1/4".  Score at 4-1/4".
Step 7:  Glue card front to card base.
Picture
Picture
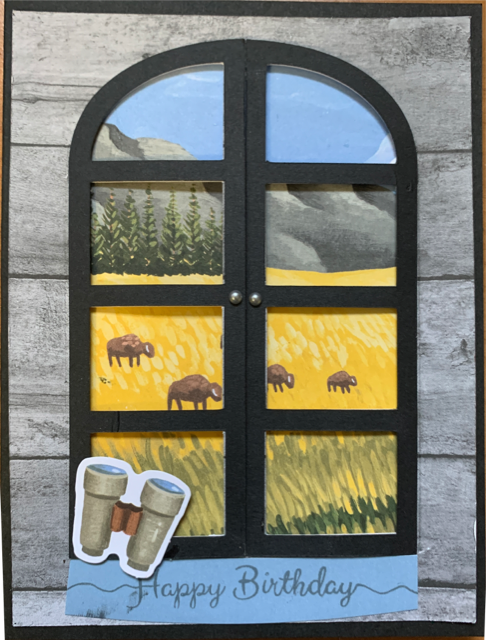
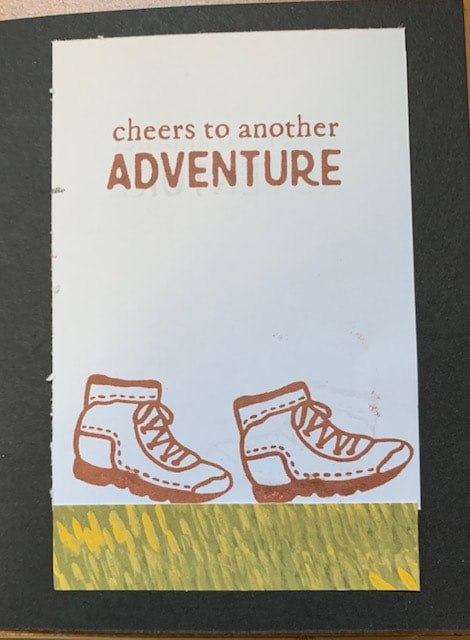
Step 8:  Add greetings and embellishments.
  • Greeting
  • Binoculars (from the Paper Pumpkin kit)
  • Metallic Pearls (for opening the windows)
Picture
Picture
Step 9:  Create inside panel for card.  Stamped items from Paper Pumpkin kit.
Picture
Let me know if you use Electric Quilt 8 for uses other than quilting?  I love hearing how you are using the software.
Window Dies for Cardmaking Learning EQ Facebook Post

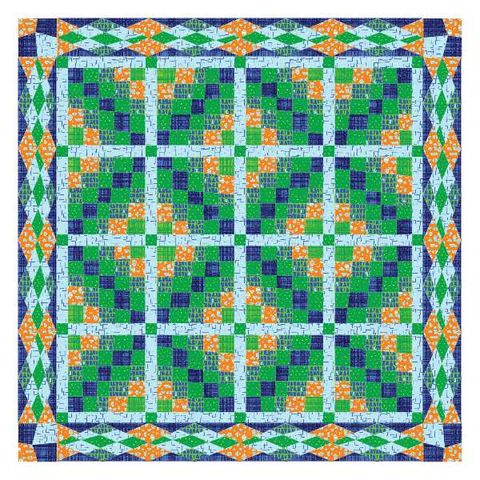
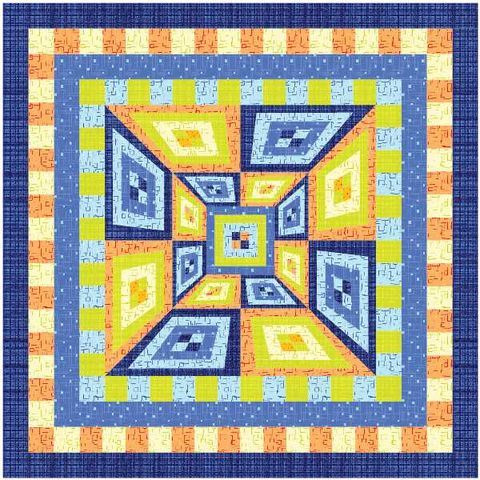
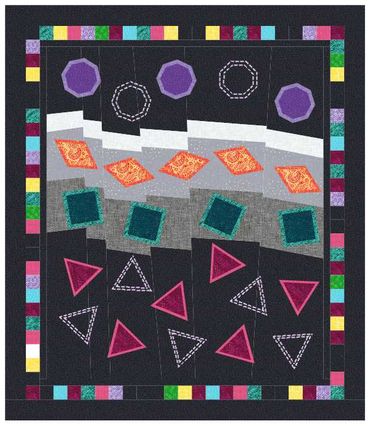
Tech Know Quilters Showcase

Current Tech Know Quilter members have been sharing their class projects along with their original designs (and in some cases quilts) in the membership's private Facebook group.  Enjoy this show of some of their recent creations.

You can learn more about the Tech Know Quilters membership program and sign up for the wait list for the next open enrollment period here.
Picture
Pat Norrad EQ Design
Picture
Pat Norrad Finished Quilt
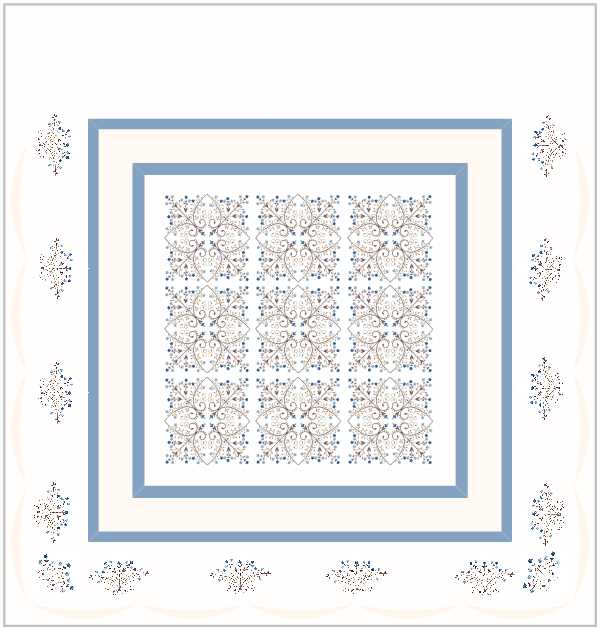
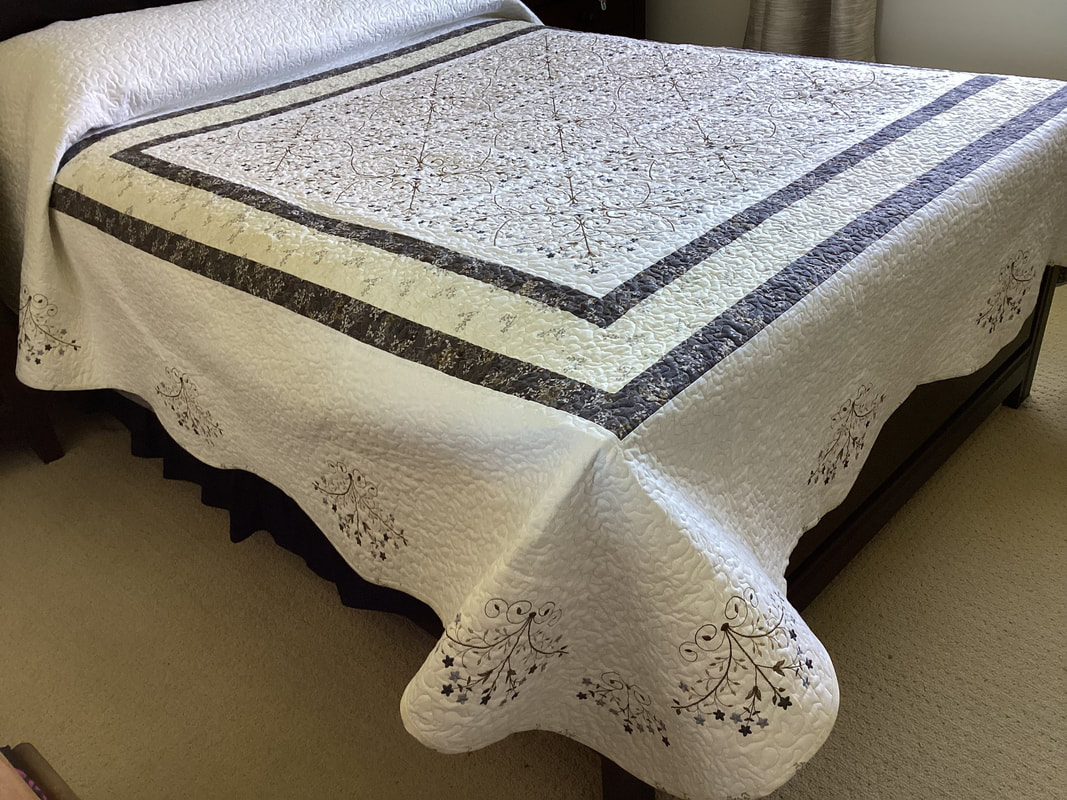
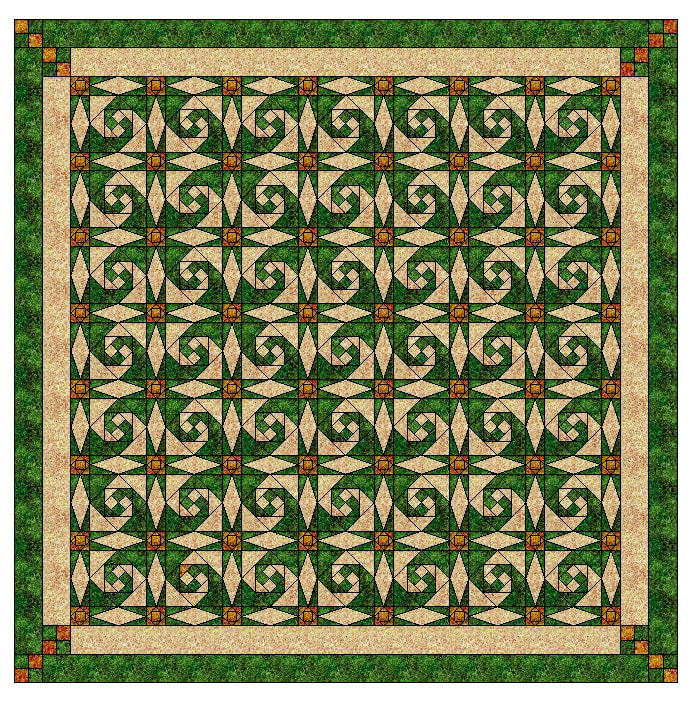
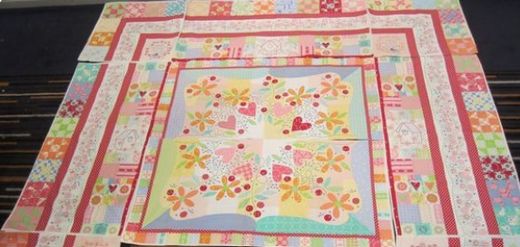
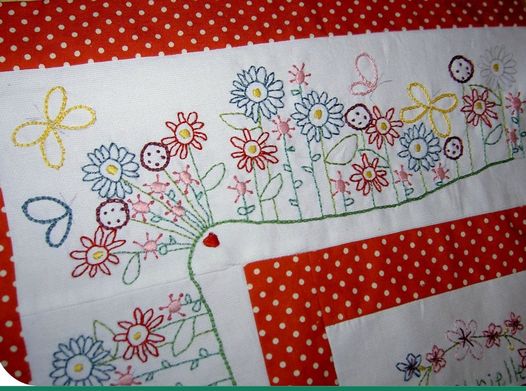
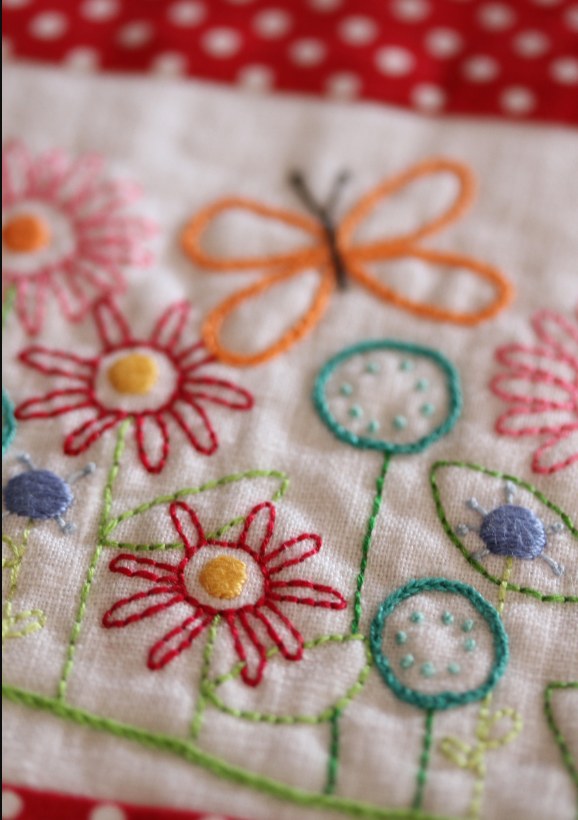
Pad Norrad     My very dear Aunt and Uncle, who are in the mid 80's, asked if I could repair their favorite quilt they've had for over 40yrs. It wasn't repairable so I said it would be easier to just make them a new one. OMGoodness - what did I just say, LOL Along with my EQ8 Program, I also enjoy Digitizing. I put the two together and was able to create my pattern in EQ8 and Digitize the Embroidery needed to go into each of the blocks. I took the Advance Border Design Class (along with many others) and thank goodness I did. I've learned a lot more than I thought I would; thank you Kari Schell. In the end, this is a Bedspread that is quilted, not your usual quilt. I've decided I would make the Pillow Shams that match. 
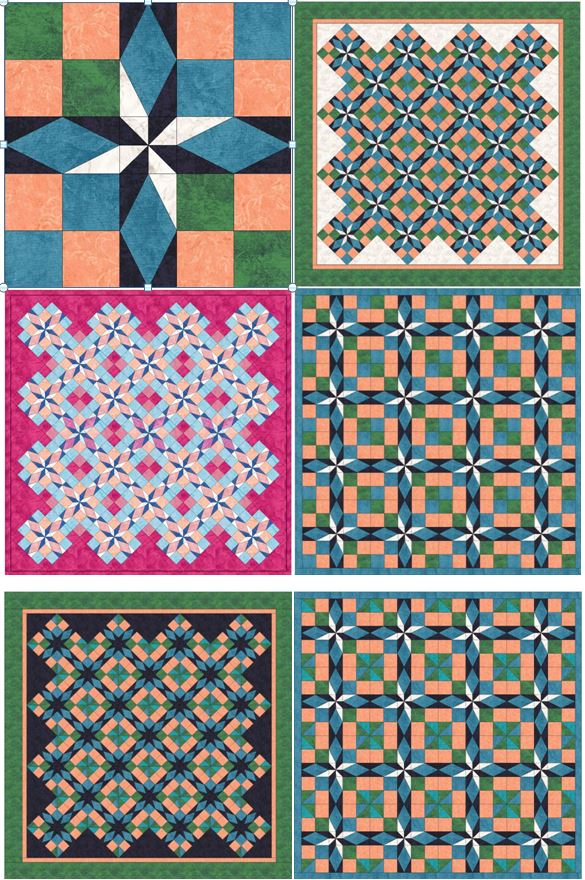
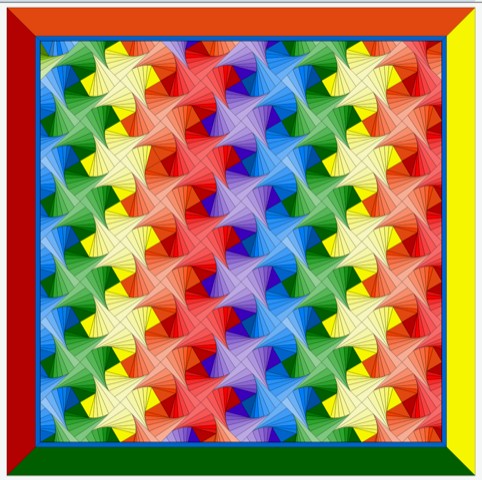
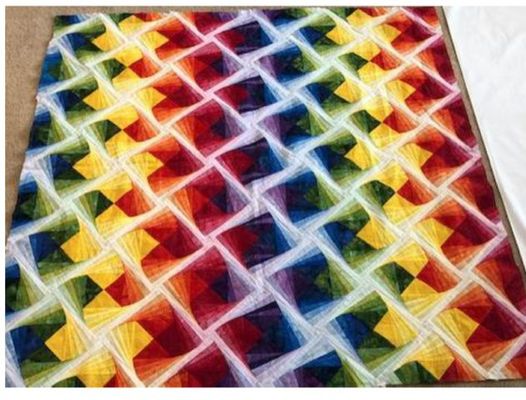
Picture
Margo Reppert I'm rather pleased with my Jacobean Challenge.
Picture
Joan Sledge Webb This is a quilt I designed using fabric colors from my grandson's wedding.
Ann Cornett Horsley -- One block used in five different layouts.  Playing around.
Picture
Picture
Pat Norrad EQ8 Design
Picture
Pat Norrad Quilt
Pat Norrad​ We were given Challenge to only use two colors to make a project. The two crayons I pulled from a brown paper bag was Brown and Orange (go figure). We could have a cream, white or black background. I created this Quilt using the Storm at Sea block with shades of the two colors.
Picture
Connie Bobcik My Gees Bend quilt
Picture
Connie Bobcik One of my horizontal quilts.
Picture
Connie Bobcik - One of my Log Cabin 3D Quilts
Picture
Connie Bobcik - My Fractured Background quilt.
Picture
Pat Norrad EQ8 Design
Picture
Pat Norrad Quilt Top
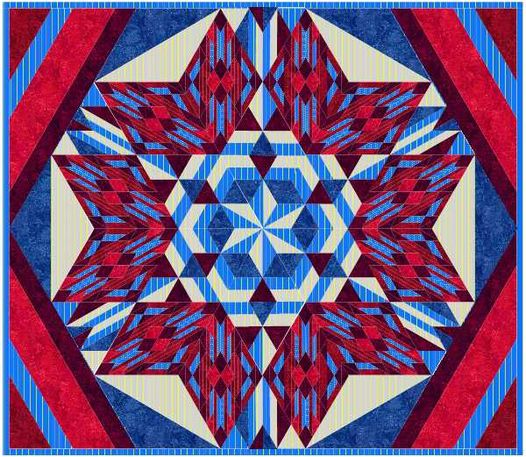
Pat Norrad This is another quilt I just finished. It is a Grad Quilt for our next door neighbor's daughter. We've good neighbors for 19 yrs and have watched their 3 children grow up. Their daughter finally got her wish to have her 'own' dog and she is just crazy over this dog. I drew the pattern in EQ8 and I'm so glad I did. 
Picture
Cindy Meyer I've called this "Where the Stars Go" because it reminds me of a black hole. The fabrics were downloaded from a website and, of course, I purchased those fabrics to make this quilt. I've printed the foundations but still playing with the borders before I begin.
Picture
Edith Craig My class this month was Masters Hexies and More. I used the concepts from this class, some of the blocks we drafted in class, and used a different layout template from the Layout Library. The combination of various blocks made a striking layout and shows how varied a quilt can look using only a couple of blocks.
Picture
Maureen Pinwill
I have been working on a quilt for the past few years which involves a great deal of simple embroidery along the whole border of a king size quilt, so much of this hand embroidery has been undertaken by hand either whilst watching tv or when I wake up, usually at about 4 - 4.30 am. The patchwork pieces are tiny and quite traditional but all the pieces are the same along the top and sides of the quilt. It has lots of small embroidery decorations that are mirrored on top to bottom and also side from side. So I had to ensure that everything was pieced in the correct order. All the top blocks are joined together and then a backing will be placed when all the tops have been joined. I only have three more blocks to finish and only then can I start back the quilt sew the quilting top and put the border on. I hope to get it finished for my daughter's next wedding anniversary in March 2024.  The next time I approached a quilt of this nature I will use my Artista Designer Plus Embroidery program to do so, as I am sure it would have been completed much earlier if I had taken the time and trouble to put the design in that program. Although I do use embroidery to meditate so it has given me many, many hours of peace and calm 
Picture
Picture
Picture
Helen Warwick EQ Quilt
Picture
Picture
Helen Warwick Foundation pattern
Helen Warwick Drafted in EQ8 for foundation paper piecing. The original Java Twist was not foundation paper pieced and my friend could not get any of the blocks to come out the correct size by following the directions. I suggested trying to draft it as a foundation paper pieced block and she knew how to do foundation paper piecing, but not how to draft them. This is what I came up with. I learned a lot in the foundation paper piecing lessons from Kari. The quilt turned out beautiful.
I have a very happy friend. 
Picture
Linda Carlson This Masters Hexes and More variation came from Lesson 5. What looks like white pin dots on blue is actually a stripe fabric turned on the diagonal. It was a good class!
Picture
Joan Sledge Webb I'm expecting my first Great Grandchild in September. I wanted to make a scrappy quilt using the It's A Boy collection by Riley Blake. Took me a few tries but I did get the pieced border to line up and I'm pretty happy with it. I might change some of the fabrics before I start on the quilt but it's a start.
Picture
Rhonda Goss Masters Hexie class quilt
Picture
Julie Pedersen Masters Hexies N More class
Learn More About Tech Know Quilters and Sign Up for the Wait List
Picture
Happy quilting.

​Kari

Join the On Point Quilter weekly newsletter and receive regular tips and inspiration on using Electric Quilt 8 along with the  Free 12 Top
Tips for EQ8 video guide.
Picture

Applique From EQ8 to Cricut Silhouette or Brother Scan N Cut

12/10/2022

 
Scroll down for information on creating cut images from EQ8 applique.  But first -- check out a new live webinar happening right after Christmas.

Register for Free EQ8 Webinar after Christmas

Turn Your Next Panel into a One of a Kind Quilt

Picture
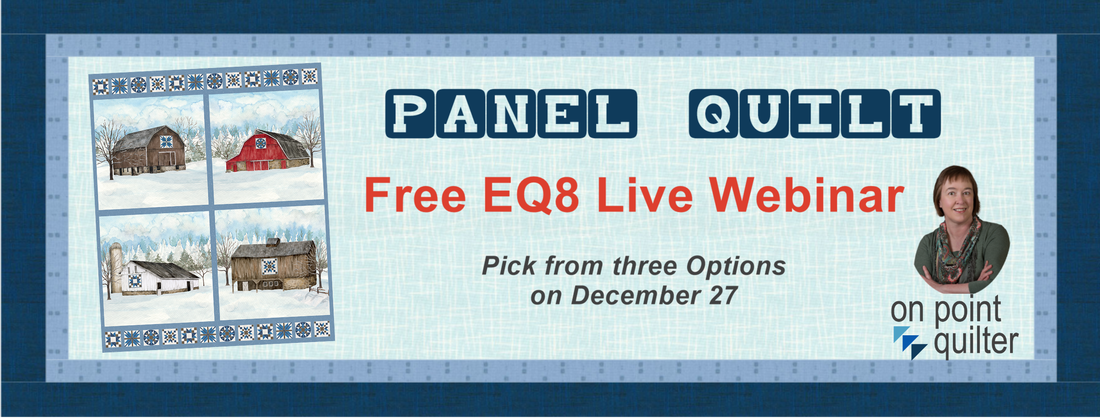
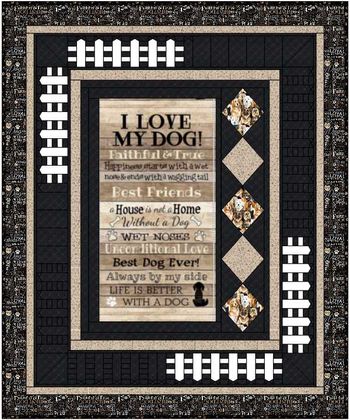
How many times have you purchased (on contemplated purchasing) a panel and then struggled what to do with it?  Obviously you  can slap on a couple of straight borders, add a bit of basic quilting and the binding and it is ready to give away. 

But what if you want to do more?
  • Maybe you wish to personalize your panel with unique borders.
  • Or maybe you wish to cut up your panel and make it a series of blocks in your quilt.
  • Or maybe you just want a go to method for working with any panel you currently own (or plan to purchase in the future).

Let me show you how to quickly get past the overwhelm and uncertainty of working with panels. 

Join my free Electric Quilt 8 webinar where I will take you step by step through the entire process to create your own panel quilt.  In this live webinar, you will learn how to:  

  • ​import a panel image into EQ and figure out the sizes of sections of the panel.
  • subdivide the panel image to experiment with different options for using the panel in a quilt.
  • learn how to personalize your quilt by designing coordinating blocks.
  • learn my tricks for working with those awkward sizes that always seem to happen when designing around panels.
  • learn how to create borders with multiple blocks that create flow and visual appeal.

What are you waiting for? Join us today.

Plus you will also receive a guidebook that you will be able to use as a reference both during and after the video.  This will assist you when you're working on your project.
 
I can't wait to see your panel quilt design.

​Join us now. 
​
Free Webinar Registration Information

Choose the time that works the best below and register for this amazing fun webinar.  You won't be disappointed.

​For all those that attend live, I will be offering a special bonus offer as well.  Make sure to join me.  I can't wait to see you there.

A replay will be available for 24 hours if you cannot attend live.​  But you must register in advance to access the replay.
Date and Time
Tuesday, December 27
10 am Central Time
Tuesday, December 27
3 pm Central Time
Tuesday, December 27
8 pm Central Time
Registration Link
Enroll
Enroll
Enroll
Local Time
Time Zone Converter
Time Zone Converter
Time Zone Converter

APPLIQUE FROM EQ8 TO CRICUT SILHOUETTE OR BROTHER SCAN N CUT

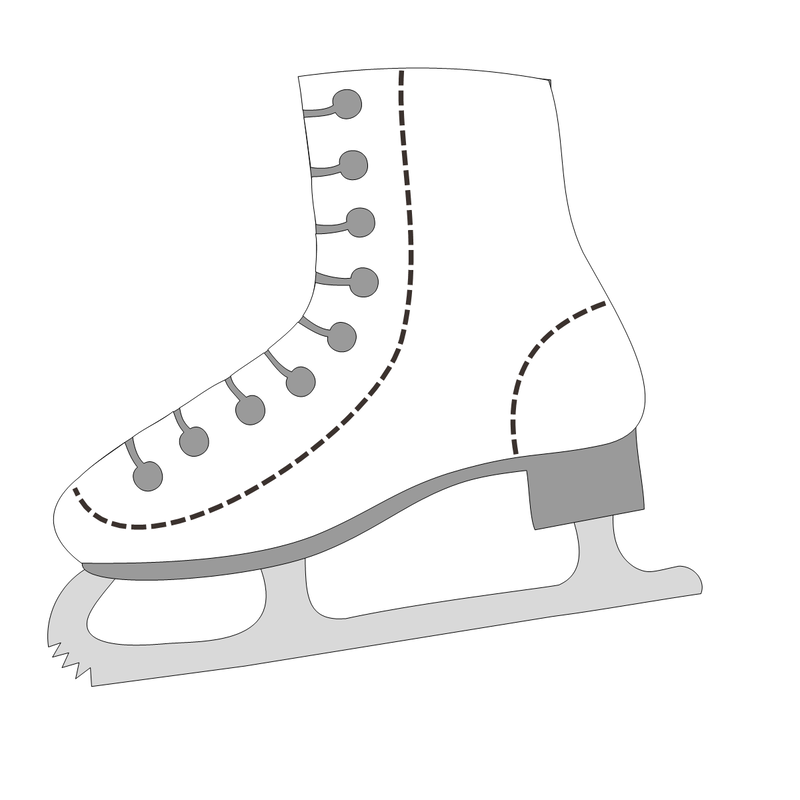
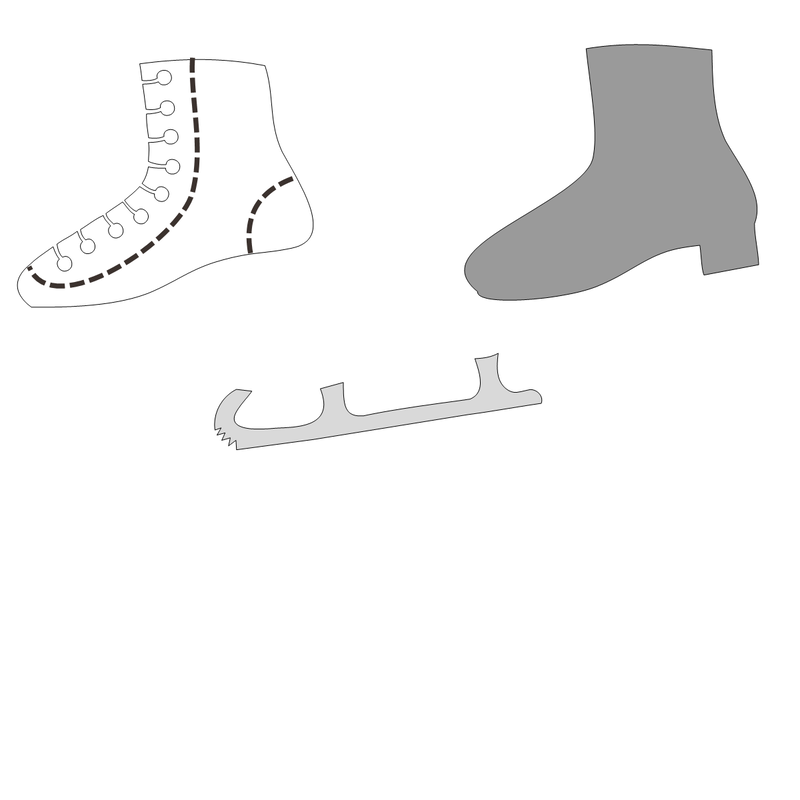
Last week I shared how to draft your own Ice Skating Motif using Electric Quilt 8.   If you want to see the power of EQ8 up close and personal (and learn more about the applique tools) you will definitely want to check out this post. 
Picture
Picture
Ice Skate Applique Motif Blog Post
In this video, I will share how to convert your EQ Applique drawing into an SVG file.  An SVG file allows you to use the images (exactly as drawn) in the electronic cutting system of your choice -- Cricut, Silhouette, or Brother Scan N Cut.

While many of the cutting systems will suggest using their tracing features, I have had mixed success with traces.  Often they can muddy aspects of the images and they are really not successful in pictures with layered images.  So I knew I wanted a technique that preserved the integrity of the initial drawing in Electric Quilt.

I found that the key to success is an extra piece of software called Inkscape.  
What is Inkscape?

The extra piece of software I used for creating the SVGs is Inkscape.  Inkscape is a professional vector graphics editor for Windows, Mac OS X and Linux. It's free and open source. 

Inkscape can seem overwhelming to use when you open it for the first time. However you only need to use a couple of tools within Inkscape -- so this really is a piece of cake. You can download Inkscape here.

Inkscape will allow you to create an SVG file which may be used in any electronic cutting system (Cricut Design Space, Silhouette Studio, or Brother Canvas Workspace).

So what is an SVG file?  An SVG file is a graphics file that uses a two-dimensional vector graphic format.  Unlike raster formats such as JPG, GIF, and PNG, an SVG image remains crisp and clear at any resolution or size.  My Translation -- Much cleaner of an image than any trace in a cutting system.
Best Tips from the Video

Electric Quilt Tips
  • Color your block with colors (not fabric).
  • Print to a pdf writer.  If you need a pdf writer check out these free options:
    • Cute PDF Writer for Windows  (www.cutepdf.com/Products/CutePDF/writer.asp)
    • RWTS PDFwriter for MAC  (https://github.com/rodyager/RWTS-PDFwriter)
  • If you have stitch (thread) lines, turn on print block and patch outlines.  Otherwise turn them off.

Inkscape Tips
  • Ungroup everything.
  • Patches will have both outlines and fill.  Delete the outlines and keep the fill.
  • Thread will only have fill.
  • Group everything and note the size.
  • Save as an svg file.

Cricut Design Space Tips
  • Once importing the svg file, resize the group to match the size noted in Inkscape.  (Depending on the latest update, the size may be correct or may not be correct.  So always check.)
  • Use Deboss if you wish to create an impression (for thread) rather than a cut.
  • Select Attach to keep the thread with the related patch.

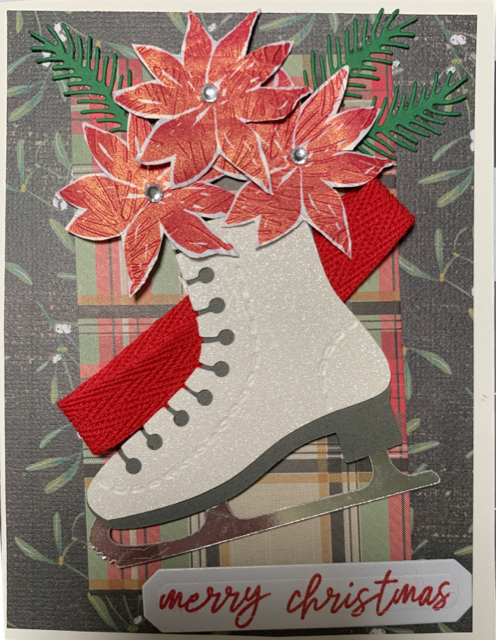
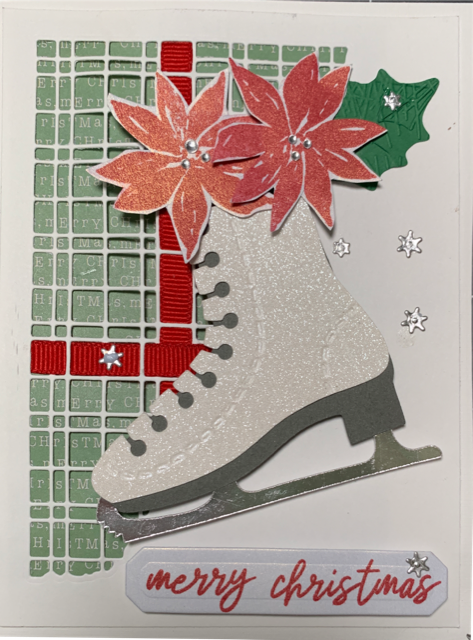
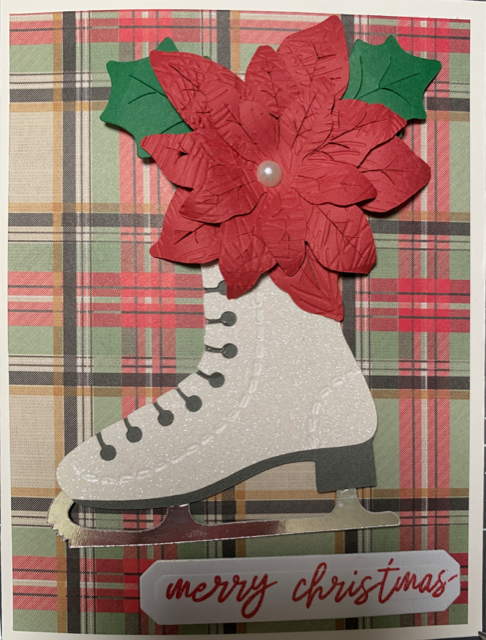
Card Ideas Using the Cut Ice Skates

The following cards were make from my stash of card making supplies using the Ice Skating motif design in Electric Quilt 8 and cut with my Cricut Maker. 

I am a huge Stampin Up fan and a part-time distributor (i.e. I want the purchasing discount) -- but I also accumulate supplies from a variety of other sources.  I think of card making like making scrap quilts -- use what you have on hand!
Picture
Ice Skate Card #1 - Supplies and Measurements
  • Card Base:  5-1/2" x 8-1/2", folded at 4-1/4"
  • Background:  4" x 5-1/4"
  • Layered Plaid Paper:  2-3/4" x 4-1/2"
  • Stamped Images:  Ringed With Nature Stamp Set from Stamping Up.  (Hand trimmed the poinsettias)
  • Pine Needles cut with Winter Welcome Sled dies by Spellbinders
  • Red Ribbon cut 6-1/2"
  • EQ skates cut from glimmer white (boot), grey cardstock (heal), foil cardstock (blade)
  • Not sure about the tag die cut source (size approximately 2-3/4" x 1/2".
Picture
Ice Skate Card #2 - Supplies and Measurements
  • Card Base:  5-1/2" x 8-1/2", folded at 4-1/4"
  • White cardstock:  4" x 5-1/4".  Split Card Texture dies from Stampin Up used for cut-away.
  • Christmas paper cut 3" x 5" attached to back of die-cut white cardstock.
  • Stamped Images:  Ringed With Nature Stamp Set from Stamping Up.  (Hand trimmed the poinsettias)
  • Foil Snowflakes from  Barn Dies by Stampin Up
  • Green Leaf from retired Poinsettia Petals dies.  Embossed with  Wintery 3D Embossing folders (pine bough pattern) from Stampin Up.
  • Red Ribbon cut 4-1/2" and 3".  (Ribbon as 1/4" wide).
  • EQ skates cut from glimmer white (boot), grey cardstock (heal), foil cardstock (blade)
  • Not sure about the tag die cut source (size approximately 2-3/4" x 1/2").
Picture
Ice Skate Card #3 - Supplies and Measurements
  • Card Base:  5-1/2" x 8-1/2", folded at 4-1/4"
  • Plaid paper:  4" x 5-1/4".  
  • Stamped Sentiment:  Ringed With Nature Stamp Set from Stamping Up.  
  • Poinsettia and Green Leaf from retired Poinsettia Petals dies.  Embossed with  Wintery 3D Embossing folders (pine bough pattern) from Stampin Up.
  • EQ skates cut from glimmer white (boot), grey cardstock (heal), foil cardstock (blade)
  • Not sure about the tag die cut source (size approximately 2-3/4" x 1/2").

Picture
Happy quilting.

​Kari

Join the On Point Quilter weekly newsletter and receive regular tips and inspiration on using Electric Quilt 8 along with the  Free 12 Top
Tips for EQ8 video guide.
Picture
    Picture
    Picture
    Picture
    Free guide available for newsletter subscribers
    Picture
    Picture
    Picture

    Kari Schell

    Electric Quilt Expert and Educator and Pattern Designer.

    Categories

    All
    Art And Stitch
    Cricut Maker
    Dear Jane
    Electric Quilt 7
    Electric Quilt 8
    Goose Goose Duck Challenge
    Inkscape
    Patterns
    Silhouette Cameo
    Stampin Up
    Tips And Techniques
    Tools And Rulers

    Archives

    April 2025
    March 2025
    February 2025
    January 2025
    December 2024
    November 2024
    October 2024
    September 2024
    August 2024
    July 2024
    June 2024
    May 2024
    April 2024
    March 2024
    February 2024
    January 2024
    December 2023
    November 2023
    October 2023
    September 2023
    August 2023
    July 2023
    June 2023
    May 2023
    April 2023
    March 2023
    February 2023
    January 2023
    December 2022
    November 2022
    October 2022
    September 2022
    August 2022
    July 2022
    June 2022
    May 2022
    April 2022
    March 2022
    February 2022
    January 2022
    December 2021
    November 2021
    October 2021
    September 2021
    August 2021
    July 2021
    June 2021
    May 2021
    April 2021
    March 2021
    February 2021
    January 2021
    December 2020
    November 2020
    October 2020
    September 2020
    August 2020
    July 2020
    June 2020
    May 2020
    April 2020
    March 2020
    February 2020
    January 2020
    December 2019
    November 2019
    October 2019
    September 2019
    August 2019
    July 2019
    June 2019
    May 2019
    April 2019
    March 2019
    February 2019
    January 2019
    December 2018
    November 2018
    October 2018
    September 2018
    August 2018
    July 2018
    June 2018
    May 2018
    April 2018
    March 2018
    February 2018
    January 2018
    December 2017
    November 2017
    October 2017
    September 2017
    August 2017
    July 2017
    June 2017
    May 2017
    April 2017
    March 2017
    February 2017
    January 2017
    December 2016
    November 2016
    October 2016
    September 2016
    July 2016
    June 2016
    May 2016
    April 2016
    March 2016
    February 2016
    January 2016
    December 2015
    November 2015
    October 2015
    September 2015
    August 2015
    July 2015
    June 2015
    May 2015
    April 2015
    March 2015
    February 2015
    January 2015
    December 2014
    November 2014
    October 2014
    September 2014
    July 2014
    June 2014
    May 2014
    April 2014
    March 2014
    February 2014
    January 2014
    December 2013
    November 2013
    October 2013
    September 2013
    August 2013

    RSS Feed

Contact:
On Point Quilter
e-mail:  [email protected]
phone:  763-566-6536

GET MY NEWSLETTER FOR REGULAR EQ AWESOMENESS!

* indicates required
  • Blog
  • About
  • EQ8 Training
    • Tech Know Quilters Electric Quilt 8 Membership Training
    • EQ8 Made Easy
    • Electric Quilt 8 Sneak Peek
  • Store
  • Contact