
|
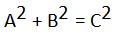
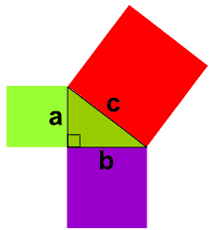
Last week I showed how I decomposed a block using Electric Quilt. As a reminder this was the block I drafted. 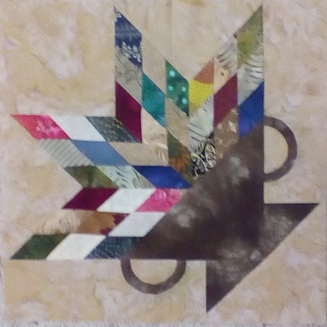 The Pythagoream Theorem in ActionI was asked for a better explanation of the Pythagorean theorem. Let me give you an example with the block I drafted last week. I knew I wanted to put the block on point. This means I needed to figure out the size of my new block. 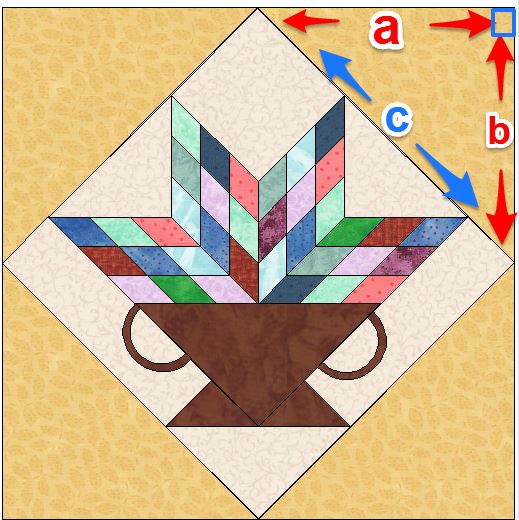 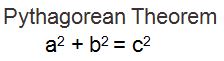 Here is what we know:
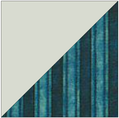
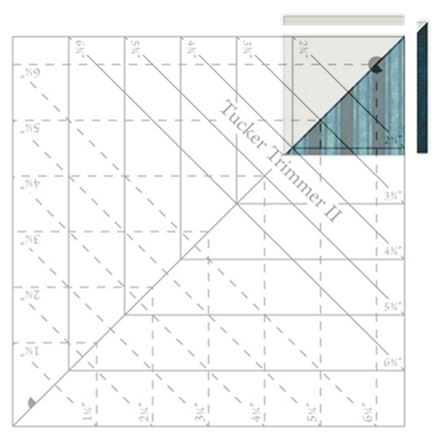
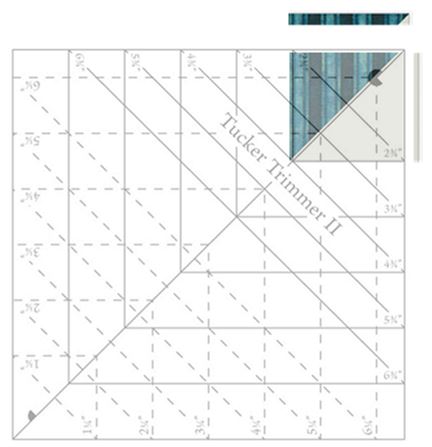
Here is the math to solve for "a" after filling in the information we know: 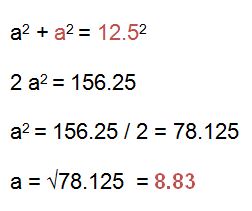  Coming Up with a Layout for the Flower Box Block I mentioned that I wanted to come up with my own layout using Electric Quilt. I decided to use a Lady of the Lake type of setting (yes a gazillion half square triangles). It was a great opportunity to make a slight dent into my scraps. No new fabrics were used in the half square triangles! This weeks video will include information on rotating the block, creating some additional blocks using the grid and line tools in Easy Draw, adding a block from the library, creating a new layout and setting the larger block on layer two. Piecing those Half Square TrianglesAs you are probably aware, I love over-sized piecing trim-down techniques. I definitely decided I needed that for these half square triangle units. The finished size of each unit is 1.75" by 1.75". That meant I couldn't use Tucker Trimmer 1. But no fears -- that is why I also have a Tucker Trimmer 2. The Tucker Trimmer 2 works the same way, but in 1/4" and 3/4" increments.
Trim all units to 2-1/4" x 2-1/4" using the Tucker Trimmer 2™ or your favorite square ruler. Trim the top and right sides. Rotate the unit and line up cut edges with the 2-1/4″ marks on the tool or ruler. Trim the other two sides keeping the diagonal seam aligned with the marking on the tool.
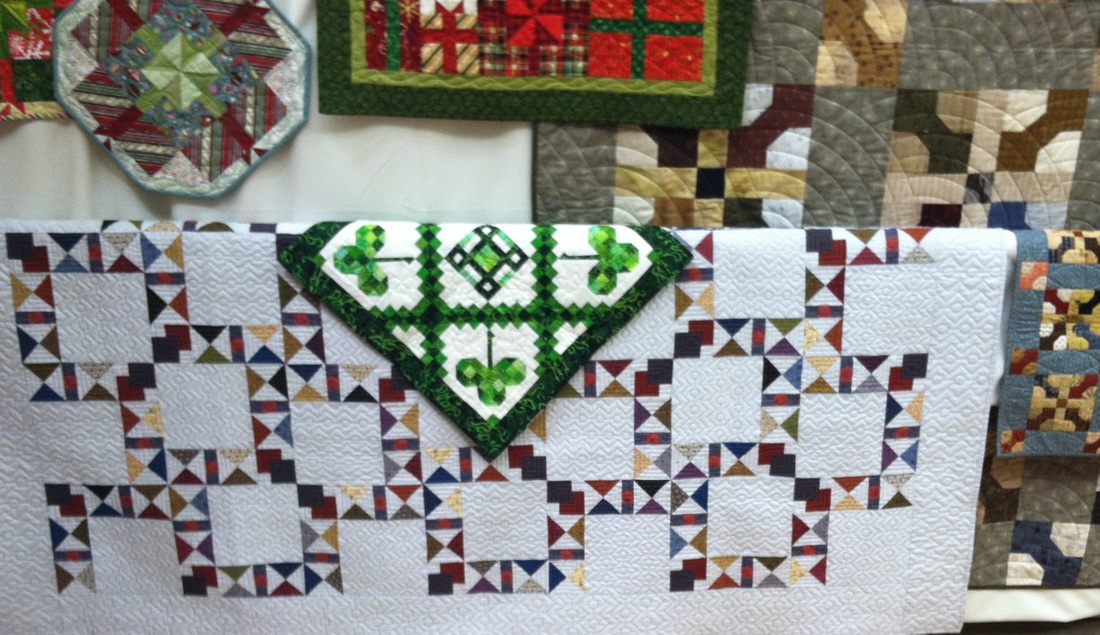
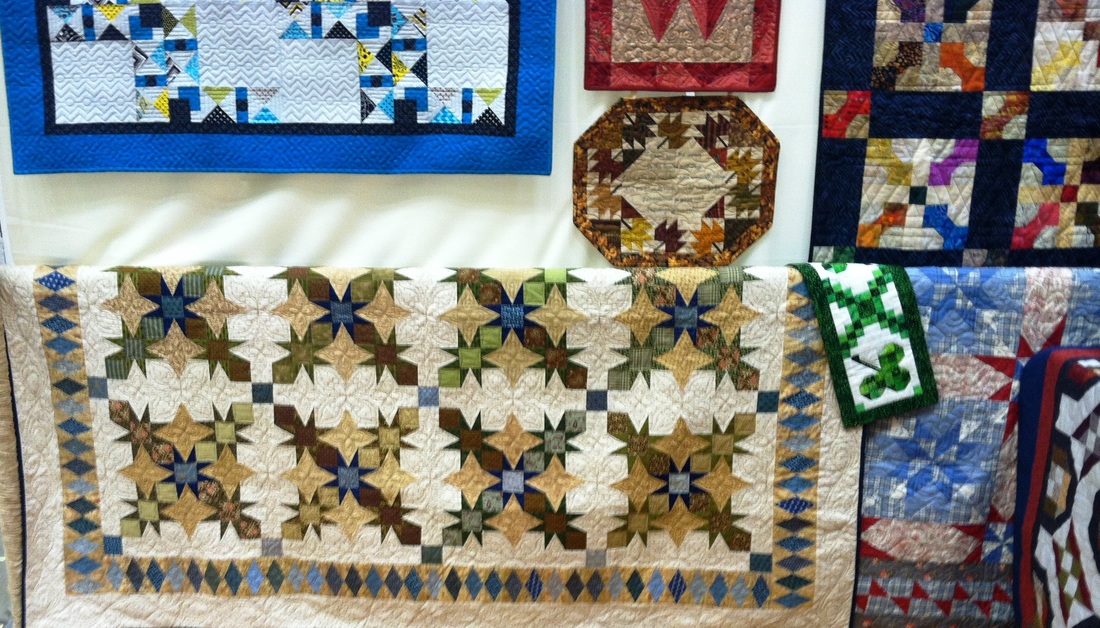
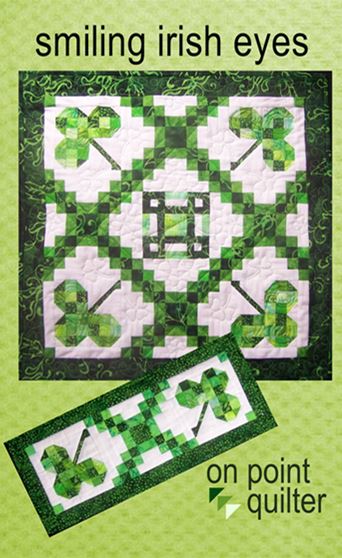
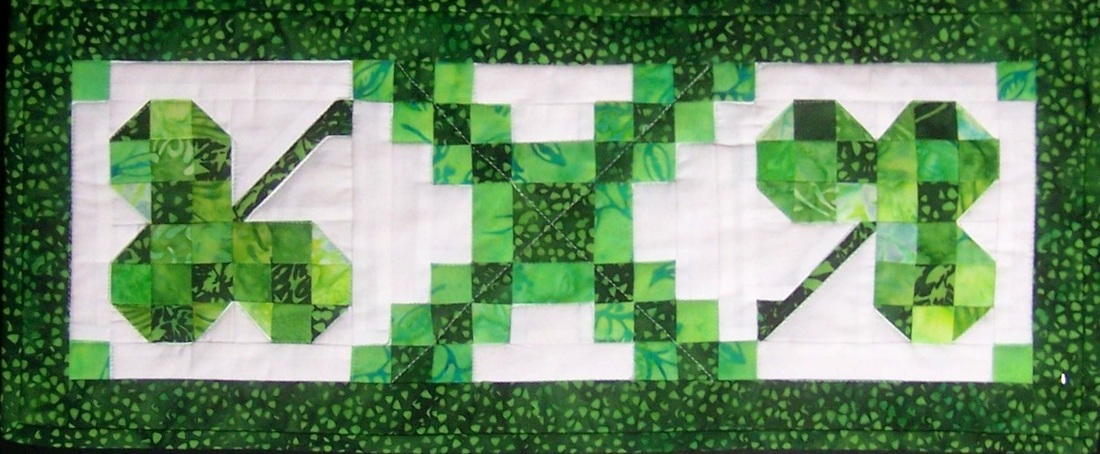
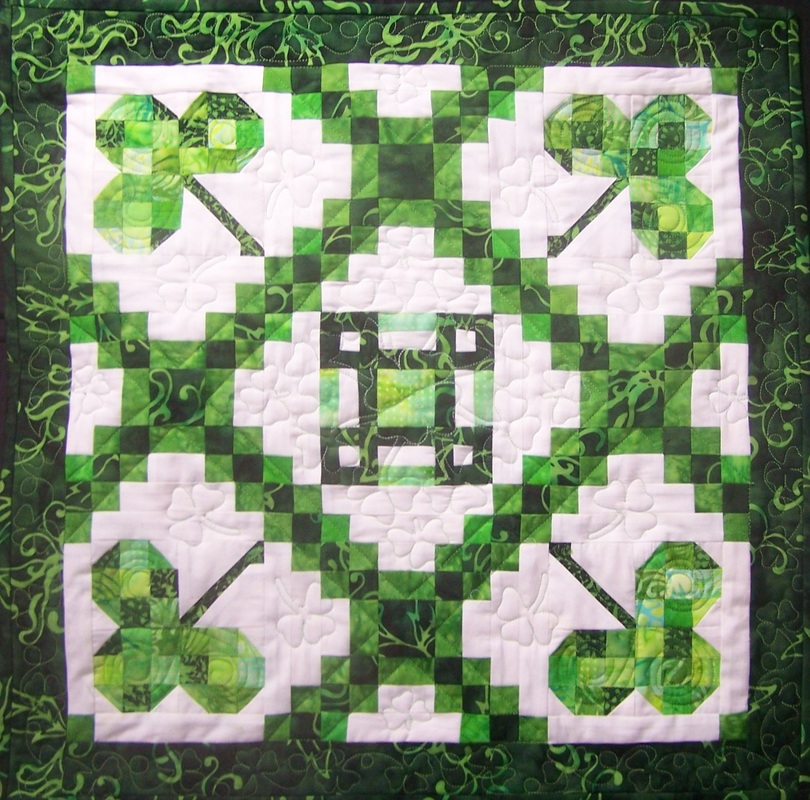
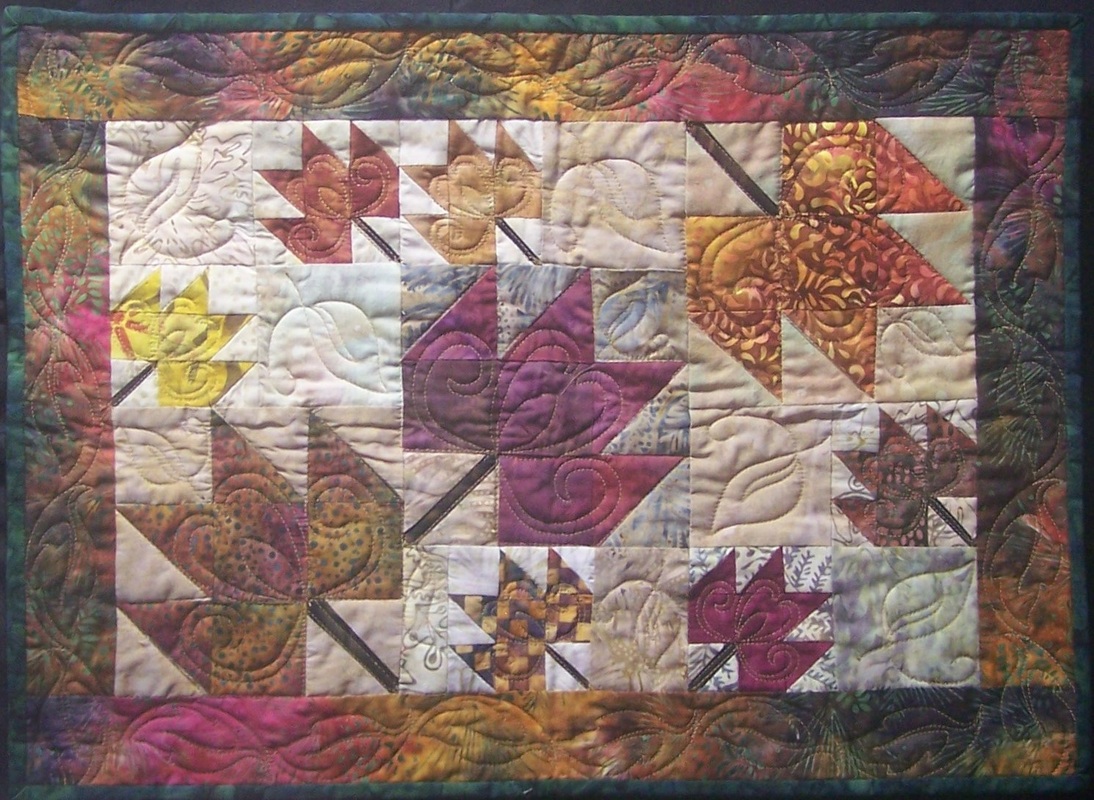
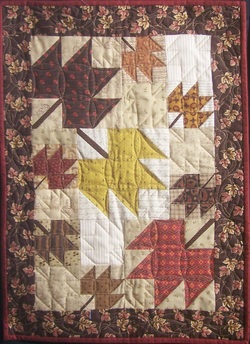
I'm not sure I care to count how many retreats I worked on these triangles. I don't think I ever actually worked on them at home. I will say that it was very exciting to finally see the quilt come together. Now for the reveal---- My Finished Quilt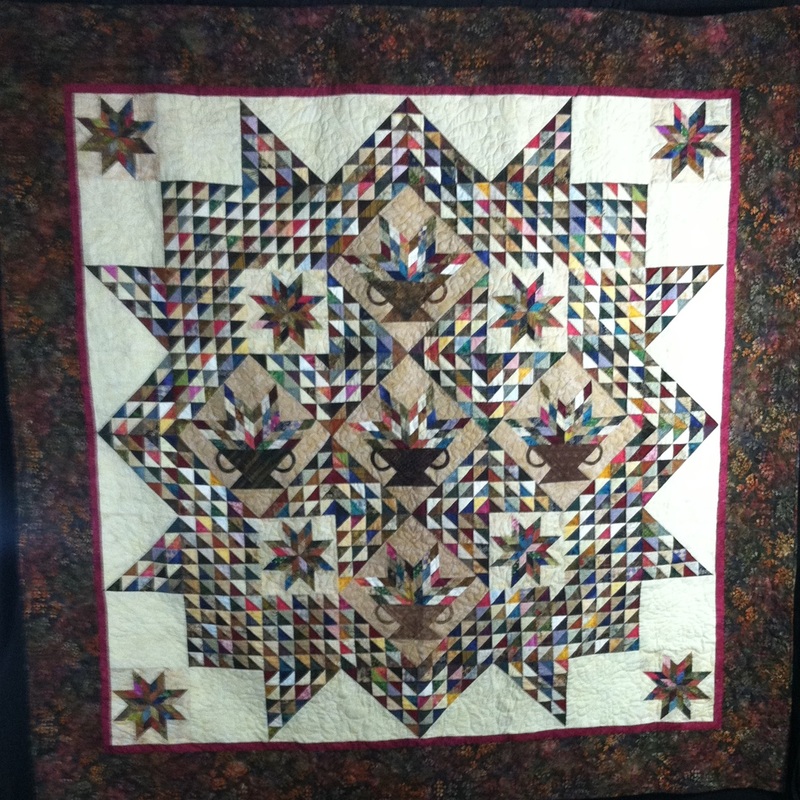 Flower Box Variation by Kari Schell 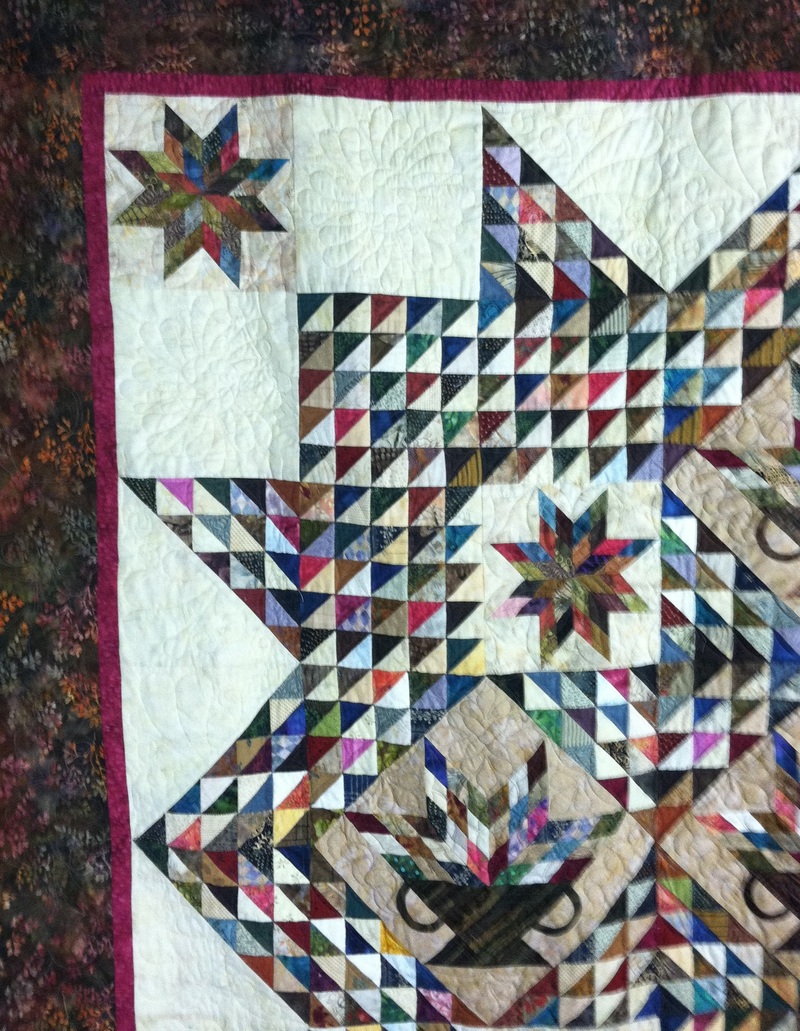 Flower Box Close Up 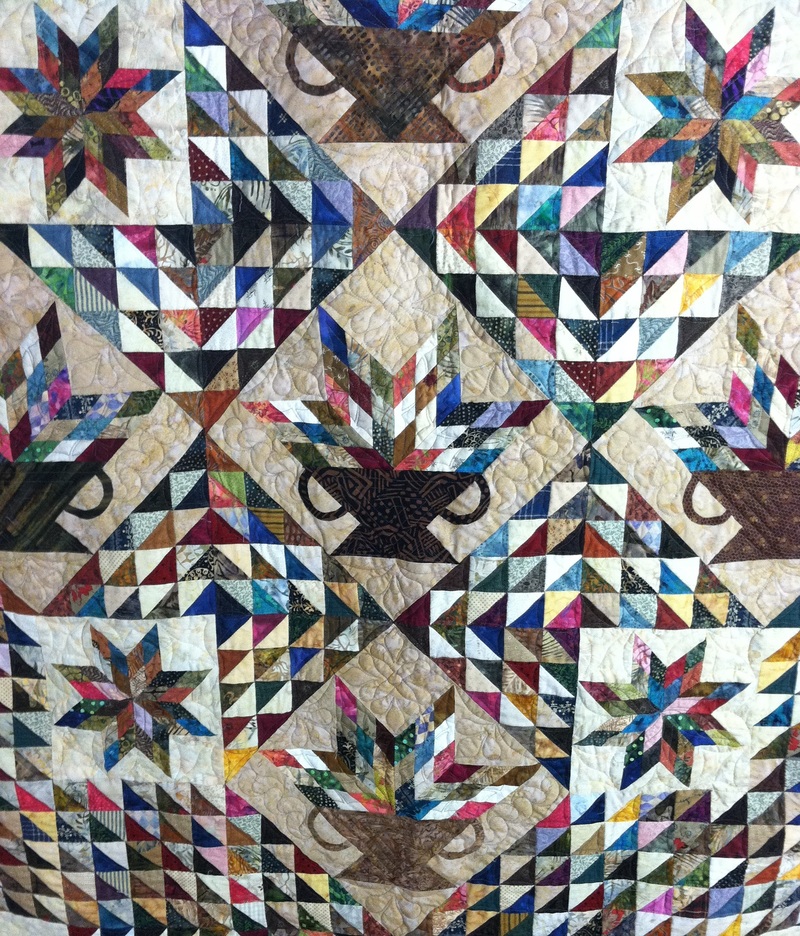 Flower Box Close-Up Featured Pattern - Smiling Irish EyesFor this week I decided to feature a pattern that used the Tucker Trimmer 2 tool. These miniature quilts have an Irish theme – shamrocks, a Celtic quilt block and Irish chain blocks. Instructions provide for oversized units that are cut down with the use of the recommended rulers. This makes miniature quilts a breeze. The table topper finished 21" x 21" and the vertical wall quilt finished 8" x 20".
The pattern is a steal at $8. Click here to purchase. Are you also interested in the Tucker Trimmer 2? Click here to purchase. Happy quilting. Kari Sign up for my newsletter to stay current on what's happening in my studio and learn more quilting tips. As a thank you, I'll send you a FREE pattern for this small maple leaf quilt.
Before we get started, I wanted to thank those who posted comments and sent e-mails on my early retirement. I was touched by the thoughtful words and encouragement on my new venture. I had a great time at Quilt Market and made lots of great contacts. There is lots for me to do in the coming weeks. Do you remember the first time you found a critical error in a pattern? For some of us it ranks up there to remembering where we were when 9/11 struck. For me it happened during my second year of quilting. I don't remember the pattern name, but I remember the quilt. it had browns, reds and tans. It was going to be big -- queen size. I had reached the stage where I had gained some confidence in my piecing abilities and to be efficient I cut out the entire quilt top before I began piecing it. Yes -- all nine yards of fabric beautifully cut up, stacked and ready for a day at my sewing machine. I then proceeded to work through each of the steps -- before doing step two, I finished step 1 for all 20 blocks of the quilt. I reached the point where I needed to add a large half square triangle to a previously pieced unit. I found I had to really stretch the triangle to make it fit. Hmmm. I began checking the normal suspects:
Everything seemed to be ok on my end. I finally pulled out a sheet of graph paper (this was pre-Electric Quilt) and redrafted the block and checked the math using the Pythagorean theorem from high school albegra.
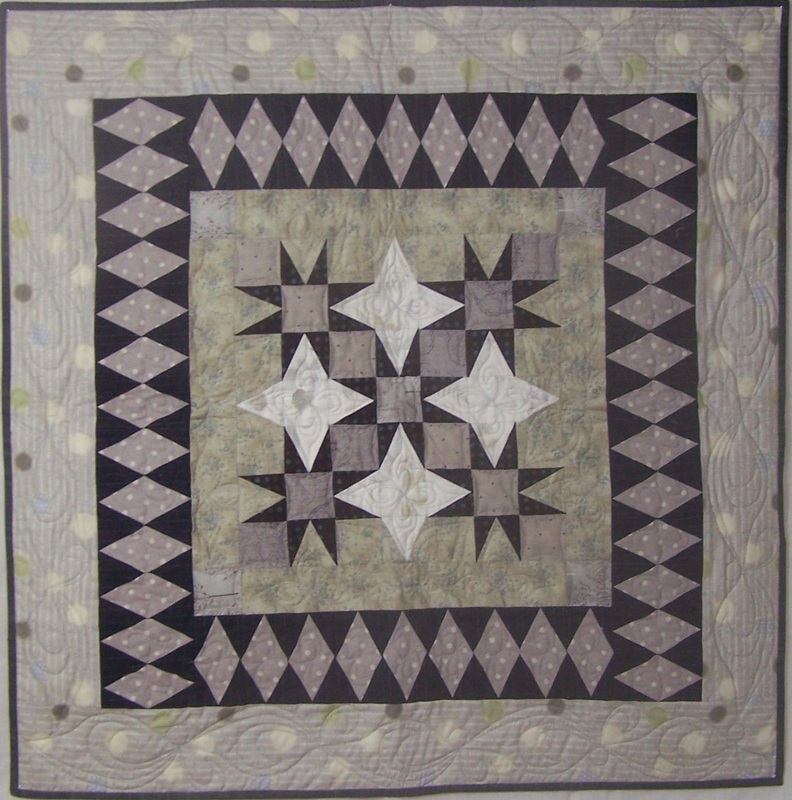
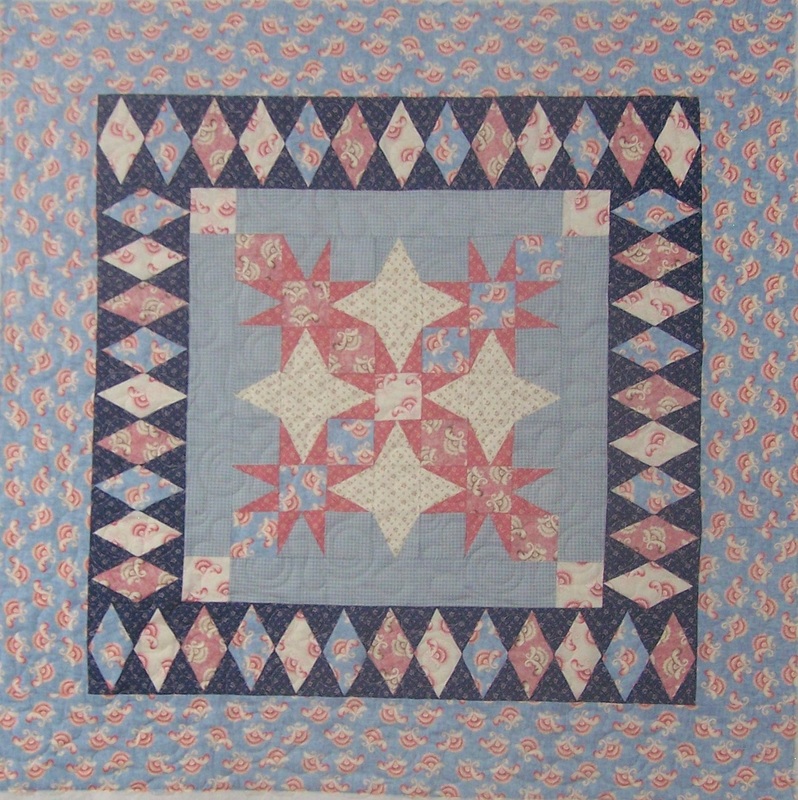
The issue was not me but the size of those half square triangles. I couldn't find more of the fabric so the entire quilt was delegated to the UFO (unfinished objects) bin where it languished for many years until I eventually decided to throw it and the pattern away. Now I wish I could say this was the only time I found an error in a pattern. I've now learned the importance of decomposing a pattern and checking the math. This technique can be done with graph paper -- but I find I am much more efficient with Electric Quilt. For this weeks video, let me share how I did this with Flower Box, a pattern I purchased from Laundry Basket Quilts. (The pattern for this block plus a great quilt, can be purchased directly from Laundry Basket Quilts.) Note that there were no errors in the instructions -- but I wanted to redraft the block in Electric Quilt so I could play with some different layout options. I picked this one because it was a beautiful (but complicated) block. 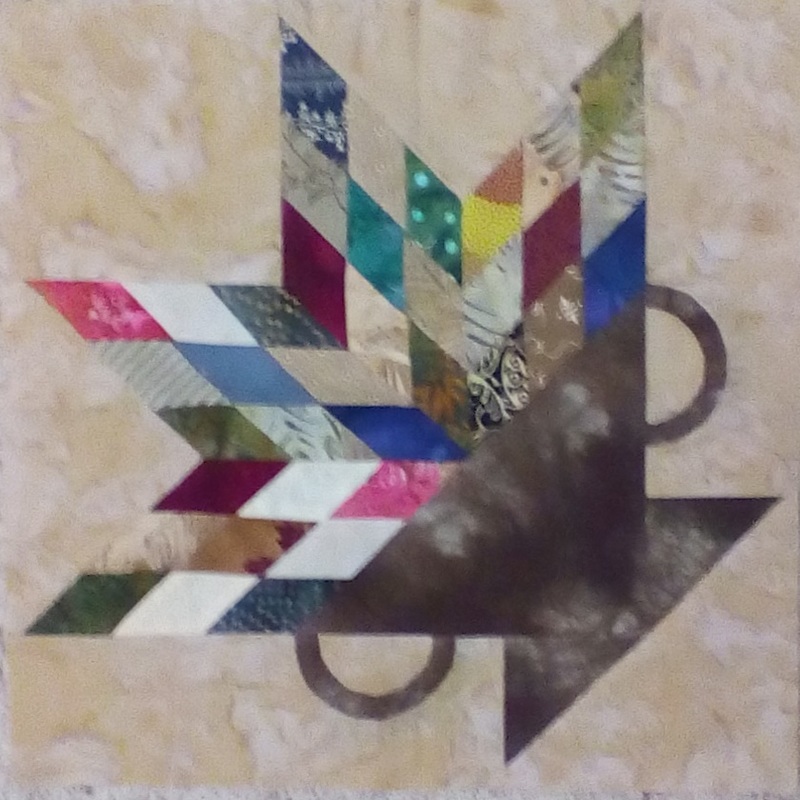
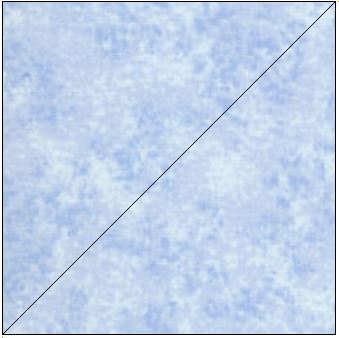
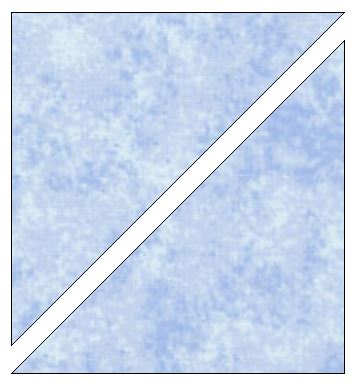
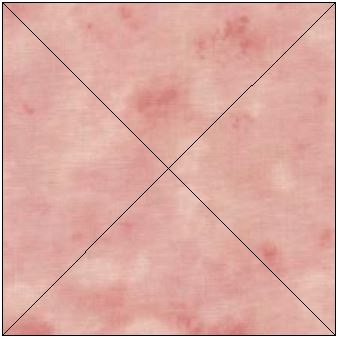
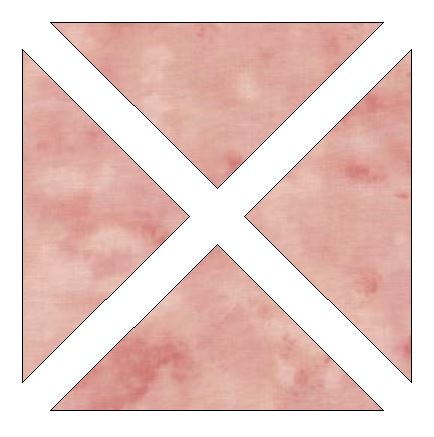
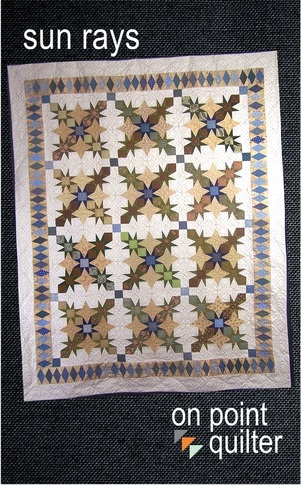
General Rules to Remember Most units can be decomposed using three simple math equations once you have the cutting instructions for the block. The annotated block below shows the rules I used for each patch in the block. The lines show the straight of grain. When looking at the triangle units note the X-cut units (#3) have one edge that is on the straight of grain. Those cut once on the diagonal (#2) have two edges on the straight of grain. 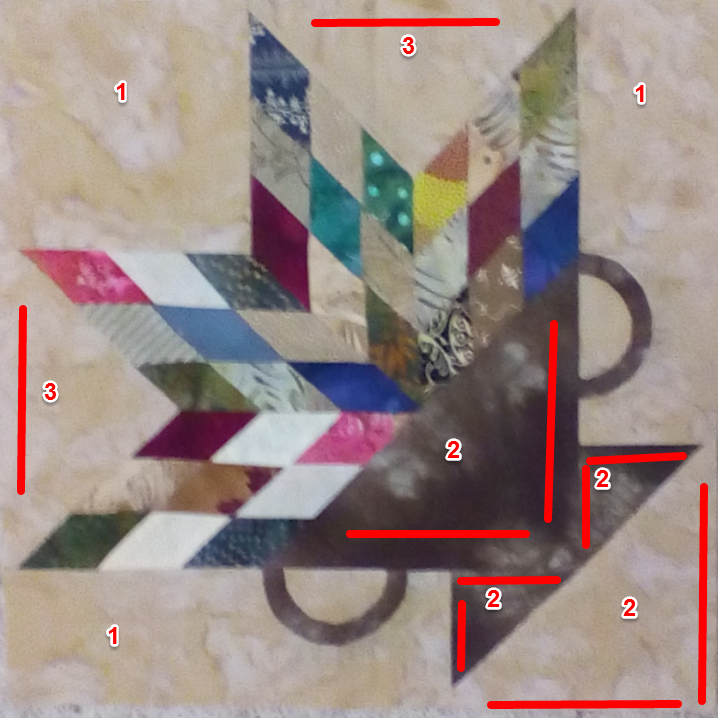 Now that you have the basics, let's get to the video. Warning: There is a lot in here (18 minutes)! Next week I will share an original layout I developed for this block. Featured Pattern - Sun RaysAfter a cold and rainy series of weeks, the sun is finally shining and we are getting a taste of spring. As a tribute to the "sun", I thought it would be appropriate to feature my Sun Rays quilt. 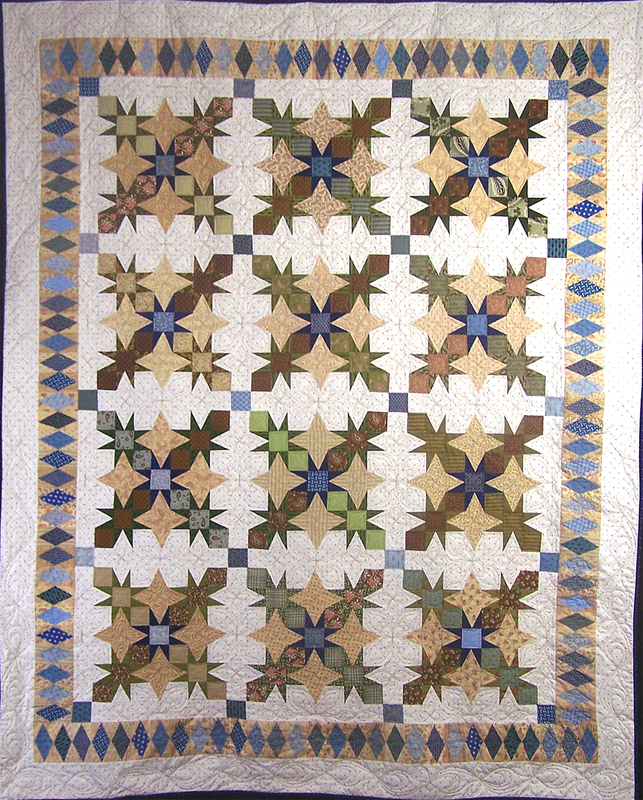 Sun Rays Quilt by Kari Schell
Happy quilting. Kari Sign up for my newsletter to stay current on what's happening in my studio and learn more quilting tips. As a thank you, I'll send you a FREE pattern for this small maple leaf quilt.
Yahoo! As of end of day Wednesday, I am officially retired. (Please note that this is early retirement. I have quite a few years before I hit the official retirement age.) After 17 years at UnitedHealthcare (UHC) it was time to leave my "safe" job and pursue my passion in the quilting business.
So what did I do in my full-time job? I was the Program Management Director for the Operational Excellence program. For those in the corporate world -- this translates to Six Sigma. For those non-corporate types, this means we were responsible for fixing process problems in the company. Although there is no formal "retirement" at UHC, I was able to end my career on a high. A few weeks ago, there was a team dinner with participants from all over the country. (They even surprised me by flying in my staff person in Nebraska to join the celebration.) On Tuesday, there was cake in the office with attendees from the groups I worked with over the years. Here are a few photos. 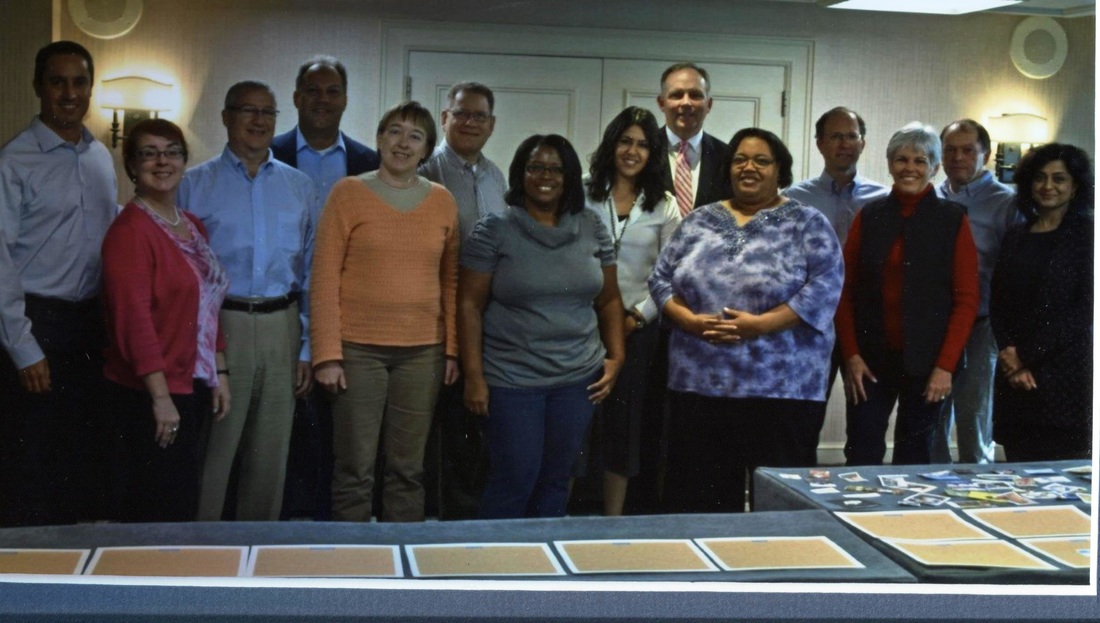
My primary team members at UHC.

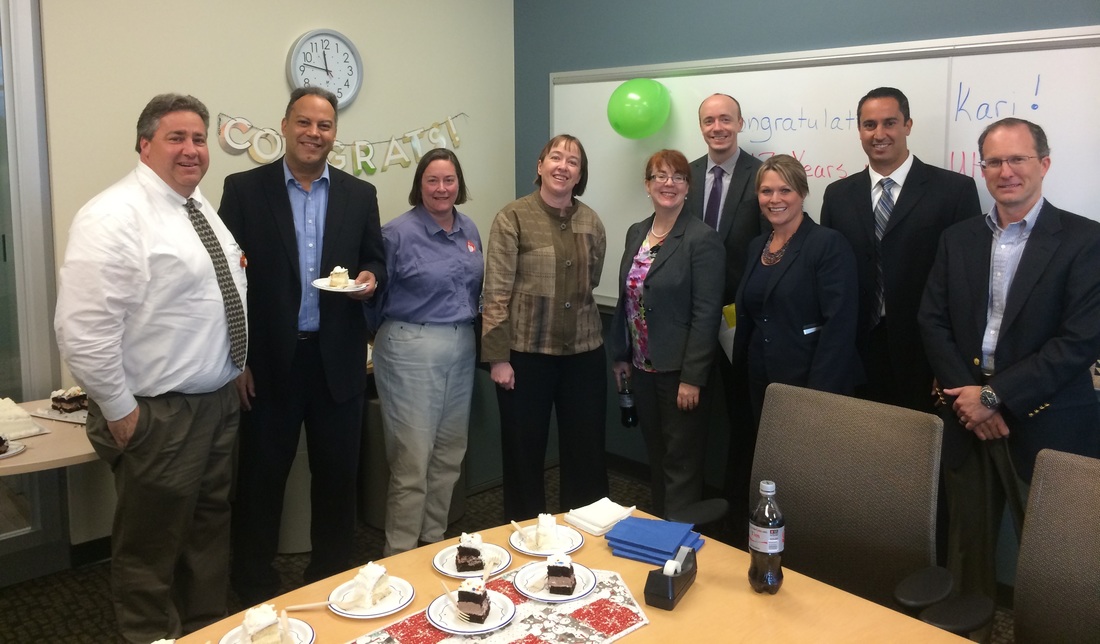
A few attendees for cake.
So What's Next
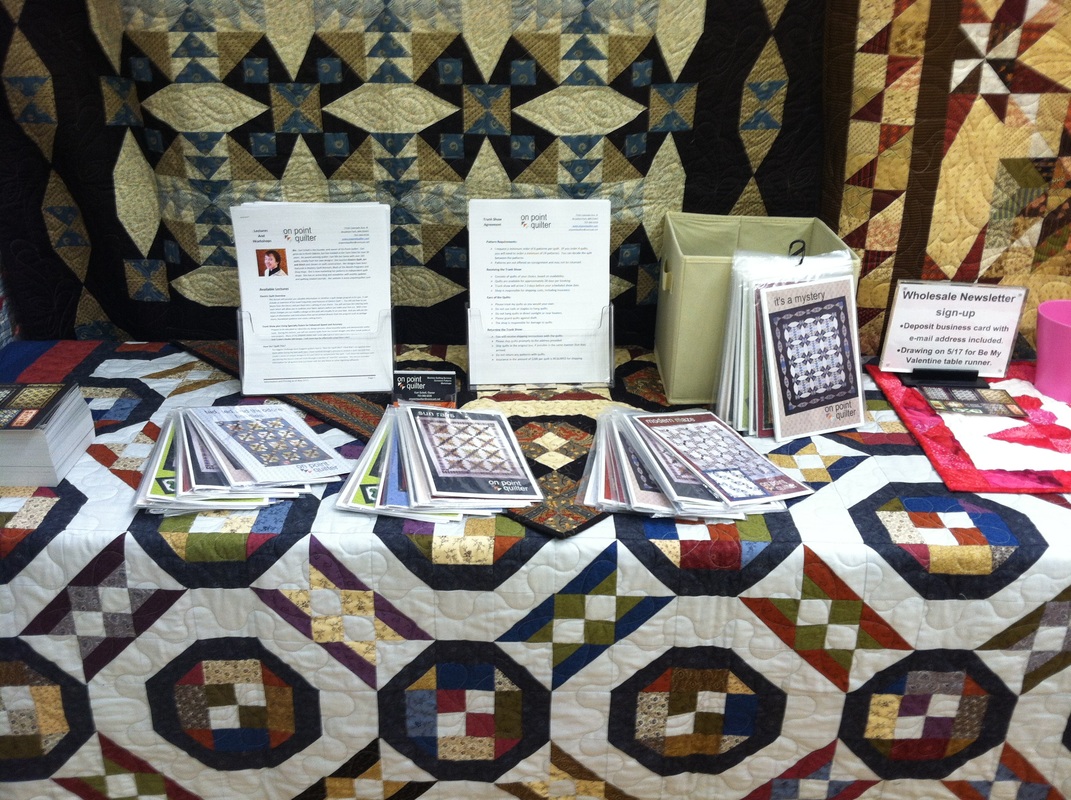
I left myself no time to relax. After I turned in my laptop and other equipment on Wednesday, I drove to the convention center and started setting up my booth for International Quilt Market.
For those that don't know, International Quilt Market is the trade show for quilt shop owners and those who are in the business. It is held twice a year. Spring market rotates across the country and fall market is always in Houston. Here are a few photos of my first ever booth. 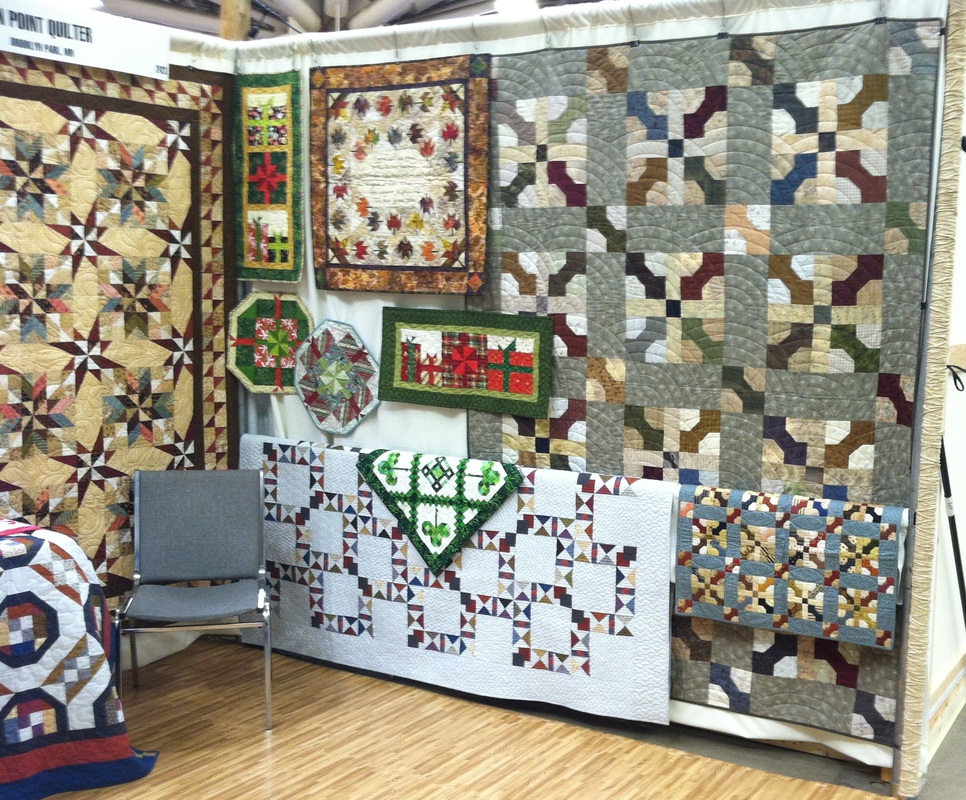
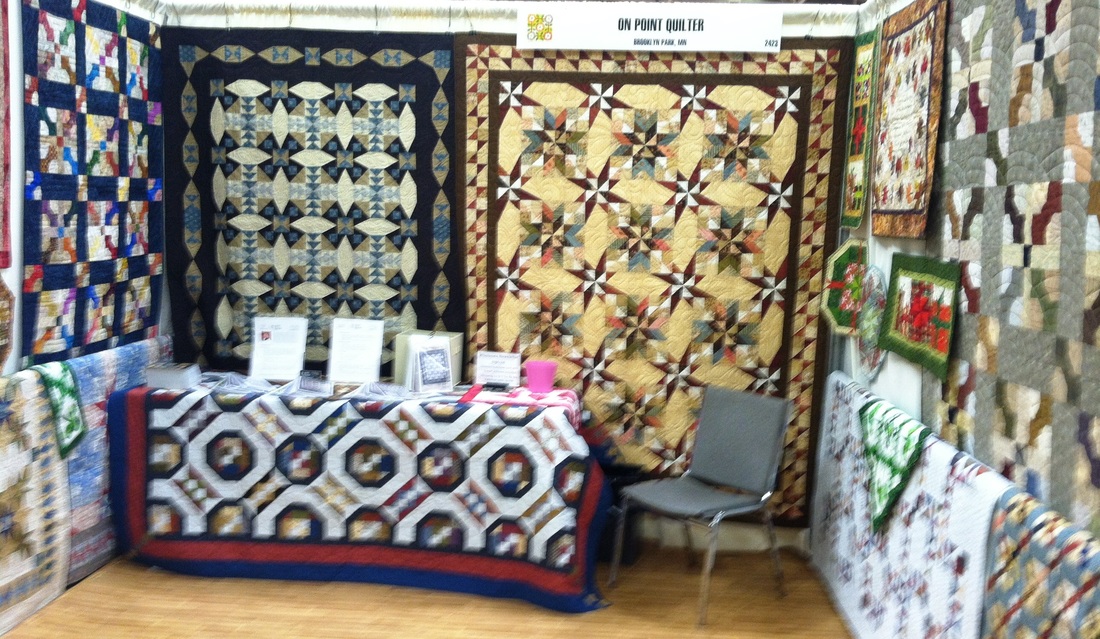
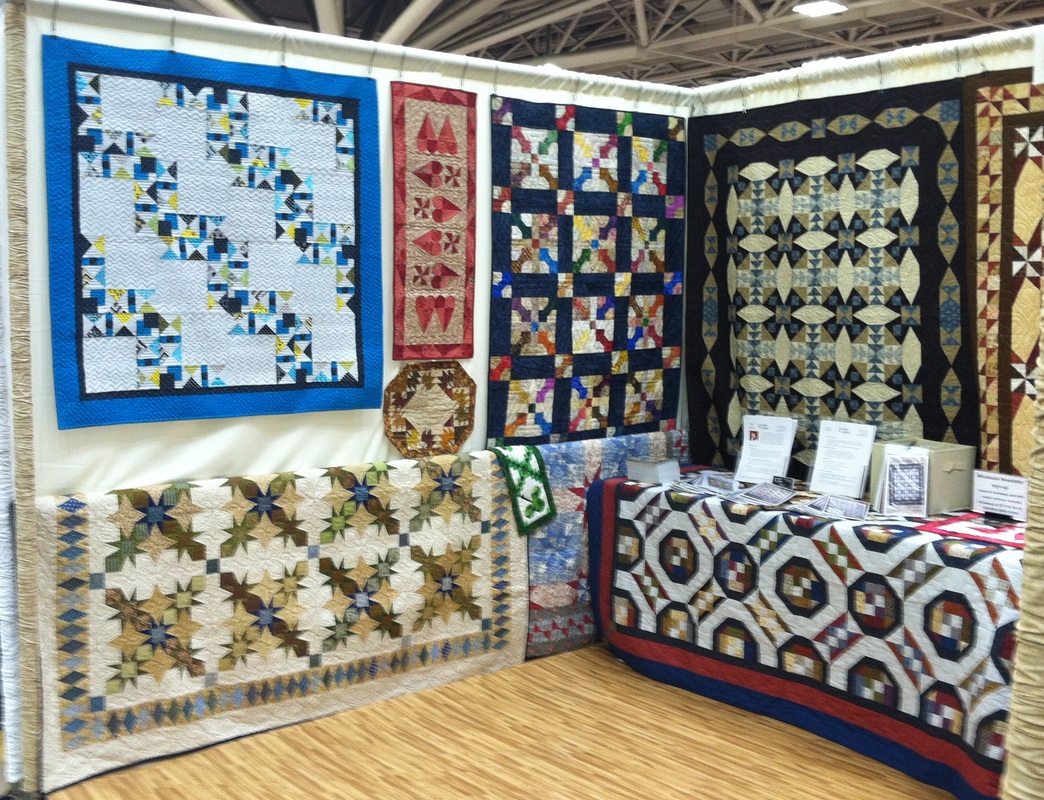

I hope you recognize a few of these quilts. :)
In addition to pattern design, I am hoping to do more teaching (both online and at shops and shows). So I suspect I will keep very busy. I've even hired Morna McEver as a business coach to help me stay focused as I start on this new venture. Morna McEver is the CEO and founder of the International Association of Professional Quilters and International Association of Creative Arts Professionals. 
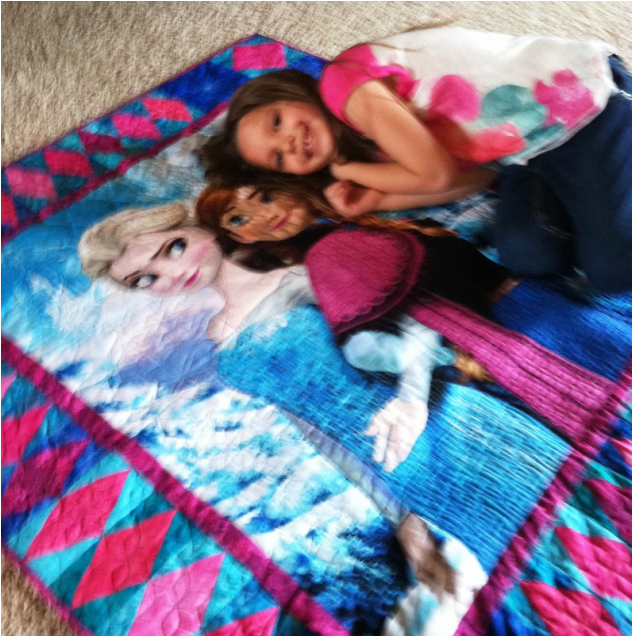
Gifting the Elsa and Anna Frozen Quilt
I saw my niece Josie last weekend and was able to give her the Frozen quilt. She carried it around all weekend -- so I'm guessing I can conclude it was a hit.
She was also a great helper -- opening all my pattern bags and even binding a portion of a table topper so I could get ready for market. Is six a good age for girls to start quilting? (She learned to tie her shoes last weekend and seemed pretty good at fine motor skills.) 
Happy quilting.
Kari Sign up for my newsletter to stay current on what's happening in my studio and learn more quilting tips. As a thank you, I'll send you a FREE pattern for this small maple leaf quilt.
Let me preface this post by saying -- this isn't about the really challenging stuff in life (family issues, health issues, etc.).
Do you think quilting is EASY?
In the early years I took a lot of classes. If there was a quilt show, I would sign up for 3-4 classes. At the local quilt shop, I picked at least one new class each quarter. I then began buying quilting books and magazines and watching quilting shows on TV. Now I consider quilting relaxing and most aspects I find “easy” (at least most of the time).
Do you think quilting is DIFFICULT?
|


Ferris Wheel Pattern by On Point Quilter
|
Finished sizes:
Recommended (optional) Tools:
To make construction easier, sections in the quilt use oversized piecing along with the mentioned specialty rulers. If you chose not to use the specialty rulers, alternate instructions are provided. Purchase here for sales price of $9 (regularly $10). |
Modern Maze
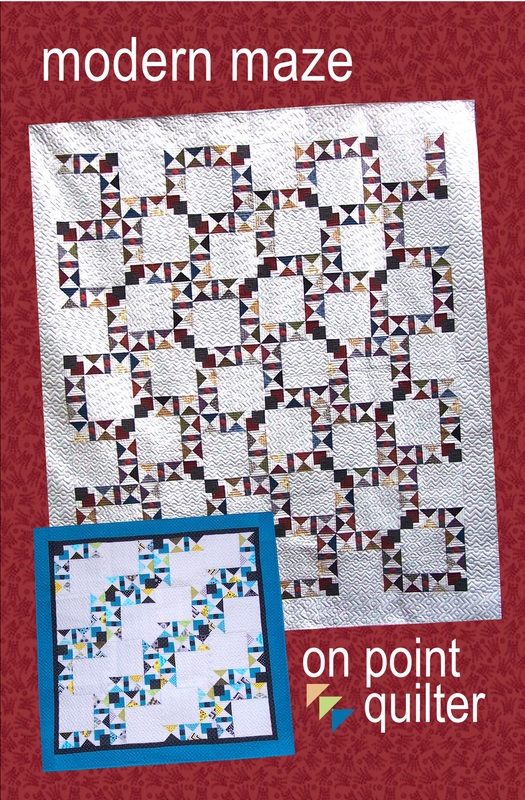
Modern Maze Pattern by On Point Quilter
|
Create your own maze with these asymmetrical blocks. There are endless rotation possibilities. The quilt may be completed with four fabrics or may be made from scraps.
Finished sizes includes:
Recommended (optional) Tools: Purchase here for sales price of $9 (regularly $10). |
Happy quilting.
Kari
Sign up for my newsletter to stay current on what's happening in my studio and learn more quilting tips. As a thank you, I'll send you a FREE pattern for this small maple leaf quilt.
Kari
Sign up for my newsletter to stay current on what's happening in my studio and learn more quilting tips. As a thank you, I'll send you a FREE pattern for this small maple leaf quilt.
|
|

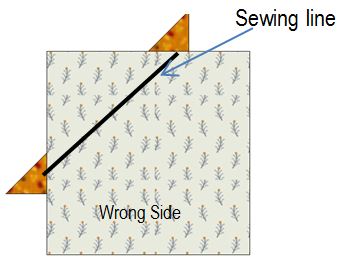
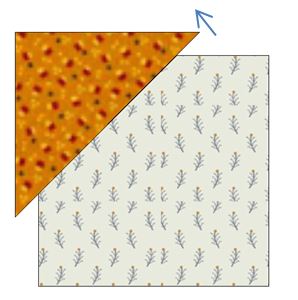
Traditional Folded Corner. The line highlighted in blue is the sewing line.
|
Traditional Folded Corner Finished
|
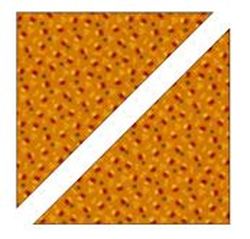
Back when I started quilting, I had a book from Mary Ellen Hopkins entitled "It's OK if you Sit on My Quilt Book". In this book she introduced the quilting world to connector corners. I think this may have been one of the techniques that revolutionized modern day quilting. Over the years I have heard a number of names for the technique including "cheater corner" and "folded corner".
The technique refers to a method of adding triangles to a quilt block. It is frequently the suggested method for creating snowball blocks, square within a square units and flying geese units. Although I've used the technique over the years, I found that I would have some fabric slippage or I would stretch the fabric in the pressing process -- resulting in less than perfect results.
The technique refers to a method of adding triangles to a quilt block. It is frequently the suggested method for creating snowball blocks, square within a square units and flying geese units. Although I've used the technique over the years, I found that I would have some fabric slippage or I would stretch the fabric in the pressing process -- resulting in less than perfect results.
A couple of years ago I was introduced to the Perfect Corner Ruler™. It is built off the folded corner concept. However this variation on the technique gets rid of some of the challenges with folded corners.
The Perfect Corner Method™ and Ruler™ were both developed by
Ruthanna Grihalva, Forever In Stitches, LLC.
The Perfect Corner Method™ and Ruler™ were both developed by
Ruthanna Grihalva, Forever In Stitches, LLC.
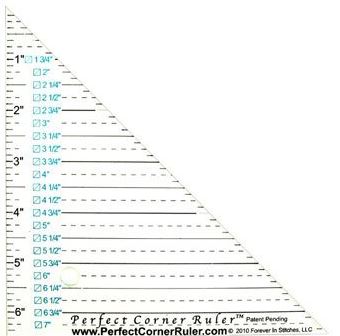
Perfect Corner Tool
Using the Perfect Corner Ruler
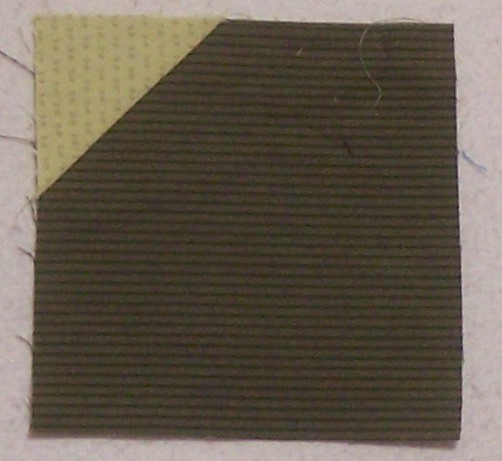
I used the Perfect Corner ruler in my Tad, Ted and Theodore Bowtie pattern. The example below is for the "Theodore" unit in this pattern.
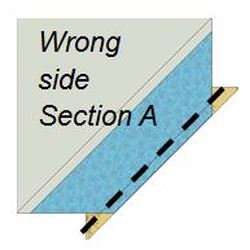
Using the ruler, draw a diagonal line on the wrong side of the base piece of fabric (this is the piece the corner will be added to). The measurement to use for this line is exactly the same as your folded corner measurement. (For the Theodore unit this is 2".)
Using the ruler, draw a diagonal line on the wrong side of the base piece of fabric (this is the piece the corner will be added to). The measurement to use for this line is exactly the same as your folded corner measurement. (For the Theodore unit this is 2".)
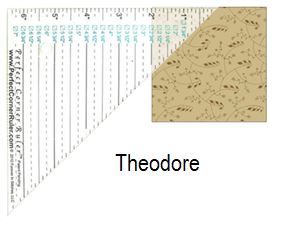
Theodore Perfect Corner Line
Cut corners. The square for these corners will be 3/4" greater than the folded corner square. For Theodore this was 2-3/4" x 2-3/4". Cut the square once on the diagonal for two corner pieces.
|
Place one of the Corner Triangles underneath the Base unit as shown. The right sides of the fabric will be together and the wrong side of the Base unit will be up. Make sure that about ¼” of the Corner Triangle extends beyond the sewing line for the seam allowance.
Sew on the drawn line. |
|
Fold the Corner Triangle into position. An added benefit is that the seam allowance can be pressed either away from or towards the corner.
|
Finished Theodore unit after trim-down
|
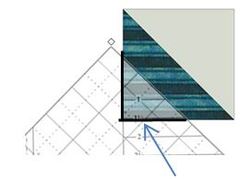
Here is the MAGIC! Align a square ruler to the original size of the Base Unit and trim off the excess Corner Triangle fabric.
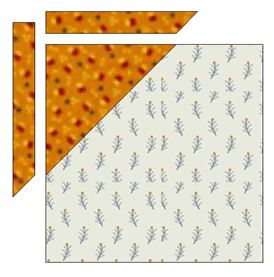
Finish by folding the Corner Triangle down out of the way and trimming the excess base unit fabric. |
Using the Corner Pop Ruler
Approximately six months ago Deb Tucker came out with her version of a "folded corner" ruler. Corner Pop™ from Studio 180 Design is used for folded corner units. Using this tool you will trim rather than mark, add an oversized replacement triangle and then square everything to a perfect size.
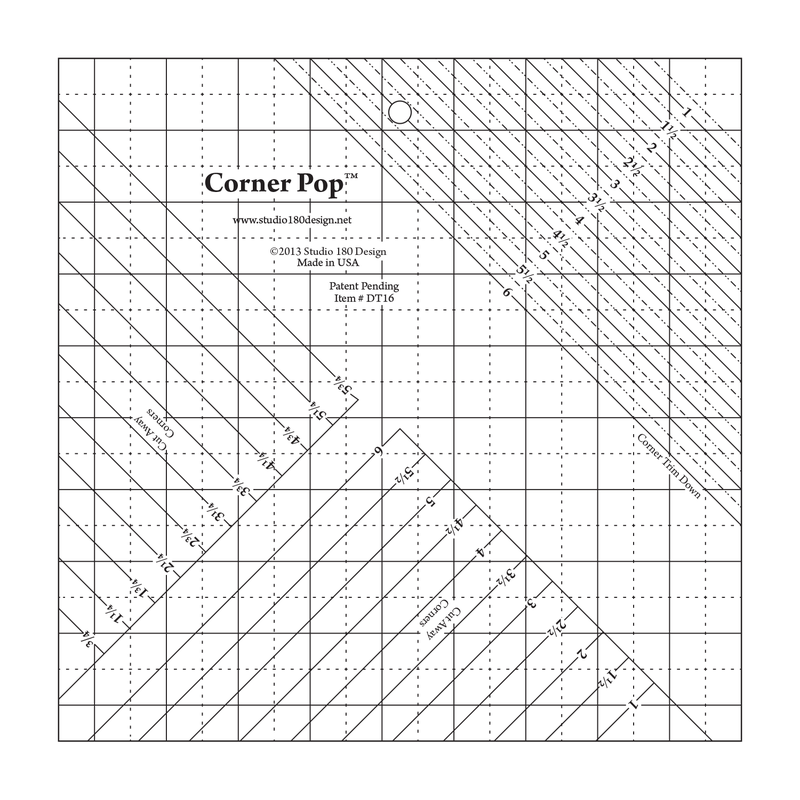
Deb Tucker's Corner Pop Ruler
This tool is featured in my latest pattern - Ferris Wheel. This pattern would have traditionally called for a 2 inch folded corner. Here is how I used the Corner Pop tool.
Use the 1 1/2″ Cut Away lines on the Corner Pop™ to cut one corner on a half-square triangle unit.
The square for these corners will be 3/4" greater than the folded corner square. (For this unit, the square is 2-3/4" x 2-3/4".) Cut each corner squre once on the diagonal to create two half-square triangles.
With the half square triangle unit on top, sew (using an accurate 1/4″ seam) the corner triangle to the half square triangle.
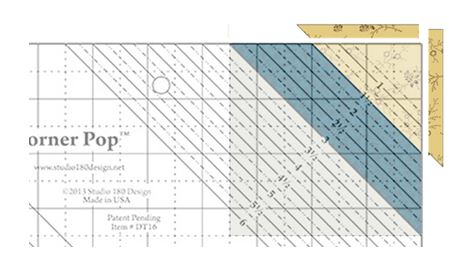
|
Press either direction. Trim the added corner triangle using the 1 1/2″ Corner Trim Down line on the Corner Pop™. Trim the top and right sides.
|
|
Here is one of the finished units from a Ferris Wheel block.
|
Folded Corner Poll
Inquiring minds what to know....what methods you have tried -- and if you have tried multiple methods, which one do you prefer. Poll selections are confidential.
|
|
|
Featured Pattern - Ferris Wheel
When going to the fair as a child, the ferris wheel was my favorite ride. I loved the view at the top and enjoyed colorful lights late at night. This quilt can be made with 8 fabrics or the medium and dark fabrics may be made from scraps. If made from scraps, Charms work for the Dark; and Fat Eighths or Fat Quarters for Medium 1 and 2.
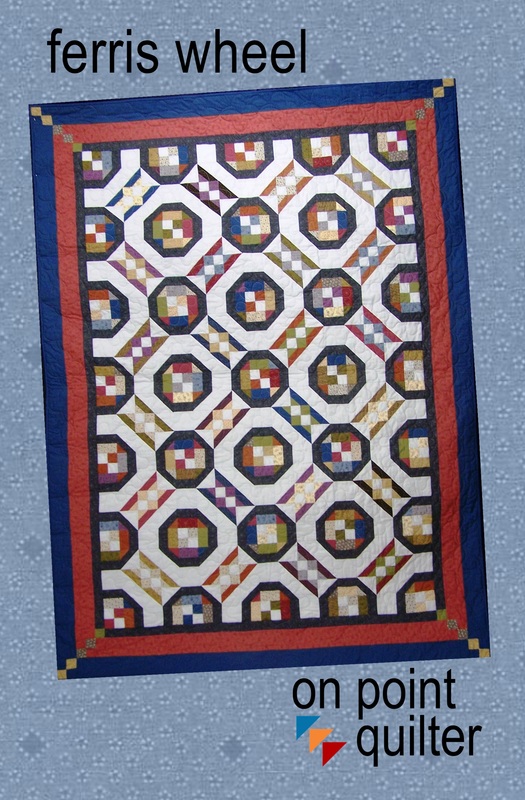
Ferris Wheel Pattern by On Point Quilter
|
Finished sizes:
Recommended (optional) Tools:
To make construction easier, sections in the quilt use oversized piecing along with the mentioned specialty rulers. If you chose not to use the specialty rulers, alternate instructions are provided. |
Happy quilting.
Kari
Sign up for my newsletter to stay current on what's happening in my studio and learn more quilting tips. As a thank you, I'll send you a FREE pattern for this small maple leaf quilt.
Kari
Sign up for my newsletter to stay current on what's happening in my studio and learn more quilting tips. As a thank you, I'll send you a FREE pattern for this small maple leaf quilt.
|
|


Free guide available for newsletter subscribers


Kari Schell
Electric Quilt Expert and Educator and Pattern Designer.
Categories
All
Art And Stitch
Cricut Maker
Dear Jane
Electric Quilt 7
Electric Quilt 8
Goose Goose Duck Challenge
Inkscape
Patterns
Silhouette Cameo
Stampin Up
Tips And Techniques
Tools And Rulers
Archives
July 2024
June 2024
May 2024
April 2024
March 2024
February 2024
January 2024
December 2023
November 2023
October 2023
September 2023
August 2023
July 2023
June 2023
May 2023
April 2023
March 2023
February 2023
January 2023
December 2022
November 2022
October 2022
September 2022
August 2022
July 2022
June 2022
May 2022
April 2022
March 2022
February 2022
January 2022
December 2021
November 2021
October 2021
September 2021
August 2021
July 2021
June 2021
May 2021
April 2021
March 2021
February 2021
January 2021
December 2020
November 2020
October 2020
September 2020
August 2020
July 2020
June 2020
May 2020
April 2020
March 2020
February 2020
January 2020
December 2019
November 2019
October 2019
September 2019
August 2019
July 2019
June 2019
May 2019
April 2019
March 2019
February 2019
January 2019
December 2018
November 2018
October 2018
September 2018
August 2018
July 2018
June 2018
May 2018
April 2018
March 2018
February 2018
January 2018
December 2017
November 2017
October 2017
September 2017
August 2017
July 2017
June 2017
May 2017
April 2017
March 2017
February 2017
January 2017
December 2016
November 2016
October 2016
September 2016
July 2016
June 2016
May 2016
April 2016
March 2016
February 2016
January 2016
December 2015
November 2015
October 2015
September 2015
August 2015
July 2015
June 2015
May 2015
April 2015
March 2015
February 2015
January 2015
December 2014
November 2014
October 2014
September 2014
July 2014
June 2014
May 2014
April 2014
March 2014
February 2014
January 2014
December 2013
November 2013
October 2013
September 2013
August 2013
 RSS Feed