
|
I must admit that I am a high-tech quilter. I design all my quilting in Electric Quilt. I sew them all on a sewing machine (even the applique). I quilt them all on my longarm (with the computerized Intelliquilter module). When people ask what my least favorite part of quilting is, I usually respond "binding". This is the one piece that I typically perform by hand as I really like the look of a nicely tacked hand binding. While the look is great -- it is also time-consuming. A few weeks ago I received an e-mail with a link to site that had a new method of creating machine bindings. This technique creates a flange on the front of the quilt and the entire binding is done by machine. I am totally in awe of this technique and will be using it for all my donation quilts along with some of my own. The first page of the post is below (to whet your interest): 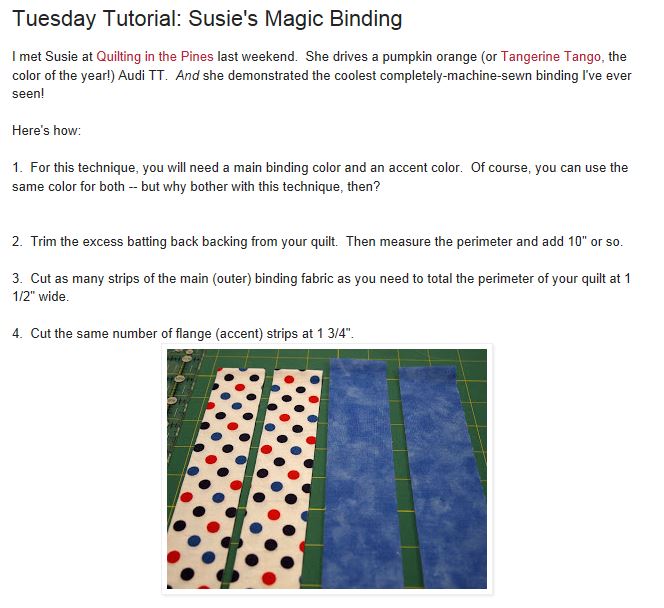 Magic Binding Tutorial I suggest reading the entire post by Aunt Marti. However here are a few of my observations after trying the technique.
A Use for the Binding - Last weekend Maple Grove Quilters worked on boys and girls charity quilts. Thanks for Stephanie for organizing this project. For the boys quilts we all needed to bring in a number of 8 inch finished pinwheels. For the girls quilts we needed to bring in 8 inch finished heart blocks. We divvied up the completed blocks and turned them into lap quilts. I think we managed to get at least six tops done on Saturday morning. I took a couple of them home to quilt electing to go with a fairly simple edge to edge pattern. Here is an example of one of the boys quilts that was quilted with a football pantograph (perfect for a young boy or man in your life):  Charity Boys Quilt with Football Pantograph 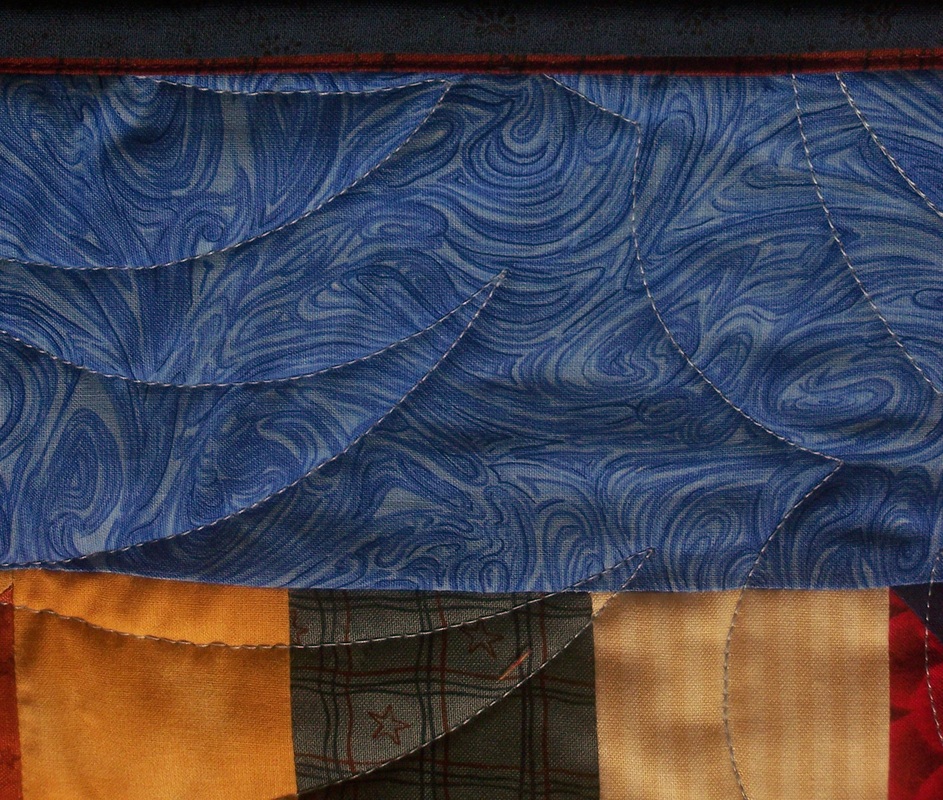 Magic Binding Close-up. Magic Binding Close-up. The flange is 1/8" and was stitched on top of the red. Happy quilting.
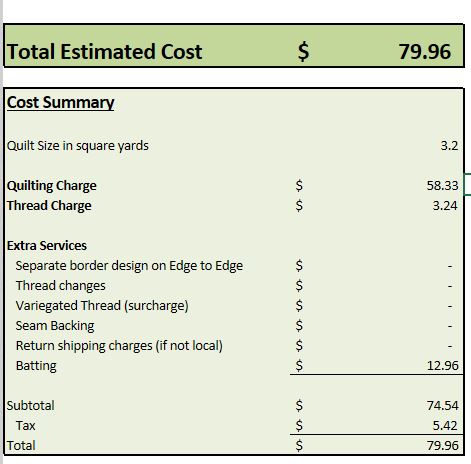
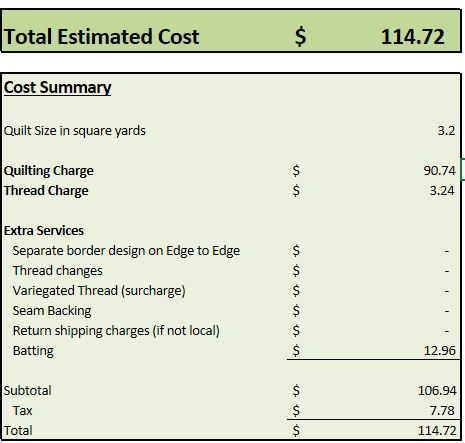
Kari If you have taken your quilts to a longarm quilter you have probably realized that figuring out how much it is going to cost you can take a little bit of work. Some quilters charge by the square inch. Others charge by the square yard. Minimum charges are different. Thread costs are different. Then there is the batting charge. All of this confusion is the beauty of free enterprise. However, all you probably want to know is "how much is quilting my quilt going to cost" and "are there things I can do to influence the cost". I developed a quilting calculator to assist my current and future customers in understanding these factors. And it is something they can run on their own -- before they even pick up the phone to give me a call. 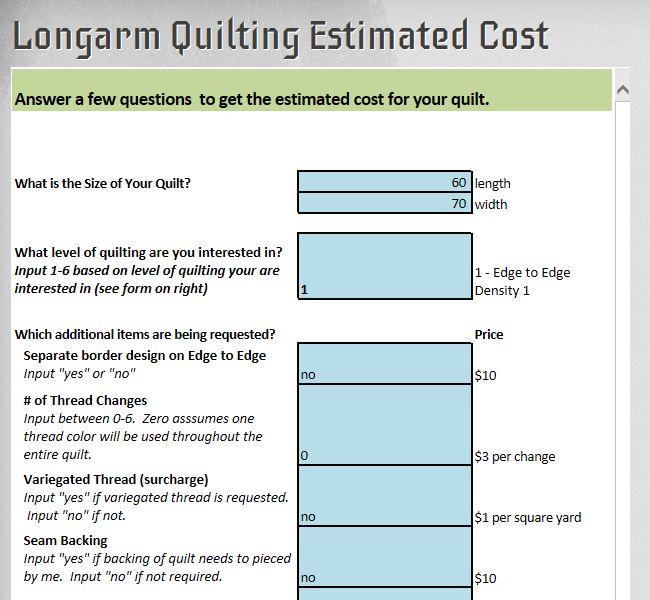 Quilting Calculator All you need to do is answer a few questions. First put in the dimensions. Then the type of quilting you are interested in. Selecting the level of quilting has the greatest amount of impact on your final cost. You can see how much more "light custom" is compared to "an edge to edge design". Not just the rate -- but the impact on YOUR quilt. Then a few "yes/no" questions. And you now have a final estimate.
On the left is an estimate for a 60 x 70 quilt with Edge to Edge Density 1. On the right that same quilt with Medium Custom. All I did was change the Level of Quilting from 1 (Edge to Edge Density 1 to 4 (Medium Custom). Descriptions of each level of quilting are on the website and I am in the process of taking and uploading some photo examples as well.
Happy quilting. Kari I'm a member of a quilt group - Dear Jane Minnesota. We have been meeting for over ten years with the primary intent to encourage each other on the completion of a quilt (or quilts) inspired by the Jane Stickle quilt hanging in the Bennington Museum in Vermont. The quilt was made popular through a book entitled "Dear Jane" written by Brenda Manges Papadakis. we have used her book along with the Electric Quilt CD to make our renditions of this masterpiece. Every couple of years we like to have a show to display what we have been working on. These quilts are on display at Four Seasons Quilt Shop in Maple Grove Minnesota. They will be on display through the end of September. The star attraction of our show this year is Sherry Perry's Dear Jane. The quilt is breath-taking and is definitely worth seeing in person with 225 blocks (every one different). She did a fabulous job quilting it on her domestic sewing machine. 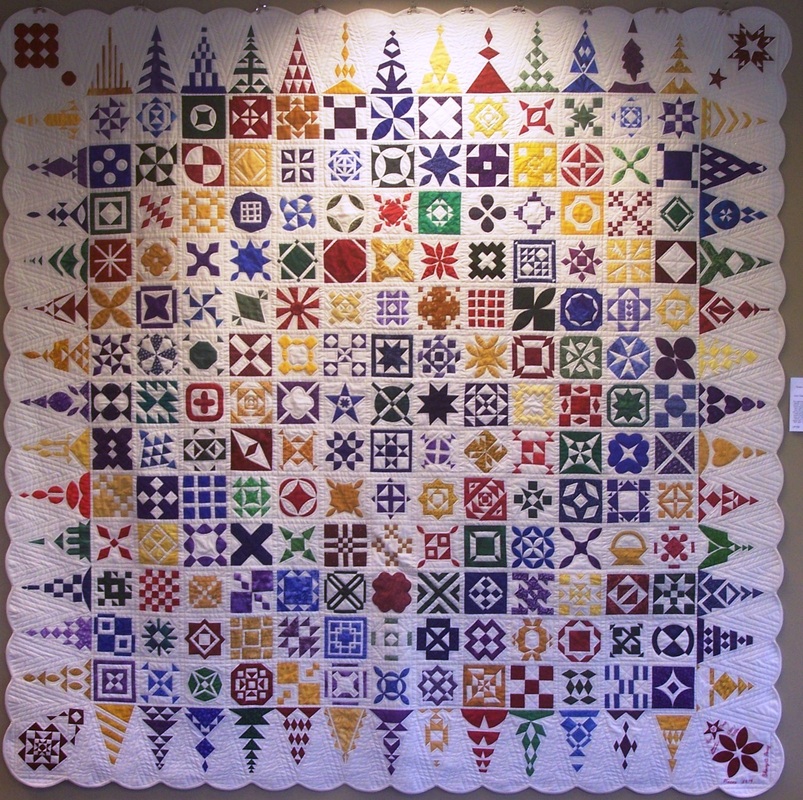 Holiday Exchange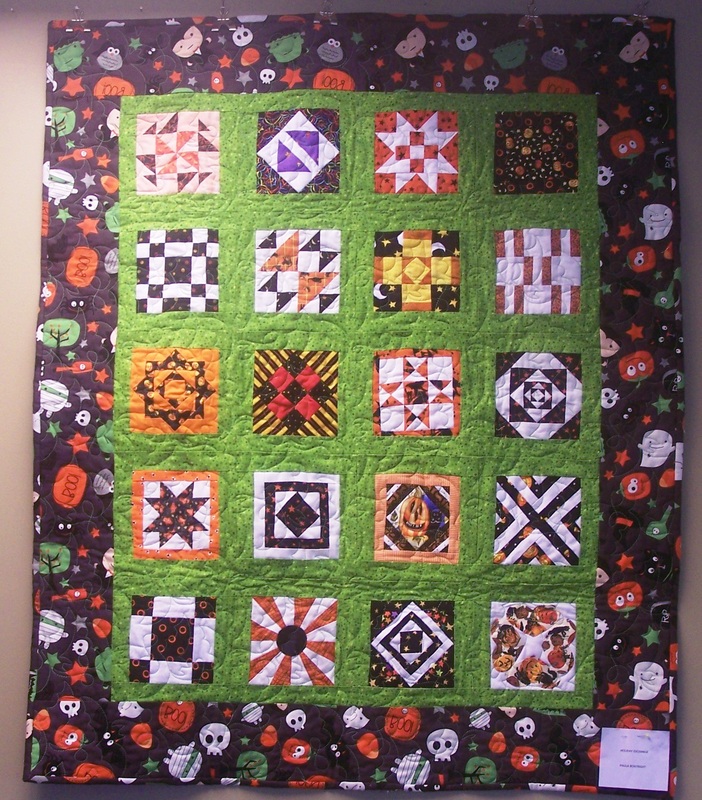 Paula's Halloween Jane Quilt - This was from a challenge from a number of years ago. We each selected one block from the "Jane" quilt and made 18 variations. The variations were based on selected holidays/seasons selected by each member of the exchange. So for Paula, we each did our selected blocks in Halloween fabrics. 10 ChallengeA year ago the group decided to have a challenge to celebrate our 10th year of retreating at St. Ben's College at St. Joseph Minnesota. We took each of the "10" blocks (the tenth block in each row of the quilt) and each received a random row assignment. The challenge was to design a quilt around that block. Some also incorporated the theme of ten in their quilts. Not everyone finished the challenge -- but here are those that are on display. Maybe we will see the rest in 2015.  JoAn S. A10 Quilt. Great use of a log cabin block for a setting for her quilt. 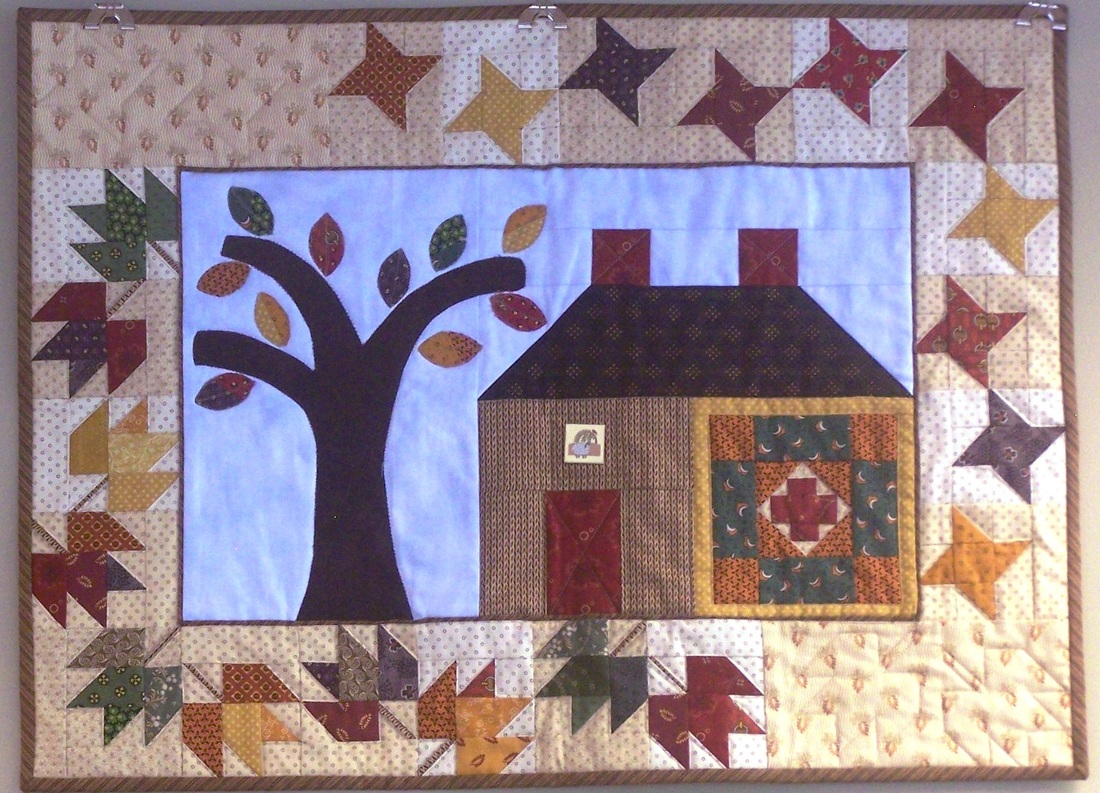 Erin Kennedy's B10 Quilt. Notice the B10 block in the house. There are also 10 stars, ten maple leaves along with ten leaves on the tree.  Kari's (i.e. my) B10 Quilt. I used the B10 block for my setting. The then included 9 other blocks from the "B" row in my quilt. 9 blocks plus the setting makes 10. 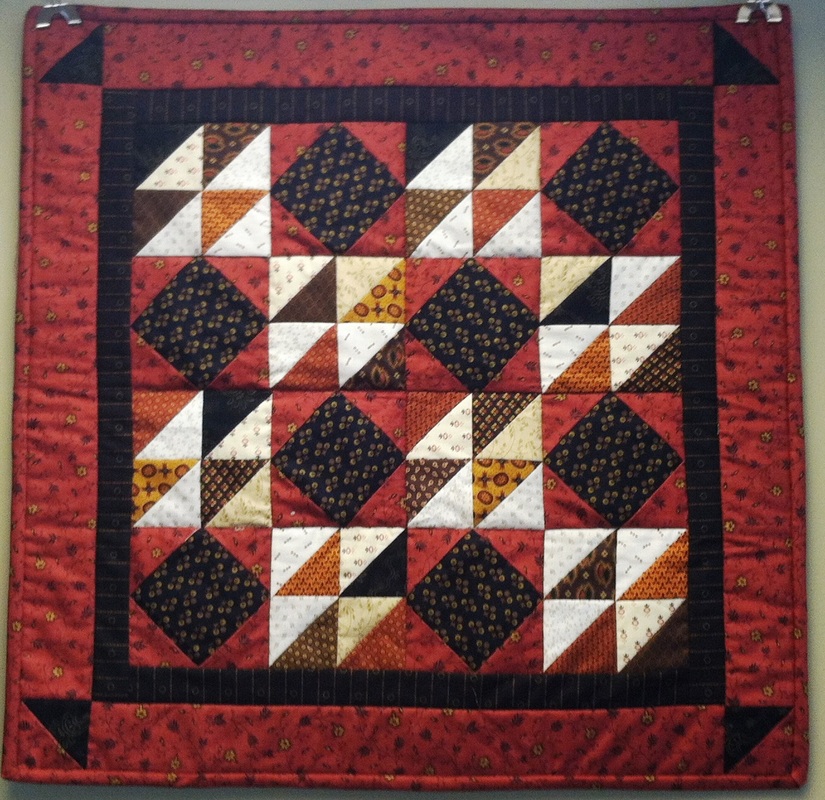 JoAnn's D10. She pieced four of the D10 block and set them together. This is classic JoAnn with her signature red and black civil war fabrics. 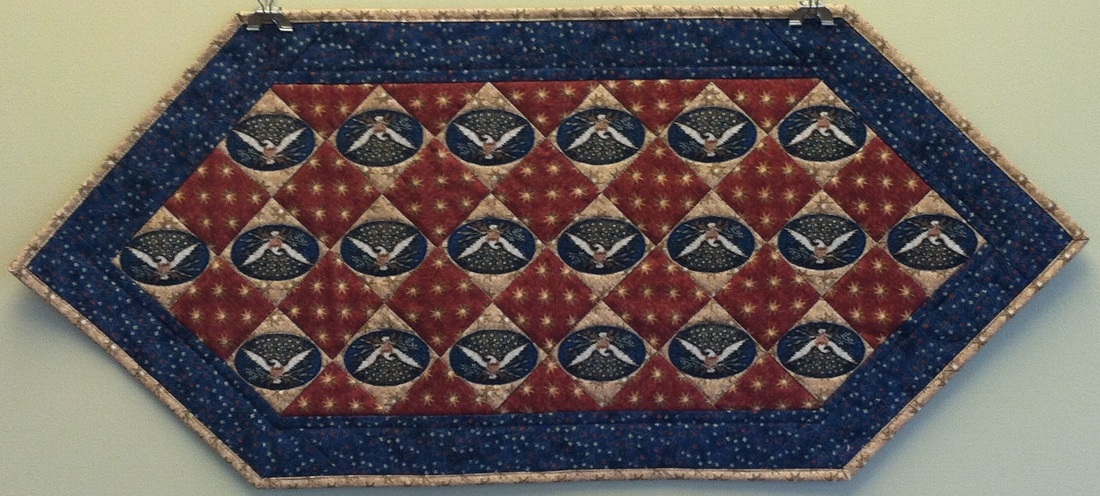 Sherry Perry's E10. Sherry has had a productive year finishing her "big" quilt and the challenge. I love how she fussy cut the eagles for each of the melons in this quilt. 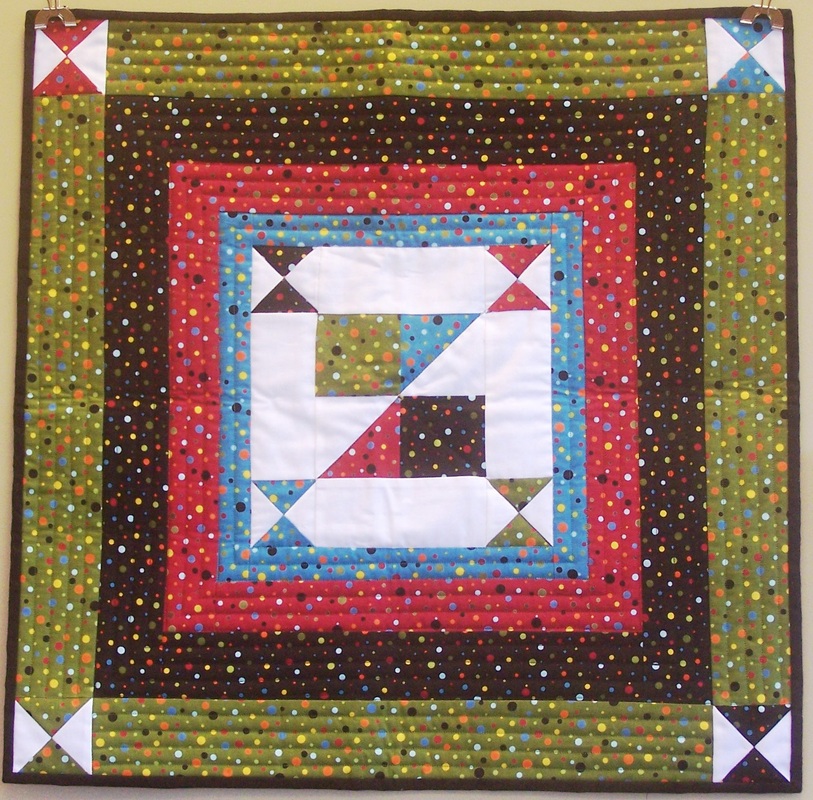 Pam's H2. I'm not sure why, but I keep thinking fish when I look at Pam's rendition of this block. 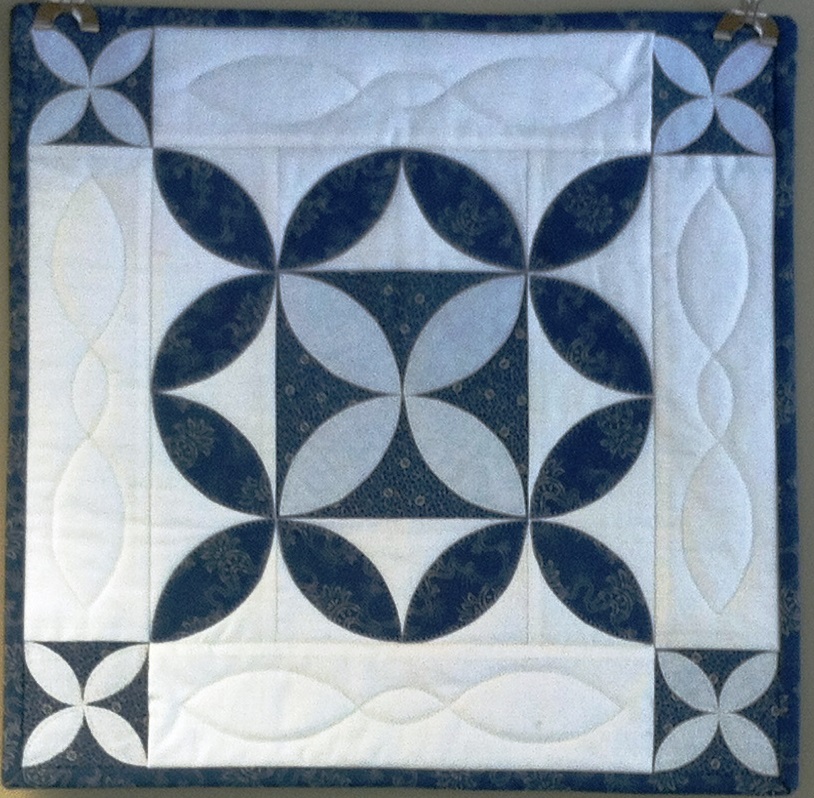 Mona Harmann's J10. I would like to make this one. The white borders really make the melons shine. The applique looks perfect. 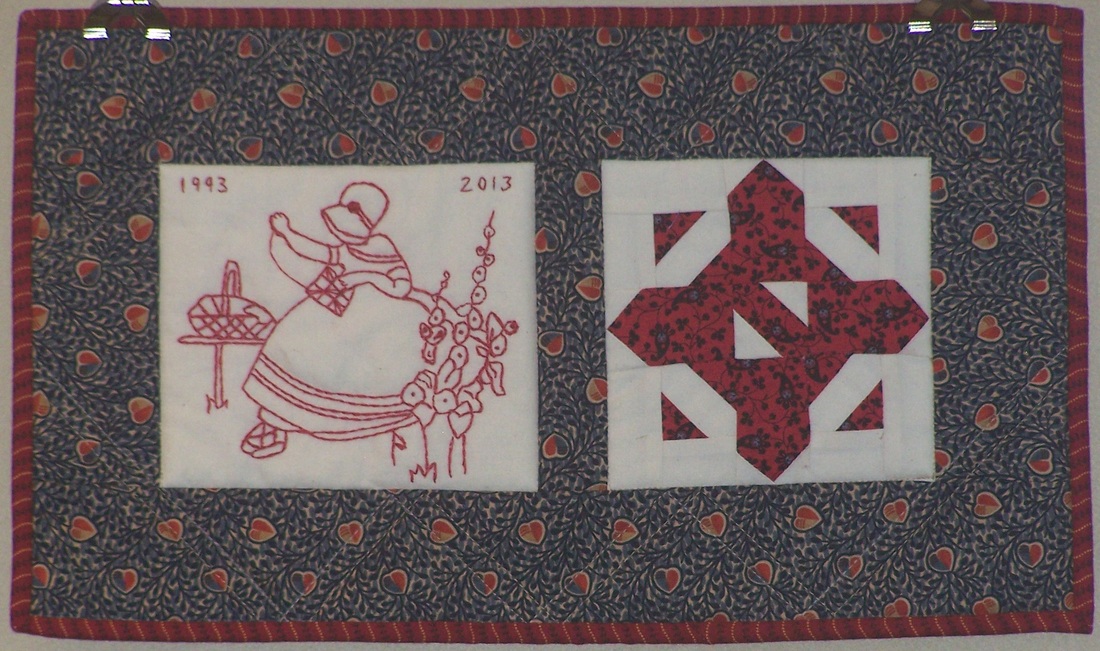 Diane Rose's K10. Diane combined both her love of redwork and her love of Dear Jane. The young woman is hand sewing a Dear Jane block, as Diane is doing her Dear Jane quilt by hand. I'm wondering if this quilt will be in the redwork show as well?  Rose's L11. Rose had the most difficult block (at least in my opinion) in the challenge. She bravely managed to make three of them and incorporated in a wall hanging. I hope you enjoyed the virtual rendition of our show. And if time allows, please check out the quilts in person at Four Season Quilts.
One step in my goal toward publishing my patterns, is to take better photos of my quilts. I've taken many snapshots over the years, but have never been very excited about the end result. So I decided to do some research on the internet on photographing quilts. One of the best articles I found on the subject was by Holly Knott and Andy Baird called Shoot that Quilt. In their article they recommend using a few high-powered daylight balanced compact fluorescent bulbs. These are the bulbs that are recommended for Seasonal Affective Disorder (SAD). You can you tell they're daylight-balanced by the "color temperature" rating, expressed in degrees Kelvin. You need to find a bulb that says "5000 K". I couldn't find any of these bulbs at the local home stores, so went online to 1000Bulbs.com and purchased four 30W bulbs. Below are two pictures of a quilt. The first used the regular light bulbs from my house. 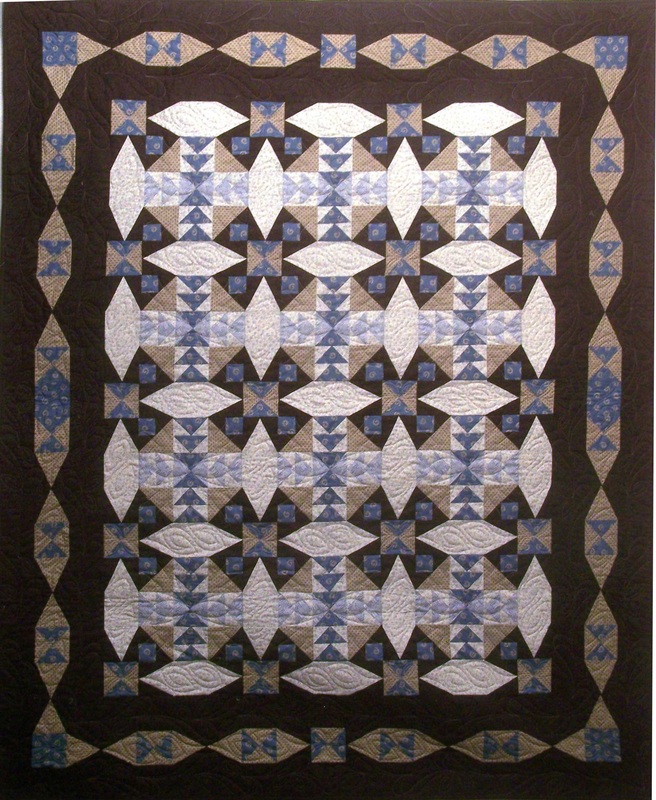 The next is the same picture taken with the new light bulbs. 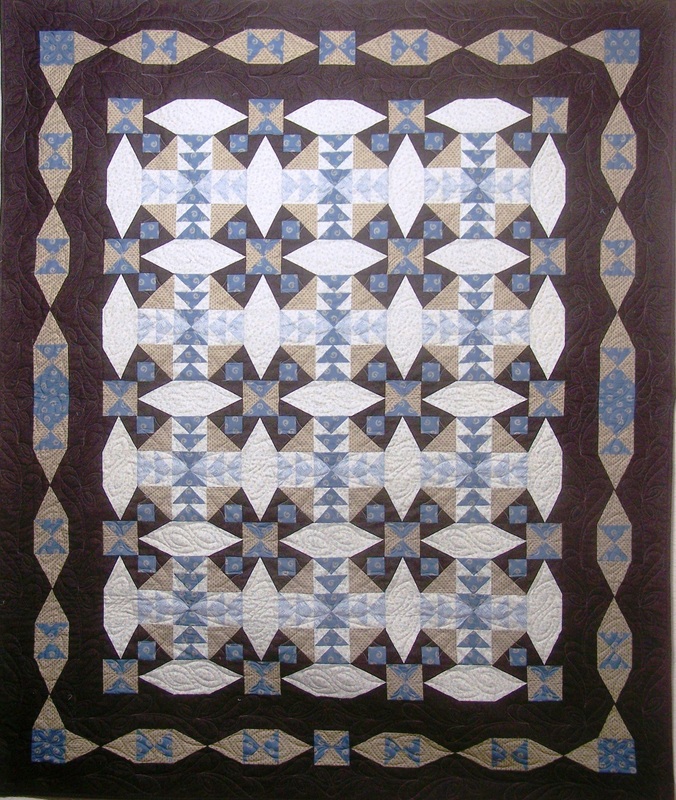 The first definitely has a more "yellow" cast. White that second is very "white". Now to figure out which one I like best for my new pattern cover It's A Mystery.
However I want to tell you the real find in all of this. I had a couple of extra bulbs, so I put them in ceiling light in my sewing room. The difference there was absolutely phenomenal. The fabrics on my shelves and worktable are so much clearer to see. I'm now going back and purchasing more of these light bulbs and plan to use them in other areas of the house as well. Happy Quilting. |


Free guide available for newsletter subscribers


Kari SchellElectric Quilt Expert and Educator and Pattern Designer. Categories
All
Archives
July 2024
|
 RSS Feed