
|
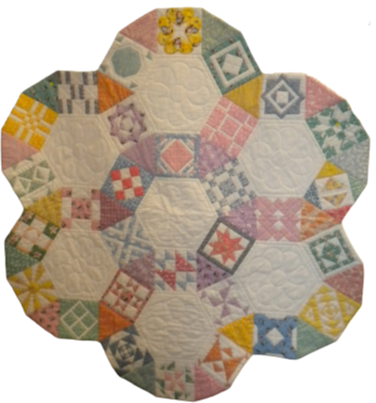
My friend Sherry Perry recently posted a picture on her Facebook account of a Dear Jane quilt she did in the Jack's Chain layout.

Dear Jane Exchange Quilt by Sherry Perry of Maple Grove MN
Scroll down to see a tutorial on how to create this layout (with blocks of your choice) using Electric Quilt.
I met Sherry when we were part of a fledgling group that met monthly to talk about and work on our Dear Jane quilts. The group was formed in 2000 by JoAnn Atkins at a local quilt shop.
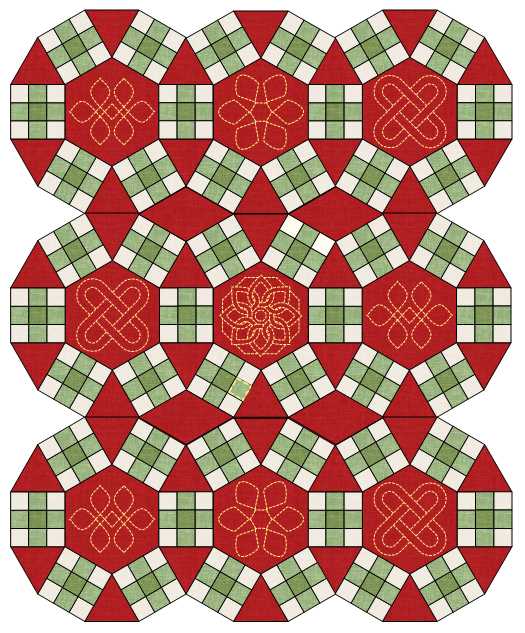
The group ended up enjoying being together so much that we started doing Work Days and then annual retreats at a nearby college. One of the activities the group participated in through the years were block exchanges. Sherry reminded me that this particular quilt was how she used her blocks from our Holiday exchange. In 2009 each participant chose a Dear Jane block and a holiday (or season). We then made 18 of the same block (in the original 4-1/2" finished size) but in 18 different holiday schemes. The blocks were exchanged in May 2010. After wracking my brains and a search through old quilting bins, I located my quilt from the exchange. My theme was "fall". I was much more efficient than Sherry and just used the 18 blocks from the exchange. No extra blocks for me. :) 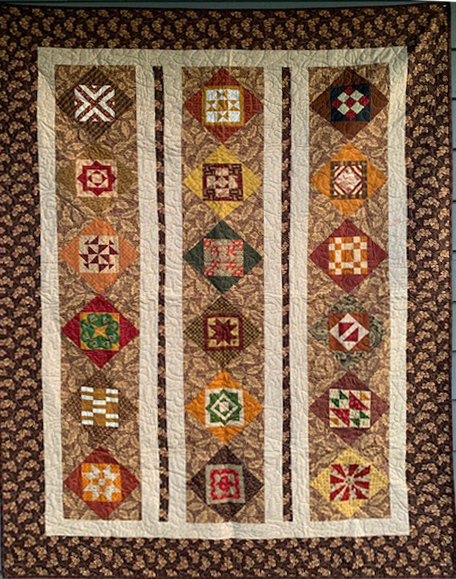
Kari Schell's Holiday Exchange Quilt with Dear Jane Blocks
Can you spot the block matches between my and Sherry's quilt? I still am not 100% certain what block was my block for the exchange. I think it may be the fifth block down on column 3. That block is L-5 Chattanooga Charlie.
Here is a picture of Sherry with her full Dear Jane quilt (before quilting). This picture was taken during one of our annual quilting retreats.
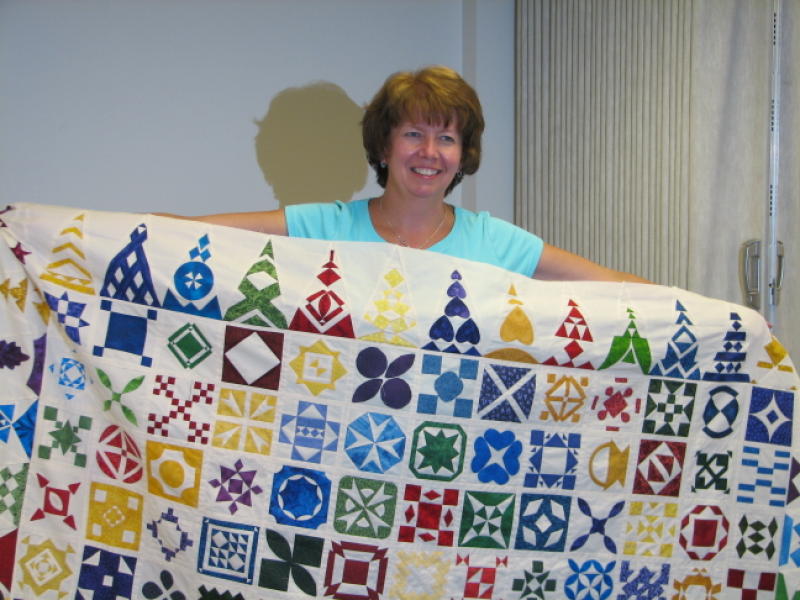
Sherry Perry with her full Dear Jane quilt.
Jacks Chain with Dear Jane Blocks
Electric Quilt recently released the Dear Jane Add-on for EQ. Check out the blog post on my approach to using the updated Dear Jane software to create a progress report ( a new feature in the add-on software).
In this tutorial, I will share will you how to create a Jack's Chain layout using EQ8 and then add the Dear Jane blocks to the quilt.
You can use this tutorial without the Dear Jane software. Feel free to use a favorite block collection instead of Dear Jane blocks. If doing so, resize your blocks to 4-1/2" using the adjust tool on the quilt worktable.
Sherry Perry's Quilt
Jack Chains Quilt by Sherry Perry
My Jack's Chain EQ design from the video.
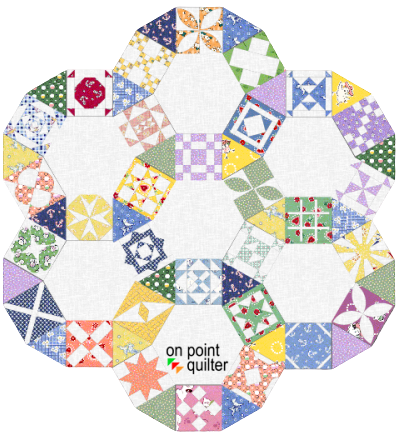
Jacks Chain Quilt created by Kari Schell using EQ8
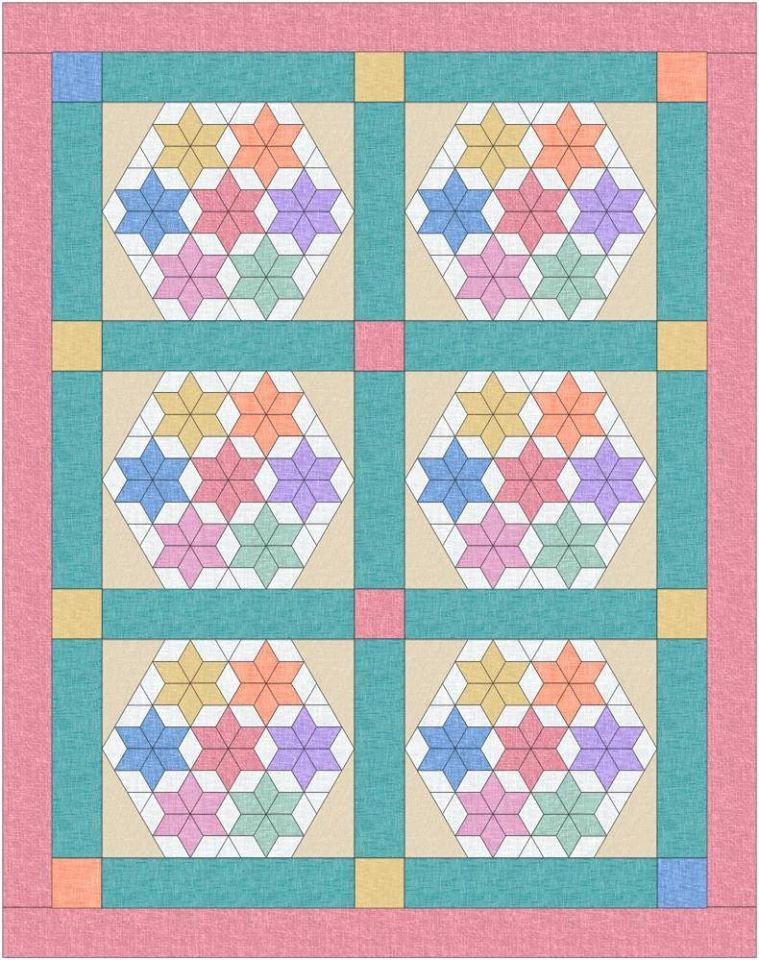
In this blog, I will share with you how I turned my virtual quilt into a "real" quilt during a mini-quilt retreat..
I used 2-1/2" squares of five different ombre fabrics and some English Paper Piecing templates for the hexagons. The background is a grey Kona cotton (Dove) . I added a grey ombre for the binding.
Hexagon Templates from EQ to Cricut Design Space
With EQ and an electronic cutting system of your choice, you will never need to purchase English Paper Piecing templates again -- and you will be able to have complete control over the sizes.
I printed the hexagon template from Electric Quilt to a pdf file. Then I used Inkscape to convert the pdf file to svg. Inkscape is a professional vector graphics editor for Windows, Mac OS X and Linux. It's free and open source. You can download the most current version of Inkscape here. Once I had an SVG file, I could import it into Cricut Design Space and cut out all my templates using my Cricut Maker. This process would also work if you use the Brother Scan n Cut or Silhouette Studio.
This video will take you through the process of going from EQ to Inkscape to Cricut Design Space.
Modern Hexagon Quilt Construction
I used a number of new techniques (at least for me) to construct my quilt.
This video will take you through the major steps of my process:
Here is an Amazon link to the glue products used in the video.
Note that these are affiliate links and I will receive a small commission if you purchase from the link.
Here is my finished project (100% completed at my mini-retreat). It feels so good to have had some sew time along with a chance to catch up with some quilting friends. And I could get really spoiled with the four tables per person -- to help us with social distancing.
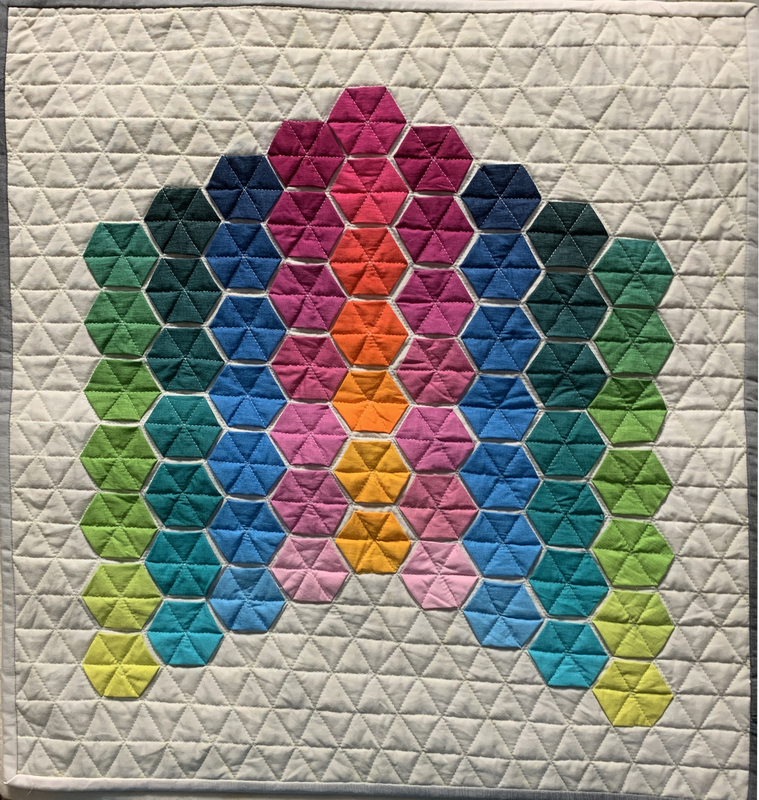
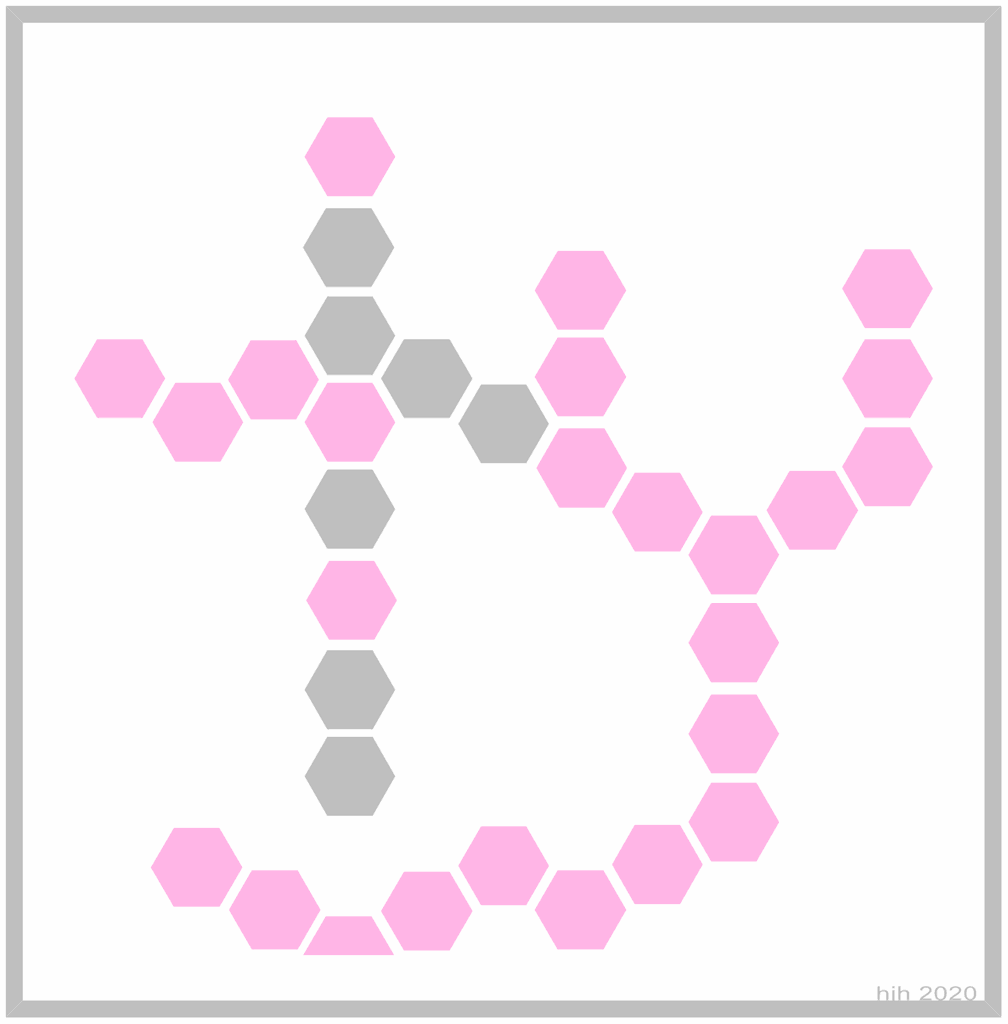
Modern Hexagon Quilt by Kari Schell
Last week, some creative modern hexagon designs were shared in the Learning EQ Facebook group. Great job ladies!
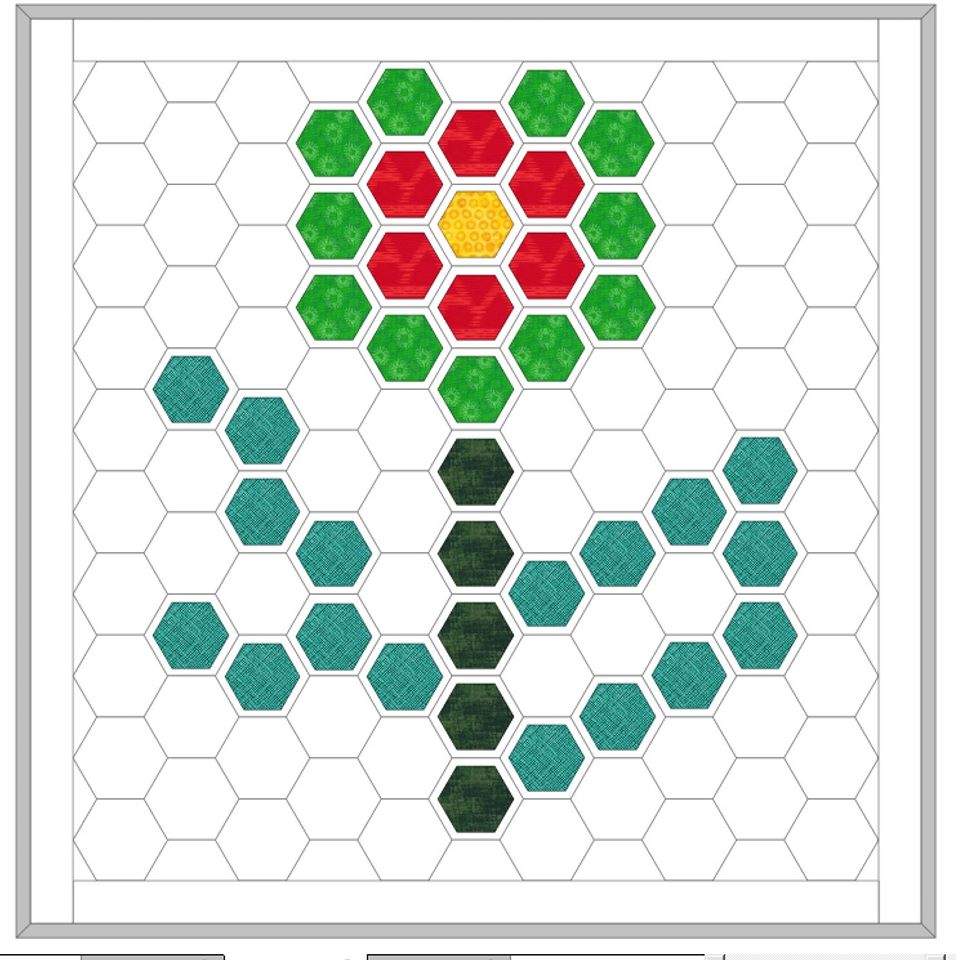
After doing a Google search for Modern Hexagon Quilt, I saw many examples of slightly reduced sized hexagons set in a hexagon layout. I liked the cleanness of the added white space and decided to try my hand at designing my own modern hexagon quilt.
For the background I used a one patch layout. Although I wasn't planning to piece the one patch layout, I found the lines provided the perfect backdrop for placement of my English Paper Pieced Hexagons.
I then created a basic hexagon block in PolyDraw and placed the blocks on Layer 2. Rearranging those hexagons can be a bit addicting. This is where you can get really creative in designing a one-of-a-kind quilt.
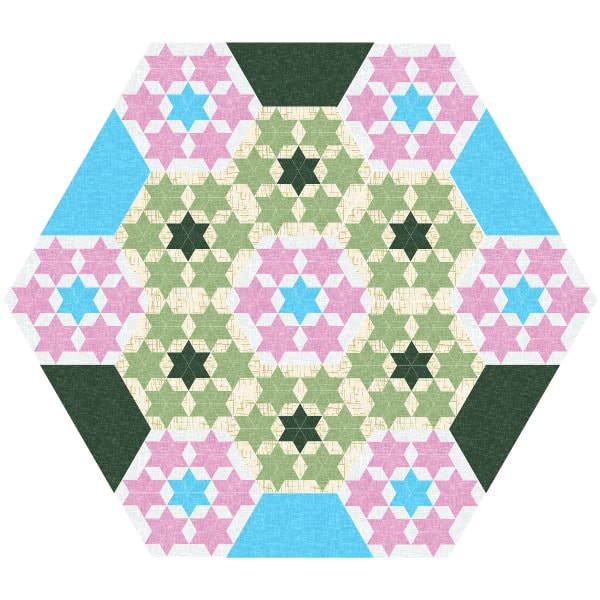
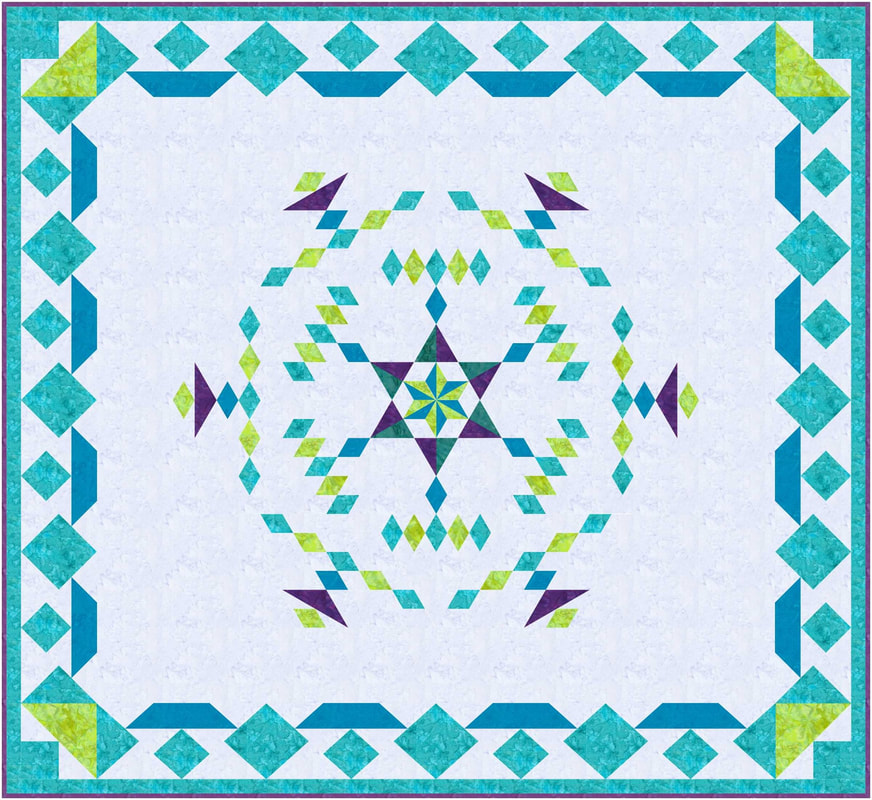
Here is the quilt from the video. I have some leftover ombre fabrics from another project and plan to use them to make this quilt.
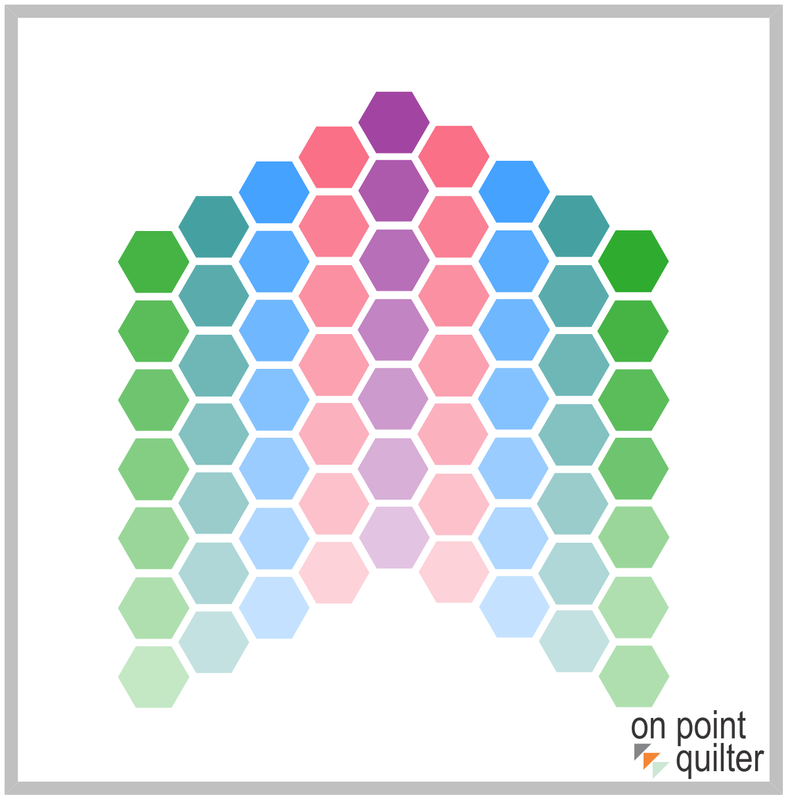
Modern Hexagons Quilt designed by Kari Schell using EQ8
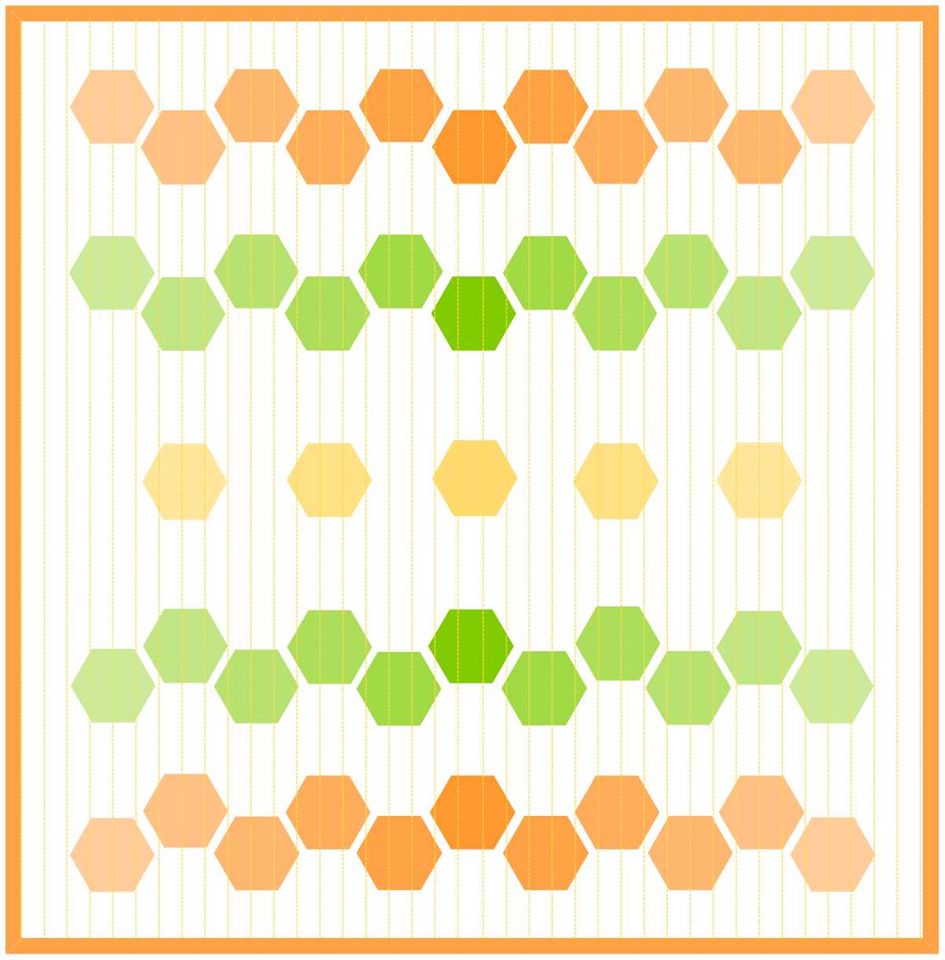
Here is one additional option. The fabrics are from Riley Blake Designs Pin Drop by Christopher Thompson. This was the free fabric download from Electric Quilt for July 2020. You can download the Pin Drop collection here.
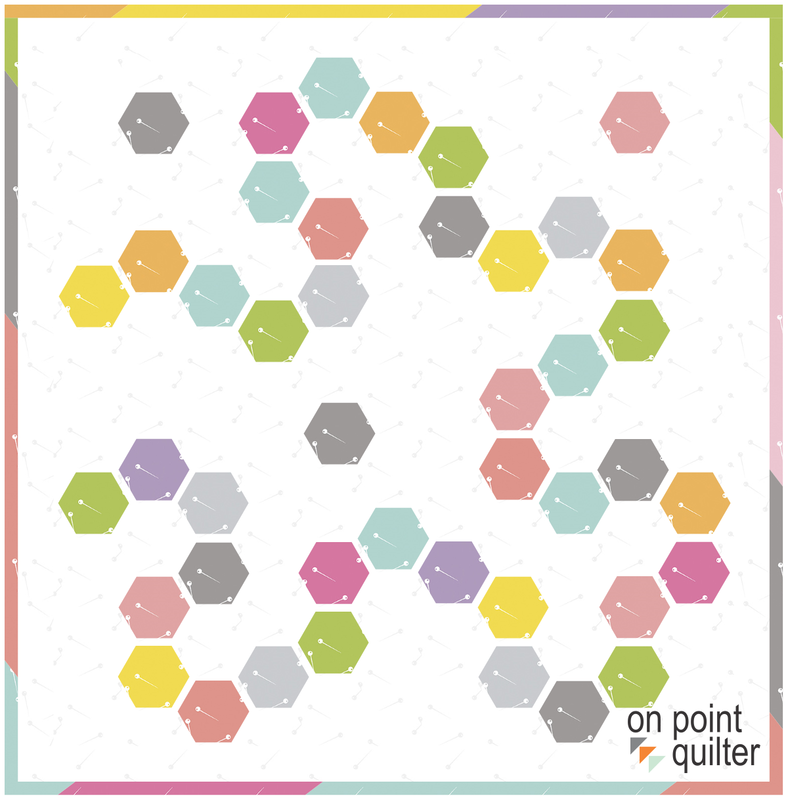
Modern Hexagons Quilts (option 2) designed by Kari Schell using EQ8
I would love to see pictures of your modern hexagon quilt. Feel free to post in the Learning EQ Facebook group. I have set up a separate post just for your designs.
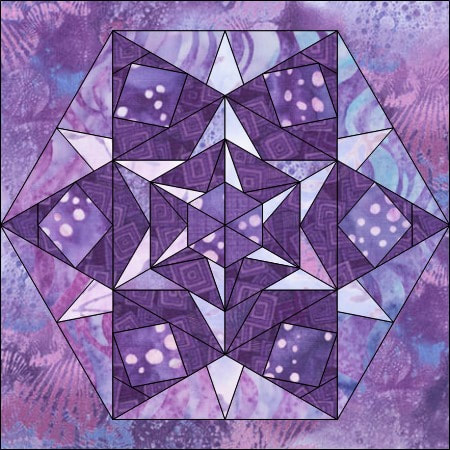
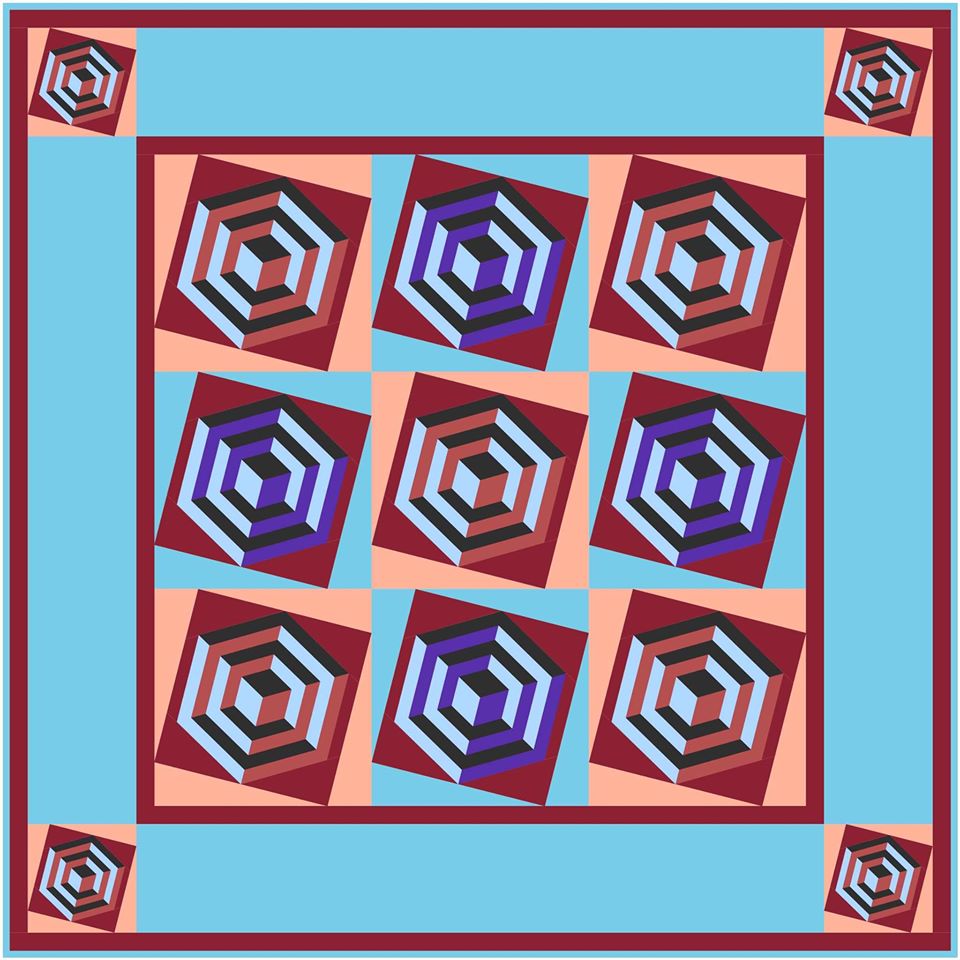
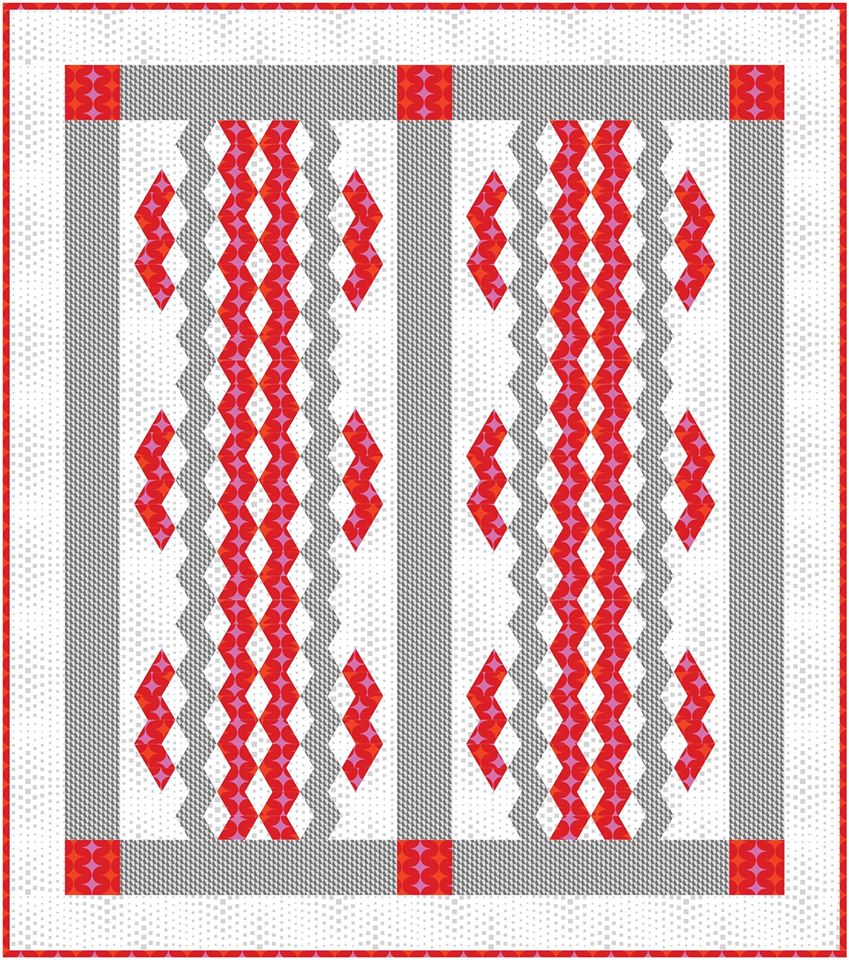
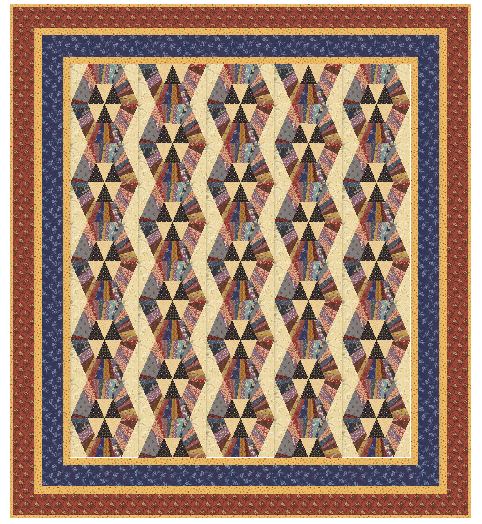
Optical Illusion Triangles
This will be a fairly simple block to draw in Electric Quilt 8 using EasyDraw. I used a variable point layout as it allows me to have a different Width and Height. I then decided to try the block in a second layout.
Here are my quilts from the video.
My challenge to you this week, is to redraft the block and create a quilt using the block. If you would like to share, feel free to post a picture on the Learning EQ Facebook group.
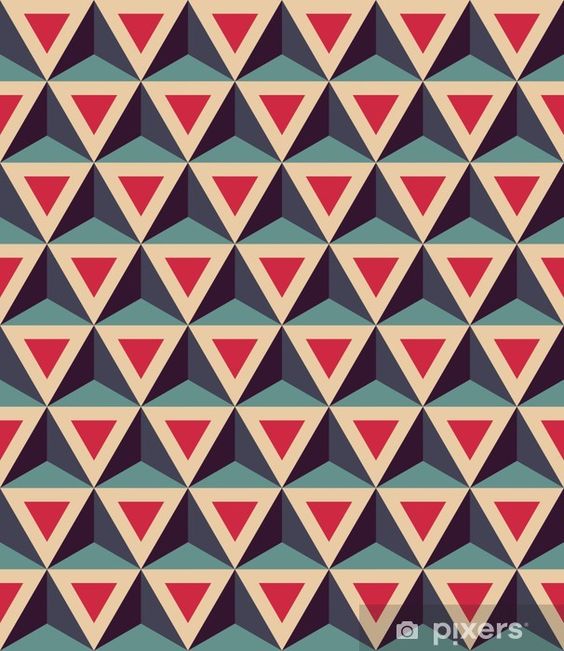
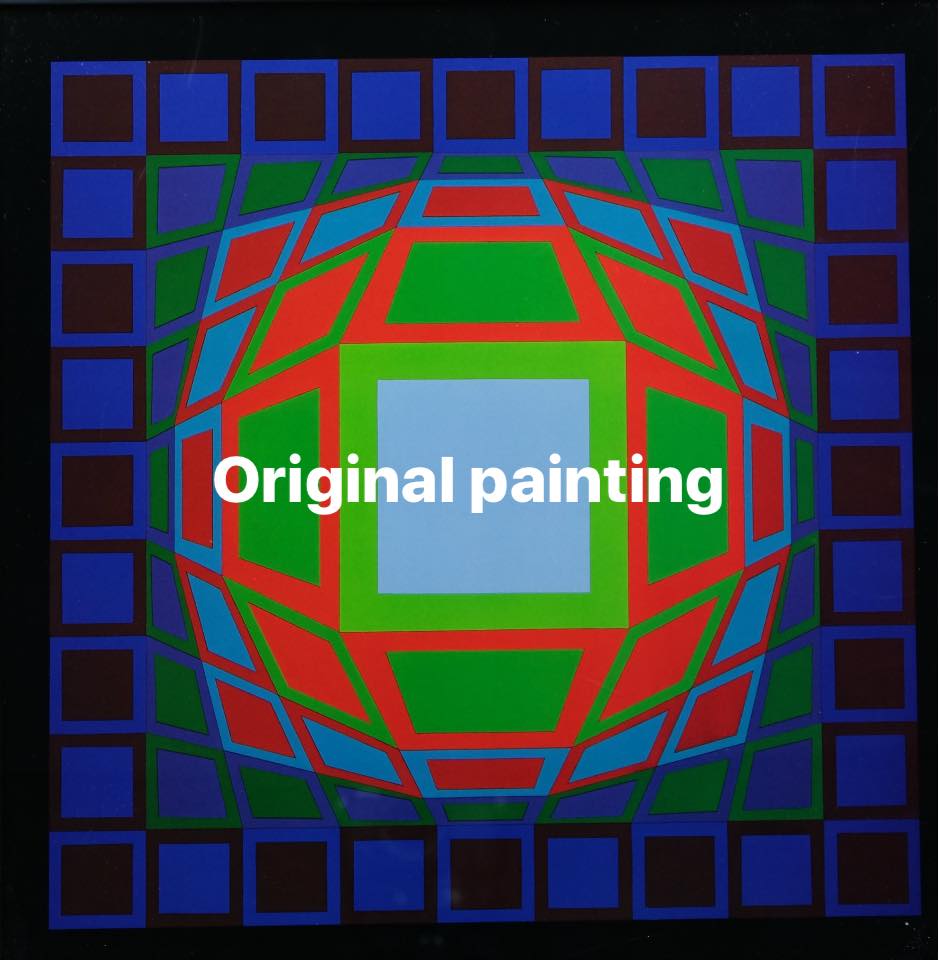
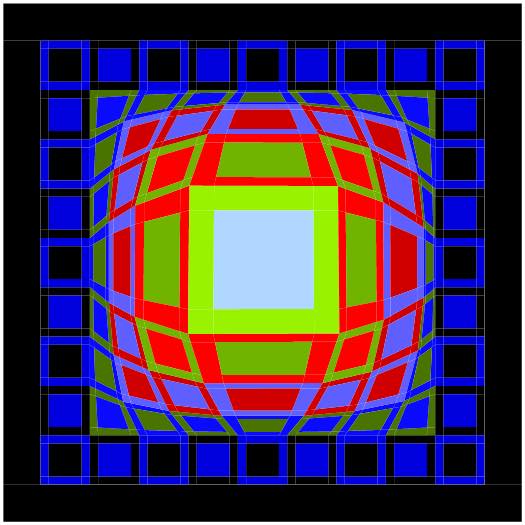
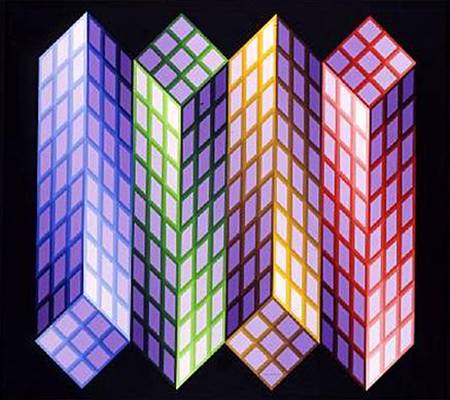
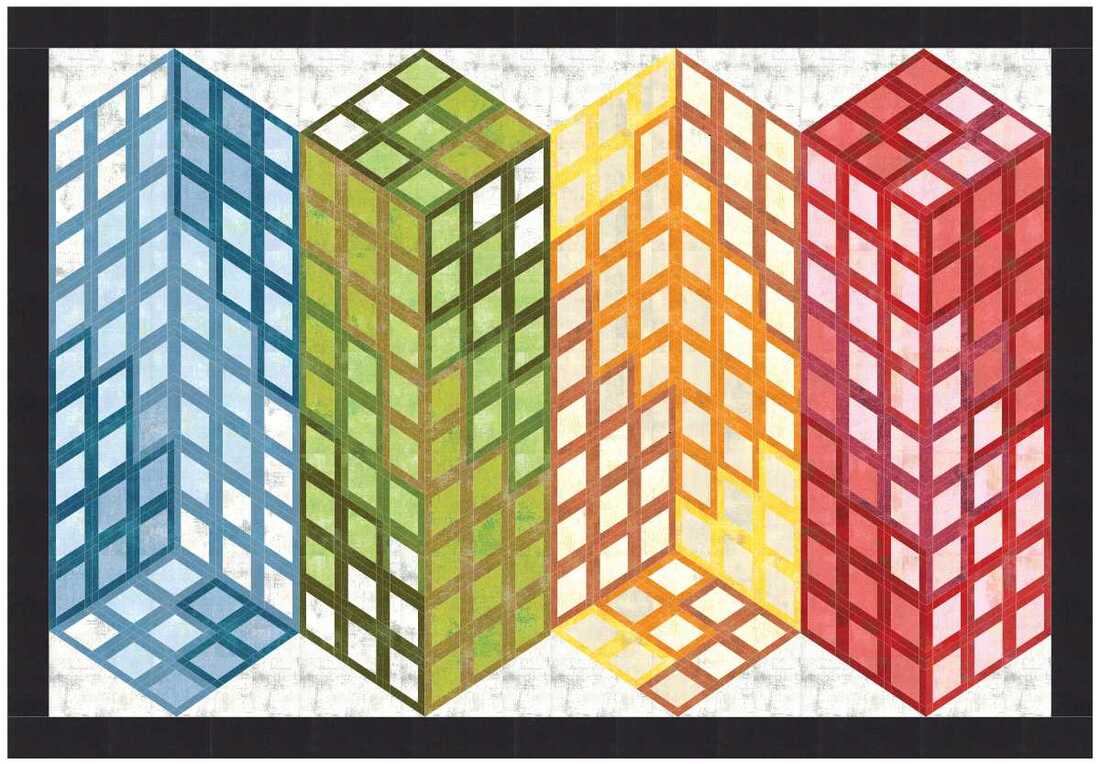
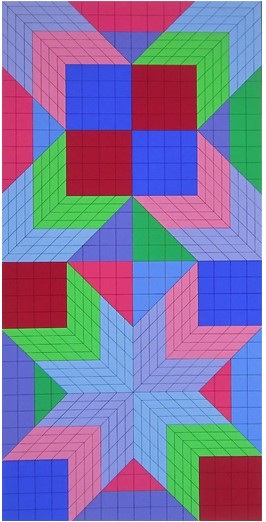
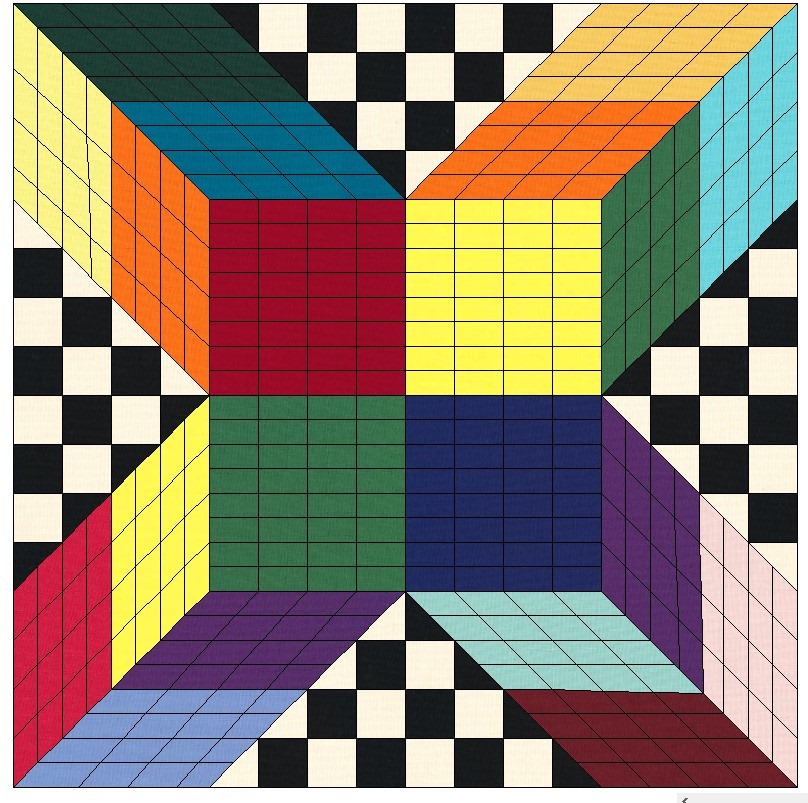
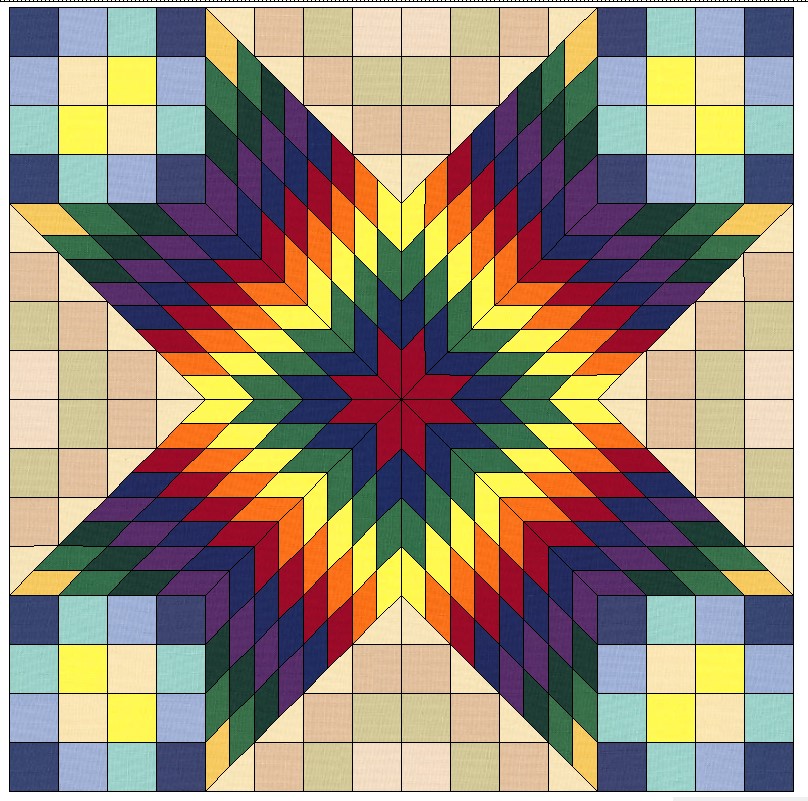
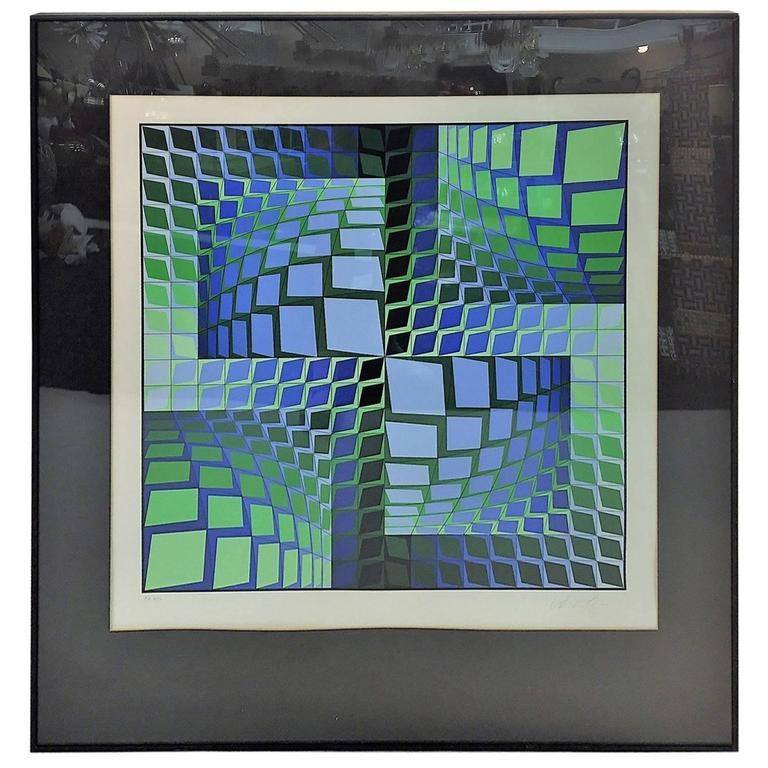
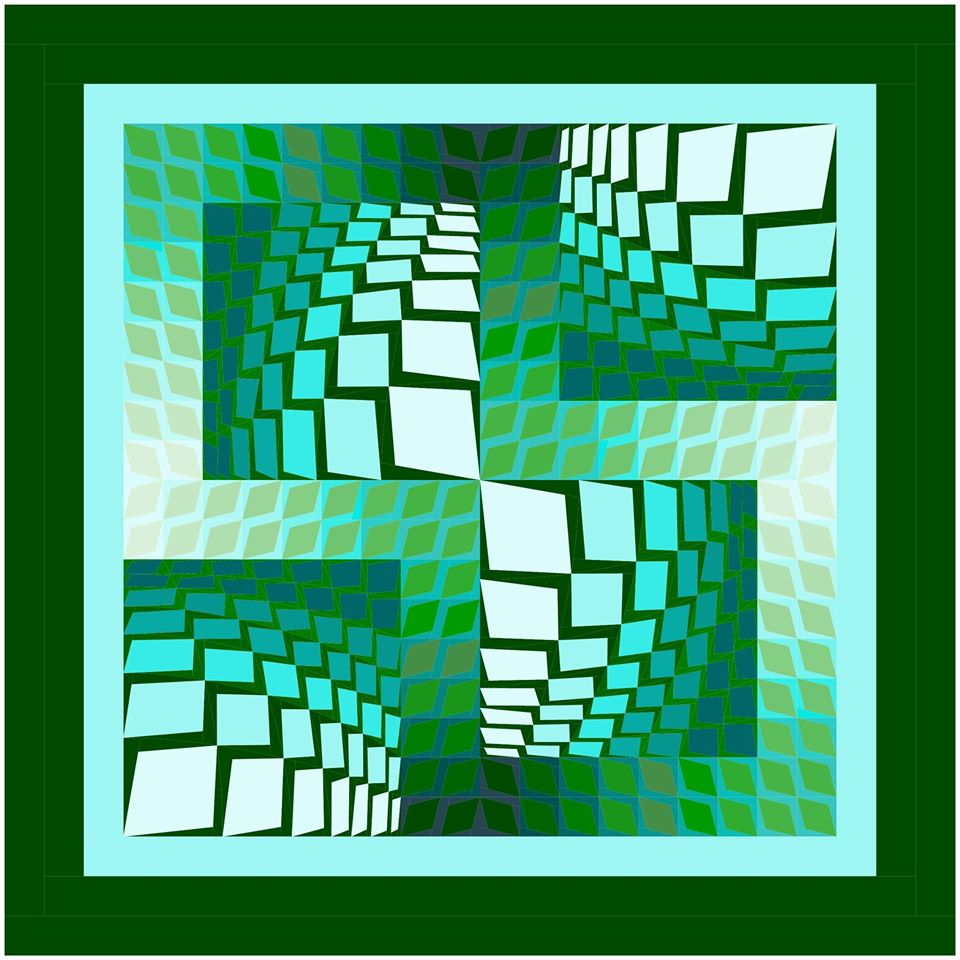
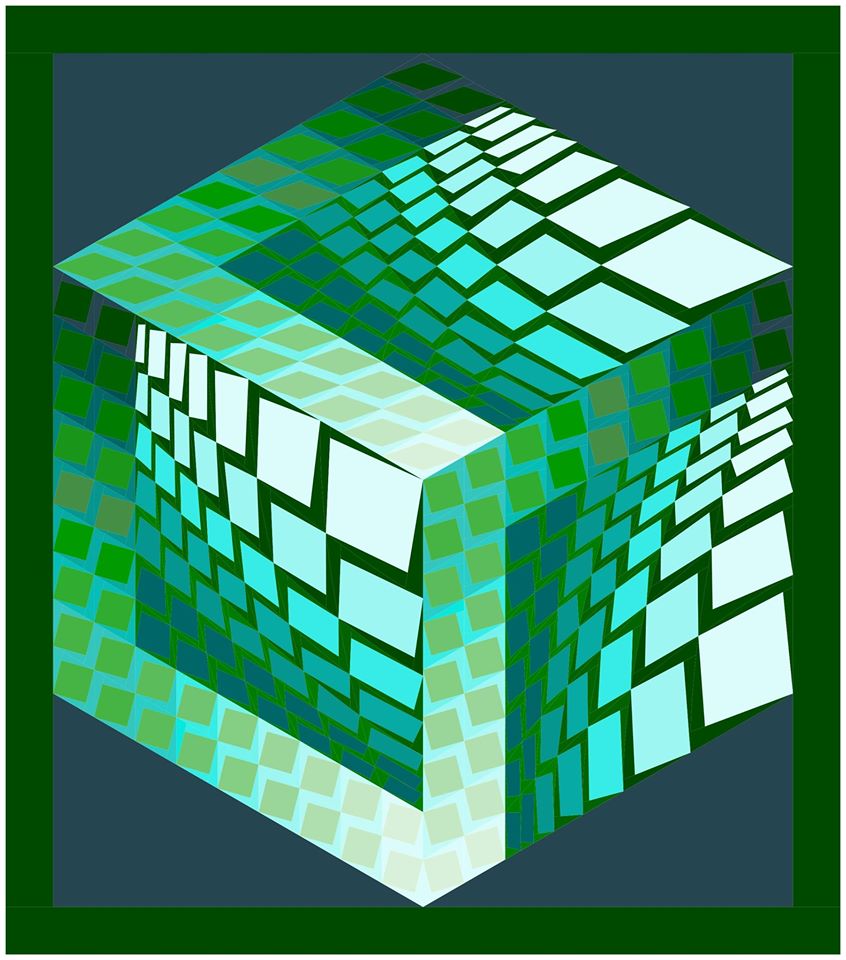
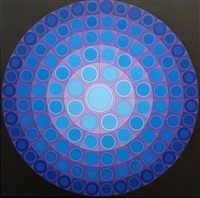
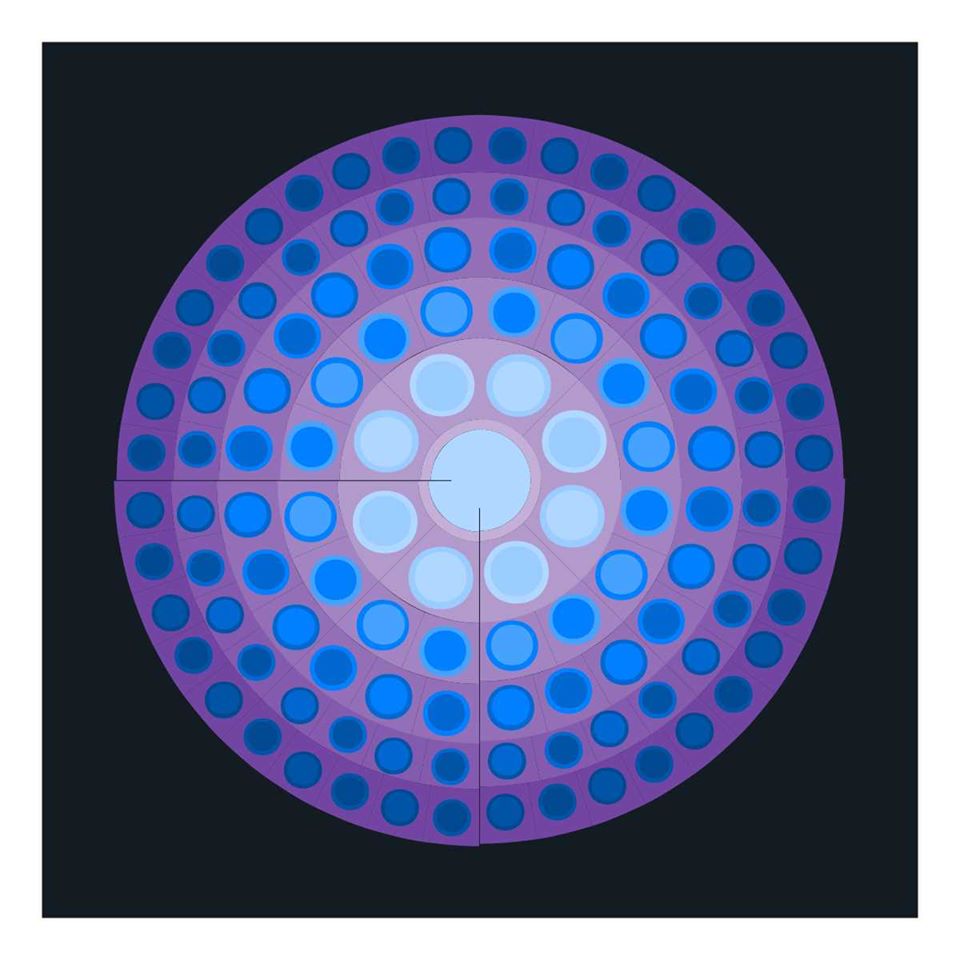
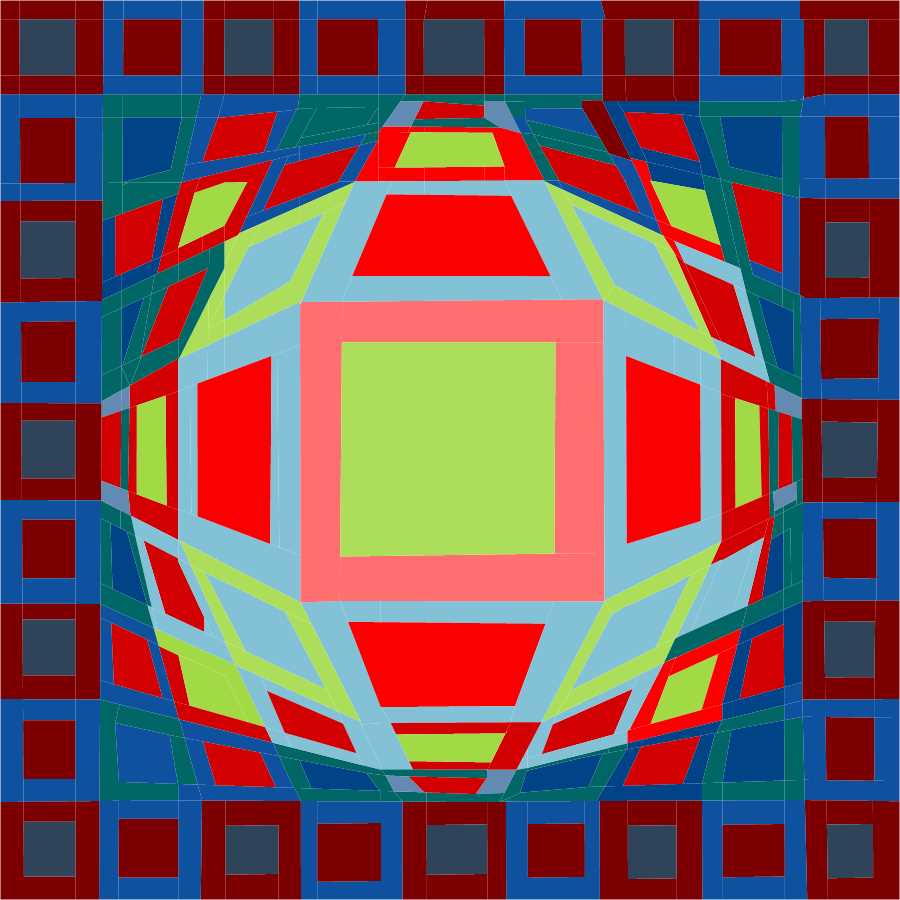
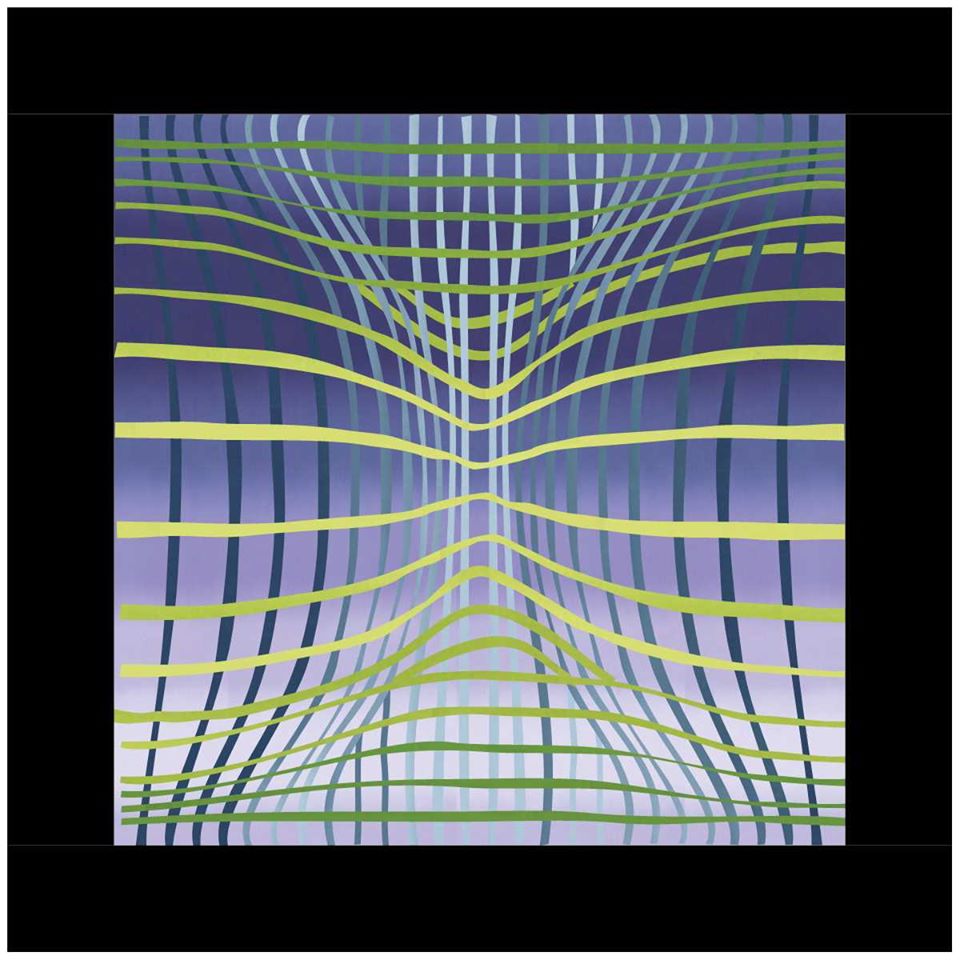
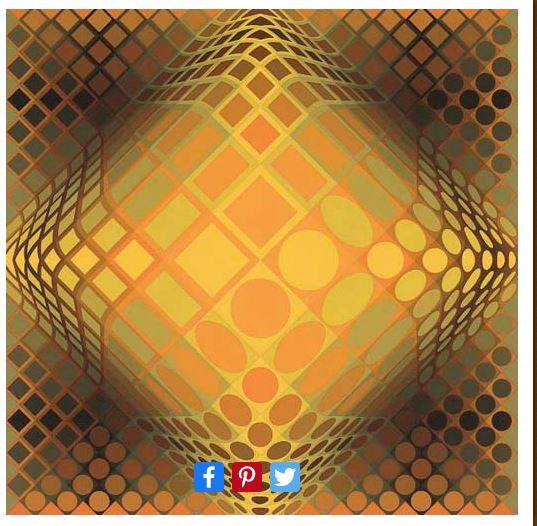
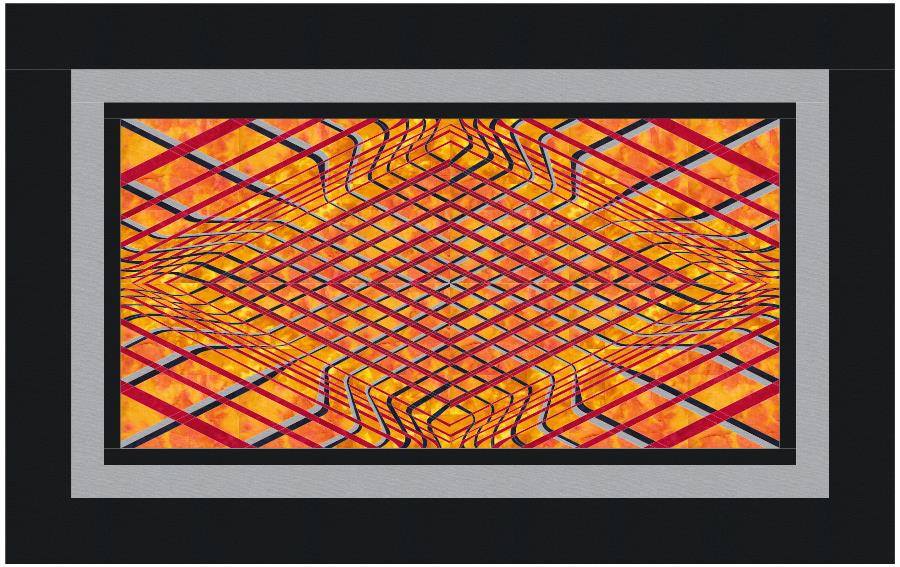
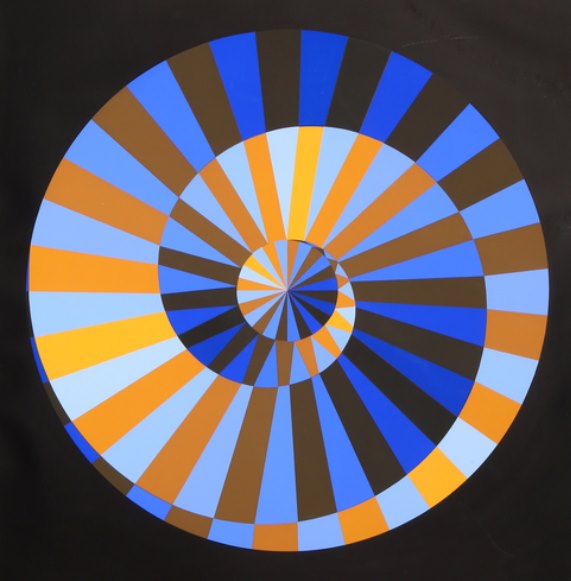
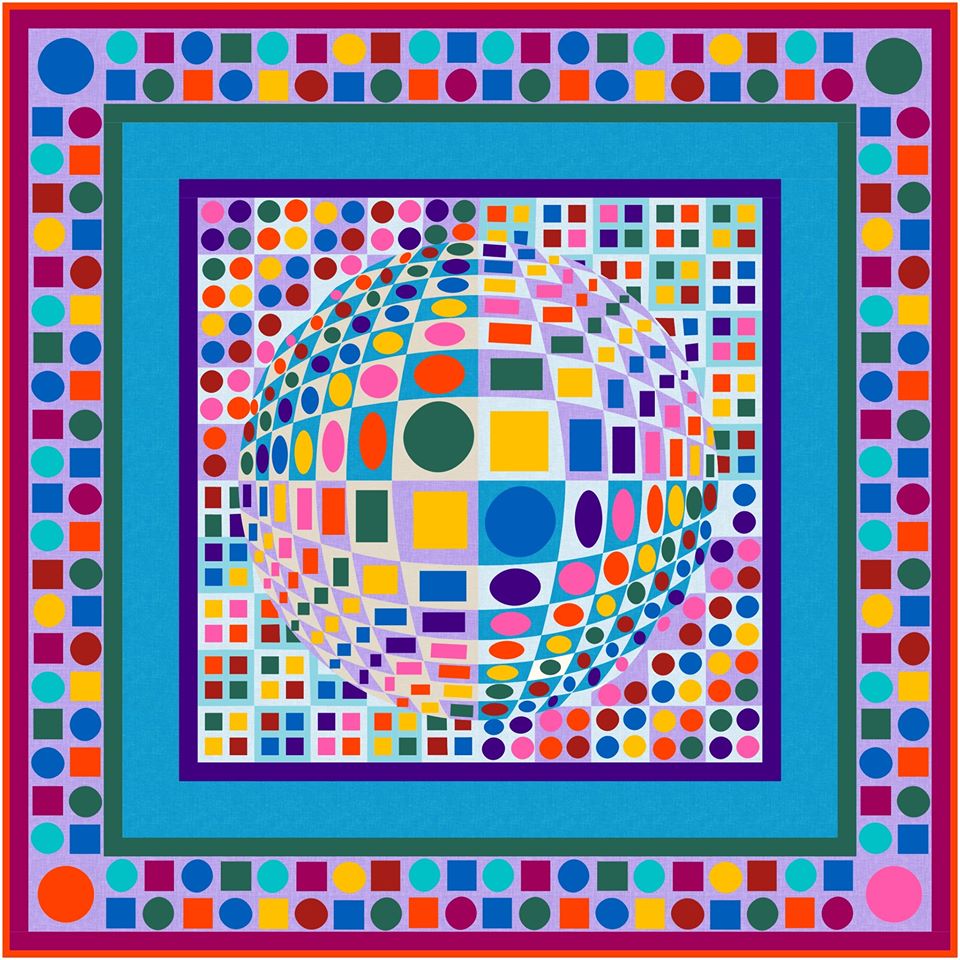
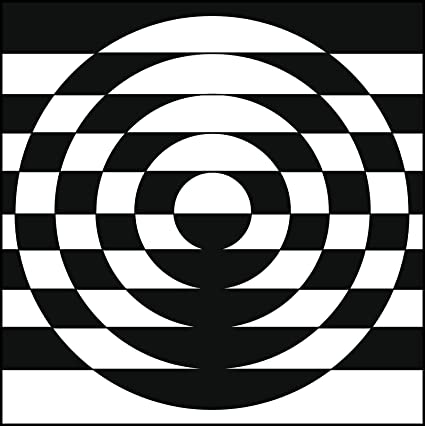
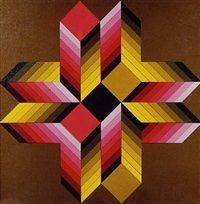
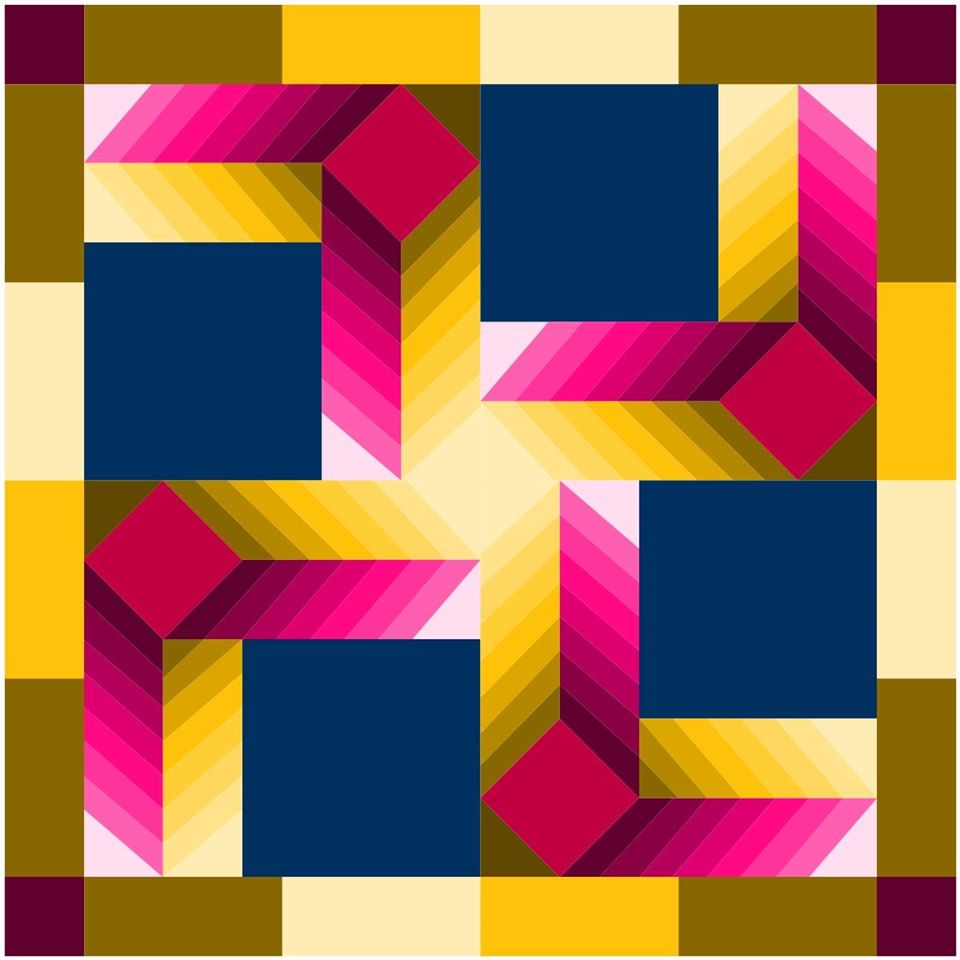
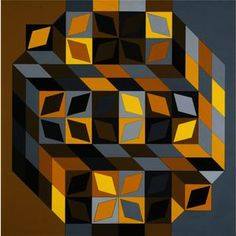
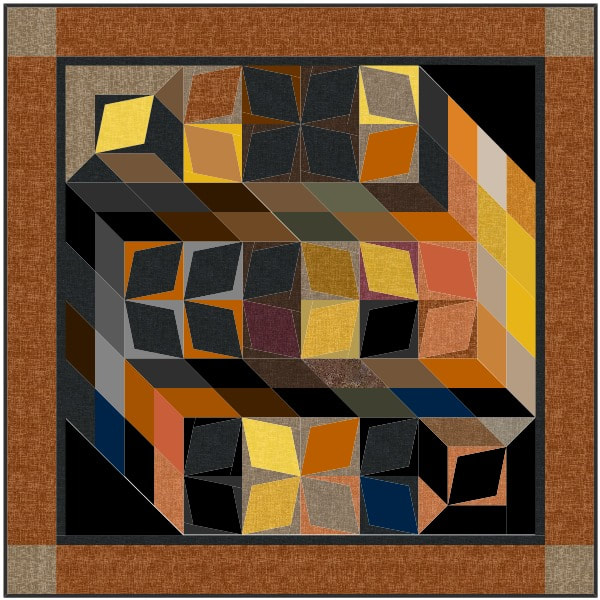
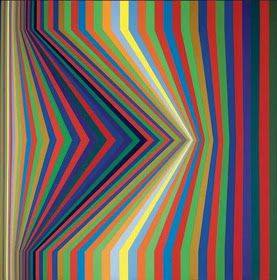
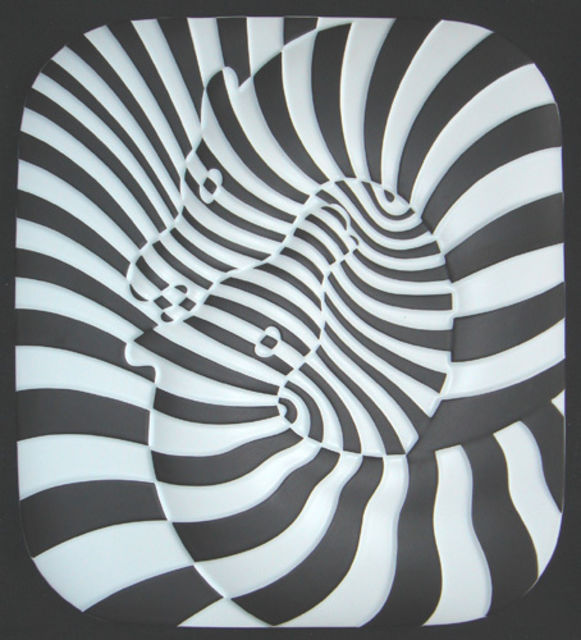
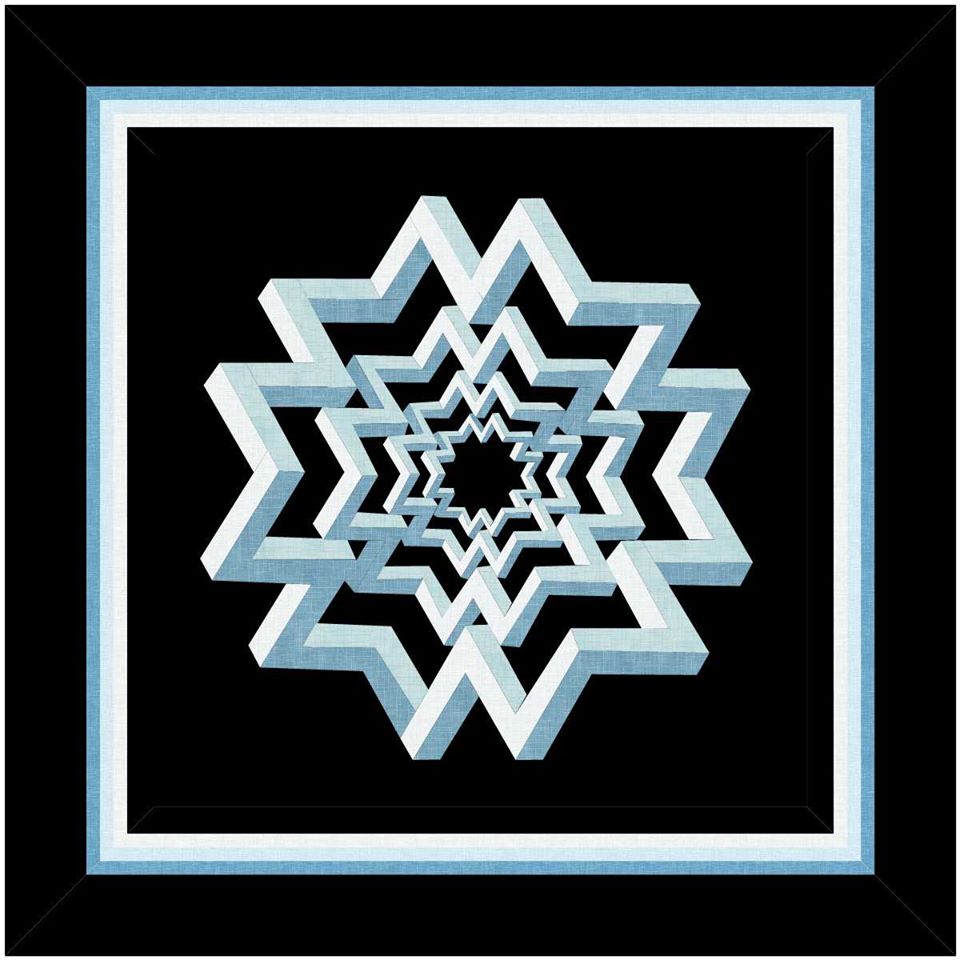
TKQ Masters Victor Vasarely Inspirations
While creating a new Tech Know Quilter class on drawing Optical Illusion quilts, I discovered Victor Vasarely.
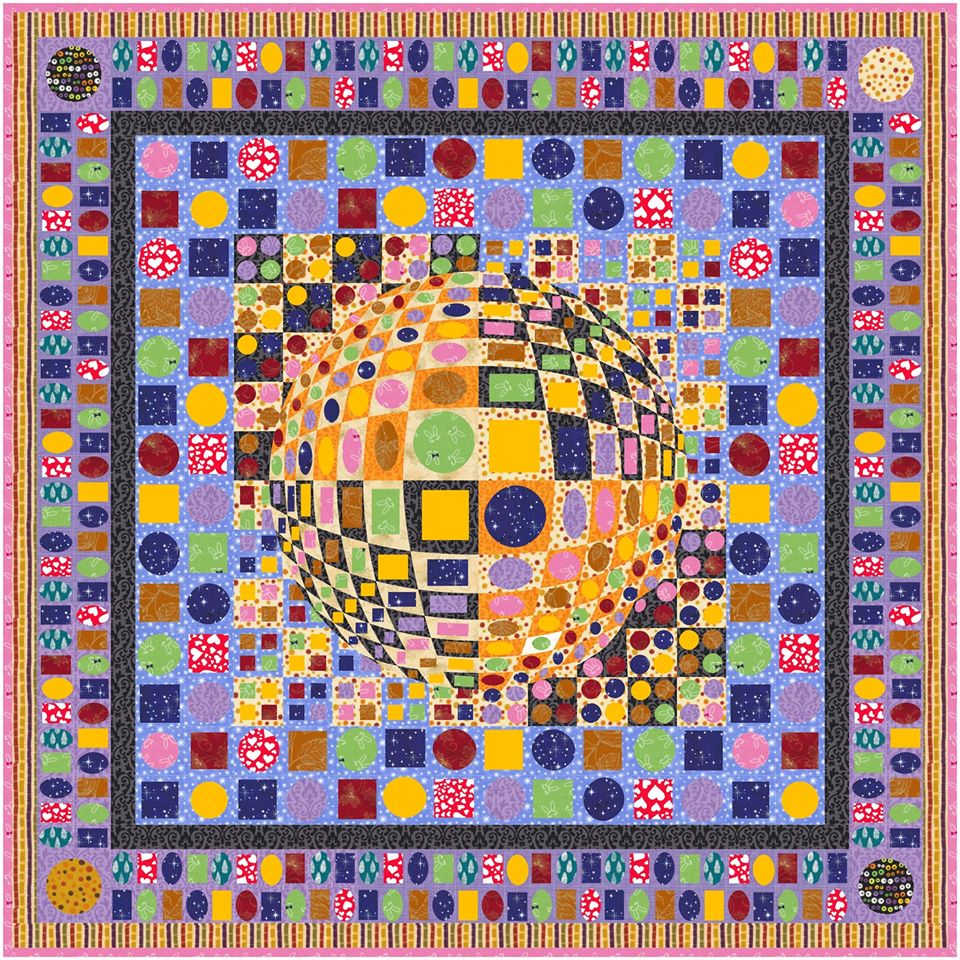
Tech Know Quilters is a paid membership program for those serious about mastery of Electric Quilt 8. You can learn more here and sign up for the wait list for the next open enrollment period. Victor Vasarely was a French-Hungarian artist credited as the grandfather and leader of the Op Art movement. Utilizing geometric shapes and colorful graphics, the artist created compelling illusions of spatial depth. Vasarely’s method of painting borrowed from a range of influences. Many of his designs struck me as being quilt friendly. As part of the class, we created three different "Vasarely" inspired quilts. I also challenged the Tech Know Quilter masters group, to create their own design inspired by Vasarely. Here is what they shared with me.
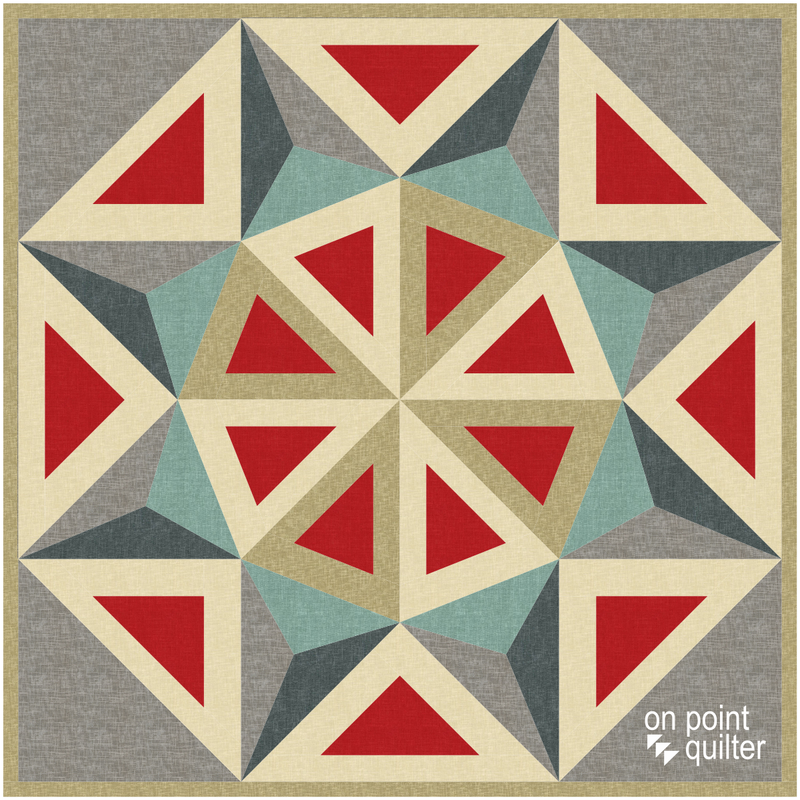
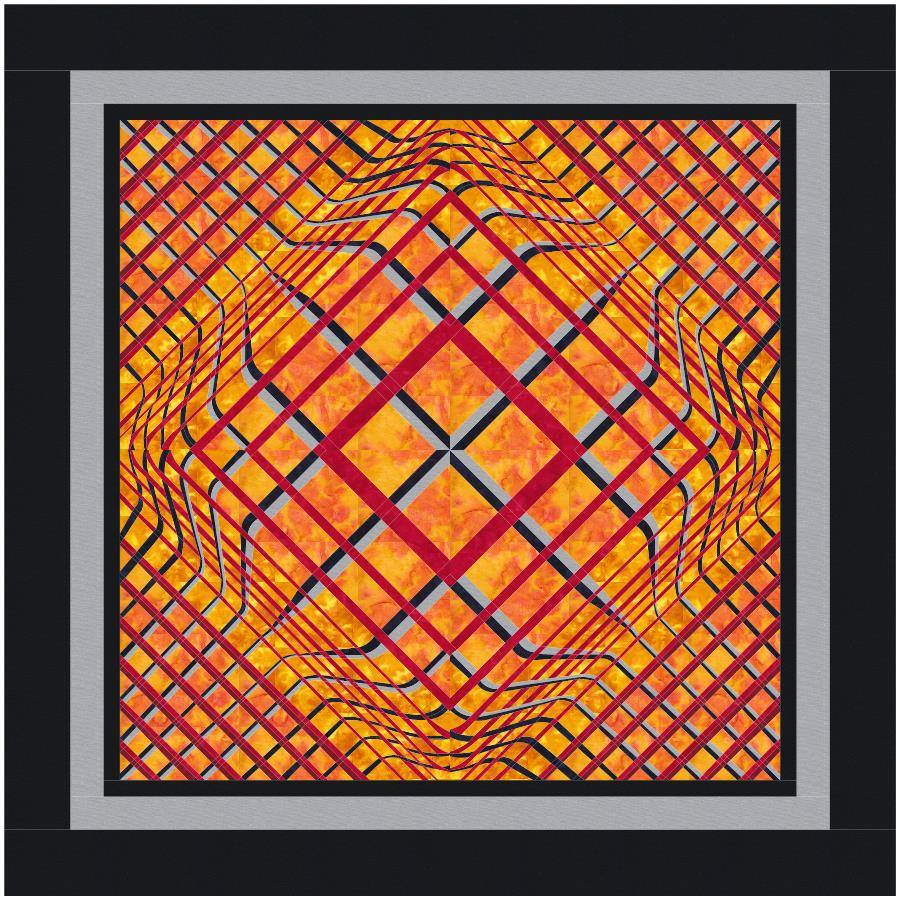
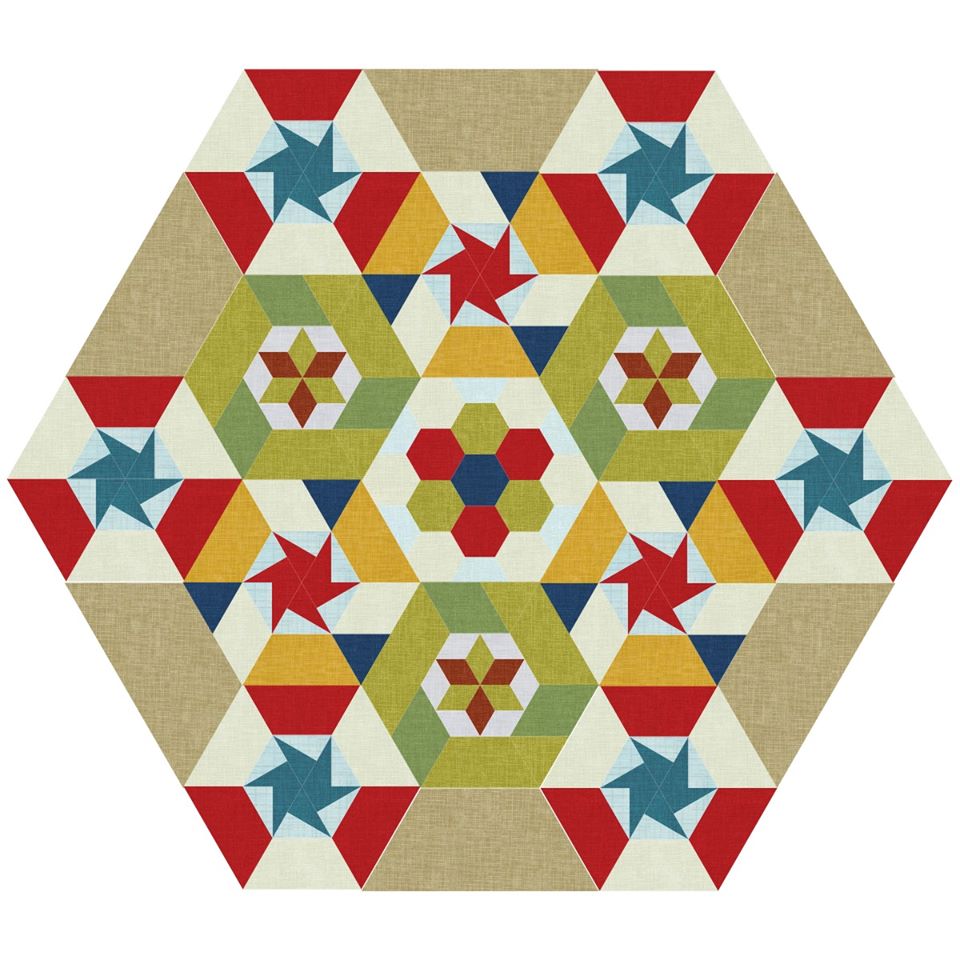
Curryanne Hostetler Quilt
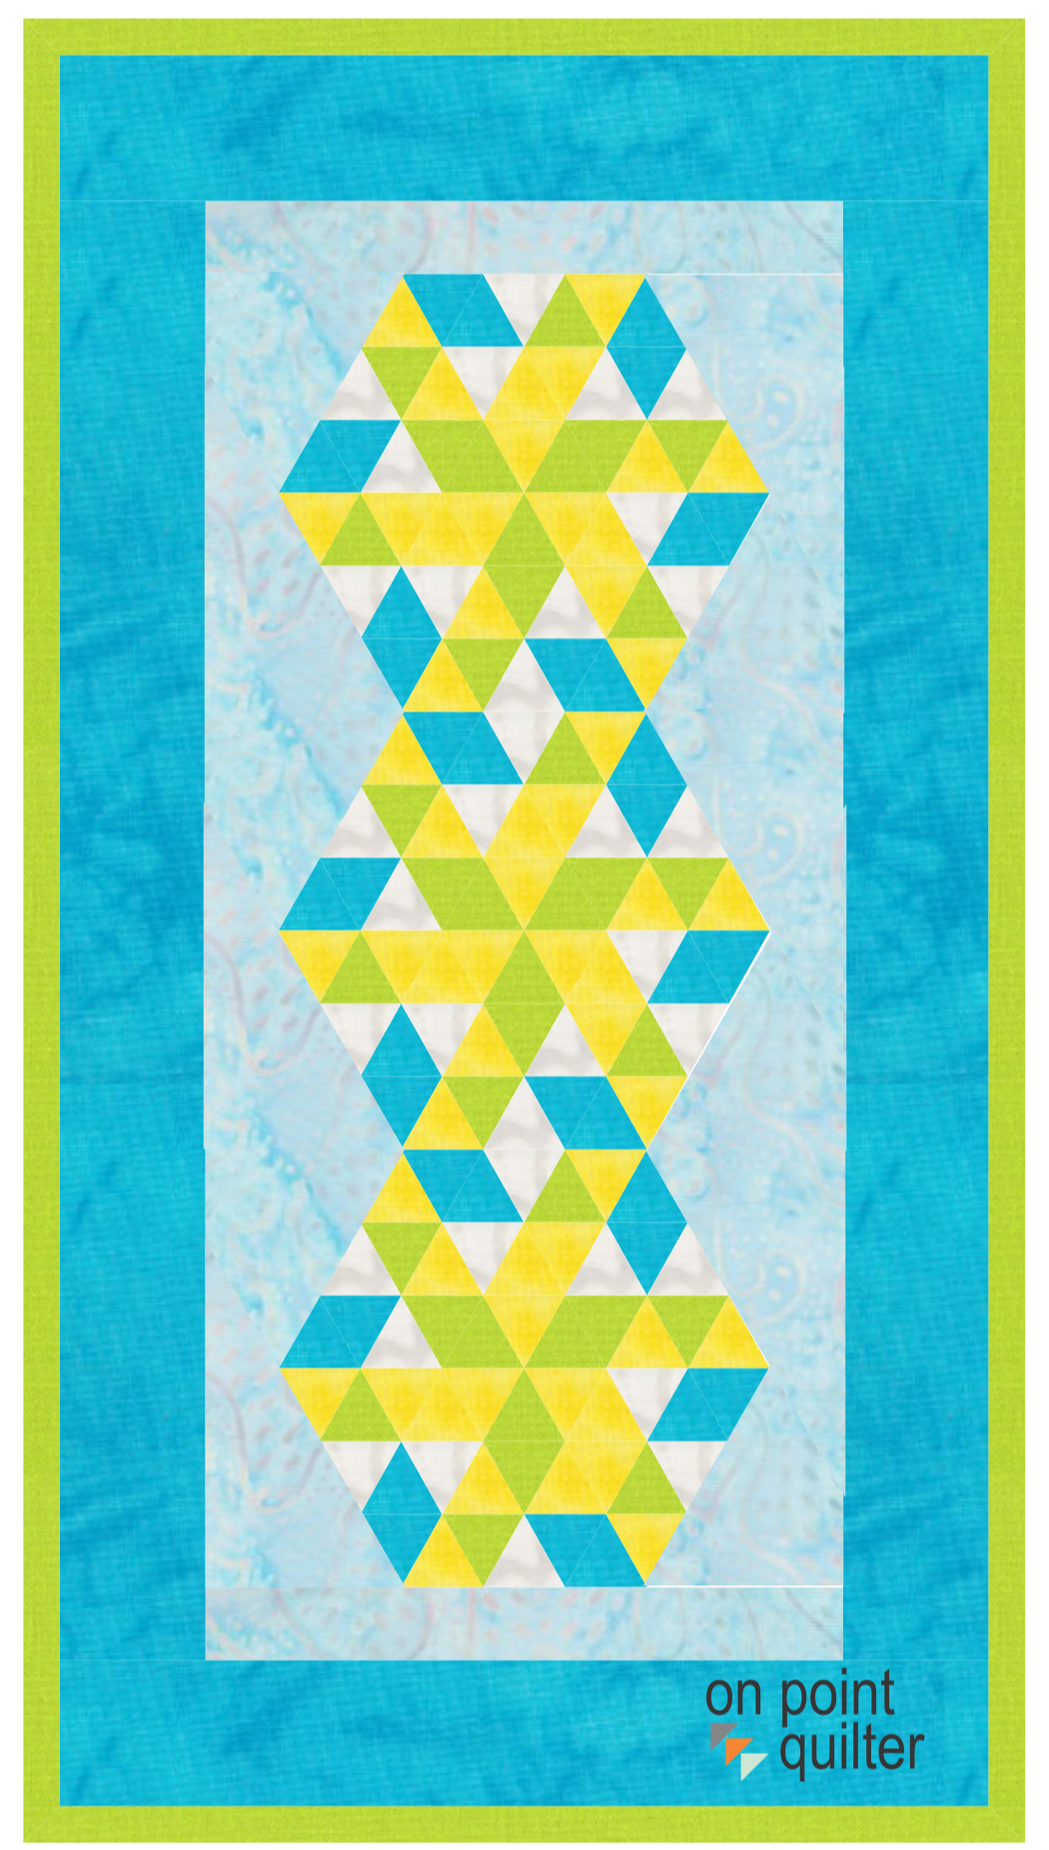
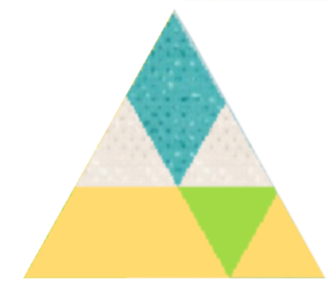
Let me take you through the process of making the quilt. Equilateral Triangle 1
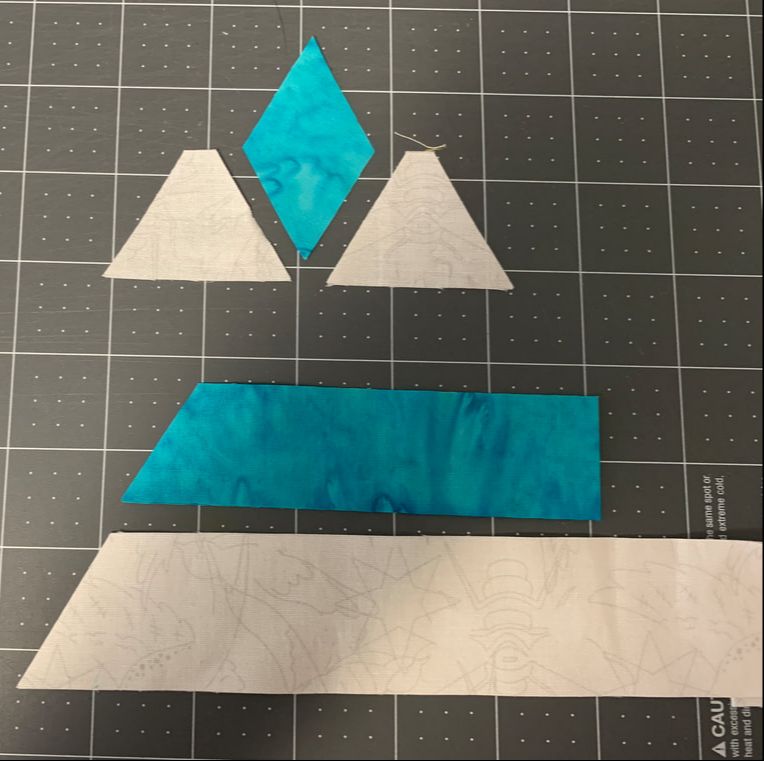 Cut blue diamond from 1-1/4" strips and side triangles from 1-1/2" strips. The cuts were done with the Star 60 Wedge tool from Studio 180 Design. 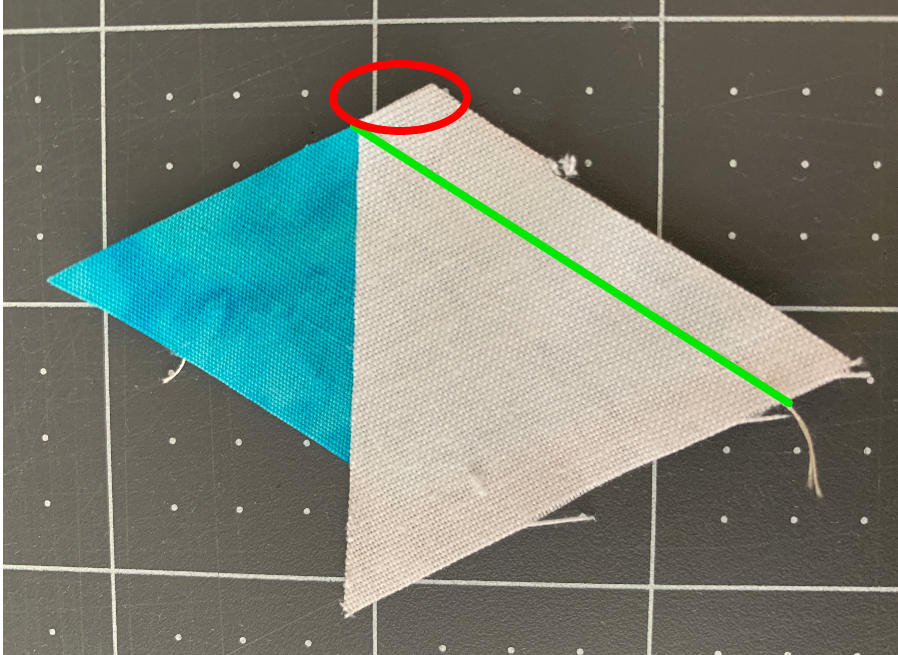 Match the flat corner of the triangle (shown with circle) with the edge of the diamond. Also align the raw edges. Sew 1/4 inch seam. 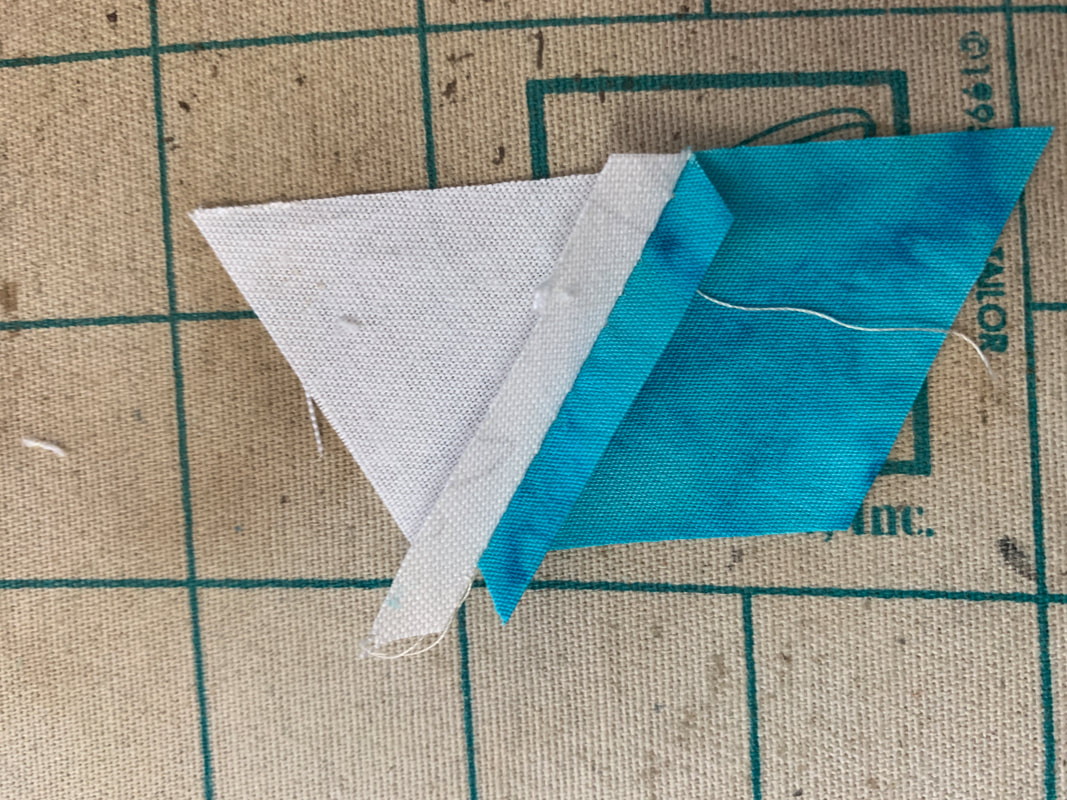 Press all seams open. This will make sure the units lay really flat. 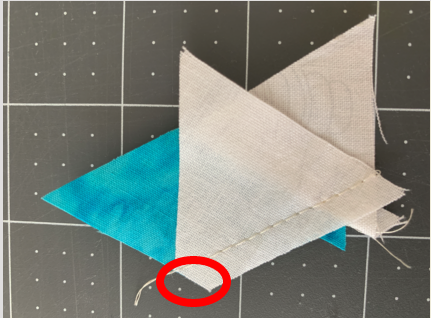 Position another white triangle on the other size of the diamond point. Align the flat corner of the triangle with the edge of the diamond. Sew 1/4 inch seam. 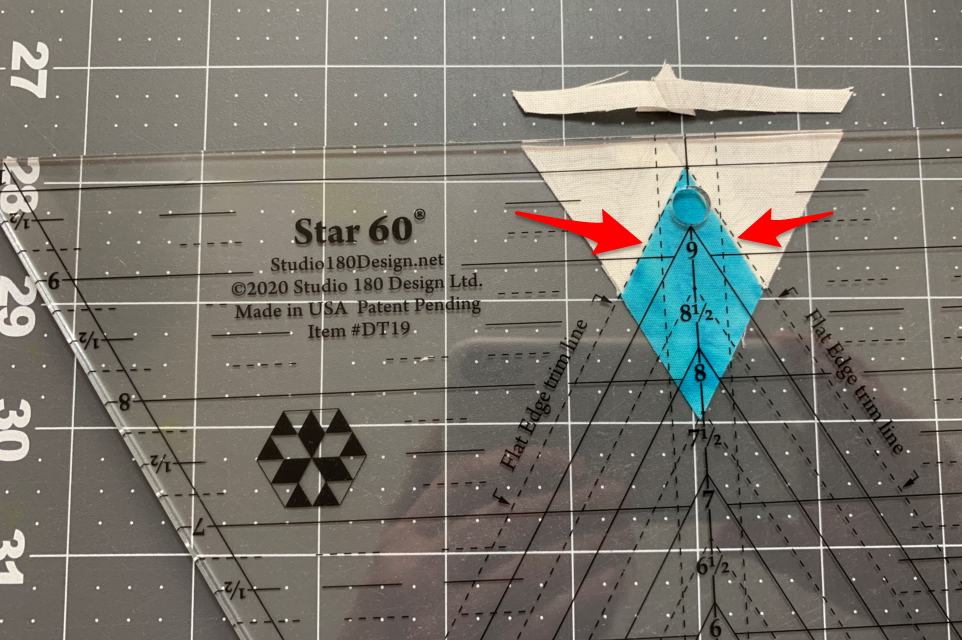 Use the Star 60 tool and align the Flat Edge trim lines with the diamonds. Trim off the top edge (leaving a perfect 1/4 inch seam allowance) . 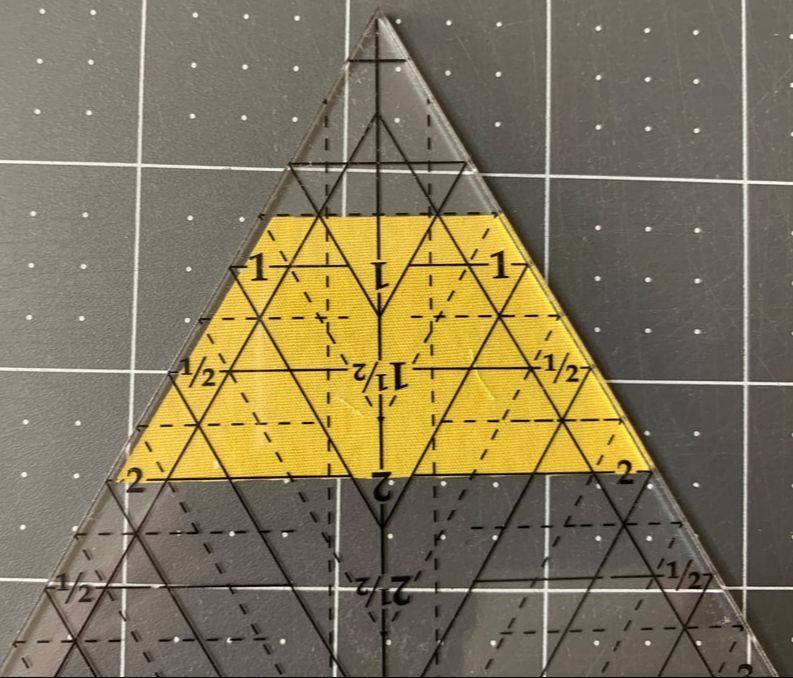 Cut 1-1/4" Yellow strips and Green strips. Align the 2" horizontal line on the Star 60 tool with the bottom of the yellow 1-1/4" strip. Trim the left and right slanted lines. 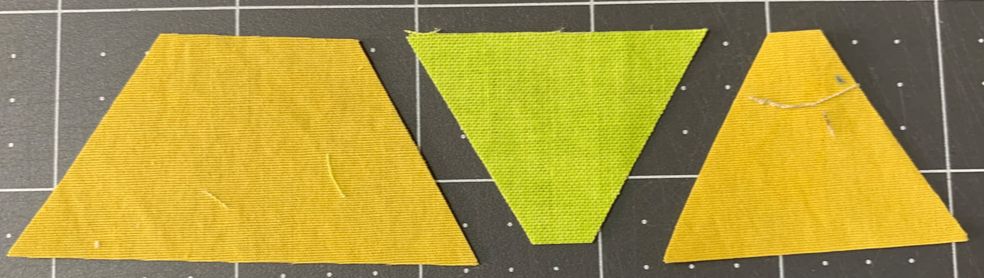 Cut yellow and green triangles from the 1-1/4" strips as well. 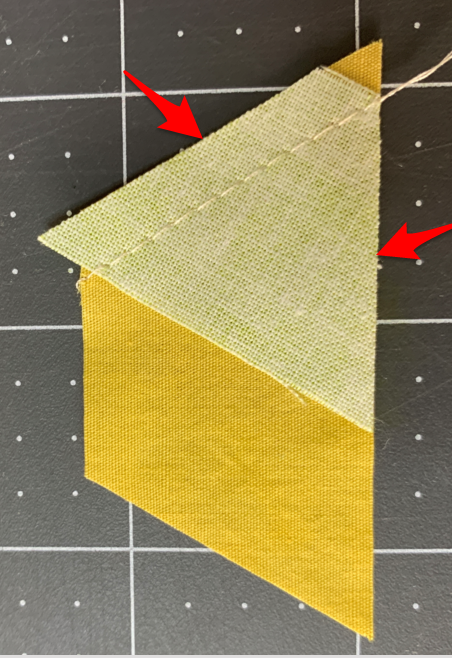 Match the two raw edges of the Green triangle with the right and bottom raw edges of the of the trapezoid. Sew 1/4" seam. 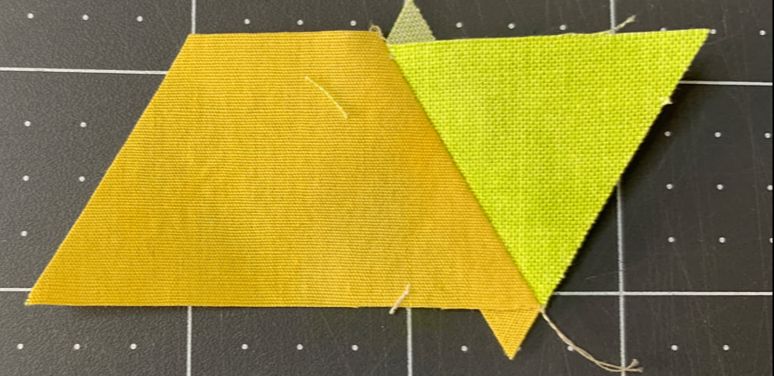 The sewn unit after pressing open. 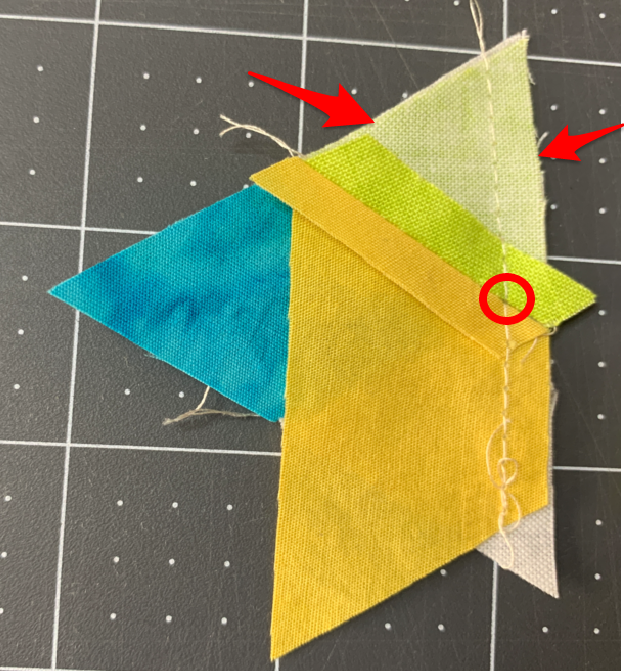 Match the raw edges (noted with arrows) of the new unit with the Star 60 Unit. Also, make sure the seam intersections (noted with red circle) are aligned 1/4 inch from raw edge. Consider using a pin to keep it aligned. Sew 1/4 inch seam. 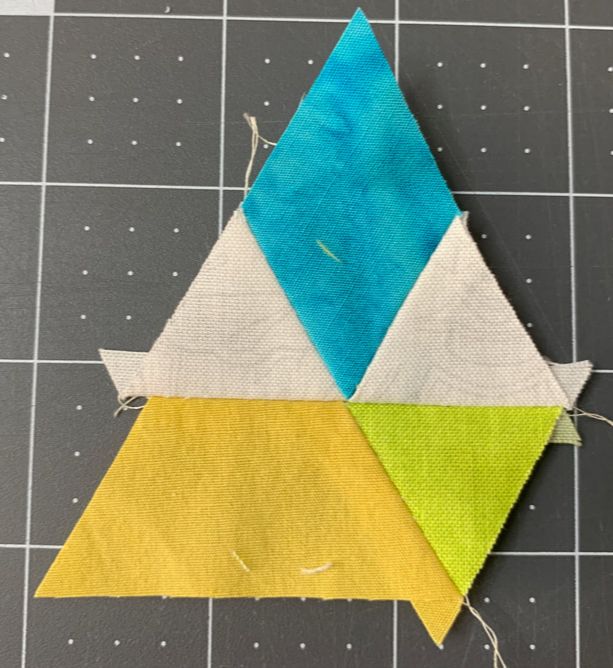 Sewn unit. Ideally all the points will meet perfectly in the center. 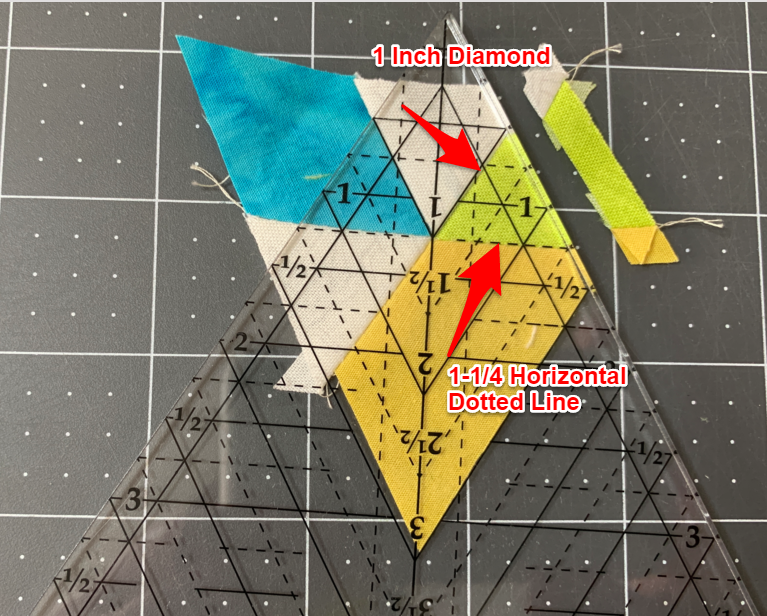 Align the sewn edges of the green triangle with the Star 60 wedge tool. One edge should align with the 1" diamond and the other with the 1-1/4" horizontal dotted line. Trim the right edge. 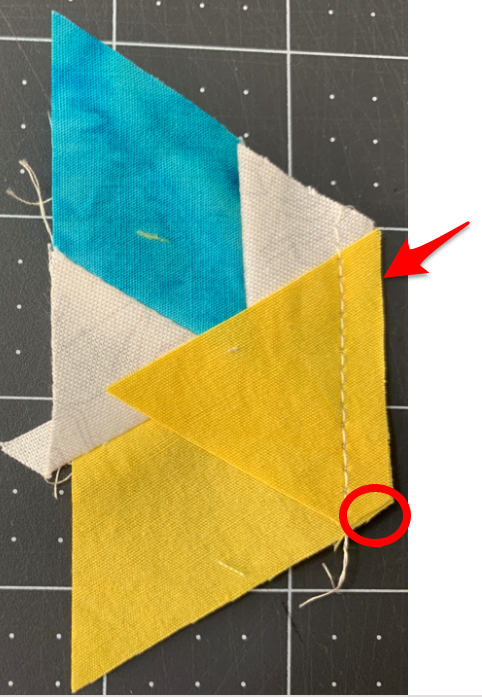 Match the flat edge of the yellow triangle with the bottom of the previous unit. The raw edges should also be aligned. Sew 1/4 inch seam. 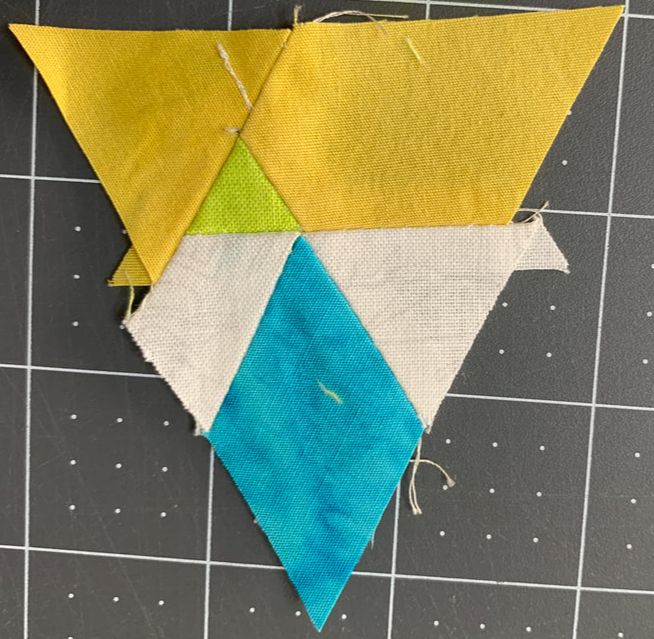 Ready for trim down. 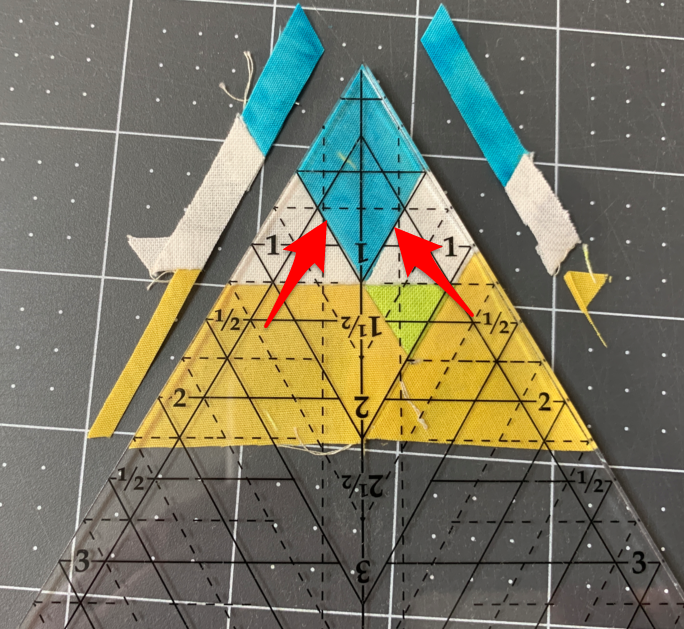 Match the 1 inch diamond guidelines from the Star 60 tool with the blue diamond sew lines. Trim the right and left edges. 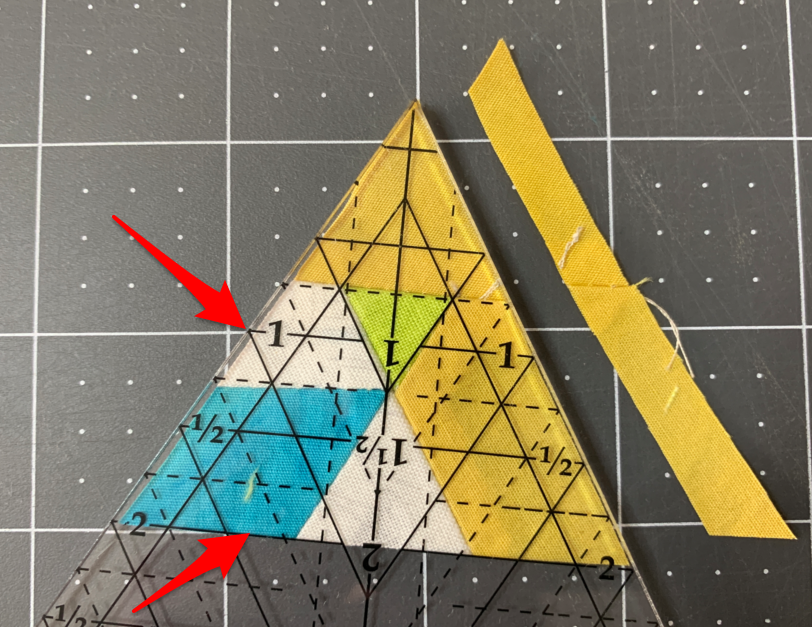 Rotate the unit so the most recently cut edges align with the left edge and 2 inch horizontal line on the Star 60 tool. Trim the right edge. 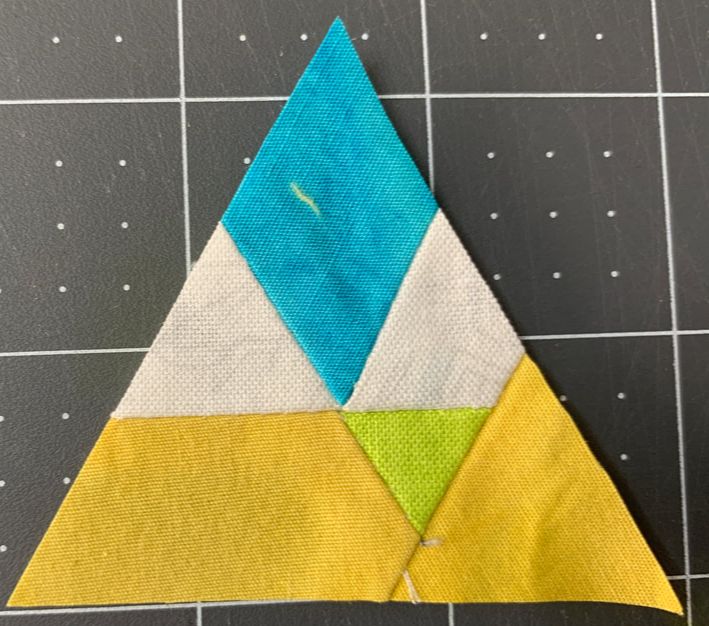 Finished Equilateral Triangle. Make 3 for each hexagon (9 total for 3 hexagon blocks). Equilateral Triangle 2
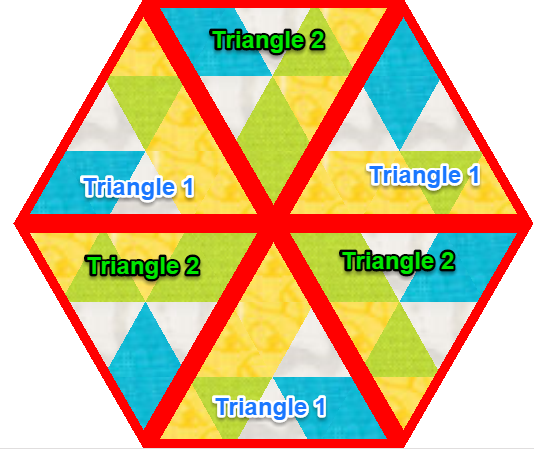
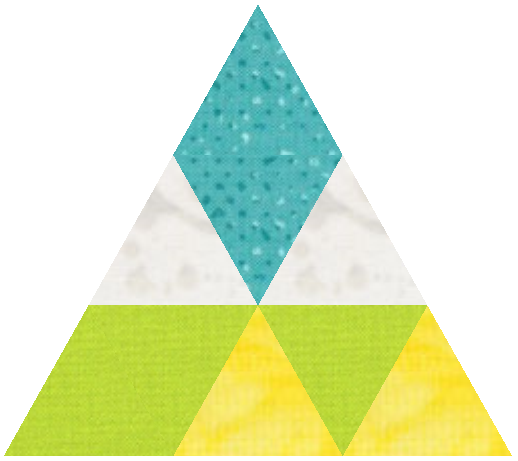
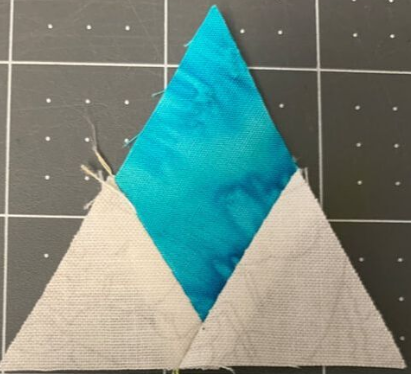 Construct the teal and white Star 60 units as described in Equilateral Triangle 1.  Cut Green diamonds and triangles from 1-1/4" green strip. Cut yellow triangles from 1-1/4" yellow strip. Cuts should be done with the Star 60 tool. 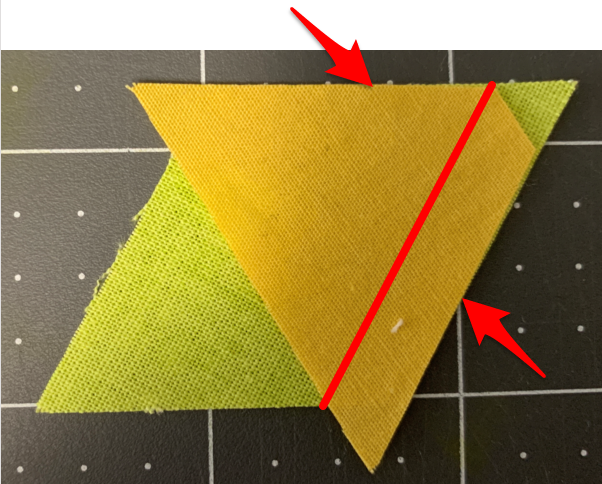 Align raw edges of yellow triangles with green diamond (red arrows). Sew 1/4" seam on right side (red line). 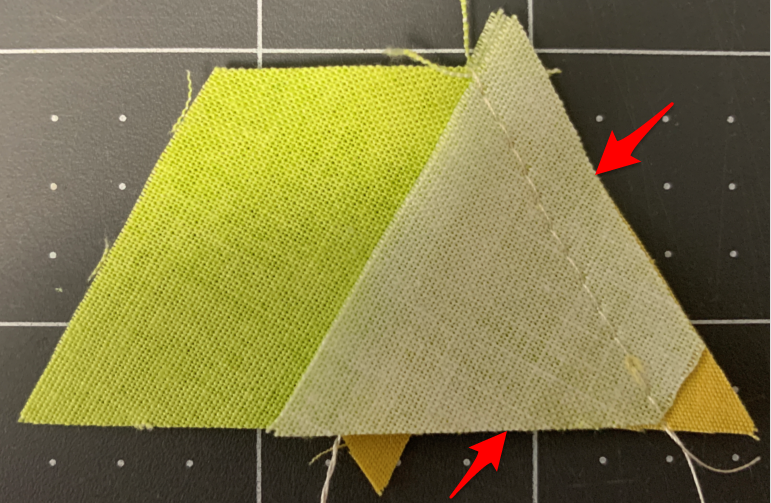 Align raw edges of green triangle with previous unit (red arrows). Sew 1/4" seam on right side.  Position below the Star 60 Unit. 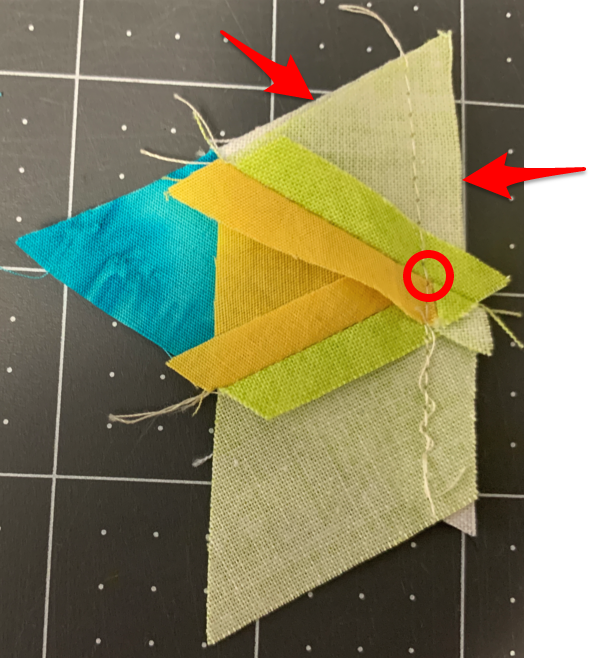 Align raw edges of parallelogram with equilateral triangles (noted by red arrows). make sure the seam triangle intersections line up (the red circle). Sew 1/4" seam. 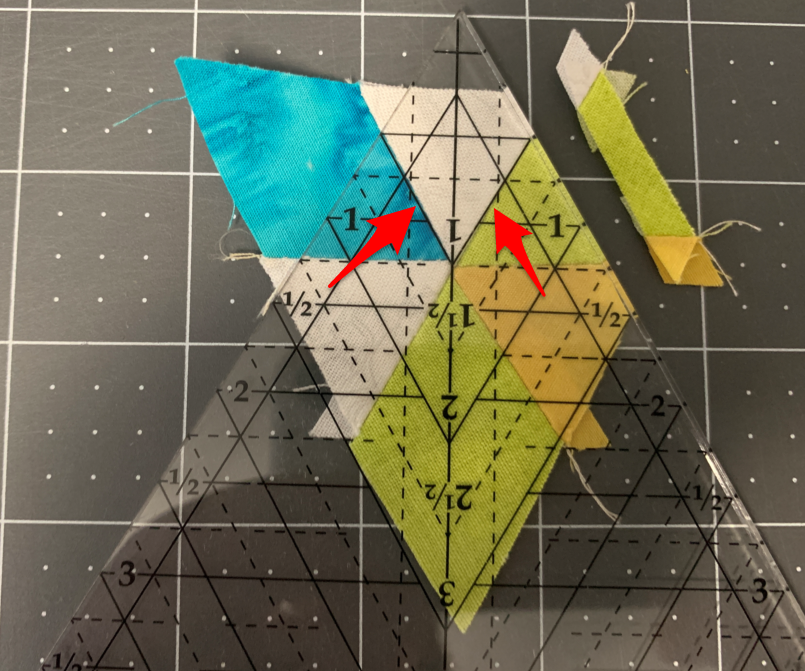 Line up sewn seams on white triangle with the 1" diamond guidelines on the Star 60 tool. Trim right edge. 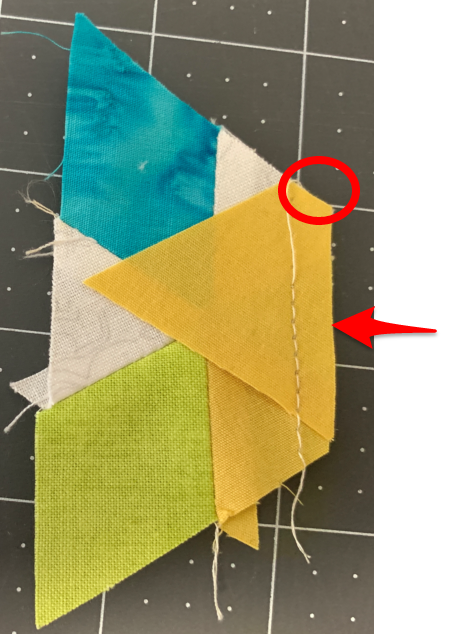 Match the flat edge of the yellow triangle with the previous unit. The raw edge should also be aligned. Sew 1/4" seam. 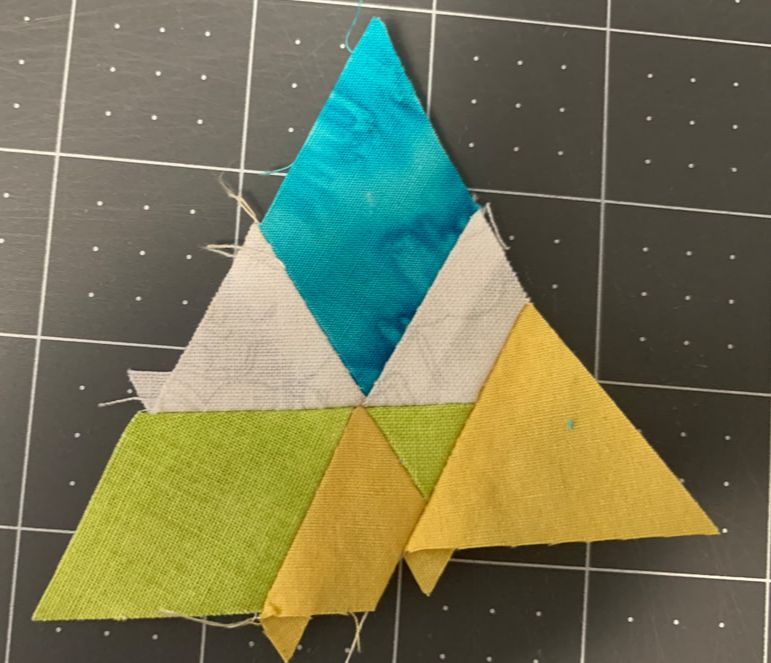 Ready for trim down. 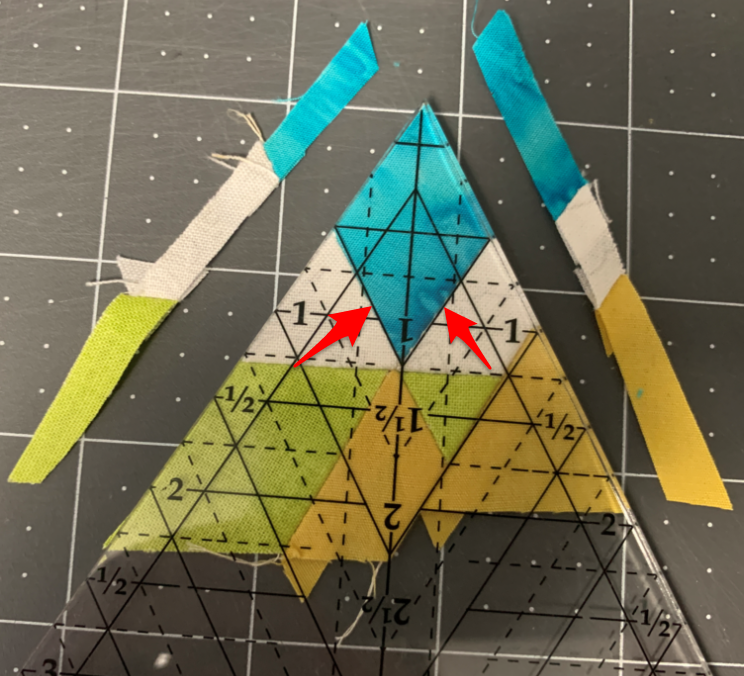 Match the 1 inch diamond guidelines from the Star 60 tool with the blue diamond sew lines. Trim the right and left edges. 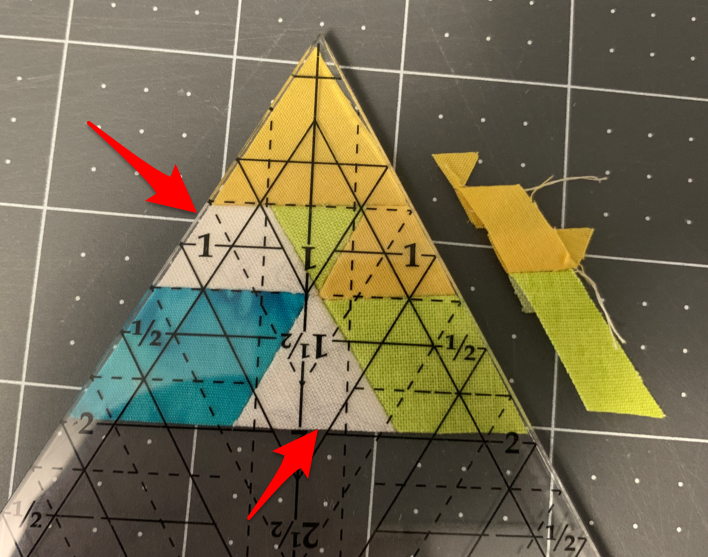 Rotate the unit so the most recently cut edges align with the left edge and 2 inch horizontal line on the Star 60 tool. Trim the right edge. 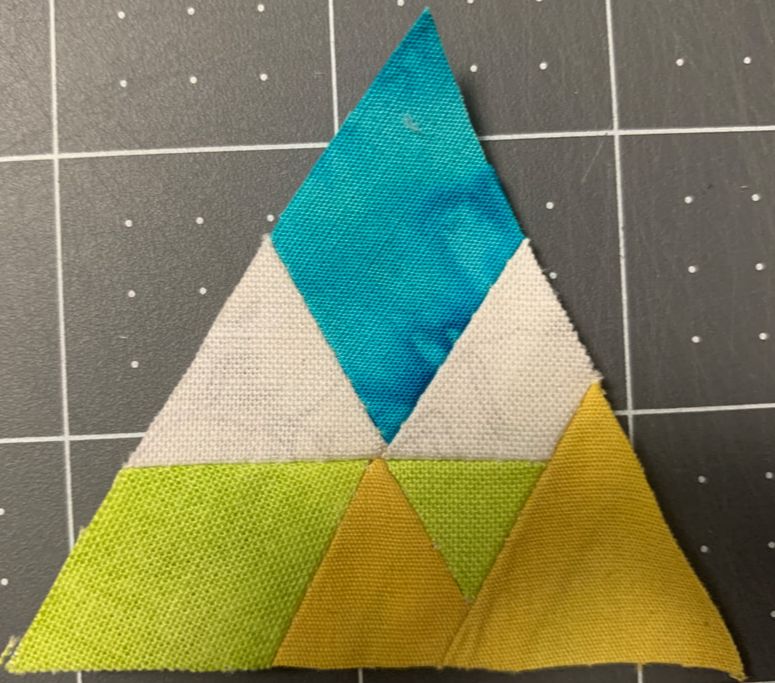 Finished Equilateral Triangle 2. Make 3 for each hexagon (9 total for 3 hexagon blocks). 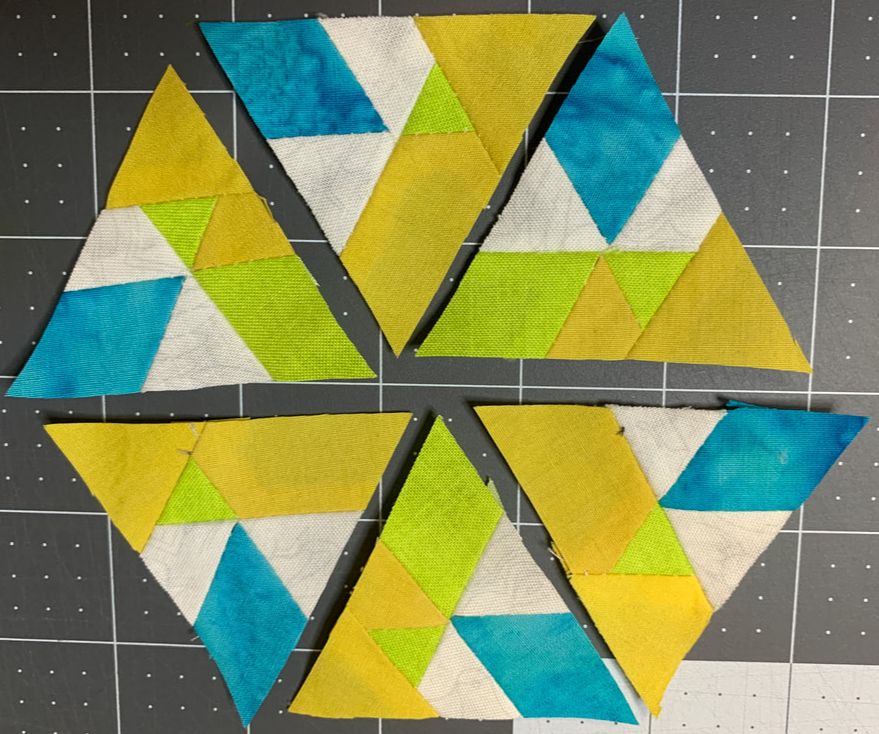 Lay out each hexagon block using 3 of equilateral triangle 1 and 3 of equilateral triangle 2. Make sure the rotation of each unit matches the EQ design. Block Construction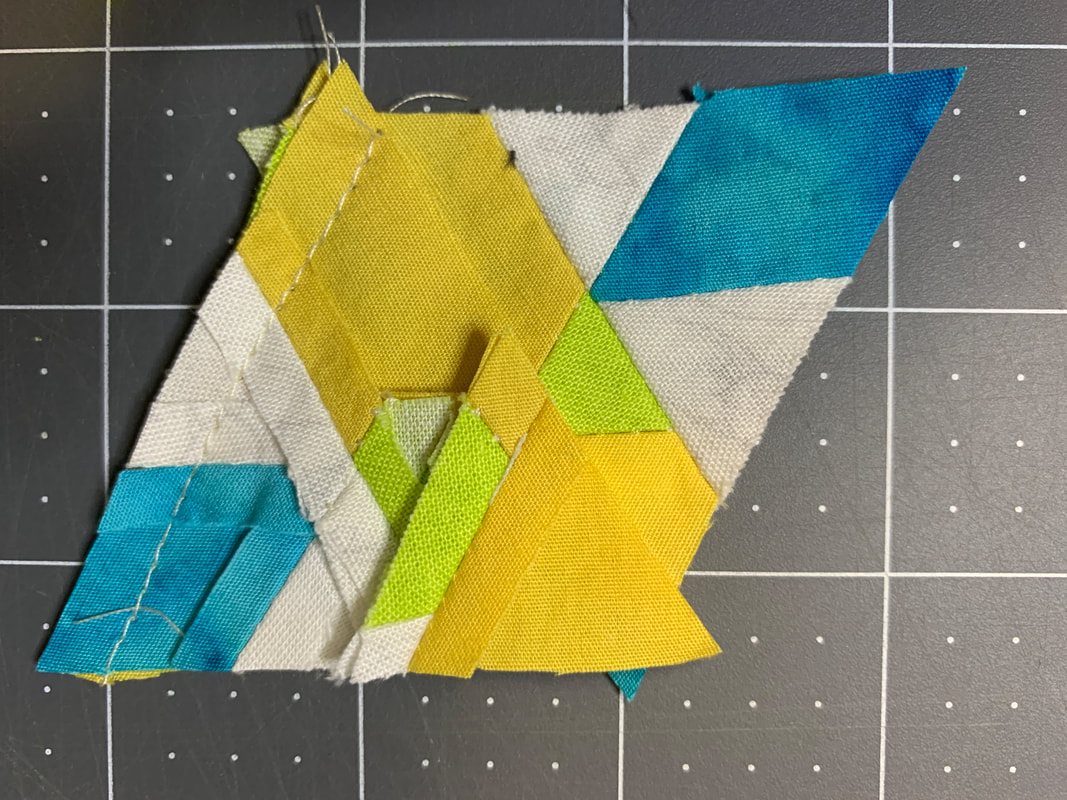 Join 3 equilateral triangles in a row. Create two rows for each hexagon. 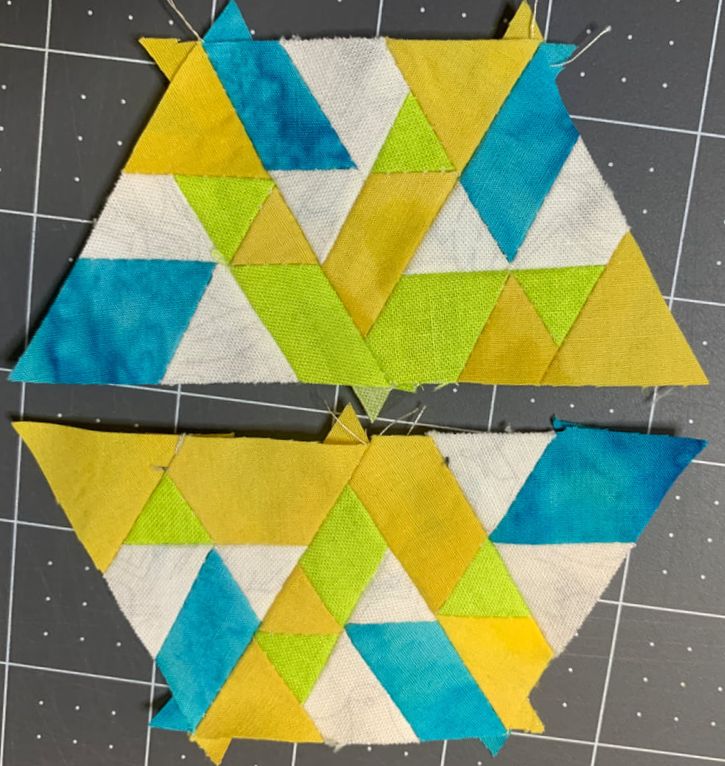 Combine top and bottom rows. 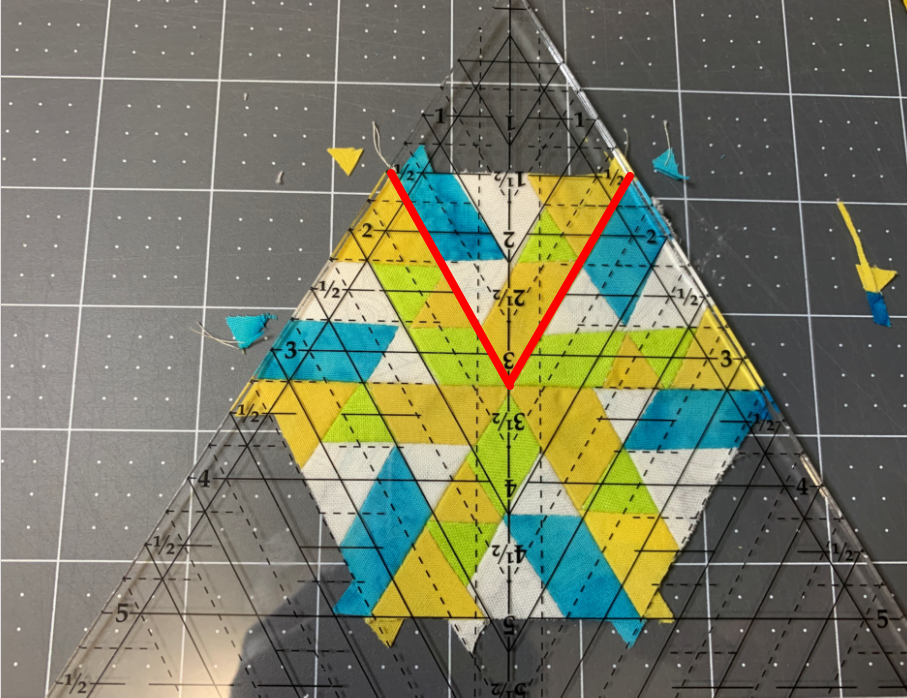 Line up the 3" equilateral triangle lines on the Star 60 wedge tool and trim any extra. There may only be the extra nubs on the bottom to trim. Rotate unit and do the trim down for every triangle section. 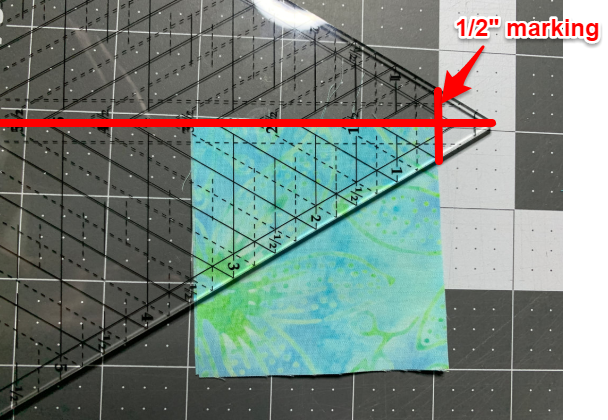 Put two 3 inch squares right side together. Line up the center mark on the Star 60 tool and the marking at 1/2 inch. Trim slanted edge. 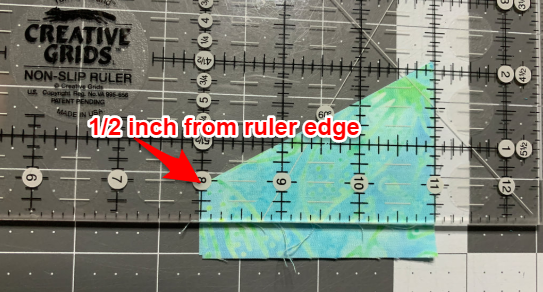 Using a standard ruler, trim second set of setting triangles to 1/2 inch from slanted cut. 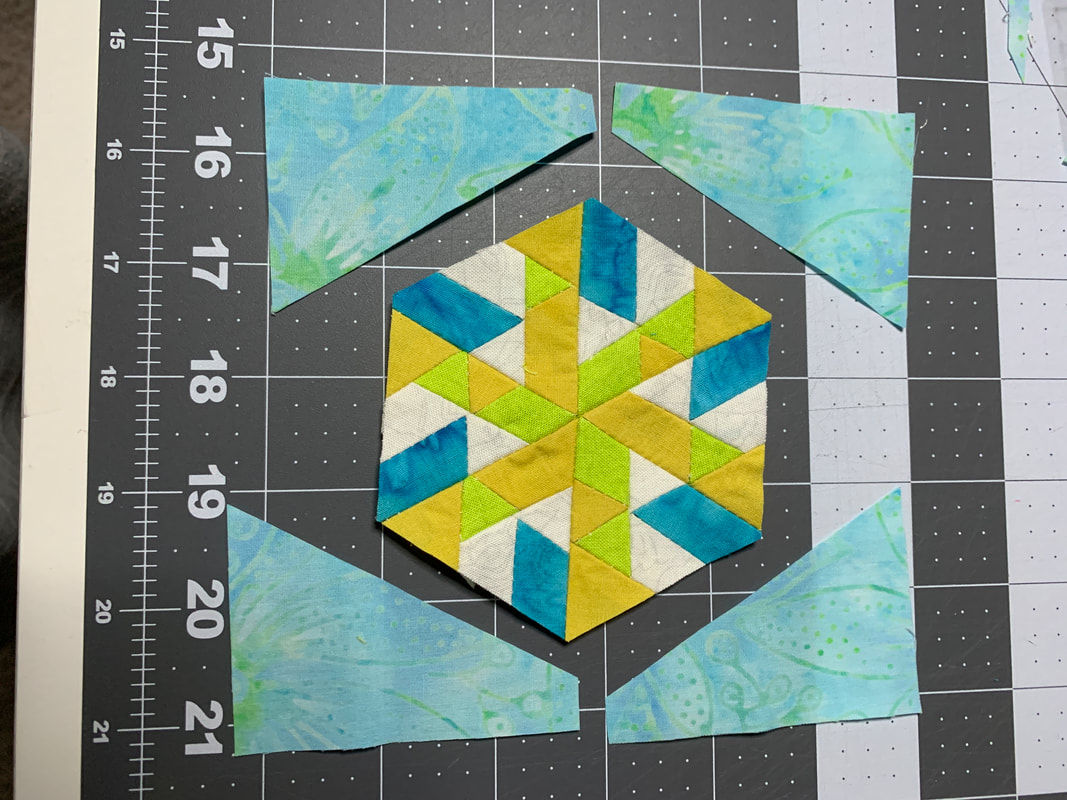 Lay out setting pieces on four sizes of pieced hexagon. 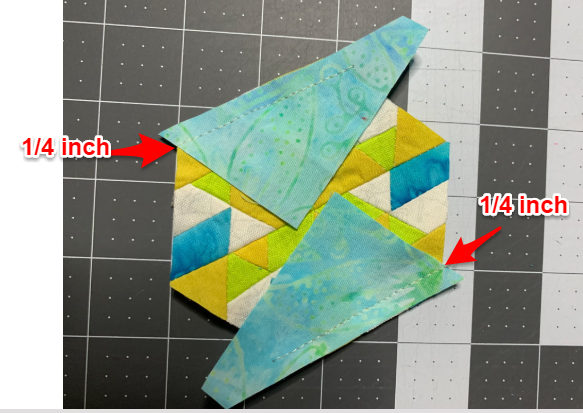 With right sides together lay setting pieces on two corners. Shift the pieces so that the start of the sew lines is 1/4 inch. Sew. Press toward setting corner pieces. 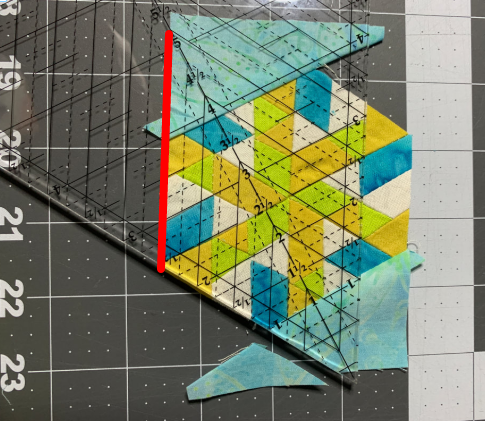 Match up the edge with the 5" diamond line and trim the setting piece on the opposite corner. 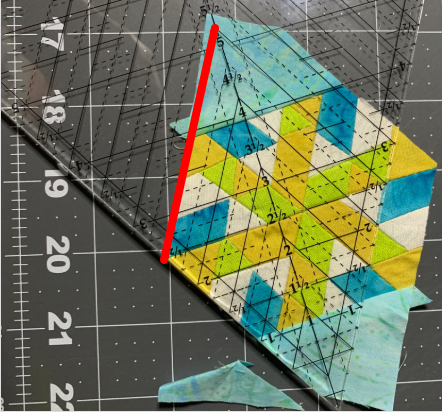 Rotate unit 180 degrees and repeat trim down on the other side. 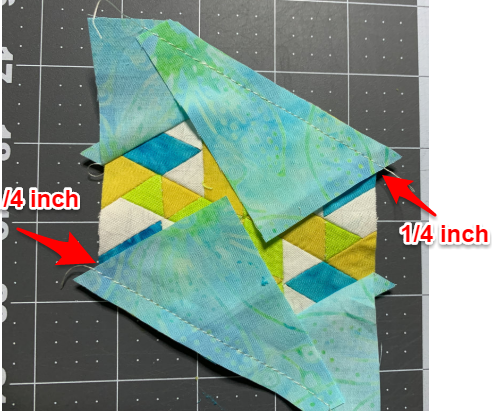 With right sides together lay setting pieces on the other two corners. Shift the pieces so that the start of the sew lines is 1/4 inch. Sew. Press toward setting corner pieces. 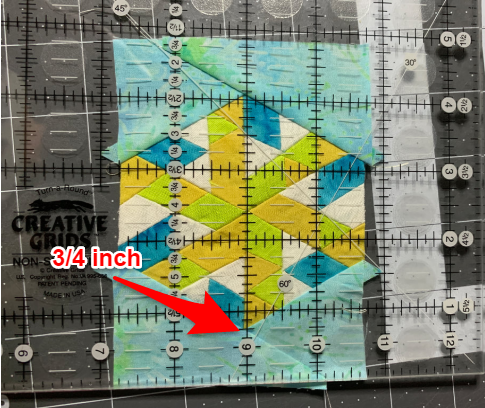 Using a standard ruler trim edges of block so the setting triangles are 3/4 inch from hexagon corner. Trim both sides. 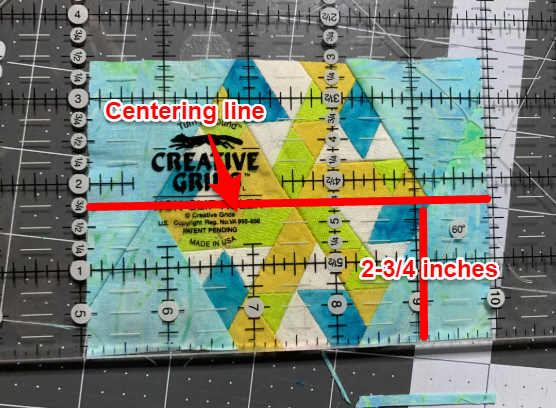 Trim top and bottom so that the center line on the ruler is at 1-3/4". The block should now measure 5" x 3-1/2". Quilt Construction Sew 3 blocks together. Center should measure 9-1/2" x 5". 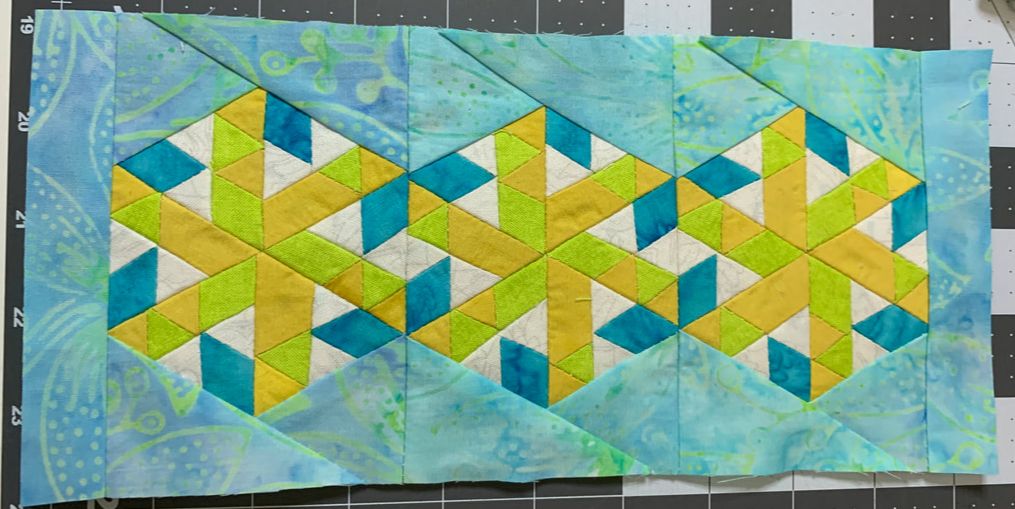 Add 1" x 3-1/2" strips of setting fabric to two sides. Piece should measure 10-1/2" x 5"  Add 1-1/2" x 10-1/2" border pieces to two sides. Add 1-1/2" x 7" border pieces to opposite two sides. Piece should measure 12-1/2" x 7". 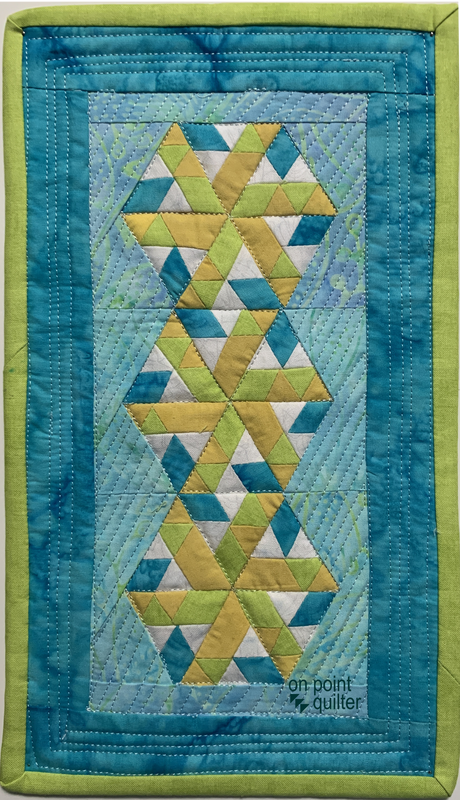 To quilt the Miniature Star 60, I stitched in the ditch around the equilateral triangles. For the setting corners and inner border, I quilted about 1/4 inch apart following the angle of the hexagon blocks. I quilted straight lines for the outer border. Everything was eye-balled (with no pre-marking of the quilting lines) Review of Star 60 Tool by Studio 180 DesignI liked that all of my pieces were easy to cut with the Star 60 tool (equilateral triangles, diamonds and the trapazoid pieces). I was even able to cut the setting triangles. Of course the oversized piecing, trim down technique from Studio 180 Design is always a preferred piecing methodology in any of my quilts. I was pleasantly surprised that these miniature units were no problem. The instructions that came with the tool were good -- but there were a lot of them and it was a little easy to get lost the first time cutting and trimming down each unit. I know that I will use this tool again. The tool should be available at local quilt shops. Here is a link directly to the Studio 180 Design website, if you would like to purchase directly from them. 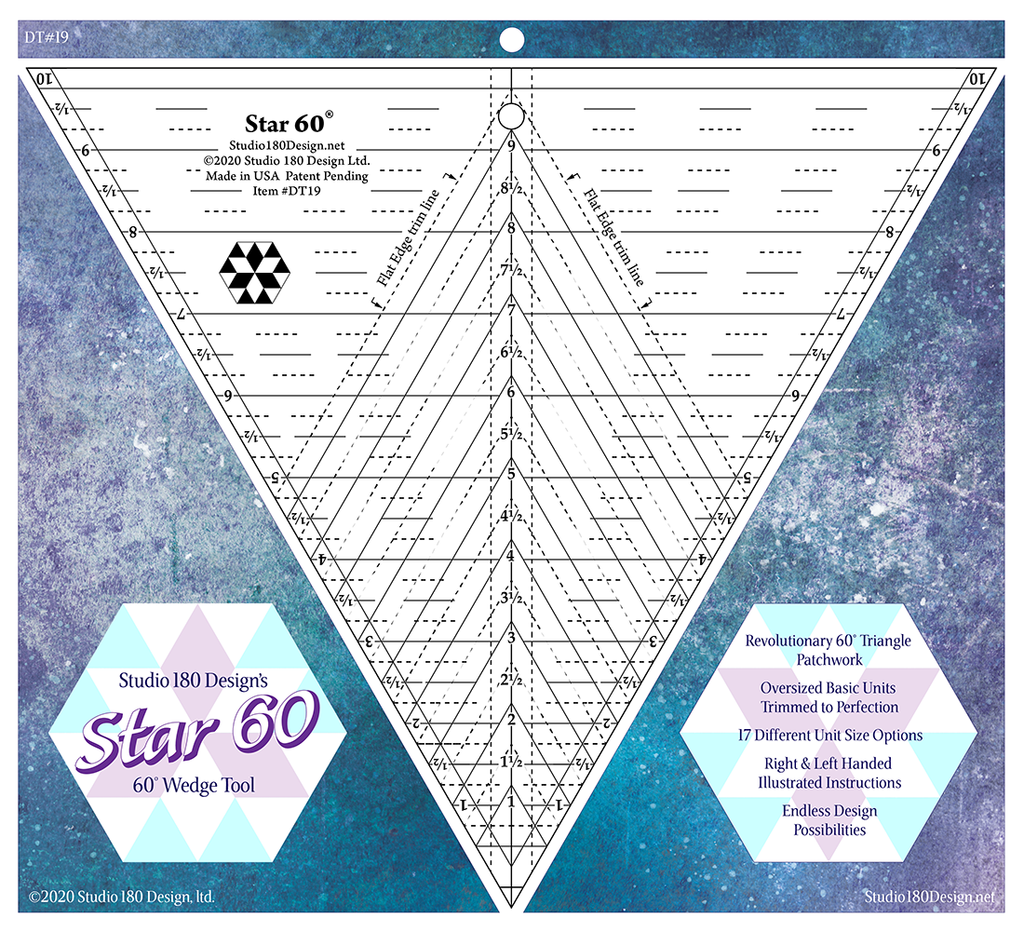 https://deb-tuckers-studio-180-design.myshopify.com/collections/star-60/products/star-61 Hexagon Quilts Designed in EQHexagons are one of my favorite type of designs in my Tech Know Quilter's classes. Tech Know Quilter's is a paid membership program for quilters who wish to master using Electric Quilt 8. Membership is only open a few times a year, so sign up for the wait list to be informed of the next open enrollment period. Here are a few of the hexagon designs created by Tech Know Quilter members. Many of these were class projects -- with a few originals or variations included. (Note that these are not necessarily Star 60 friendly.)
|


Free guide available for newsletter subscribers


Kari SchellElectric Quilt Expert and Educator and Pattern Designer. Categories
All
Archives
July 2024
|


 RSS Feed