ON POINT QUILTER
  • Blog
  • About
  • EQ8 Training
    • Tech Know Quilters Electric Quilt 8 Membership Training
    • EQ8 Made Easy
    • Electric Quilt 8 Sneak Peek
  • Store
  • Contact
Picture

Easter Egg PosieMaker

3/30/2024

 
I promise -- this is the last egg-stranza post for the year.  I have been a bit fixated on egg quilts.  In case you missed it, you may want to check out the posts for the last two weeks:
  • Easter Egg Hunt
  • Foundation Pieced Applique Easter Egg

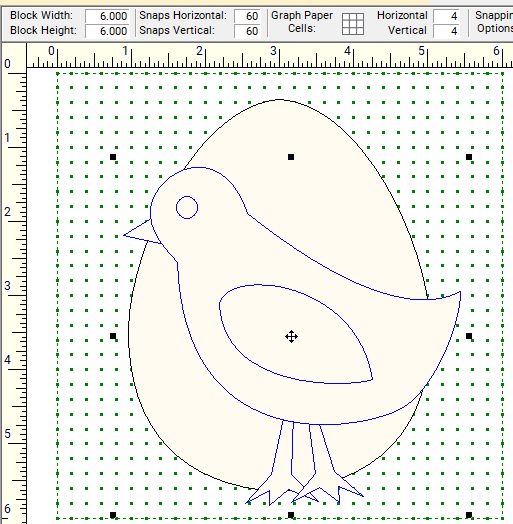
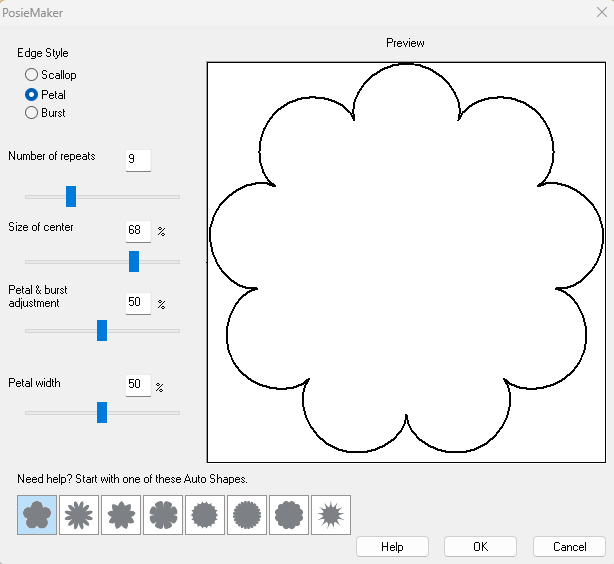
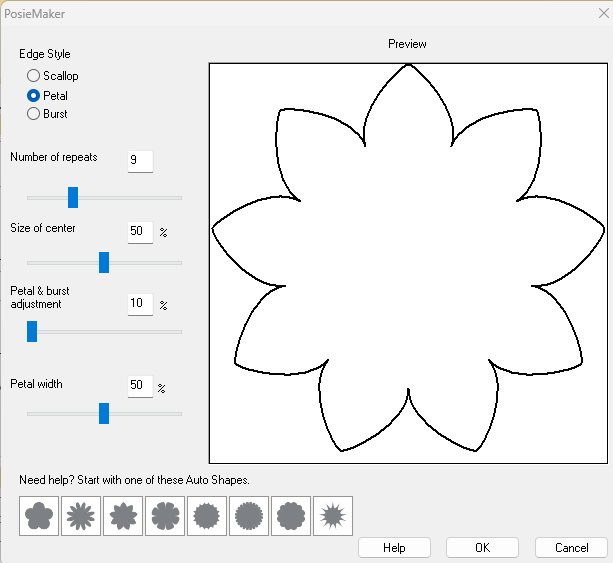
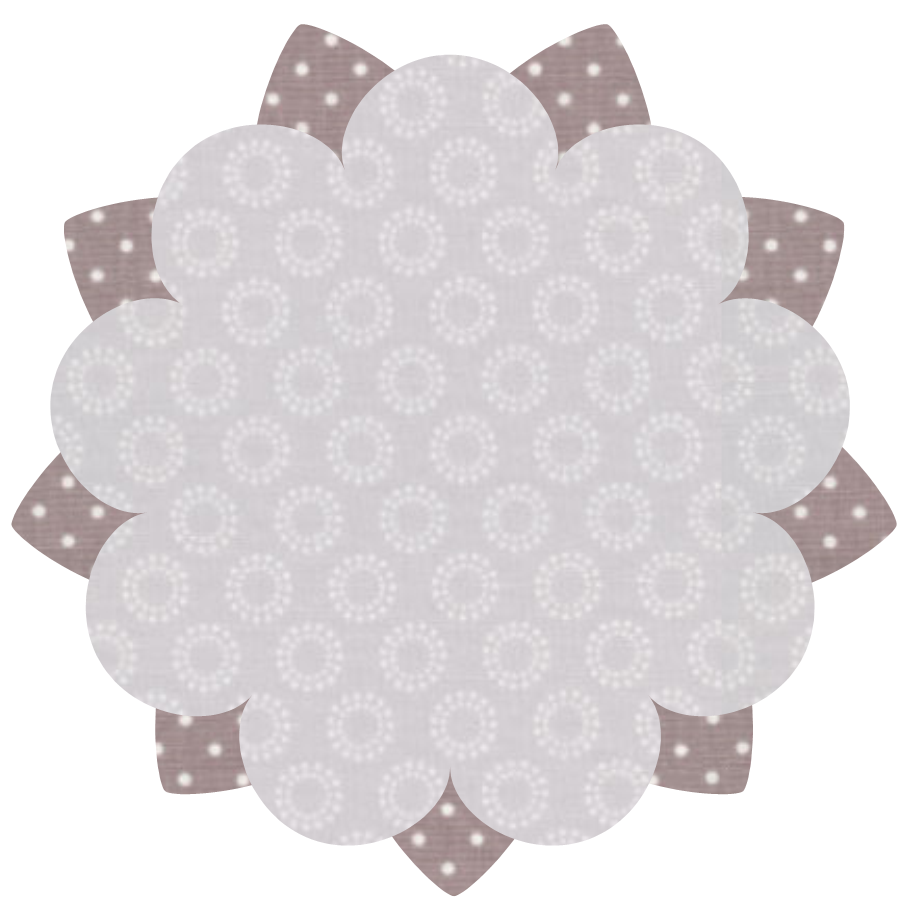
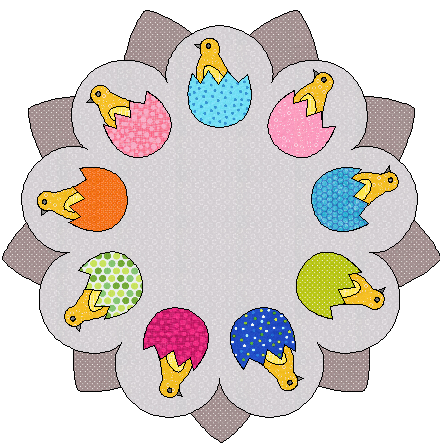
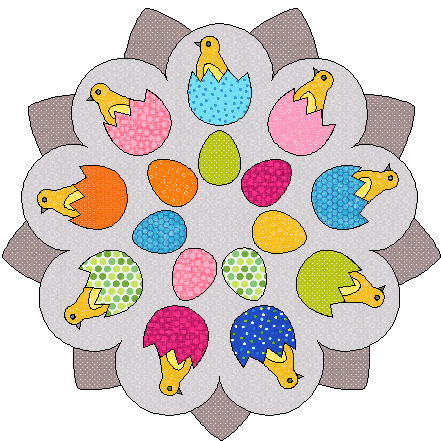
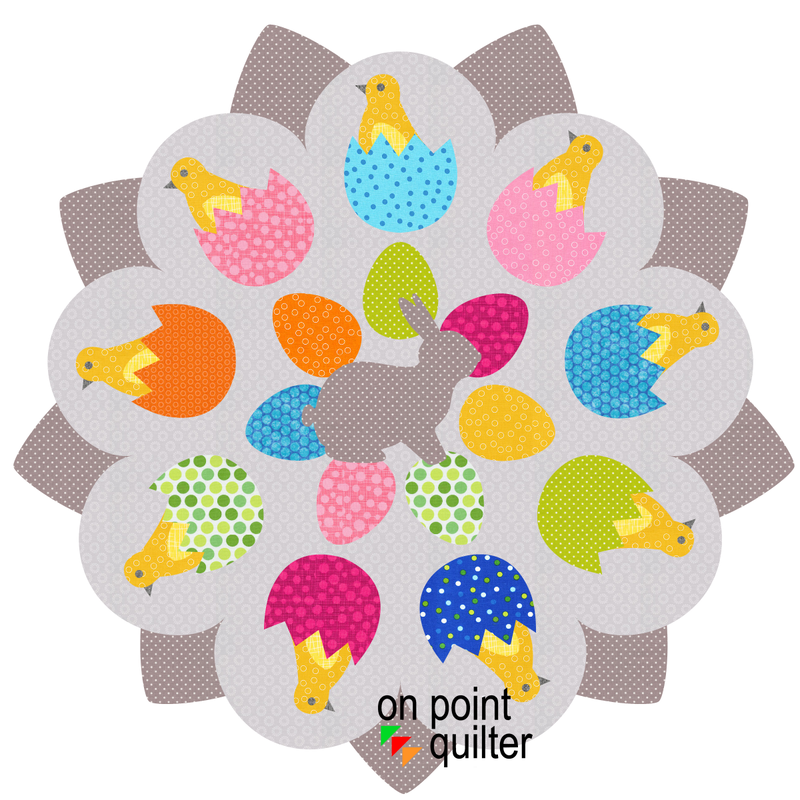
The new one I will be sharing with you today is a circular design.  Depending on the size you could turn it into a table topper for a round circular table.  Or for those that are into working with wool and embroidery -- a candle mat.

Easter Egg PosieMaker EQ8 Tutorial

  • Start with three blocks from the EQ8 Library.  These were all found in 05 Contemporary Applique>Holiday-Easter. 
Picture
Decorative Easter Egg from the EQ8 Block Library
Picture
Baby Chick from the EQ8 Block Library
Picture
Chocolate Rabbit from the EQ8 Block Library
  • Find the Decorative Easter Egg in the Project Sketchbook and edit to the Block Worktable.

  • Delete all the "decorations".

  • From the Main Menu select Edit>Copy.

  • Select a New Block>Applique Motif.

  • Select Paste.

  • Color and Add to Sketchbook. 
Picture
Easter Egg Motif
  • In the Project Sketchbook, edit the Baby Chick block.
​
  • Make sure you are on the Applique tab.
 
  • ​Select all the patches with the Pick tool.
 
  • From the Main Menu select Edit>Copy.
 
  • View the Project Sketbook and select the Egg Motif (make sure you are selecting on the Motifs tab -- not the Block Tab).
 
  • ​Select Edit>Paste.
Picture
Baby Check and Egg Motif Combined in a New Motif
  • Make a copy of the Egg motif and move it slightly away.
  • Position the Baby Chick under the egg.  Rotate the chick to fit in the egg.
  • Select the original egg motif and convert to guides.
  • Center the duplicated egg motif.
  • With the Draw tool, select the line.  Draw a series of slanted lines to crack the egg.
  • Add nodes on the egg (double click with the Edit tool) where it intersects with the crack.
  • Click directly on the node and break at node.  Tip -- If you aren't seeing the break option, click away and try clicking directly on the node again.
  • Delete the top segment.
  • With the Edit tool, connect the crack lines with the egg.  If necessary reposition the egg curves to match the guidelines.
  • Make sure the egg is on top of the baby chick.
  • ​Color and add to sketchbook.
Picture
  • Use Posie Maker to make two flowers.

  • Use the first and third auto shapes as a starting points.
​
  • For both use the style Petal and 9 repeats.

​
Picture
Posie Maker 1 Settings
Picture
Posie Maker 2 Settings
  • Resize the Posies 300% and Layer them on the Block Worktable.
​
  • Note the picture shows them without the Baby Chick and Egg Motif.
Picture
PosieMaker Results
  • Select the Baby Chick and Egg motifs and use Wreathmaker.

  • ​Adjust the Wreathmaker settings so they fit in the scallops of the first Posie.
​
  • ​Add to Sketchbook to Save.
Picture
Baby Chicks with Eggshell Wreath on Posie Blocks
  • In the Project Sketchbook find and edit the Egg motif.  Select the motif with the Pick tool.
  • From the Main Menu select Edit>Copy.
  • In the Project Sketchbook, locate the Posie Block and select Edit.
  • From the Main Menu select Edit>Paste.
  • Use Wreathmaker to make a wreath of 7 eggs that fit inside the ring of Baby Chicks with Egg motifs.
  • Add to Sketchbook to save. 
Picture
Posie Block with Added Egg Wreath
  • In the Project Sketchbook find and edit the Chocolate Bunny block. 
  • Select the applique tab and select the motif with the Pick tool.
  • From the Main Menu select Edit>Copy.
  • In the Project Sketchbook, locate the Posie Block and select Edit.
  • From the Main Menu select Edit>Paste.
  • Resize and reposition the bunny in the center of the quilt.
  • Add to Sketchbook to save. 
Picture
Easter Egg PosieMaker Block
  • Select the Quilt worktable.
  • Select New Quilt>Custom Set.
  • Decide on the size of quilt you would like and change the dimensions on the Layout tab..
  • On Layer 2, select Block>Set Block.
  • Locate the final posie motif and drag it on the quilt worktable.
  • Resize if necessary and make any final adjustments to coloring.
  • Add to Sketchbook to save.
Picture
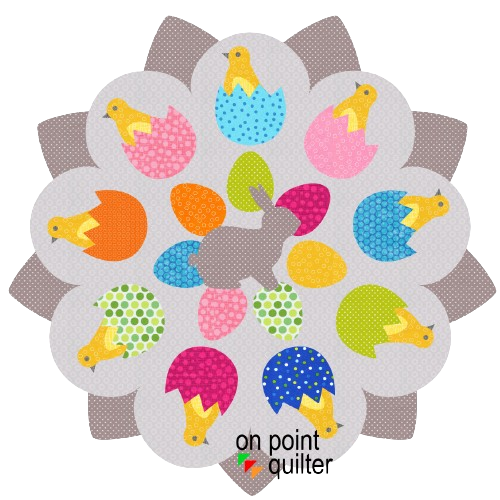
Easter Egg PosieMaker Quilt
Check out the video for more details on drafting the Easter Egg Posie Maker design.
There are so many ways to personalize this design.  Here are a few.
  • Use a different fabric collection.
  • Change the number of repeats for the posies.
  • Change up the motifs used with wreathmaker.  This could easily be adapted for a different holiday or season of the year.
I would love to see your design.  Feel free to share in the Learning EQ Facebook group.
Learning EQ Facebook Group Easter Egg PosieMaker Design

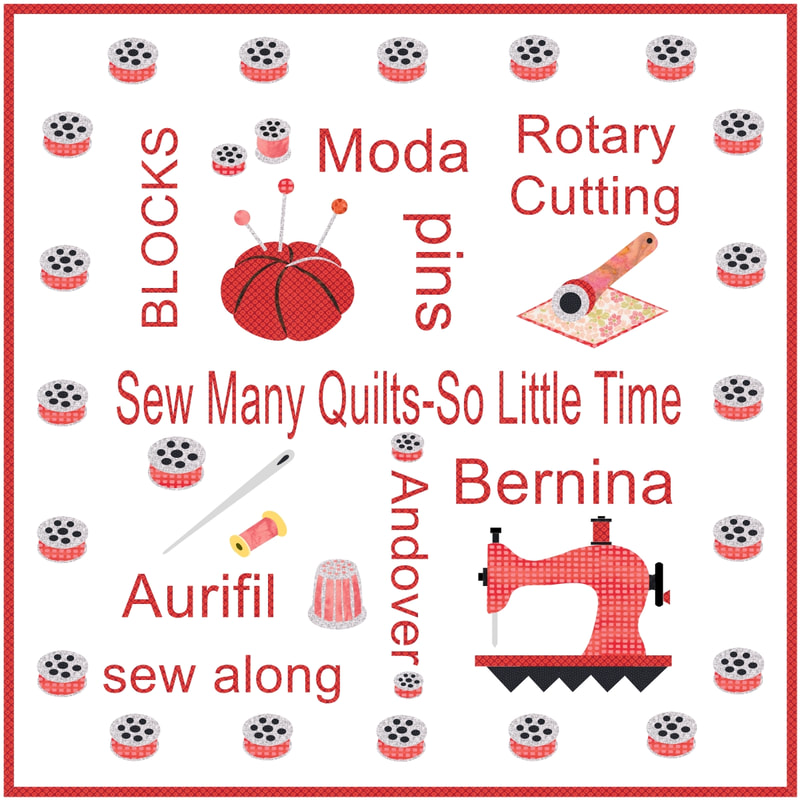
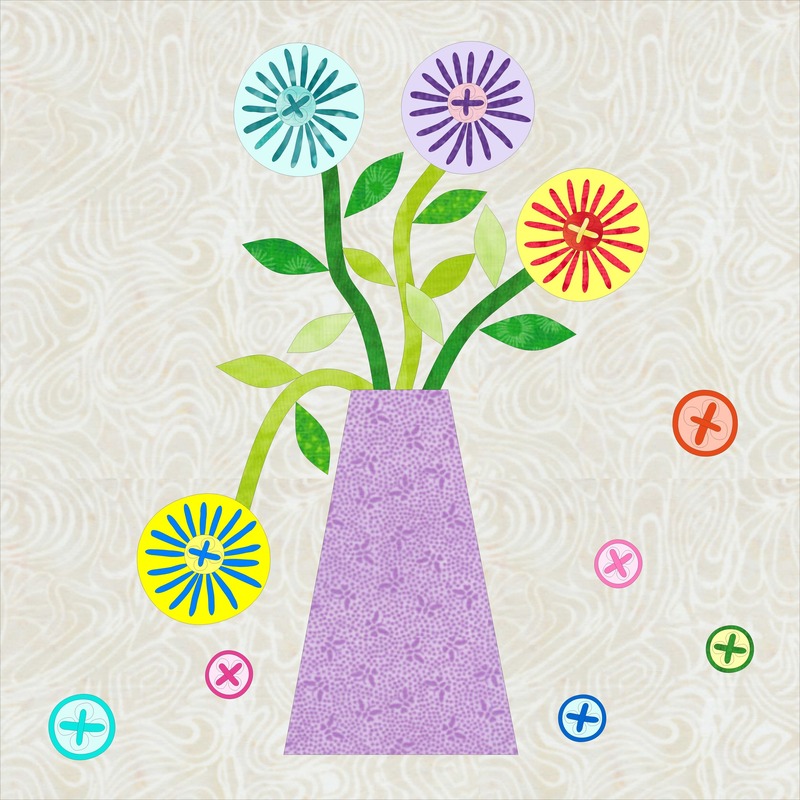
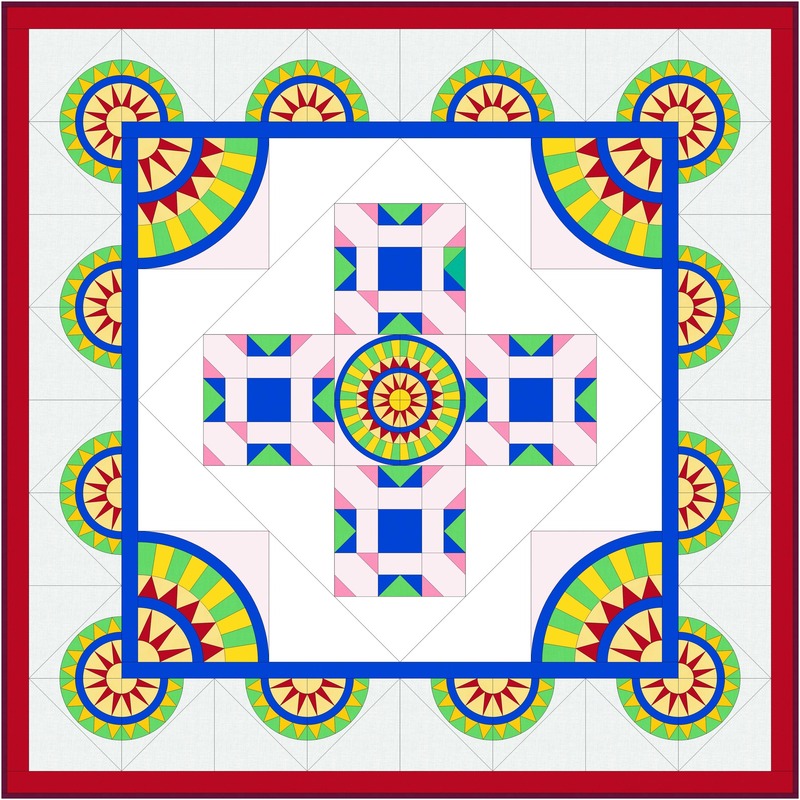
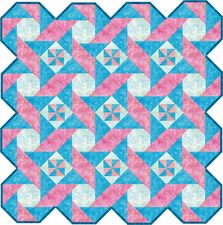
Tech Know Quilter Month End Challenge

Each month I encourage Tech Know Quilter members to share favorite projects from their class for the month and applications of the concepts for their own quilts.  Here are their submitted designs for the February Month-End Challenge.

​I am so grateful to be able to assist an amazing group of quilters and designers in their Electric Quilt journey.
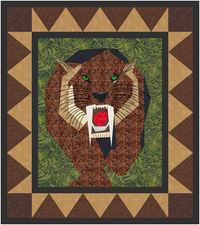
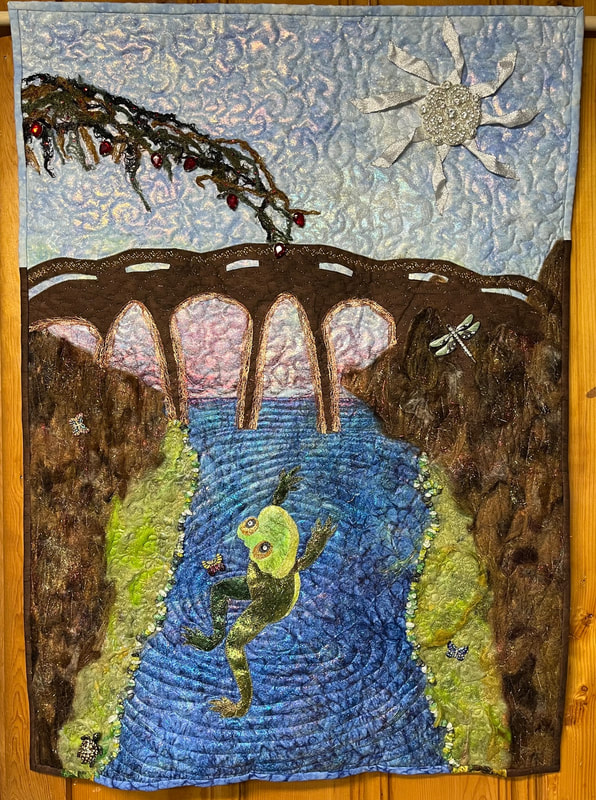
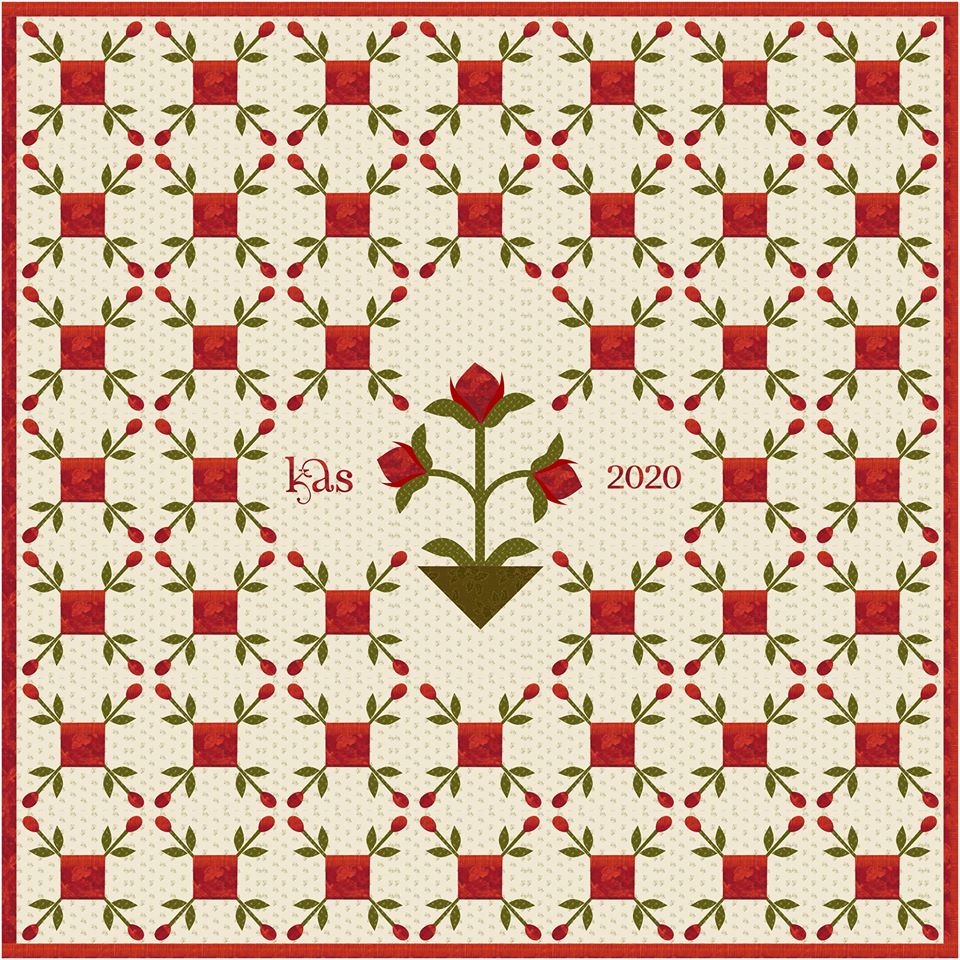
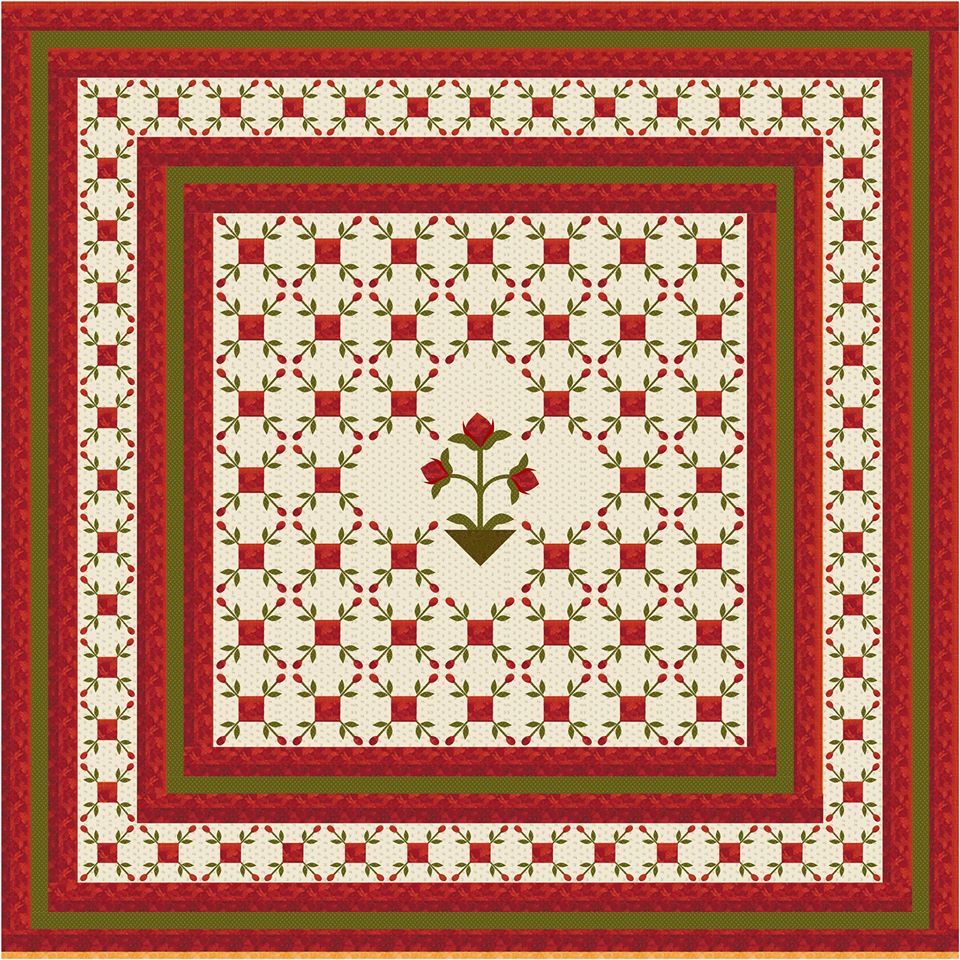
Picture
Elly da Silva This quilt is a combination of all the blocks of this month
Picture
Narue Isabelle I designed this quick quilt yesterday using the blocks we worked on in Easy draw Kaleidoscopes class.
Picture
Narue Isabelle This has been my long-haul project of the past few months: a Zelda quilt for a friend’s daughter. I have traced and designed my appliqués and blocks , putting some of my Accuquilt dies to good use in the process. I’m halfway through piecing it and just about to tackle the 70-something cherry blossom flowers… wish me luck… and patience
Picture
Margo Reppert Here's my favorite quilt from this month's lesson.
Picture
Kristy Goodin Soard My sewing related quilt was fun to design.
Picture
Denise Mohler February was packed full of learning for me. I was able to complete all the lessons for "2021" Here is January Lesson 1
Picture
Denise Mohler February 2021 Lesson 5
Picture
Denise Mohler March 2021 Lesson 6
Picture
Denise Mohler April 2021 Lesson 7
Picture
Denise Mohler May 2021 Lesson 6
Picture
Denise Mohler June 2021 Lesson 6
Picture
Denise Mohler July 2021 Lesson 7
Picture
Denise Mohler August 2021 Lesson 7
Picture
Denise Mohler September 2021 Lesson 2
Picture
Denise Mohler October 2021 Lesson 7
Picture
Denise Mohler November 2021 Lesson 6
Picture
Denise Mohler December 2021 Lesson 4
Picture
Terry McCaskey I'm finally binding a project based on Quiltworx charms class pieced over a year ago. EQ became my tool to both colorize the scrap placement and do a virtual "test-drive" of possible quilting designs. The free-motion outcome is different but the virtual EQ design skills learned in Kari's classes helped me along the way
Picture
Terry McCaskey's Finished Quilt
Picture
Zdenka Nemethova This month I really learned and practiced a lot in Masters "Letters & Text Class", e.g. how to generate and then use AI pictures in EQ, imports & exports between EQ and Inscape etc. Enjoyed every lesson
Picture
Edith Craig My class this month was Masters More Letters and Texts. I used the techniques to design this Lighthouse Quilt. I used Easy Draw (with photo images as guides) to draft the lighthouses. I then added the title and names of the lighthouses on Layer 2 using one of the fonts that we downloaded for the lessons this month. I used a border that reflected the same black and white pattern as shown on one of the lighthouses. Fun to play with.
Picture
Jane Perri EQ Design
Picture
Jane Perri Quilt
Jane Perri Quilt 

This is the finished quilt from the EQ8 design above. I was trying to see how far I could push Angelina fibers and other embellishments. The quilt was first made in cotton. The sky, water and frog are covered in Angelina which changed the colors. The "trees" and "riverbed marsh" is covered in natural wool with Angelina felted in. I dyed the green wool. The shorelines are glass bead chips. The tree branch overhanging the bridge is made from dyed cheese cloth, decorated with hot fix crystals and beads. The sun is a rhinestone patch with silver metallic ribbons radiating out for rays. The bridge is stitched in holographic threads and trimmed in copper metal ribbon. Pins of bugs and a turtle are attached. I bowed out and stuffed the lower center of the river to simulate a mouth of a river flowing into the sea. This was great fun to design and make!
Picture
Fran Heisey There was so much to learn in Masters More Letters and Text this month. This was my favorite, but there were so many quilts I really liked, it was hard to choose.


​Tech Know Quilters
 is a membership program focused on mastery of Electric Quilt 8.  We have members at all stages of their Electric Quilt journey. 

Click here to learn more.

Happy Easter!

Picture
​Happy quilting.

​Kari

Join the On Point Quilter weekly newsletter and receive regular tips and inspiration on using Electric Quilt 8 along with the  Free 12 Top
Tips for EQ8 video guide.
Picture

Foundation Pieced Applique Easter Eggs

3/23/2024

 
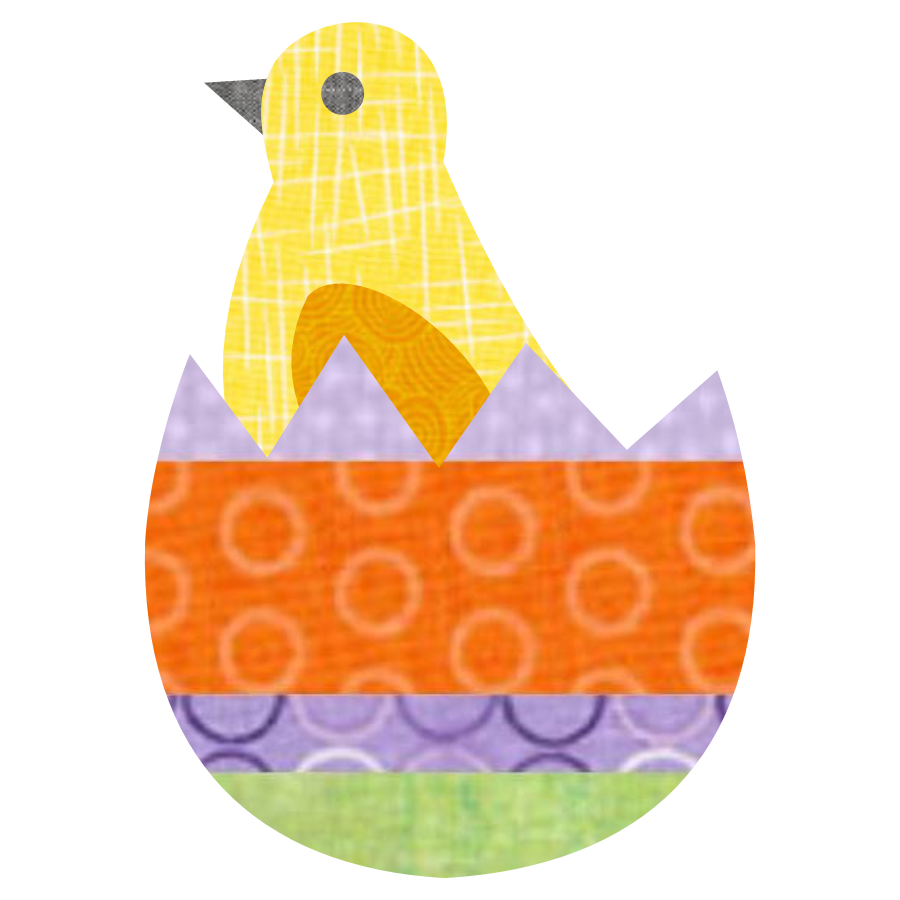
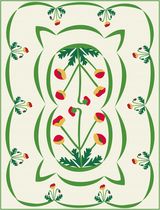
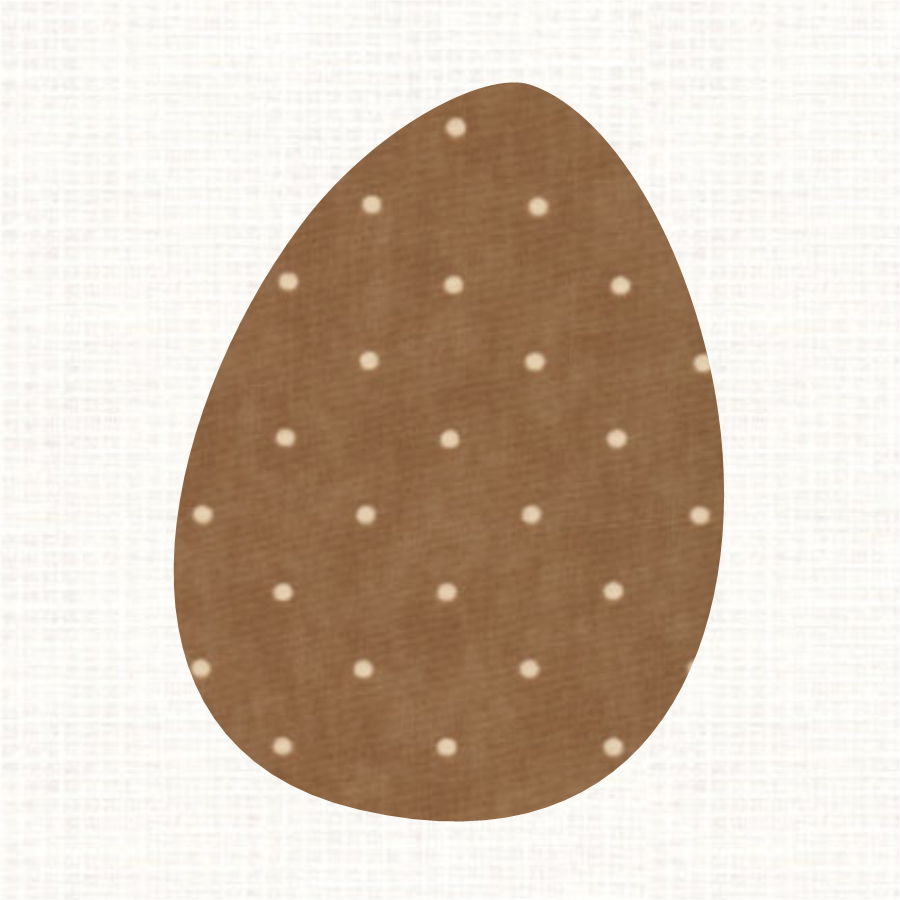
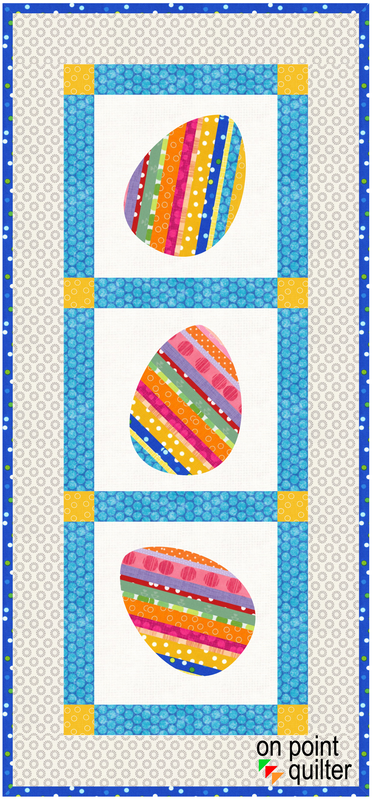
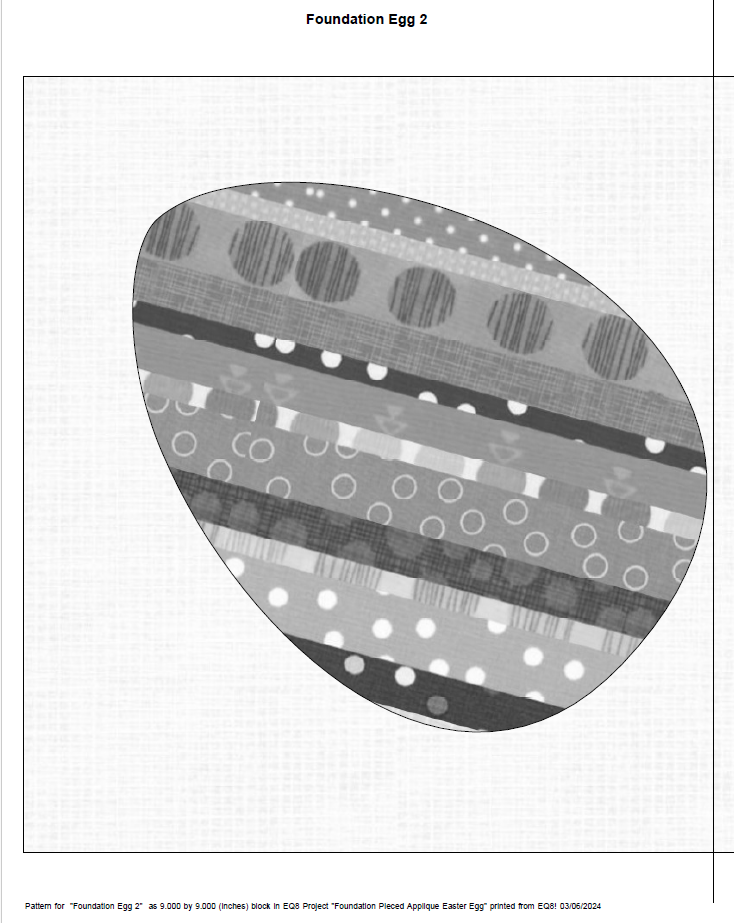
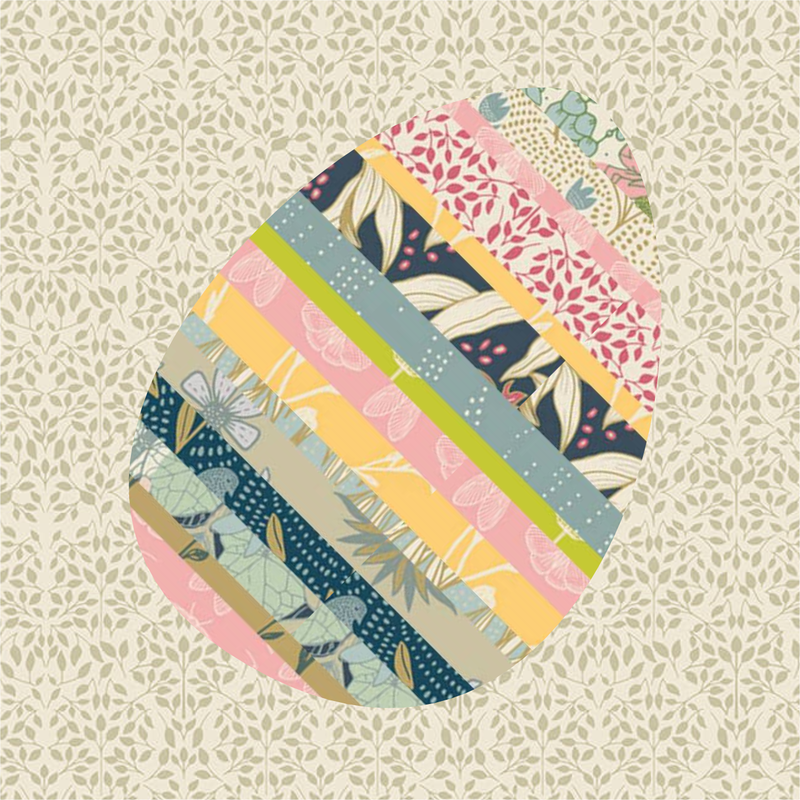
Continuing on with an egg-travaganza theme, I will be sharing a new way to add foundation piecing to your applique shapes.  The only applique "drawing" in this tutorial is deleting a few patches from a block in the library and rotating the ending shape.

Super simple.

Foundation Pieced Applique Easter Eggs Tutorial

When I was working on the Easter Egg Hunt post, I found all these decorative eggs in the EQ8 Library.  They are all under 05-Contemporary Applique>Holiday -Easter.  While I loved the blocks, I wanted something simpler to work with.

So I deleted all the elements other than the Easter egg shape.

Then rotated the shape, to have three different Easter eggs.
Picture
Decorative Easter Egg from the Contemporary Applique library in EQ8
Picture
Easter Egg 1
Picture
Easter Egg 2
Picture
Easter Egg 3
I then created my quilt layout.  I kept it simple.
  • Horizontal Layout
  • 1 x 3 Blocks
  • Block size 9" x 9"
  • Sashing (including sashing border) 1-1/2" 
  • Border #1  Long Horizontal 2"
  • Border # 2  Mitered 1/2"

Put the egg blocks in the quilt.

​Colored the quilt using the fabrics from last weeks video (a combination of default fabrics and those in Themes>Dots) in the EQ8 Fabric Library.
Picture
Foundation Pieced Applique Easter Egg -- Quilt Layout
Super simple - but I promised you foundation pieced eggs.  I decided to go with a strip set concept.
  • Using EasyDraw, set up a 10 x 10 Block.
  • Set the snaps at 40 x 40 (every quarter inch).
  • Snapping options: just Snap to Grid.
  • Draw a series of horizontal lines.  I varied the width of the strips from 1/4" to 3/4" inch finished sizes.  That means the cut strips would vary between 3/4" to 1-1/4".  Feel free to change up the size of the strips to match any pre-cut strips you are working with.
Picture
Strip Set Drawn in EasyDraw
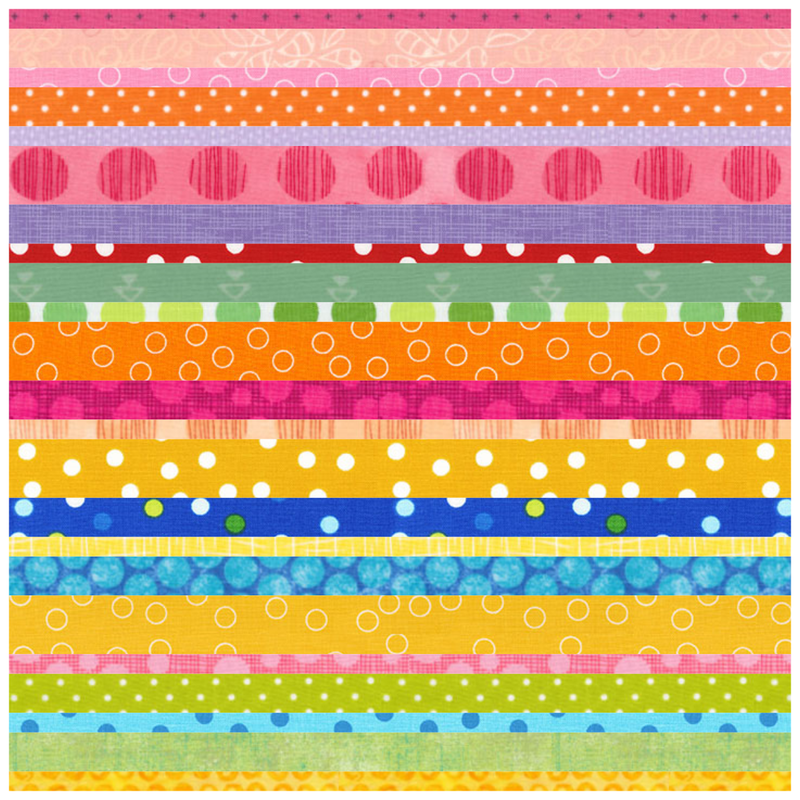
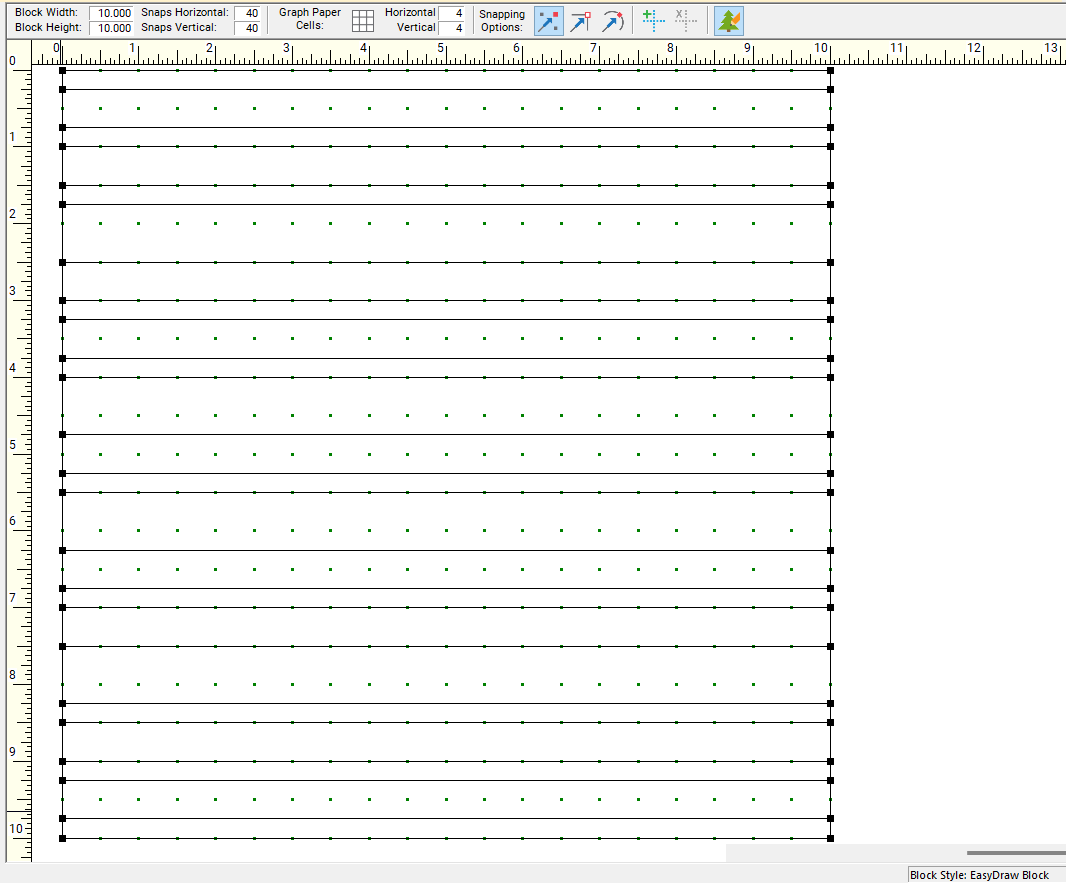
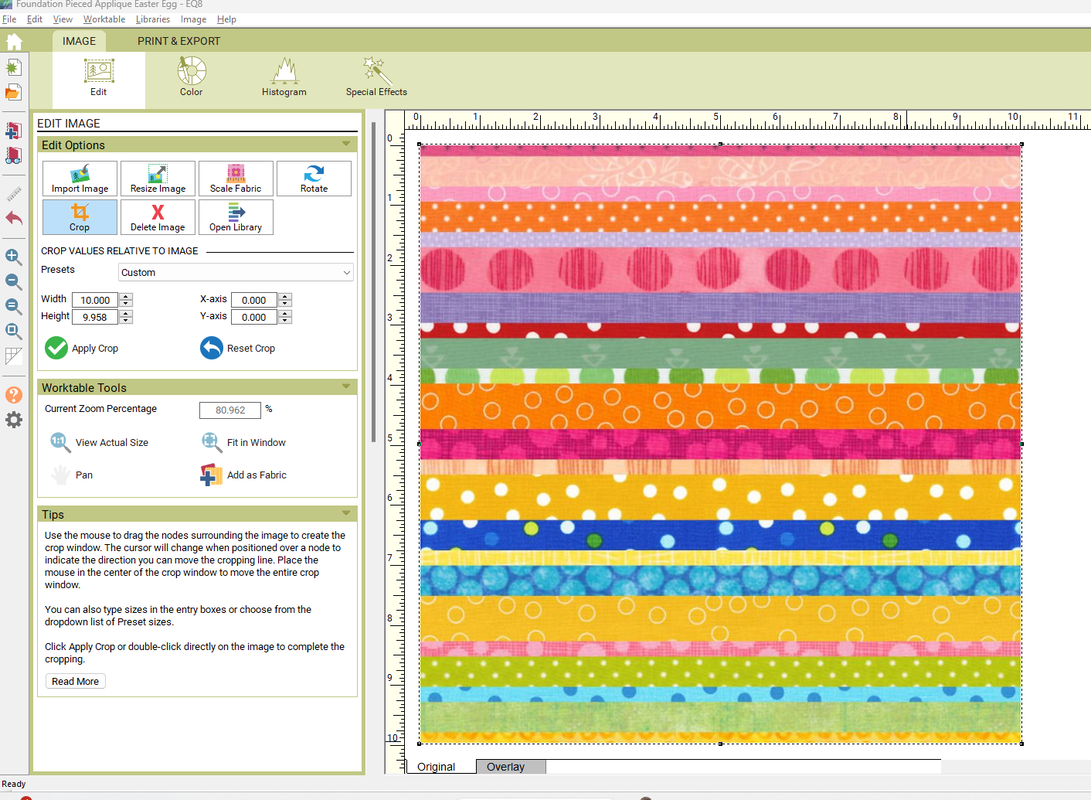
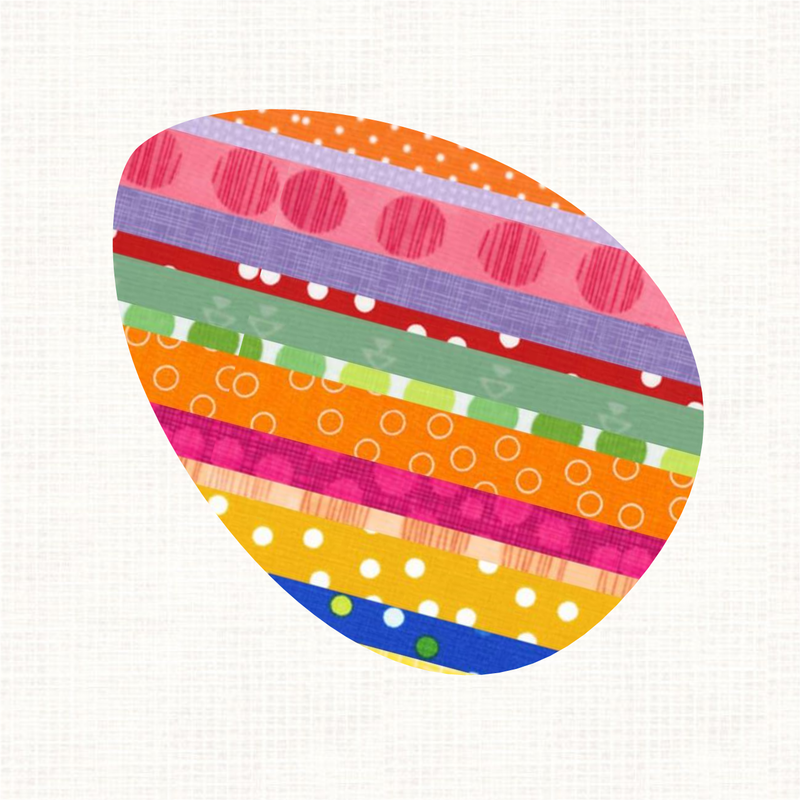
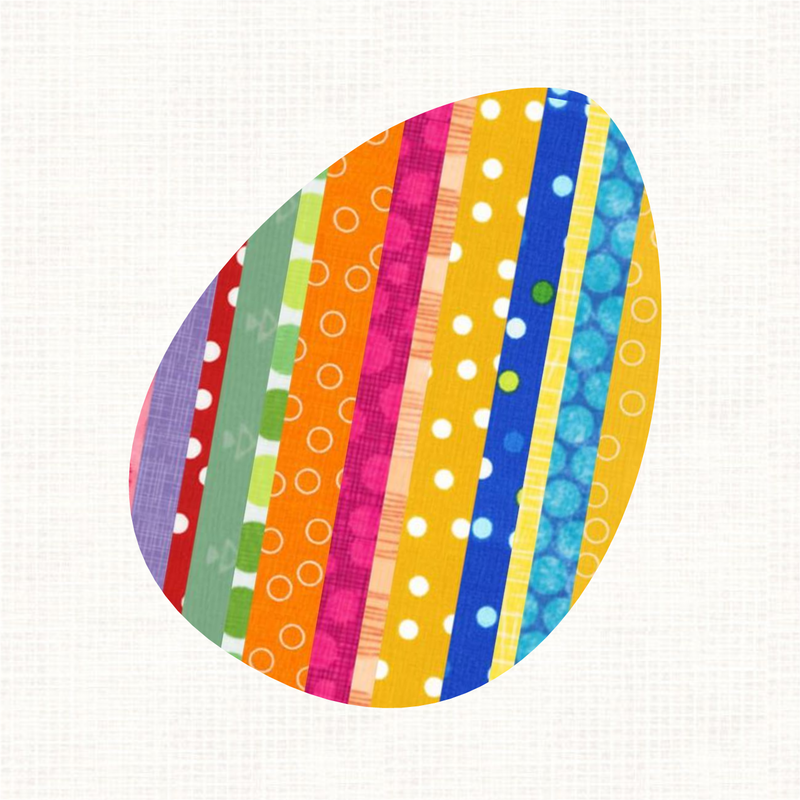
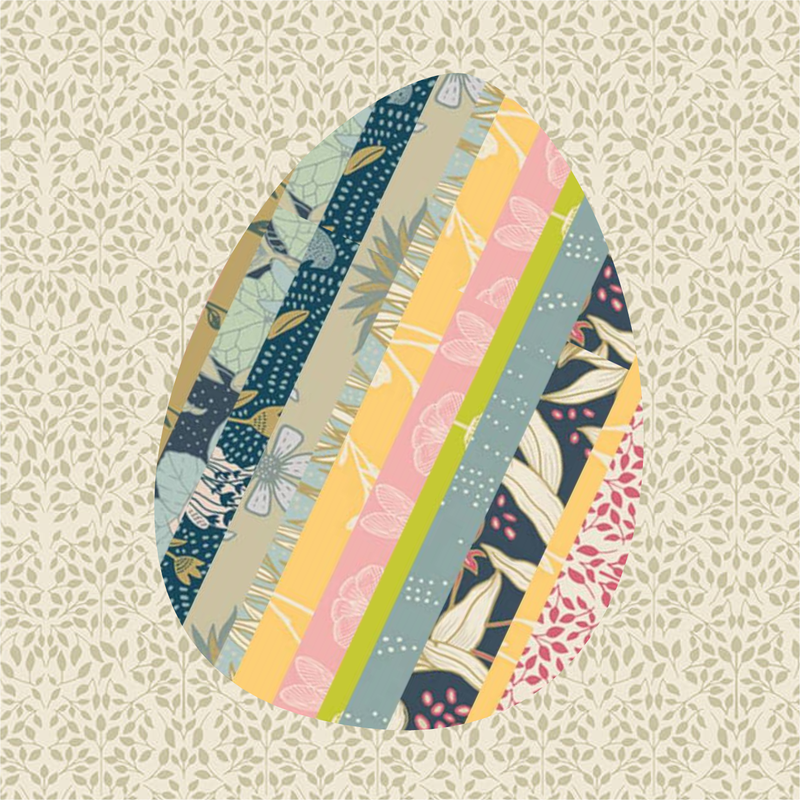
Color your strip set with a favorite fabric collection.  I used the fabric collection I had collated for last weeks blog post.
Picture
Strip Set Block Created in EasyDraw
Set your new block in a horizontal quilt with a 1 x 1 layout, 10" block, and no border.  

Add your quilt to sketchbook as a photo.

On the image worktable, edit and resize your image.

Save as Fabric.


Picture
Editing the EasyDraw Block on the Image Worktable to convert to fabric
Locate the initial quilt (with the eggs) and edit.

Replace the fabric with the foundation fabric.  Hint:  It will be the last fabric on the palette.

Use the Advanced Rotation option and Fussy Cut to finalize placement of the fabrics.

​Add to sketchbook.
Picture
Foundation Friendly Egg Quilt in Default and Dots Fabrics in EQ8i
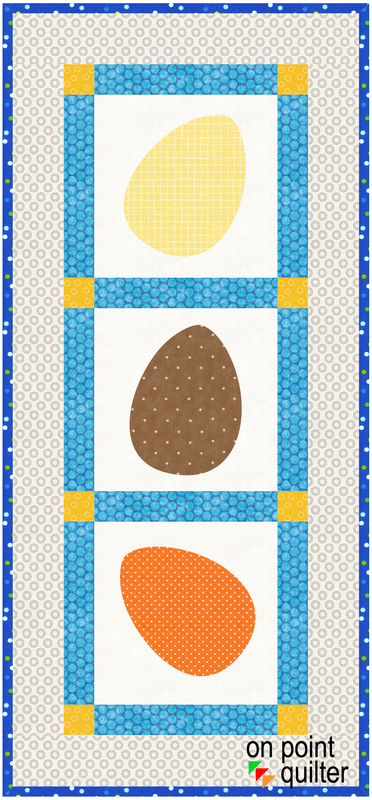
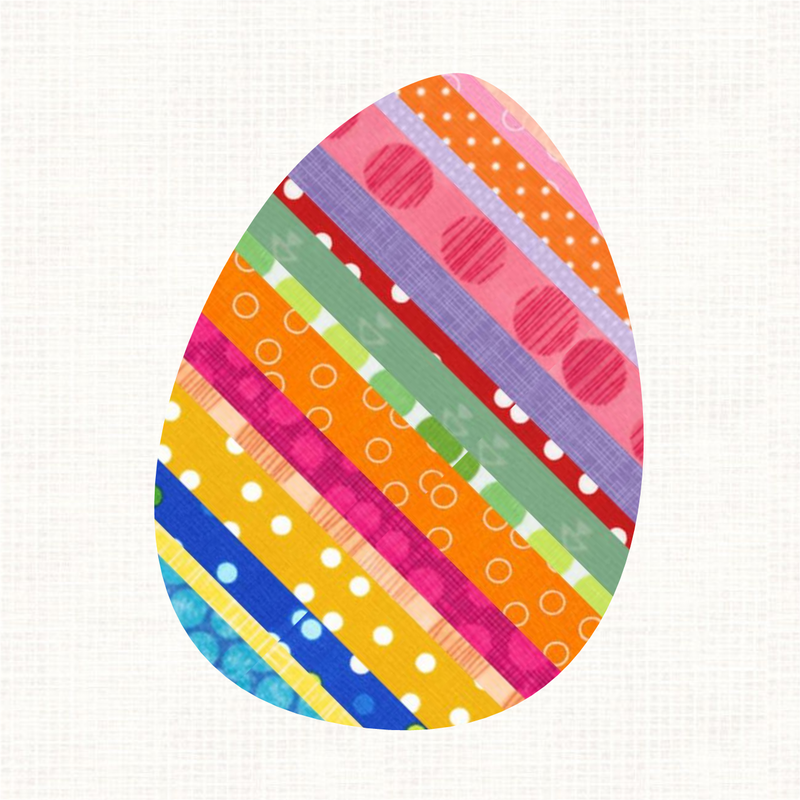
Here are the final foundation friendly blocks.
Picture
Foundation Egg #1
Picture
Foundation Egg #2
Picture
Foundation Egg #3
To print your foundation, print your block at 9 X 9. 

​Make sure to select Showing Fabrics.  If you have a grey-scale option on your printer, select that.

The lines between the fabric pieces will be your sewing lines for your eggs.  You can also use this to cut out your final egg shape.

Note that these will print without seam allowances.
Picture
Applique Egg Foundation Printed from EQ
Check out the video for step by step instructions to create your own Foundation Friendly Easter Egg Applique blocks and quilt.
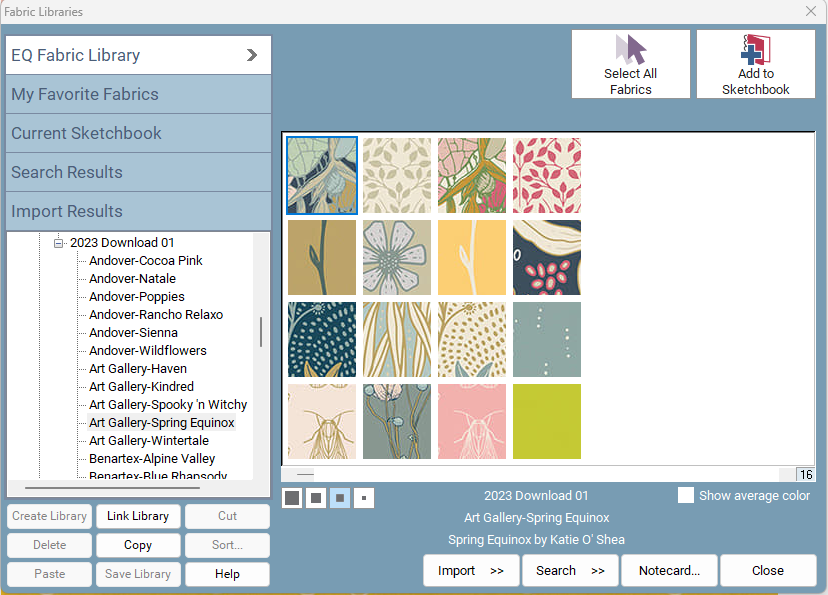
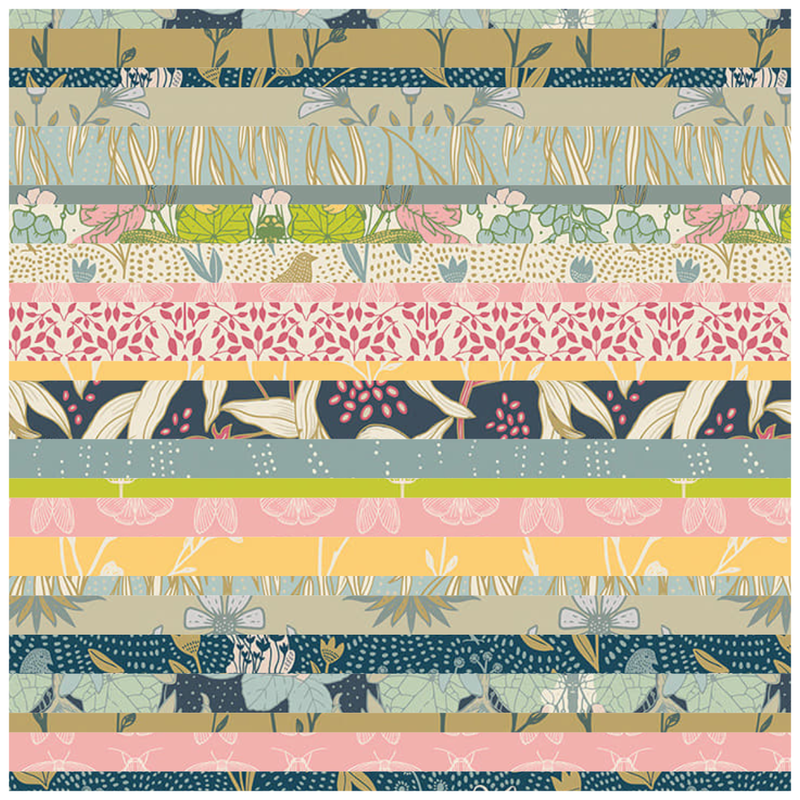
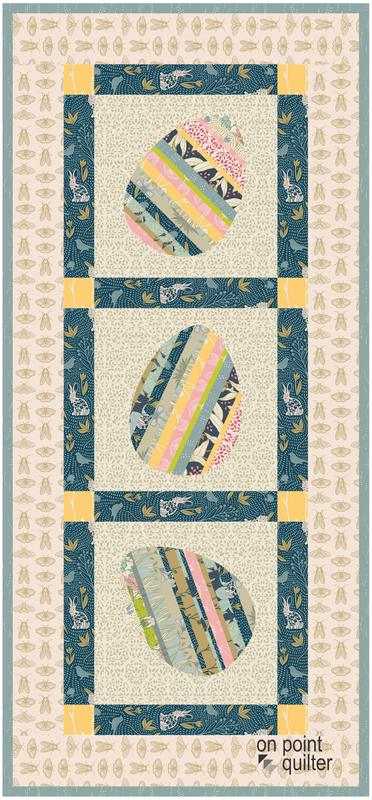
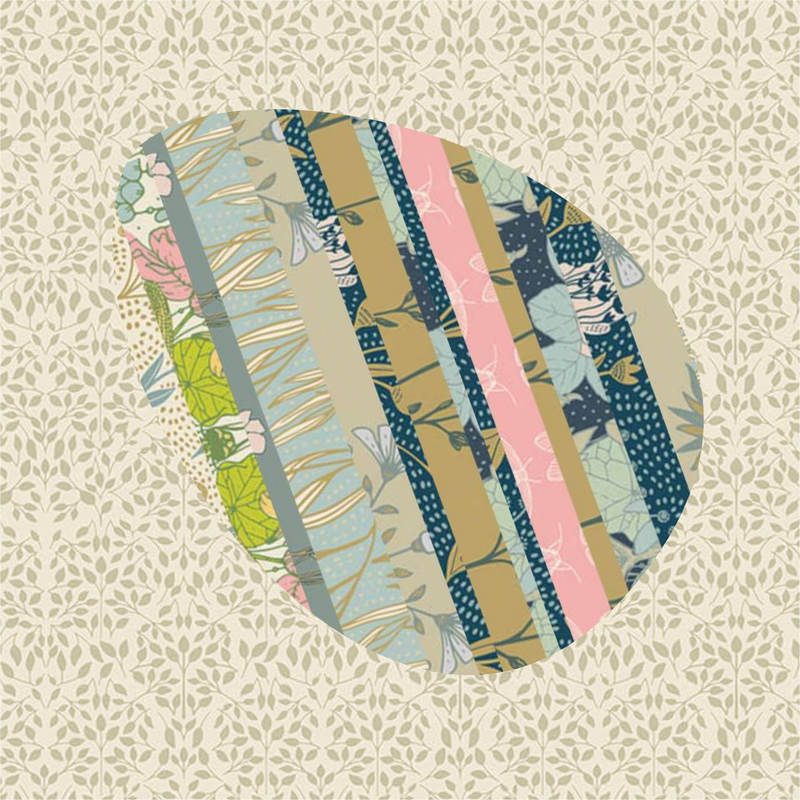
Just for fun, I decided to try the concept with a different fabric collection.  I chose the Spring Equinox fabrics by Art Gallery.  They were part of Stash Collection #1.

​I think it gives the blocks and quilt a more elegant look.
Picture
Spring Equinox from Art Gallery
Picture
Foundation Strip Set Block
Picture
Spring Equinox Egg Quilt
Picture
Spring Equinox Egg Block #1
Picture
Spring Equinox Egg Block #2
Picture
Spring Equinox Egg Block #3
I would love to see what you decide to work with when implementing the ideas from the video.  Feel free to share your designs in the Learning EQ Facebook group.  I've set up a dedicated post for your pictures.
Learning EQ Facebook Group for Foundation Pieced Applique Easter Eggs
Picture
Happy quilting.

​Kari

Join the On Point Quilter weekly newsletter and receive regular tips and inspiration on using Electric Quilt 8 along with the  Free 12 Top
Tips for EQ8 video guide.
Picture

Easter Egg Hunt EQ8 Tutorial

3/16/2024

 
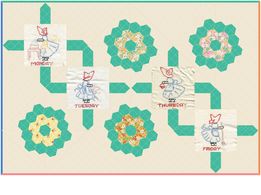
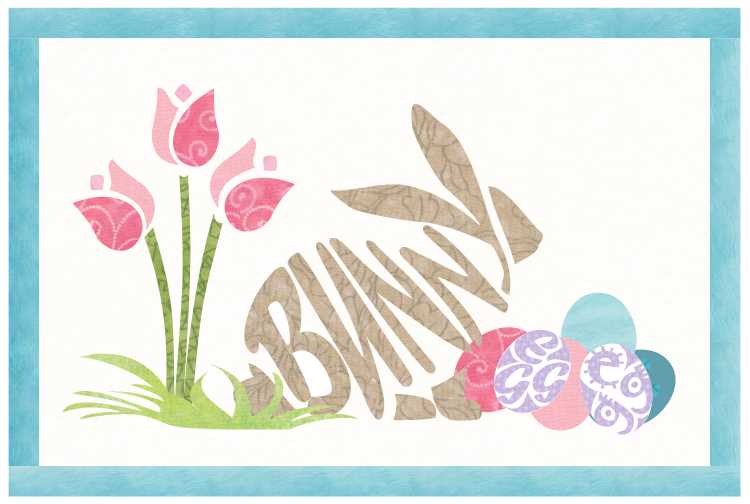
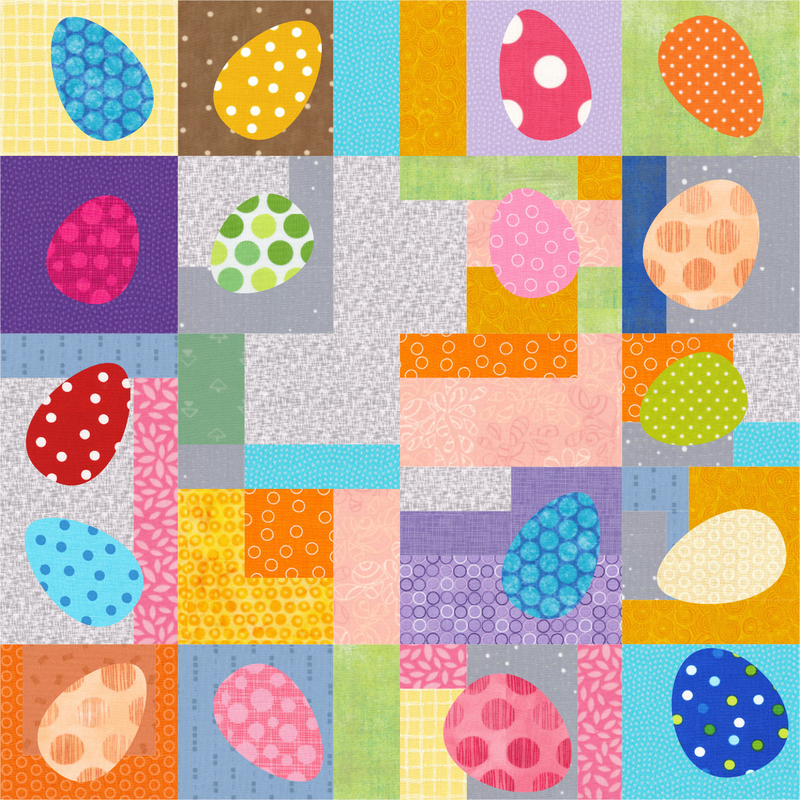
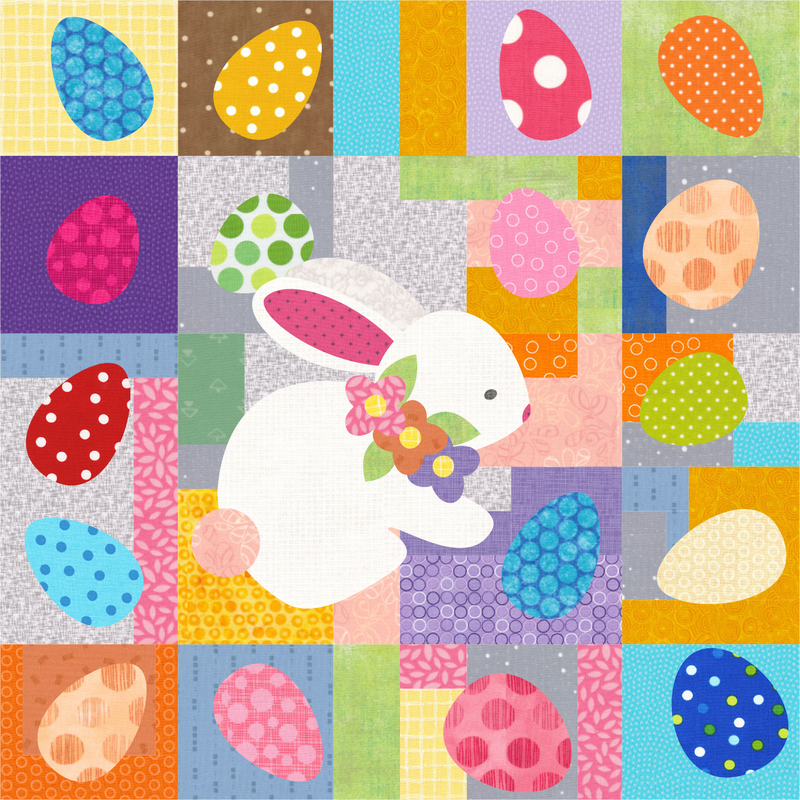
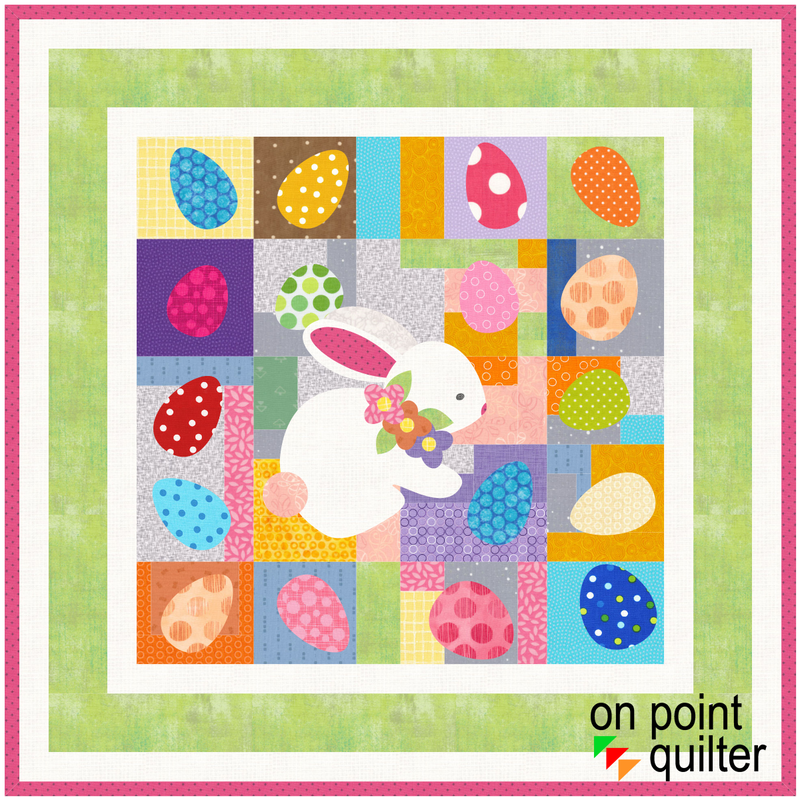
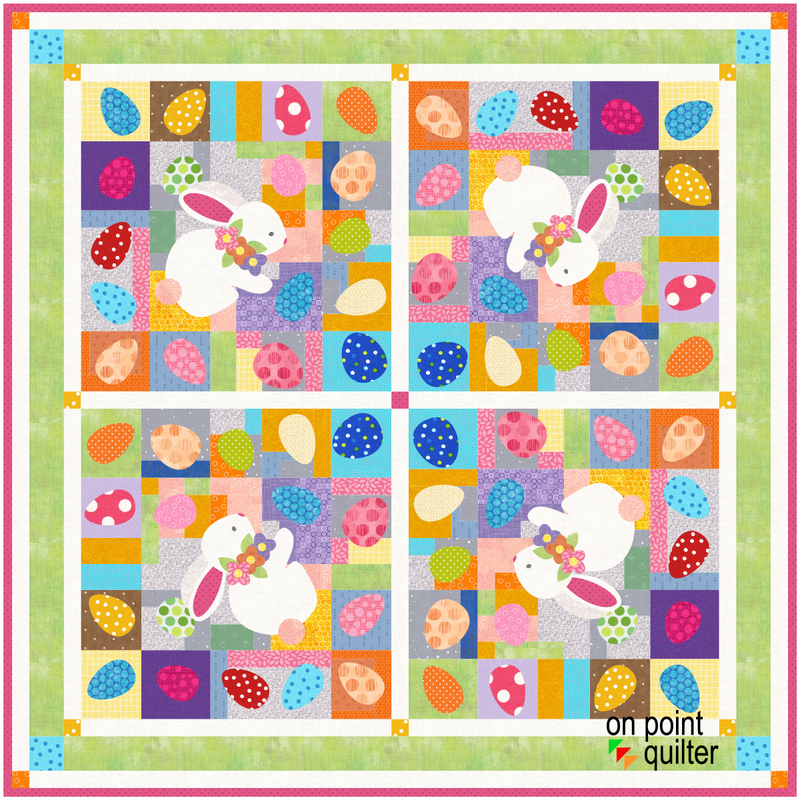
The weather is getting warmer.  And spring is getting closer.  I loved playing with some spring colored fabrics in creating this fun new block which has two quilt options.

There are three components to the whimsical/block:
  1. A pieced background (completed in EasyDraw).
  2. Eggs drafted as Applique motifs. 
  3. Easter bunny obtained from the EQ8 Block Library and incorporated in the combo-block.

Easter Egg Hunt Design

Pieced Background

Start a new block> Pieced and Applique>Easy Plus Applique.

Make sure snap to grid is turned on with grid snap increments at 36 x 36.  That will give you very clean cutting instructions for the block.

Draw four horizontal lines and four vertical lines to create 16 rectangles.  Ideally they are all different sizes.  

In each of the 16 rectangles add additional horizontal and vertical lines to provide more visual interest for your background.

Don't worry about matching my lines.  The key is to have lines that will be easy to rotary cut and machine piece.
Picture
Pieced Background with Squares and Rectangles Only

Adding Applique Eggs

On the applique tab, use the Circle under Shapes and draw 3 circles using The Cntl (PC users) or Command (MAC users) key.

Change the nodes at the top and bottom to Symmetrical.

Shorten the handles at the top to get an egg shape.

Resize the eggs -- ideally you will have three distinct eggs for the block.

Place the applique eggs  in the original rectangle spaces, rotating as desired for a random "look".
​
Picture
Pieced Background with Applique Easter Eggs
Blocks were colored with the default palette and Dots fabrics  The Dots fabrics are available in the EQ8 Fabric library under Themes.

Adding the Bunny from the EQ8 Blocks Library

In the EQ Block library, under Contemporary Applique>Holiday-Easter, locate the Bunny with Flowers block.  

Edit to block worktable.  

Copy the applique pieces and paste on the Background with Easter Eggs block.

Picture
Bunny with Flowers from the EQ8 Block Library
On the combo block, resize, rotate and place the Bunny.  I just played with all three until I found something visually appealing.

Color the added patches using the fabric collection.
Picture
Easter Egg Block with Added Bunny

Draft the Quilt on the Quilt Worktable

I created two quilt options.  One with one block and the other with four.  Pick the option that appeals to you.
Picture
Easter Egg Hunt 27" x 27"
Picture
Easter Egg Hunt 46" x 46"
Check out the video for more details on creating the block and quilts.
There are so many ways you could personalize this design.
  • Change the horizontal and vertical lines drawn in EasyDraw.  You could simplify the design -- or add more.
  • Change the sizes of the eggs -- or consider using a different shape.
  • Replace the bunny with a different applique motif.

I would love to see what you do with the concept.  Feel free to share you designs in the Learning EQ Facebook group.
Learning EQ Facebook Group Easter Egg Hunt Post
Picture
​Happy quilting.

​Kari

Join the On Point Quilter weekly newsletter and receive regular tips and inspiration on using Electric Quilt 8 along with the  Free 12 Top
Tips for EQ8 video guide.

Picture

Lucky Shamrocks Quilt

3/9/2024

 
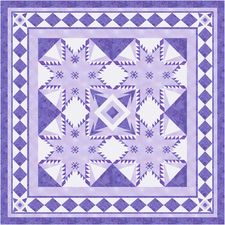
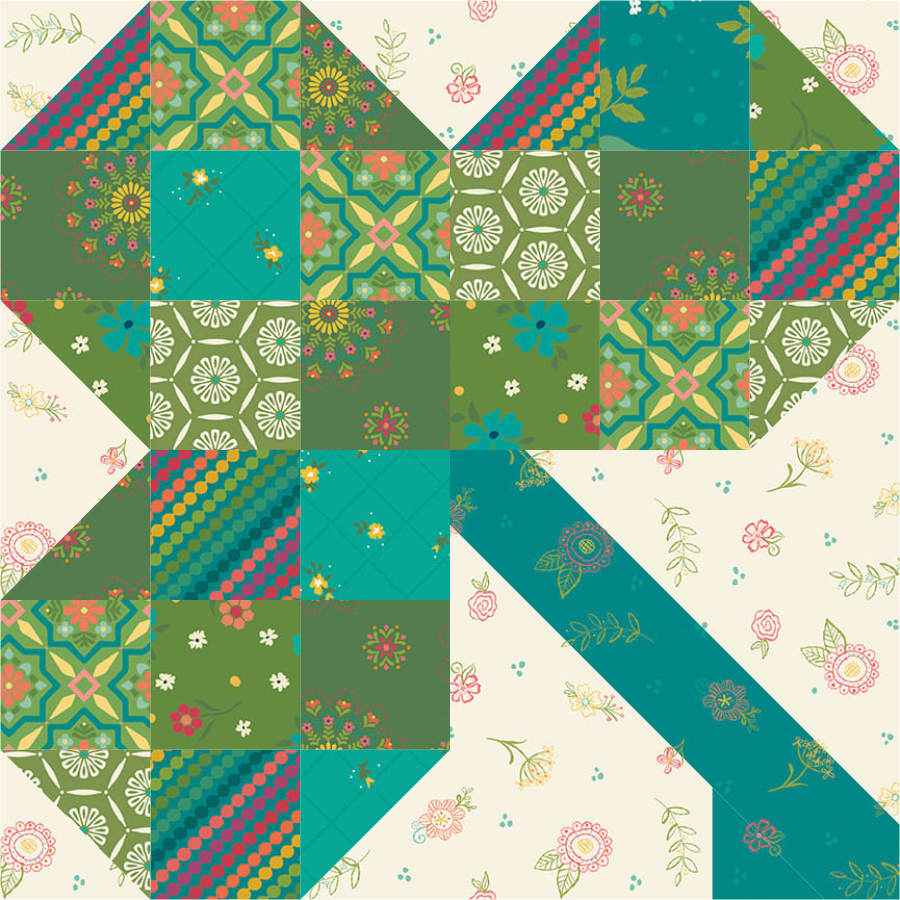
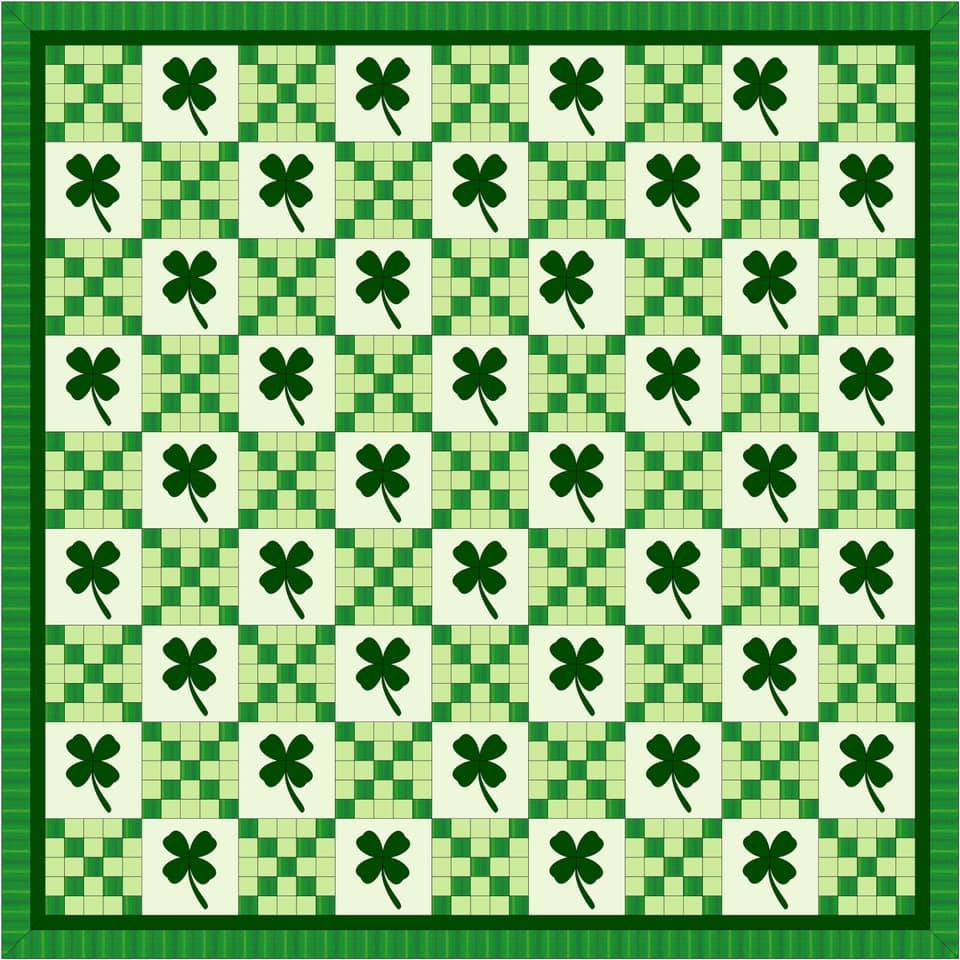
Learn my best tips for merging blocks in Electric Quilt as you learn how to create a Shamrock block and merge it into a frame and then merge both the original shamrock and the framed shamrock into a new block. 

​Use the blocks in a simple layout for your next St. Patrick's Day celebration.​

Lucky Shamrocks Quilt EQ8 Tutorial

I reworked the Shamrock block from one of my patterns and will be sharing not only the drafting of the block, but a number of variations.
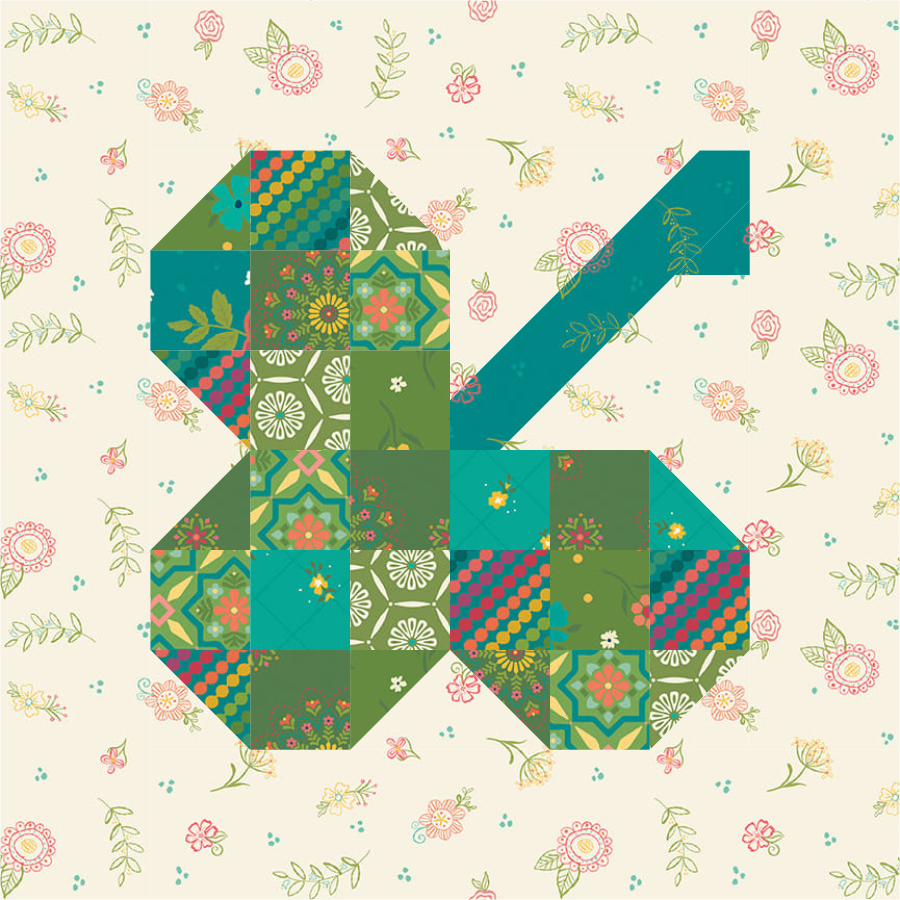
Shamrock Block 1

The three leaves are very conducive to rotary cutting instructions (all squares and half square triangle units).

The stem has a couple of piecing options.  
  1. Foundation piece the unit.
  2. Add the background pieces along with the little notch as cheater corners (sometimes referred to as folded corners) to the stem unit. 

Option 2 will take a little bit of simple math since EQ does not consider these pieces rotary cutting friendly.

Draft the block using EasyDraw.  Set the block width and height at 6 inches and the snaps at 24 x 24.

​Draw the upper left corner.  Copy, paste and rotate for the upper right and lower left corners.
Picture
Shamrock Block Created by Kari Schell using EQ8
Shamrock Block 2

Using EasyDraw, create a simple frame.  Start with a six inch block and add horizontal and vertical lines one inch from the edges.  The square in the center will be 4" finished.  

​Then merge the frame block with the shamrock block. 

Tip:  Consider making the frame 3/4" on all four sides.   Then the shamrock will be 9" x 9" in the 12" version of the block.  Since the block is based on a 6 x 6 grid, the 9" size will be much more conducive to rotary cutting.
Picture
Lucky Shamrock Frame
Picture
Lucky Shamrock Framed Block 12 inch
Shamrock Block 3

Then create a nine patch block with 9 half square triangle units in the four corners.  This will be the master block that will be used for merging.  

In my video, I share my ninja trick for using a 9-patch block for merging. 

​(EQ considers the space too small for merging.  So it involves just a bit more work on our part to trick EQ into getting the blocks merged.)
Picture
Lucky Shamrock Setting Block for Merging
Check out the full video.
Picture
Lucky Shamrock Single Merged Block (with binding). Block measures 36" x 36".
If you are more ambitious, consider combining four of the blocks in a two by two layout for a bed sized quilt.
Picture
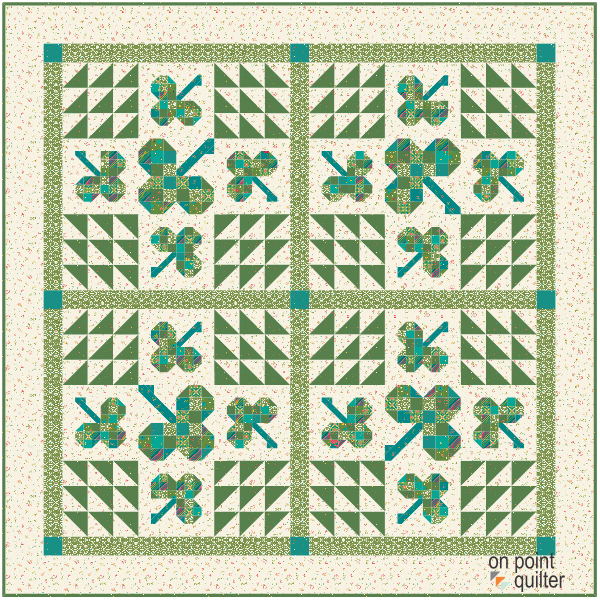
Lucky Shamrock Quilt in 2 x 2 Layout. Ending size of 94" x 94".
How will you celebrate St. Patrick's Day this year?

​Share your Lucky Shamrock quilt -- or another favorite St. Patrick's Day quilt on the Learning EQ Facebook group.
Learning EQ Facebook Group Lucky Shamrock Post
Picture
Happy quilting.

​Kari

Join the On Point Quilter weekly newsletter and receive regular tips and inspiration on using Electric Quilt 8 along with the  Free 12 Top
Tips for EQ8 video guide.
Picture

Not Your Traditional Irish Chain Quilt

3/2/2024

 
Do you have a quilt that got you interested in quilt making?

Here is mine. My grandmother made an Irish Chain quilt for me (probably in the late 60s or early 70s). I loved the quilt and when it began to wear out I wanted another one for my bed.

This was a very traditional Irish chain -- which I now think is a bit boring. 

​Our tastes change over the years -- and that can definitely be a good thing.
Picture
Traditional Irish Chain Quilt Made by Martha Keller (circa 1960s)
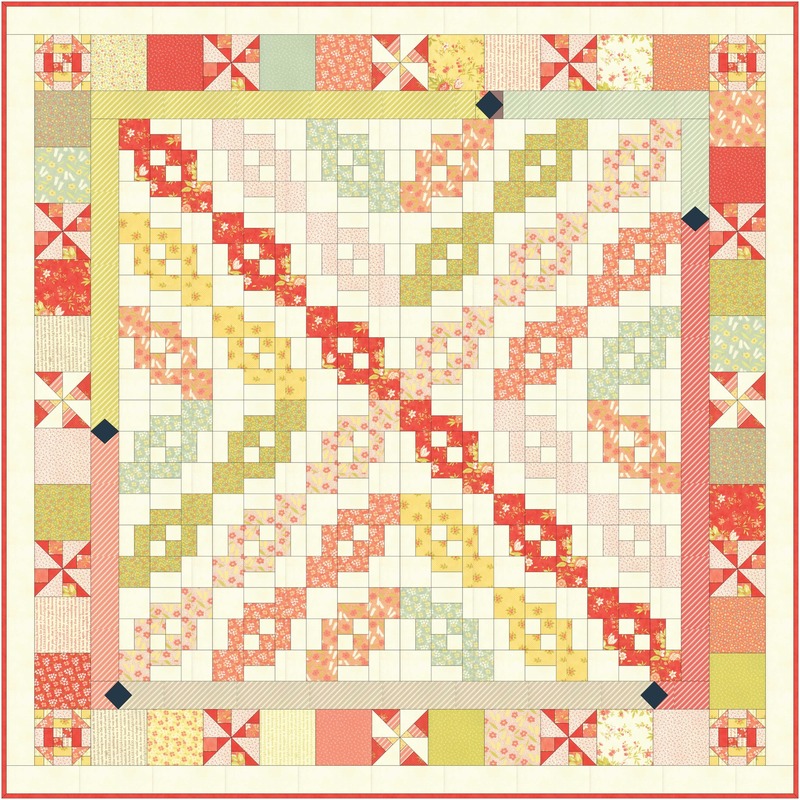
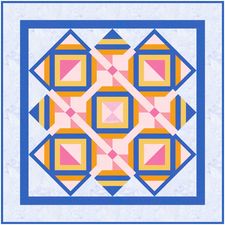
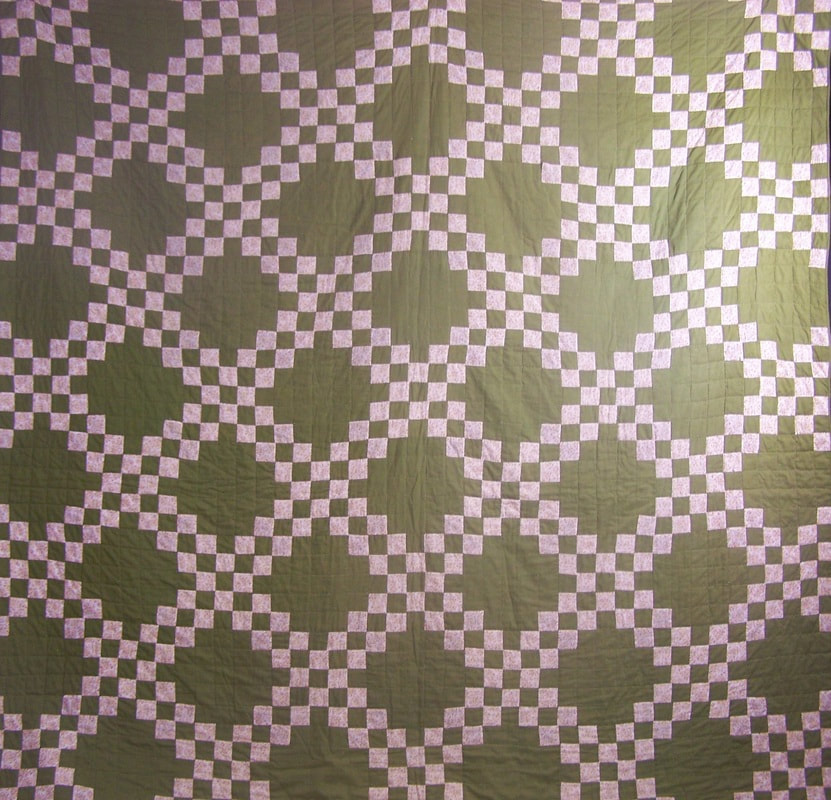
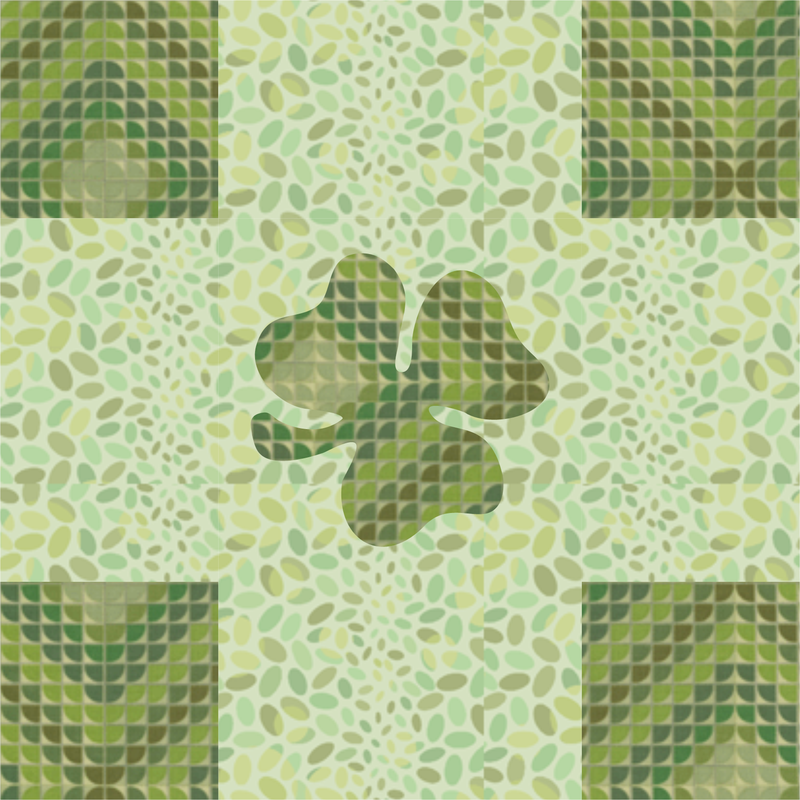
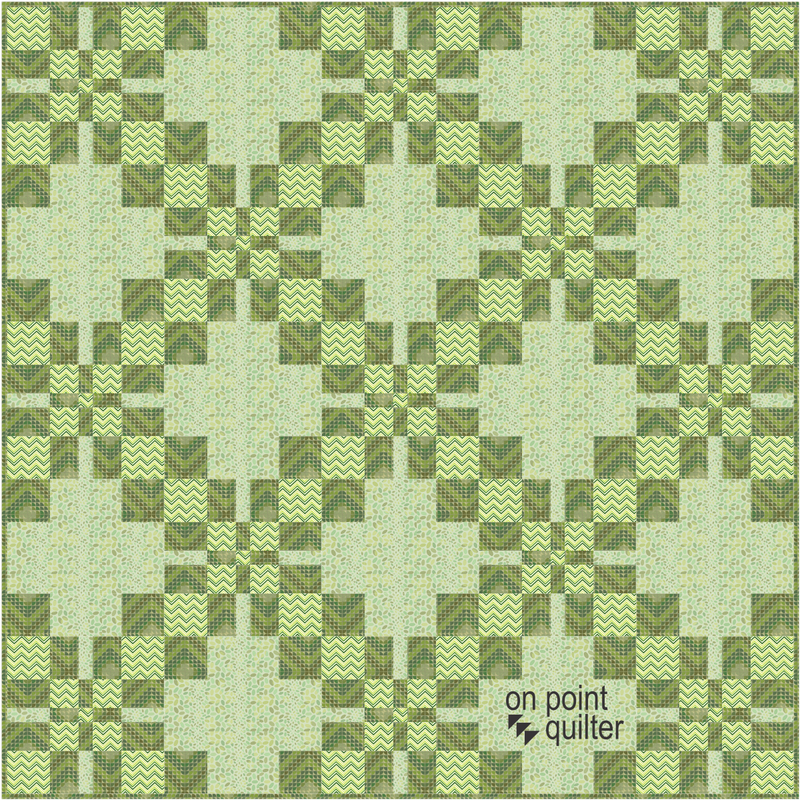
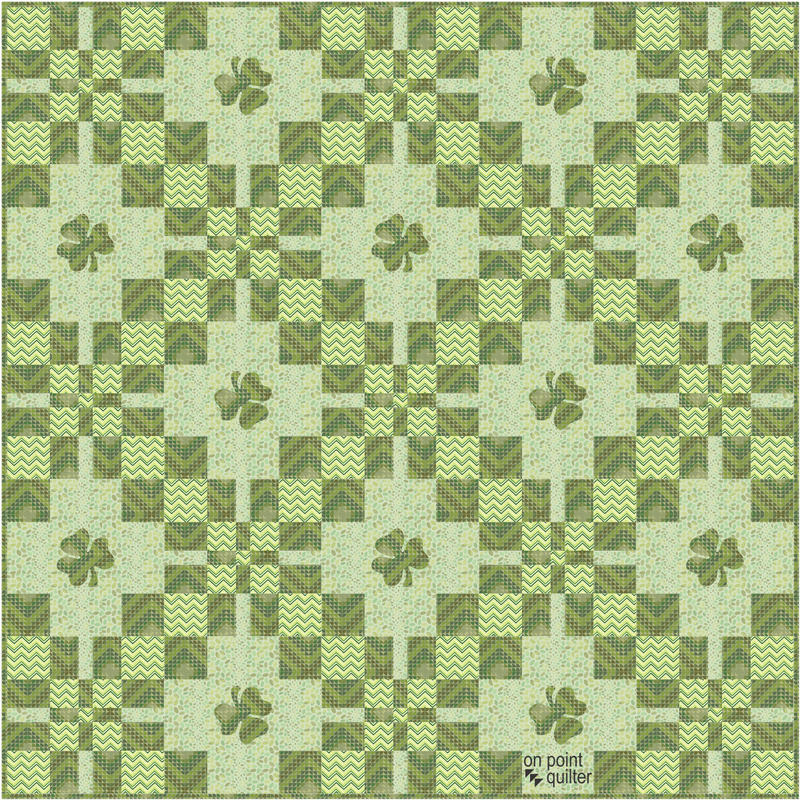
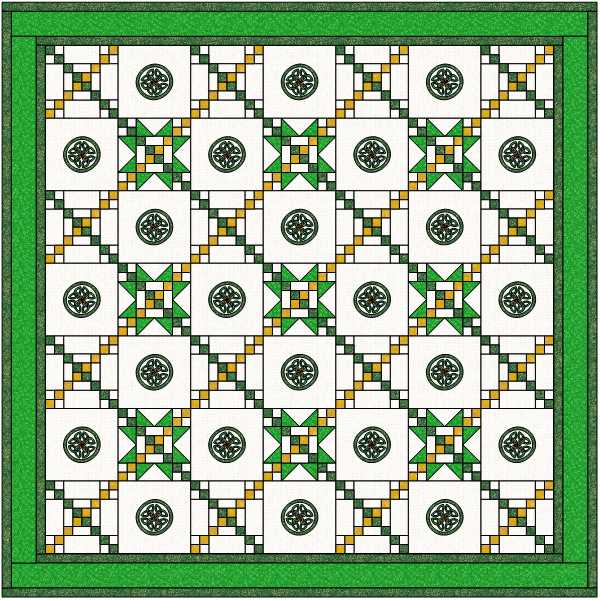
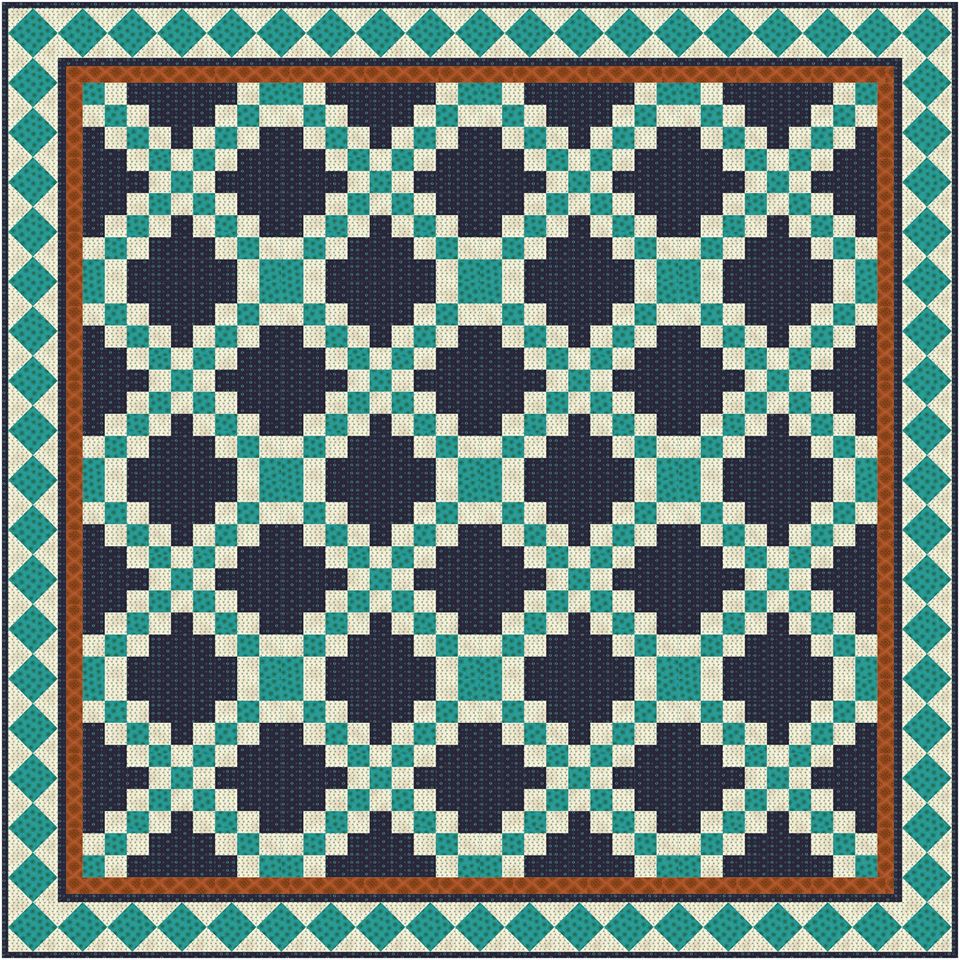
This traditional Irish Chain consisted of two blocks that would be super easy to draft in EasyDraw.
Picture
Irish Chain Block 1 - Five by Five Grid
Picture
Irish Chain Block 2 - Also drafted with 5 x 5 Snap Points. If you are replicating Martha's quilt, put applique squares in the corners.
But I wanted to explore something more.  What if we drafted a similar type of design but varied the distance between the lines?

In the video I explore what that would look like with columns and rows that are different sizes. 

And then add a touch of applique (from the EQ library) for the center.  

Picture
Irish Chain Block 1 Variation
Picture
Irish Chain Block 2 Variation 1
Picture
Irish Chain Block 2 Variation 2

If you use Symmetry you can also quickly rotate the blocks for a more random placement of those applique motifs.
Picture
Irish Chain Variation Option 1
Picture
Irish Chain Variation Option 2
Check out the video for more details on drafting these blocks and quilts.
As you work through the video, think through how you would modify the design.  I would love to see what you do to my Grandmother's Irish Chain quilt. 

​I've set up a post in the Learning EQ Facebook group where you can share your ideas.
Learning EQ Facebook Group Irish Chain Variation Post
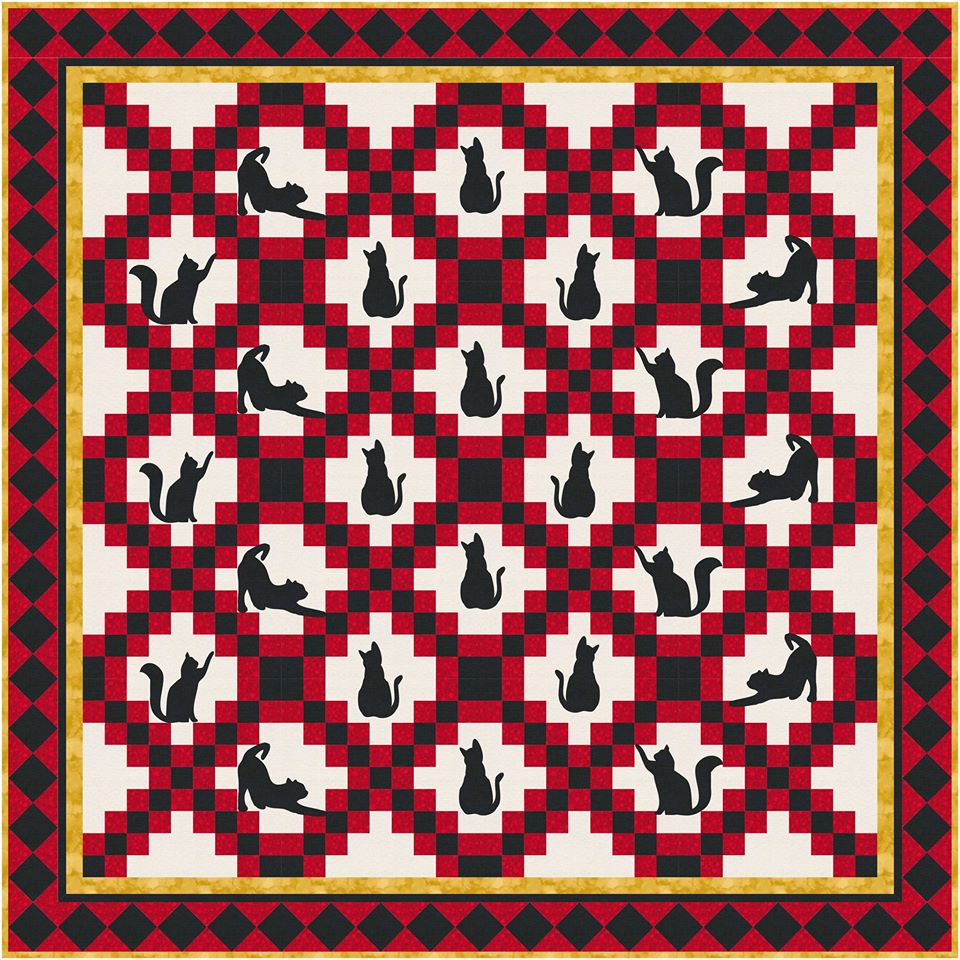
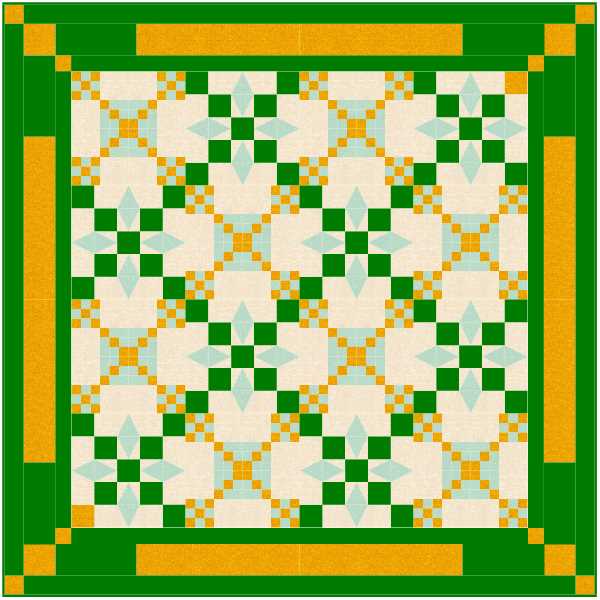
To inspire you, I though I would share a few chain designs by some Tech Know Quilter members.  I loved seeing how they thought outside the box.
Picture
Pat Harkin
Picture
Rick Danner I immediately think of Beleek China. Clean minimalist design. For me, these quilts would get amped up with the quilting. I just got a huge set of asymmetrical curve long arm rulers that can create some delicious interlocking designs that would really set these quilts on fire.
Picture
Kristy Goodin Soard when I read the words crossing blocks, my thoughts immediately went to a darling rosebud block I had seen on Pinterest.
Picture
Kristy Goodin Soard
Picture
Joyce Drenth In browsing Pinterest, I happened upon an interesting crossover Irish Chain design and decided that I wanted to attempt to figure out its layout.
Picture
Suzanne Golden
Picture
Suzanne Golden
Picture
Barbara Bobbitt
Tech Know Quilter's only opens enrollment to new members a few times a year.  Send me a note if you would like more information on joining.

Note that Tech Know Quilter's classes are all virtual and can be completed at your convenience from the comfort of your own home.
Picture
Happy quilting.

​Kari

Join the On Point Quilter weekly newsletter and receive regular tips and inspiration on using Electric Quilt 8 along with the  Free 12 Top
Tips for EQ8 video guide.
Picture
    Picture
    Picture
    Picture
    Free guide available for newsletter subscribers
    Picture
    Picture
    Picture

    Kari Schell

    Electric Quilt Expert and Educator and Pattern Designer.

    Categories

    All
    Art And Stitch
    Cricut Maker
    Dear Jane
    Electric Quilt 7
    Electric Quilt 8
    Goose Goose Duck Challenge
    Inkscape
    Patterns
    Silhouette Cameo
    Stampin Up
    Tips And Techniques
    Tools And Rulers

    Archives

    June 2025
    May 2025
    April 2025
    March 2025
    February 2025
    January 2025
    December 2024
    November 2024
    October 2024
    September 2024
    August 2024
    July 2024
    June 2024
    May 2024
    April 2024
    March 2024
    February 2024
    January 2024
    December 2023
    November 2023
    October 2023
    September 2023
    August 2023
    July 2023
    June 2023
    May 2023
    April 2023
    March 2023
    February 2023
    January 2023
    December 2022
    November 2022
    October 2022
    September 2022
    August 2022
    July 2022
    June 2022
    May 2022
    April 2022
    March 2022
    February 2022
    January 2022
    December 2021
    November 2021
    October 2021
    September 2021
    August 2021
    July 2021
    June 2021
    May 2021
    April 2021
    March 2021
    February 2021
    January 2021
    December 2020
    November 2020
    October 2020
    September 2020
    August 2020
    July 2020
    June 2020
    May 2020
    April 2020
    March 2020
    February 2020
    January 2020
    December 2019
    November 2019
    October 2019
    September 2019
    August 2019
    July 2019
    June 2019
    May 2019
    April 2019
    March 2019
    February 2019
    January 2019
    December 2018
    November 2018
    October 2018
    September 2018
    August 2018
    July 2018
    June 2018
    May 2018
    April 2018
    March 2018
    February 2018
    January 2018
    December 2017
    November 2017
    October 2017
    September 2017
    August 2017
    July 2017
    June 2017
    May 2017
    April 2017
    March 2017
    February 2017
    January 2017
    December 2016
    November 2016
    October 2016
    September 2016
    July 2016
    June 2016
    May 2016
    April 2016
    March 2016
    February 2016
    January 2016
    December 2015
    November 2015
    October 2015
    September 2015
    August 2015
    July 2015
    June 2015
    May 2015
    April 2015
    March 2015
    February 2015
    January 2015
    December 2014
    November 2014
    October 2014
    September 2014
    July 2014
    June 2014
    May 2014
    April 2014
    March 2014
    February 2014
    January 2014
    December 2013
    November 2013
    October 2013
    September 2013
    August 2013

    RSS Feed

Contact:
On Point Quilter
e-mail:  [email protected]
phone:  763-566-6536

GET MY NEWSLETTER FOR REGULAR EQ AWESOMENESS!

* indicates required
  • Blog
  • About
  • EQ8 Training
    • Tech Know Quilters Electric Quilt 8 Membership Training
    • EQ8 Made Easy
    • Electric Quilt 8 Sneak Peek
  • Store
  • Contact