
|
It has been a busy week between the Panel Quilt webinars and open enrollment for Tech Know Quilters. Now my time moves to primarily serving those in the Tech Know Quilter group.
I received a couple of notes from people who missed my e-mails regarding the Tech Know Quilter open enrollment during the last four days -- not exactly sure how that is possible but email providers seem to love putting my emails in spam and promotions folders. And I heard that a few of you were traveling and not able to get to your emails. If that is you, send me a note and I will send you a link to sign up. We can still squeeze in a few new members before we start delivery of classes on Monday. This will be the last time to lock in to 2022 pricing. You can read more about the program here -- but the sign-up links have been taken down. Two Block Quilts
Two times a month I do live help sessions with Tech Know Quilter members. During the session on Thursday, one member was asking about working with blocks that don't quite work well together. Maybe one uses a 7 x 7 grid and the other an 8 x 8. While Electric Quilt can turn these all into a standard block size, the numbers on the rotary cutting chart start looking a bit scary.
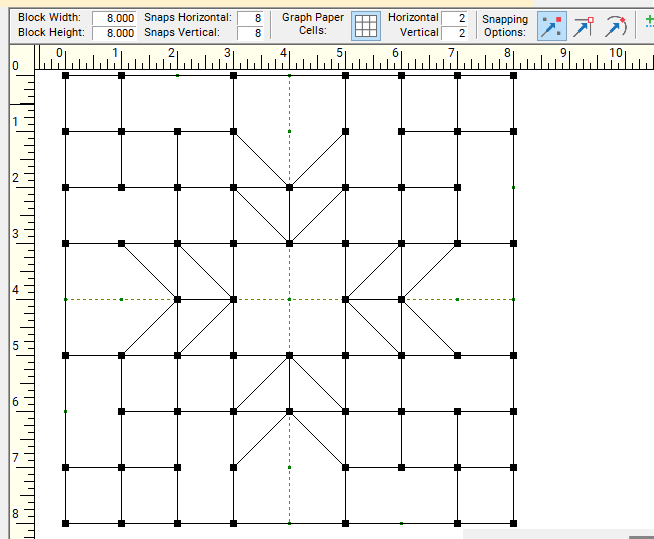
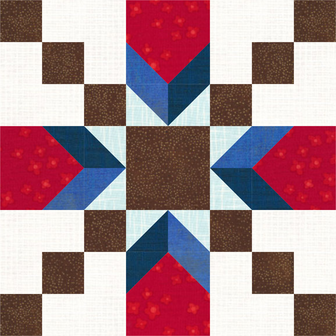
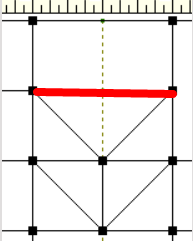
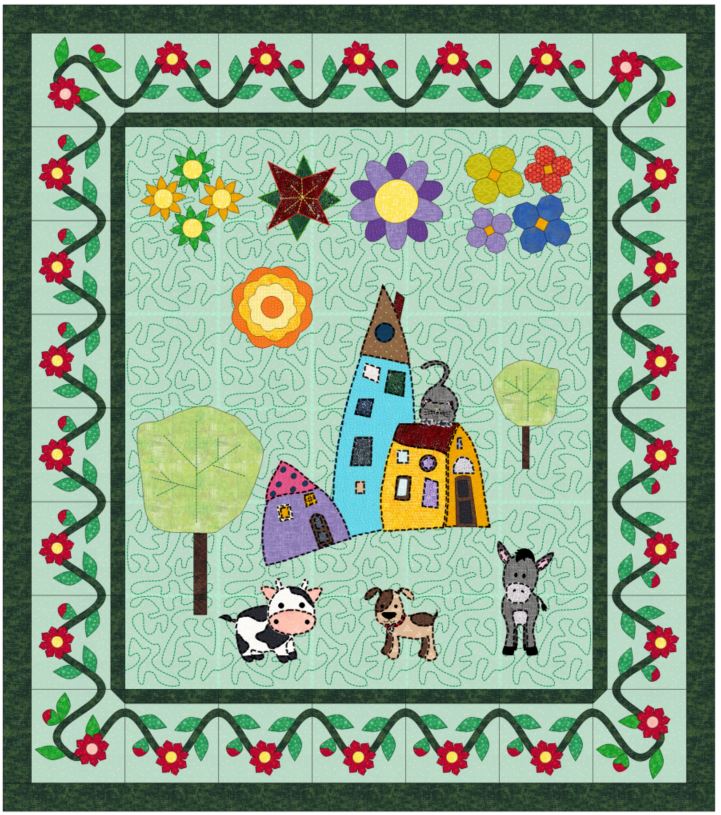
We talked through how to resolve that issue. Since I still had my panel quilt Electric Quilt 8 project open I demonstrated a process on how to design blocks that work well together. I started with one of the pieced border blocks from the Panel Quilt webinar. Here is some background on drafting the block. Just in case you missed the webinar.
Here was how I chose to draft the block. I was thinking I would do 1-1/2" folded corners on 2-1/2" squares for the the "house" units.
Watch the video to see the process to draft the remaining blocks as quilt.
Add a binding to finish off a quilt that would be easy to piece. This would make a great project Linus quilt -- or with some resizing (adjust the number of blocks horizontal and vertical), a quilt of valor.
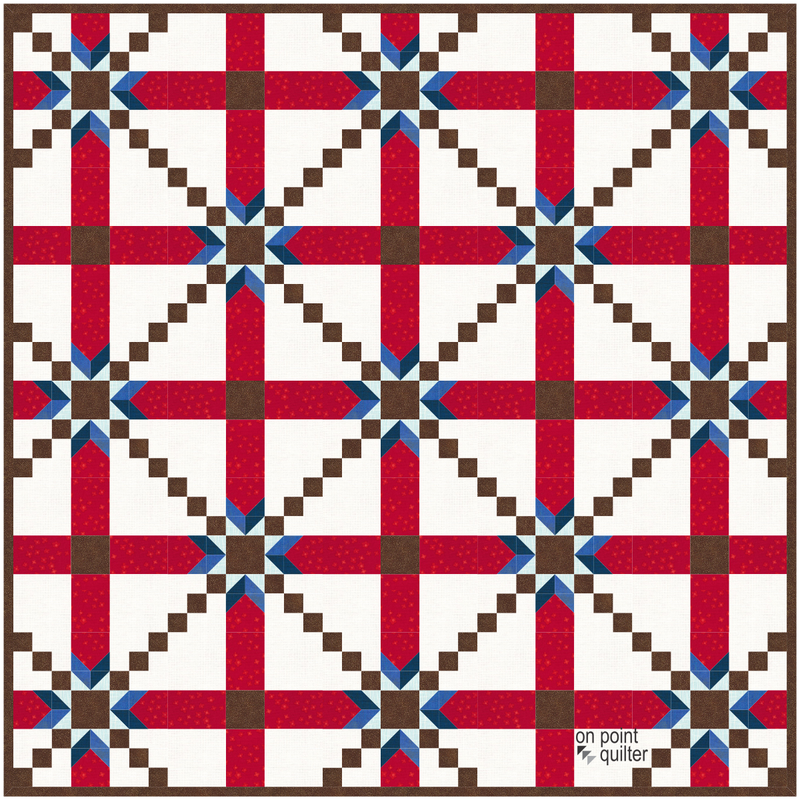
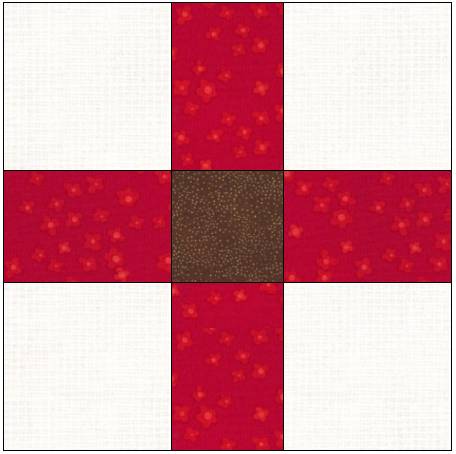
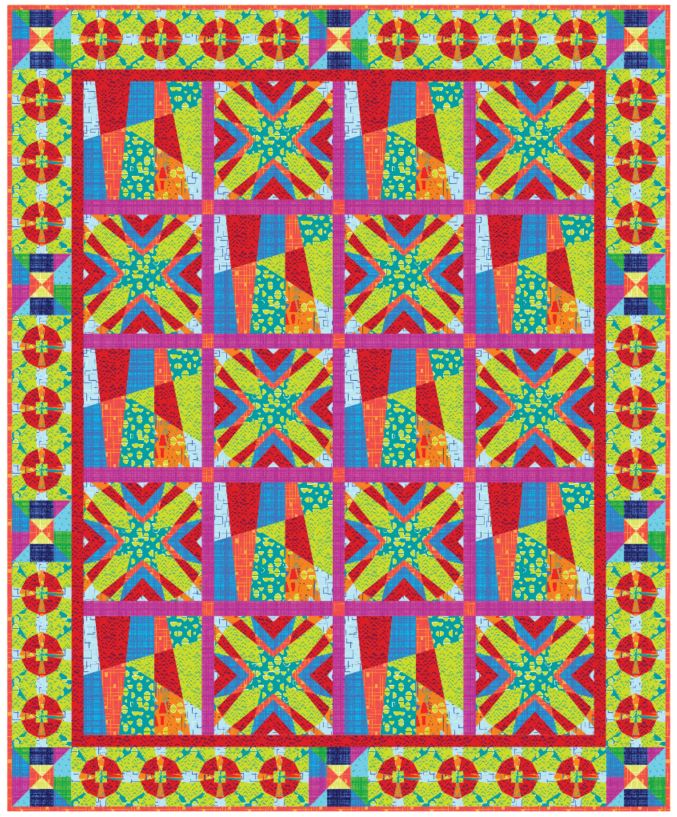
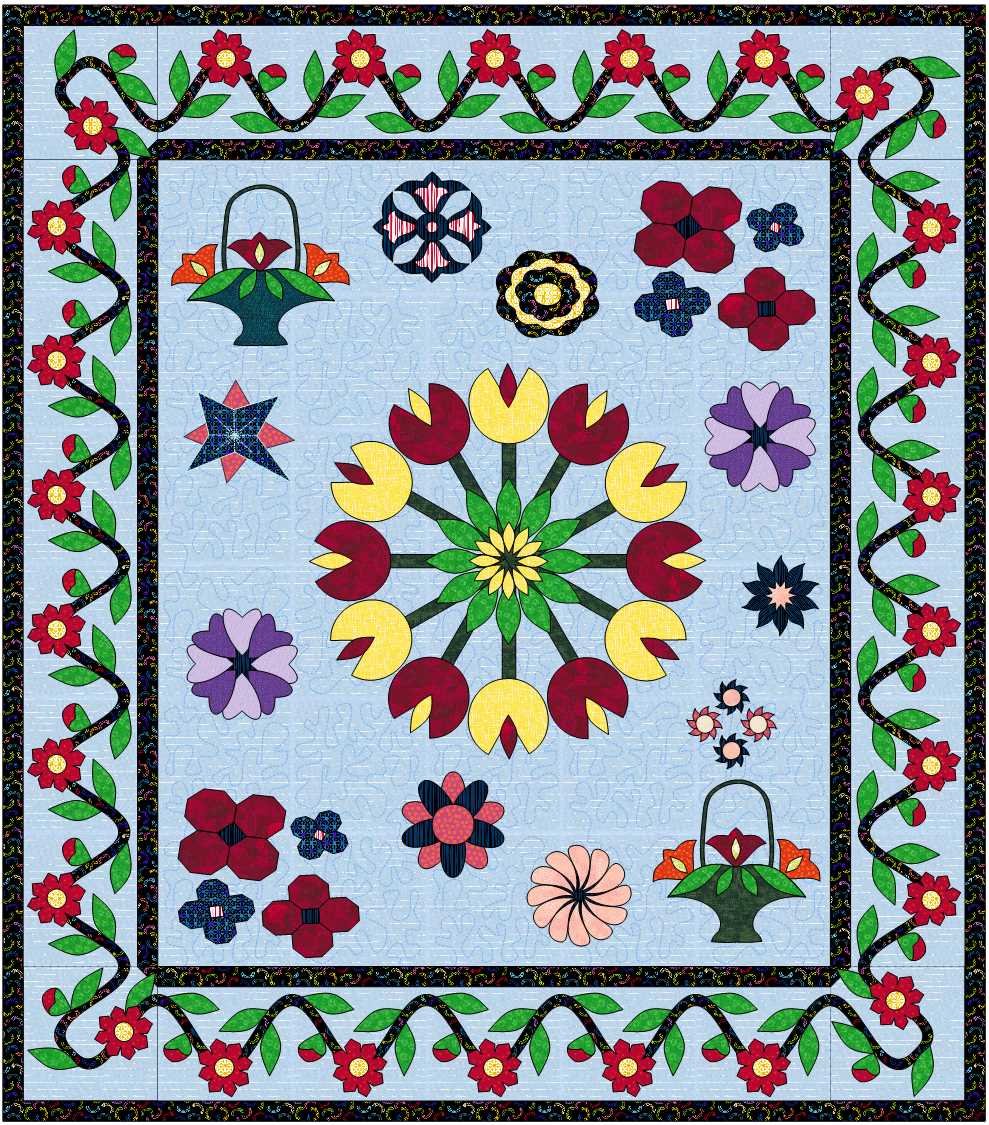
But I couldn't stop. I began thinking about taking the modified 9-patch corner segments and create a pieced border that also works well with the pieced blocks in the center.
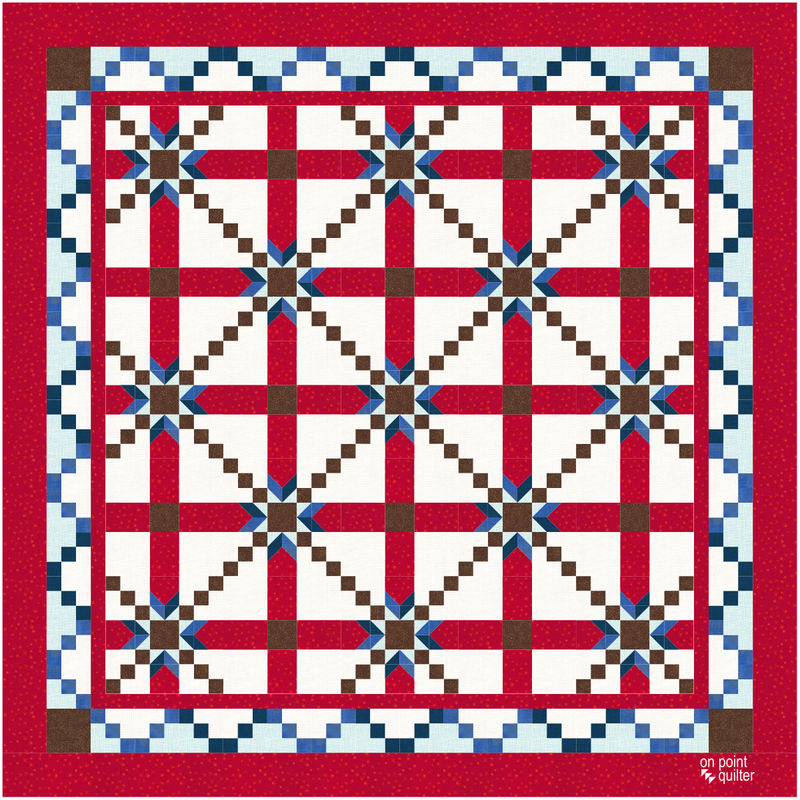
Do you prefer the quilt with or without the pieced border? Or maybe you have a different idea for a two block quilt. Share your ideas in the Facebook group.
One week to Christmas. The to do list is growing with everything I want completed "before" Christmas. The project in this post is a fun one -- use it as a break when you need a little time to decompress from all of the holiday bustle.
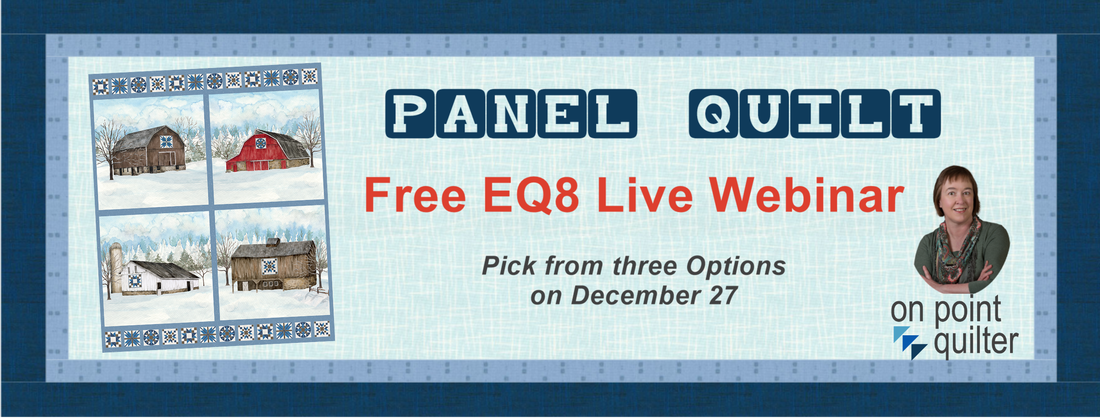
Scroll down to see the free EQ8 tutorial. I also want to check and make sure you have signed up for the free webinar -- right after Christmas. Make sure to reserve your spot for this live webinar. Turn Your Next Panel into a One of a Kind Quilt
|


|
Bonus for Attending Live
Each of the live webinars will have a drawing for one of the fabric panels used during the webinar. You must be present during the drawing to win. |
|
What are you waiting for? Join us today.
Plus all participants will also receive a guidebook that you will be able to use as a reference both during and after the video. This will assist you when you're working on your project.
I can't wait to see your panel quilt design.
Join us now.
Plus all participants will also receive a guidebook that you will be able to use as a reference both during and after the video. This will assist you when you're working on your project.
I can't wait to see your panel quilt design.
Join us now.
Free Webinar Registration Information
Choose the time that works the best below and register for this amazing fun webinar. You won't be disappointed.
For all those that attend live, I will be offering a special bonus offer as well. Make sure to join me. I can't wait to see you there.
A replay will be available for 24 hours if you cannot attend live. But you must register in advance to access the replay.
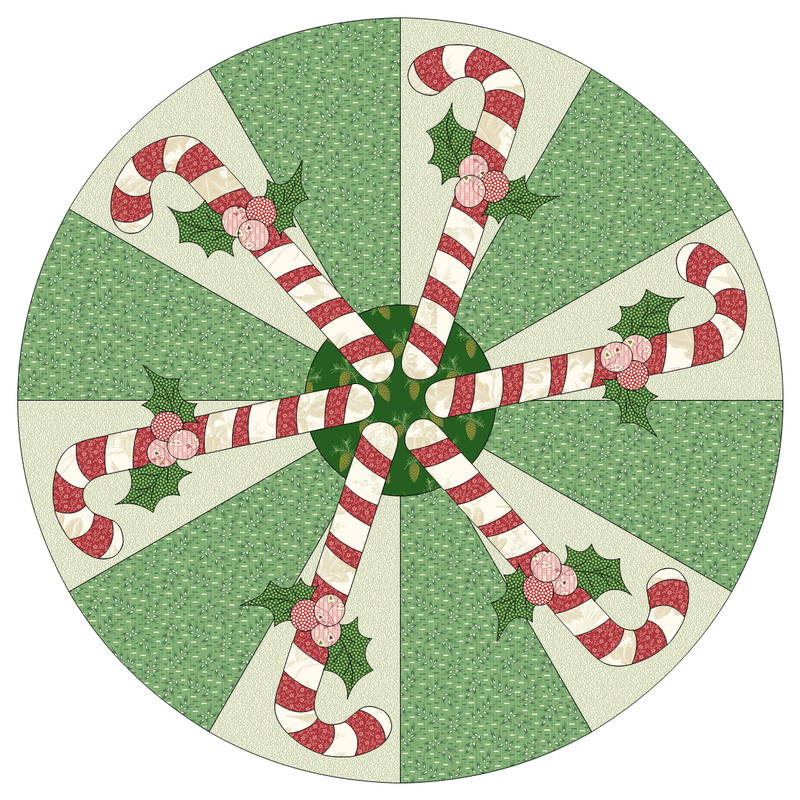
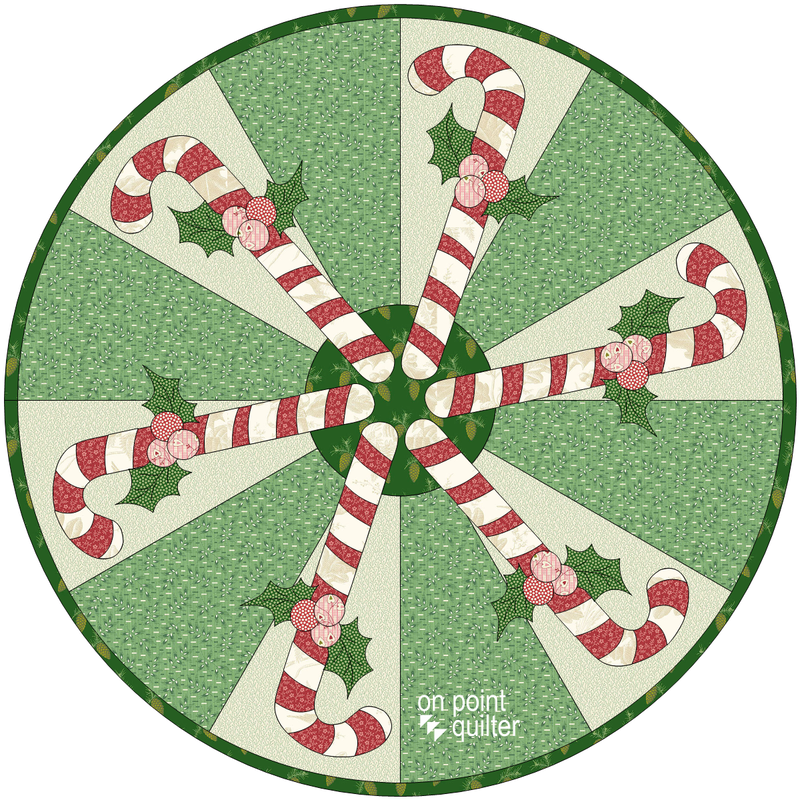
Candy Cane Circular Quilt
A super fun quilt for Christmas.
The Candy Cane block will be drawn as a combination block -- which combines both PolyDraw and Applique in the same block.
|
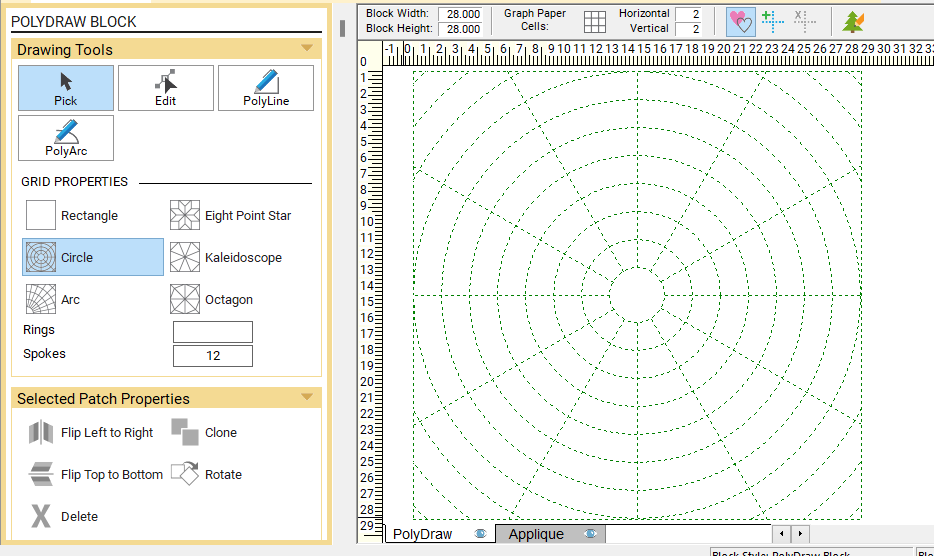
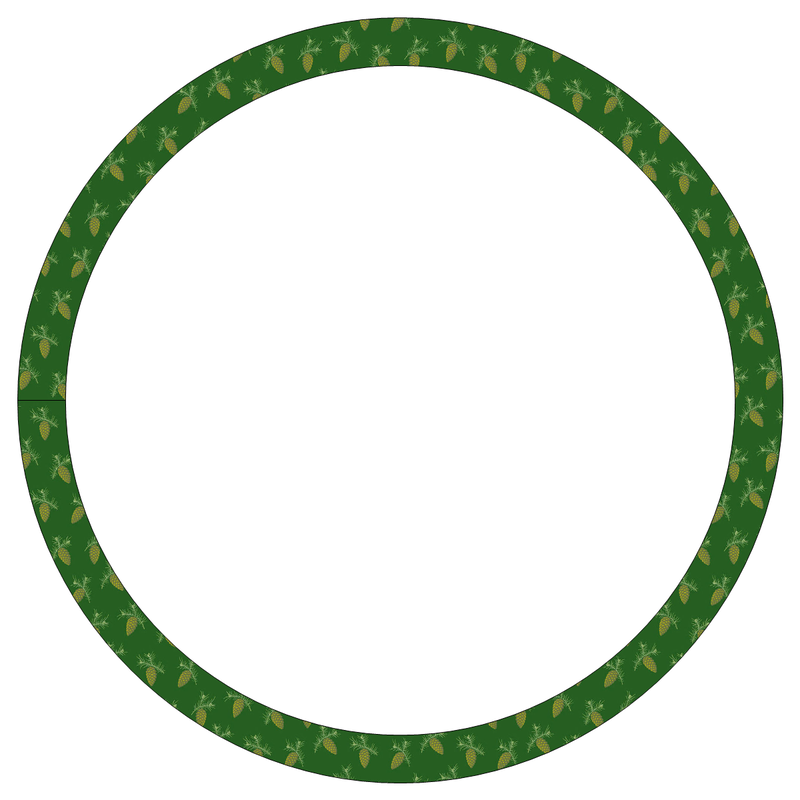
PolyDraw is the ideal tool for the wedges of the block as we can use the Circle Grid. The circle grid allows you to split the circle in an equal number of wedges and an equal number of rings. Patches can be drawn by connecting any of the wedge/ring intersections. The other plus in using PolyDraw is the block does not need to be square or rectangular. So rather than drawing a circle within a Square block -- the circle is the block. |

|
|
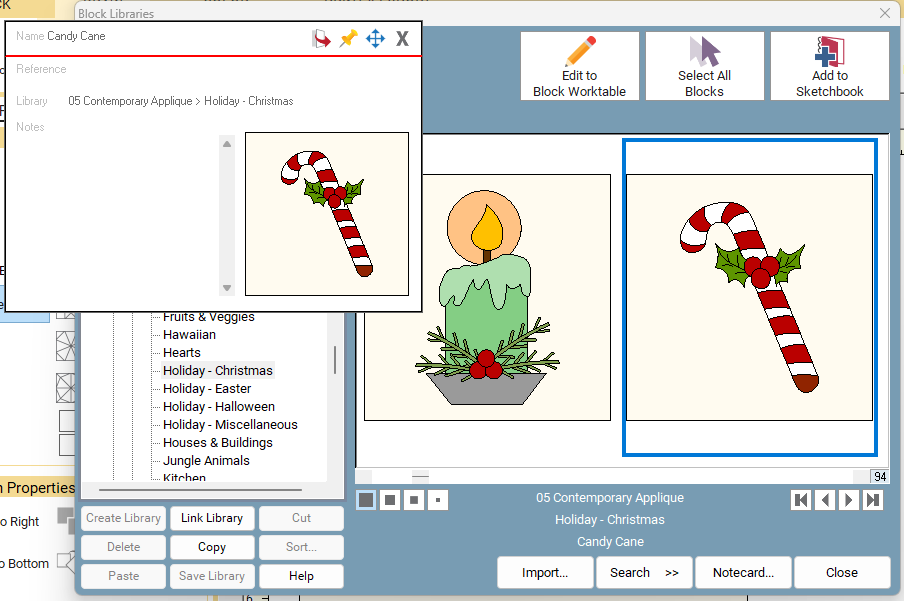
There is no need to learn all the Applique tools for this quilt, as we will use a block from the EQ library.
You will learn how to copy the applique (without the background) from one block to another. |
|
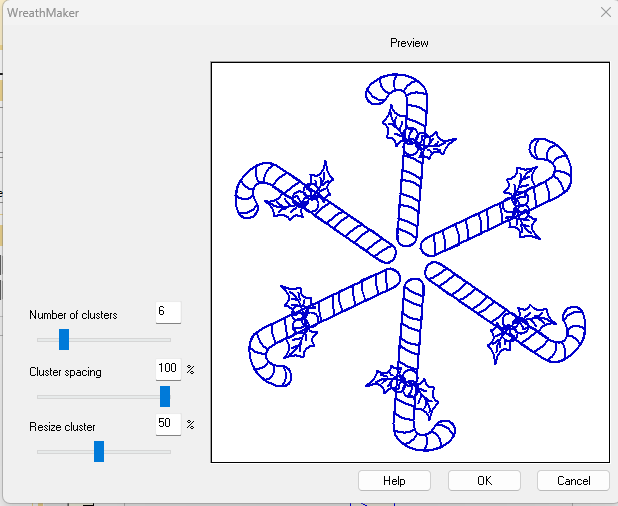
And you will then be introduced to WreathMaker. WreathMaker is super fun as it can turn any applique into a wreath.
|
|
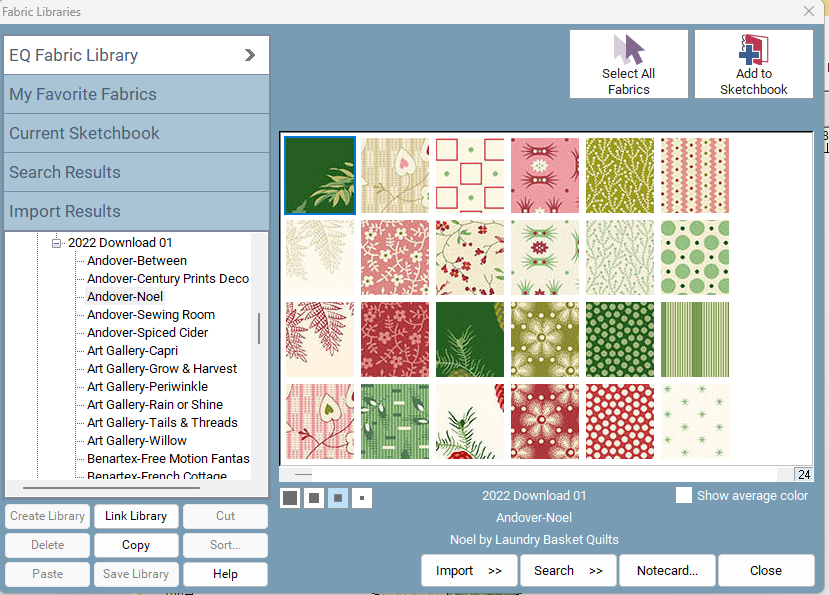
To color the block, I used the Noel fabric collection by Andover. The collection was designed by Laundry Basket Quilts.
This was part of the Electric Quilt Stash collection (Download 01 for 2022). The collections are $9.95 and can save you the work of downloading, cropping and resizing from the manufacturer websites. |
|
|
Here is the candy cane wreath block from the video.
|
|
|
To add a finishing touch, I will also share how to draft a binding block in PolyDraw as well.
|
Finish off the quilt by setting the two blocks in Custom Set. Change the size to accommodate the planned usage of the quilt.
I would love to see pictures of a circular quilt you designed in EQ -- it could be this one or a different project.
No time to make the quilt? Use it as your desktop background. Or post to your Facebook newsfeed. so your friends and family can see your work.
Tech Know Quilters Showcase
|
Tech Know Quilter members shared some of their favorite projects (along with their own designs) from their October class. You can learn more and sign up for the wait list to join this amazing group of designers here.
|

|
Lee Wiencki I used all the lessons in Paper Piecing to make this.
|
Loronda Schuler I used lessons past and mix and match medallion boarders to draw my own corner blocks and play with a different center and colors. Very fun.
|

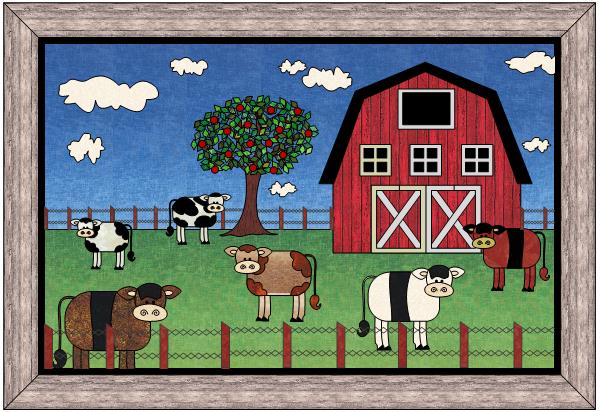
Cindy Meyer I used lessons in Working with Fabric Images to create this Quilt of Valor. I imported photos of fabric on hand and used them to create the quilt.
|
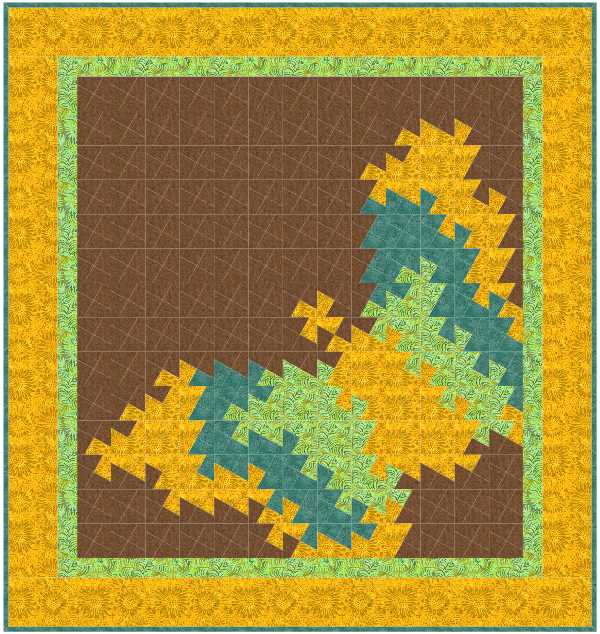
Merle Rawson I played with the Twister Tesselations lessons to come up with my butterfly. After I created the quilt I moved the butterfly down so she was no longer centered. I hope to make this sometime for my bed.
|
Eileen Tuss Specialty Rulers and Dies
|
Julie Pedersen Here is my Tessellation class quilt.
|
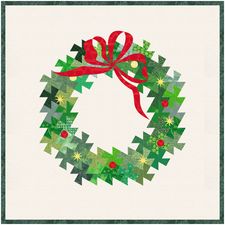
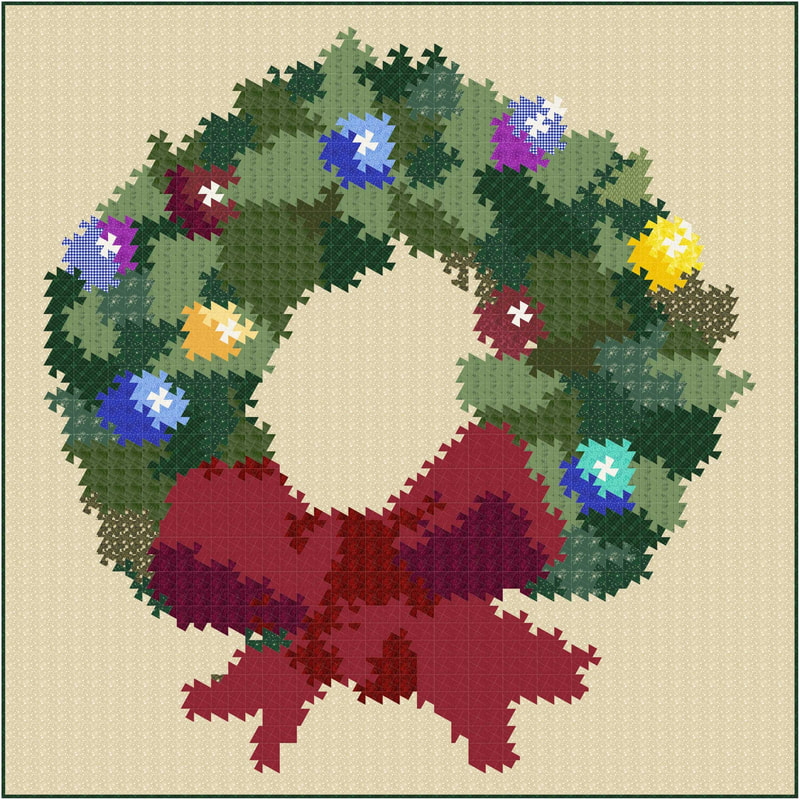
Edith Craig I drafted this quilt as part of the Master's Tesselation class and added some applique balls and a bow. It was fun to take the concepts from this class and draft something of my own.
|
Curryanne Hostetler Here is my challenge.
|
Candy Huddleston Here is one of the quilts I designed during my Landscapes Classes.
|

Candy Huddleston Lovebird and Candy Here is one of the quilts I designed during my Landscapes Classes.
|
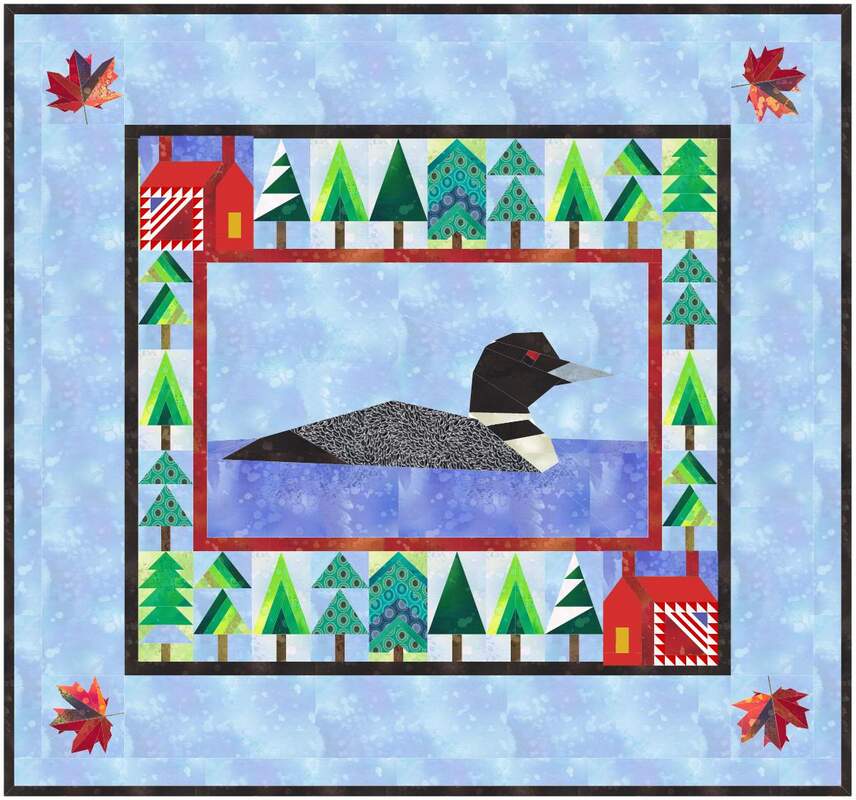
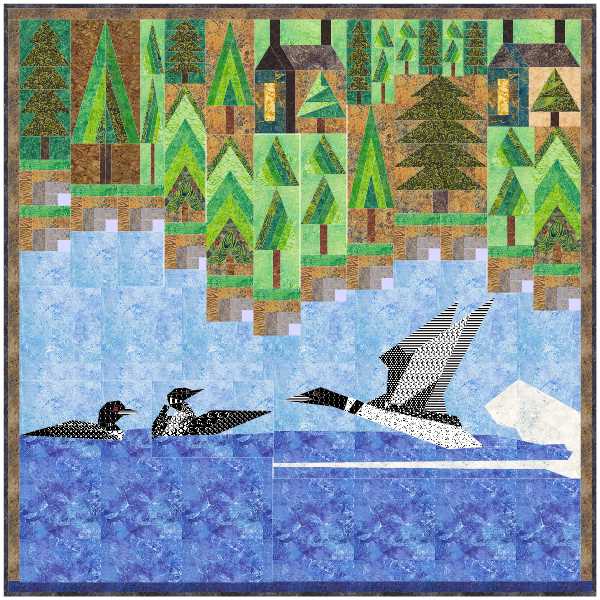
Terry McCaskey I am making progress with foundation paper piecing. This quilt is a compilation of techniques from Kari's lessons this month. I doubt I will ever make a loon quilt but learning the techniques is always helpful.
|
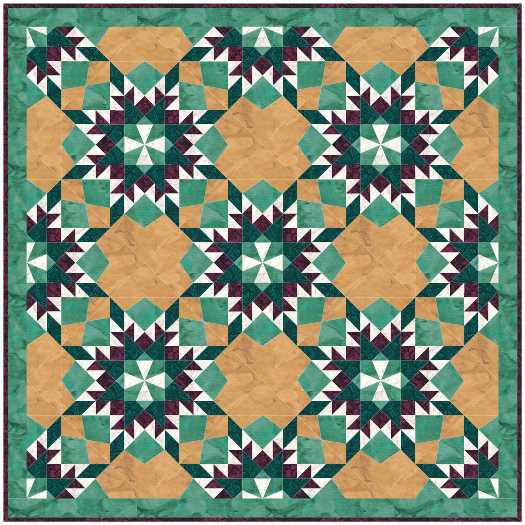
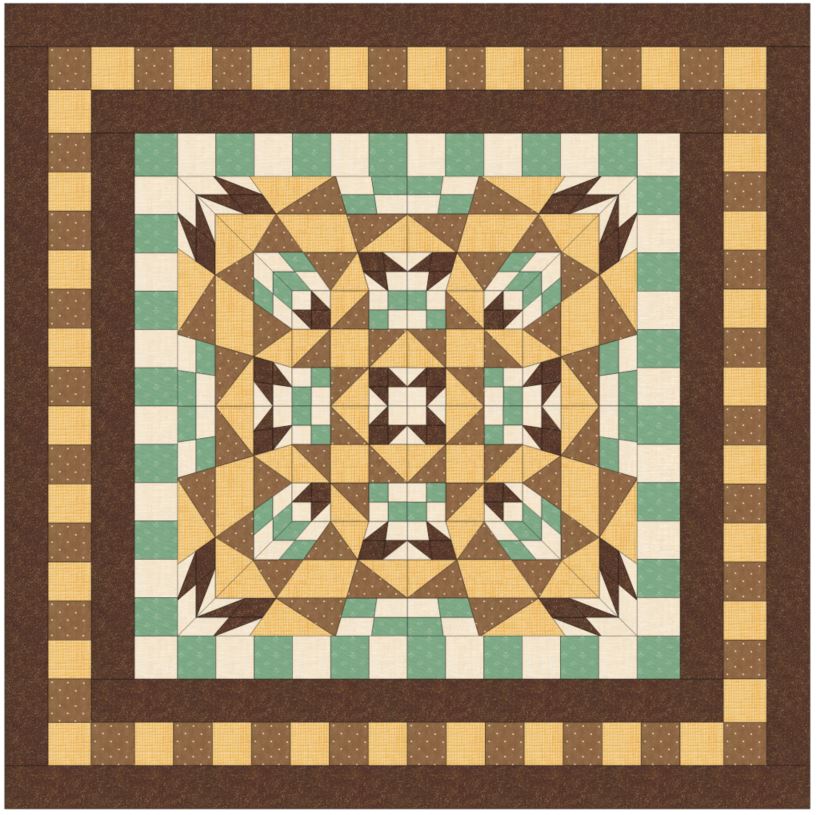
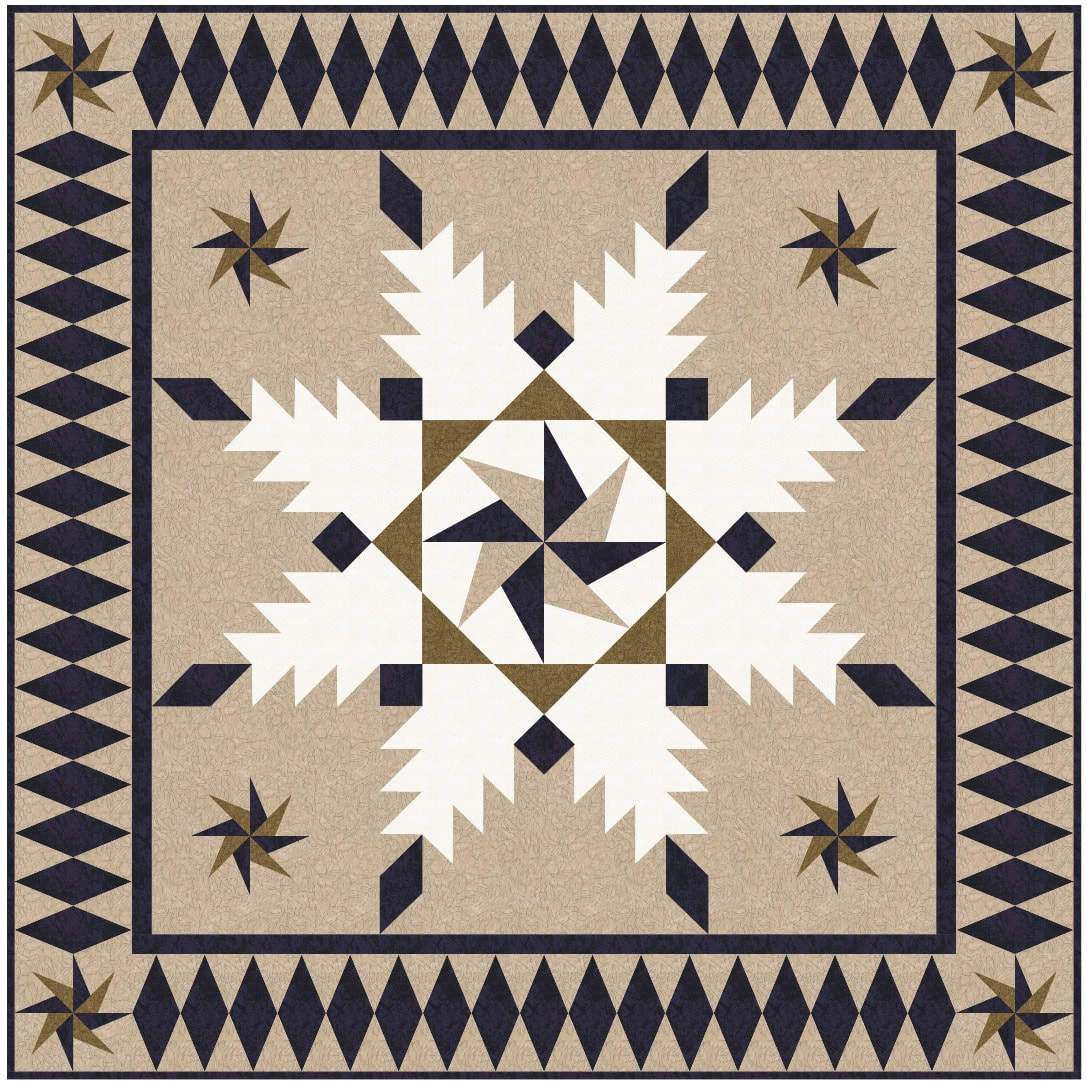
Zdenka Nemethova I enjoyed Advanced Easy Draw Class this month. I used Feathered Star block in this quilt.
|
Nanne Panne I have taken the modern class this month and this is one of my quilts
|
Nanne Panne And this is fun too.
|
|
|
|
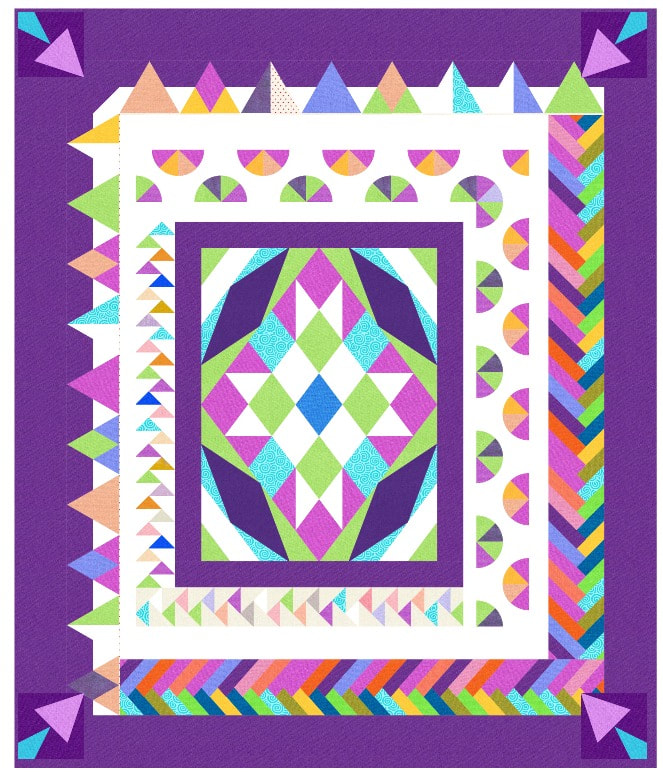
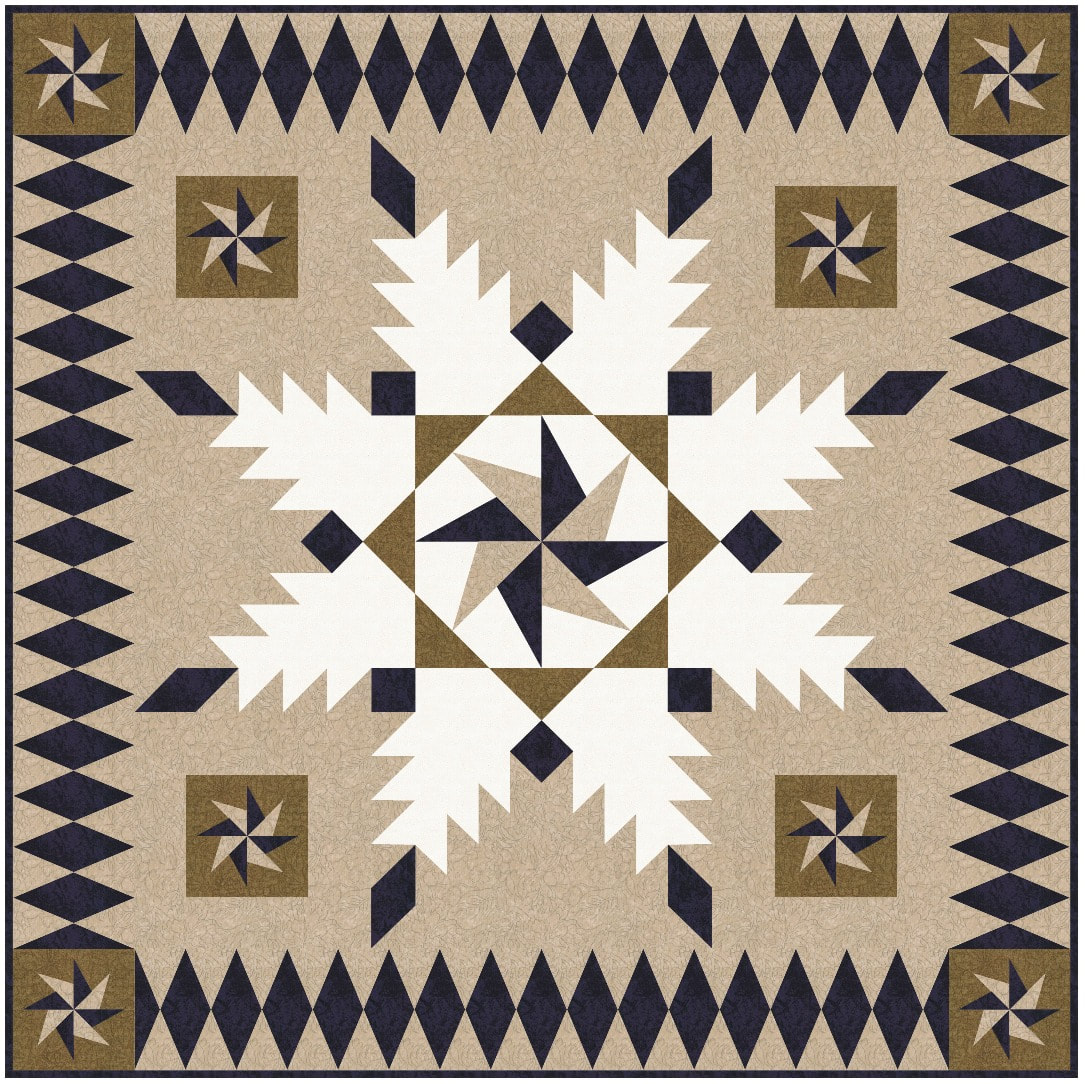
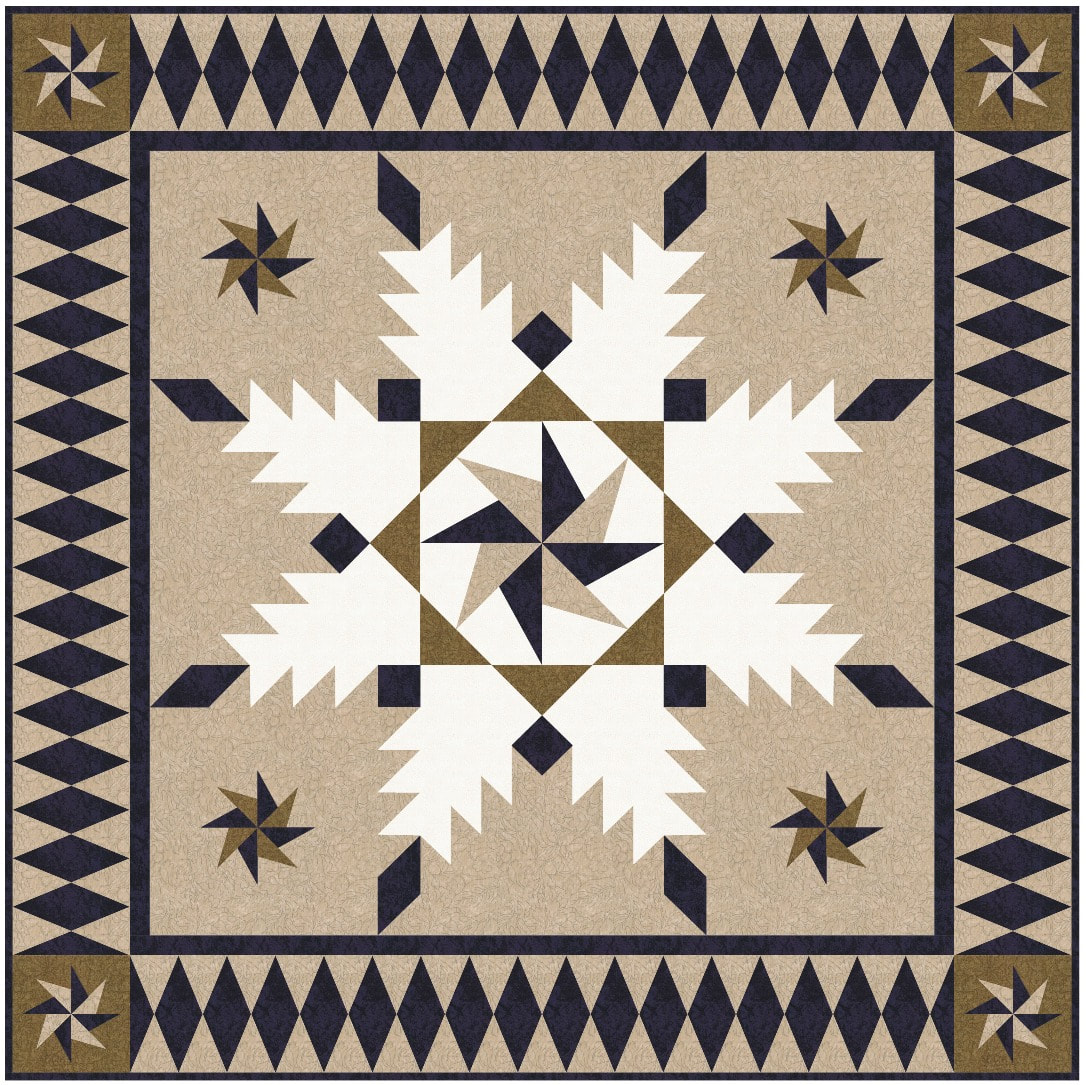
Carol Mayhew Here are three variations of the feathered star quilt from the Advanced Border Design class, The last two I added a 1" inner border and increased the number of diamonds to 17 to maintain the 45 degree angle that you mentioned in your video. The last quilt layout I changed the half dropped diamond border to the diamond border and changed the corner units so the points extend all the way to the meet the point of the diamond in the border. The first quilt I left the dark area around the spinning design (in the quilt body) but changed it to the background color in the others.
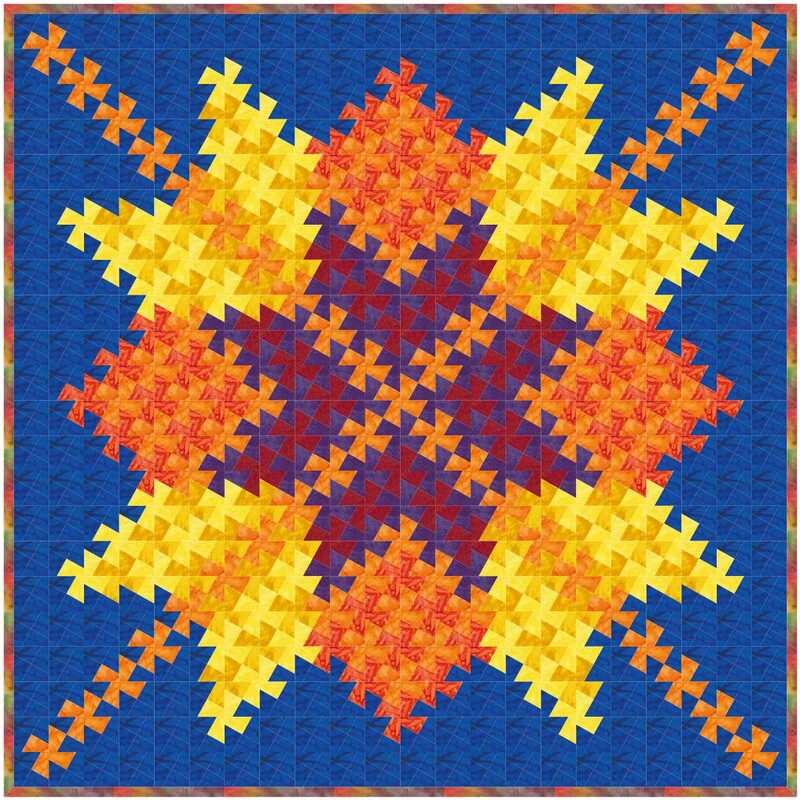
Debbi Treusch Here's my quilt from the Tessellation class where I turned a cross stitch pattern into a twister pattern.
|
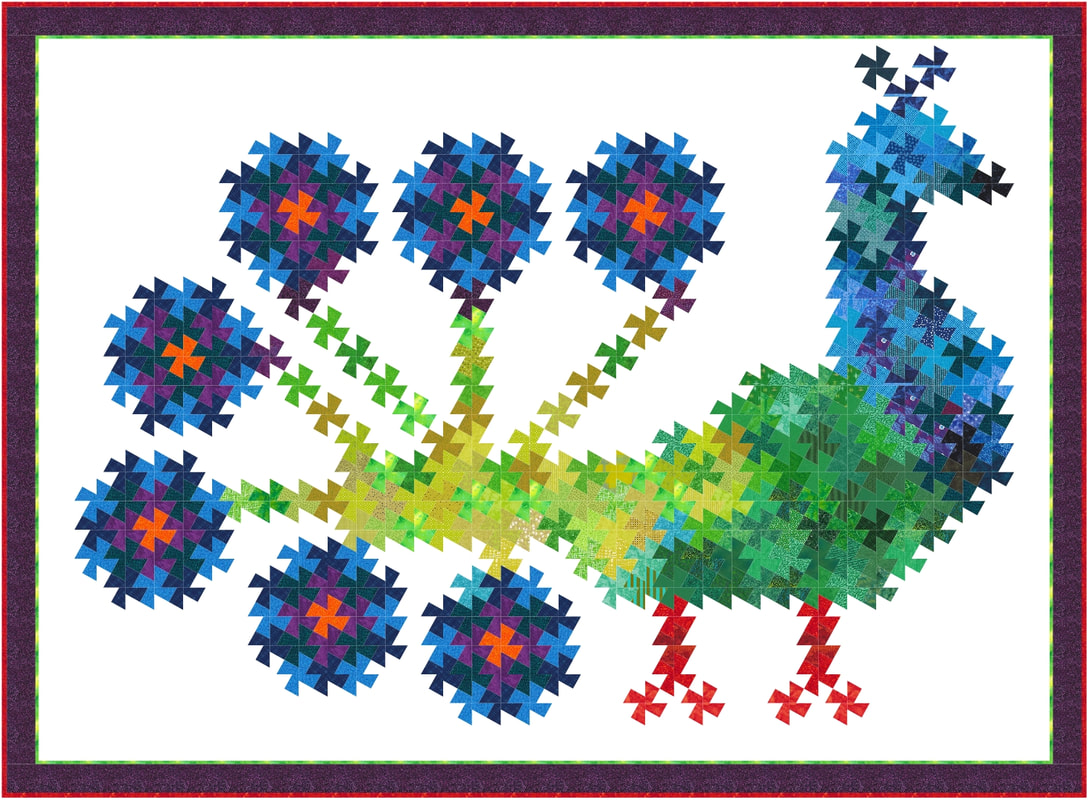
Dorothy Ilgner In October I was in the Tessilation Class. I liked the idea of transforming an embroidery pattern into a twister Tesselation and choose a peacock from one of my embroidery magazines.
|
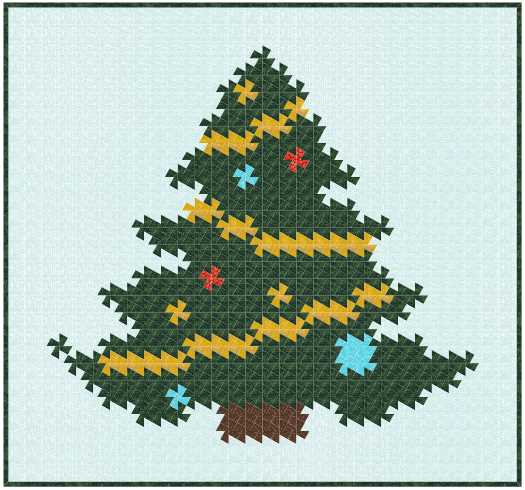
Zdenka Nemethová In Masters Class I applied Tessellation on a X-mas tree
|
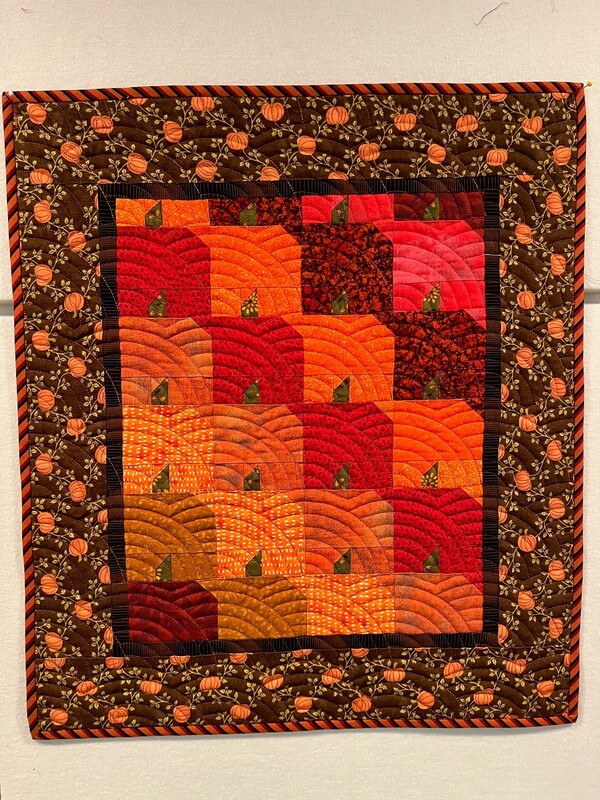
Anne Hurlburt My Tessellated Pumpkins quilt, in its finished form. Paper pieced.
|

Pat Harkins My fall tessellations wreath with acorns and pine cones applique
|
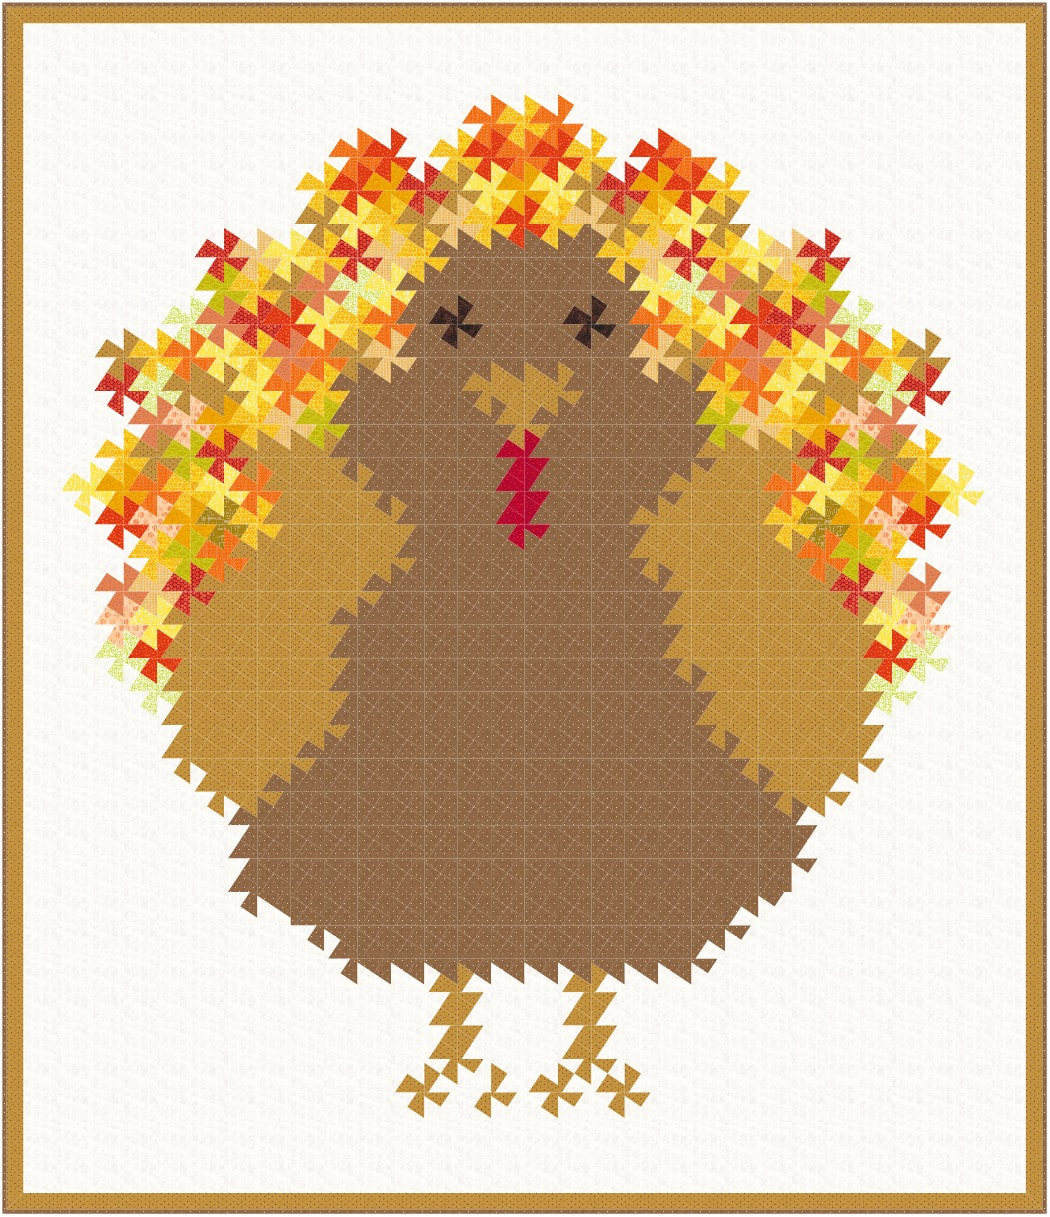
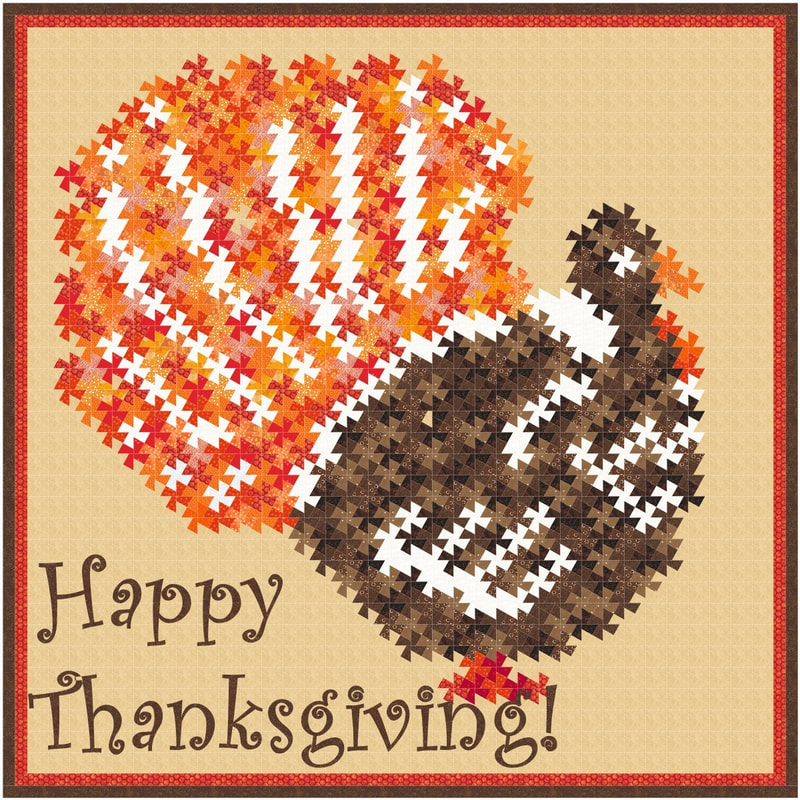
Mary Groesbeck In October, the Masters Class tessellated. This was a really fun class. One of my favorite designs for the month was Mr. Turkey. He would be tedious to piece (lots of blocks), but I could easily simplify him to have far fewer blocks.
|


|
Happy quilting.
Kari Join the On Point Quilter weekly newsletter and receive regular tips and inspiration on using Electric Quilt 8 along with the Free 12 Top Tips for EQ8 video guide. 
|
Scroll down for information on creating cut images from EQ8 applique. But first -- check out a new live webinar happening right after Christmas.
Register for Free EQ8 Webinar after Christmas
Turn Your Next Panel into a One of a Kind Quilt
How many times have you purchased (on contemplated purchasing) a panel and then struggled what to do with it? Obviously you can slap on a couple of straight borders, add a bit of basic quilting and the binding and it is ready to give away.
But what if you want to do more?
Let me show you how to quickly get past the overwhelm and uncertainty of working with panels.
Join my free Electric Quilt 8 webinar where I will take you step by step through the entire process to create your own panel quilt. In this live webinar, you will learn how to:
What are you waiting for? Join us today.
Plus you will also receive a guidebook that you will be able to use as a reference both during and after the video. This will assist you when you're working on your project.
I can't wait to see your panel quilt design.
Join us now.
But what if you want to do more?
- Maybe you wish to personalize your panel with unique borders.
- Or maybe you wish to cut up your panel and make it a series of blocks in your quilt.
- Or maybe you just want a go to method for working with any panel you currently own (or plan to purchase in the future).
Let me show you how to quickly get past the overwhelm and uncertainty of working with panels.
Join my free Electric Quilt 8 webinar where I will take you step by step through the entire process to create your own panel quilt. In this live webinar, you will learn how to:
- import a panel image into EQ and figure out the sizes of sections of the panel.
- subdivide the panel image to experiment with different options for using the panel in a quilt.
- learn how to personalize your quilt by designing coordinating blocks.
- learn my tricks for working with those awkward sizes that always seem to happen when designing around panels.
- learn how to create borders with multiple blocks that create flow and visual appeal.
What are you waiting for? Join us today.
Plus you will also receive a guidebook that you will be able to use as a reference both during and after the video. This will assist you when you're working on your project.
I can't wait to see your panel quilt design.
Join us now.
Free Webinar Registration Information
Choose the time that works the best below and register for this amazing fun webinar. You won't be disappointed.
For all those that attend live, I will be offering a special bonus offer as well. Make sure to join me. I can't wait to see you there.
A replay will be available for 24 hours if you cannot attend live. But you must register in advance to access the replay.
Choose the time that works the best below and register for this amazing fun webinar. You won't be disappointed.
For all those that attend live, I will be offering a special bonus offer as well. Make sure to join me. I can't wait to see you there.
A replay will be available for 24 hours if you cannot attend live. But you must register in advance to access the replay.
APPLIQUE FROM EQ8 TO CRICUT SILHOUETTE OR BROTHER SCAN N CUT
Last week I shared how to draft your own Ice Skating Motif using Electric Quilt 8. If you want to see the power of EQ8 up close and personal (and learn more about the applique tools) you will definitely want to check out this post.

|
|
In this video, I will share how to convert your EQ Applique drawing into an SVG file. An SVG file allows you to use the images (exactly as drawn) in the electronic cutting system of your choice -- Cricut, Silhouette, or Brother Scan N Cut.
While many of the cutting systems will suggest using their tracing features, I have had mixed success with traces. Often they can muddy aspects of the images and they are really not successful in pictures with layered images. So I knew I wanted a technique that preserved the integrity of the initial drawing in Electric Quilt.
I found that the key to success is an extra piece of software called Inkscape.
What is Inkscape?
The extra piece of software I used for creating the SVGs is Inkscape. Inkscape is a professional vector graphics editor for Windows, Mac OS X and Linux. It's free and open source.
Inkscape can seem overwhelming to use when you open it for the first time. However you only need to use a couple of tools within Inkscape -- so this really is a piece of cake. You can download Inkscape here.
Inkscape will allow you to create an SVG file which may be used in any electronic cutting system (Cricut Design Space, Silhouette Studio, or Brother Canvas Workspace).
So what is an SVG file? An SVG file is a graphics file that uses a two-dimensional vector graphic format. Unlike raster formats such as JPG, GIF, and PNG, an SVG image remains crisp and clear at any resolution or size. My Translation -- Much cleaner of an image than any trace in a cutting system.
Best Tips from the Video
Electric Quilt Tips
Inkscape Tips
Cricut Design Space Tips
Electric Quilt Tips
- Color your block with colors (not fabric).
- Print to a pdf writer. If you need a pdf writer check out these free options:
- Cute PDF Writer for Windows (www.cutepdf.com/Products/CutePDF/writer.asp)
- RWTS PDFwriter for MAC (https://github.com/rodyager/RWTS-PDFwriter)
- If you have stitch (thread) lines, turn on print block and patch outlines. Otherwise turn them off.
Inkscape Tips
- Ungroup everything.
- Patches will have both outlines and fill. Delete the outlines and keep the fill.
- Thread will only have fill.
- Group everything and note the size.
- Save as an svg file.
Cricut Design Space Tips
- Once importing the svg file, resize the group to match the size noted in Inkscape. (Depending on the latest update, the size may be correct or may not be correct. So always check.)
- Use Deboss if you wish to create an impression (for thread) rather than a cut.
- Select Attach to keep the thread with the related patch.
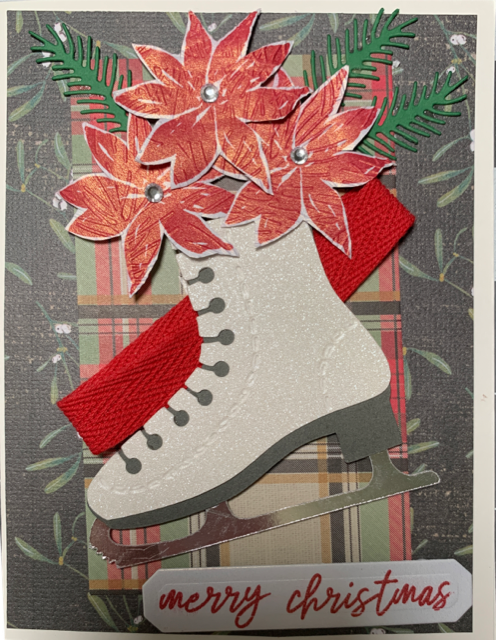
Card Ideas Using the Cut Ice Skates
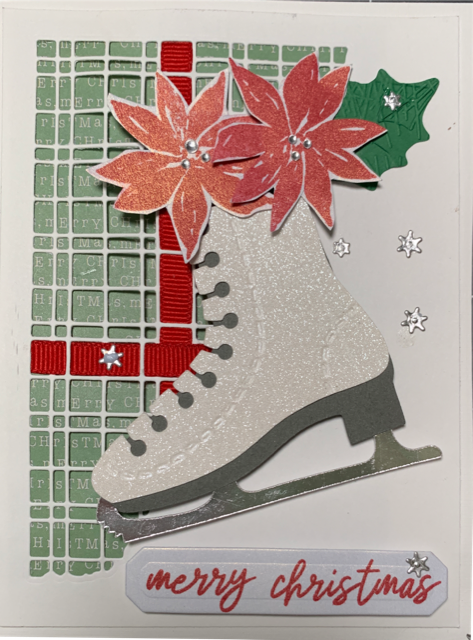
The following cards were make from my stash of card making supplies using the Ice Skating motif design in Electric Quilt 8 and cut with my Cricut Maker.
I am a huge Stampin Up fan and a part-time distributor (i.e. I want the purchasing discount) -- but I also accumulate supplies from a variety of other sources. I think of card making like making scrap quilts -- use what you have on hand!
I am a huge Stampin Up fan and a part-time distributor (i.e. I want the purchasing discount) -- but I also accumulate supplies from a variety of other sources. I think of card making like making scrap quilts -- use what you have on hand!

|
Ice Skate Card #1 - Supplies and Measurements
|
|
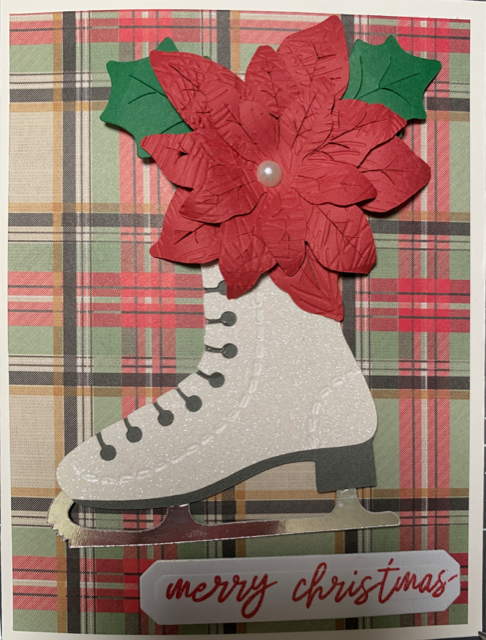
Ice Skate Card #2 - Supplies and Measurements
|
|
Ice Skate Card #3 - Supplies and Measurements
|

|
Happy quilting.
Kari Join the On Point Quilter weekly newsletter and receive regular tips and inspiration on using Electric Quilt 8 along with the Free 12 Top Tips for EQ8 video guide. 
|
This week I have been seriously getting started with Christmas cards. Although I have a lot of Stampin Up supplies, they do not have an ice skate. So I decided to use Electric Quilt 8 to make my own ice skate.
The design does take a bit of time to draw. The original video was around 35 minutes --but since nobody has time to watch a long video this month, I shortened it a lot (to around 12 minutes). When new points are presented, I talk through the mechanics -- but then speed up the video to demonstrate the execution.
The design does take a bit of time to draw. The original video was around 35 minutes --but since nobody has time to watch a long video this month, I shortened it a lot (to around 12 minutes). When new points are presented, I talk through the mechanics -- but then speed up the video to demonstrate the execution.
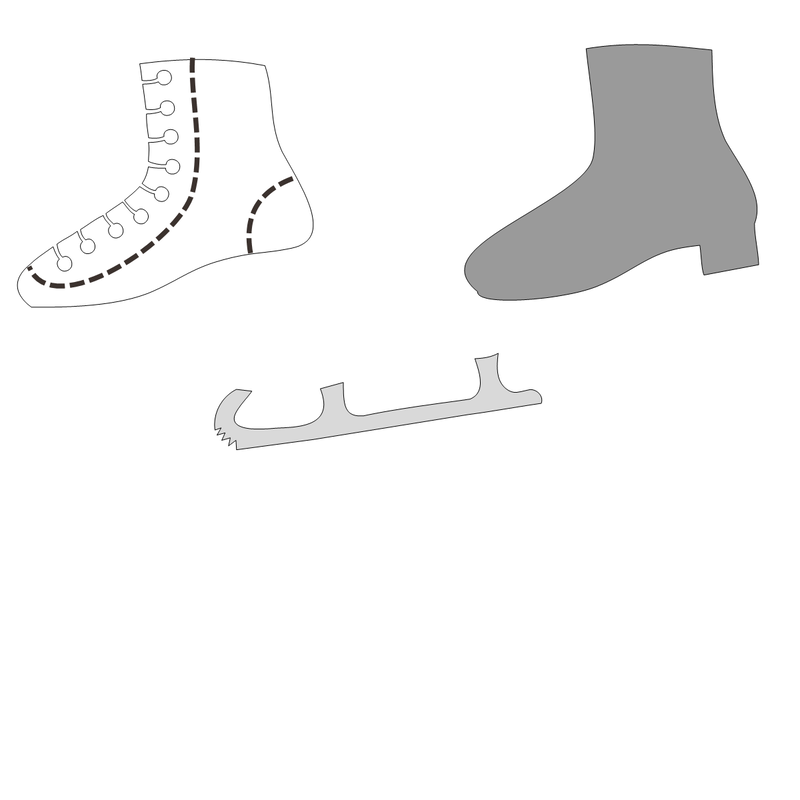
Here are the images used in the video. They may be downloaded and used for tracing your own ice skate.
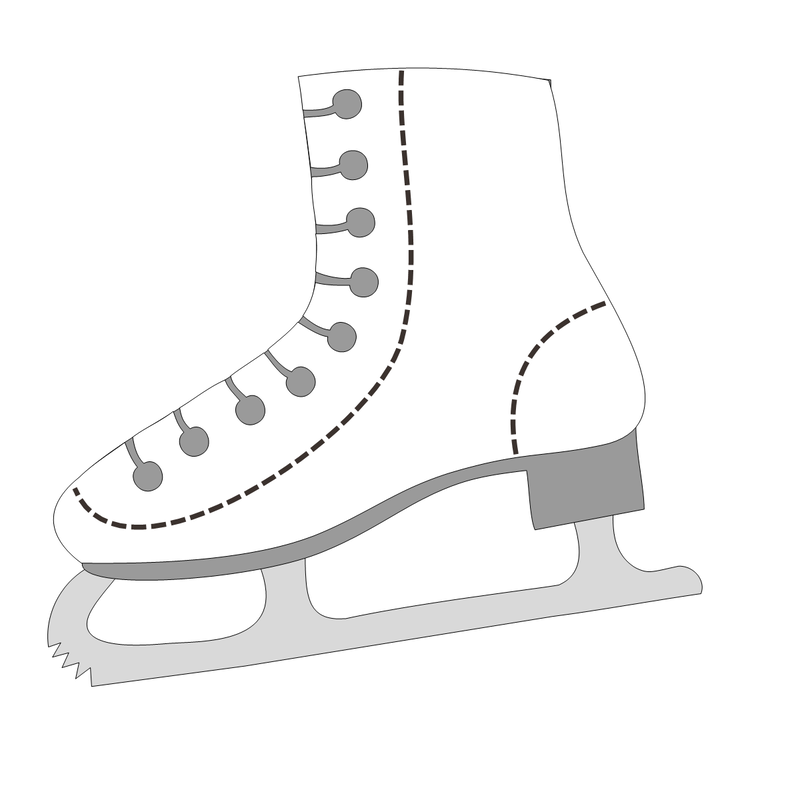
Ice Skate Motif created in EQ8 by Kari Schell
|

Individual Patches for Ice Skate Motif
|
Ready to Learn the Applique Tools in Electric Quilt 8?
My plans are to open enrollment for Tech Know Quilters at the end of December. (The membership is a more economical way to take the class.)
|
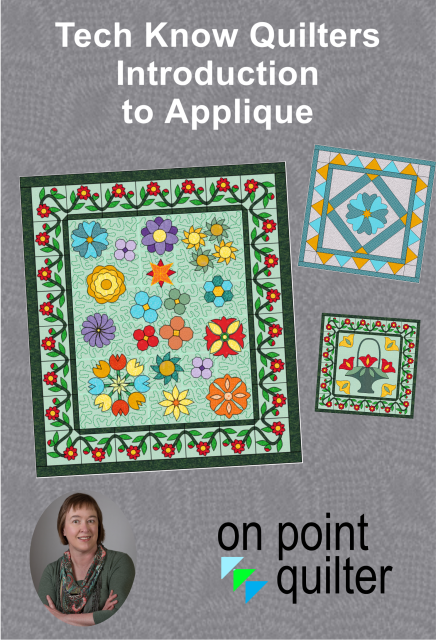
For those new to Applique (or would like to learn at a slower and more methodical approach), I offer an Introduction to Applique class. It is offering in Tech Know Quilters - a membership focused on mastery of Electric Quilt 8.
I have also included a few of the beginning Tech Know Quilter classes in my store -- for those that would like to try a class before joining the membership.
Introduction to Applique Agenda
|
Here are a few images shared by Tech Know Quilter members after completing the Introduction to Applique class.
Nanne Panne (combined elements of the class with original applique)
|

Ad Sumida
|

Mary Groesbeck
|
Zdenka Nemethova
|

Dianna Carter said the class was so fun, she had to design an extra quilt. She never though she would love to do applique.
|
Linda Goldfarb
|
Using the Ice Skate Design in Christmas Cards
I thought I would give you a sneak peak on how I chose to use the ice skate. I cut them out using my Cricket Maker -- and created a few designs using other card making supplies I had on hand.
I am planning to make about a dozen cards for friends in my ice skating community. Our Christmas party is next week -- so I best get busy.
I will talk more about how I transferred the design and used it in Cricut Design Space next week.
I am planning to make about a dozen cards for friends in my ice skating community. Our Christmas party is next week -- so I best get busy.
I will talk more about how I transferred the design and used it in Cricut Design Space next week.
|

|

|
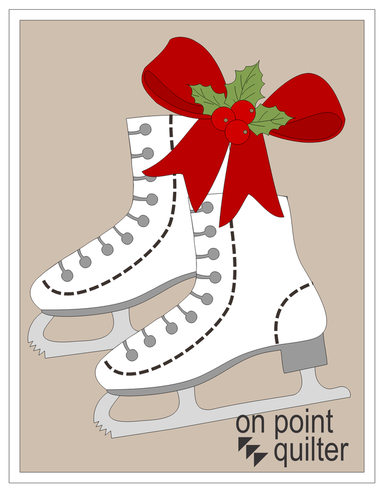
My original card design in EQ. This used two skates and the bow from the EQ Library.
|
I am also thinking that the skate could be used in a Christmas tree ornament as well. And could definitely be part of a quilt. What do you think?
I look forward to seeing your ice skate. Feel free to share pictures in the Learning EQ Facebook group.
I look forward to seeing your ice skate. Feel free to share pictures in the Learning EQ Facebook group.
|
Happy quilting.
Kari Join the On Point Quilter weekly newsletter and receive regular tips and inspiration on using Electric Quilt 8 along with the Free 12 Top Tips for EQ8 video guide.Happy quilting. 
|


Free guide available for newsletter subscribers


Kari Schell
Electric Quilt Expert and Educator and Pattern Designer.
Categories
All
Art And Stitch
Cricut Maker
Dear Jane
Electric Quilt 7
Electric Quilt 8
Goose Goose Duck Challenge
Inkscape
Patterns
Silhouette Cameo
Stampin Up
Tips And Techniques
Tools And Rulers
Archives
July 2024
June 2024
May 2024
April 2024
March 2024
February 2024
January 2024
December 2023
November 2023
October 2023
September 2023
August 2023
July 2023
June 2023
May 2023
April 2023
March 2023
February 2023
January 2023
December 2022
November 2022
October 2022
September 2022
August 2022
July 2022
June 2022
May 2022
April 2022
March 2022
February 2022
January 2022
December 2021
November 2021
October 2021
September 2021
August 2021
July 2021
June 2021
May 2021
April 2021
March 2021
February 2021
January 2021
December 2020
November 2020
October 2020
September 2020
August 2020
July 2020
June 2020
May 2020
April 2020
March 2020
February 2020
January 2020
December 2019
November 2019
October 2019
September 2019
August 2019
July 2019
June 2019
May 2019
April 2019
March 2019
February 2019
January 2019
December 2018
November 2018
October 2018
September 2018
August 2018
July 2018
June 2018
May 2018
April 2018
March 2018
February 2018
January 2018
December 2017
November 2017
October 2017
September 2017
August 2017
July 2017
June 2017
May 2017
April 2017
March 2017
February 2017
January 2017
December 2016
November 2016
October 2016
September 2016
July 2016
June 2016
May 2016
April 2016
March 2016
February 2016
January 2016
December 2015
November 2015
October 2015
September 2015
August 2015
July 2015
June 2015
May 2015
April 2015
March 2015
February 2015
January 2015
December 2014
November 2014
October 2014
September 2014
July 2014
June 2014
May 2014
April 2014
March 2014
February 2014
January 2014
December 2013
November 2013
October 2013
September 2013
August 2013
 RSS Feed