
|
Last fall I ordered and Elsa and Anna fabric panel, thinking it would make a great Christmas gift for my four year old niece. She is a HUGE Frozen fan. The panel was on back order and I didn't receive it until after Christmas. And then I was dealing with a few higher priorities. I finally opened the package this week and am very excited to begin playing with the panel. I decided this really needed to be a four-part series. Even if you do not use the Elsa and Anna panel, there will be lots of great suggestions for using any panel.
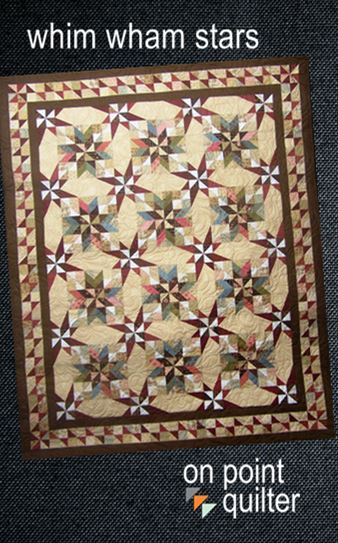
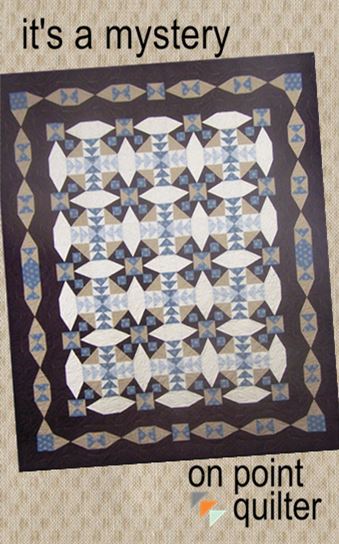
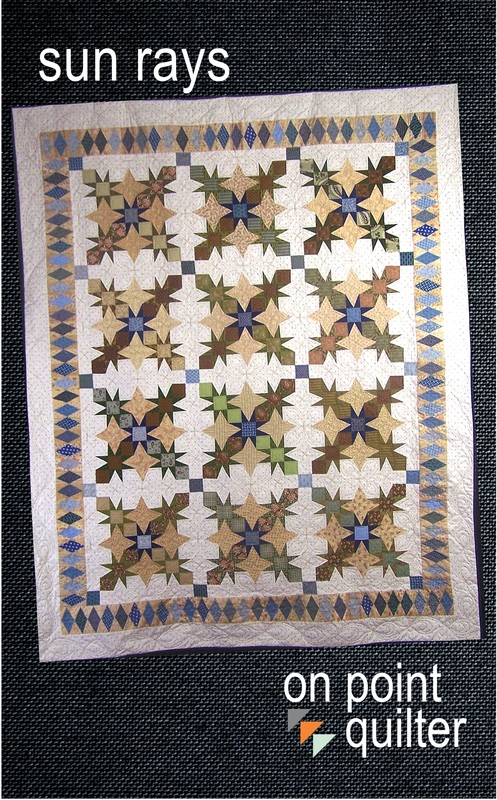
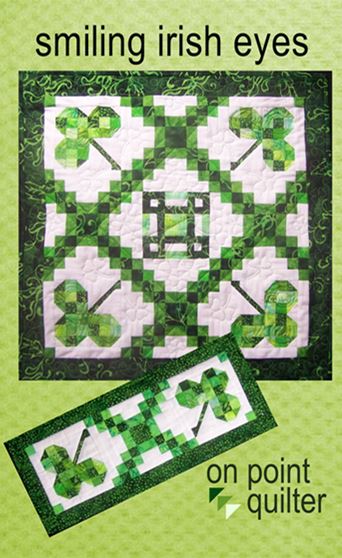
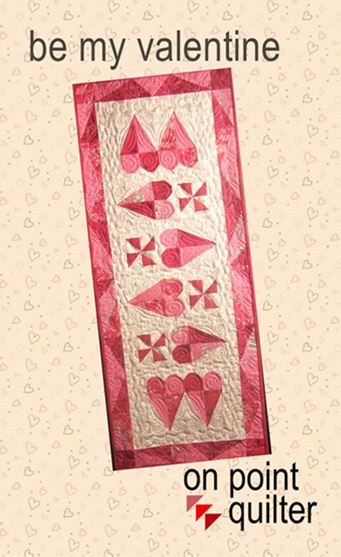
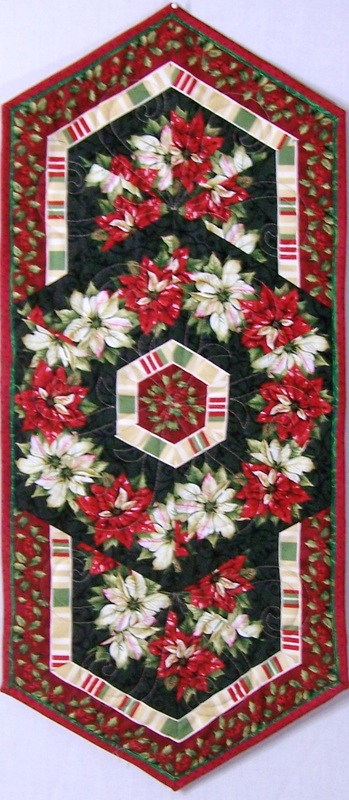
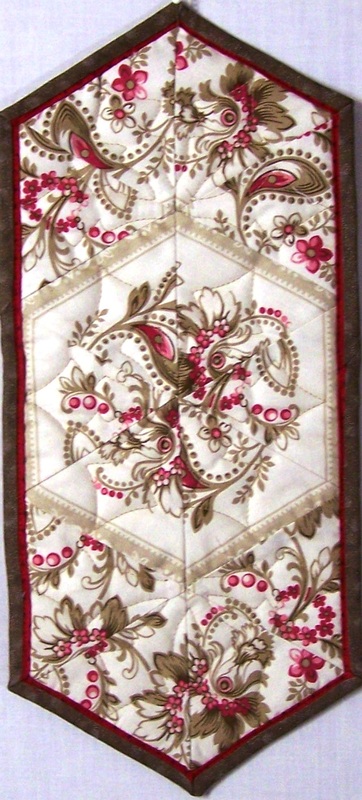
Importing the Fabric Panel into Electric QuiltI started by measuring my fabric panel I decided to just use the center without any of the borders I also cut it down a bit to make it easier to work with when designing additional borders. 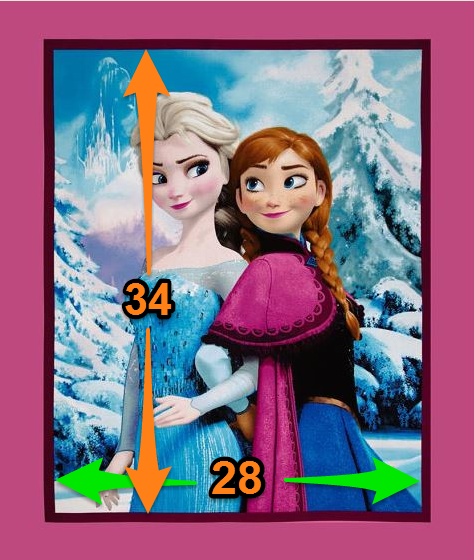 The panel (minus the borders) measured slightly over 28" x 34". So when I go to cut the panel I will want to cut it at 34-1/2" x 28-1/2". The following video tutorial will show how I imported the image and re-sized it in Electric Quilt. Fabric ShoppingI don't have a lot of bright fabrics in my collection. So I decided I needed to go shopping to get some fat quarters in both the magenta and blue colors that stand out in the quilt panel. I found this new online store (at least new for me) that has this really nifty tool for finding matching fabrics. The following video will demonstrate how I used this tool. The website I used is Thousands of Bolts… Only One Nut. In addition to demonstrating the color picker, I'll show you how I imported the images of these fabrics into Electric Quilt. This will allow me to design my border while waiting for the fabrics to arrive. Next week I will demonstrate the creation of my pieced border using Electric Quilt. God's Light Warms the SoulI am currently exhibiting 11 of my quilts in a private showing at North Heights Lutheran Church. The exhibit is entitled "God's Light Warms the Soul". It includes original designs (including Sun Rays, Whim Wham Stars, It's a Mystery and Be My Valentine) along with quilts I made from purchased designs. If you live in the Twin Cities, this can be a fun outing for cold day. The address is: North Heights Lutheran Church 1700 West Hwy. 96 Arden Hills, MN 55112 The exhibit will be on display through the end of February. Be My ValentineAre you looking for a quick Valentine's day project? How about the "Be My Valentine" table runner? The pattern is now available in quilt shops across the country. If you cannot locate it at your favorite quilt shop, I am offering it for a limited time with free shipping for those in the US and Canada. To order click here. To enable "free shipping" select ECONOMY shipping during the checkout process. This subtracts $2 from your order. 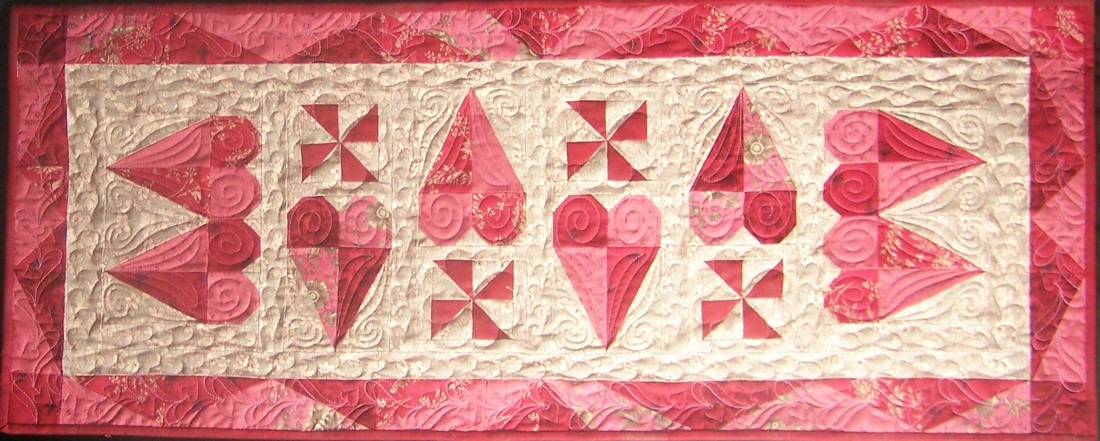
Be My Valentine by Kari Schell
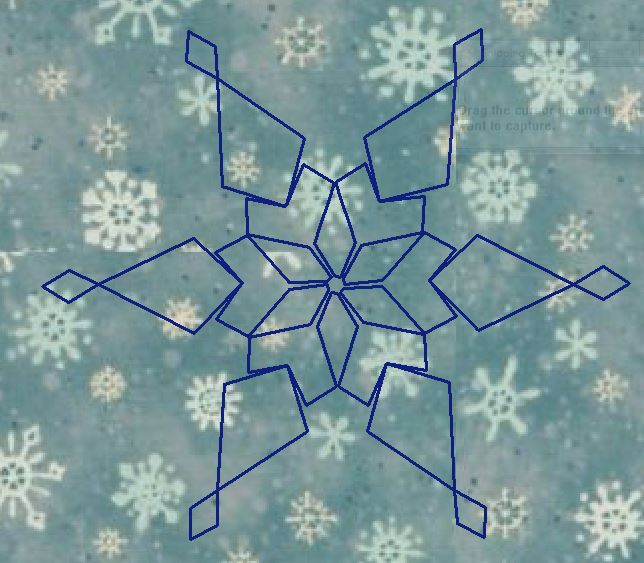
Art and Stitch Snowflake
Happy quilting. Kari Sign up for my newsletter to stay current on what's happening in my studio and learn more quilting tips. As a thank you, I'll send you a FREE pattern for this small maple leaf quilt.
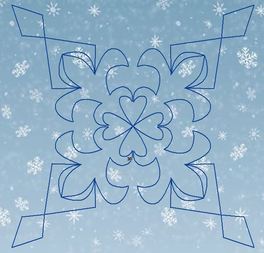
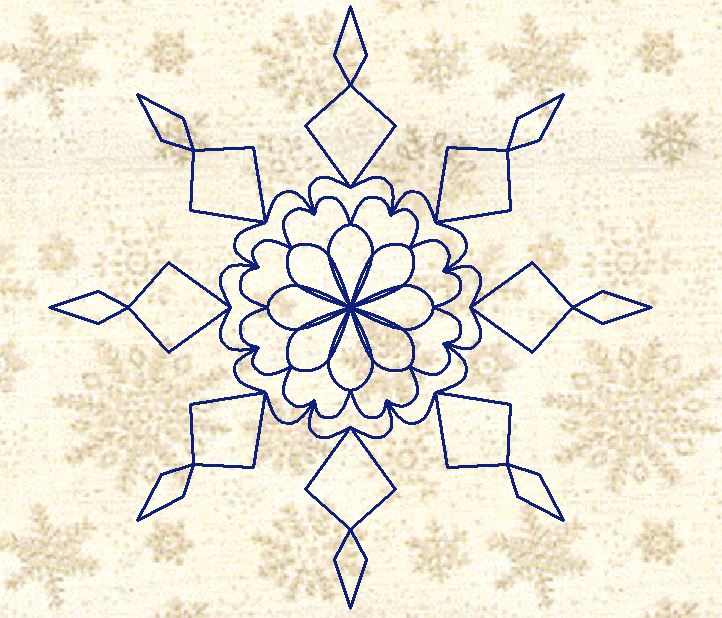
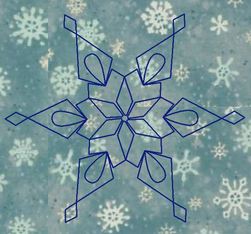
As I look out on my backyard today I see snow. I am a northern gal and love snow this time a year (as long as I don't have to drive in it). During my appointment with the hand doctor earlier this week, I was told no cross-country skiing this year. This was disappointing, but not a total surprise given the broken wrist that happened the beginning of January. Since I can't enjoy the snow outdoors, I decided to focus on making snowflakes that could be quilted. I've been playing in Art and Stitch, my digital quilting software, and have come up with a method to make lots of snowflakes. These snowflakes are based on the paper snowflake method we all probably tried in grade school. The following video demonstrates how I made one of these snowflakes. Here are a few of my completed snowflakes. If you click on the photo, you can get a FREE pdf of the design for use on your quilts. 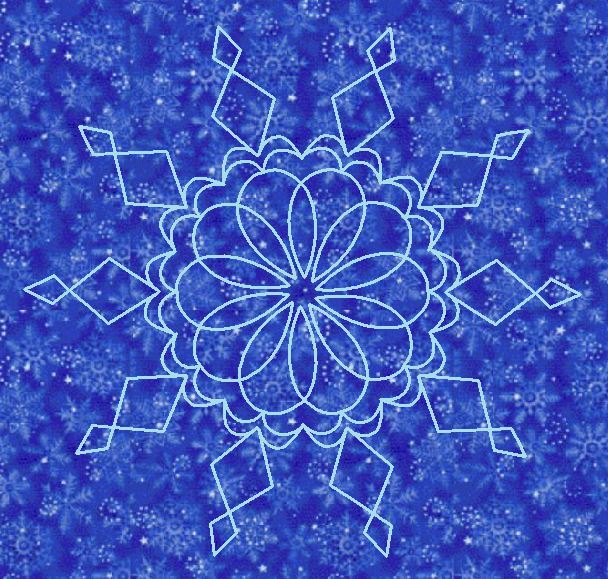 Snowflake 1 by Kari Schell
Art and Stitch Snowflake ExchangeI thought it would be fun to offer an exchange for those that use the Art and Stitch software. To participate in this exchange, you will need to draft a snowflake in Art and Stitch. You can make it as simple or as complex as you like. Please don't infringe on anyone's copyrighted designs. For ideas search Google Snowflake Images, or Paper Snowflakes, or check out a Snowflake font. Once you have completed the design, label it with your name and save the file in the ANS format. Send me the file at [email protected]. I will create a members only page on my website and set you up with access to this page. All Art and Stitch files received will be posted to the page. As a member of this private page, you will be able to download any of the submitted ANS files. Only those who have contributed a snowflake will be allowed access to the page. I received a question on the members only feature. When I receive your submission, I will set you up as a member using your current e-mail address. You will receive an email asking you to set a personal password for the site. I will link your email address with the private page. You will need to log in on my site to be able to access the private page. Membership is only required for the private pages.  The login button will change to "My Account". You will then be able to choose the page to access.  I will post pictures of the submitted designs on an upcoming blog post with your name (but will not provide access to the files). Due date is February 7. I'm looking forward with great anticipation to seeing all your snowflakes. Feel free to post questions in the comment section. I will do my best to respond. And the Winner is......I had 74 comments to my studio tour on last weeks blog hop. I was overwhelmed and deeply grateful with your responses. The winners are Sylvia K. and Tabitha K with random numbers (60 and 47). They will be receiving two On Point Quilter patterns of their choice. Happy quilting. Kari Sign up for my newsletter to stay current on what's happening in my studio and learn more quilting tips. As a thank you, I'll send you a FREE pattern for this small maple leaf quilt.
This week I am joining a number of talented designers on virtual tours of our quilting spaces. After seeing the tours to date, I have a little studio envy. I wonder if they would hire out for a studio make-over. I will admit that since quilting has taken over my life, it also continues to take over a larger and larger piece of my house. I started by commandeering a bedroom. This serves as my office along with where I do most of my piecing.
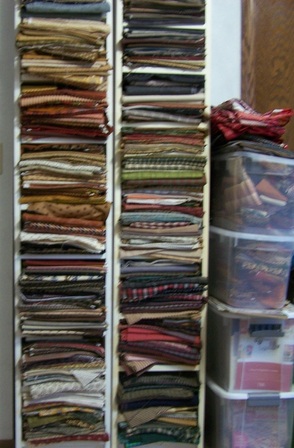
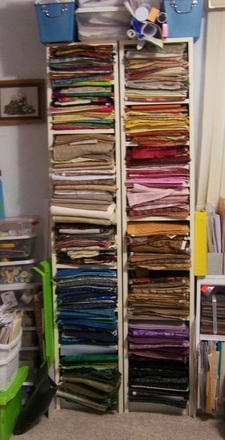
Fabric is stored throughout the room. I found some great bookcases as Office Max. They are 11-3/4" wide (inside measurement), which makes them great for storing fat quarters.
The set on the left is for my favorite collections -- Jo Morton, other Civils War, Taupes, Plaids. The set on the right are sorted by color. The overflow ends up in bins and in the closet. Speaking of the closet. I had shelving built for it a number of years ago. I even designed the layout in EQ. The only problem was that I forgot to factor in the size of the shelving pieces themselves. Fortunately my contractor was able to adapt. 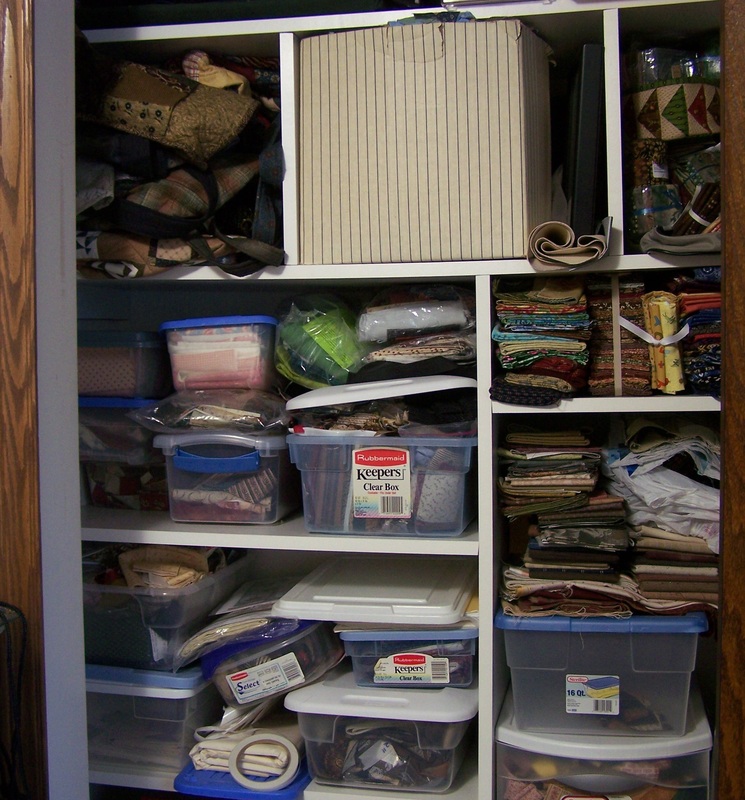 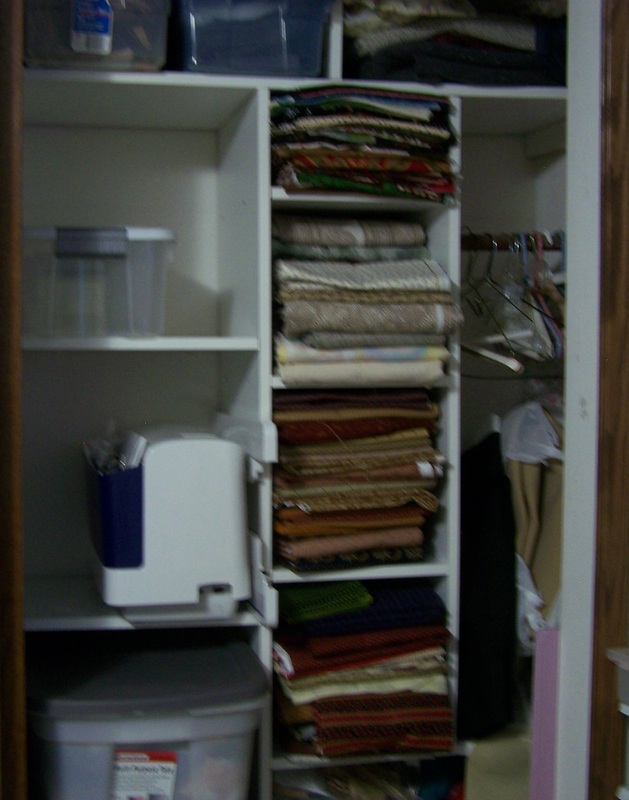 The shelves hold larger pieces of fabrics along with work in process. I try to take all the projects out once a year to inventory them and decide if I really want to finish them. I also have my scraps semi-organized. First by collection and then by size within the collection. So if I need 2-1/2" pieces of Jo Morton fabric, I will start with that box before cutting into my fat quarters. So where do I sew?  This is fairly clean, as I am not actually sewing at the moment. Sewing table is on the right. i have a huge cutting table in back with an ironing pad on one side and the cutting mat on the other. Rulers are along the wall with another stack of the specialty rulers in a tote by the table. Lots of good hiding places for things I can't do without. About ten years ago I decided I really wanted a longarm. But couldn't find a good place to put it in the house. I solved the problem by putting on an addition. It technically is a three season porch. However with the baseboard heat, it is fully functional all year round, even with our sub-zero temperatures this last month. 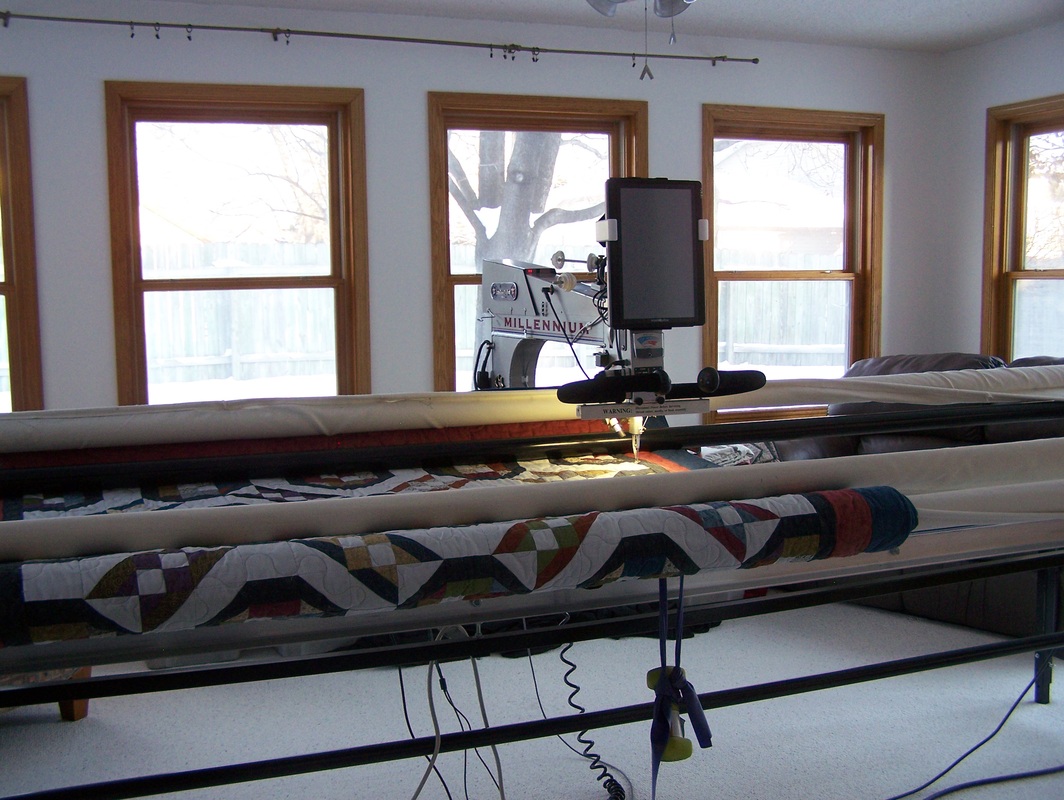 Still no window coverings, but I did put up a current rod that I can use for mounting quilts. I have found that it isn't that practical (unless you want to feature my APQS Millennium in all the shots -- and if you shoot during the day the light highlights the seam allowances). 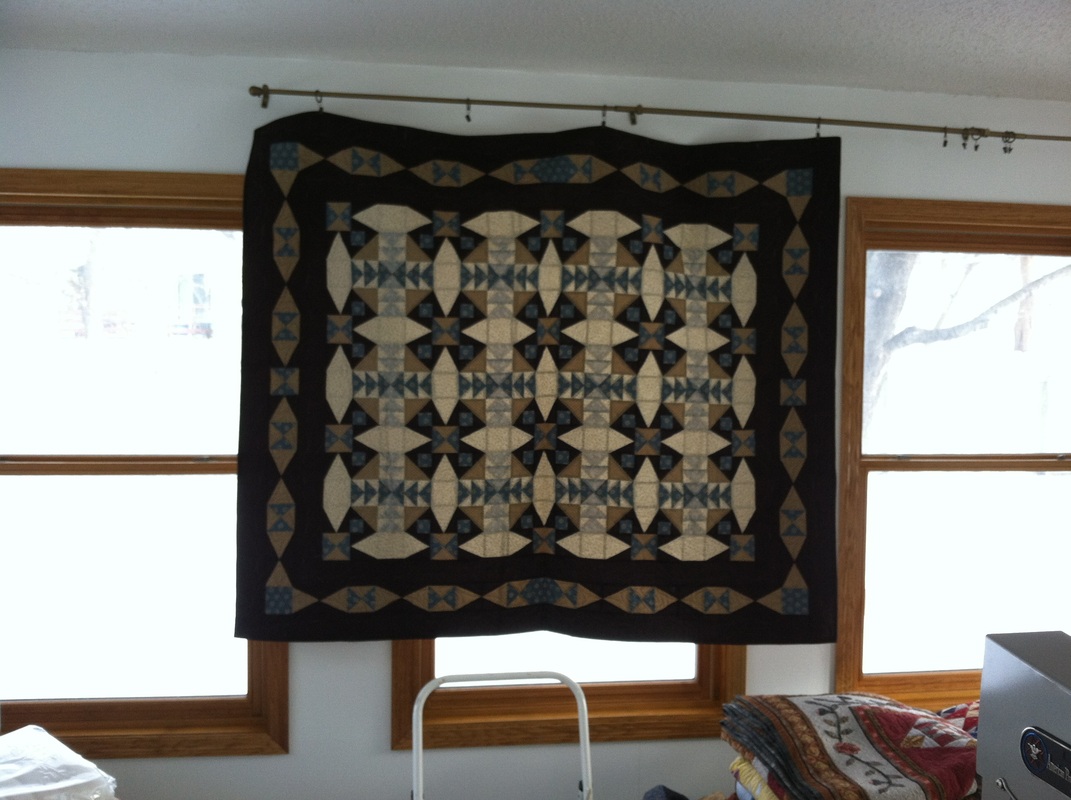 So I have moved to photographing my quilts in my family room. I have a piece of insulation board (cover with an old sheet) that I use as a backdrop for my smaller projects. For the larger projects, I use a photo-stand, with a black sheet for a backdrop. 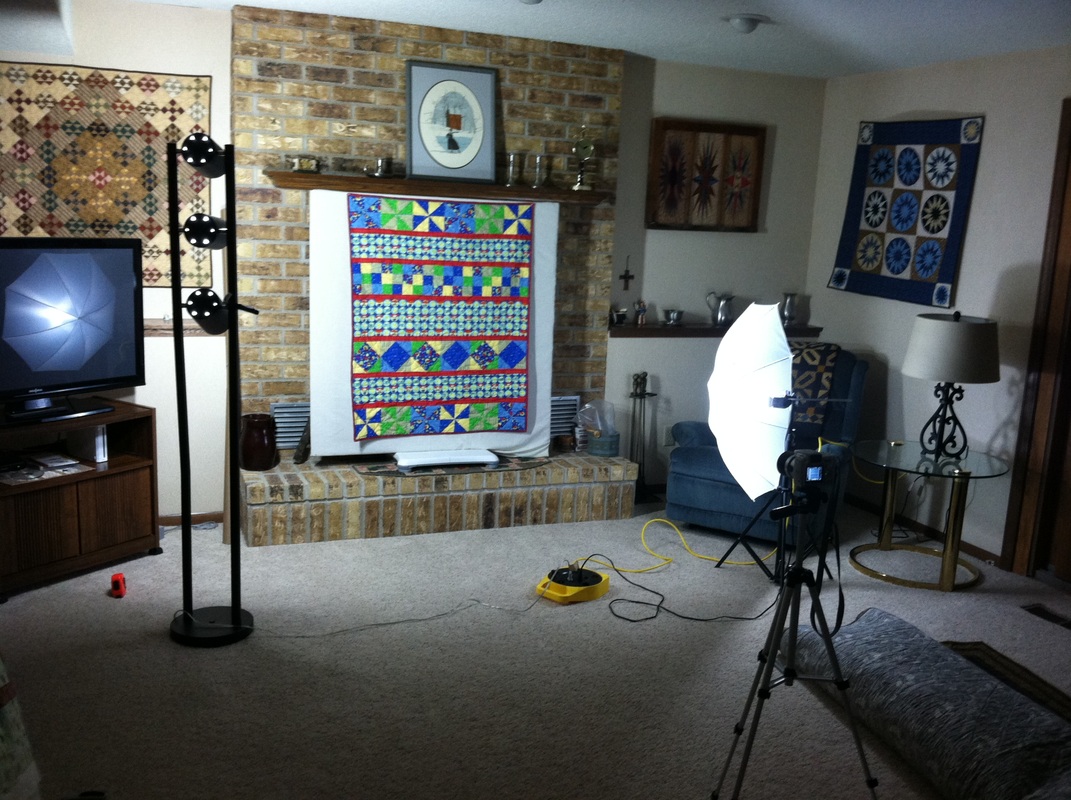  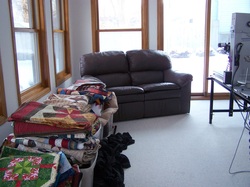 Bins and bins of finished quilts are also stored in the longarm room. I use my photo backdrop sheet to cover these to minimize sun damage. I hope you enjoyed my tour. As you can see, my studio space was not "professionally designed", but an evolution as my needs as a quilter and designer have changed. Pattern Giveaway To celebrate this blog hop, I will be giving away two patterns of your choice to two people posting comments on this blog. You will have until the end of the hop (January 23rd) to post your comments. Tell me about your quilting space or give me a recommendation on mine. Here are your pattern choices:
Visit Bunnie Cleland of Artistically Engineered Designs tomorrow. I met her at a creative arts business summit last year. She is not only a creative designer, but a fantastic individual. Those that follow my blog know how much I love her patterns. I've shared a number of posts regarding her patterns including fabric audioning using Electric Quilt, how to quilt these designs and a magic binding. Happy quilting. Kari Sign up for my newsletter to stay current on what's happening in my studio and learn more quilting tips. As a thank you, I'll send you a FREE pattern for this small maple leaf quilt.
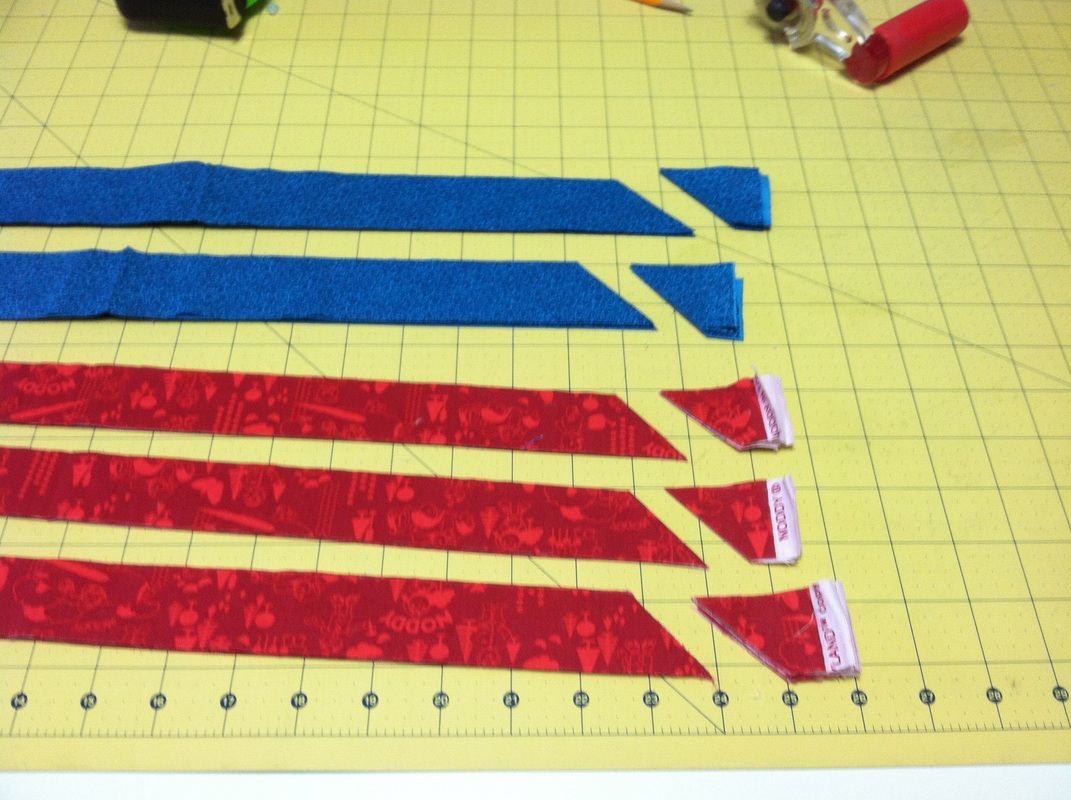
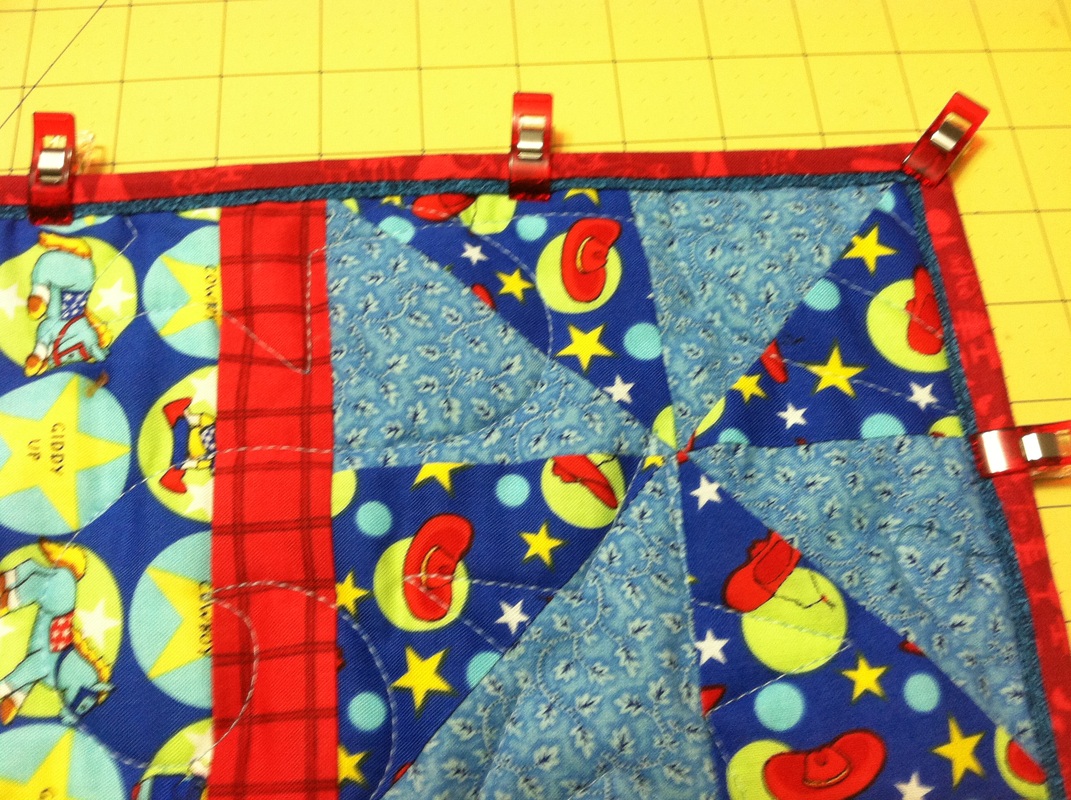
Someone had shared with me a post over a year ago for a “magic binding”. I had successfully used the technique on a charity quilt, posted about it, and then forgot it. A month ago a friend showed me a quilt she did with the technique and reminded me that I had written about it on my blog. Thanks Erin for the reminder. Since I am currently finishing up a number of baby quilts and a number of Triangle Frenzy table toppers, this was a good opportunity for me to get caught up on my binding. So I thought I would re-share the technique, with a few more photos and suggestions for successfully creating this magic binding. Step 1 - Calculate number of strips needed. Measure the perimeter of the quilt. Divide by 40 and round up to the next whole number.
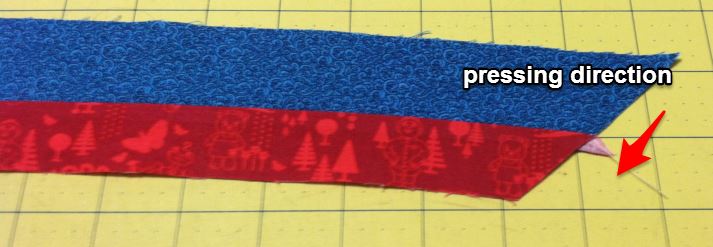
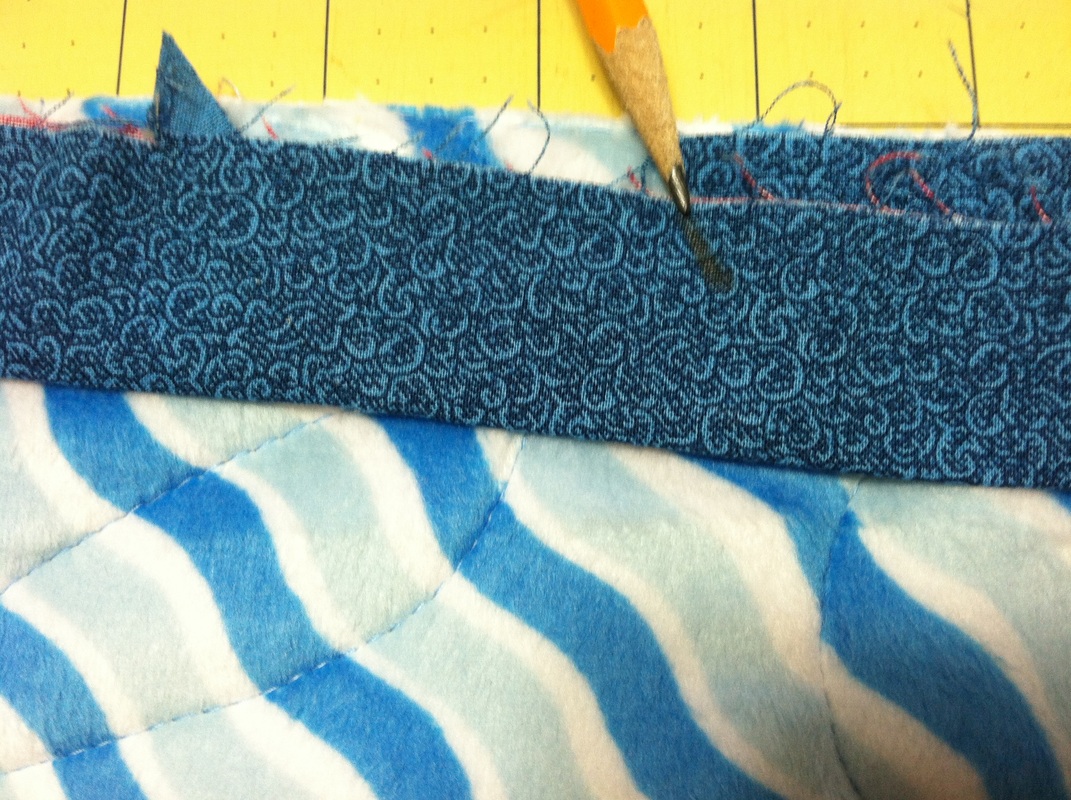
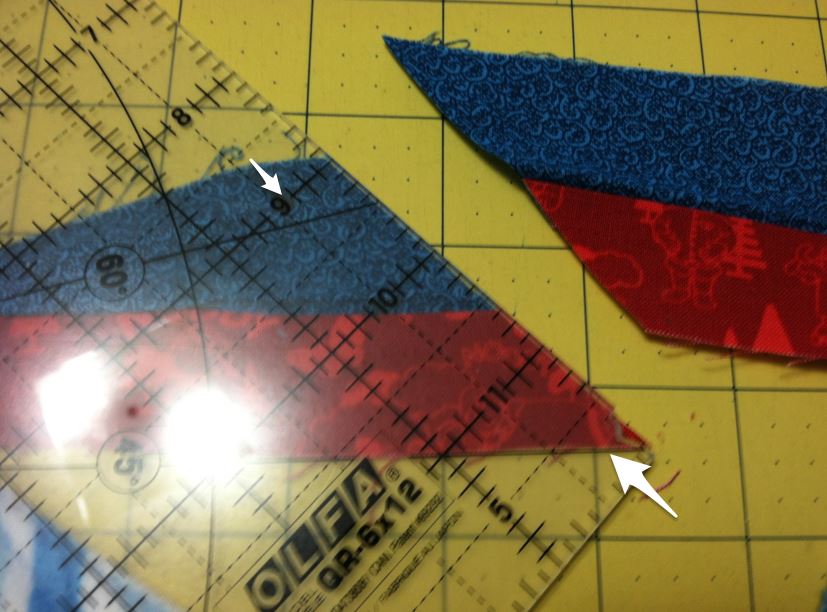
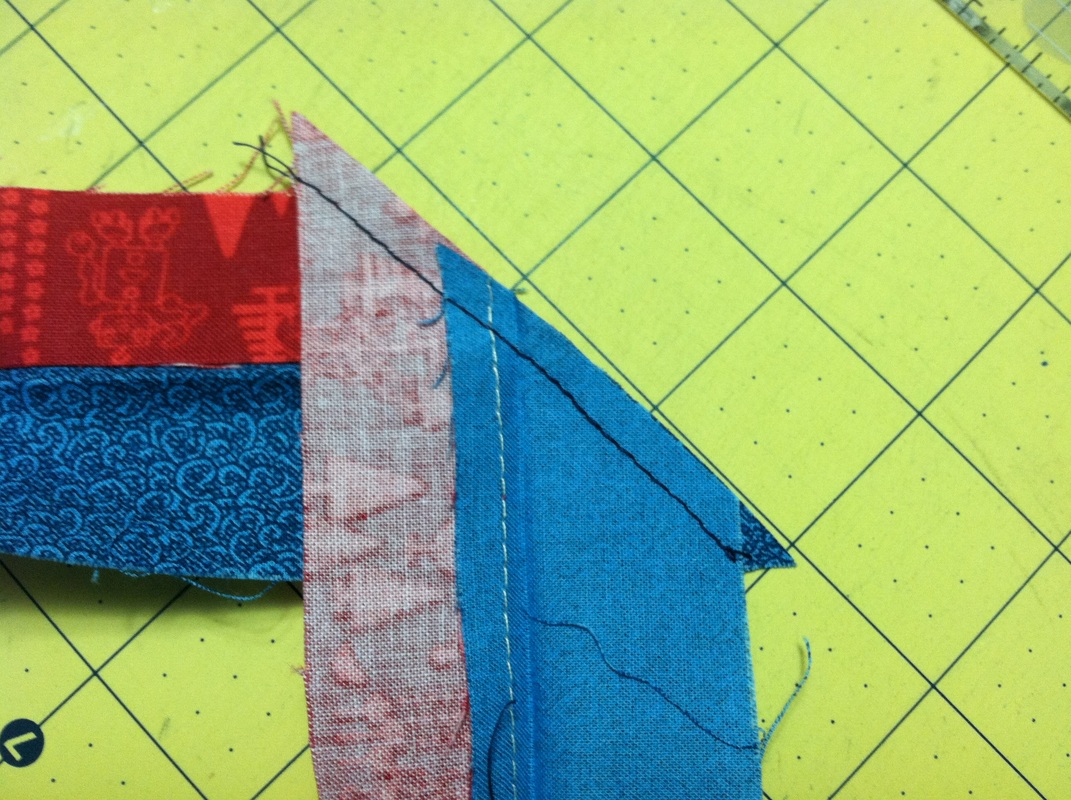
Step 3 – Combine binding and flange strips for one long strip of each. Because I folded the strips before cutting the 45 degree angle, the strips will all interlock. If one side doesn’t work, flip to the other side when piecing.
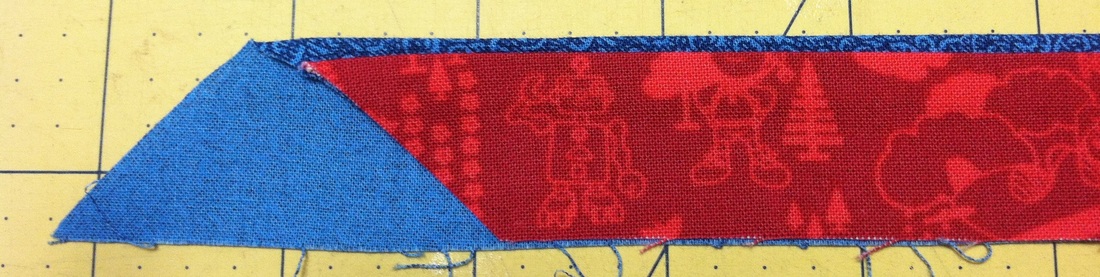
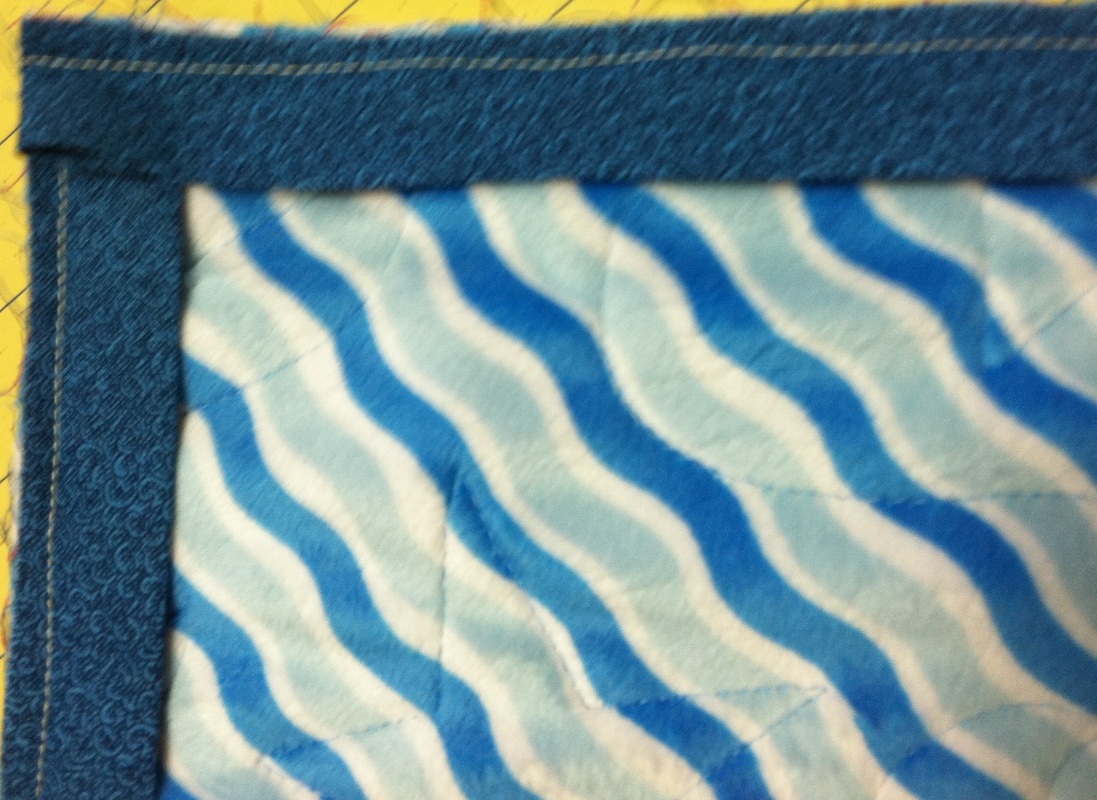
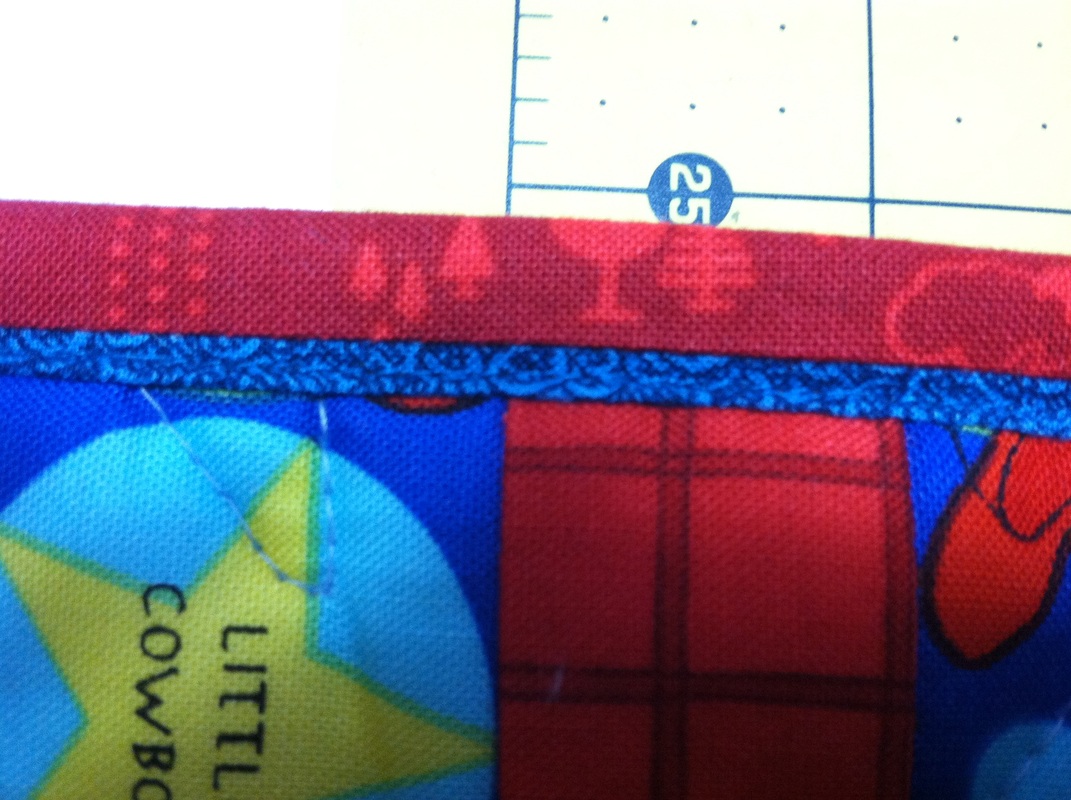
Step 11 - Stitch in the ditch on the flange. Change thread on the machine so the top thread matches the flange cover (dark blue) and the bottom thread matches the backing fabric or the quilting thread used for the back of the quilt (light blue in my example).
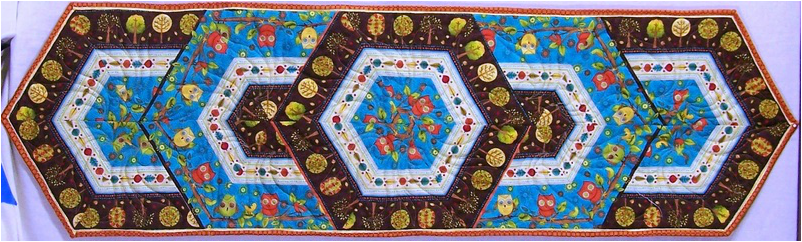
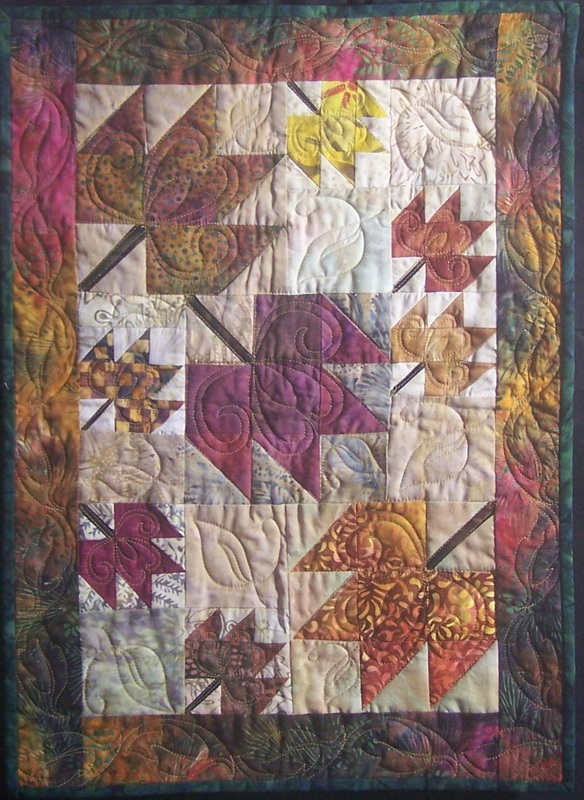
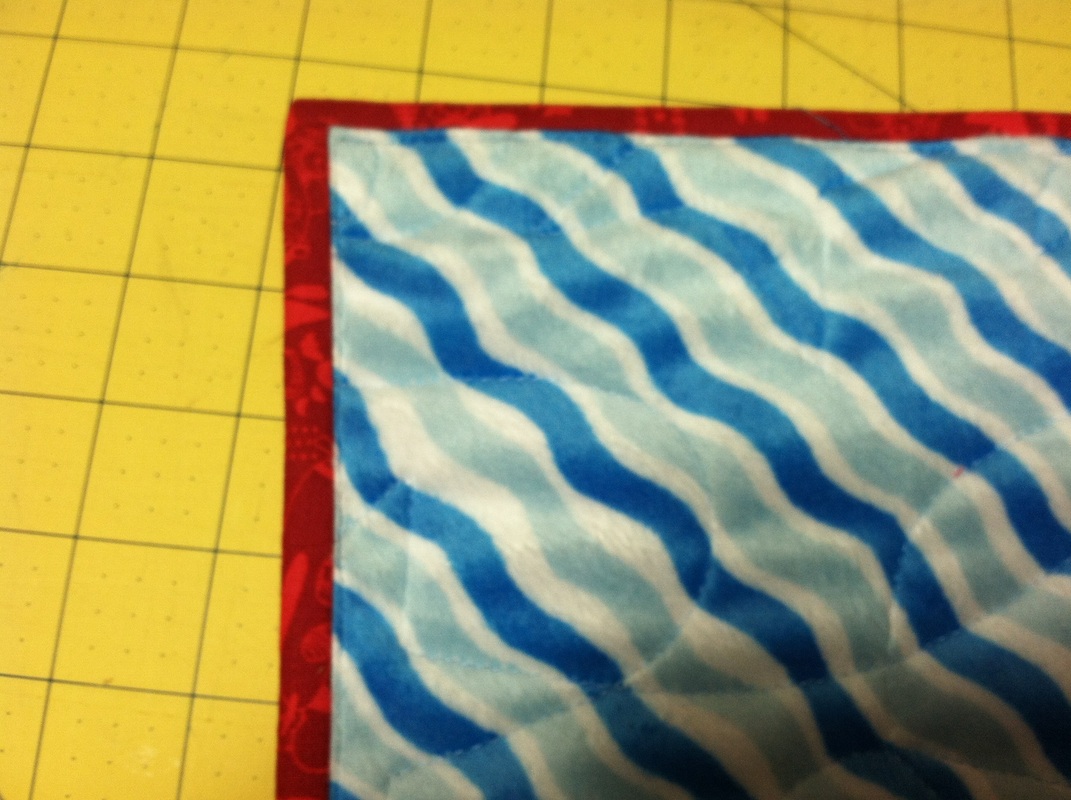
Here are a few additional Triangle Frenzy quilts with the Magic Binding. These were made using the Triangle Frenzy patterns by Bunnie Clealand and are a great way to use border fabrics.
Studio Spotlight Blog Hop Would you like to see my studio? I will be participating in a blog hop with 10 designers where we will each share a tour of our work pace. There are lots of fun giveaways. A list of the participating designers is included in the link below. I'm hoping you can join the fun. Click on this link for all participating designers.  Happy quilting. Kari Sign up for my newsletter to stay current on what's happening in my studio and learn more quilting tips. As a thank you, I'll send you a FREE pattern for this small maple leaf quilt.
Even though I love designing my own quilts, I also enjoy makes quilts by other designers. I am a member of Heritage Club at Four Season Quilt Shop in Maple Grove, MN. At each meeting we receive either a pattern from Jo Morton's "Jo's Little Women Club" or Pam Buda's "Prairie Women's Sewing Circle". During the Christmas break, I thought I would make up one of the patterns from the last year. The one I chose was Contrary Wife by Pam Buda. It gave me an opportunity to do some applique and I really liked her setting. For today's post, I thought I would walk you through my process including
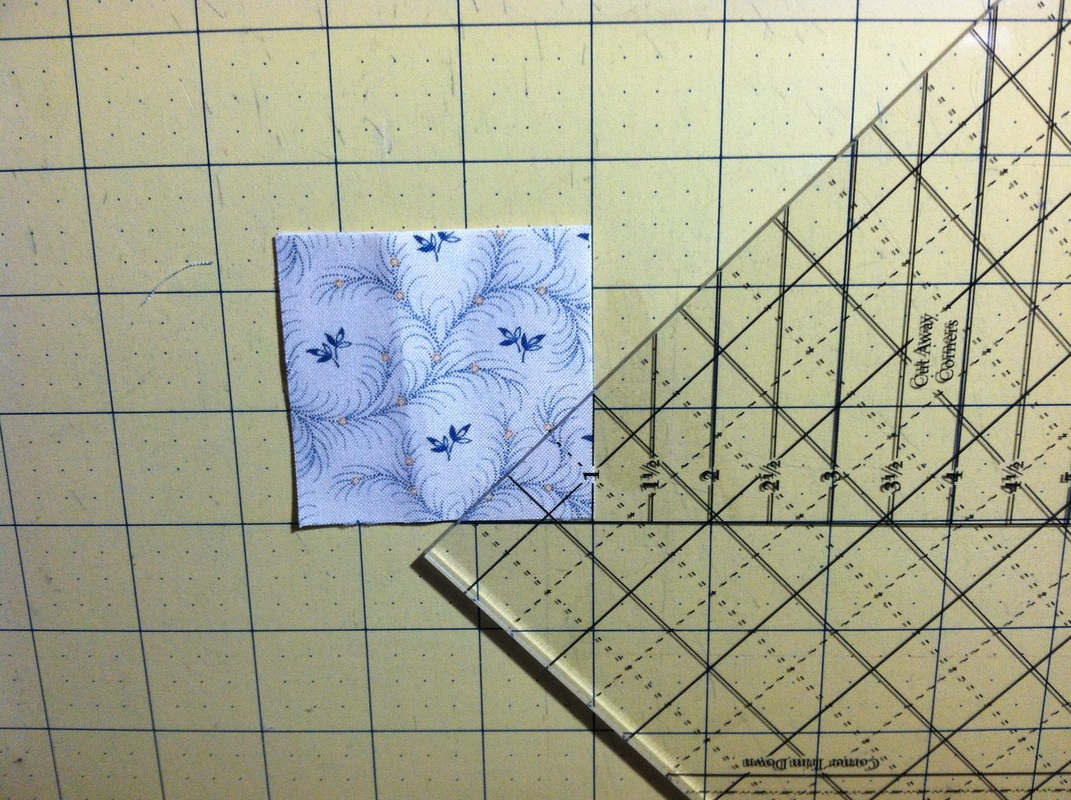
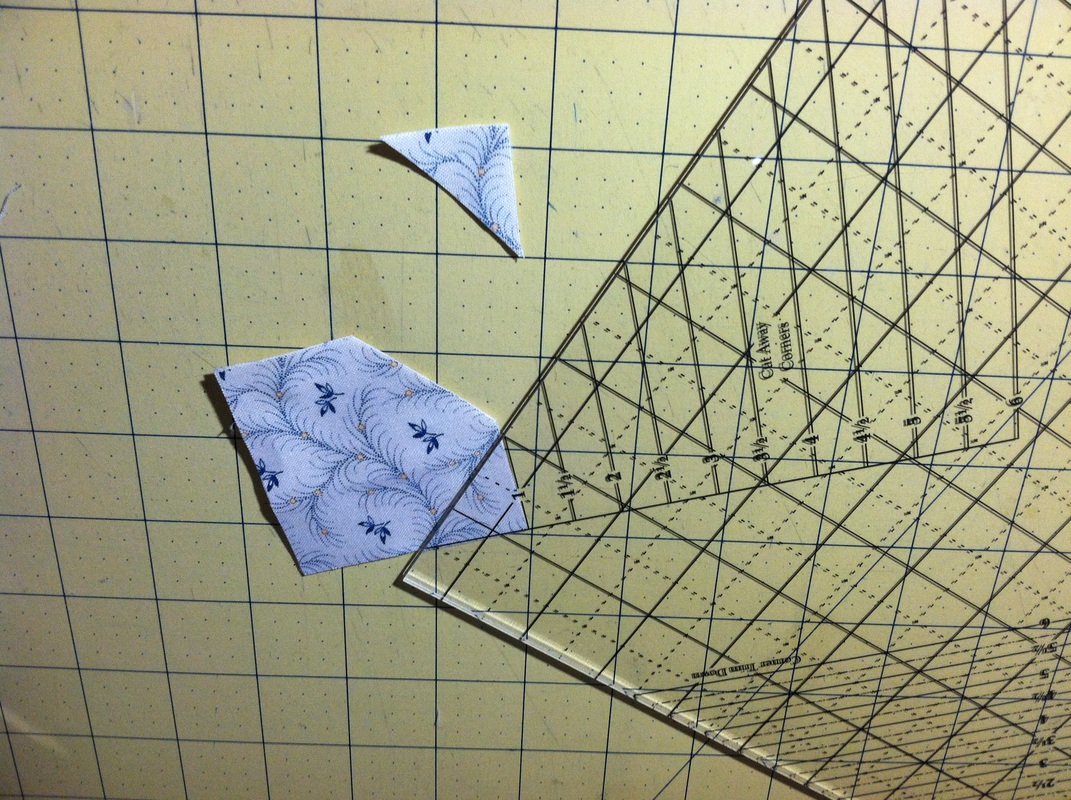
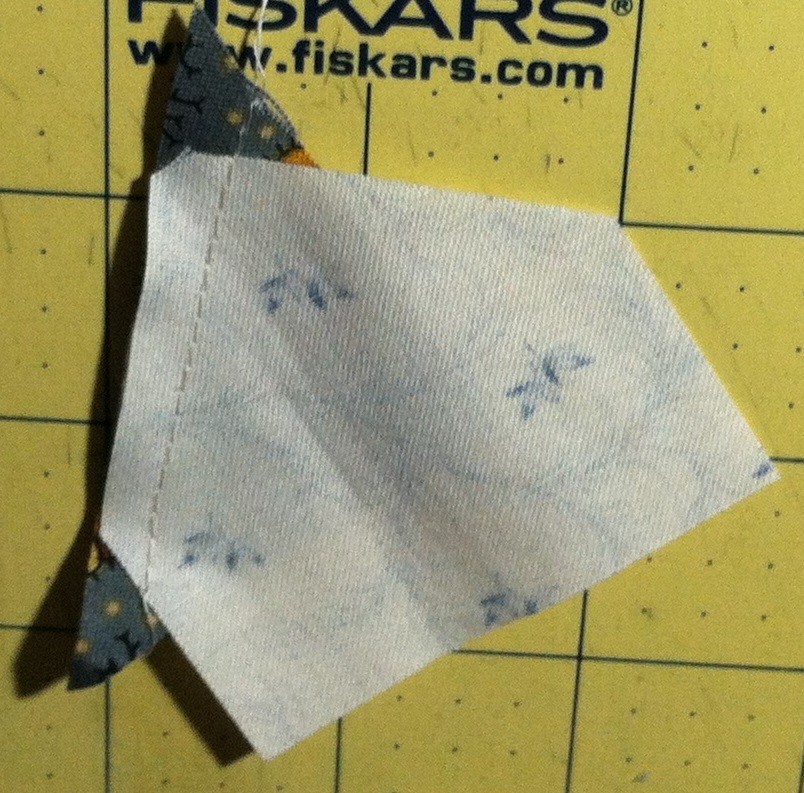
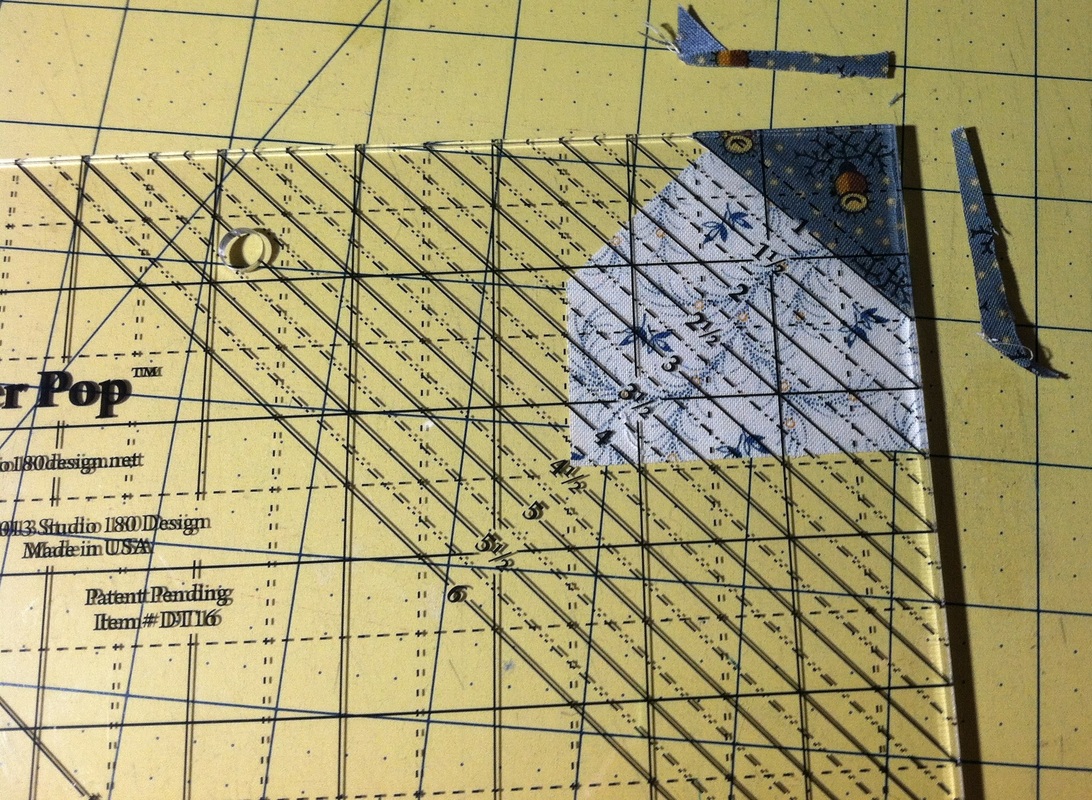
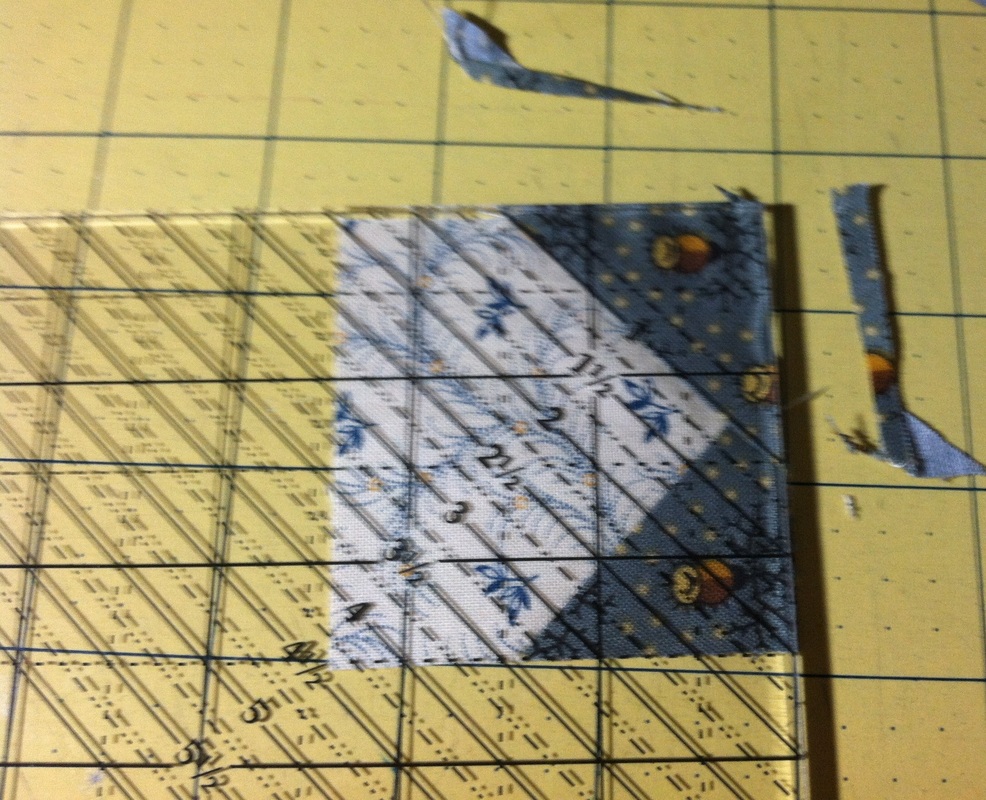
Tracing Applique Block in Art and StitchMy favorite applique technique is using freezer paper templates ironed to the back of fabric. The fabric is cut 1/4" around the templates and the seams are folded over and glued to the freezer paper template. I then use invisible thread and a blind hem stitch on my machine to attach the pieces to the background (you must be able to adjust both the stitch length and the stitch width for this to work well). I learned this technique in a class from Harriet Hargrave many years ago. I've taken numerous classes and tried many other applique methods over the years, but this one works the best for me. Which method of applique do you prefer? However, I digress. What I wanted to do, is cut out my freezer paper templates with the Silhouette Cameo. In order to create the pieces for cutting, I used Art and Stitch to draft the units and the block and then transferred to design to Silhouette Cameo. The follow video provides a demo of how I did this. Corner Pop Ruler DemonstrationFor the sashing, I thought I would try out the Corner Pop ruler by Deb Tucker's Studio 180 Design. The pattern called for folded corners and this ruler provides another way to better execute those corners. Let me share the steps with one of the units in the Contrary Wife quilt. 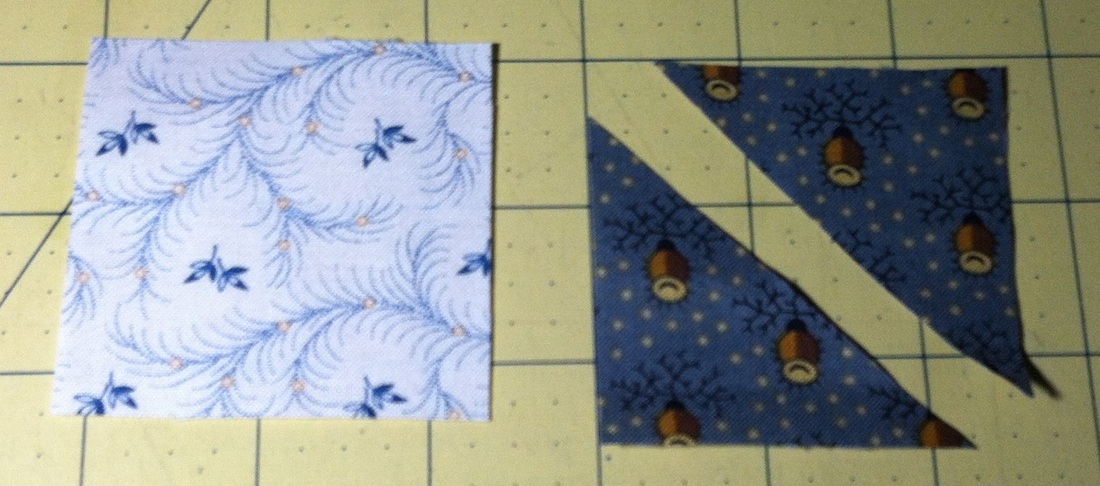 Cut background 2-1/2" x 2-1/2". Cut triangles (replacement for folded corners 2-1/4" x 2-1/4". Cut once on diagonal for two triangle units. (The measurements are included in the instructions for the Corner Pop ruler.)
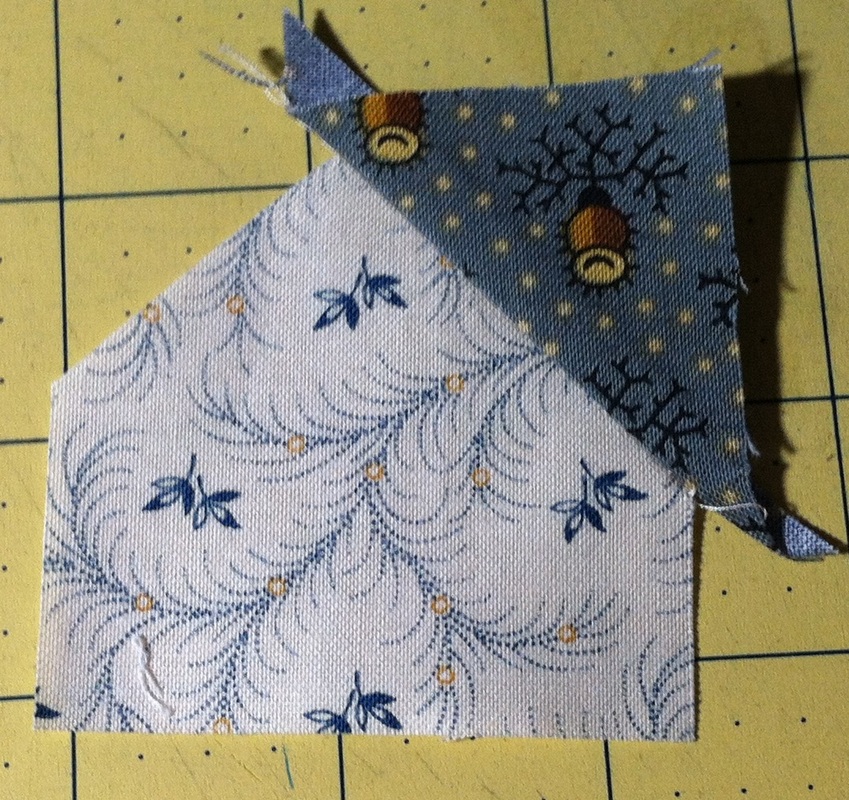
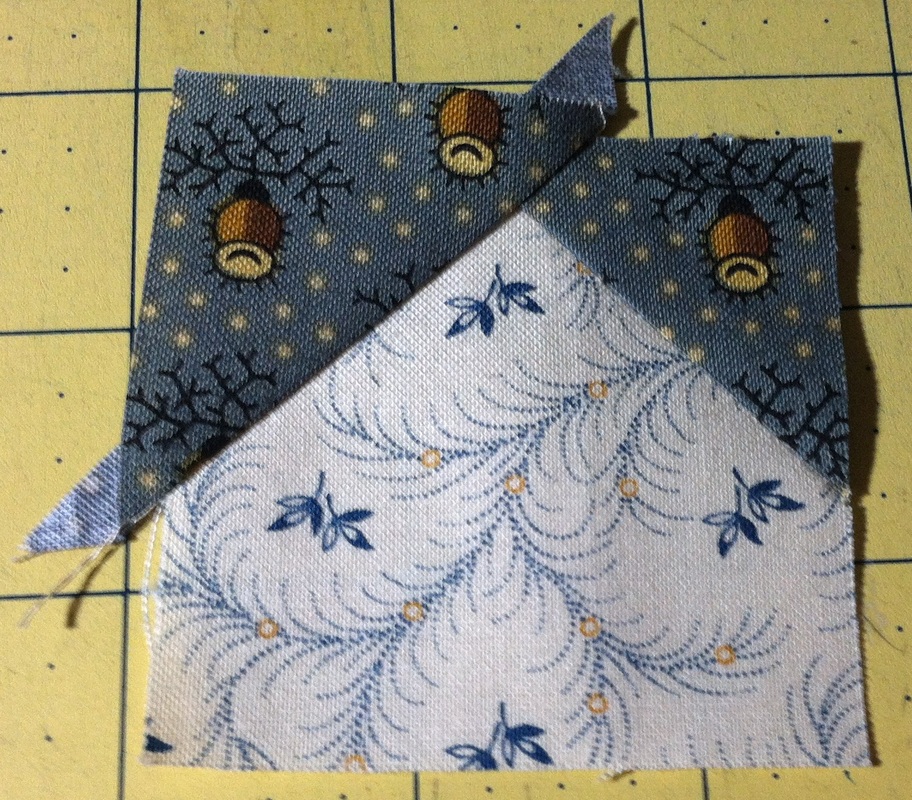
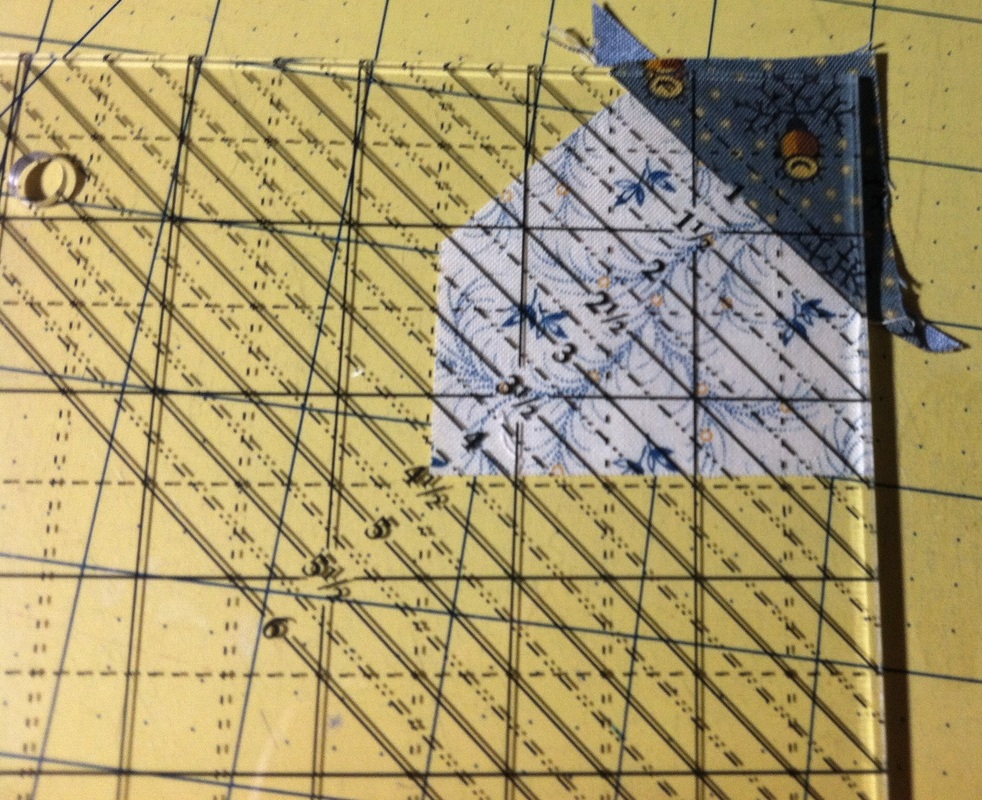 Matching up the 1" line on the corner trim down section of the ruler, trim the outside edges of the triangle.
 Finished unit is 2-1/2" x 2-1/2". How Did I Quilt This?I took a photo of my quilt top and brought it into Art and Stitch as a backdrop. 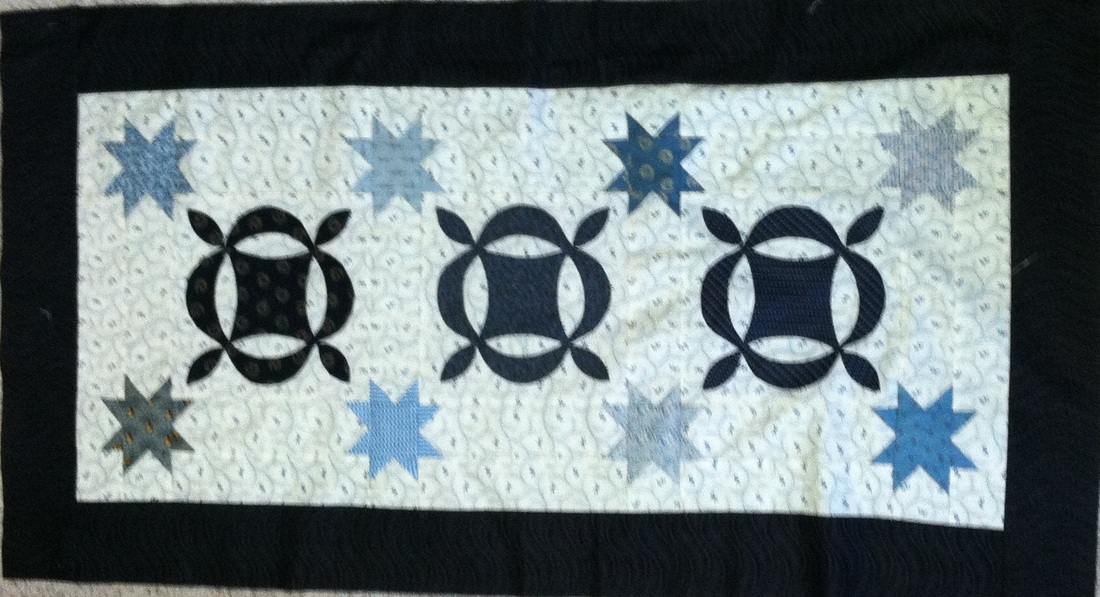 I found a sashing design that I had previously designed that worked really well (bowties). I aslo had a paisley point to point design that I could work around the star blocks. Then I just needed something for the center of the star blocks and and contrary wife applique. I just used the leaf from the applique and made a magic square.  Bowtie design for sashing and borders.
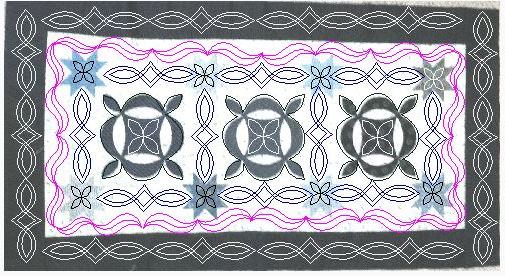 Contrary Wife Quilting Layout Here is the final quilt with a close-up of the quilting. 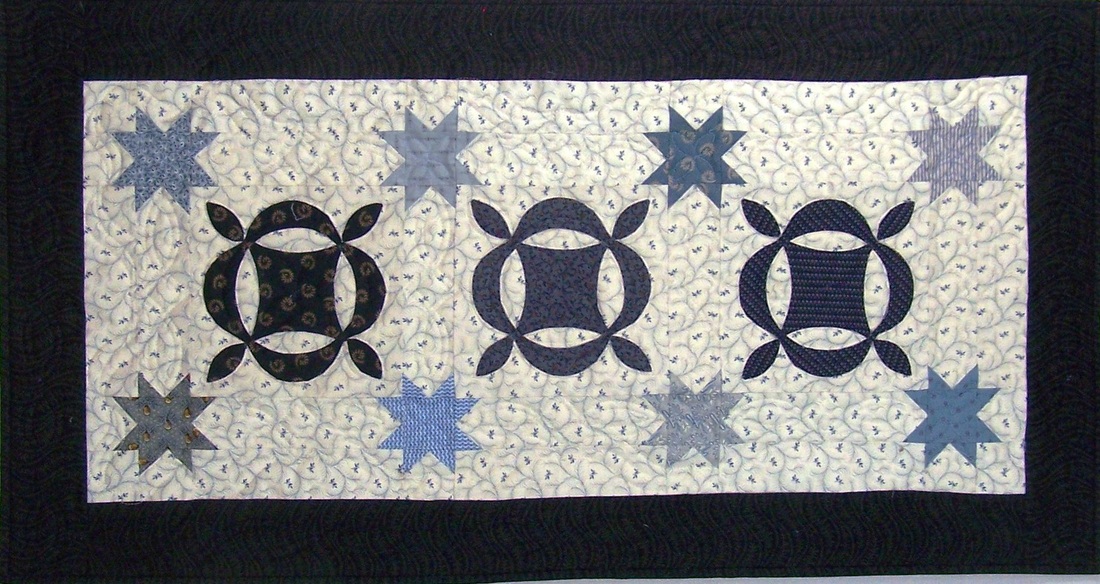 Contrary Wife Finished Quilt by Kari Schell  The quilt will be on display as part of the Heritage Club show at Four Season Quilts during the month of January. If you are in the area, please check it out. Happy quilting. Kari Sign up for my newsletter to stay current on what's happening in my studio and learn more quilting tips. As a thank you, I'll send you a FREE pattern for this small maple leaf quilt.
|


Free guide available for newsletter subscribers


Kari SchellElectric Quilt Expert and Educator and Pattern Designer. Categories
All
Archives
July 2024
|


 RSS Feed