
|
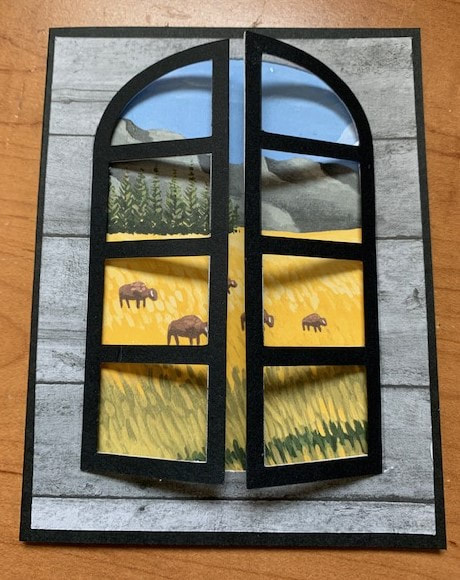
My latest hobby has been making my own greeting cards. This week I came across a design that had a window frame that overlayed a landscape image. I began thinking about how I could do something similar using Electric Quilt 8. I wanted to be able to cut the design out on an electronic cutting system. For me that meant incorporating Cricut Design Space and my Cricut Maker.
In the video, I will take you through my process. At a high level:
**What is Inkscape?
The extra piece of software I used for creating the SVGs is Inkscape. Inkscape is a professional vector graphics editor for Windows, Mac OS X and Linux. It's free and open source. Inkscape can seem overwhelming to use when you open it for the first time. However you only need to use a couple of tools within Inkscape -- so this really is a piece of cake. You can download Inkscape here. Inkscape will allow you to create an SVG file which may be used in any electronic cutting system (Cricut Design Space, Silhouette Studio, or Brother Canvas Workspace). So what is an SVG file? An SVG file is a graphics file that uses a two-dimensional vector graphic format. Unlike raster formats such as JPG, GIF, and PNG, an SVG image remains crisp and clear at any resolution or size. My Translation -- Much cleaner of an image than any trace in a cutting system.
The video is broken into three parts (in case you don't want to watch the entire video):
Window Card Construction
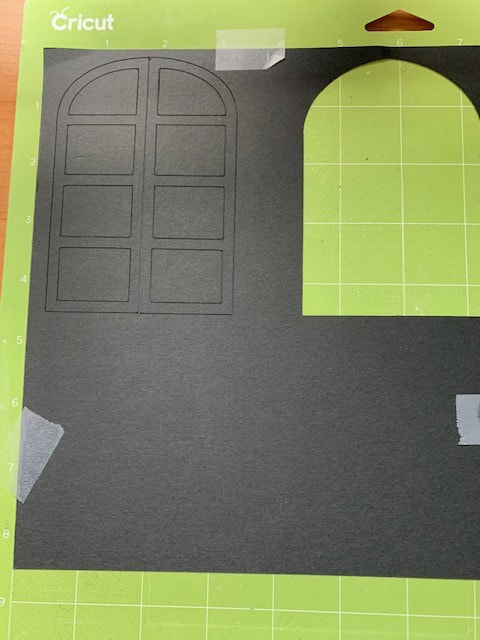
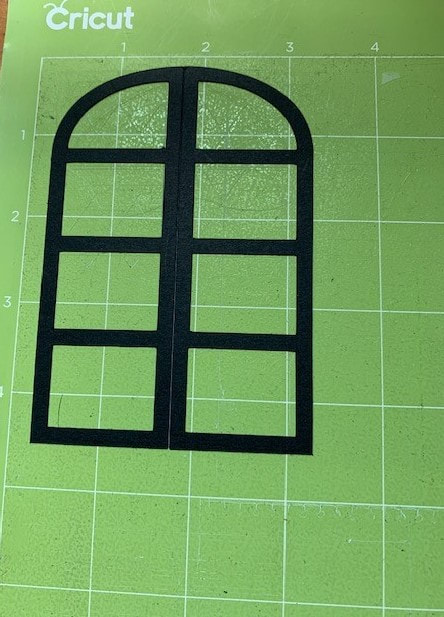
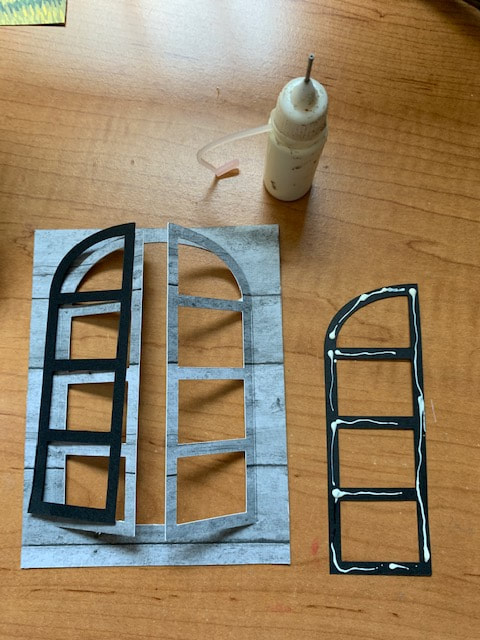
Step 1: Cut out the Window Frame svg on your electronic cutting system.
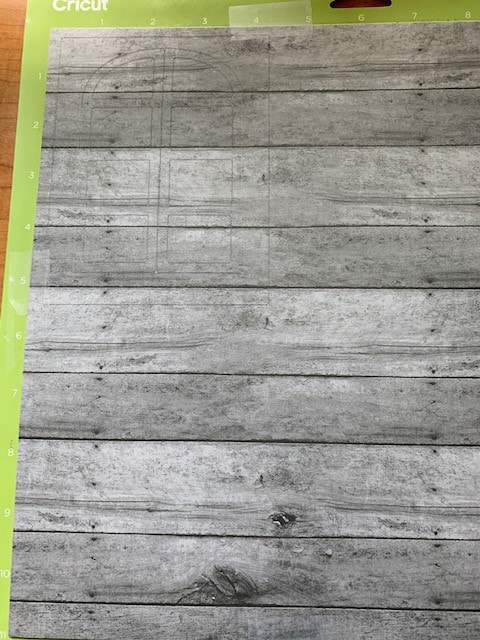
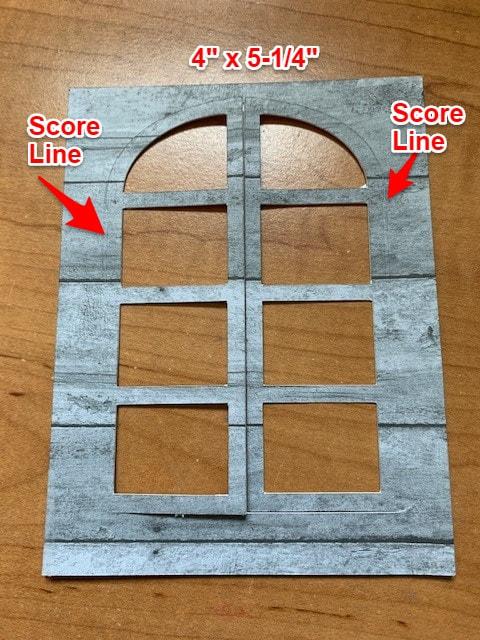
Step 2: Cut out the card front with the foldable window frame on your electronic cutting system. I used the Cricut Maker to score the left and right edges and cut the rest of the SVG.
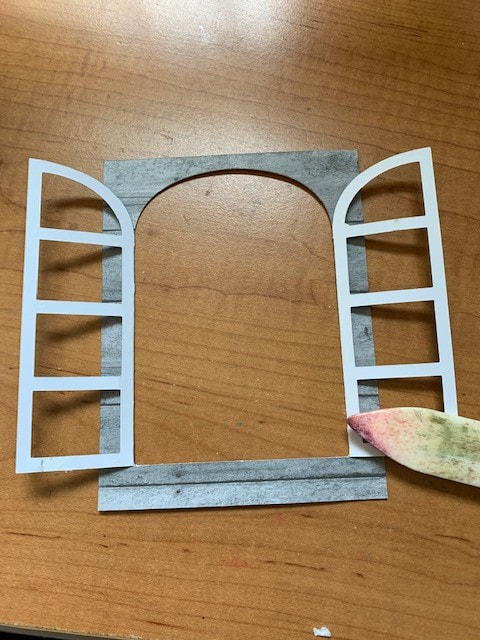
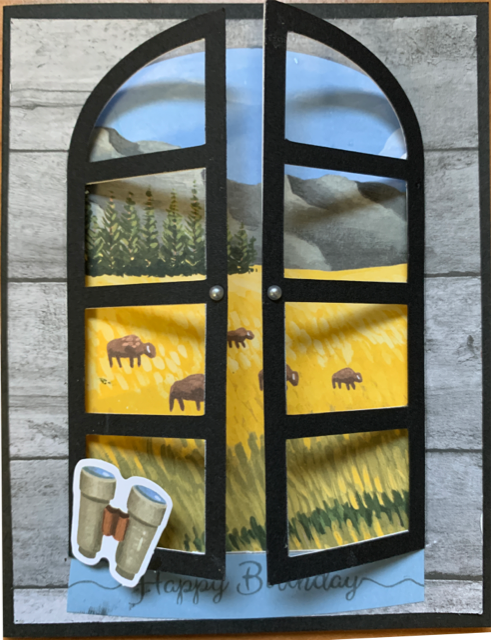
Step 3: Fold back along score lines and press with a bone folder.
Step 4: Glue black frames to card front.
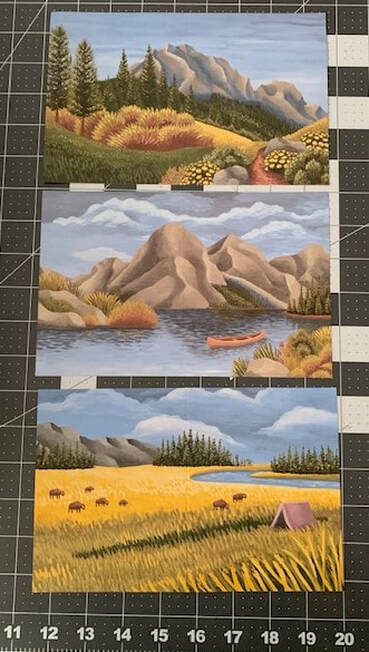
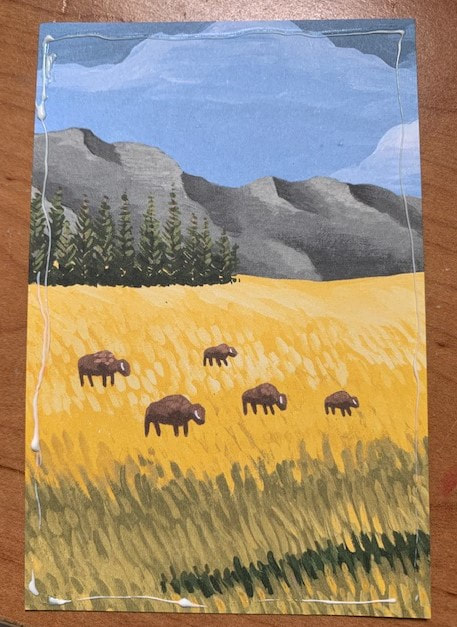
Step 5: Select a background. Trim to 3-1/4" x 4-3/4", Glue to back of card front. I was thinking that if you had a fun landscape photo from a trip, it might be nice to use that instead.
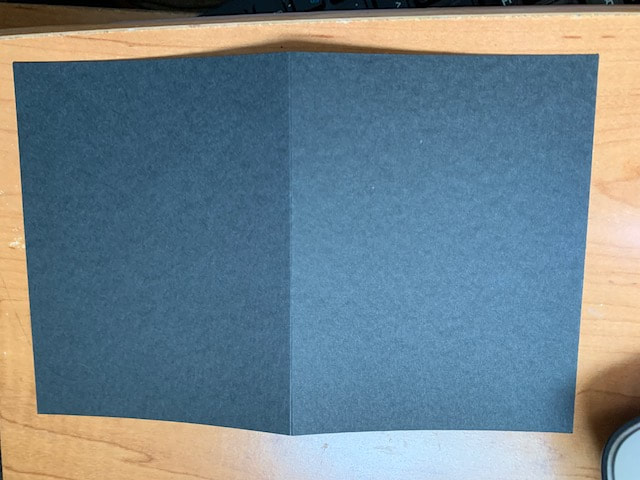
Step 6: Cut a card base using Black cardstock 8-1/2" x 5-1/4". Score at 4-1/4".
Step 7: Glue card front to card base.
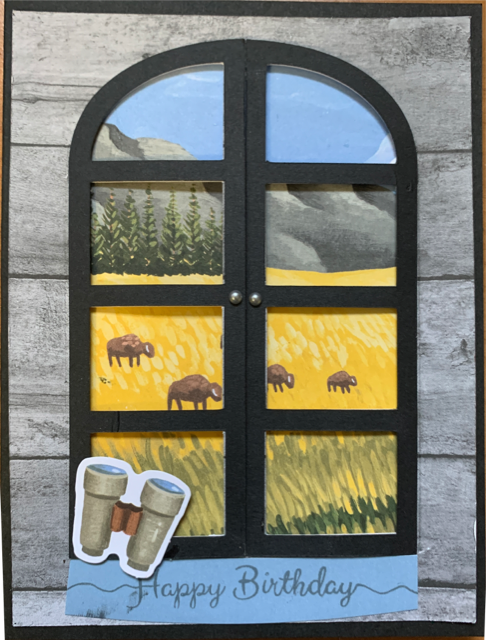
Step 8: Add greetings and embellishments.
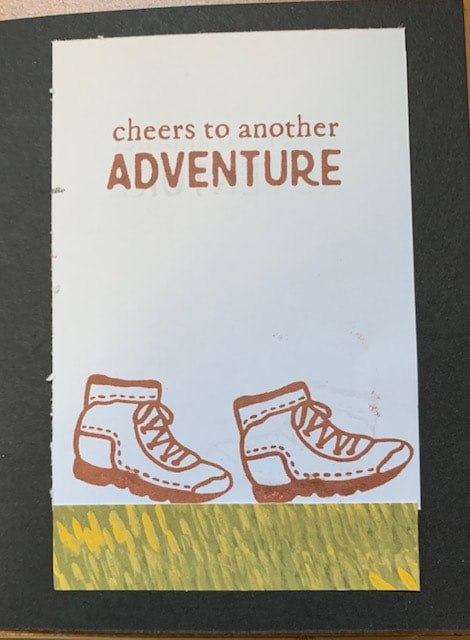
Step 9: Create inside panel for card. Stamped items from Paper Pumpkin kit.
Let me know if you use Electric Quilt 8 for uses other than quilting? I love hearing how you are using the software.
Tech Know Quilters Showcase
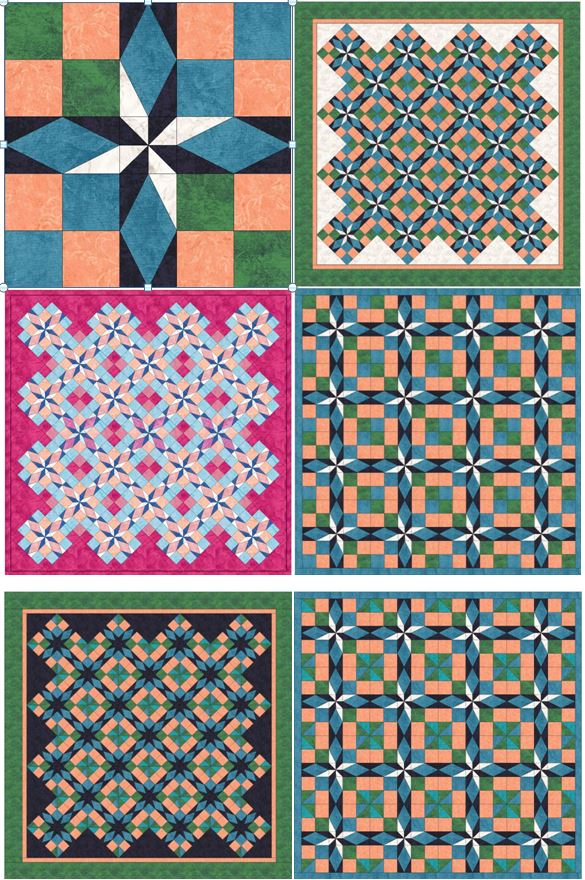
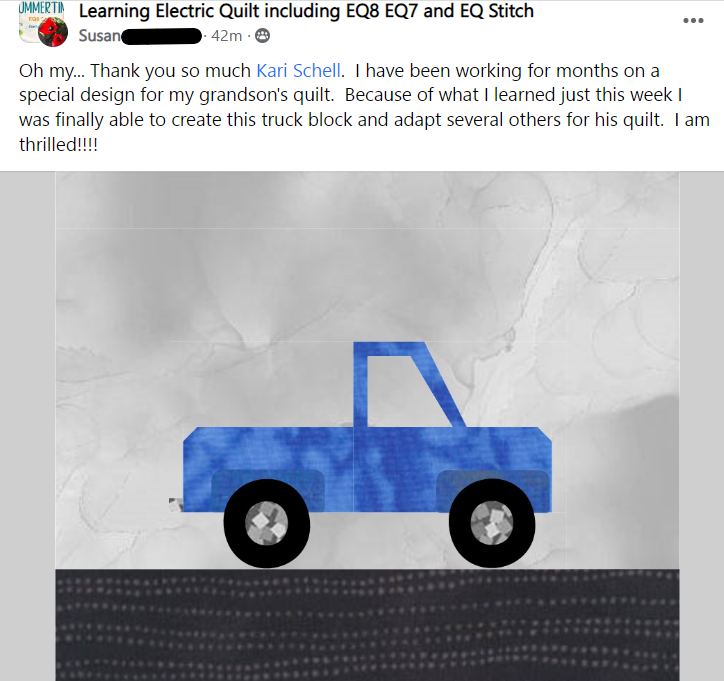
Current Tech Know Quilter members have been sharing their class projects along with their original designs (and in some cases quilts) in the membership's private Facebook group. Enjoy this show of some of their recent creations.
You can learn more about the Tech Know Quilters membership program and sign up for the wait list for the next open enrollment period here.
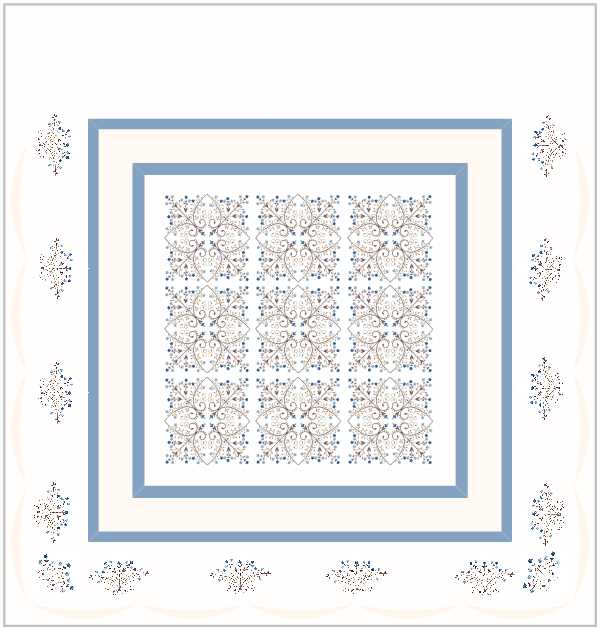
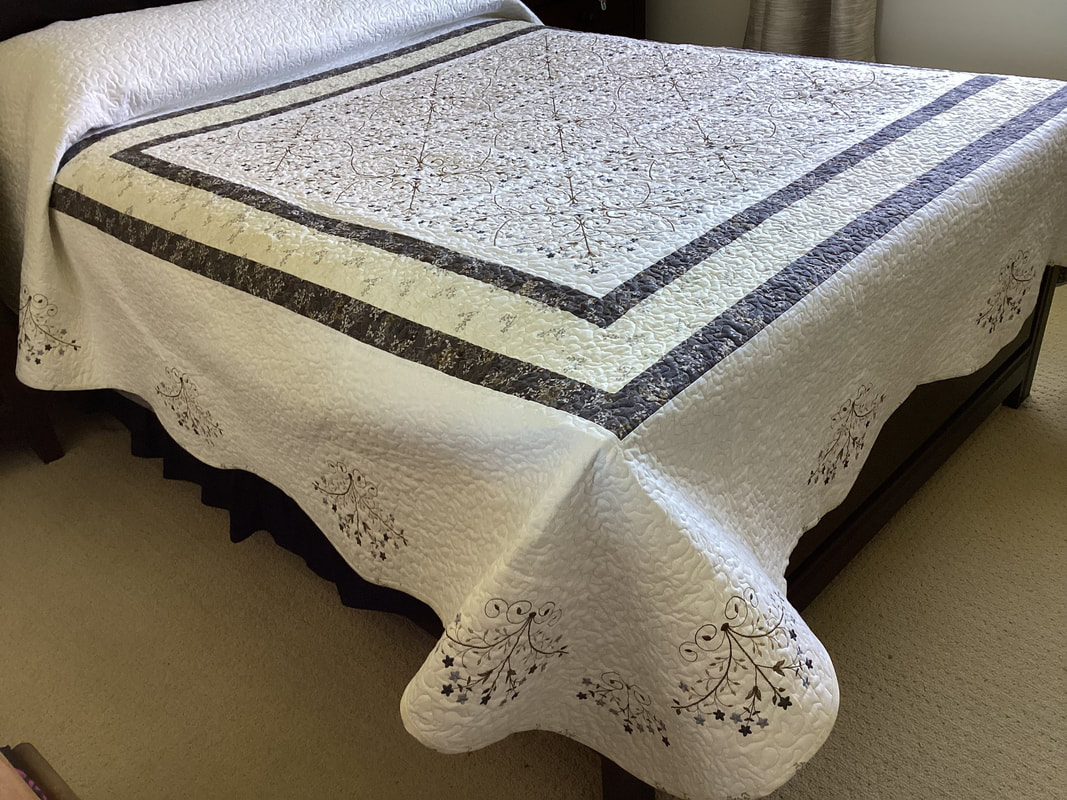
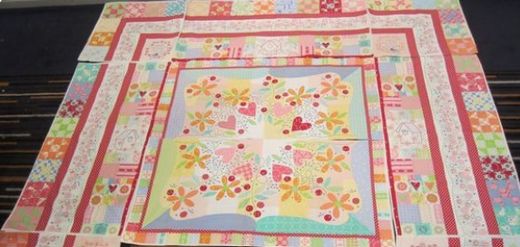
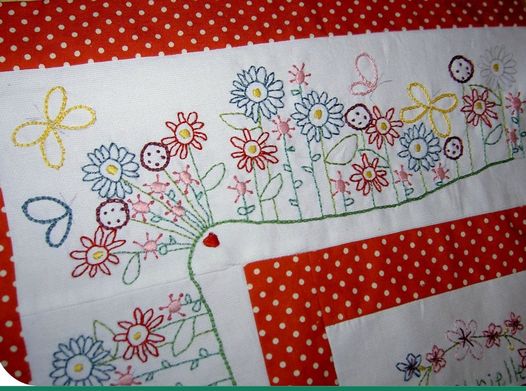
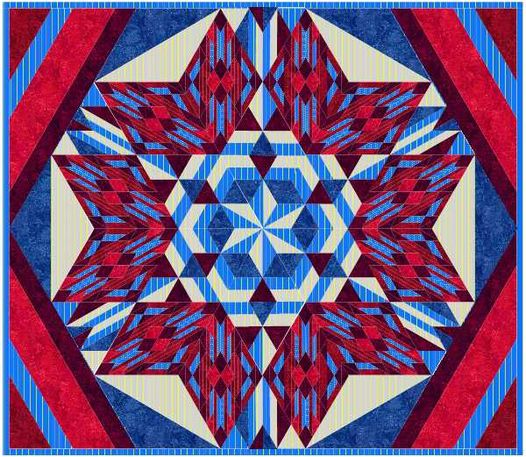
Pad Norrad My very dear Aunt and Uncle, who are in the mid 80's, asked if I could repair their favorite quilt they've had for over 40yrs. It wasn't repairable so I said it would be easier to just make them a new one. OMGoodness - what did I just say, LOL Along with my EQ8 Program, I also enjoy Digitizing. I put the two together and was able to create my pattern in EQ8 and Digitize the Embroidery needed to go into each of the blocks. I took the Advance Border Design Class (along with many others) and thank goodness I did. I've learned a lot more than I thought I would; thank you Kari Schell. In the end, this is a Bedspread that is quilted, not your usual quilt. I've decided I would make the Pillow Shams that match.
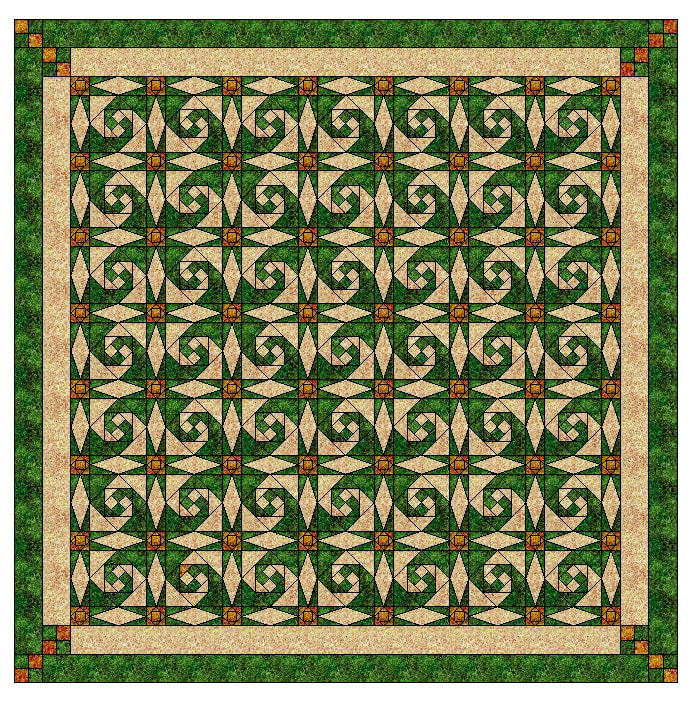
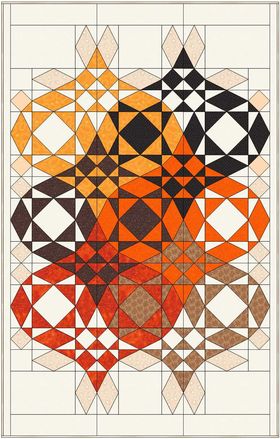
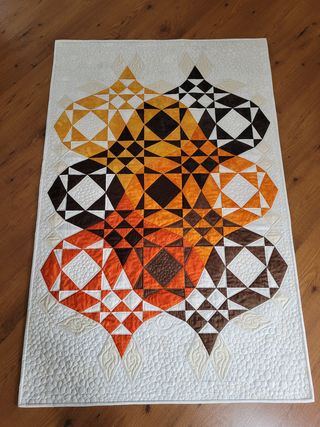
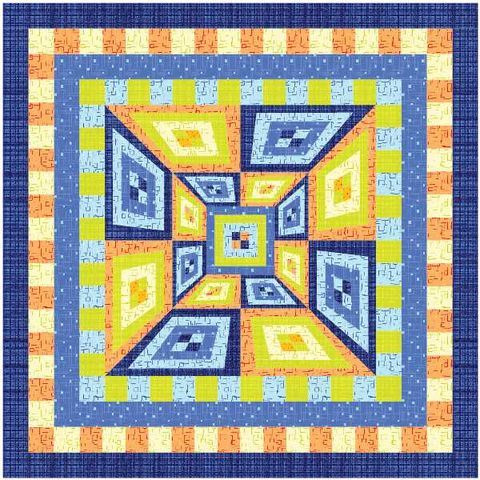
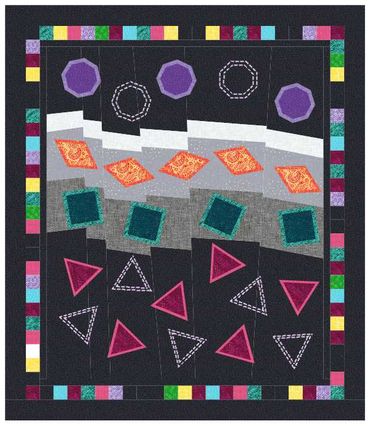
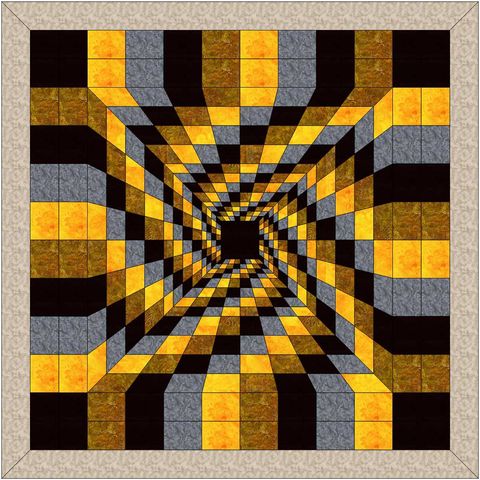
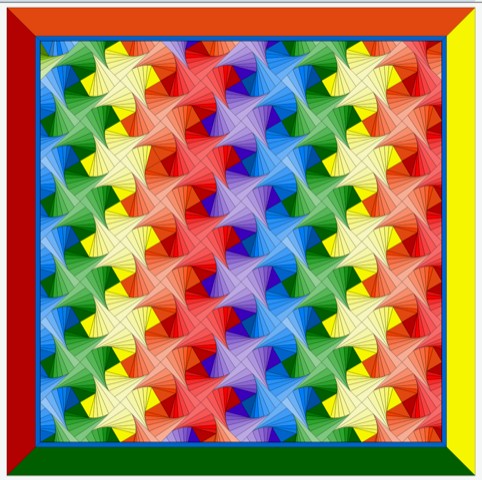
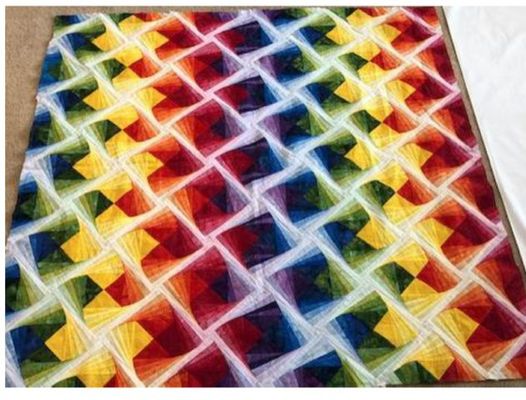
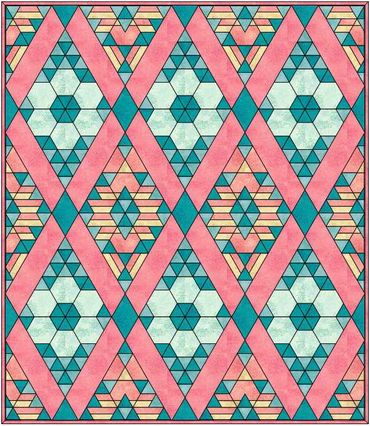
Pat Norrad We were given Challenge to only use two colors to make a project. The two crayons I pulled from a brown paper bag was Brown and Orange (go figure). We could have a cream, white or black background. I created this Quilt using the Storm at Sea block with shades of the two colors.
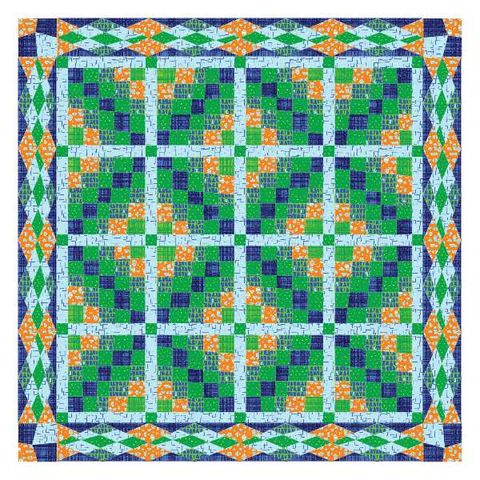
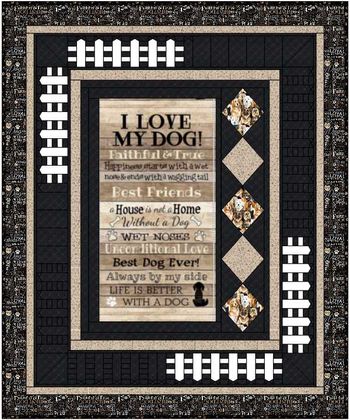
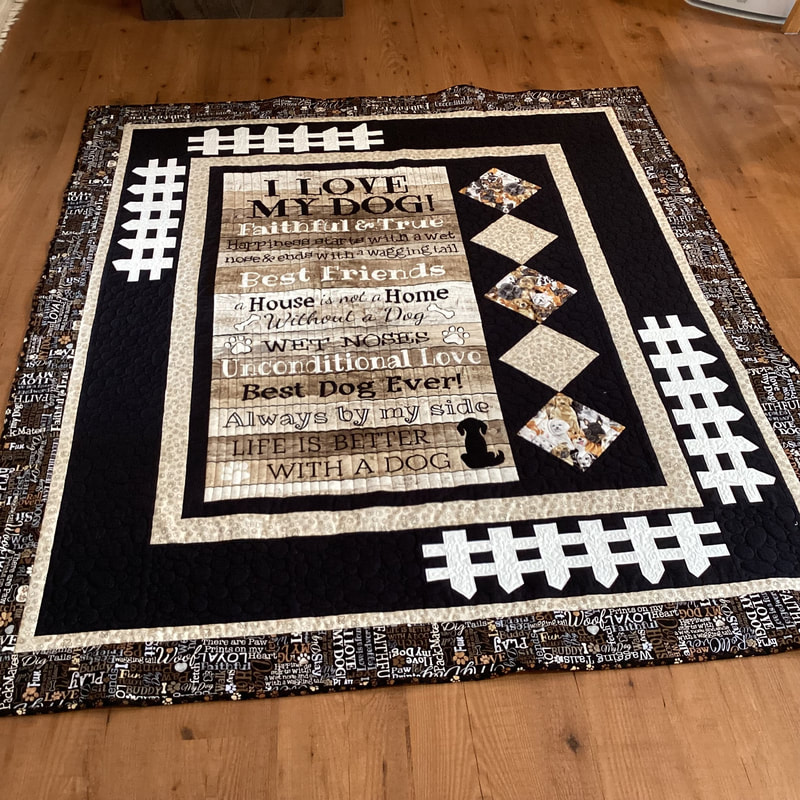
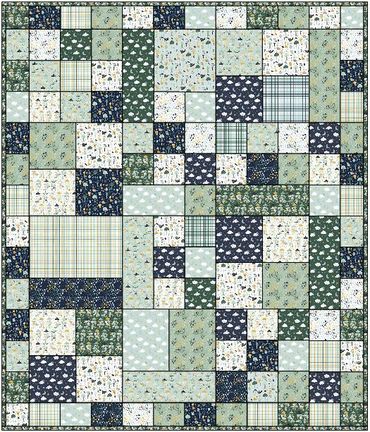
Pat Norrad This is another quilt I just finished. It is a Grad Quilt for our next door neighbor's daughter. We've good neighbors for 19 yrs and have watched their 3 children grow up. Their daughter finally got her wish to have her 'own' dog and she is just crazy over this dog. I drew the pattern in EQ8 and I'm so glad I did.
Scroll down for information on creating cut images from EQ8 applique. But first -- check out a new live webinar happening right after Christmas.
Register for Free EQ8 Webinar after ChristmasTurn Your Next Panel into a One of a Kind Quilt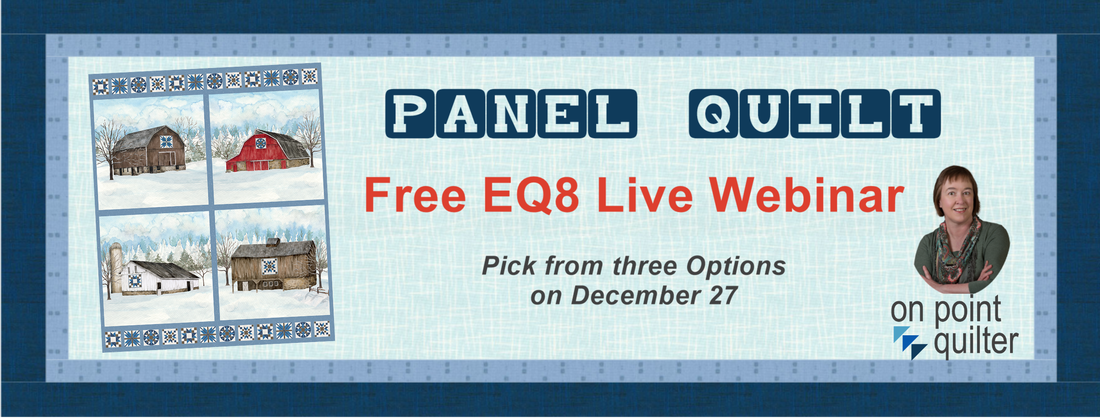
How many times have you purchased (on contemplated purchasing) a panel and then struggled what to do with it? Obviously you can slap on a couple of straight borders, add a bit of basic quilting and the binding and it is ready to give away.
But what if you want to do more?
Let me show you how to quickly get past the overwhelm and uncertainty of working with panels. Join my free Electric Quilt 8 webinar where I will take you step by step through the entire process to create your own panel quilt. In this live webinar, you will learn how to:
What are you waiting for? Join us today. Plus you will also receive a guidebook that you will be able to use as a reference both during and after the video. This will assist you when you're working on your project. I can't wait to see your panel quilt design. Join us now.
Free Webinar Registration Information
Choose the time that works the best below and register for this amazing fun webinar. You won't be disappointed. For all those that attend live, I will be offering a special bonus offer as well. Make sure to join me. I can't wait to see you there. A replay will be available for 24 hours if you cannot attend live. But you must register in advance to access the replay. APPLIQUE FROM EQ8 TO CRICUT SILHOUETTE OR BROTHER SCAN N CUT
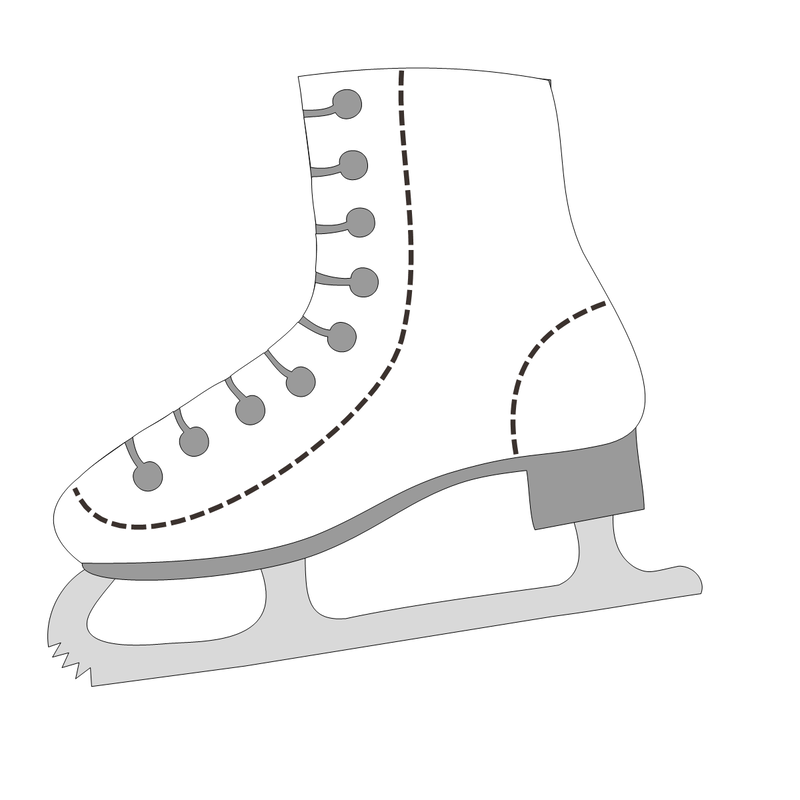
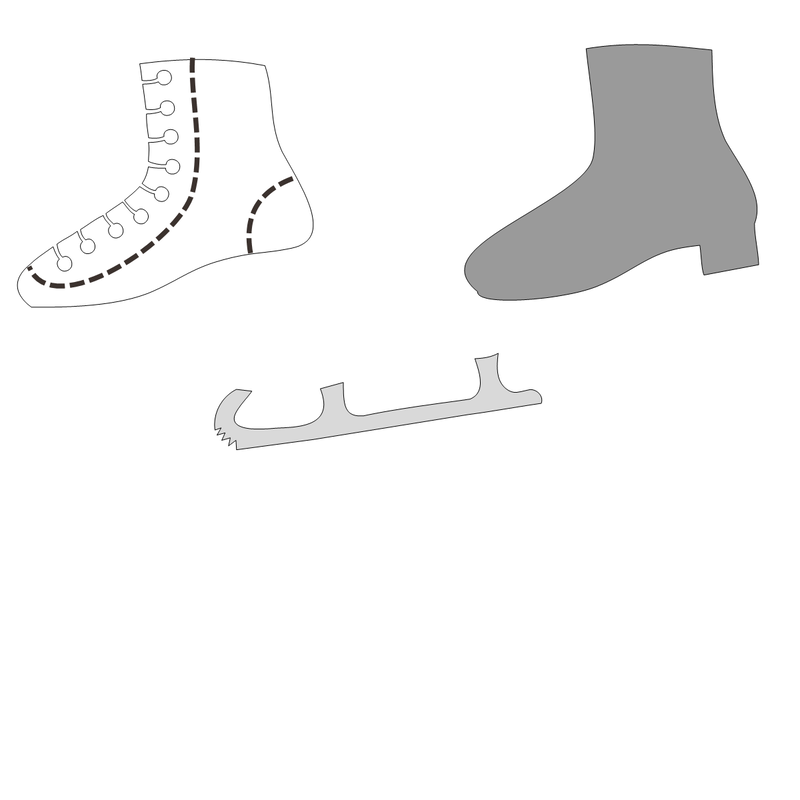
Last week I shared how to draft your own Ice Skating Motif using Electric Quilt 8. If you want to see the power of EQ8 up close and personal (and learn more about the applique tools) you will definitely want to check out this post.
In this video, I will share how to convert your EQ Applique drawing into an SVG file. An SVG file allows you to use the images (exactly as drawn) in the electronic cutting system of your choice -- Cricut, Silhouette, or Brother Scan N Cut.
While many of the cutting systems will suggest using their tracing features, I have had mixed success with traces. Often they can muddy aspects of the images and they are really not successful in pictures with layered images. So I knew I wanted a technique that preserved the integrity of the initial drawing in Electric Quilt. I found that the key to success is an extra piece of software called Inkscape.
What is Inkscape?
The extra piece of software I used for creating the SVGs is Inkscape. Inkscape is a professional vector graphics editor for Windows, Mac OS X and Linux. It's free and open source. Inkscape can seem overwhelming to use when you open it for the first time. However you only need to use a couple of tools within Inkscape -- so this really is a piece of cake. You can download Inkscape here. Inkscape will allow you to create an SVG file which may be used in any electronic cutting system (Cricut Design Space, Silhouette Studio, or Brother Canvas Workspace). So what is an SVG file? An SVG file is a graphics file that uses a two-dimensional vector graphic format. Unlike raster formats such as JPG, GIF, and PNG, an SVG image remains crisp and clear at any resolution or size. My Translation -- Much cleaner of an image than any trace in a cutting system.
Best Tips from the Video
Electric Quilt Tips
Inkscape Tips
Cricut Design Space Tips
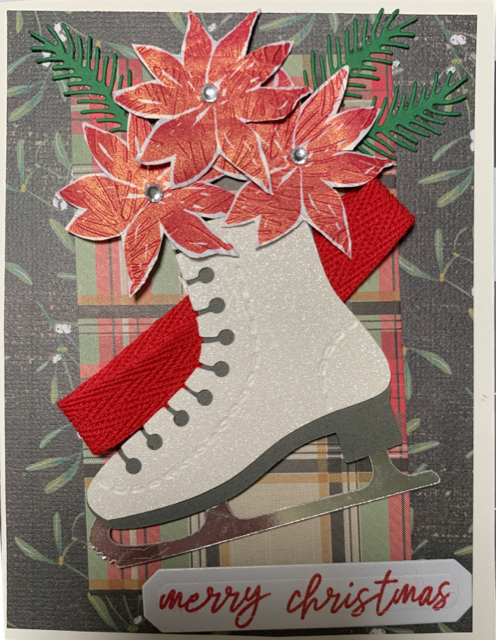
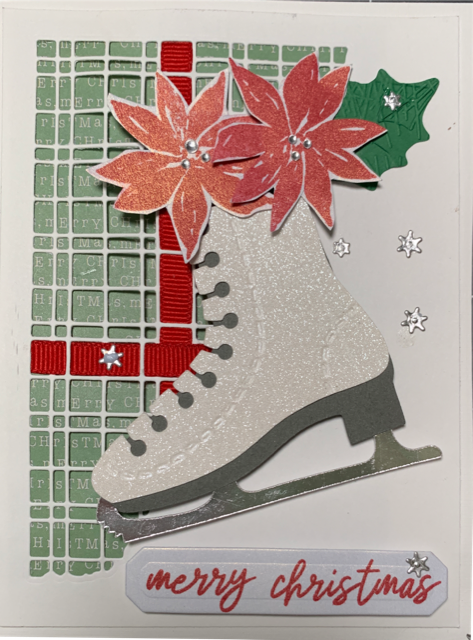
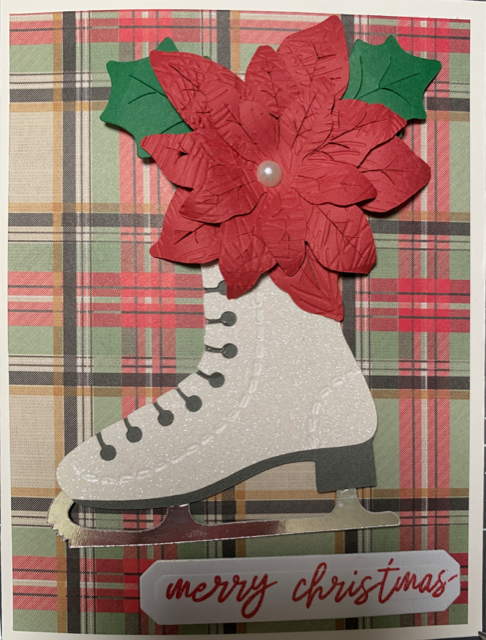
Card Ideas Using the Cut Ice Skates
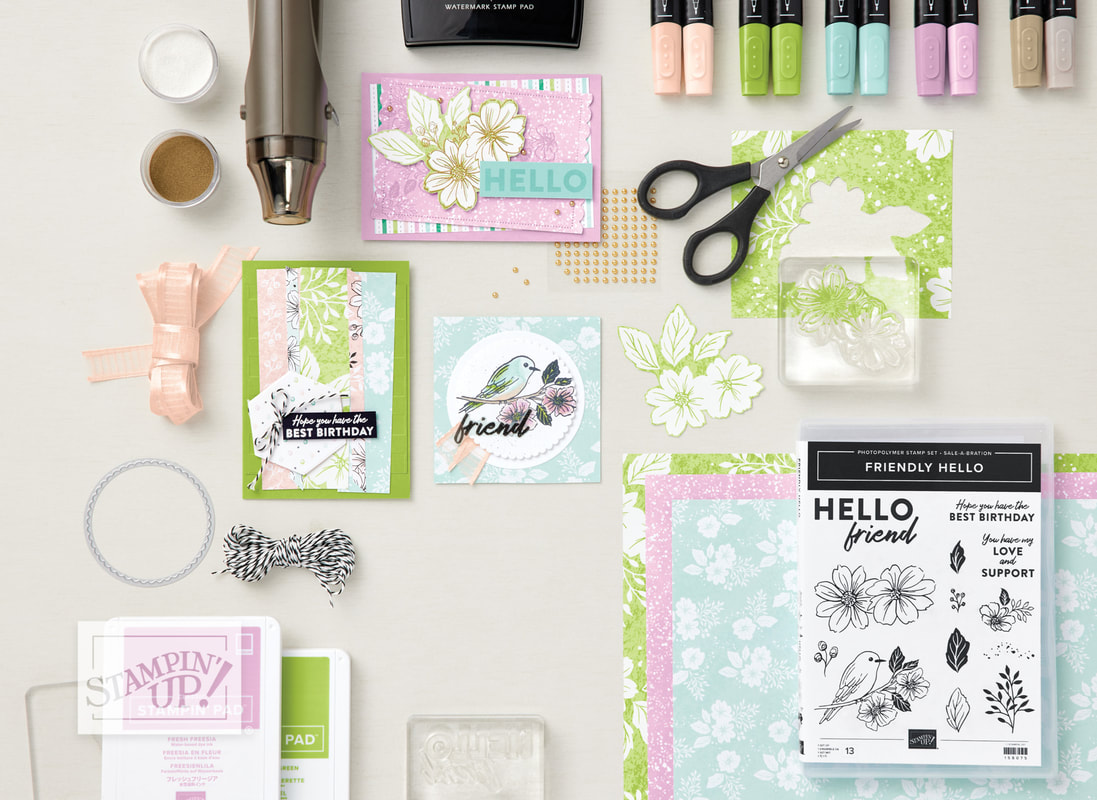
The following cards were make from my stash of card making supplies using the Ice Skating motif design in Electric Quilt 8 and cut with my Cricut Maker.
I am a huge Stampin Up fan and a part-time distributor (i.e. I want the purchasing discount) -- but I also accumulate supplies from a variety of other sources. I think of card making like making scrap quilts -- use what you have on hand!
With over 1,200 participants in the Summertime EQ8 Challenge, everyone has had a busy week -- including me. I am so impressed with the blocks that are being drafted as the knowledge and confidence that has been gained while going through each of the free tutorials.
You are still welcome to sign up for the free challenge. Videos will be available through the end of the month.
Summertime Quilt Reveal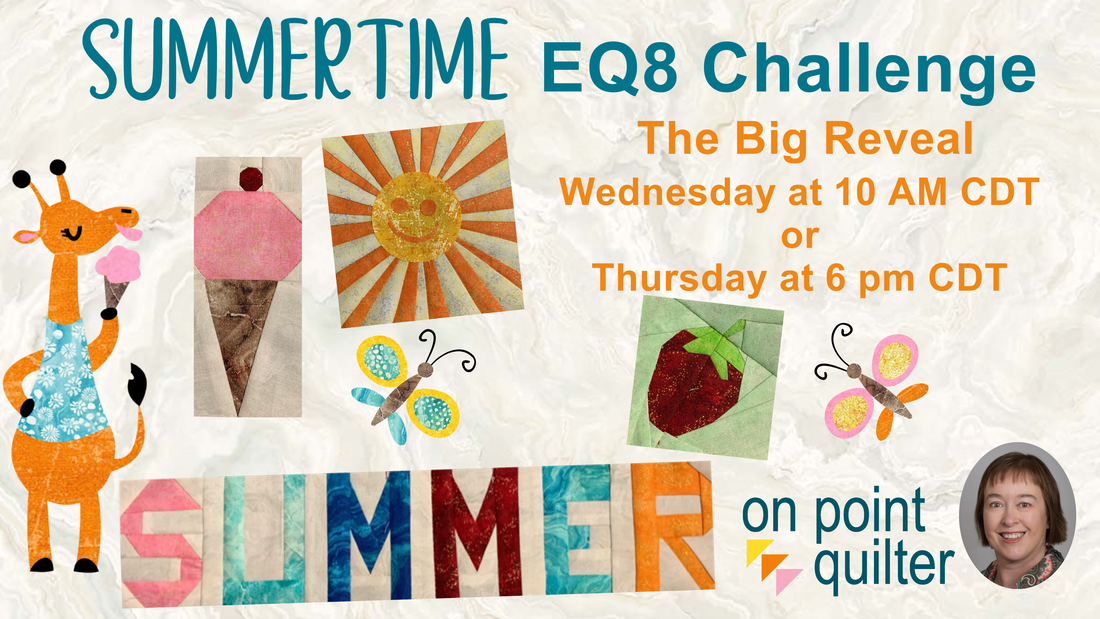
Choose between Wednesday morning or Thursday evening where we will be finishing up the Summertime challenge with a live Zoom meeting.
For those enrolled in the challenge, the videos will be available through the end of the month. (During the zoom meeting, I will be sharing a way to have unlimited access to these videos.) Even if you were unable to join the challenge, you are still welcome to participate in the reveal where I share my layout along with my pieced quilt using these cute little blocks. I will also be talking about Tech Know Quilters and announcing a flash sale. New Tips and Techniques for Paper Piecing
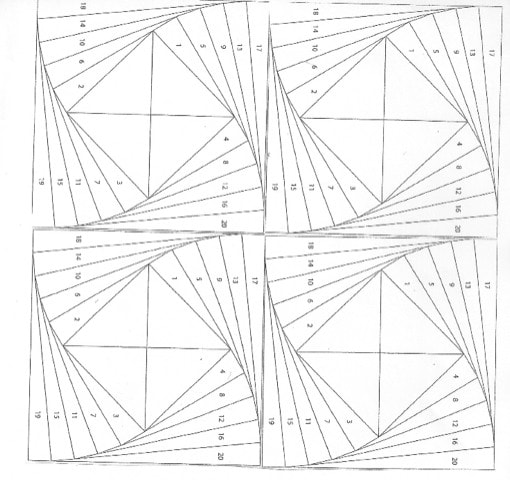
Electric Quilt is fantastic in that is provides us with easy to print foundation patterns. However there has been some confusion on how to paper piece and how to cut those fabric pieces slightly oversized for the foundations.
Since I have been sharing a lot of newly designed paper pieced patterns in the free Summertime EQ8 challenge, I thought I should also share my thoughts on actually making these blocks. Paper Piecing Instructions
If you are new to foundation/paper piecing, here is my suggested piecing process. This is excerpted from my Northwoods Loon pattern.
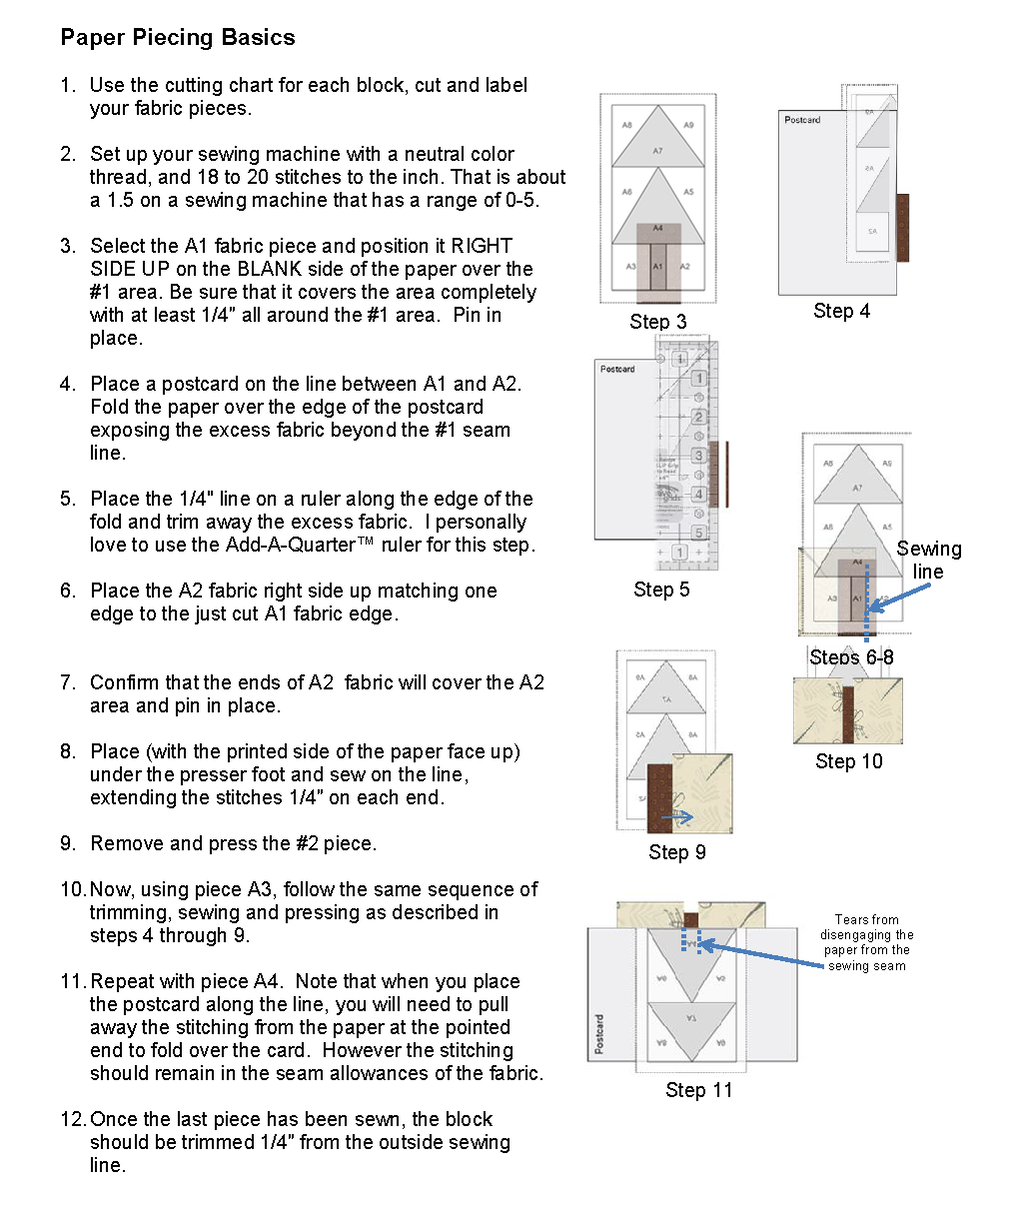
For those that prefer a video, her is a short one covering the same steps noted above (just using a different block).
Oversized Piecing Calculations - Manual Approach
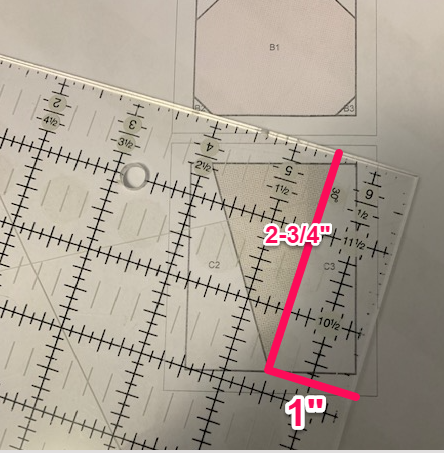
When I write paper piecing instructions (for either myself or a pattern that I am publishing) I like to create a pre-cutting chart. In those instructions, I provide the measurements for rectangles that are slightly oversized and can be added to a previous patch (or patches). If you would like to try my approach, here are some specifics:
For each patch in the block:
Adding 3/4" to both the width and height gives me an oversized piece measuring 1-3/4" x 3-1/2". I always test my patterns and if I am having any problems I will add a bit more to the pre-cut size.
Here is my cutting chart for the ice cream cone block. The block has a finished size of 2" x 5". And was the first block in the Summertime EQ8 Challenge. 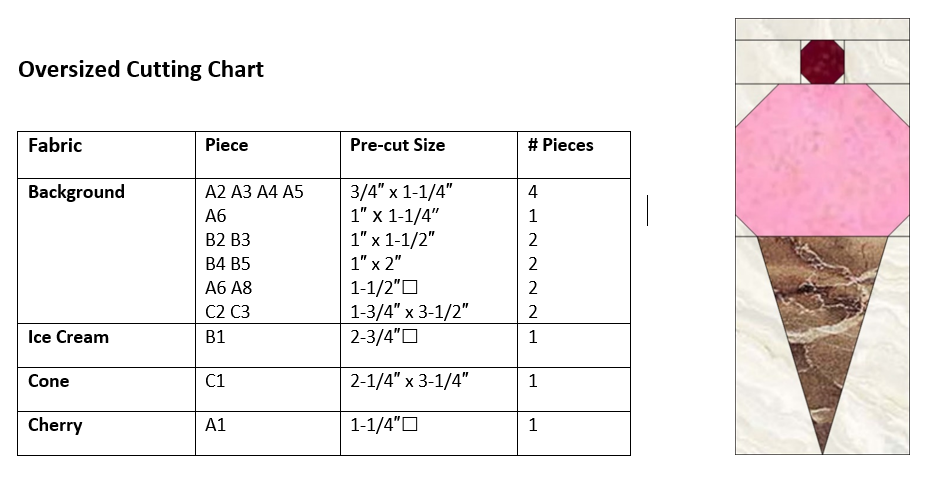
Creating SVG Oversized Cutting Charts
This week I decided to play with two different approaches to creating svg cutting charts for a foundation pattern. I couldn't decide between starting with a block diagram or templates in EQ.
Both approaches use an extra piece of software called Inkscape.
What is Inkscape?
The extra piece of software I used for creating the SVGs is Inkscape. Inkscape is a professional vector graphics editor for Windows, Mac OS X and Linux. It's free and open source. Inkscape can seem overwhelming to use when you open it for the first time. However you only need to use a couple of tools within Inkscape -- so this really is a piece of cake. You can download Inkscape here. I am currently using version 1.1 (which is the version demonstrated in the video). Inkscape will allow you to create an SVG file which may be used in any electronic cutting system (Cricut Design Space, Silhouette Studio, or Brother Canvas Workspace). So what is an SVG file? An SVG file is a graphics file that uses a two-dimensional vector graphic format. Unlike raster formats such as JPG, GIF, and PNG, an SVG image remains crisp and clear at any resolution or size.
SVG Oversized Piecing Approach 1 : Adding Seam Allowances with Inkscape
SVG Oversized Piecing Approach 2: Create the Oversized Seam Allowances using Templates in EQ 8 and use Inkscape to Convert to SVG
Creating SVG Files with Oversized Piecing Video
Here is the video where I demonstrate both approach 1 and approach 2.
Here is the link for the Cute PDF Writer for Windows referred to in the video.
Here is the link for the RWTS PDF Writer for MAC referred to in the video.
Working the Your Cutting System
Each of the major cutting systems has a slightly different approach. Chances are that if you have a cutting system, you have worked through the process of importing a picture or an svg. My primary suggestion is to always double check the measurements of your imported images and adjust them before dong anything else in your cutting system. I have discovered that each of the cutting systems has a different "conversion" from an SVG file. And Cricut (the brand I use), seems to "update" their system at least once a week with the updates changing the conversion percentage. Learn from my mistakes. I have thrown away way too much fabric for forgetting to check and adjust the size before cutting.
I love quilting and enjoy spending a great deal of time every day creating virtual quilts using Electric Quilt. However, I decided I needed to spend a little bit of time away from quilting to explore expressing my creativity in a new medium.
So, this last year I have taken up card making. I am finding that card making allows me to play with different colors and textures. Some of the same things I love about quilting. I have become hooked on Stampin Up and have watched a ton of You Tube videos where demonstrators share various techniques to create works of art in their cards. I've purchased a fair number of stamps and the entire collection of current ink pads (because who wants to be missing a crucial color in the midst of card design). I was so excited when I discovered that Stampin Up offers kits -- which they call Paper Pumpkin. What is Paper Pumpkin?
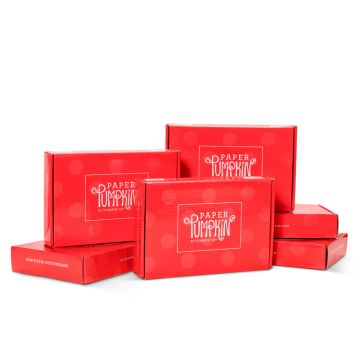
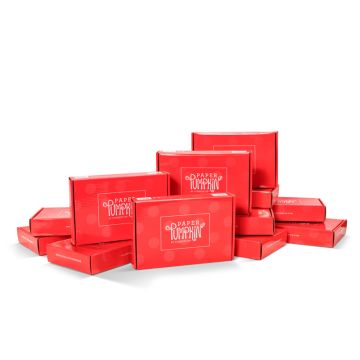
Paper Pumpkin is a monthly kit that includes all the supplies necessary to create a series of cards around a different theme each month.
Just like in quilting I found it easy to feel overwhelmed by some of the projects I found on YouTube. Paper Pumpkin solved that overwhelm, because everything you need for your project is included in your monthly art box. All you have to do is open it up and get started. You’ll be able to make cards, treat bags, and so much more from this monthly subscription. It even includes the envelopes for mailing your cards. Among the items in each Paper Pumpkin monthly craft kit is a set of reusable rubber stamps. So after you’re done creating your monthly craft, you’ll have a valuable stamp to add to your collection. You even get a free clear stamping block with your first craft box. Plus, you get a different color small ink pad every month as well. January 2022 Kit - Kisses and Hugs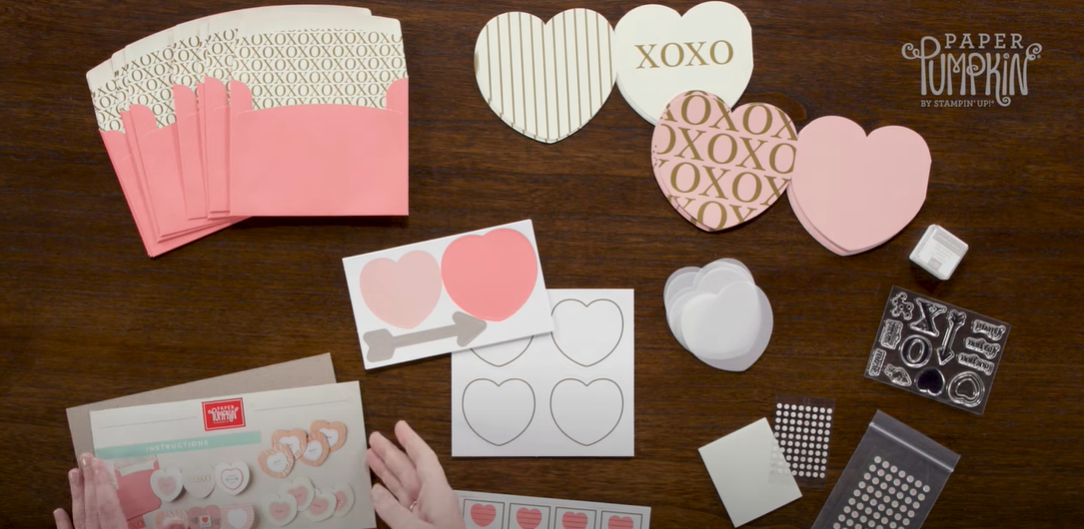
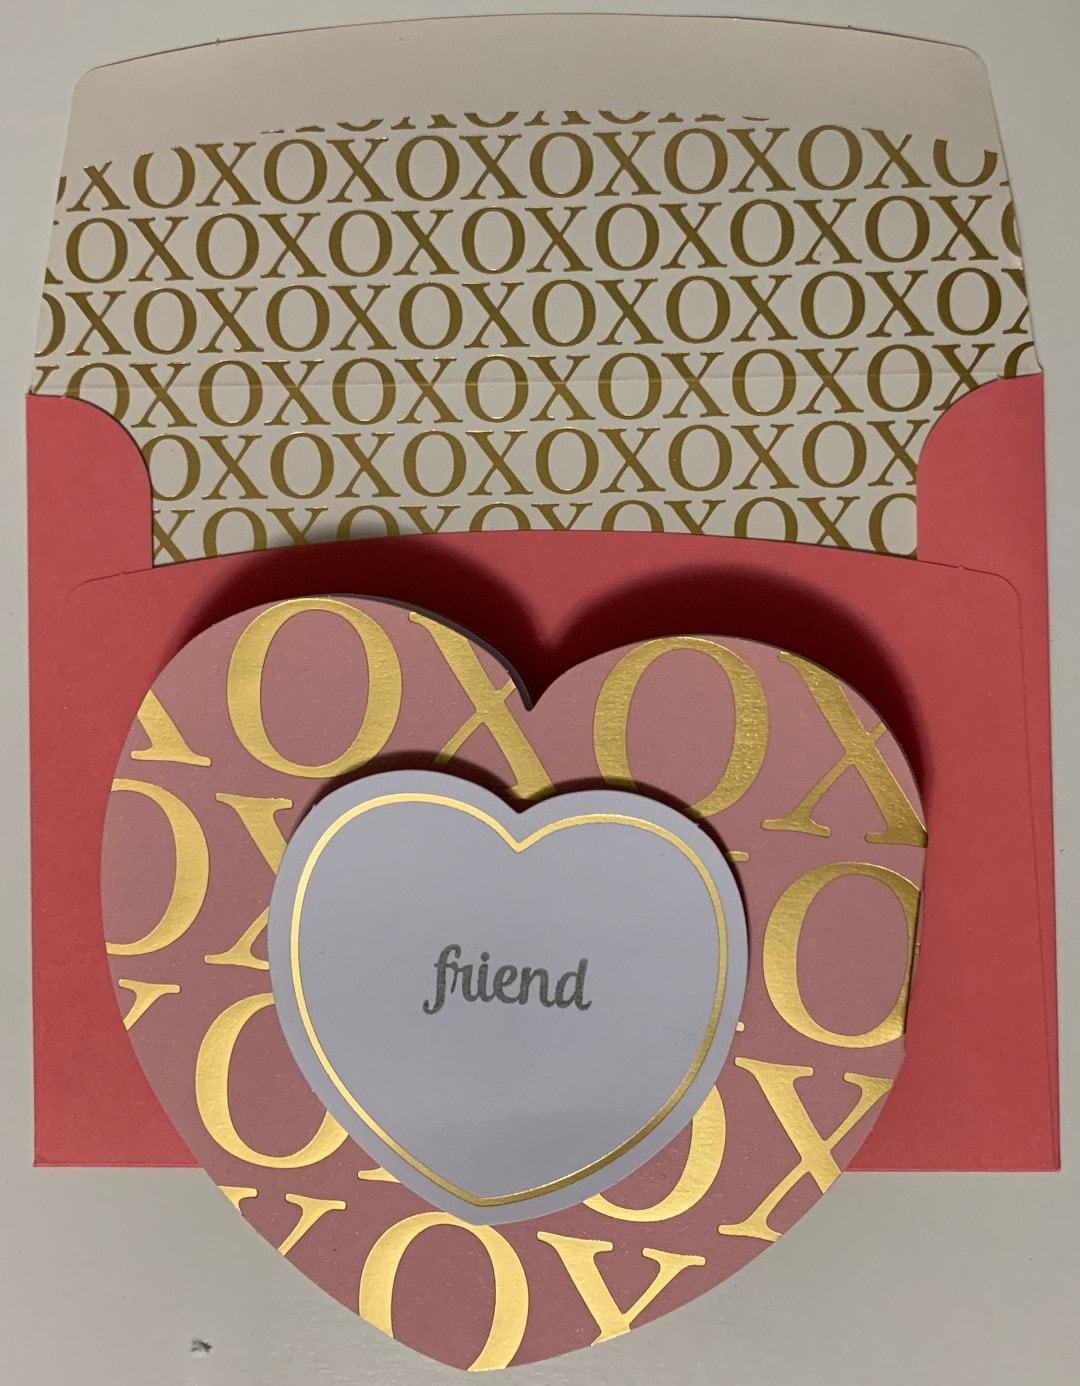
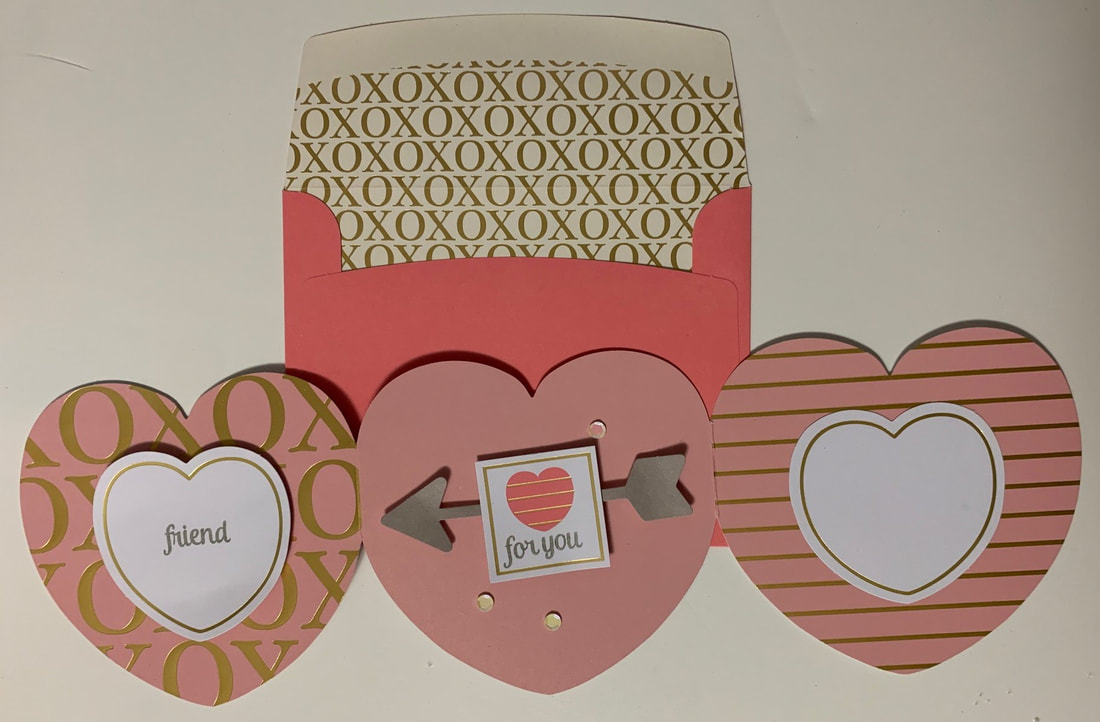
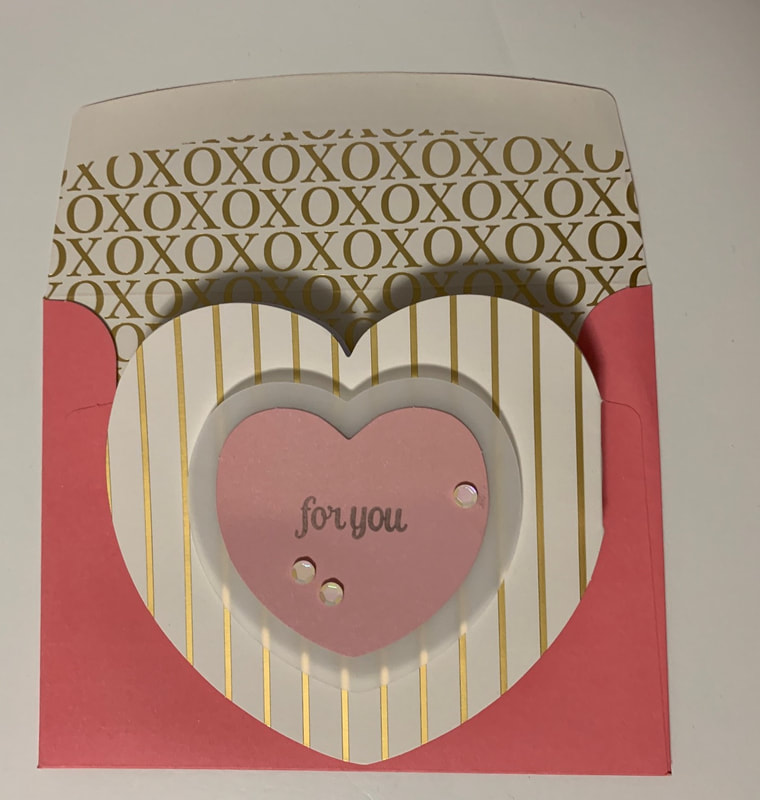
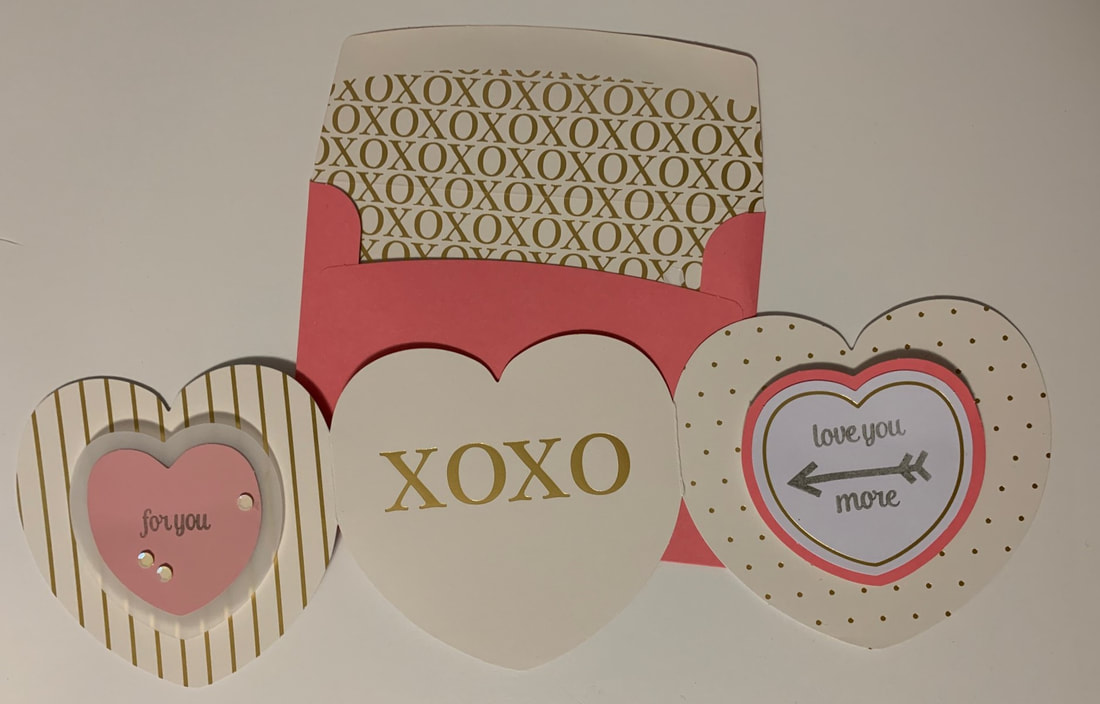
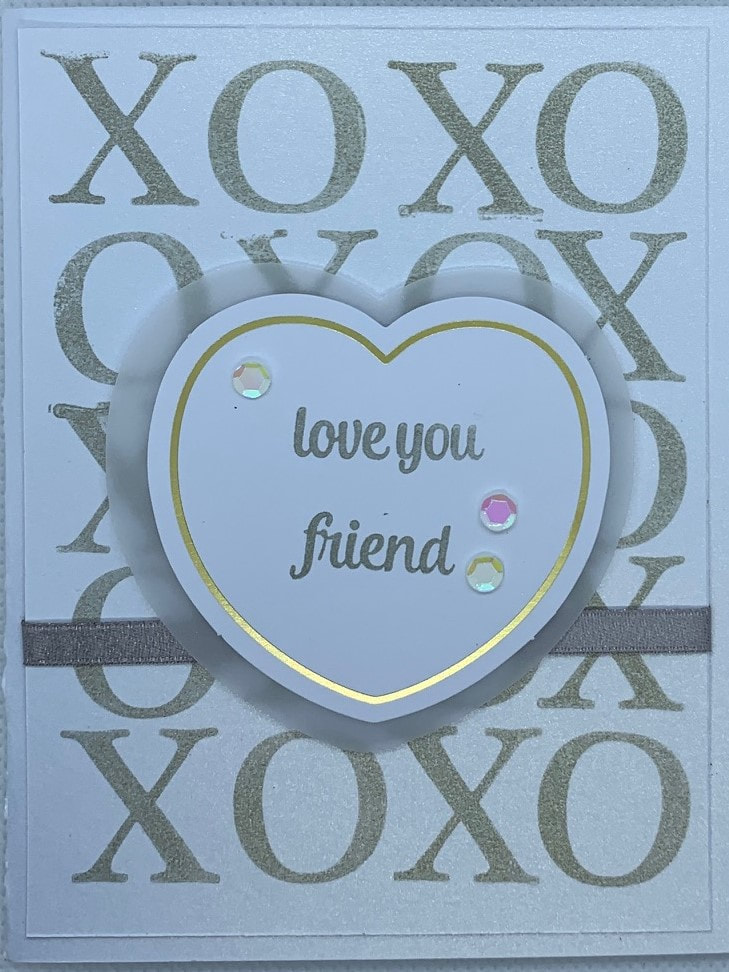
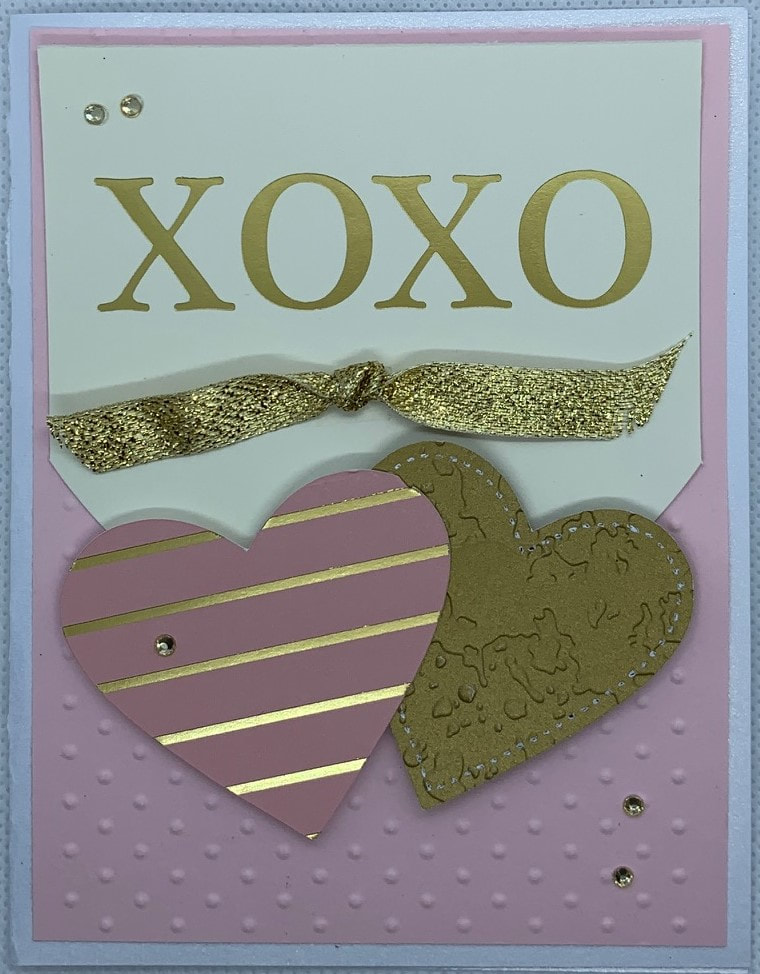
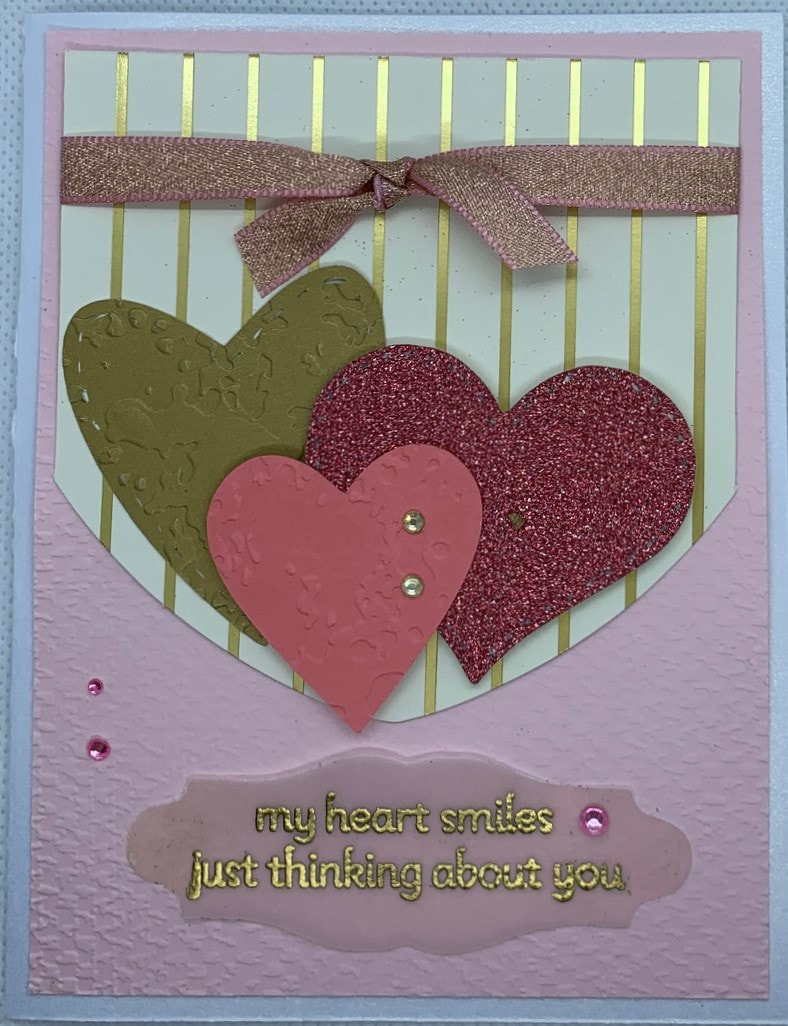
The January kit was Kisses and Hugs. The Kisses & Hugs Paper Pumpkin Kit contained trifold heart-shaped cards. The printed gold foil designs added a timeless touch to these cards that you could use year-round as this kit isn’t bound to just Valentine’s Day—it works for all love occasions like anniversaries, weddings, birthdays, or those “just because” days.
I made one of each of the cards following the instructions in the kit. (There were enough supplies to make 5 of each.)
These were beautiful, but I really wanted to see what else I could design with the remaining supplies from the kit.
To add to the kit, I decided to draft a series of hearts in Electric Quilt 8. And then transferred the designs to Cricut Design Space to save time cutting everything out. My free video this week will take you through the process of drafting a group of hearts using Electric Quilt 8 along with the transfer process. Bonus -- there are two options for transferring the designs.
No Electronic Cutting System: If you don't have an electronic cutting system (Cricut, Silhouette, or Brother Scan and Cut), you could still print out your hearts created in Electric Quilt on cardstock. Just color everything white in Electric Quilt 8 before printing. And you will want to turn on outline patches. Then use your favorite paper snips to cut the designs (never use those fabric scissors for this). :)
Inkscape
The extra piece of software I used for creating the SVGs is Inkscape. Inkscape is a professional vector graphics editor for Windows, Mac OS X and Linux. It's free and open source.
Inkscape can seem overwhelming to use when you open it for the first time. However you only need to use a couple of tools within Inkscape -- so this really is a piece of cake. You can download Inkscape here. Inkscape will allow you to create an SVG file which may be used in any electronic cutting system (Cricut Design Space, Silhouette Studio, or Brother Canvas Workspace). So what is an SVG file? An SVG file is a graphics file that uses a two-dimensional vector graphic format. Unlike raster formats such as JPG, GIF, and PNG, an SVG image remains crisp and clear at any resolution or size. My Paper Pumpkin Alternative Cards
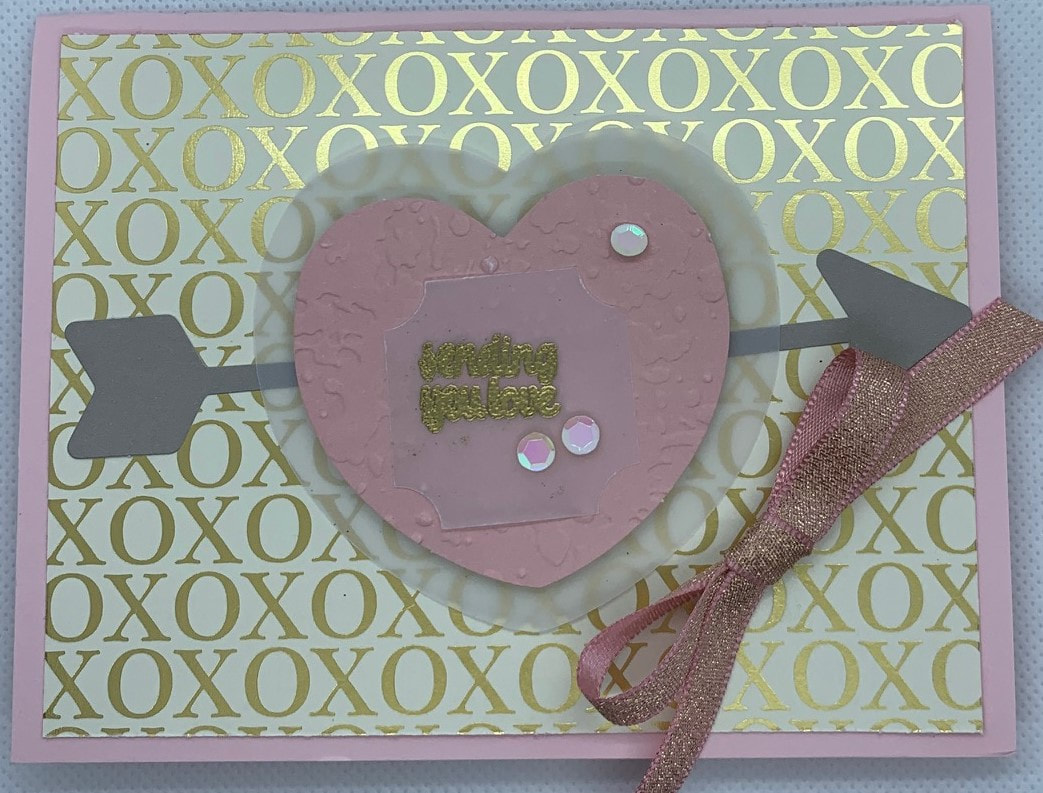
The first two alternatives primarily used supplies from the kit. The only items added were card stock and ribbon.
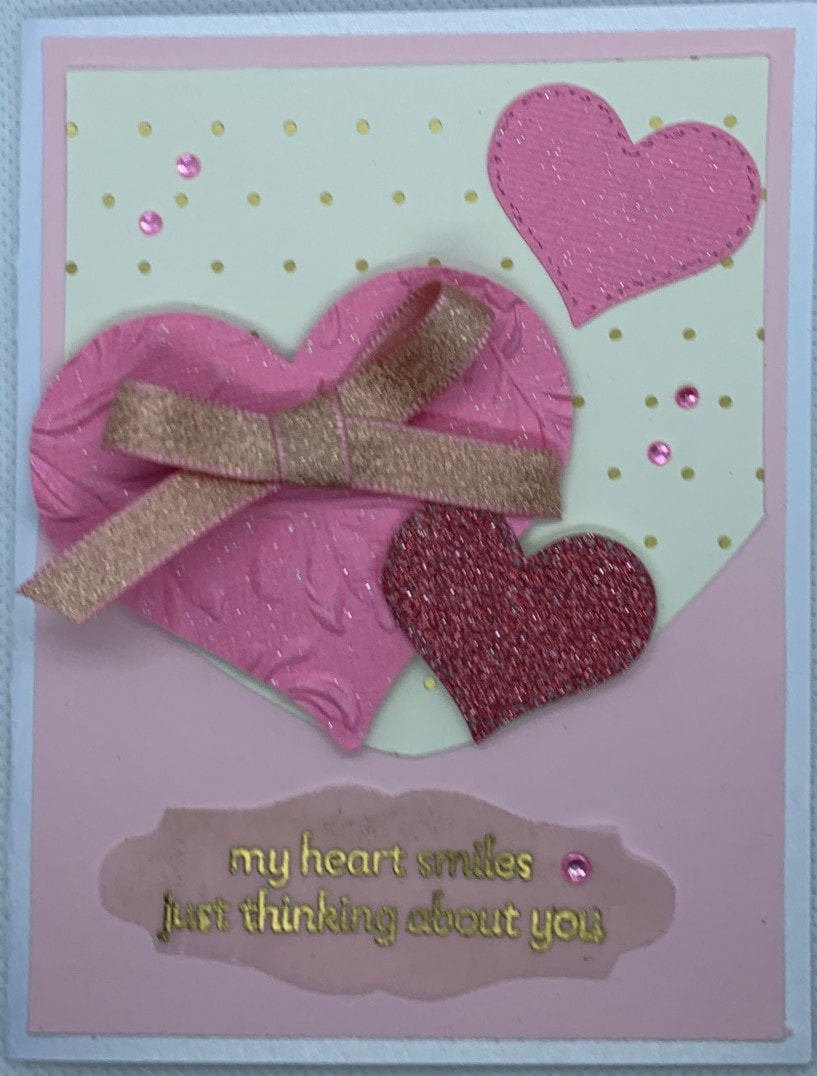
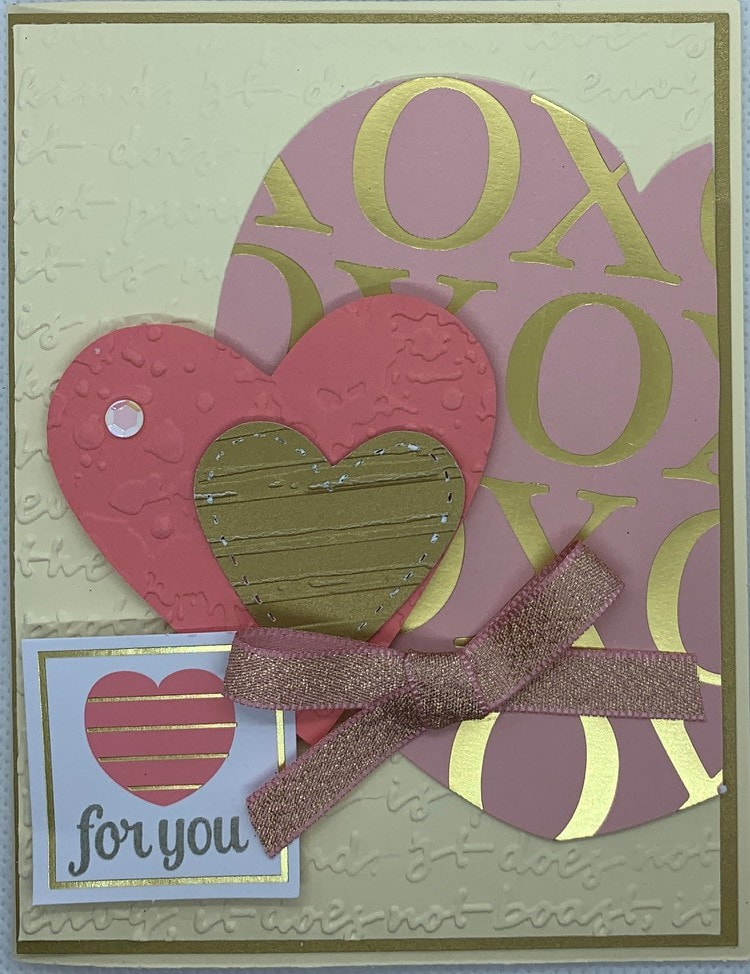
The remaining cards used some pieces from the kit -- but I added some of the Electric Quilt designed hearts (cut out in a variety of cardstock). I also had some fun with both heat embossing (the sentiments) and dry embossing (the added texture to the paper). Notice that I even cut some of the EQ hearts from some of the card stock in the kit.
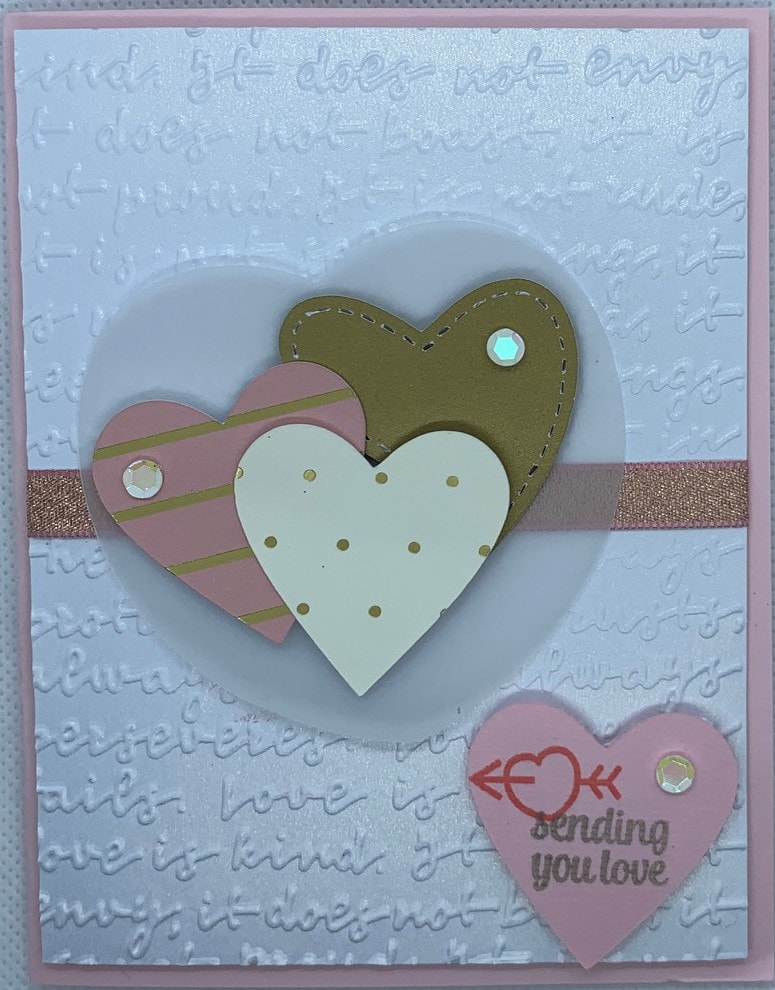
I still have a lot of extra supplies from the January kit. I will be doing some additional playing this week before mailing off my Valentine day cards.
Paper Pumpkin
If you would like to start card making, I suggest starting with Paper Pumpkin. You don't need to think through a huge list of supply options to figure out what you need first. Everything you need to get started will be in your box. Subscribe by the 10th of any month to receive that month's kit. The first box will even include a mounting block that will work with all the stamps.
Stampin' Up offers both monthly subscriptions and prepaid subscriptions. In both situations, you can pick the months you want to participate. It is super easy to opt out of a month that doesn't interest you. Stampin' Up prices for Paper Pumpkin will be going up on March 1st. As a result the prepaid subscription is a great value. Essentially you are pre-buying a number of boxes at the current price. Then you can decide which months to apply them to. Click on the links below to purchase any prepaid subscription. The prepaid subscriptions are non-renewing unless you elect to renew.
You may also make any other purchases of Stampin Up products while you are on the Stampin' Up website. If you purchase Stampin Up product using my host code during February 2022, you are eligible for a special thank you gift from me, plus purchasing bonuses from Stampin Up.
Kari's Thank You Gift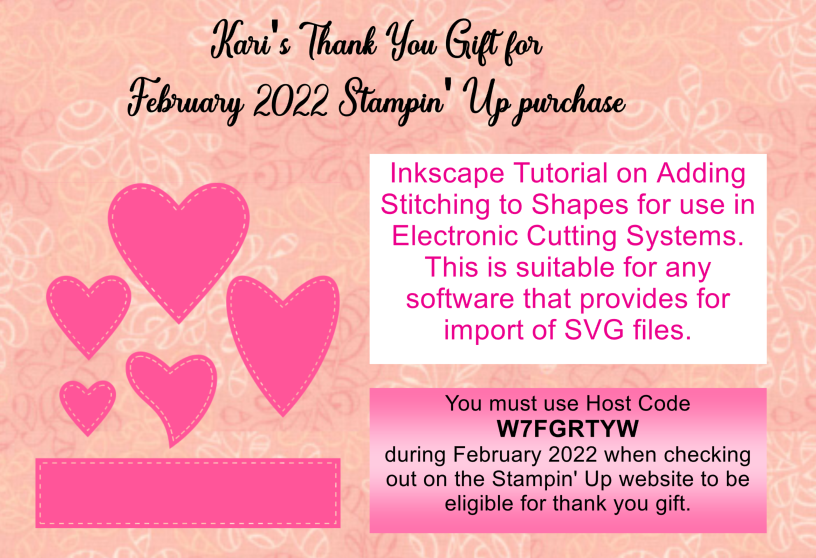
Being a quilter, I really love the look of stitched lines around a shape. It could be one of the heart shapes from today's tutorial. Or a square, rectangle or even oval shape for stamping a sentiment. Learn my process for adding those stitched lines to your shapes with an exclusive tutorial for those purchasing with Host Code W7FGRTYW. You must use the host code when checking out with Stampin' Up to be eligible for the bonus.
Tutorial will be sent to you the first week in March. Bonuses from Stampin' Up
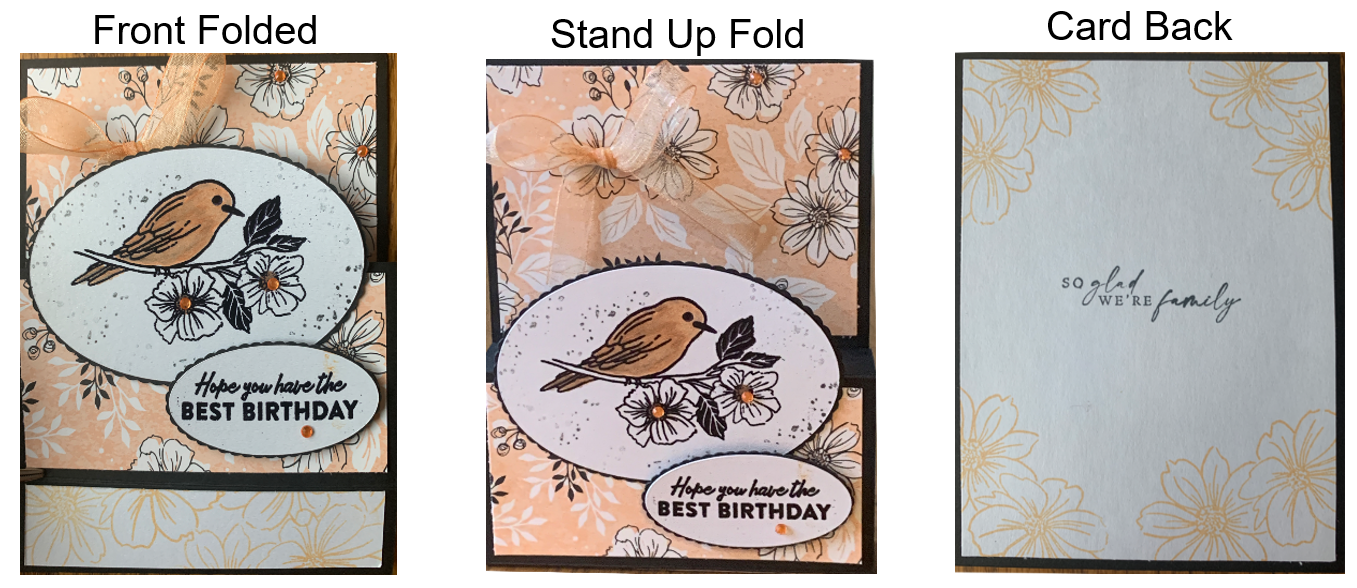
My first card from this set was a "fun fold". It folds up to 5-1/2 x 4-1/4 (standard card size). The bottom section folds down, which means the card can stand up for display purposes. The bird was colored with alcohol markers. The personal sentiment goes on the back. Inspiration was a tutorial by Cindy Brumbaugh.
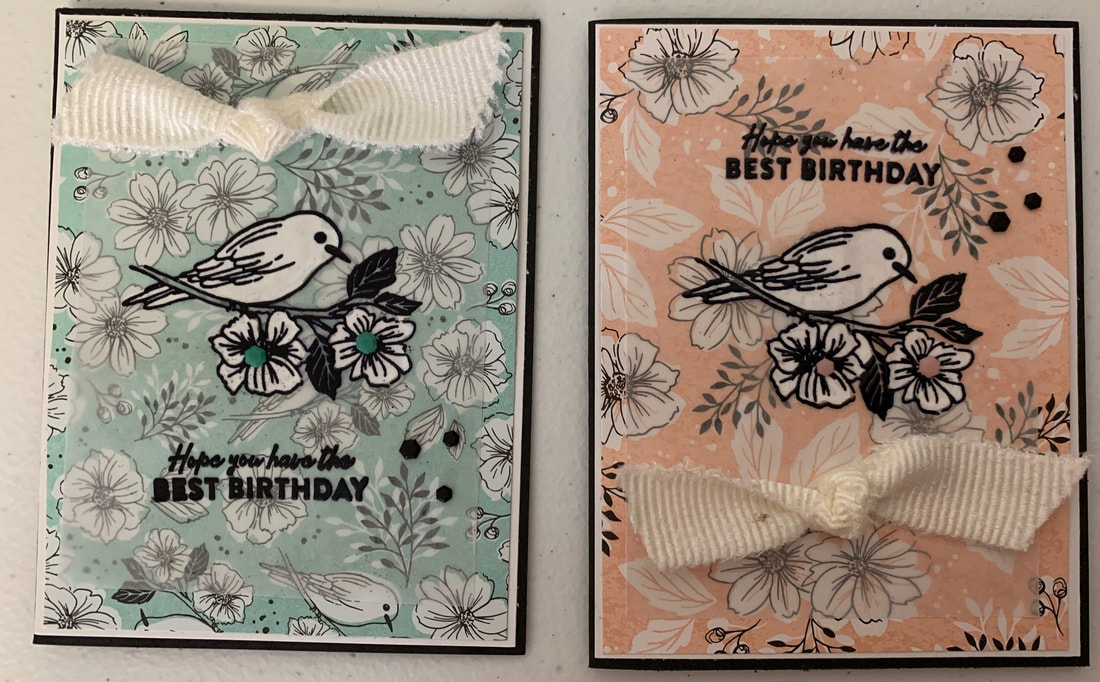
These cards were stamped on vellum and heat embossed with black embossing powder. The stamped bird and flower were painted with Whisper White craft ink on the back side of the vellum. Inspiration was a tutorial by Cheri Stojkovich.
'Stampin' Up Check Out Process
This quick video will walk you through the check out process. Make sure to enter the host cost W7FGRTYW when checking out. This will ensure you are eligible for the free Inkscape tutorial on adding stitching lines. This will also explain how to add your Sale-a-bration rewards to your order.
Please feel free to send me an email with any questions on your Stampin' Up order. I can be reached at [email protected]
If you use Electric Quilt to design either the hearts (or another image) for cardmaking, I would love to see your designs or cards. Feel free to post in the Learning EQ Facebook group using this link.
I was recently made aware of sublimation. Sublimation is a process that mixes specialized ink within the fabric fibers. Think of it as a variation of printing and/or using vinyl on fabric. However both of these other examples put the material on top of the product. With the sublimation the product is infused into the material.
I am doing a deeper dive into the process in the TKQ Masters class this month. However I though I would share a simplified process in this post.
In the video, I decided to decorate a 9 x 7 cosmetic bag. I had purchased some cosmetic bag blanks from Cricut that I used for this project. Since I own a Cricut Maker and am most familiar with Cricut Design Space, I will include information at the end of the tutorial on my process for transferring the design from EQ to Design Space along with the process for cutting out the design and using an EasyPress 2 heat press from Cricut for the actual sublimation.
The one area that did not work super well for me was the actual transfer of ink from the transfer sheet to the the bag. In hindsight, I should not have included the zipper the pressing area. That caused heat to escape and I ended up needing multiple transfers to finally get the ink infused on the bag.
Here is my infused cosmetic bag.
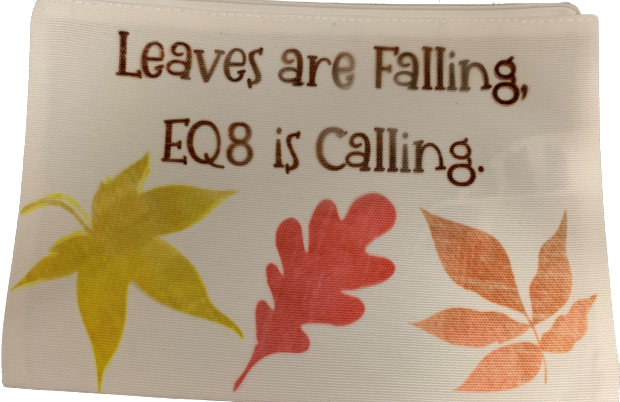
Sublimated Cosmetic Bag with an EQ8 Designed Quilt
Do you have experience working with infusible ink or infusible transfer sheets? I would love to hear your thoughts and recommendations on the process.
If you chose to create a sublimation friendly design in EQ8, please fee free to share in the dedicated post in the Learning EQ Facebook Group.
|


Free guide available for newsletter subscribers


Kari SchellElectric Quilt Expert and Educator and Pattern Designer. Categories
All
Archives
July 2024
|


 RSS Feed