ON POINT QUILTER
  • Blog
  • About
  • EQ8 Training
    • Tech Know Quilters Electric Quilt 8 Membership Training
    • EQ8 Made Easy
    • Electric Quilt 8 Sneak Peek
  • Store
  • Contact
Picture

Flutterby EQ8 Tutorial

2/24/2024

 
A new EQ8 tutorial for you today.  I think you will enjoy this fun idea for a new block -- that looks much more complicated than it is.

​Plus be inspired by the most recent designs from Tech Know Quilter members.

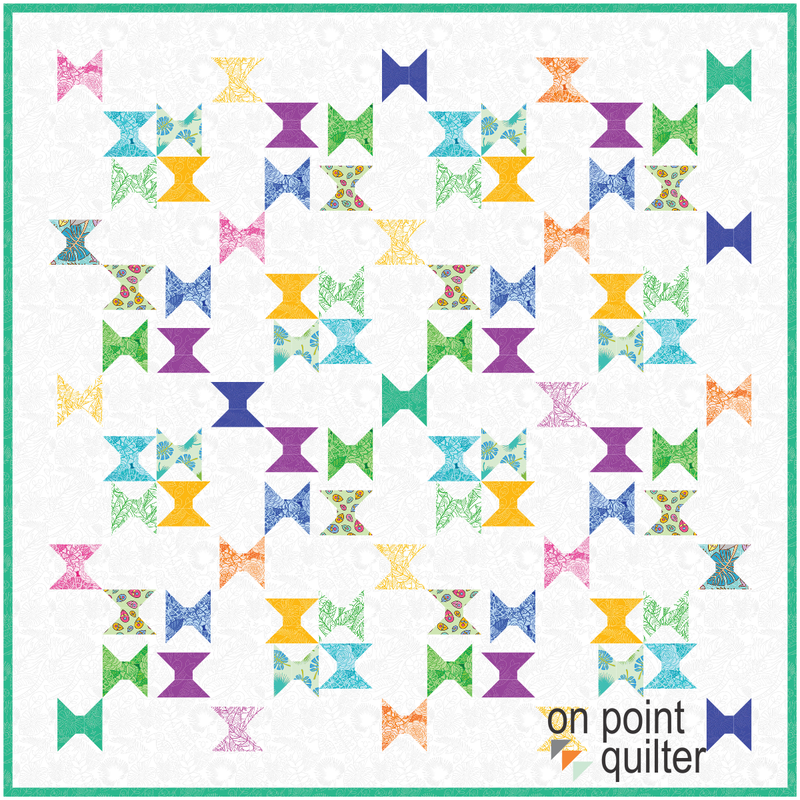
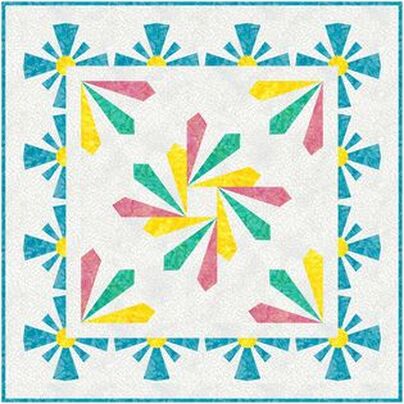
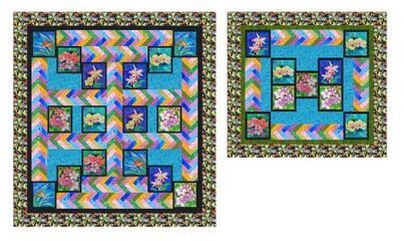
Flutterby Blocks and Quilt

Did you know that Flutterby is another name for Butterfly?  Which do you prefer?

​For this project, I am using the Rooville fabric collection designed by Kimberly Einmo for Benartex.  This was a free download from Electric Quilt for November 2023.
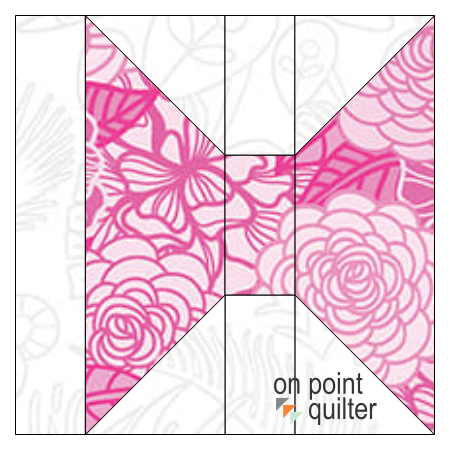
Start by drawing a 3" block using EasyDraw.  EasyDraw is just like working with pencil and graph paper.

Notice the 1/2" strip on the left -- that simple strip is the magic that keeps this quilt from being boring
Picture
Flutterby Single Block
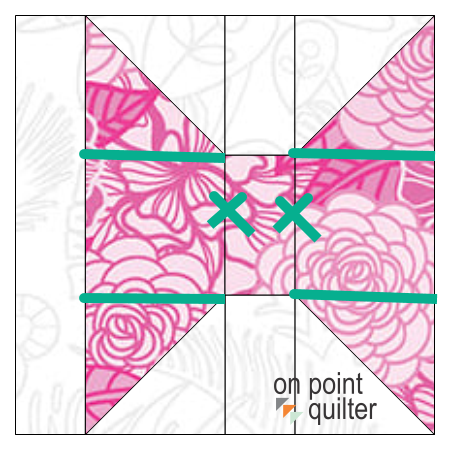
I designed the block to be conducive to adding cheater corners on rectangle blocks -- which may be your preferred construction method for adding those triangles.

However the beauty of EQ is that this would be super easy to modify if that is not your favorite construction technique.

Add four short lines -- delete two others and now you can used half square triangle units instead of cheater corners for your blocks.

​Which construction method do you prefer?
Picture
Modifications for Half Square Triangle Friendly Units
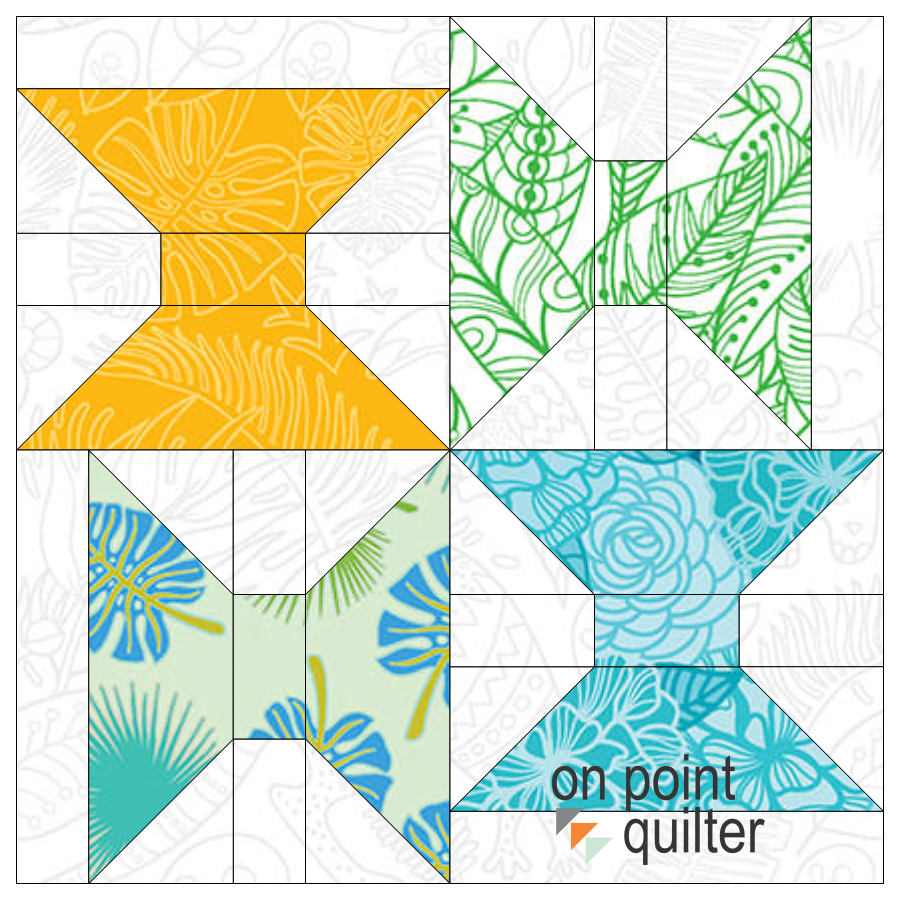
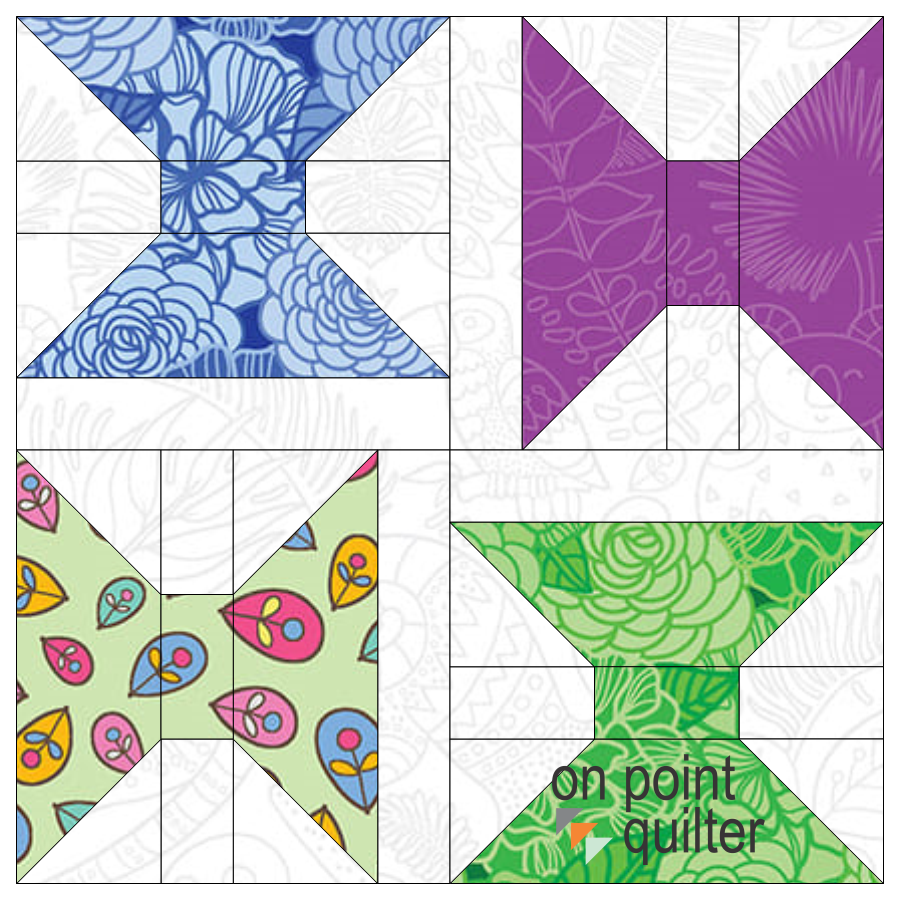
Use the Serendipity Feature to create multiple versions of the block.  In Shrink and Flip, EQ shrinks the selected block, then flips and rotates it in the four quadrants to create a new block.  Here were the two options I decided to use for my quilt.
Picture
Flutterby Shrink and Flip Block 1
Picture
Flutterby Shrink and Flip Block 2
For the quilt, I suggest using a horizontal layout.

Set the number of blocks at 4 by 4 with a size of 6" for each block.  Of course it would be easy to add more blocks or change the size of the blocks if you would like bigger Flutterbys.

Under sashing, select a size of 3".  This was the size of the original Flutterby block.  Also select the option to include sashed borders.
To create a more random look for the blocks:
  • Using Alt (PC Users) or Options (MAC Users) and set Shrink & Flip block 1 in the first full block space on the quilt worktable.
  • Using Alt (PC Users) or Options (MAC Users) and set Shrink & Flip block 2 in the 2nd full block space on the quilt worktable.
  • Using Ctrl (PC Users) or Command (MAC Users) set the initial block in the corner stone spaces on the quilt worktable.
  • Randomly rotate the cornerstone blocks.
  • Use Symmetry and click on one of the Shrink and flip blocks.  The Symmetry tool is a fast and fun way to achieve various quilt designs by using combinations of rotate and flip on all the full blocks of the quilt at once.
Picture
Flutterby Quilt designed in EQ8
When I am in design mode, I frequently create more than one variation on a quilt.  As I make changes, I always come up with other ideas that I want to experiment with.

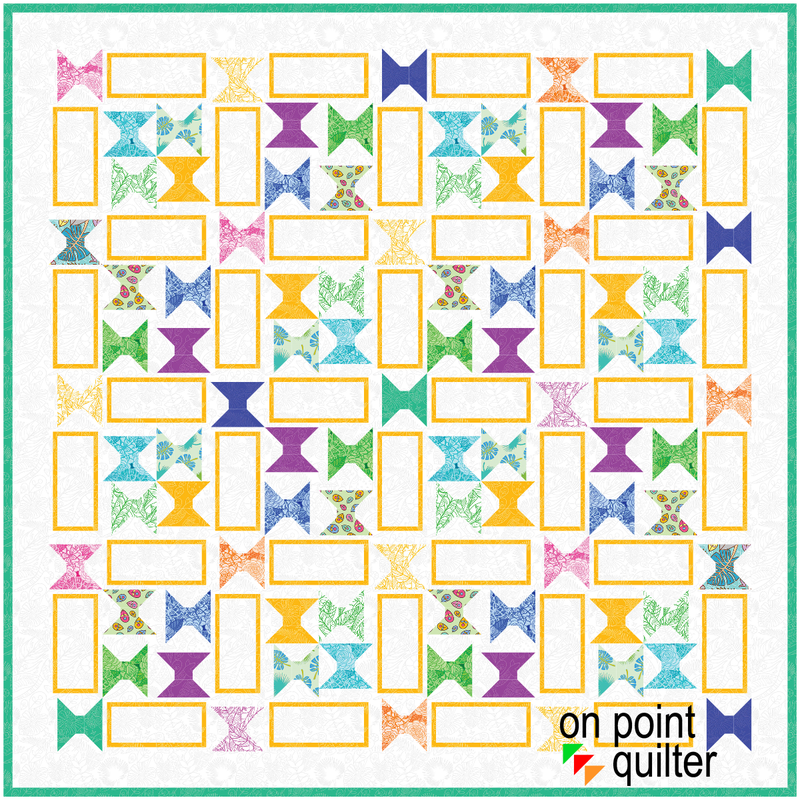
For this quilt, I decided to try a block in the sashing area.  

I made it an easy to piece block with only rectangle pieces.
Picture
Flutterby Quilt with optional pieced borders.
Check out the video for all the details on creating the Flutterby blocks and quilt.
I would love to see your designs.  Feel free to share pictures on the Learning EQ Facebook group.  I've set up a dedicated spot for your pictures.

​To personalize the project, swap out the Flutterby block with your own 3" block and use the same concepts to create a new quilt.
Flutterby Learning EQ Facebook Post

Tech Know Quilters January Showcase 

Every month I challenge Tech Know Quilter members to apply what they have been learning in the Tech Know Quilter classes.  I am so proud of this group of quilters as they share their creativity with us.
Picture
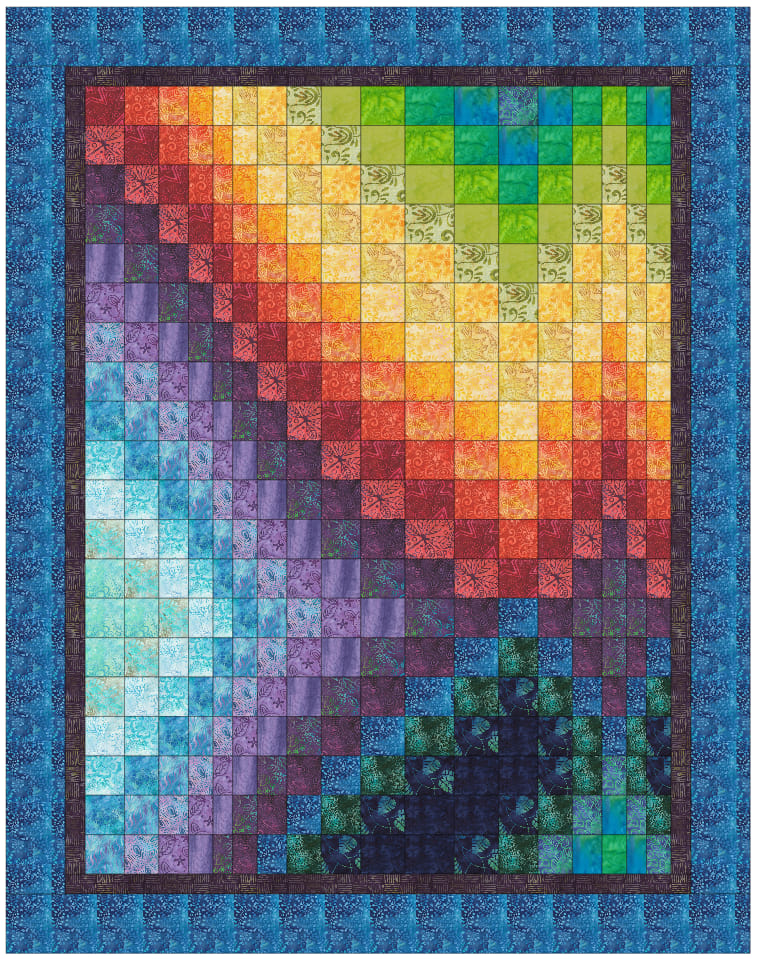
Eileen Dover I did the bargello class and loved creating the designs. This is my fave of the bunch
Picture
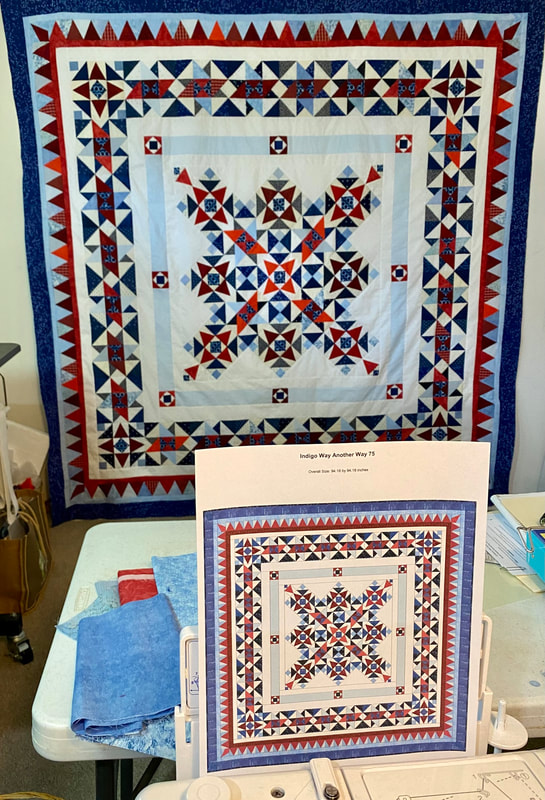
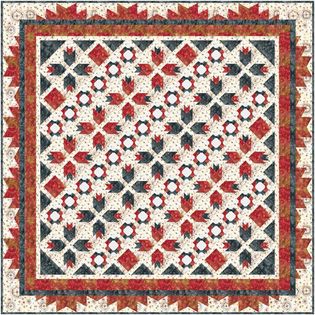
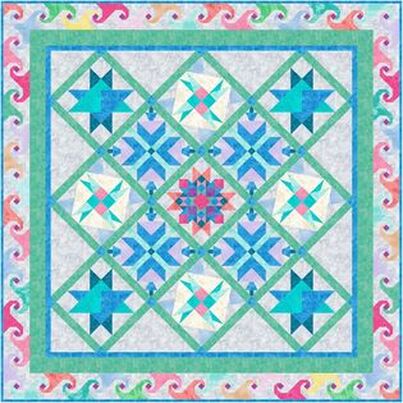
Terry McCaskey I finished piecing the re-design I created in EQ for the Bonnie Hunter Mystery Quilt "Indigo Way." This is "Indigo Way Another Way" thanks to EQ skills developed with Kari in TKQ.
Picture
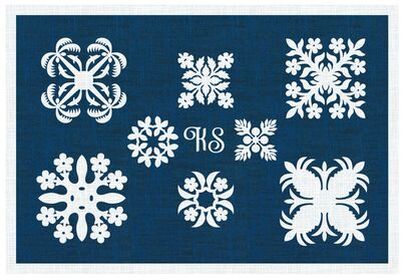
Kristy Goodin Soard My snowflake mug rug was a favorite from this month.
Picture
Rhonda Goss Letters and Text Masters Class
Picture
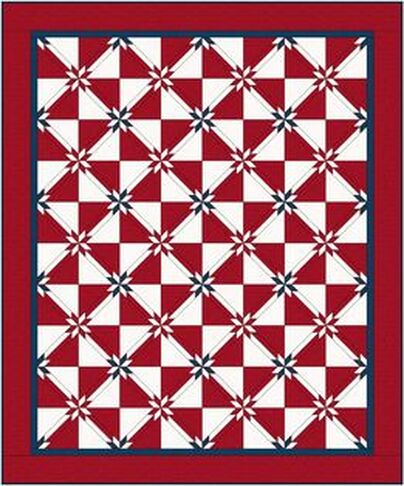
Beth Voss Ennis Here's a quilt I want to make for my son. I added (by photo and finding fabric image at manufacturer) my own fabric, along with the Hunter Star block to see what it will look like.
Picture
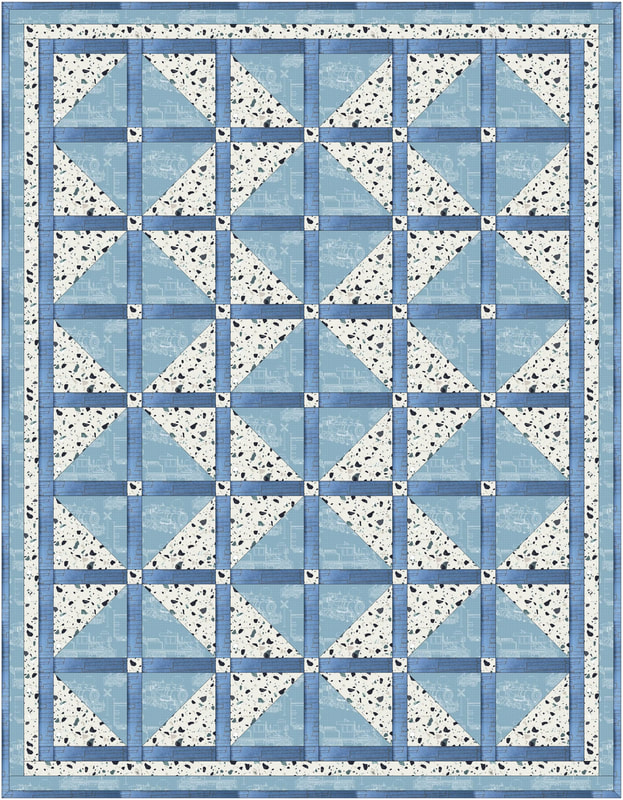
Beth Voss Ennis I feel like an over achiever, as I've created 2 quilts to make in the past week, and have another in mind. This one is for a great-nephew, and again, I added my own fabrics from the designers website, one had to be through a photo. Then I used a pattern from a 3 yard quilt book but used the rotate tool to come up with my own layout. I'm really loving what I've learned so far!
Picture
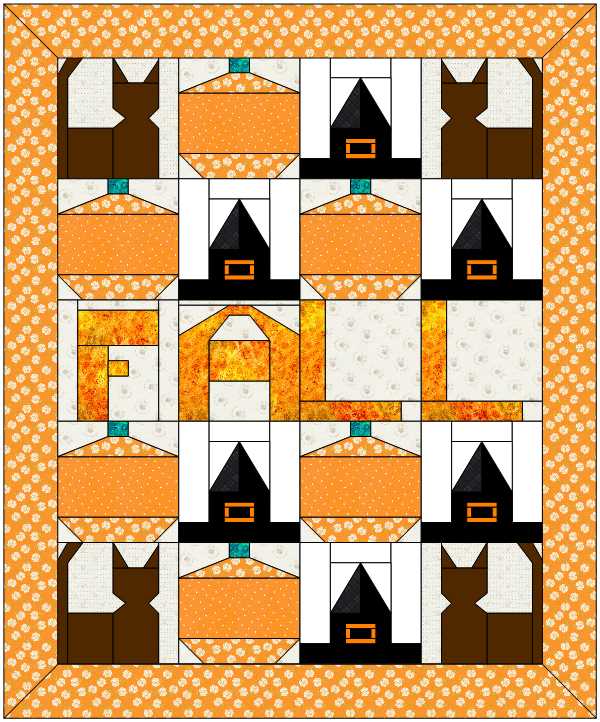
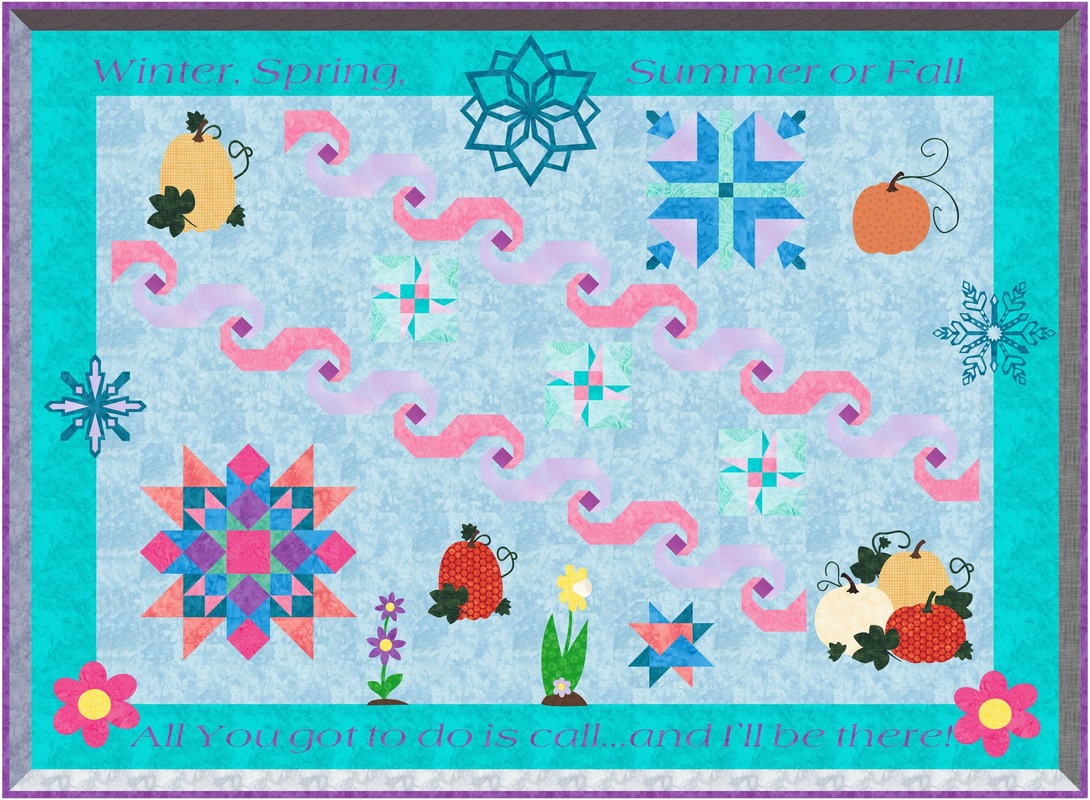
Julie Pedersen This month, I took the Masters Letters and Text class. For this challenge, I chose to use the custom layout and create a card for my school principal who is on medical leave. I used blocks from each of our seasonal quilts to create it...Winter, spring, summer and fall. Looking forward to next month's class to learn more about this topic.
Picture
Denise Mohler What did I learn in January? Well I am still playing catch-up so I have a list of completed lessons for this month..... so here we go!!!!!! TKQ Advanced Borders Lesson 10
Picture
Denise Mohler TKQ Reproduction Quilts 2 Lesson 5
Picture
Denise Mohler TKQ More Optical Illusions Lesson 13
Picture
Denise Mohler TKQ Masters Advanced Custom Set Lesson 5
Picture
Denise Mohler TKQ Masters Advanced Polydraw Lesson 3
Picture
Denise Mohler TKQ Masters Fabric From Photos Lesson 5
Picture
Denise Mohler TKQ Masters Folded Corner Holiday Quilts Lesson 7
Picture
Denise Mohler TKQ Masters Modern Dresden Blocks Lesson 7
Picture
Denise Mohler TKQ Masters Pictoral Foundation Lesson 2
Picture
Denise Mohler TKQ Masters Design Your Own Medallion Quilt Lesson 5
Picture
Denise Mohler TKQ Masters Stained Glass Quilts Lesson 2
Picture
Connie Bradley Bobcik TKQ Masters Class January 2024, Letters and Text. I am using Topper Quilt I designed for my Word Challenge. I used skills we learned to split a design and add lettering to that. I also added applique motifs. I loved all of the lettering ideas we learned thru out the month.
Picture
Stella Shaffer Crutcher I used some new skills like merging blocks and the auto borders in making this. The new skills from the classes are valuable even when I am working on something completely different than the quilts we are doing in class.
Picture
Edith Craig My class this month was Masters Letters and Texts. This class has been a great way to practice drafting appliques and placing them on a quilt. I used some images from the EQ library as a starting point for some of my appliques, removing the backgrounds to make them motifs.
Picture
Fran Heisey TKQ Masters Letters and Text. This was my favorite class so far. The snow flakes were such fun.
Picture
Brigitte Lee I made the Queen-size quilt by redrawing all the different braid sizes. After the MTKQ Class Letter and Text, lesson 2. I changed my approach for the Sofa throw, by saving the largest braid as a photo and cropping the photos to the right length. There was some fine-tuning needed as the photo added a border. (Panels are from Kaufman Fabrics, Island Sanctuary)
Picture
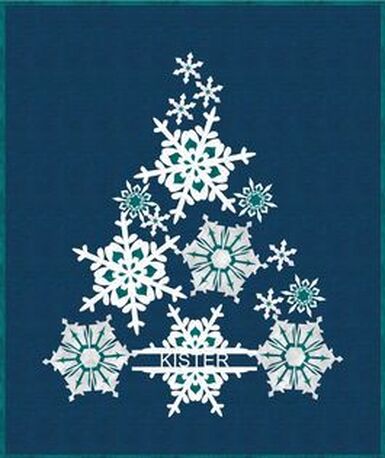
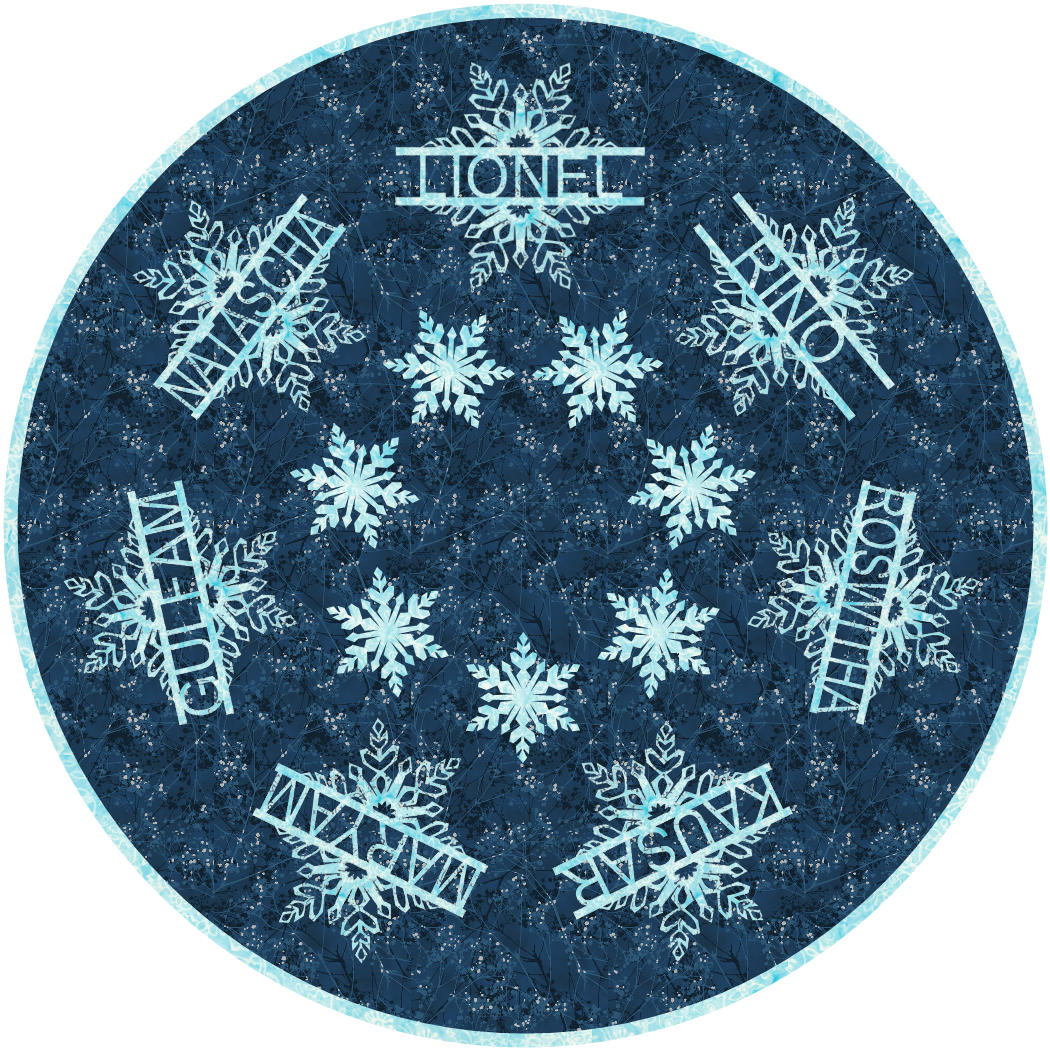
Roswitha Franz In January I took part in the Masters course “Letters and Text”. I was fascinated by the snowflakes and the possibility of adding text to them and using them to design a round quilt. I have included my family's names. It was a particular challenge to arrange 7 stars instead of the 5 in the course. In the 4 years that I have been attending Kari's courses, I have learned a tremendous amount. I never thought I'd get to the point of showing a design here. For me, Kari's courses are something like brain jogging, too. Implementing them keeps me mentally fit.
Would you like to join this amazing group of designers and quilters?  Click on the Learn More Image to find out about Tech Know Quilters.
Picture
Picture
Happy quilting.

​Kari

Join the On Point Quilter weekly newsletter and receive regular tips and inspiration on using Electric Quilt 8 along with the  Free 12 Top
Tips for EQ8 video guide.
Picture

Word of the Year Quilts

2/17/2024

 
​I did an EQ8 tutorial earlier this week -- in celebration of Valentine's Day.  

The EQ tutorial shows how to draft a template that can be used to cut two pieces of fabric that could be woven together for a single basket.

In the video, I share three different template options from Electric Quilt 8. Cutting manually. Creating an SVG. Exporting an image and tracing in an Electronic cutting system.

I also share how I used these items with Cricut Design Space.


Then learn how to weave your fabric for your own 3D basket.
.
Picture
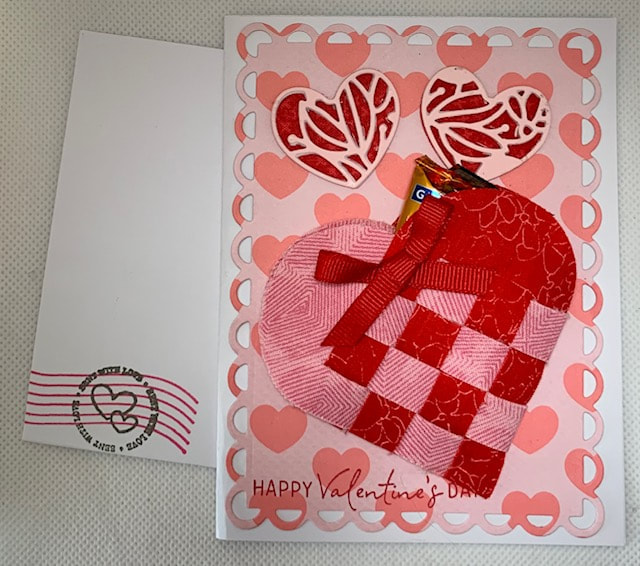
V-Day Card using the 3D Swedish Heart Basket Template Created in EQ8
I've even included some Valentine's Day cards I made with the baskets (filled with a little candy).

If you missed the early blog post, you can catch it here.

Word of the Year Challenge Showcase

In January I challenged Tech Know Quilter Masters members to come up with a word for 2024 and to create a quilt around that word. 

​I have been in groups where selecting a word for the year was suggested (as opposed to New Years resolutions).   

Why do people choose a word for the New Year?
A Word of the Year is your “mission statement” for the next 12 months. You use it to guide and inspire you when making decisions throughout the year. It's not a rigid rule to follow or a single goal to meet. As Elizabeth Rider put it, “it's a constant (but gentle) reminder to focus on creating positive change”.

This one took a bit more work for the Masters members -- but I was so impressed with their challenge words along with the quilts reflecting their word.

​Enjoy this show of their quilts.
Picture
Elly da Silva
Picture
Julie Pedersen I chose the word "giving". I try to give back as much as possible as I have been very blessed. I use my given talents to share quilts with the teachers and staff that I work with. I chose blocks that had an outward motion in them as you would giving to others. I picked a variety of colors as I wanted to express the many people that can be affected by one person giving to another and starting a "pay-it-forward" chain.
Picture
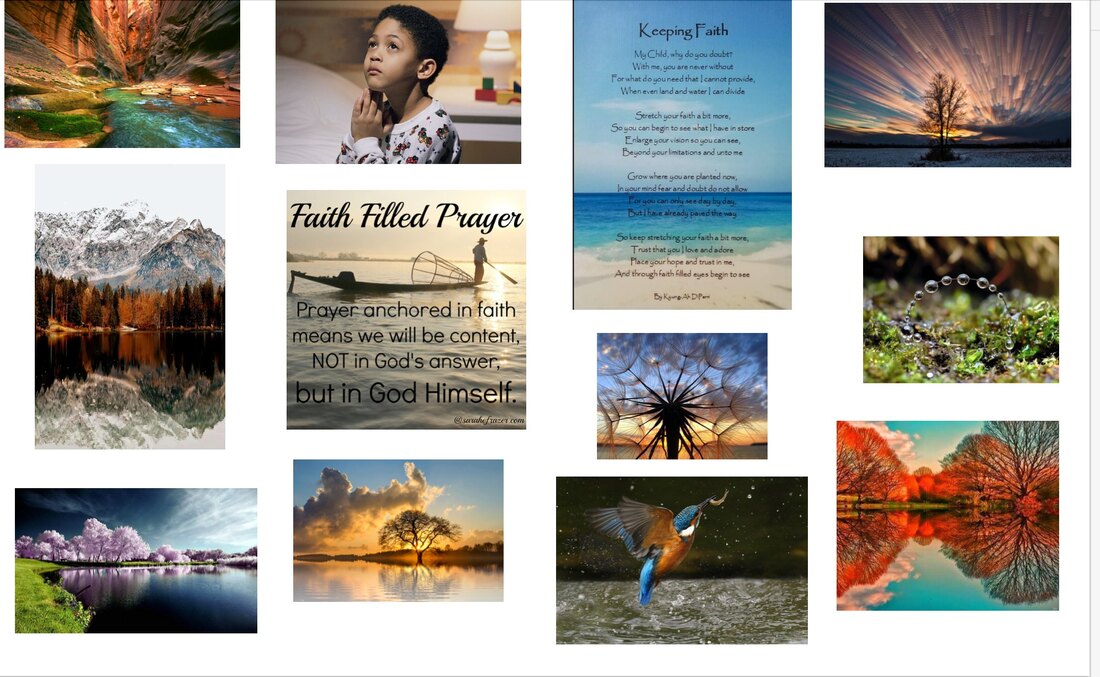
Pat Harkins My word is faith.These are the pictures I collected. I'm not sure what to do with them. They remind me that you can see God's hand all around you.
Picture
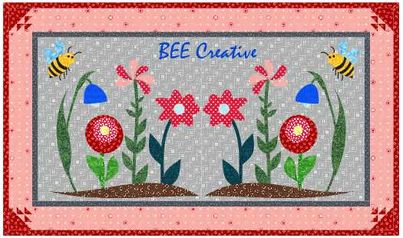
Zdenka Nemethová My "a bit adjusted" Be Creative □. I´d love to do more applique this year.
Picture
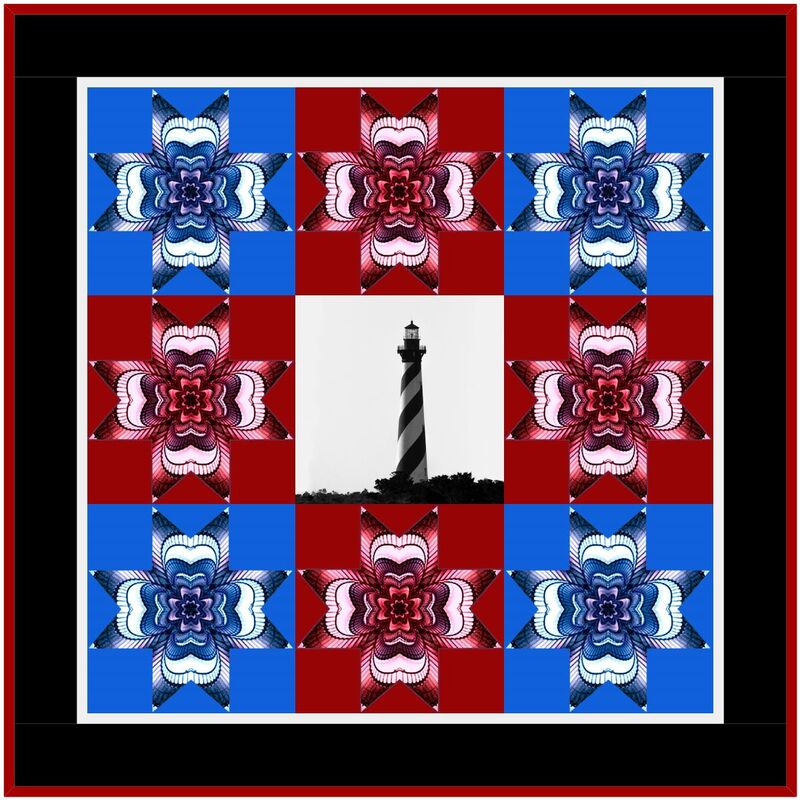
Patricia Hansen I chose the word "light" and have designed a quilt using a photograph of the Cape Hatteras Light and the spiral stairs inside the Bodie Island Light, both here on the Outer Banks of North Carolina. As a professional photographer, I was always aware of the light and how it manifested itself in every image. So I thought it would be a fitting choice of words for this exercise. I manipulated the staircase in Photoshop and fitted it into a star (another source of light) for this quilt.
Picture
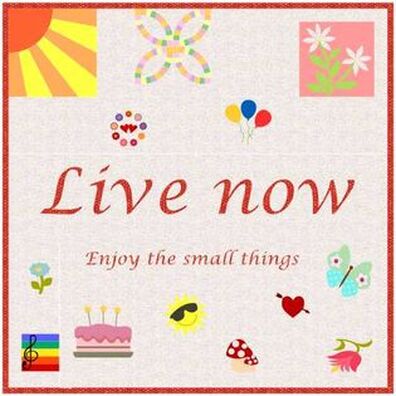
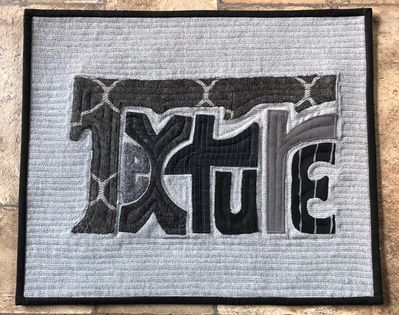
Carol Mayhew This isn't my word for the year, but it is a small quilt I did of a word. It has each letter with a fabric that is each a different texture.
Picture
Mary Groesbeck My quilt is EXPAND. I want to continue doing what I'm doing, but I want to expand beyond my comfort zone, expand out of any ruts I may get stuck in, and expand my skills, knowledge, and creations beyond where they are. I want to look for things that are different and do things I haven't thought about or tried before. We'll see how it goes.
Picture
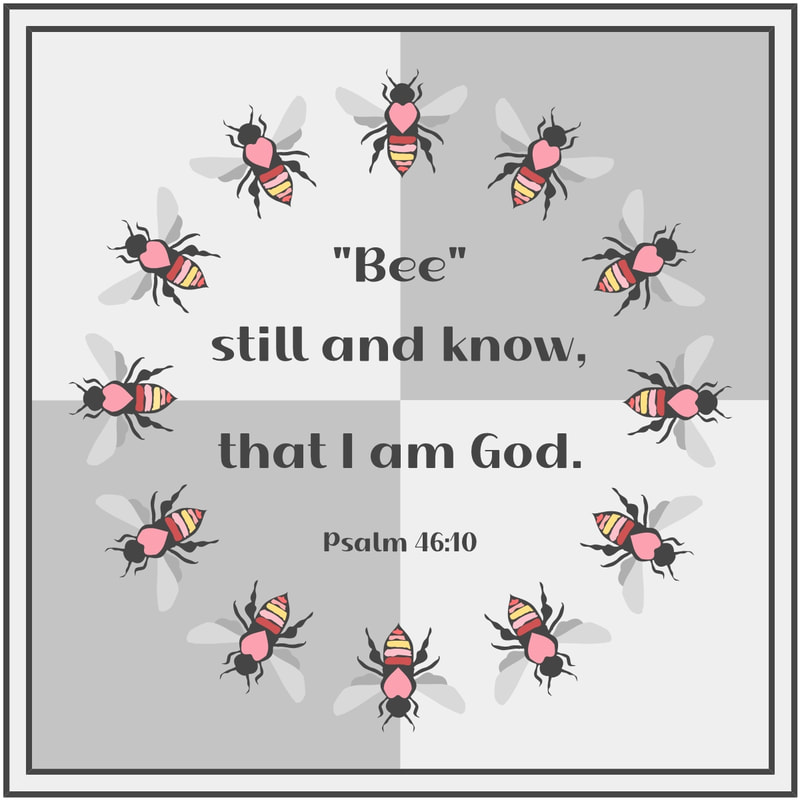
Kristy Goodin Soard My word of the year is BE. In 2024 I wish to BE present in all I do, and BE the best me in all aspects of my life; as a wife, mother, grandmother, sister, daughter, friend, student, and above all as a child of God. The bee will remind me to stay busy in this endeavor. My quilt is symbolic to me. The background four-patch represents the four seasons of this year’s endeavor, the 12 bees call to mind the 12 months of the year as well as the hours of each day, and the three borders surround it all symbolizing my being surrounded and supported by the Holy Trinity.
Picture
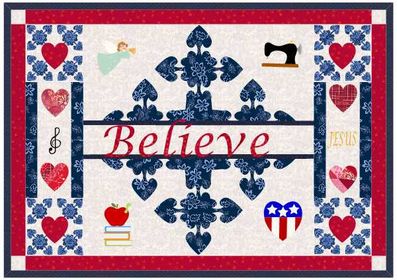
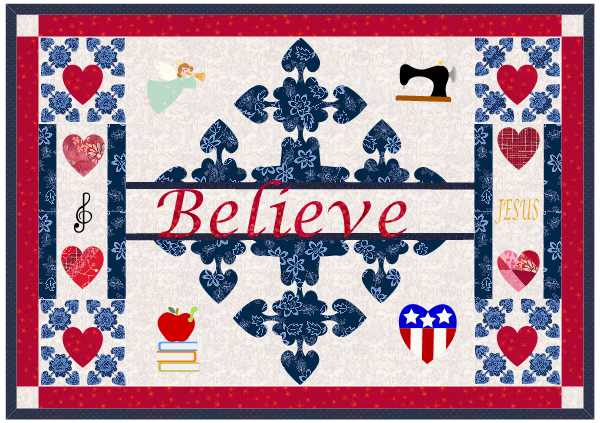
Connie Bradley Bobcik My word is Believe. I believe in Jesus and the power of prayer, and angels among us. I try hard to believe in my abilities and talents, such as sewing, quilting and others. I believe in education and trying to learn new skills. I believe with my heart and I believe in love!
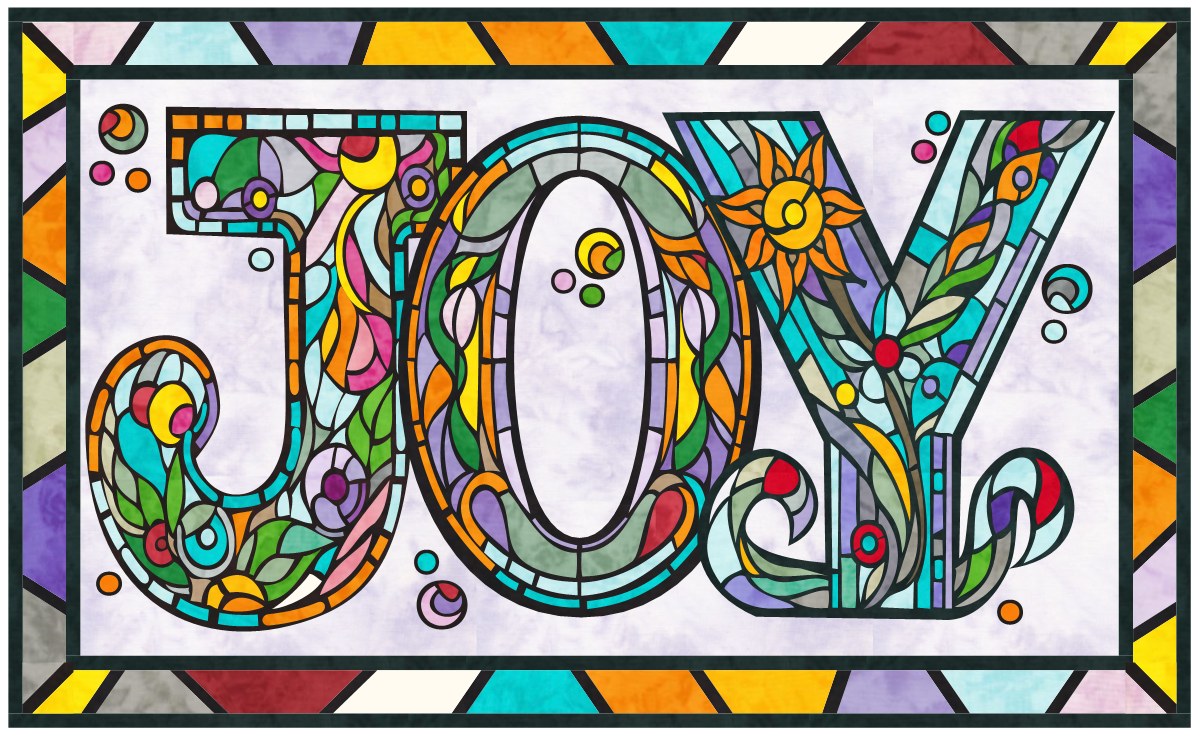
I decided to participate in the challenge as well.  My word is JOY.
Picture
 In  Embracing Advent, Jen Ludwig states  "Happiness is not the same as joy."  "Our happiness is based on what is happening, but joy can be present regardless of the circumstances." 

I want to make a more conscious effort to see God at work in all aspects of my life and to chose joy in all situations.  My design is a way to remind me of this on a regular basis.

I decided to try a stained glass type of design.  I used AI for inspiration for the various letters.  Each letter was drawn in EQ and combined in a quilt -- with an added stained glass border.  

I am currently debating making the quilt -- maybe with some batiks.  In the interim, I have put the design as wallpaper on my computer.
Want to Know More about TKQ Masters?
​

Tech Know Quilters members are eligible for the Masters program after completing 12 months of Tech Know Quilter classes.  Masters members receive fewer lessons each month, with more time to devote to their own projects and challenges.

Drop me a note if you have completed over 12 months of Tech Know Quilters and are interested in learning more about the Masters program.
​
You can learn more about the regular Tech Know Quilters membership program and sign up for the wait list for the next open enrollment period here.
Picture
Happy quilting.

​Kari

Join the On Point Quilter weekly newsletter and receive regular tips and inspiration on using Electric Quilt 8 along with the  Free 12 Top
Tips for EQ8 video guide.
Picture

3D Swedish Heart Template

2/14/2024

 
Picture
Swedish Heart Basket Quilt Designed by Kari using EQ8
On February 3, 2024, I shared how to draft a block and quilt that featured a Swedish Heart Basket.  

The traditional Swedish Heart Basket is a three dimensional design made from two pieces of construction paper.  You may have made these during your early school days.  
​
The tutorial had me wanting to make a few of these baskets for Valentines Day cards. 

The "basket" could be filled with a favorite chocolate candy. The perfect Valentine surprise.

However the design as created in EQ was not created for three dimensional use.

So I decided to go back to the drawing board and create a template. 

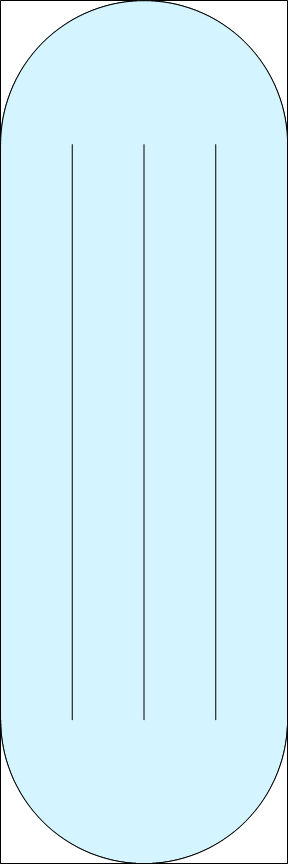
​This template would allow us to cut two pieces that could be woven together for a single basket.

Note that you could vary the spacing between the center lines for different woven baskets.

​
Picture
3D Swedish Heart Template
In the video, I  share three different template options from Electric Quilt 8:
  1. Print the template and manually cut out the fabric.
  2. Print the template to a PDF writer installed on your computer.  Use Inkscape** to make minor modifications (delete the extra patches and the header and footer information).  Save as an svg.  
  3. Export the image from EQ.  Then use the trace features in your electronic cutting system.  In the video I share how to do this with Cricut Design Space (which in my personal cutting system).  How to do this will vary based on your cutting system.  This is the most complicated of the three options.

Whenever you use a cutting system, make sure the sizes are correct before cutting.  Cutting systems have their own "logic", which may not import the correct sizes.
**What is Inkscape?

The extra piece of software I used for creating the SVGs is Inkscape.  Inkscape is a professional vector graphics editor for Windows, Mac OS X and Linux. It's free and open source. 

Inkscape can seem overwhelming to use when you open it for the first time. However you only need to use a couple of tools within Inkscape -- so this really is a piece of cake. You can download Inkscape here.

Inkscape will allow you to create an SVG file which may be used in any electronic cutting system (Cricut Design Space, Silhouette Studio, or Brother Canvas Workspace).

So what is an SVG file?  An SVG file is a graphics file that uses a two-dimensional vector graphic format.  Unlike raster formats such as JPG, GIF, and PNG, an SVG image remains crisp and clear at any resolution or size.  My Translation -- Much cleaner of an image than any trace in a cutting system.
In the video, I shared that I changed the size of the template to 2" x 6".  This size made a perfect basket that I used to make some Valentine's Day cards.  More on that below.
Whether or not you choose to make the Swedish Heart basket, I suspect you will find the information on using Electric Quilt 8 with a cutting system incredibly valuable.

​If you would like to share your results, I have set up a Facebook post in the Learning EQ Facebook Group.
Learning EQ Facebook Group for 3D Swedish Basket Hearts

Constructing the 3D Swedish Hearts Basket 

I made one basket with cardstock and a couple with fabric.  The cardstock weaving was a bit harder as I was trying not to bend the paper and I hadn't put any wiggle room in the cuts.  (Learning from my mistake, I did add the wiggle room in the cut in the video.)
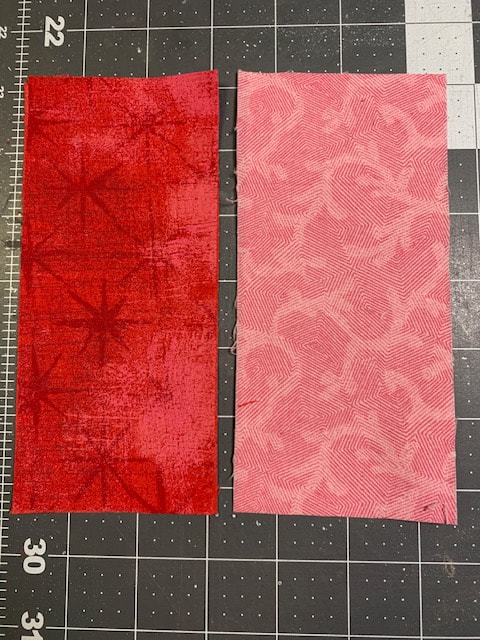
For the fabric, I created a 3" x 7" sandwich of fabric, fusible, fabric.  I used the same fabric for the front and back -- but that is not required. 

Just make sure that the wrong sides of the fabric are ironed to the fusible. 

​For fusible I used Lite Steam a Seam 2 -- but I suspect any fusible will work.

Cut the 2" x 6" pieces - either manually or using an electronic cutting system.

​
Picture
3" x 7" layered pieces of fabric, fusible, fabric ready to be cut.
Fold the pieces in half.

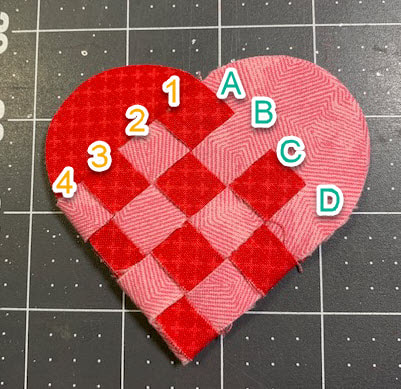
To weave, alternate between putting the loop for fabric 1 (red) outside and then inside the loop for fabric 2 (pink).  

Start with Loop 1.  Go outside Loop A, inside Loop B, outside Loop C and inside Loop D.  (If the last loop slips out, that can be fixed later.)

Loop 2  - do the opposite.  Go inside Loop A, outside Loop B, inside Loop C and outside Loop D.

Loop  3.  Go outside Loop A, inside Loop B, outside Loop C and inside Loop D.  (If the last loop slips out, that can be fixed later.)

Loop 4.  Go inside Loop A, outside Loop B, inside Loop C and outside Loop D.

After each loop, you will want to snug up the placement so it is against the previous edge.  Otherwise there won't be enough room for the last loop.


Picture
Swedish Heart Weaving Diagram
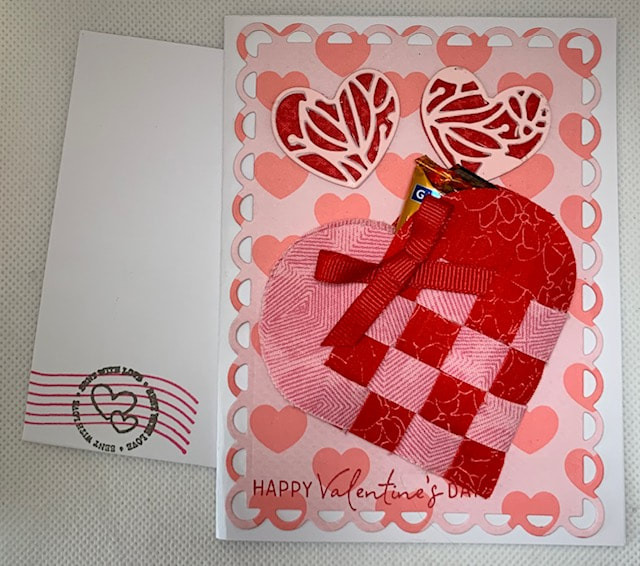
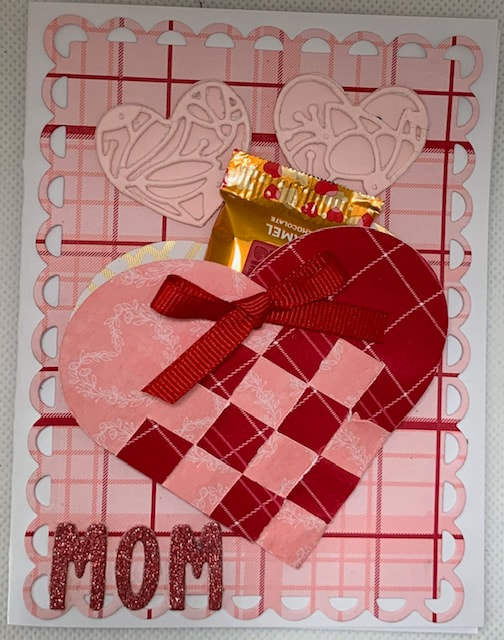
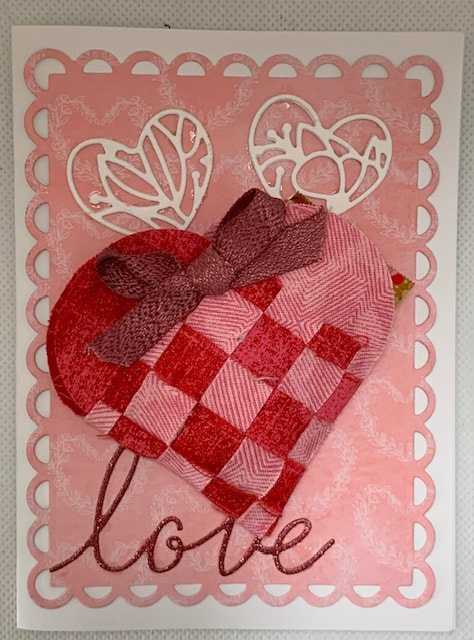
Here are my cards with the Swedish Baskets.  I was able to fit a piece of candy in each of the baskets.
Picture
Swedish Heart Basket card with two fabrics
Picture
Swedish Heart Basket card with two pieces of designer series paper (printed on both sides)
Picture
Swedish Heart Basket card with two fabrics
Card Construction Information:

Card Base:  5-1/2 x 8-1/2 Basic White cardstock.  Scored and folded at 4-1/2".

Scalloped Card Front:   Stampin Up Scalloped Contours Dies (155560).  Paper was Sale-A-Bration. Most Adored paper.  Free with a $50 order placed before the end of February 2024.

Swedish Heart Baskets:  Cut out on Cricut Maker using the templates from this video.  The middle card was cut from the Most Adored Sale-A-Bration paper.  The other cut from fabric in my stash.

Other Smaller Decorative Hearts:  Stampin Up Adoring Heart dies (currently unavailable).  I layered three of the cut pieces together and for two of the cards added a plain heart in back.
If you would like to order Stampin Up Supplies through me, you will be able to do so here. 

​When checking out enter the host code J3NW7MWC.    (If you order by the end of February and your order totals $50, make sure to select your Sale-A-Bration gift.) 

I will be sending a small gift to those who order using my host code.  :)

Other Valentine Cards (for my nieces and nephews)

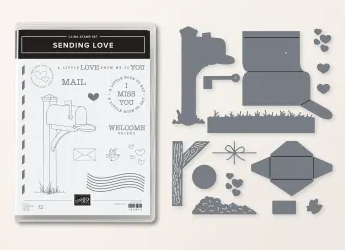
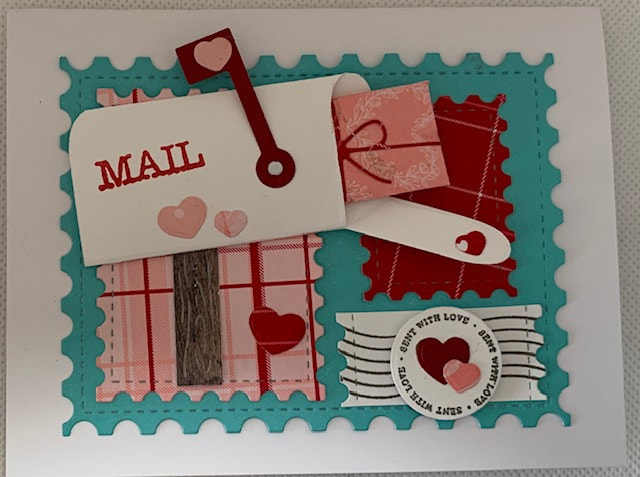
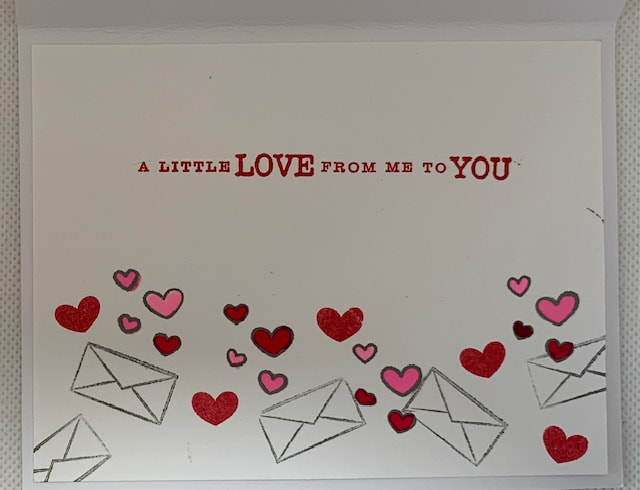
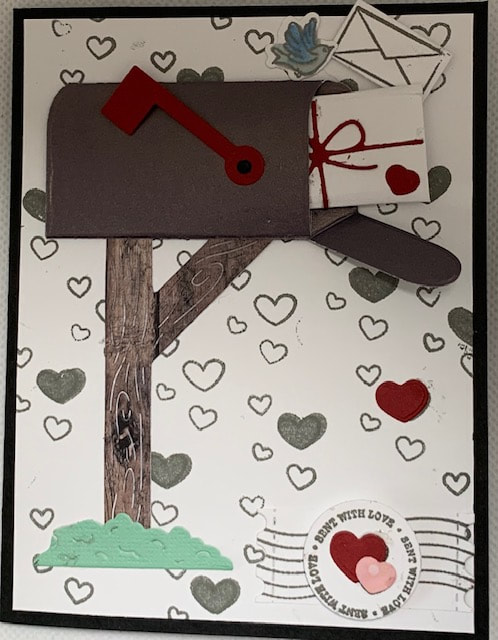
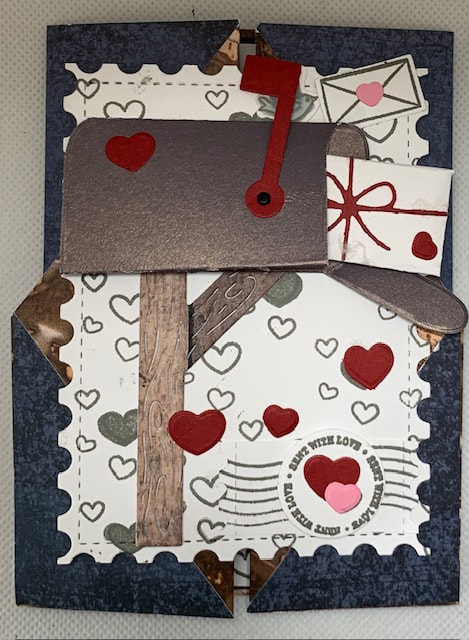
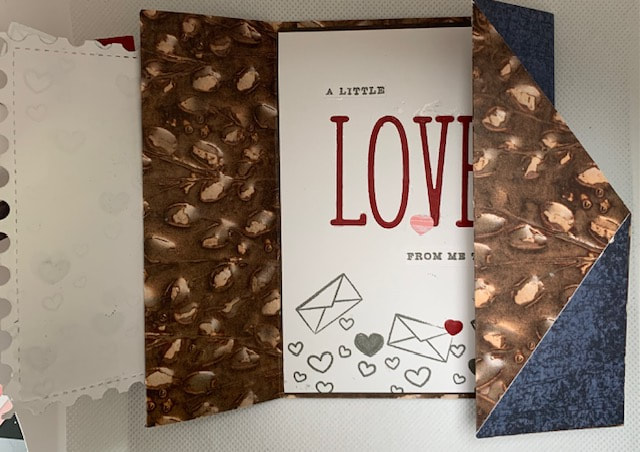
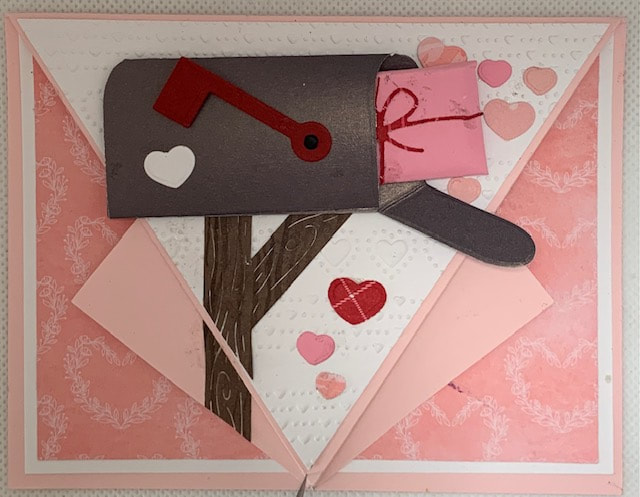
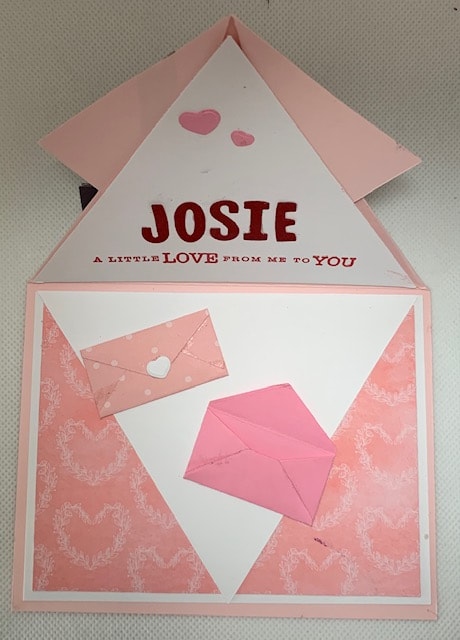
Most of these were made from the Sending Love Cling Stamp Set (162873) and Sending Love Dies (162879).  The Bundle with both is #162880. 

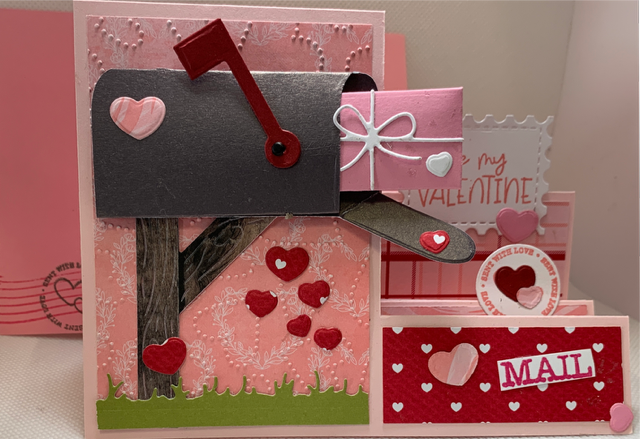
I loved the 3D mailbox and envelope.  I was able to fold up a piece of currency to fit in the envelope and put the envelope in the mailbox.

I wonder how long it will take the nieces and nephews to figure it out?
Picture
Sending Love Stamps and Dies from Stampin Up
If you use a braid, the flag can even be moved up and down.

​How cute it that.
Picture
Sending Love Card #1
Picture
Inside of Card #1
Picture
Sending Love Card #2
Picture
Sending Love Card #3. This is a fun fold that opens in the center.
Picture
Fold Out of Card #3
Picture
Sending Love Card #4 Fun Fold
Picture
Behind the flap of Card #4.
Picture
Send Love Card #5 - Stand-Up Fun Fold
Picture
Happy quilting.

​Kari

Join the On Point Quilter weekly newsletter and receive regular tips and inspiration on using Electric Quilt 8 along with the  Free 12 Top
Tips for EQ8 video guide.
Picture

Be Mine Applique Block using Electric Quilt 8

2/10/2024

 
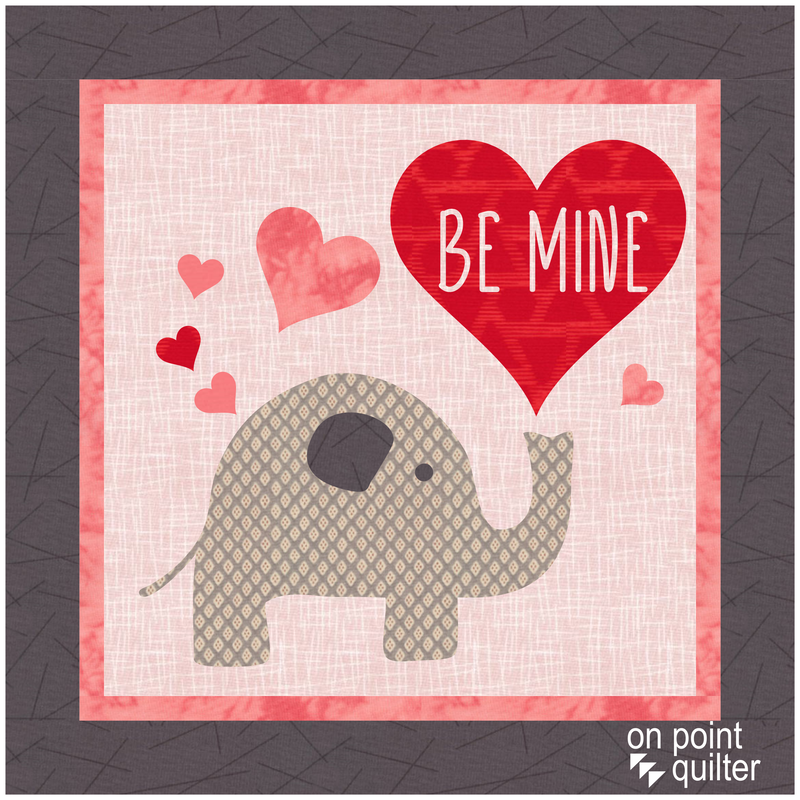
I love blocks and quilts comprised of all types of hearts.  The design I am sharing today could be used for Valentine's Day -- or would also look super cute in a baby quilt.
The inspiration for my heart focused block was a craft file from Creative Fabrica. 

I found and downloaded the Love You Tons design from the Creative Fabrica website. 

They provide a commercial license for their downloads -- which means I am able to use them for my EQ project tutorials. 

But the beauty of redrafting is that we can make modifications to the design -- as I chose to do. 
Picture
Love You Tons Design from Creative Fabrica website.
In my video tutorial, you will learn how to trace the red heart and the elephant.  And then use your creativity to modify the design and create your own small quilt.
Here is the quilt created during the video.
Picture
Be Mine created by Kari Schell using EQ8
Share your quilt in the Learning EQ Facebook group.  I would love to see your design.
Learning EQ Facebook Group Post for Be Mine EQ8 Project
Picture
Happy quilting.

​Kari

Join the On Point Quilter weekly newsletter and receive regular tips and inspiration on using Electric Quilt 8 along with the  Free 12 Top
Tips for EQ8 video guide.
Picture

Swedish Heart Baskets

2/3/2024

 
Another new heart block and quilt.  This one was inspired by an email I received from Fran H. (a talented Tech Know Quilters member) on a Swedish Heart Christmas ornament.

​In this weeks video tutorial, I will share how to draft an interwoven heart using the Applique toolkit in Electric Quilt 8 and a new quilt featuring this block.

Swedish Heart Baskets EQ8 Tutorial

Back when I started quilts (more than a few years ago), I remember making some of these woven hearts for Christmas ornaments.   It might have been something I saw in a magazine or maybe shared by my quilt guild. 

Have you made these ornaments?  It is a really fun paper or fabric activity.

There appear to be quite a few You Tube videos on constructing the woven heart designs (for either paper or fabric).  Check them out if you would like to make your own.    Maybe fill your "basket" with some Hershey's kisses for a quick and easy gift.
Picture
Swedish Heart Basket Out of Paper

Woven Unit Ideas


Any EasyDraw block that can be drawn with horizontal and vertical lines than can be drawn from one edge of the block to the other, is perfect for incorporating in a Swedish Heart Basket block.  Here are a few examples I came up with.
Picture
3 x 3 Grid (9 Patch)
Picture
4 x 4 Grid
Picture
5 x 5 Grid
Picture
4 x 4 Grid with uneven strips. This could be drawn in EasyDraw with Snaps set at 10 x 10.
Picture
5 x 5 Grid with Uneven Strips. This could be drawn in EasyDraw with Snaps set at 9 x 9.
Picture
5 x 5 Grid with uneven strips. This could be drawn in EasyDraw with Snaps set at 10 x 10.

Drafting the Swedish Heart Basket Block
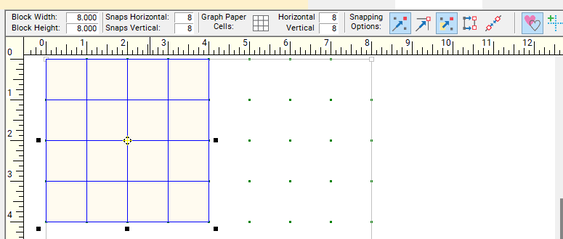
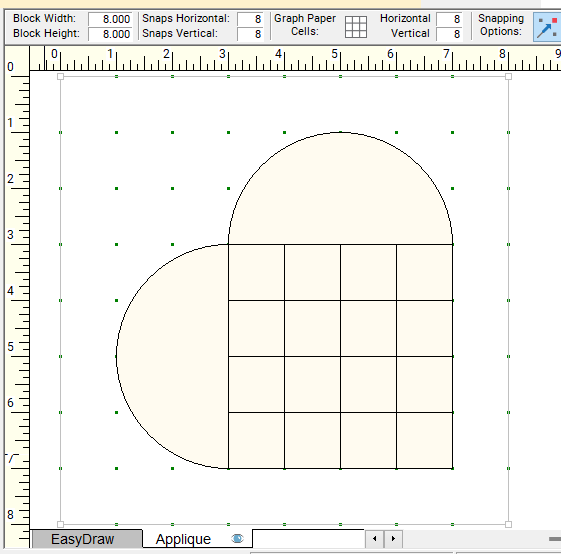
To turn these into a quilting block pattern, I found it useful to draw the Swedish Basket hearts as applique motifs.  Those "curves at the top of the heart" help cement the decision.

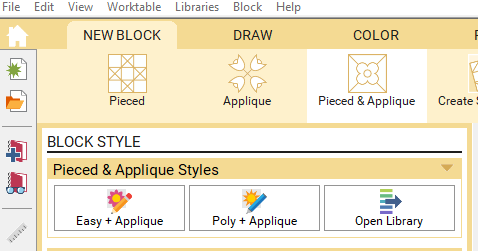
However, if you want a background behind the hearts, the best style to use is either Easy+Applique or Poly+Applique.  Both work equally well.
Picture
Block Options in EQ8
PictureSetting Up the Worktable and Drafting the Squares
Set up a block size double the size of the segment of your block that is comprise of squares and rectangles.

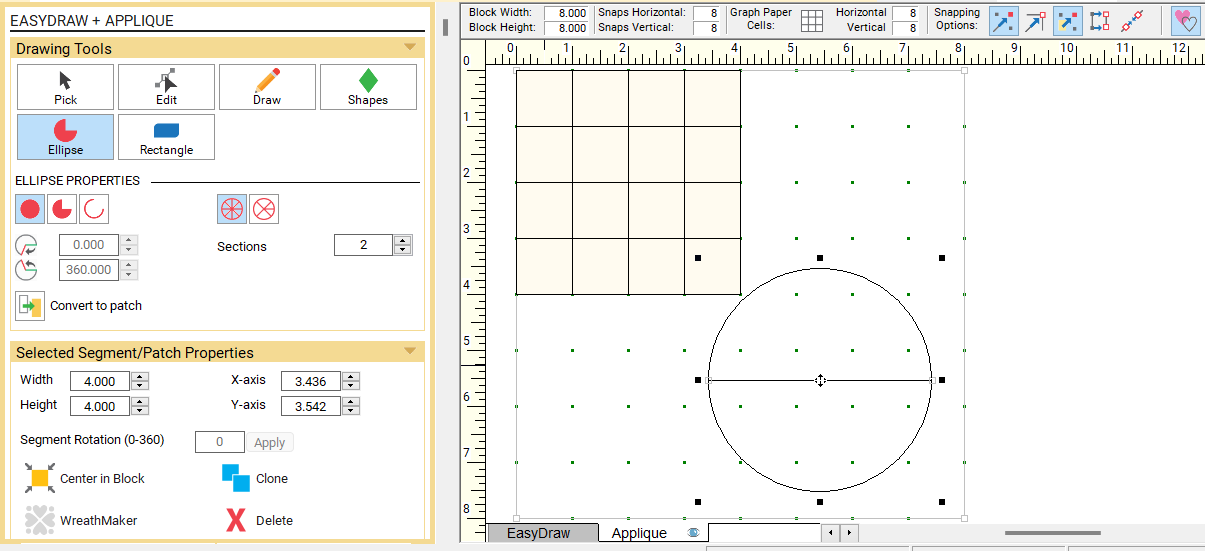
For my four by four grid, I set up an eight inch block and placed the four by four grid in the upper left corner.

Set the snaps horizontal and vertical at 8 x 8.

Under Snapping Options, turn on Snap to Grid and Snap Whole Patch to Grid Point.

Under Shapes find the square and drag a 1" square on the worktable.

Clone and reposition for 16 squares in the upper left corner.


Use the ellipse tool to draft the circle and divide it into two half circles.  

Put one half circle on the right side of the 4 x 4 segments.

​Put the other half circle on the bottom of the 4 x 4 segment.
Picture
Using the Ellipse Tool for the Half Circles
Rotate all the patches as a single unit.

Center in Block.

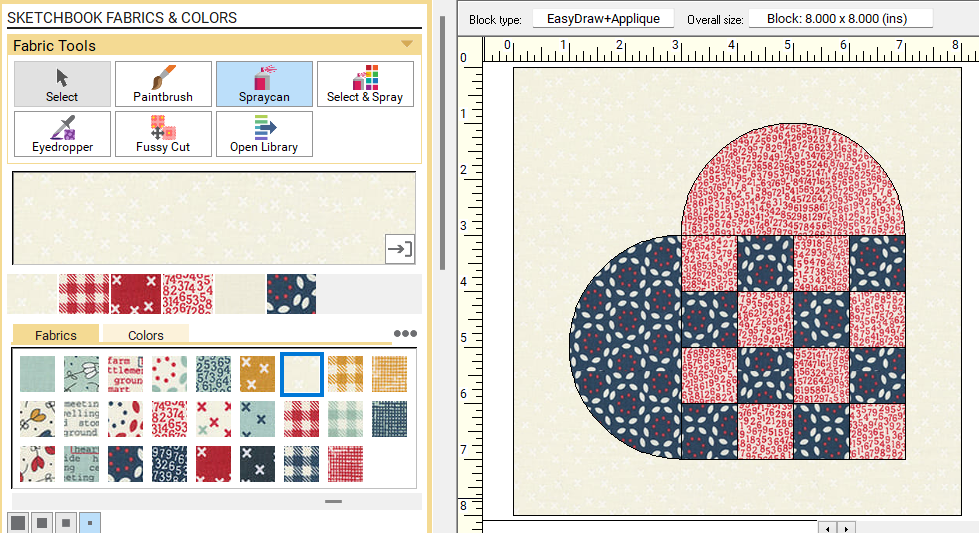
Color with a background and two "feature" fabrics.

I used the Moda Vintage fabric collection for coloring the project.  It was the free Fabric of the Month offered by Electric Quilt in November 2023.
Picture
Swedish Basket Heart drafted as Applique Motif.
Picture
Swedish Basket Heart Colored with Vintage fabric collection from Moda.

Drafting the Alternate Blocks

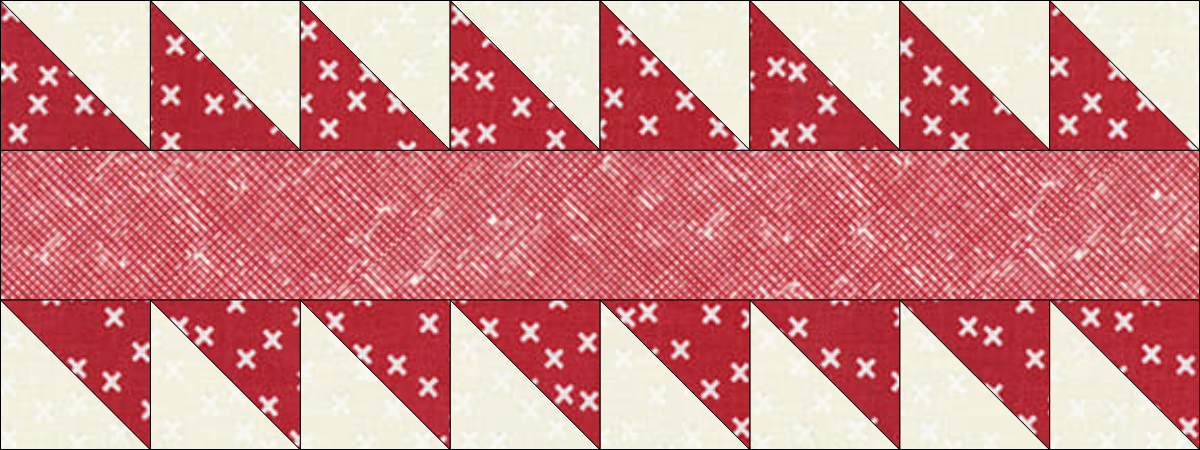
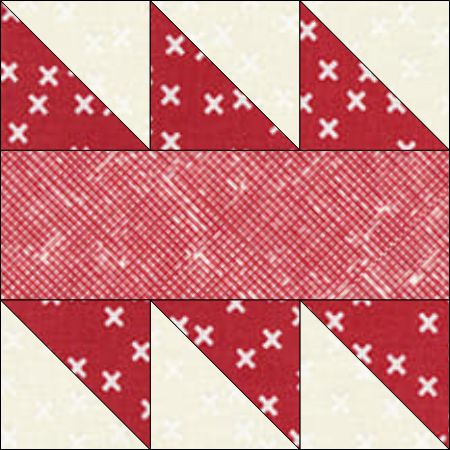
Create pieced blocks comprised of half square triangle units and rectangles for sashing and cornerstone units.

As a bonus, these same blocks will be used in the border (at the exact same sizes as in the sashing and cornerstones.
Picture
Sashing Block (Drafted at 8" x 3")
Picture
Cornerstone Block (Drafted at 3" x 3")

Swedish Basket Heart Quilt Layout

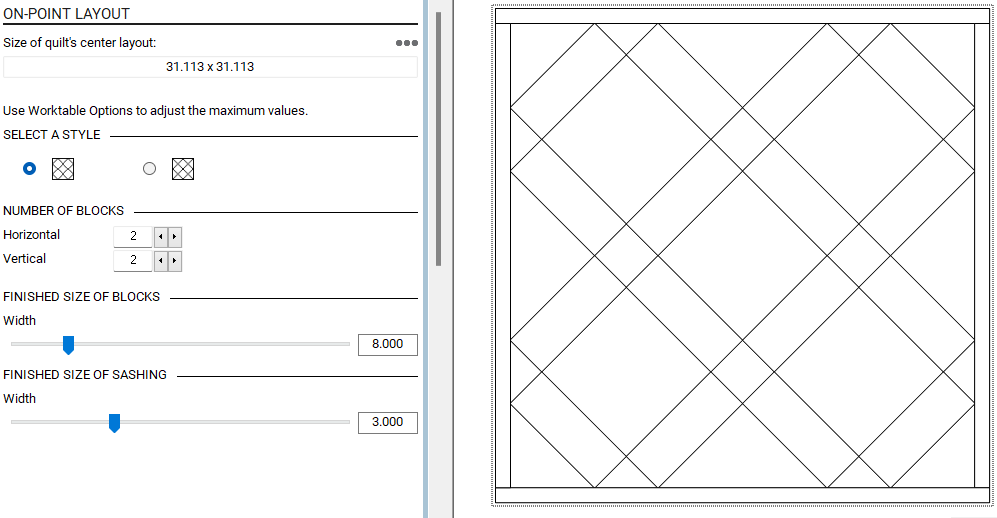
Set up an on point layout.

Number of blocks 2 x 2.

Size of block 8".

​Size of sashing 3".
Picture
Quilt Layout Set Up

Quilt Borders

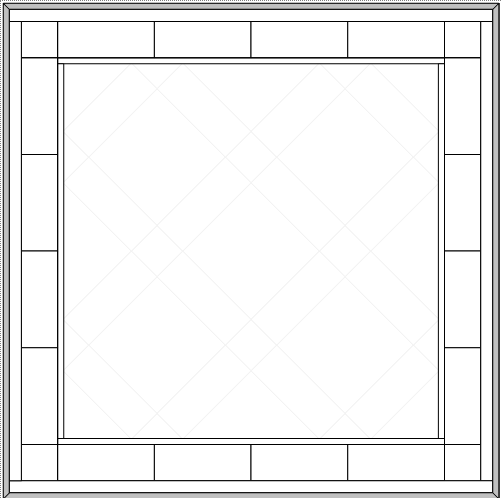
Borders are as follows:

Border #1  - .5 Long Horizontal.  (I figured out the math for this one so the next border could use the same size blocks as the sashing and cornerstones.)

Border #2 - 3" Blocks.  Number of blocks 4 x 4.

Border $3 - 1" Long Horizontal.

​Border #4 - .5" Mitered (binding).
Picture
Quilt Borders Set Up

Putting Together the Quilt Design

Place blocks in quilt.

Rotate heart blocks (if desired).

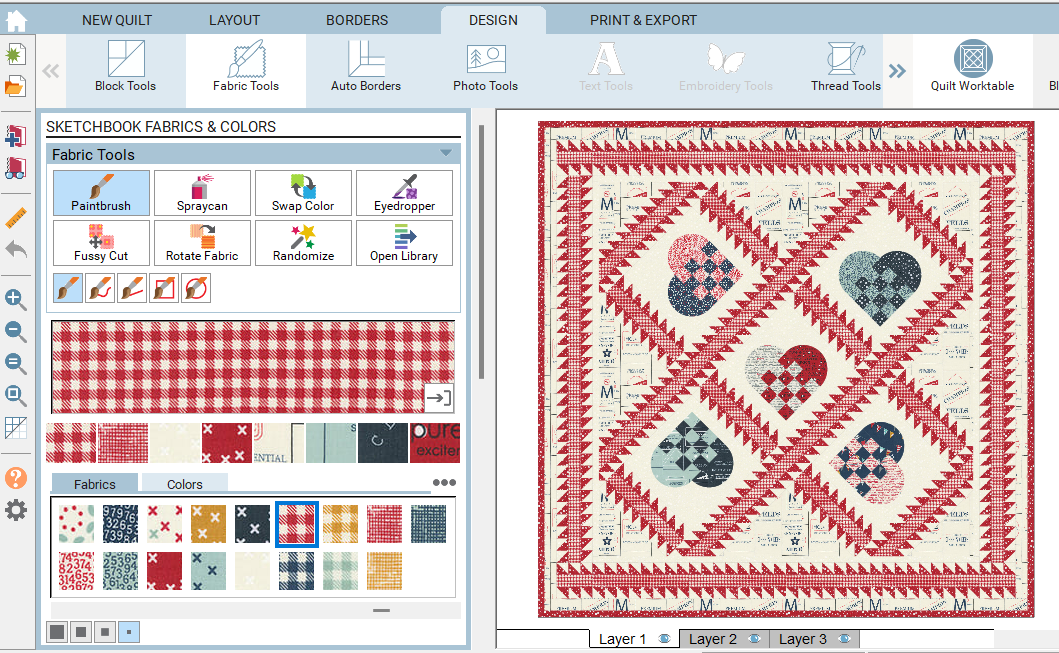
Finish coloring the quilt.

If using a plaid or check fabric, consider rotating the fabric in any diagonal pieces.

Picture
Populating and Coloring the Quilt
Watch the video for more information on how to draft the blocks and quilt using Electric Quilt 8.
Here is the final quilt from the video.
Picture
Swedish Heart Basket Quilt drawn using Electric Quilt 8
Think through how you could personalize the design.  A few ideas:
  • Swap out the fabrics with a different fabric collection.
  • Swap out the "weave" portion of the heart using one of the options above.  Or design your own option.  Make sure any design is "weave" friendly.
  • Change up the sashing and cornerstone units.
  • Design a different pieced border.
Share your quilt in the Learning EQ Facebook group.  I would love to see your design.
Learning EQ Facebook Group Post for Swedish Heart Basket Blocks and Quilt
Picture
Happy quilting.

​Kari

Join the On Point Quilter weekly newsletter and receive regular tips and inspiration on using Electric Quilt 8 along with the  Free 12 Top
Tips for EQ8 video guide.
Picture
    Picture
    Picture
    Picture
    Free guide available for newsletter subscribers
    Picture
    Picture
    Picture

    Kari Schell

    Electric Quilt Expert and Educator and Pattern Designer.

    Categories

    All
    Art And Stitch
    Cricut Maker
    Dear Jane
    Electric Quilt 7
    Electric Quilt 8
    Goose Goose Duck Challenge
    Inkscape
    Patterns
    Silhouette Cameo
    Stampin Up
    Tips And Techniques
    Tools And Rulers

    Archives

    June 2025
    May 2025
    April 2025
    March 2025
    February 2025
    January 2025
    December 2024
    November 2024
    October 2024
    September 2024
    August 2024
    July 2024
    June 2024
    May 2024
    April 2024
    March 2024
    February 2024
    January 2024
    December 2023
    November 2023
    October 2023
    September 2023
    August 2023
    July 2023
    June 2023
    May 2023
    April 2023
    March 2023
    February 2023
    January 2023
    December 2022
    November 2022
    October 2022
    September 2022
    August 2022
    July 2022
    June 2022
    May 2022
    April 2022
    March 2022
    February 2022
    January 2022
    December 2021
    November 2021
    October 2021
    September 2021
    August 2021
    July 2021
    June 2021
    May 2021
    April 2021
    March 2021
    February 2021
    January 2021
    December 2020
    November 2020
    October 2020
    September 2020
    August 2020
    July 2020
    June 2020
    May 2020
    April 2020
    March 2020
    February 2020
    January 2020
    December 2019
    November 2019
    October 2019
    September 2019
    August 2019
    July 2019
    June 2019
    May 2019
    April 2019
    March 2019
    February 2019
    January 2019
    December 2018
    November 2018
    October 2018
    September 2018
    August 2018
    July 2018
    June 2018
    May 2018
    April 2018
    March 2018
    February 2018
    January 2018
    December 2017
    November 2017
    October 2017
    September 2017
    August 2017
    July 2017
    June 2017
    May 2017
    April 2017
    March 2017
    February 2017
    January 2017
    December 2016
    November 2016
    October 2016
    September 2016
    July 2016
    June 2016
    May 2016
    April 2016
    March 2016
    February 2016
    January 2016
    December 2015
    November 2015
    October 2015
    September 2015
    August 2015
    July 2015
    June 2015
    May 2015
    April 2015
    March 2015
    February 2015
    January 2015
    December 2014
    November 2014
    October 2014
    September 2014
    July 2014
    June 2014
    May 2014
    April 2014
    March 2014
    February 2014
    January 2014
    December 2013
    November 2013
    October 2013
    September 2013
    August 2013

    RSS Feed

Contact:
On Point Quilter
e-mail:  [email protected]
phone:  763-566-6536

GET MY NEWSLETTER FOR REGULAR EQ AWESOMENESS!

* indicates required
  • Blog
  • About
  • EQ8 Training
    • Tech Know Quilters Electric Quilt 8 Membership Training
    • EQ8 Made Easy
    • Electric Quilt 8 Sneak Peek
  • Store
  • Contact