ON POINT QUILTER
  • Blog
  • About
  • EQ8 Training
    • Tech Know Quilters
    • EQ8 Made Easy
    • Electric Quilt 8 Sneak Peek
  • Store
  • Contact
  • Majestic View EQ8 Free Live Webinar
Picture

Memorial Day Flags EQ8 Tutorial

5/25/2024

 
The quilt I am sharing today was inspired by a design I saw on the Quilt Index.
Picture
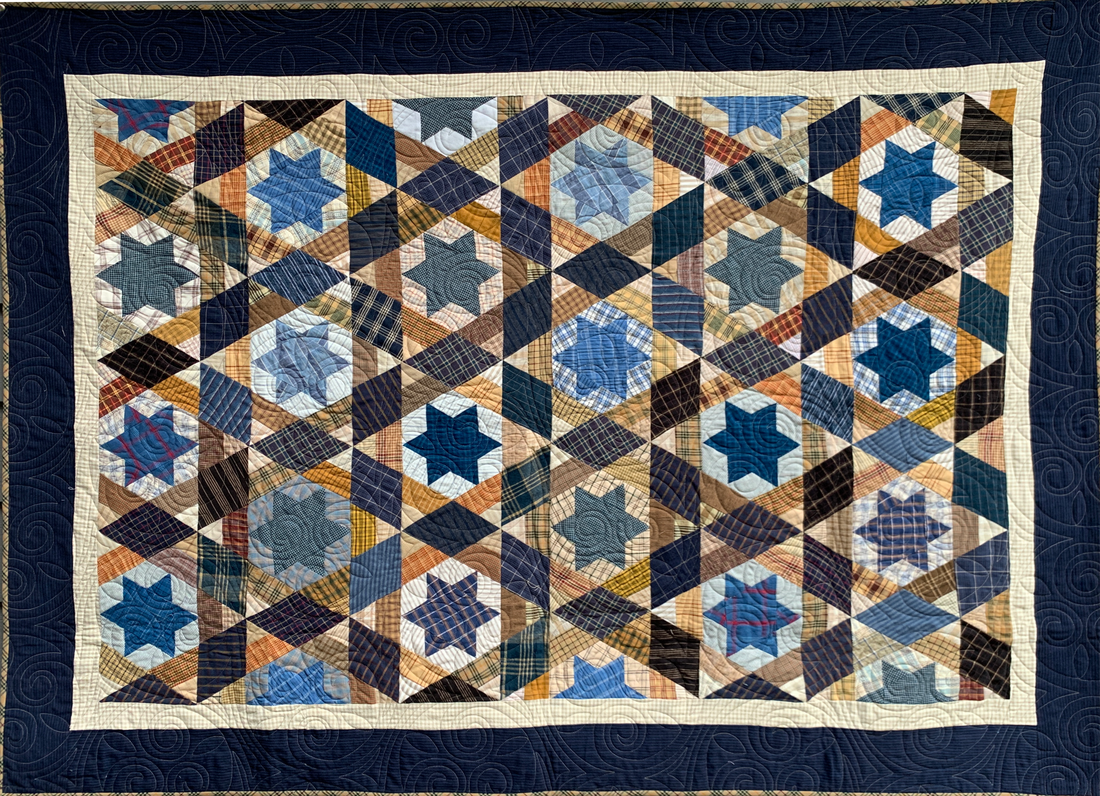
Mitchell, Eugeni. Flag Quilt. 1979. From Rocky Mountain Quilt Museum, Rocky Mountain Quilt Museum Collection. Published in The Quilt Index, https://quiltindex.org/view/?type=fullrec&kid=24-20-198. Accessed: 05/24/24
The quilt was made by Eugenia Mitchell of Golden CO and donated to the Rocky Mountain Quilt Museum.  

It was one of the original 101 quilts donated by Eugenia Mitchell to start the Rocky Mountain Quilt Museum. 

​Eugenia hated to see anything go to waste. In 1943, her son salvaged the large flag from a July 4th bandstand bunting, and Eugenia retrieved the small flags from veterans' graves after Memorial Day 1979 (with permission).

Although I didn't make an exact replica of the quilt in EQ, I did follow the layout concept from Eugenia's quilt. 

Flag Dimensions for EQ Design

In figuring out the sizing for my flag block, I found a flag calculator.  The internet is truly a wealth of information. 

This was at ​https://www.omnicalculator.com/other/flag

I chose to make some minor adjustments in the sizes to make the quilt block easier to rotary cut and piece. 

​My adjusted numbers are shown in red.
Picture
Omni Flag Calculator
In the video tutorial, I will take you through drafting both my American Flag block along with the quilt.  

One of the pluses of the quilt design is that it could easily be adapted with flags of a different country.  Or maybe a collection of flags.
Here is my final block.
Picture
American Flag Block Created in EQ8 by Kari Schell
Here is my final quilt. 

​I did my best to stay with the same width to height ratio for the blocks in the borders -- but ended up taking some liberties by adjusting the proportions in some of the border blocks (just a bit).
Picture
Memorial Day Flags Quilt designed with EQ8 by Kari Schell
I would love to see what you do with my flag block.  Or a different flag block.  Feel free to post in the Learning EQ Facebook Group.  I've set up a dedicated post.
Learning EQ Facebook Group Post on Memorial Day Flags

Tech Know Quilters April 2024 Month End Challenge

Prepare to embark on a journey of awe-inspiring creativity as we unveil our latest showcase, featuring an array of remarkable student projects from the Tech Know Quilter community.

Among the reactions, one common sentiment prevails: "I never imagined Electric Quilt 8 could achieve such feats!"

I know you will be impressed as we unveil the astonishing capabilities of Electric Quilt 8, showcased through the diverse and imaginative projects crafted by our talented members.
Picture
Sandy Dingman Wells Normally not a big fan of modern quilts - but I enjoyed making this quilt. I call it Pac-Man Maze. It reminded me of the old Atari game Pac Man with its 90 degree turns. Part of what makes this pattern trigger the imagination is the fabric selection.
Picture
Sandy Dingman Wells I have an affinity for compass and star blocks. This is the quilt I created that incorporates both a compass star block and a 3D effect.
Picture
Kristy Goodin Soard I very much enjoyed designing this quilt for the April 2024 Masters Challenge.
Picture
Terry McCaskey I have come to the end of my TKQ beginning classes with the Embellishment class before staring the Masters series in May. (a little scary Kari). As always Kari has shared many tips...most of which I never imagined were possible. However, drafting quilts in EQ is a passion and this month I updated my "freeway" sign quilt for our upcoming show! #wouldyoudraftaroadsignineq8?□ It will be on Interstate 80/90 at the end May!
Picture
Alice Hertel Borders, borders, and yet more borders. Start with a centre medallion and then just go nuts!! Love this. We have straight borders, flying geese, diamonds, piano keys, and then the crowning glory, sway with flower corners. Finally ended with even more straight borders.
Picture
Fran Heisey Master class Special Effects Layouts sounded like it might be a snore - it was anything but. Lots of new things to learn.
Picture
Lee Wiencki Special effects quilts lesson 4 with unexpected colours
Picture
Denise Mohler Well April was another month packed full for me... still playing catch up Hexagon Magic Lesson 5 is the 1st one.
Picture
Denise Mohler Four Patch Quilts Lesson 6
Picture
Denise Mohler Log Cabin Building Lesson 1
Picture
Denise Mohler Circles By Design Lesson 4
Picture
Denise Mohler Star Layouts Lesson 1
Picture
Denise Mohler Hexies and More Lesson 5
Picture
Denise Mohler Surprising Corners Lesson 6
Picture
Denise Mohler Sampler Quilt Layout Designs Lesson 6
Picture
Denise Mohler Pentagons and Decagons Lesson 3
Picture
Connie Bradley Bobcik I participated in the EQ8 April Challenge using the April 2024 Fabric of the Month, Sea Breeze by Northcott. I used many skills I've learned along the way in TKQ lessons. I did get an honorable mention with my quilt.
Picture
Connie Bradley Bobcik Working in TKQ Adding Quilt Designs, Month 21, it was fun to design quilting designs for our quilts. I do a lot of ruler work for my quilting and didn't know how to get quilting designs to interview on my quilt before actually stitching. I was so excited to learn how to use create designs that I could accomplish that with. Thank you Kari, this was so helpful to me.
Picture
Connie Bradley Bobcik Lesson 1, of what I have finished so far, was one of my favorite lessons in TKQ Masters Special Effects Library Quilts. Learning how to create unique blocks and then add them to a specific quilt setting was so intriguing. I could sit for way too long just playing.
Picture
Fran Heisey For sometime, I have wanted to set blocks in the clipping triangles in layouts from the EQ Layout Library that would have the edge of the block along the hypotenuse of the triangle rather than along one of the shorter edges. Kari showed us a technique in Special Effects Quilts that finally allowed me to do that. Here is an example.
Picture
Edith Craig My class for April was Master's Special Effects. This quilt was using and positioning shapes of various sizes. The class used circles, but I modified mine to use jewels. It was interesting to make the changes in the sizing to get the look that I wanted and fun to play with the positions. This was one of many of the quilts in this class that was fun to draft and put my own spin on.
​

​Would you like to join this amazing community of quilters?
Learn More About Tech Know Quilters
Picture
Happy quilting.

​Kari

Join the On Point Quilter weekly newsletter and receive regular tips and inspiration on using Electric Quilt 8 along with the  Free 12 Top
Tips for EQ8 video guide.
Picture

From EQ8 to T Shirt

5/18/2024


Tech Know Quilters Masters Challenge - Design Your Own T Shirt


​Many of us have made quilts designed from old T Shirts.  Maybe like this design from my T Shirt and Panel Quilt class.

​But what if we reversed the concept -- and took a quilt we designed in EQ8 and transferred it to a T Shirt?


Or create a design in EQ8 specifically for a T Shirt? 

Wouldn't that be super fun to wear to your next guild meeting?

Or your next quilt show?

​Everyone will be asking where you got your shirt. 
Picture
Custom Set Quilt Design from T Shirt and Panel Quilt Class in Tech Know Quilters

In this blog post I will inspire you with ideas developed by Tech Know Quilters Masters members who designed their own T Shirt in EQ (or used a T Shirt from the EQ library).  And then created a design for the T Shirt.

I will also walk you through the process of preparing your Electric Quilt 8 design for printing -- and will walk you through how to use VistaPrint to print your own T Shirt.

Quilty T Shirts Tech Know Quilters Masters Challenge

For this challenge, Tech Know Quilter Masters members started by either drafting their own shirt or using a shirt from the EQ library. 

In week 2, they found a design to add to their T Shirt. 

And then (if desired) they added text to their quilt. 

​I am hoping some decide to create their own personal T Shirt from their design.

I personally would love to wear any of them.
Picture
Julie Pedersen
Picture
Fran Heisey Oh my! I learned so much last month. I used a lot of it for the challenge.
Picture
Kristy Goodin Soard I chose to carry on with my word of the year with this challenge.
Picture
Brigitte Lee Recycling my old motifs.
Picture
Rhonda Goss
Picture
Zdenka Nemethova Inspired by Carolyn Friedlander Shirts Quilt pattern, just adjusted a bit to have a space for the design.
Picture
Lynne Maramieri My shirt block for this month's challenge. I rounded the neckline and made crazy patch fabric for the appliqué heart.
Picture
Connie Bradley Bobcik I decided to make a sweatshirt, just to challenge myself a little further. I had to do some thinking on this one!
Did you know that if you have received twelve months of Tech Know Quilter classes, you are eligible for the TKQ Masters program? 

​Send me a note, if you are interested in learning more about joining Masters.
Tell Me More About Joining TKQ Masters

From EQ8 to T Shirt

I decided to challenge myself to participate in the TKQ Masters Challenge as well.

I've been wanting to create a Tech Know Quilters T Shirt. 

I ended up with two designs and couldn't decide which one I preferred.
Picture
Tech Know Quilters T Shirt Quilt Design - Option 1 by Kari Schell
Picture
Tech Know Quilters T Shirt Quilt Design - Option 2 by Kari Schell
Let me walk you through the highlights on creating my design in EQ8.
  • Locate the T is for T-shirt block in the EQ8 Block library under ​03 Foundation Pieced >My ABC Quilt
  • Add to Sketchbook
  • Edit the block and delete the horizontal line at the bottom of the shirt.
  • Recolor the block.
Picture
T is for T-shirt
Picture
Modified T Shirt Block
  • Set up a New Quilt>Horizontal
  • # of Blocks 1 x 1
  • Size of Block 16 x 16
  • Delete the border
Picture
Layout Tab for Quilt
  • Place the modified T Shirt block on Layer 1
Picture
Design Tab - Layer 1
  • Select Layer 2​
  • Drag any blocks (they don't need to be applique motifs) on Layer 2  
  • I designed my own blocks for my T Shirt, but you could pick blocks from the EQ library.
  • Resize as desired.
  • Note that I colored the black in the block with the same fabric as the fabric used to color the t shirt.
Picture
Design Tab - Layer 2 Adding Designed Block
  • On Layer 2, use the Text tools to add the text
  • Pick a font installed on your computer
  • I used the 2Tech font from Dafont.com
  • ​Rotate and position the text on the t shirt
  • Add to sketchbook to save your quilt.
Picture
Design Tab - Text Tools
In my free video this week, I decided to share (as Paul Harvey would say) "the rest of the story".

While the design in EQ was great, I didn't want a quilt with the design -- but wanted an actual T Shirt.

I knew it would be fun to wear to retreats and quilt shows.

And I loved the fact that it is a one of a kind item.

The biggest challenge I needed to overcome was preparing a good design for printing.

And then finding a way to get it actually printed. 


Check out how I addressed both of these challenges.
You may have noticed in the video that I added a new piece of software to the mix. 

My original plan was to use a background remover app (such as remove.bg).  I use that app a lot, but the export was not large enough to create a crisp design.  ​
What is Inkscape?

Inkscape is a professional vector graphics editor for Windows, Mac OS X and Linux. It's free and open source. 

Inkscape can seem overwhelming to use when you open it for the first time. However you only need to use a few tools within Inkscape to clean up your T Shirt design exported from EQ -- so this really is a piece of cake.

​
You can download Inkscape here.  In the video I used version 1.3.2.
Picture
Link to Inkscape Website


​When I was looking for a way to get my shirt printed, I saw that VistaPrint https://www.vistaprint.com  was an option. 

I've used them in the past for postcards and business cards and have been impressed with their quality. 

They allow for purchases of single shirts, so I thought I would give it a try.

In the process, I realized my image should be at a dpi of at least 300.  (That was when I realized remove.bg wasn't going to work.)
It was much simpler than I thought.

I have placed an order for a few items with my design.   There were a few other items that looked appealing as well.  

I'll report back once the order arrives. 

​Until then, here is a screenshot of the preview of the shirt.
Picture
Preview of Vista Print Designed T Shirt
Do you have a favorite quilting T Shirt?  I would love to see pictures.  I've set up a separate post in the Learning EQ Facebook group for you to share.
From EQ8 to T Shirt Learning EQ Facebook Post
Picture
Happy quilting.

​Kari

Join the On Point Quilter weekly newsletter and receive regular tips and inspiration on using Electric Quilt 8 along with the  Free 12 Top
Tips for EQ8 video guide.
Picture

Adding Stripes for a Wow Factor in Your Next Quilt

5/11/2024

 
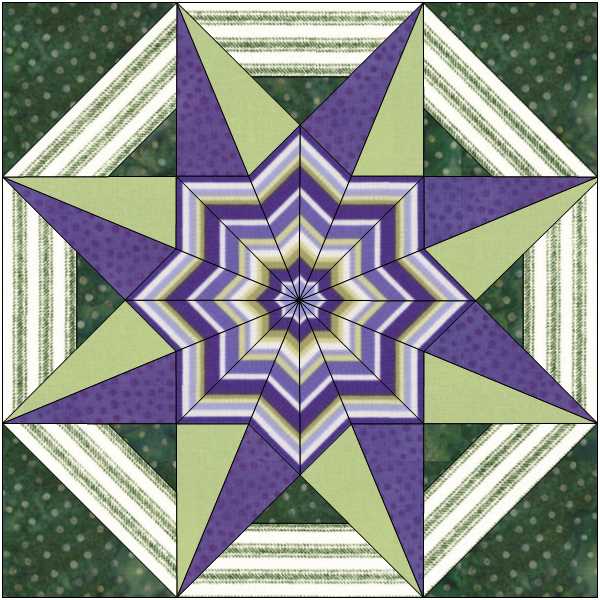
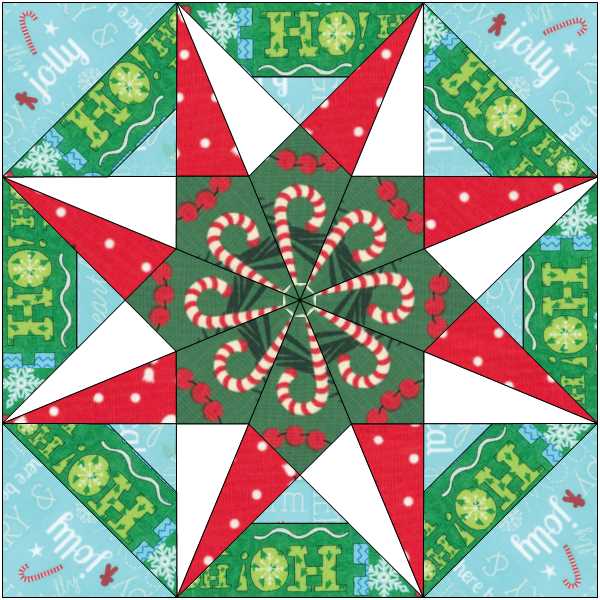
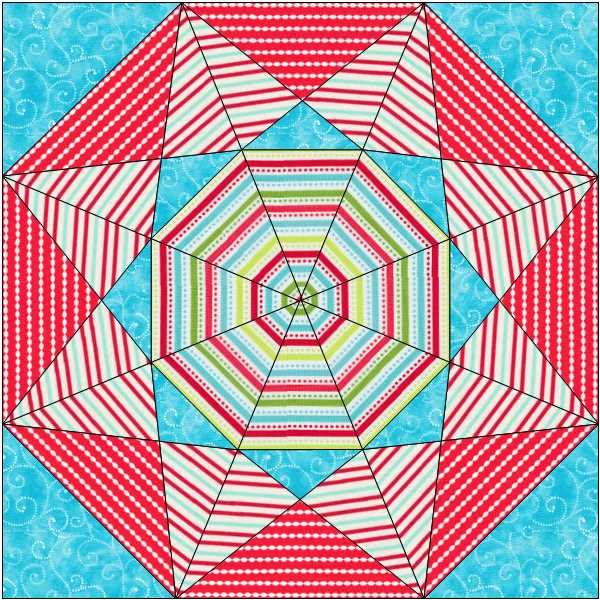
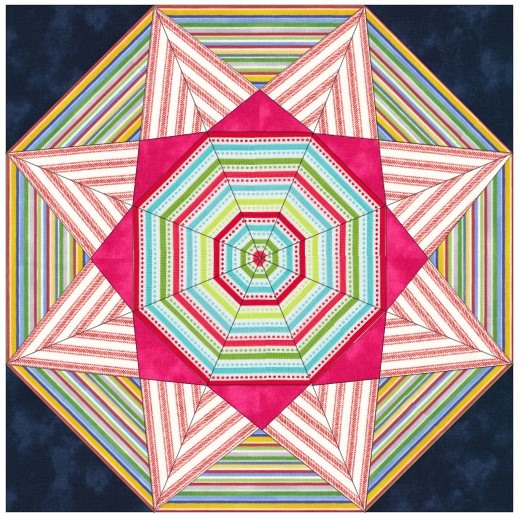
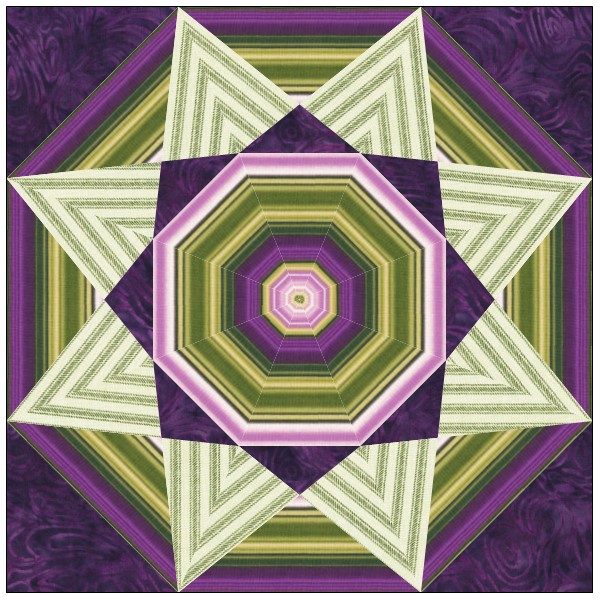
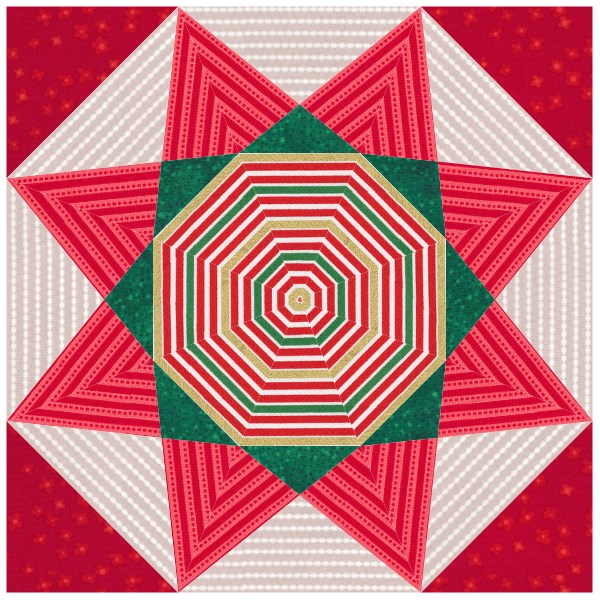
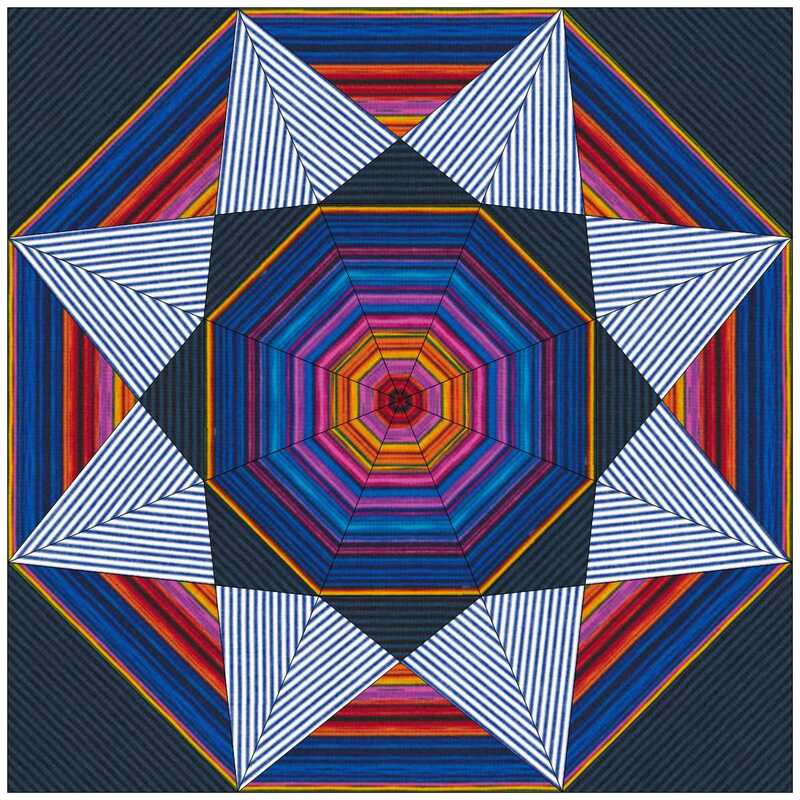
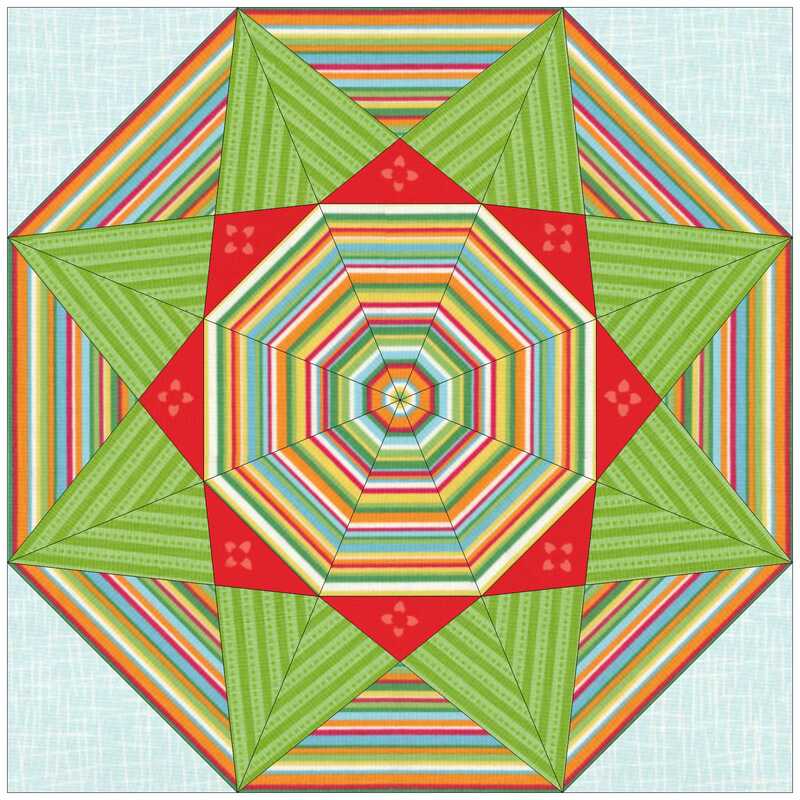
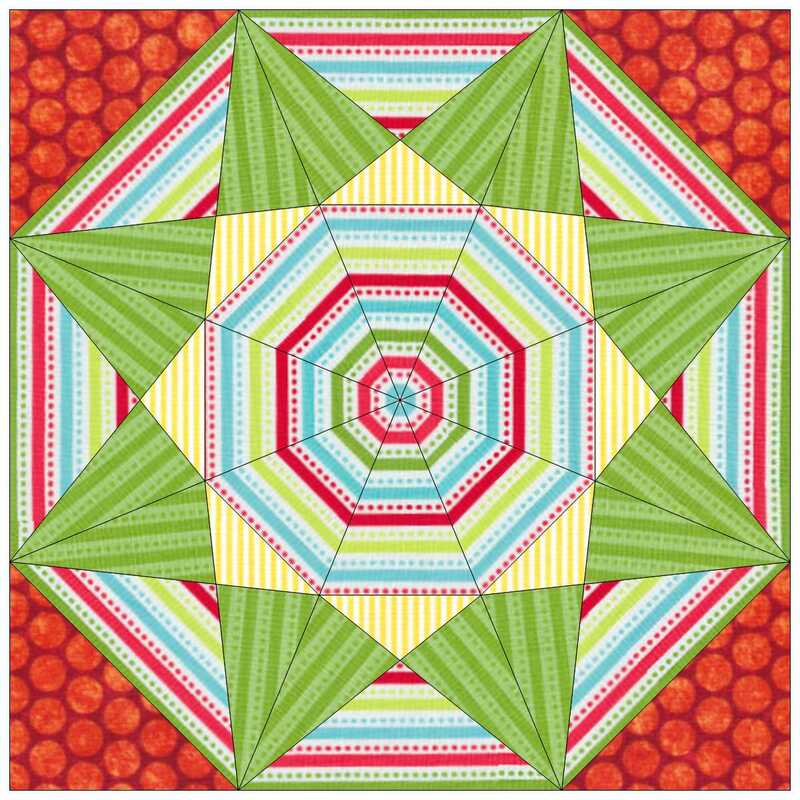
Sometimes that beautiful striped fabric in our collection can be a bit intimidating to work with. 

​If you have ever struggled with making that initial cut into striped fabric, this tutorial is for you.

Kaleidoscopes with Striped Fabric

Tech Know Quilter members have been working with striped fabric and posting their blocks in our private Facebook group..  

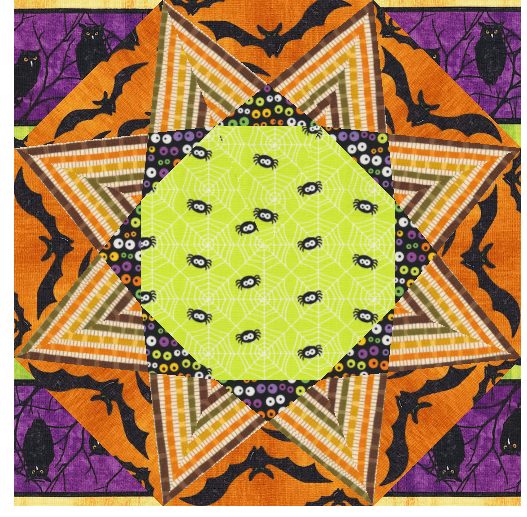
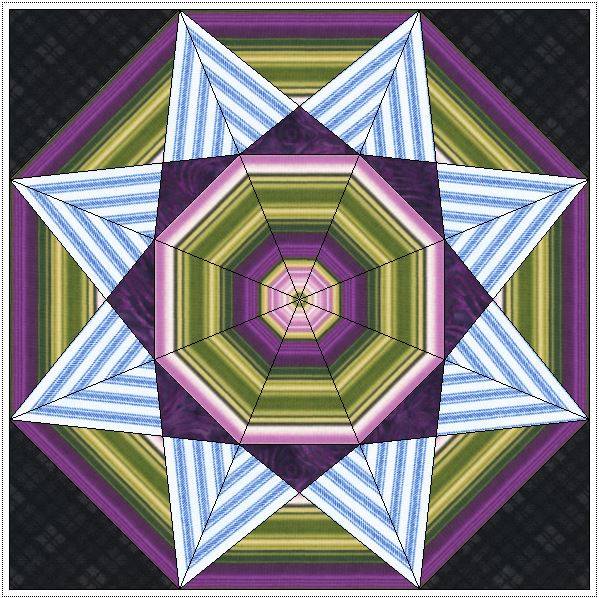
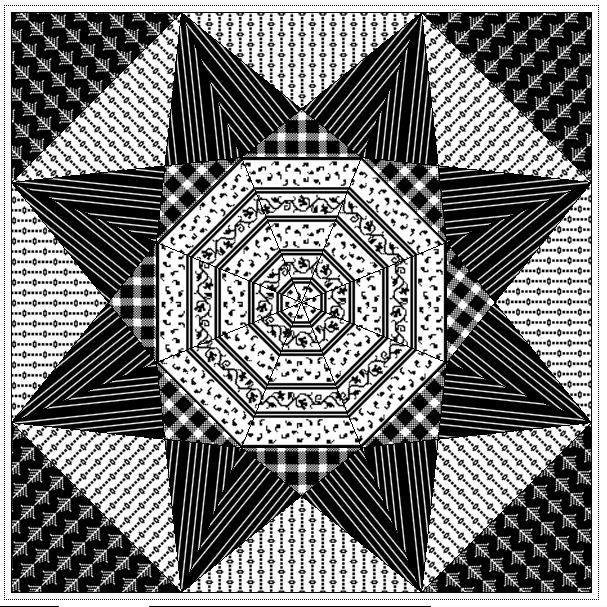
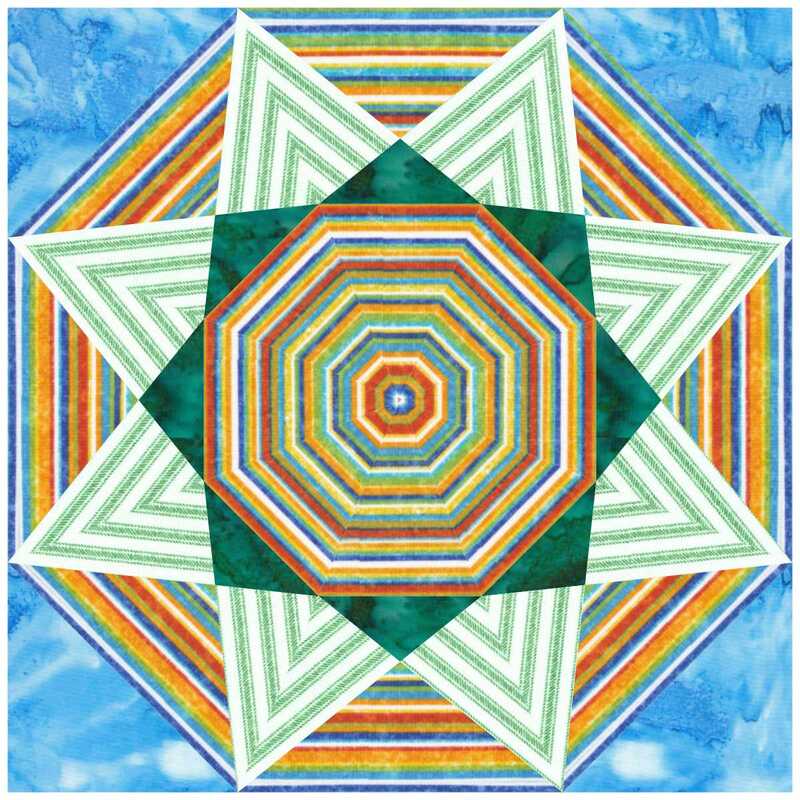
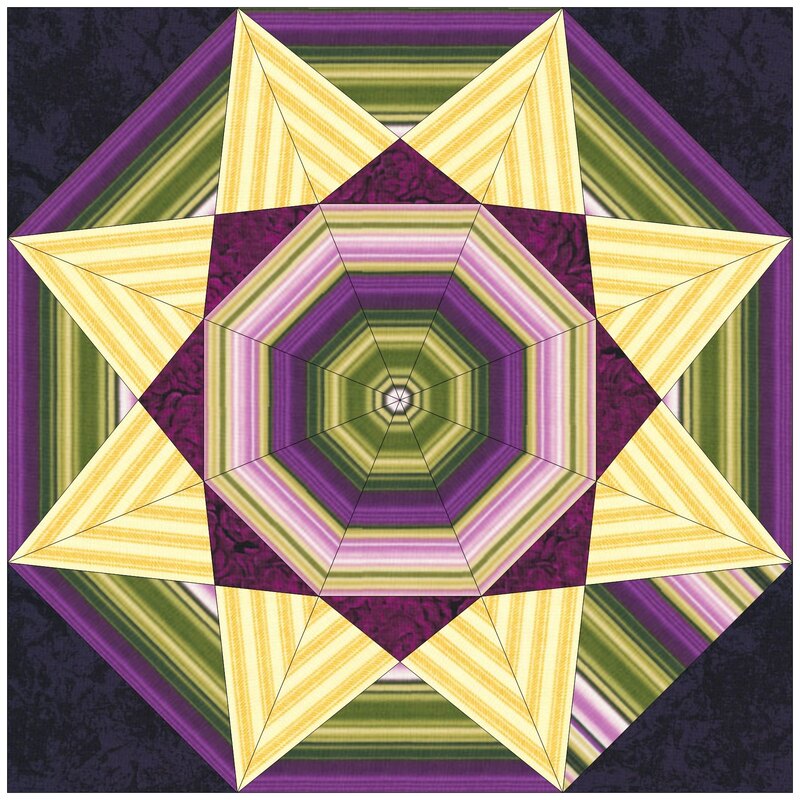
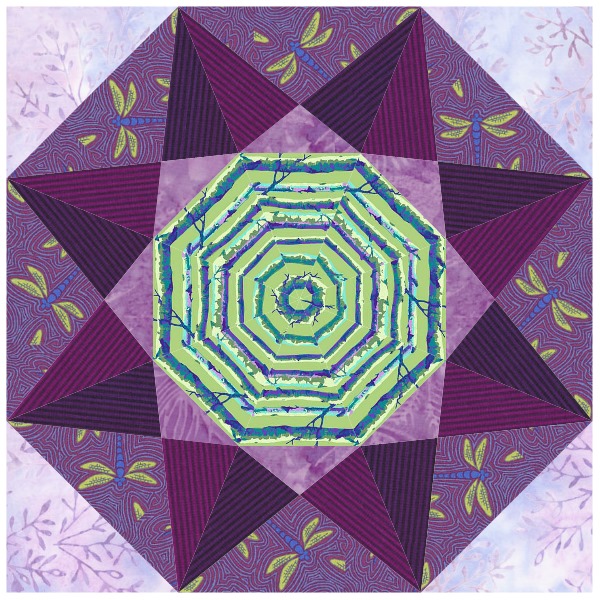
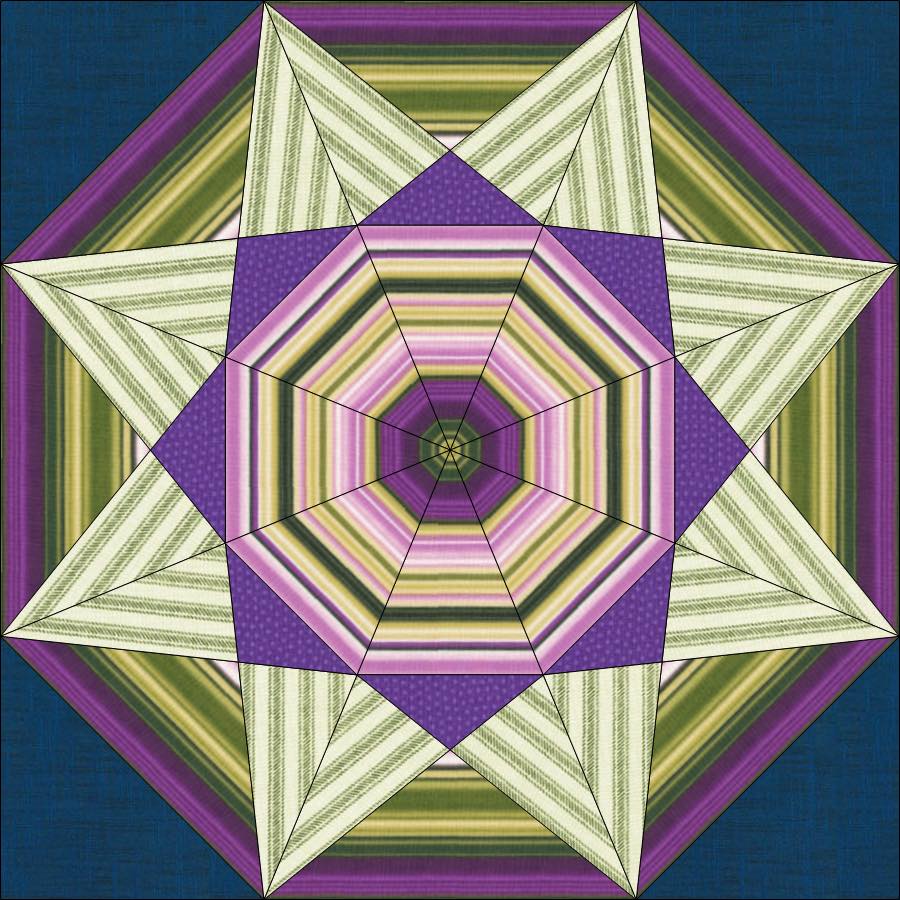
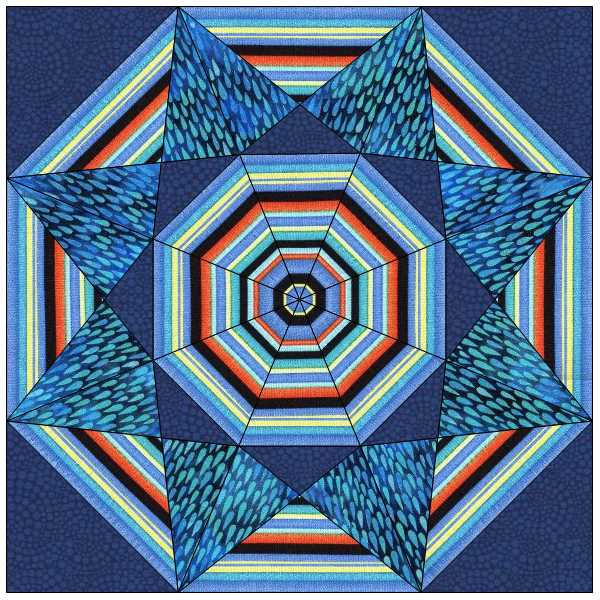
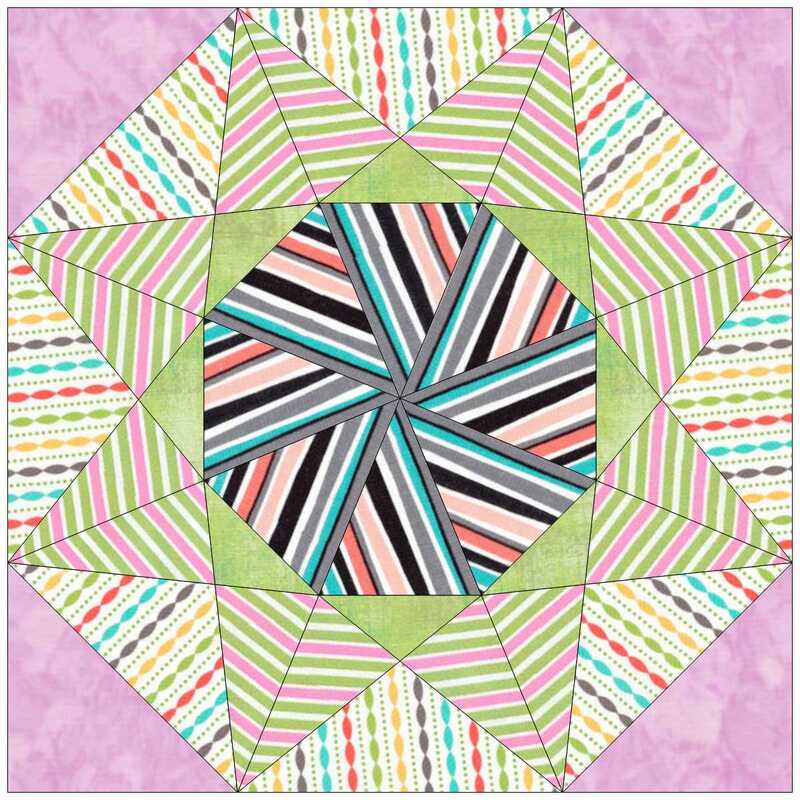
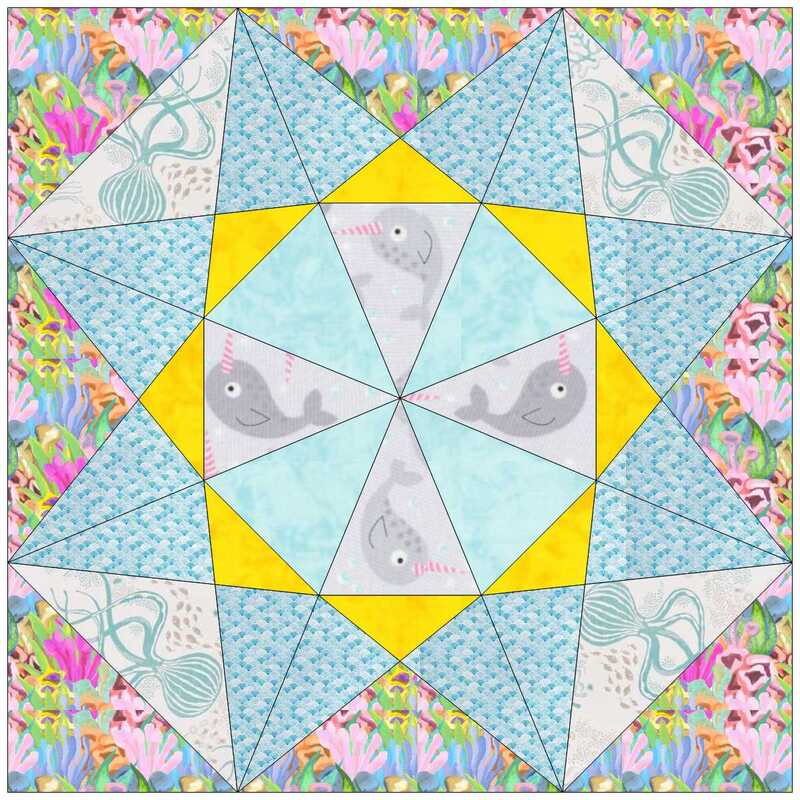
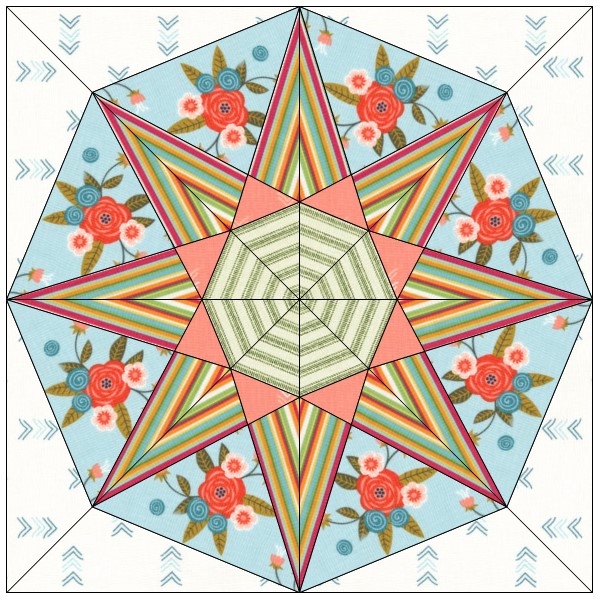
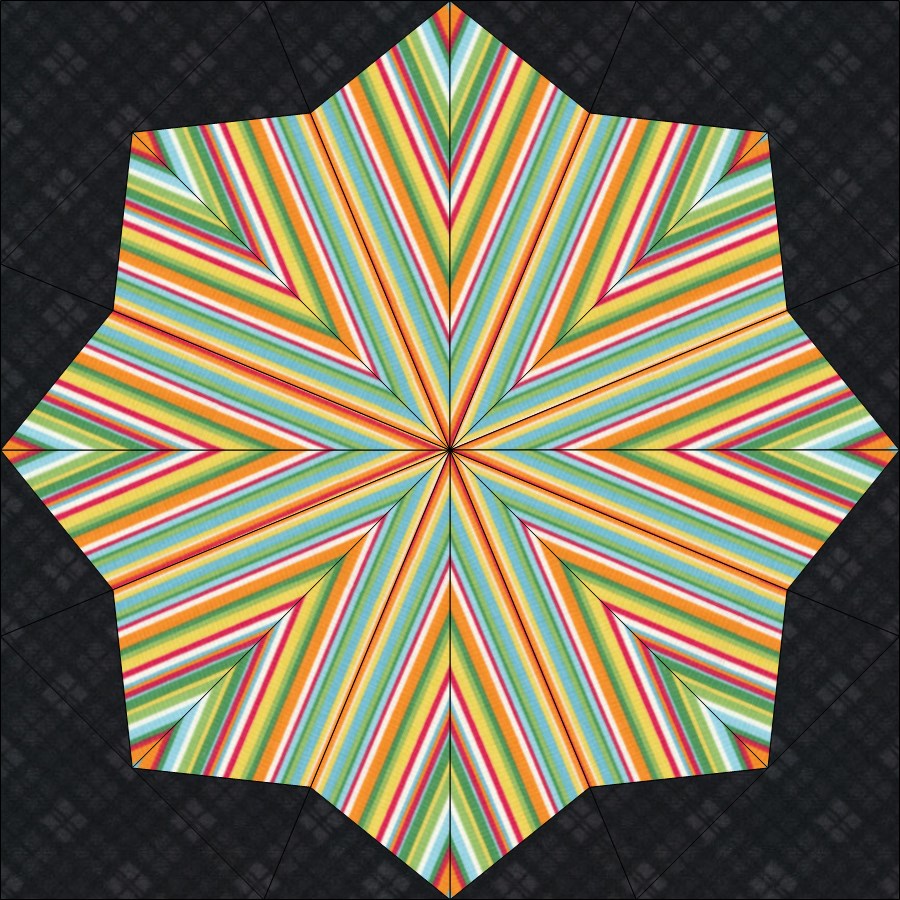
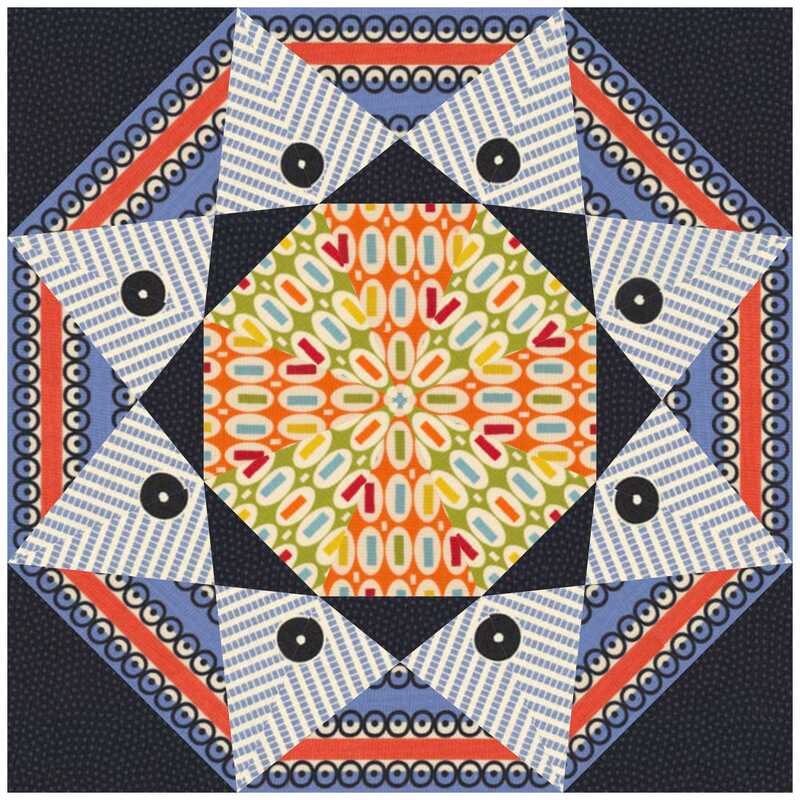
​In the EasyDraw Kaleidoscope class they created a striped fabric Kaleidoscope block. 

While many of the blocks are the same -- the fabrics result in a very different look for each of the blocks.

Enjoy some of their awesome designs.  

Picture
Shawn S.
Picture
Dawn L. experimented with a different block
Picture
Connie B.
Picture
Sara B.
Picture
Martha E.
Picture
Beth E.
Picture
Nanne P.
Picture
Loronda S.
Picture
Wilna D.
Picture
Brigitte L.
Picture
Tim T.
Picture
Debbi T,
Picture
Debbi T.
Picture
Wanda J.
Picture
Janet I.
Picture
Susan G.
Picture
Maureen P.
Picture
Maureen P.
Picture
Collien K.
Picture
Marlu A.
Picture
Carmen S.
Picture
Karen N.
Picture
Irene F.
Picture
Alice Hertel K.
Picture
Nancyanne F.
Picture
Margo R.
Picture
Roxanna K.
Picture
Roxanna K.
Picture
Connie B.
Picture
Connie B.
Picture
Katherine M.
Picture
Zdenka N.
Picture
Diane B.
Picture
Candy P.
Picture
Carol K.
If you are currently in TKQ and would like to take EasyDraw Kaleidoscopes as an add-on class, send me an email.  I have a discount coupon just for you.
Would you like to join this amazing group of quilters in mastering Electric Quilt 8.  Names are currently being collected on a wait list for our next open enrollment period.

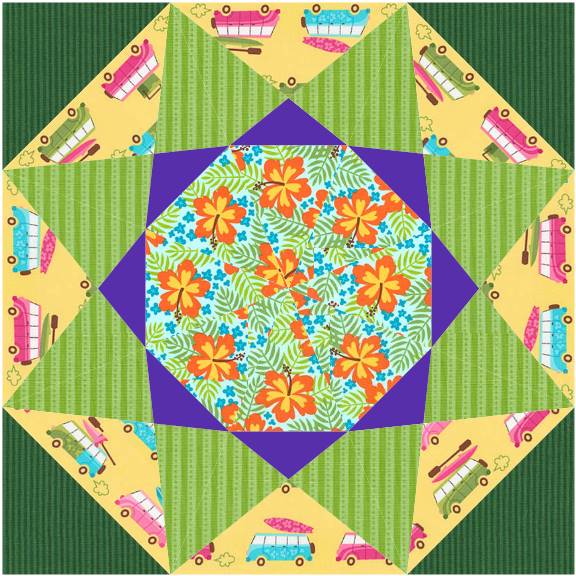
Rotating Fabric in a Block using Electric Quilt 8

Although Electric Quilt does not have a rotate fabric option in the block worktable (something definitely on my wish list), there is still a way for you to rotate fabric for your block. 

​Let me show you how.
In the video I used Rose Whisperers by Eleanor Burns for Benartex.  This is one of the fabric of the month collections from Electric Quilt. You can still get the free download on their website.

Here is the block from the video.
Picture
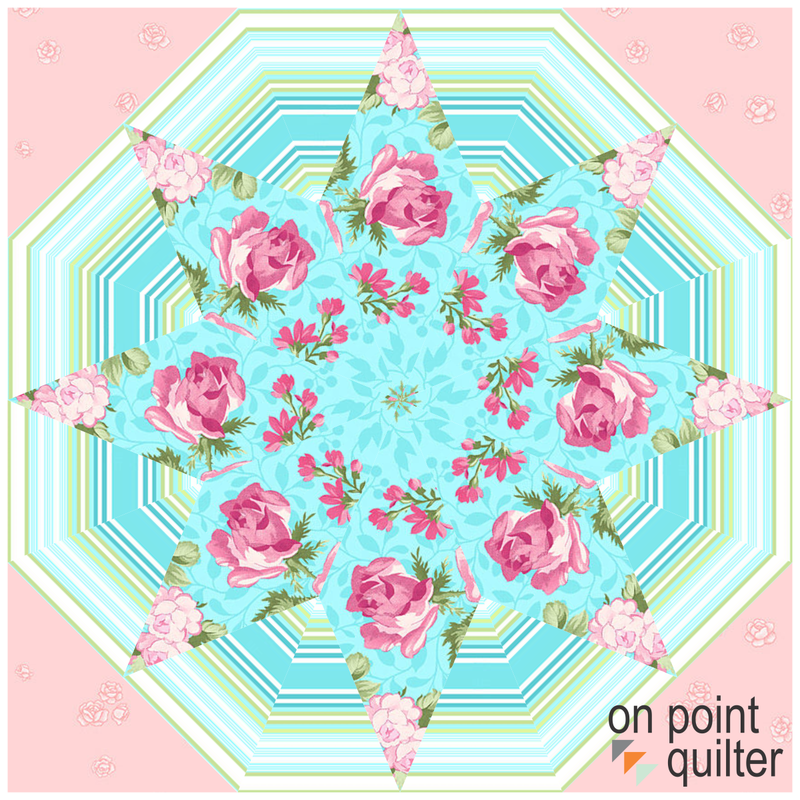
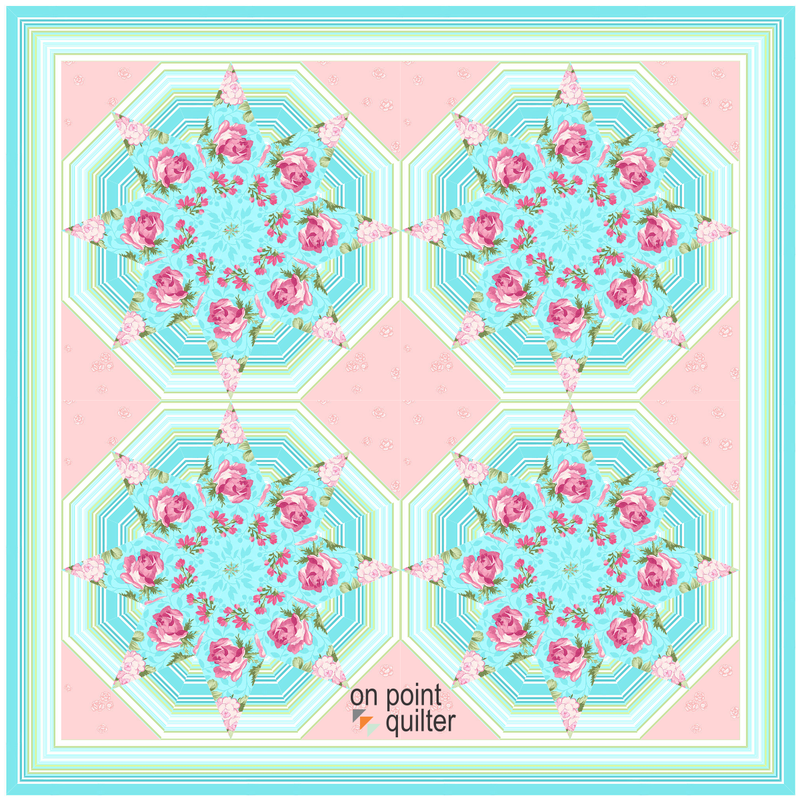
And if you want to supersize your project, consider creating a quilt comprised of four blocks.  Just don't rotate the block (or put them in an on point layout) as you will need to adjust the rotation and fussy cut the fabrics again).
Picture
I look forward to seeing what you choose to do with your striped fabric.  Post your quilts in the Learning EQ Facebook group.
Learning EQ Facebook Post for Striped Fabric in a Kaleidoscope Quilt
Picture
​Happy quilting.

​Kari

Join the On Point Quilter weekly newsletter and receive regular tips and inspiration on using Electric Quilt 8 along with the  Free 12 Top
Tips for EQ8 video guide.
Picture

Creating Quilt Labels using EQ8

5/4/2024

 
Quilt Show season is upon on.

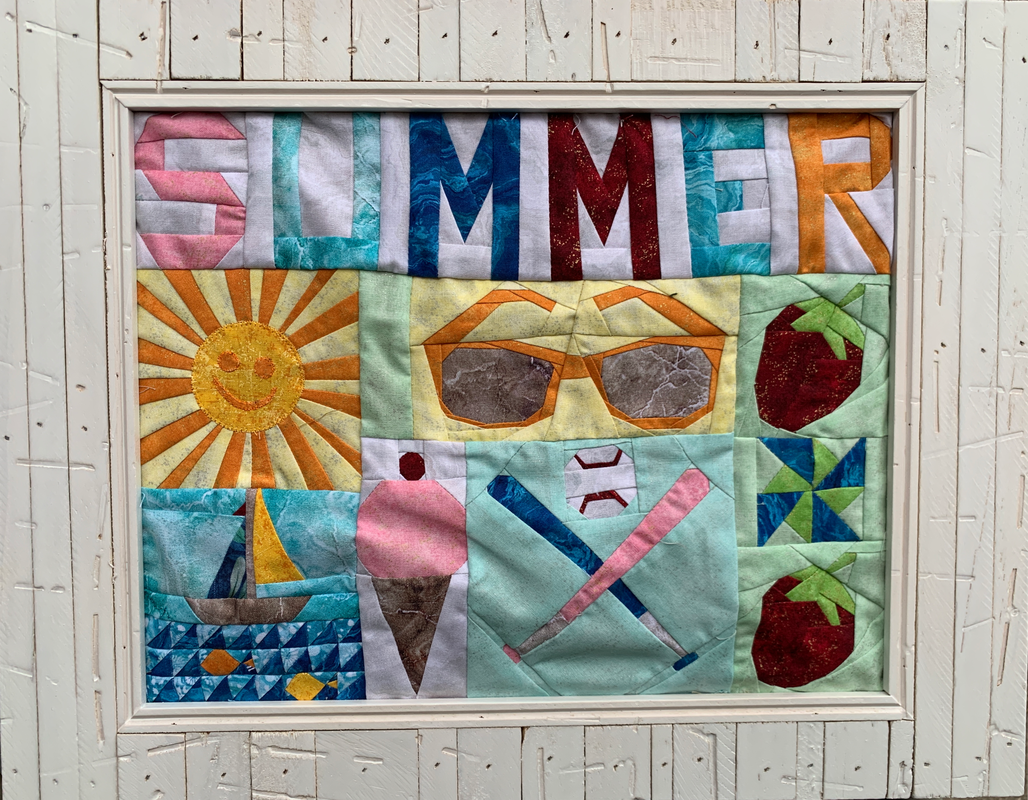
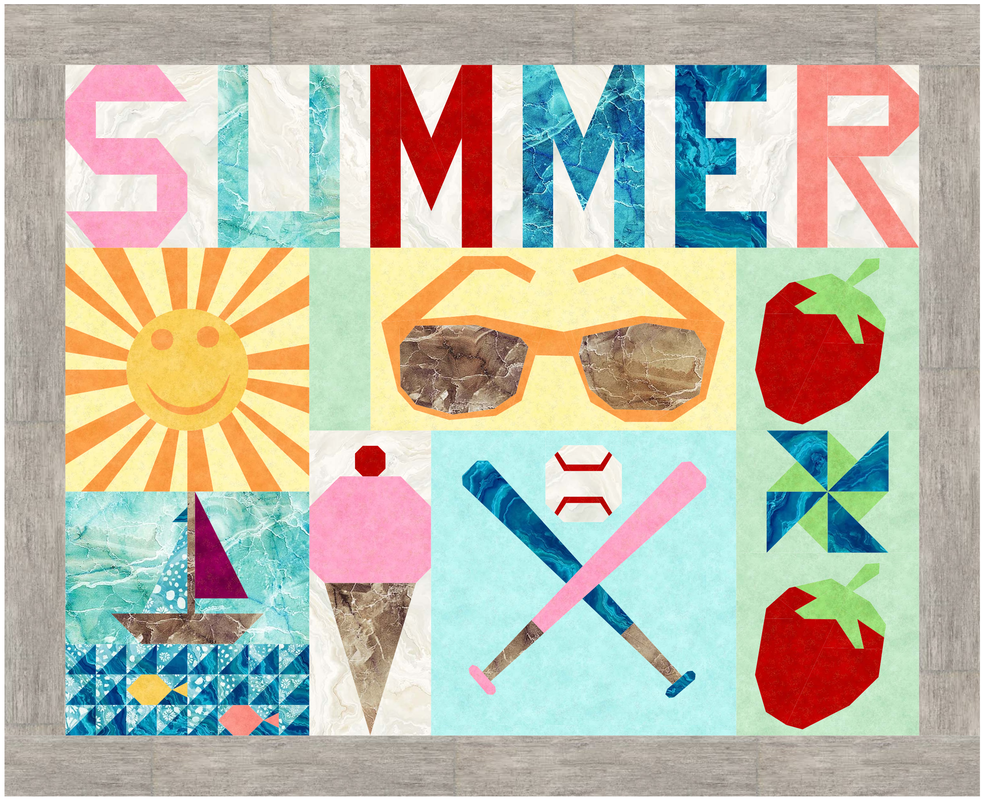
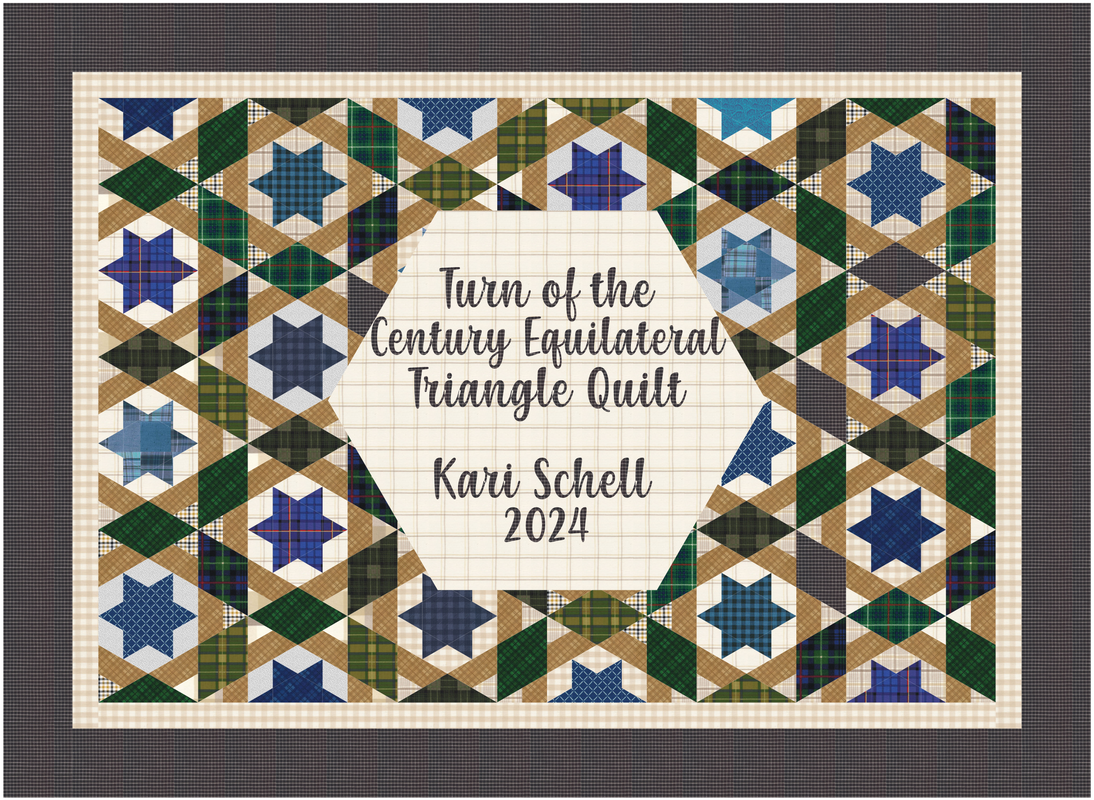
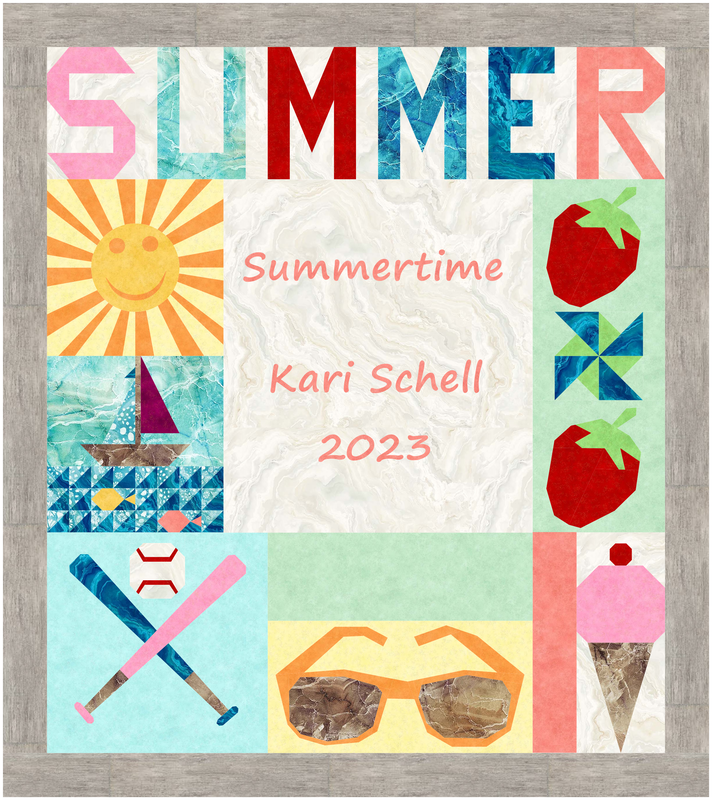
I've been enjoying the photos of award winning quilts from some of the national shows.  They are truly breathtaking.

My local quilt guild -- Maple Grove Quilters -- is having their show this weekend as well.  We have a great group of very talented quilters.  I also enjoy spending time enjoying their quilts.

During the last couple of months, I have been busy on the longarm finishing up my quilts for the show.  No custom quilting for me this year.  I was in production mode.

Two weekends ago, I was at a quilt retreat.  A good chunk of my time was trimming up the quilts and adding binding.

Last Sunday I was focused on creating and attaching labels for my quilts.

Quilt show is today (May 4th).  For those in the Twin Cities area, join me at the Maple Grove Community Center (from 9 am to 4 pm) to see a great collection of quilts created by Maple Grove Quilters.

​In this tutorial, I will share my quilts, their matching labels and walk you through my label process for one of my quilts.

Summertime EQ8 Quilt Label Tutorial

Back in 2022, I created a challenge for EQ8 users where I provided them videos on drafting a series of Summer themed blocks. 

The challenge concluded with a webinar where I presented a layout option for these blocks. 

​I had fun both designing and making the quilt which I framed and use as wall decor in my home.
Picture
Kari's Summertime Framed Quilt
For the label I started with my Summertime EQ8 file which included the blocks and designed layout for the quilt.  

If you participated in the Summertime EQ8 Challenge you are welcome to work with me using your Summertime project file.

If you didn't participate in the challenge, feel free to open one of your own EQ8 projects and use the concepts from this tutorial to design your own label.

Scroll down for additional ideas for creating your own labels from your EQ8 drafted quilts.
Picture
Summertime EQ8 Design by Kari Schell
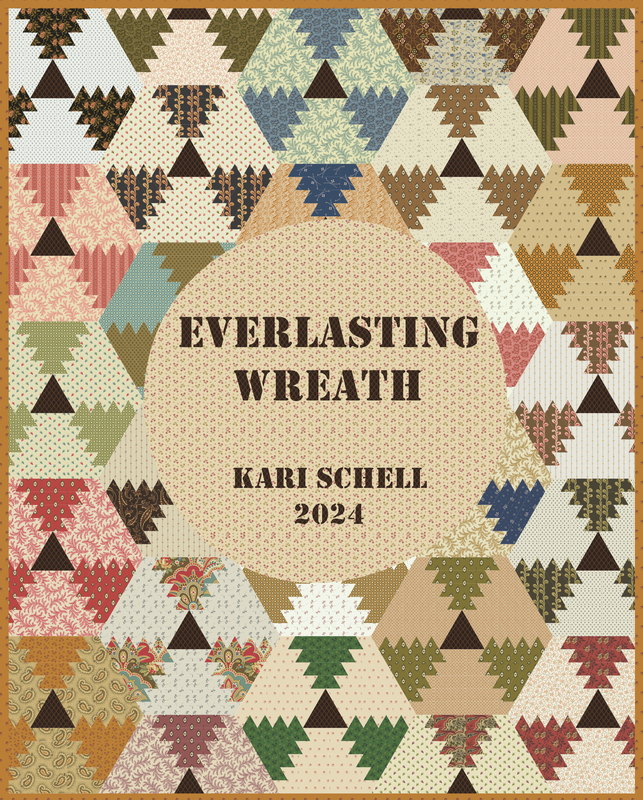
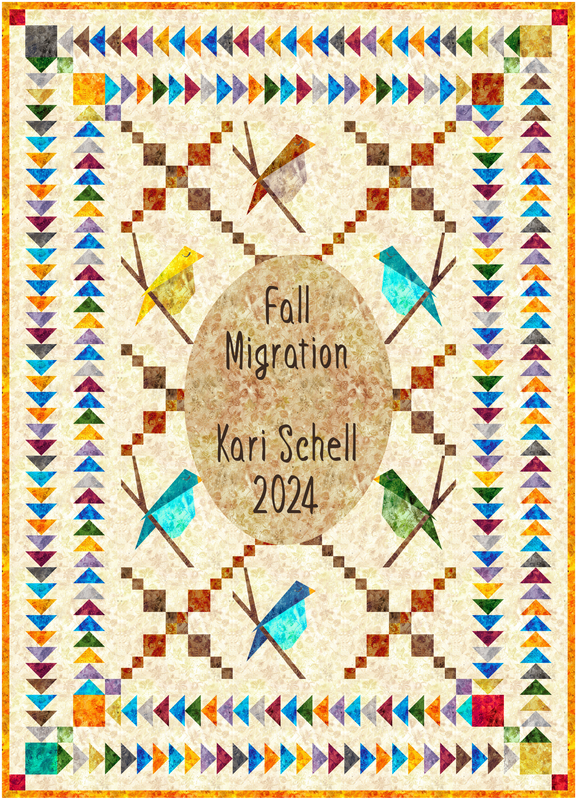
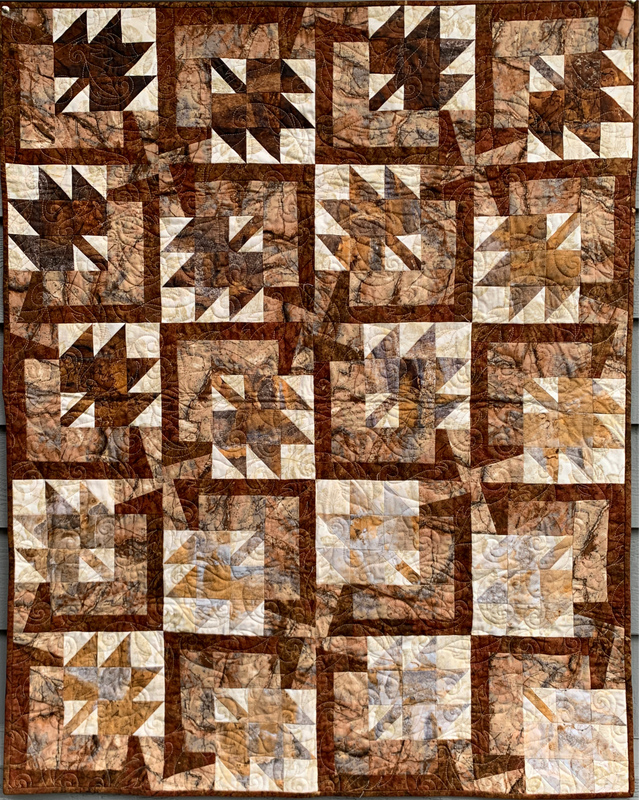
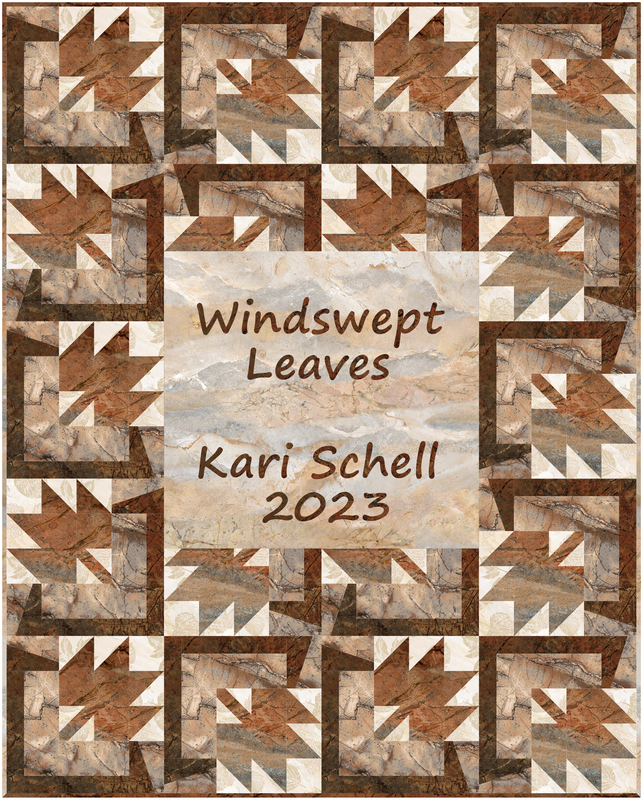
When trying to decide what to do for this label, I struggled with the fact that there was no natural place on the quilt top to add the label information. 

I didn't want to delete any of my blocks.   

So I decided to redesign the layout to include a plain block that was large enough to add my label information. 

​Check out the full process in this EQ8 video tutorial.

Printing Labels

Since I had seven labels to create, I decided to print multiple labels on a single sheet of EQ Printables. 

EQ Printables are made for printing images using an InkJet printer.  (More on that below.)

You can choose between:
  • Cotton Basic (200tc)
  • Cotton Lawn (240tc)
  • Cotton Satin (283tc)
Purchase EQ Printables from the Electric Quilt Company
Picture
EQ Printables Instructions
In a Word document, I inserted the label images exported from Electric Quilt 8.    I did a copy (Ctrl or Command Plus C) followed by paste (Ctrl or Command Plus V). 

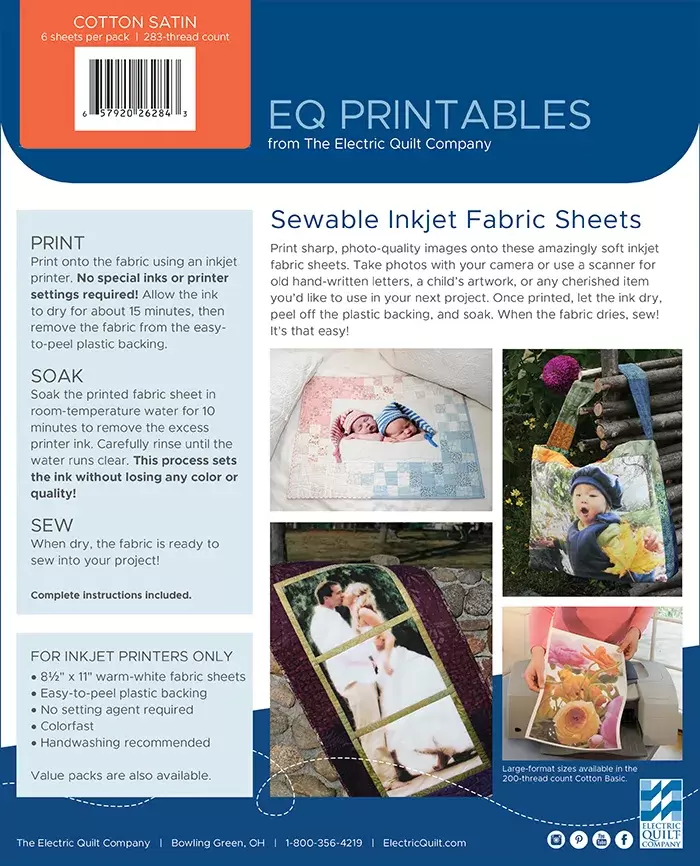
​I then resized the images to fit on three pages.


Pro Tip:  Make sure to leave at least 1/2 inch between the quilts on each page to ensure a large enough seam allowance.  It is a good idea to print the document on regular paper -- before proceeding to the EQ Printables.
Picture
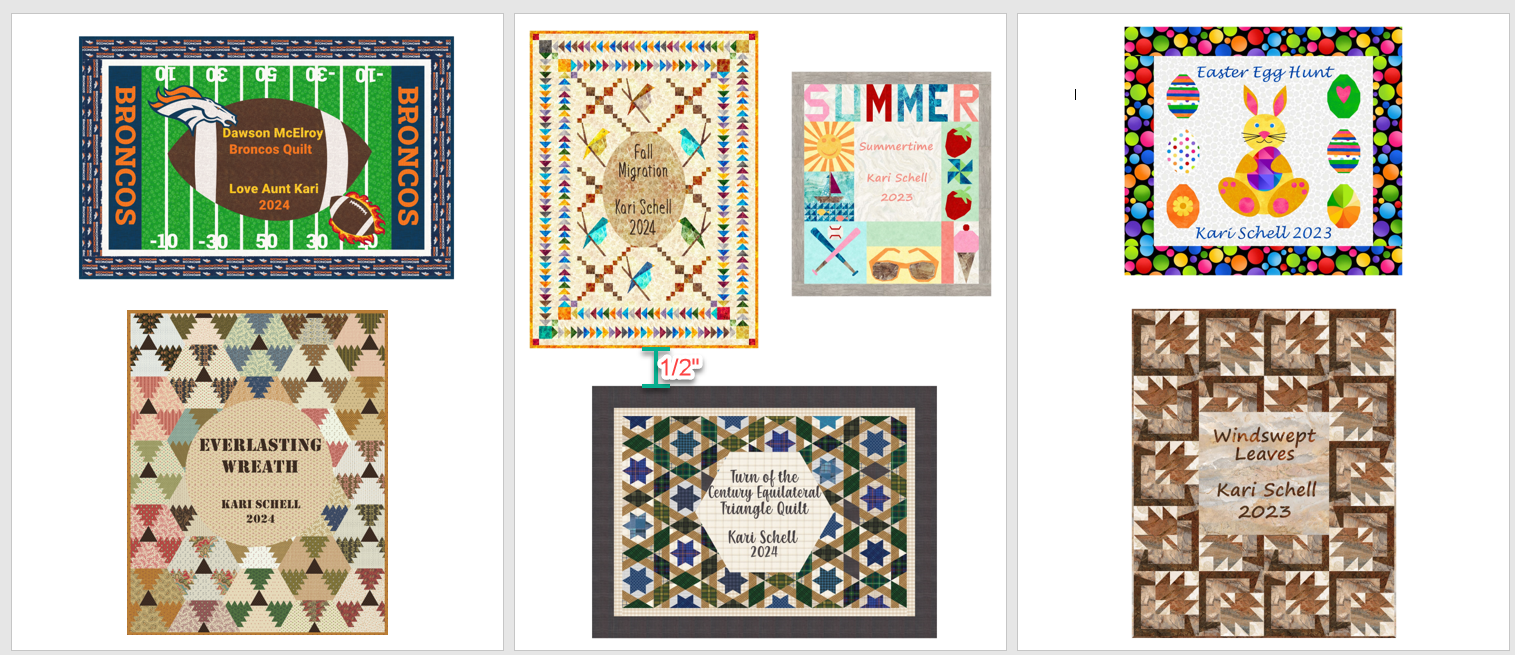
Word Document for seven different images exported from EQ8
What to Do if Your Ink Jet Printer isn't Working

Electric Quilt recommends that you print your labels on an InkJet printer.  My InkJet printer was out of ink.  So I used my laser printer instead.  This is definitely not recommended.   

I printed one sheet at a time and let my printer cool down between pages.  I did not want to melt the plastic sheets which are attached to the EQ Printables fabric.. 

I did notice that there was some extra ink on the next couple of printouts (after finishing my labels).


Using a Laser printer is not recommended -- so use it at your own risk. 

​I did find that the ink sits on top of the fabric, making the label a bit stiff.  I am also not sure about the color fastness of the label -- so you may want to test this if you decide to user a laser printer. 
​
Picture
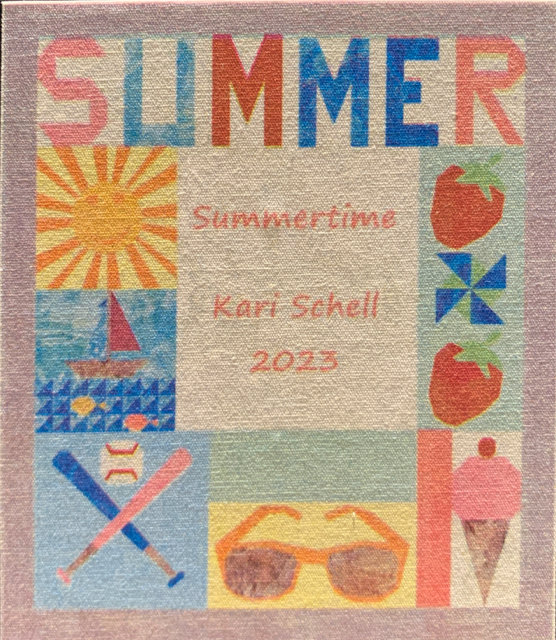
Summertime Label Printed on EQ Printables (Cotton Satin) using Laser Printer. Size was 3.5" x 4".
I would love to see pictures of your EQ designed labels.  Feel free to share in the Learning EQ Facebook group.
Learning EQ Facebook Group Post on Designing Labels using EQ8

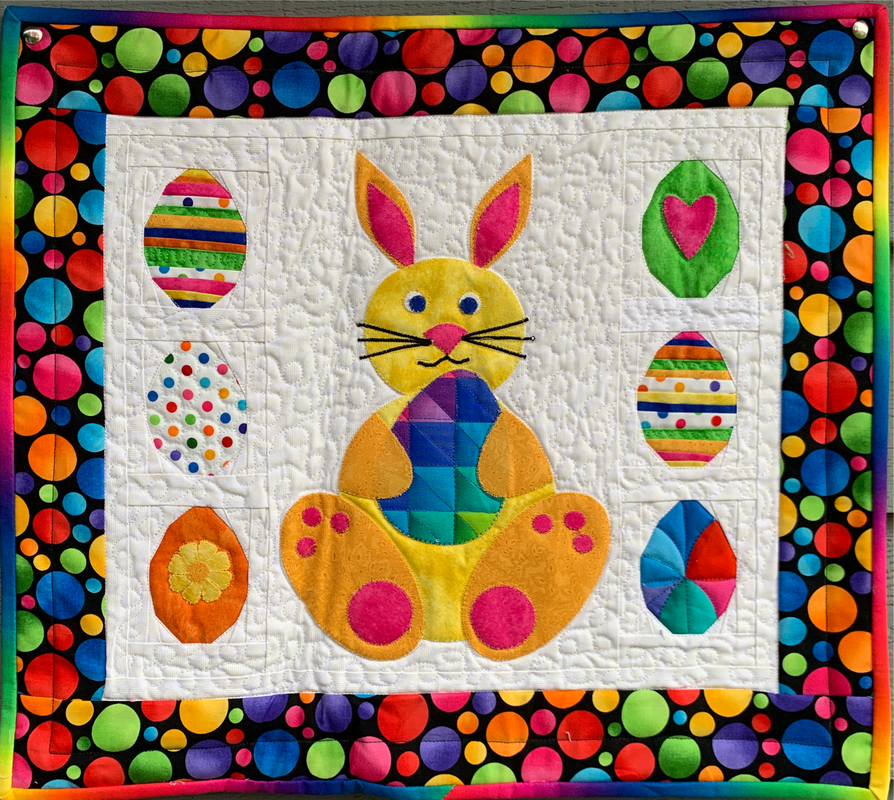
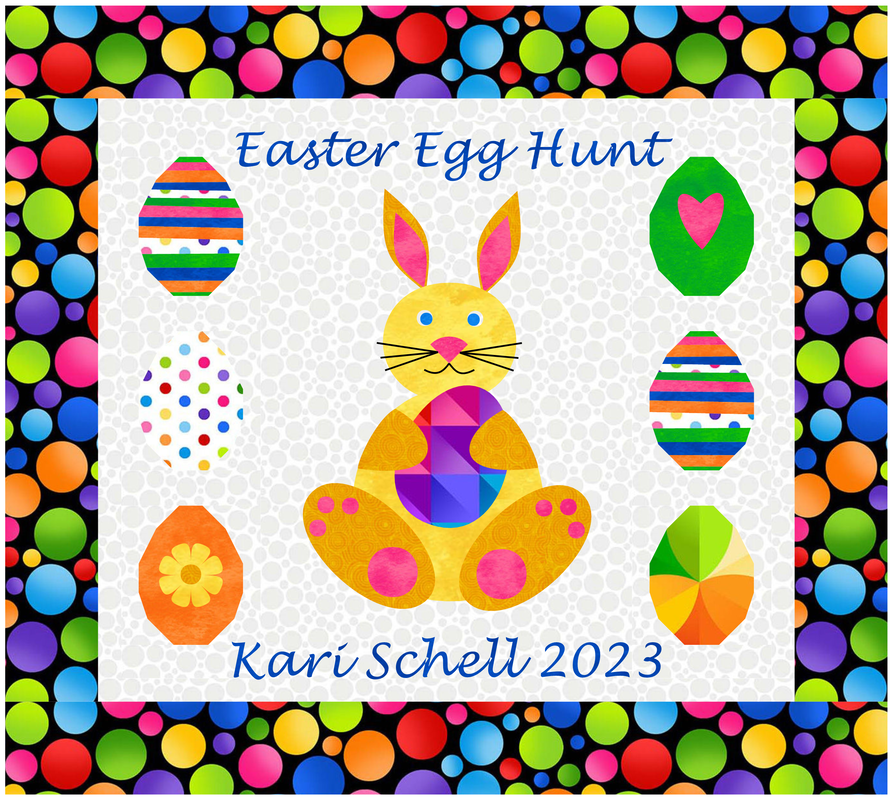
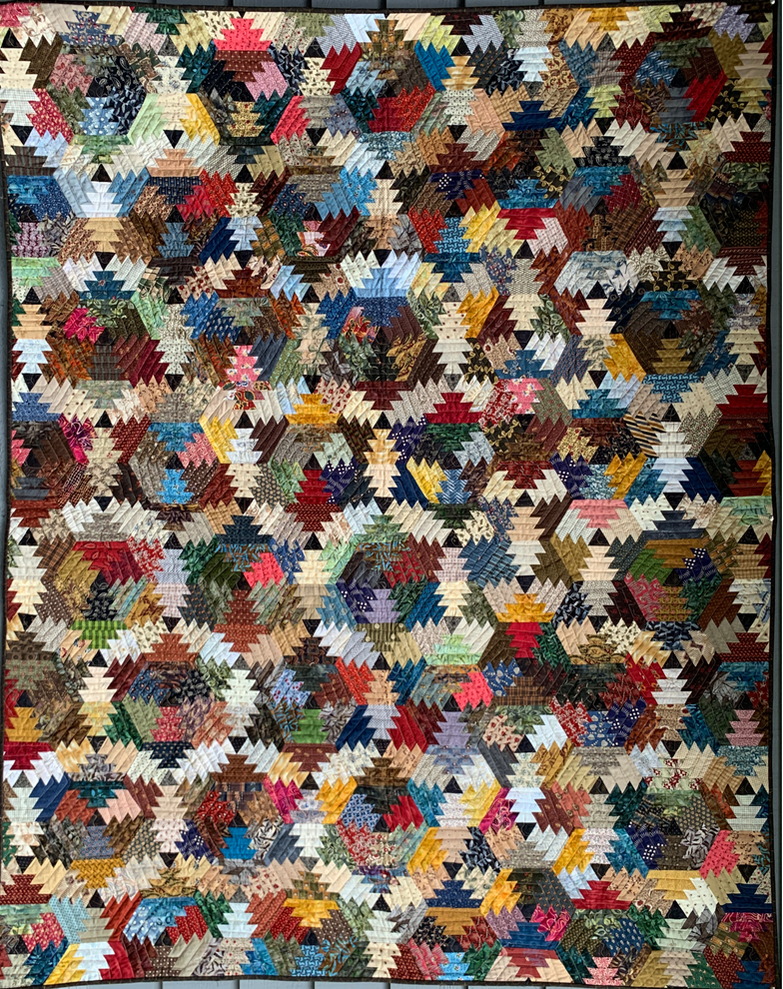
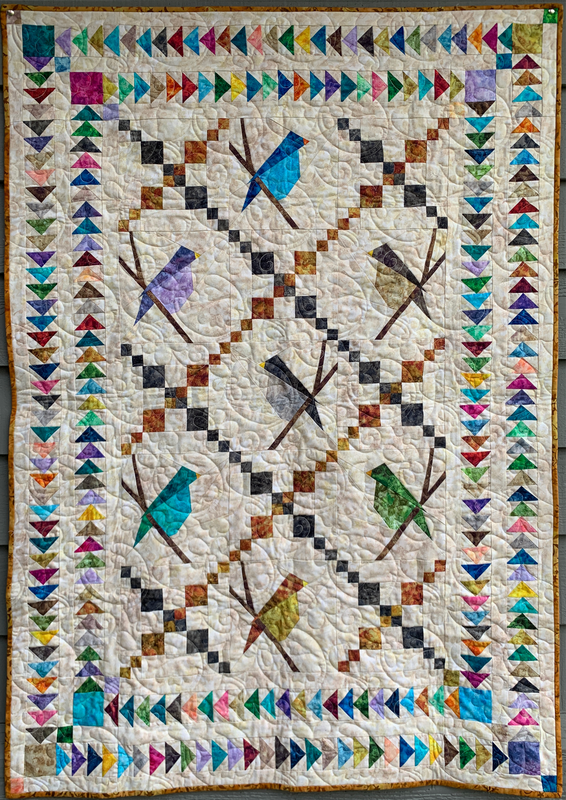
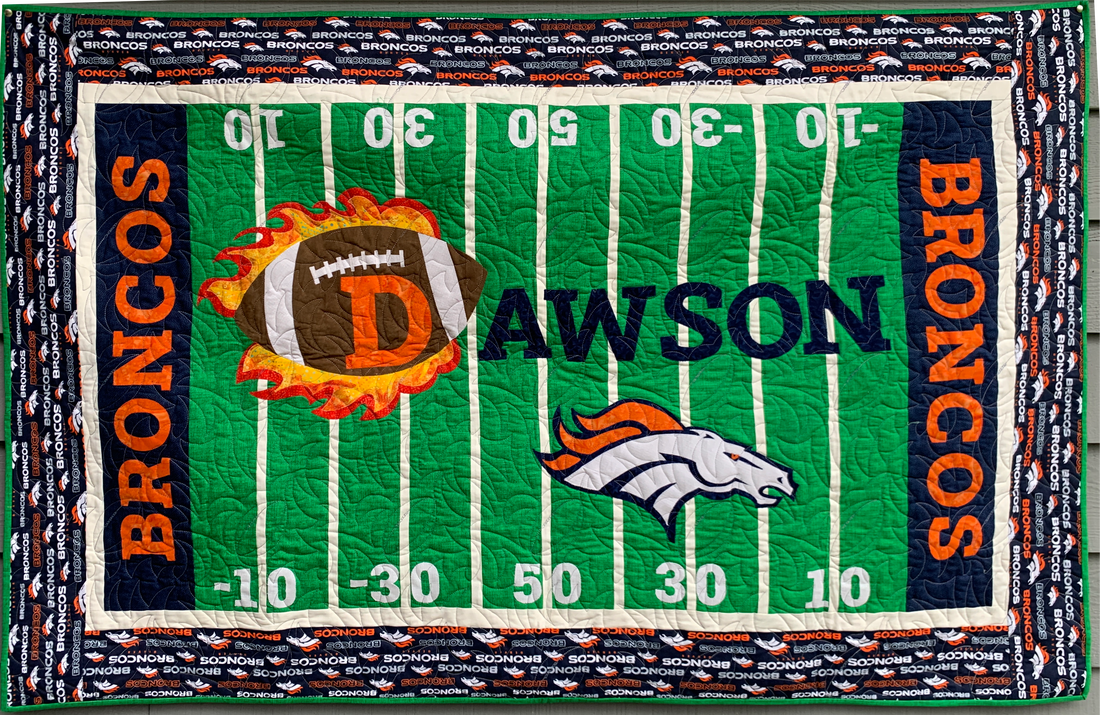
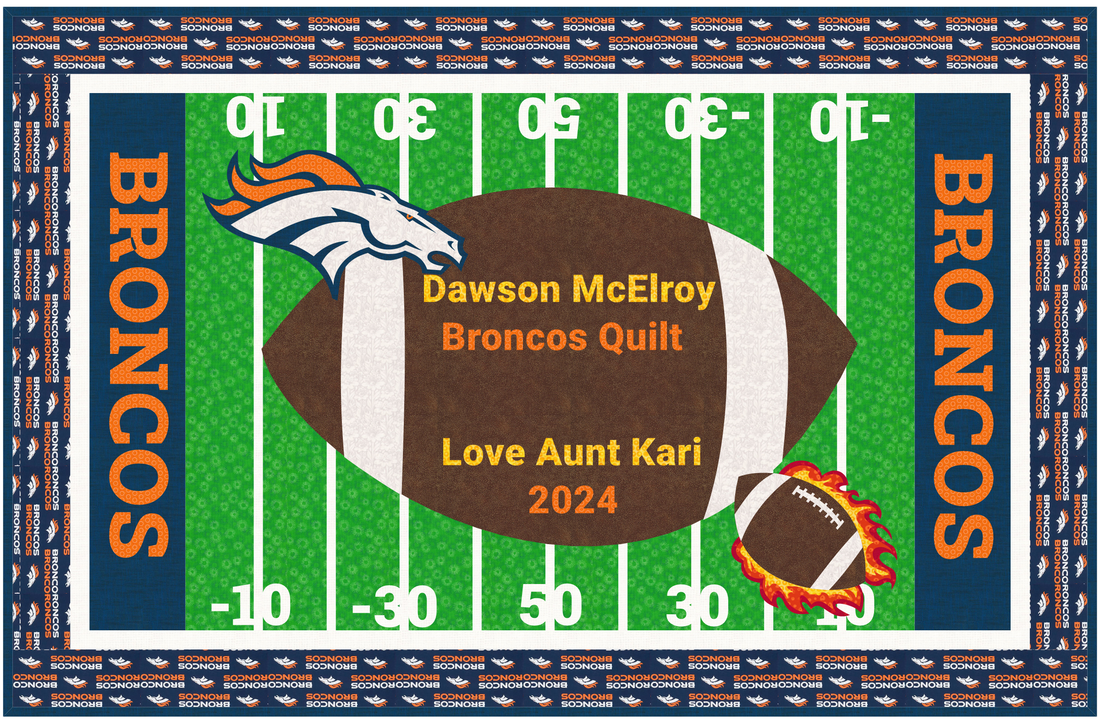
Quilts and Matching Labels

Here are the other quilts for my show along with the label (designed in EQ8).  For each label I included an explanation of how I modified the quilt when creating the label.
Turn of the Century Equilateral Triangle Quilt
Picture
I designed this quilt in EQ4 in 1999 and began this quilt around the turn of the century -- during my plaid phase. 

Pieces were relegated to a shoe box and stored in a closet for a couple of decades. 

After "discovering the shoe box" in 2022, I reworked the project (a much smaller size than my original design). 

Quilted in 2024.

​Can you figure out the blocks?  

Check out how to draft the quilt in this blog post.
Turn of the Century Equilateral Triangle Label
Picture
Created an applique motif using the hexagon under the shapes tool. 

Added the shape to Layer 2 on the quilt worktable and colored with a background plaid. 

​Added text using the Text Tools on Layer 2.
Summertime Framed Quilt
Picture
This design was created and delivered as a challenge in June 2022 for my blog and newsletter EQ8 community. 

The miniature blocks are foundation friendly.

The entire quilt measures 11" x 14" - suitable for a standard frame.

​The tutorials became an exclusive benefit to TKQ members in July 2022.
Summertime Label
Picture
To create a space for adding label information, I moved the blocks in Custom Set on the Quilt Worktable.
​
Spacers were added to the quilt -- including one in the center that was colored with a background fabric.

Text was added via the Text Tool on Layer 2.
Easter Egg Hunt Quilt
Picture
The design was created for a webinar delivered in March 2023.

Participants learned how to use Applique shapes to jump start an applique design, create foundation friendly Easter eggs and incorporate specialty fabric (panels or gradation fabric) in a design.

The webinar became an exclusive benefit to TKQ members in April 2023.
Easter Egg Hunt Quilt
Picture
The Easter Bunny had been added to the quilt as an applique motif on Layer 2.

The motif was shrunk and centered in the quilt -- creating additional white space above and below the bunny.

​Text was added on Layer 2 using the text tool.
Everlasting Wreath Quilt
Picture
Design by Laundry Basket Quilts. 

This quilt has taken me a decade (or more to complete). 

It has been my back-up project for many quilt retreats. 

​Loved combining my extensive collection of both civil war and batik fabrics in the same quilt.
Everlasting Wreath Label
Picture
The block and quilt were drafted in Electric Quilt. 

It is not an exact replica of the quilt pattern by Laundry Basket Quilts as I decided to include additional logs in each block for my design.  I also changed up the size of the equilateral triangle in the center.

The circle was created as a applique motif and added to Layer 2.

Text was added using the Text Tool on Layer 2.
Fall Migration Quilt
Picture
This quilt is a variation on the raffle quilt I designed for Maple Grove Quilters. 

​I used this design for a free webinar I offered on drafting blocks and quilts using Electric Quilt 8 in September 2023.

​The design became an exclusive benefit for Tech Know Quilter members in October 2023.
Fall Migration Label
Picture
The circle was created as a applique motif and added to Layer 2.

Text was added using the Text Tool on Layer 2.
Broncos Quilt for Dawson
Picture
​Dawson is my first great-nephew - born in April 2024. 

His father is a huge Broncos fan, so I decided to encourage continuing the tradition with a Broncos quilt. 

​I designed the quilt using Electric Quilt 8 with some of the images obtained using AI which were then traced in Electric Quilt.
Broncos Quilt for Dawson Label
Picture
For the quilt label, I simplified the football motif.  The motif was resized and placed on Layer 2. 

​The other motifs were shrunk and repositioned on Layer 2.

Text was added using the Text Tool on Layer 2.

And yes -- I did forget to rotate the Broncos text on the left side of the quilt label to match the finished quilt.  :)
Windswept Leaves Quilt
Picture
The setting was inspired by pattern by Maple Island Quilts. 

I reworked the design to work with a maple leaf block. 

​I used a single gradated fabric for the leaves.  It took a bit of organizing to cut and sort the fabric from light to dark.
Windswept Leaves Label
Picture
A plain block was added on Layer 2 and colored with a background fabric.

​Text was added using the Text Tool on Layer 2.
Picture
Happy quilting.

​Kari

Join the On Point Quilter weekly newsletter and receive regular tips and inspiration on using Electric Quilt 8 along with the  Free 12 Top
Tips for EQ8 video guide.
Picture
    Picture
    Picture
    Picture
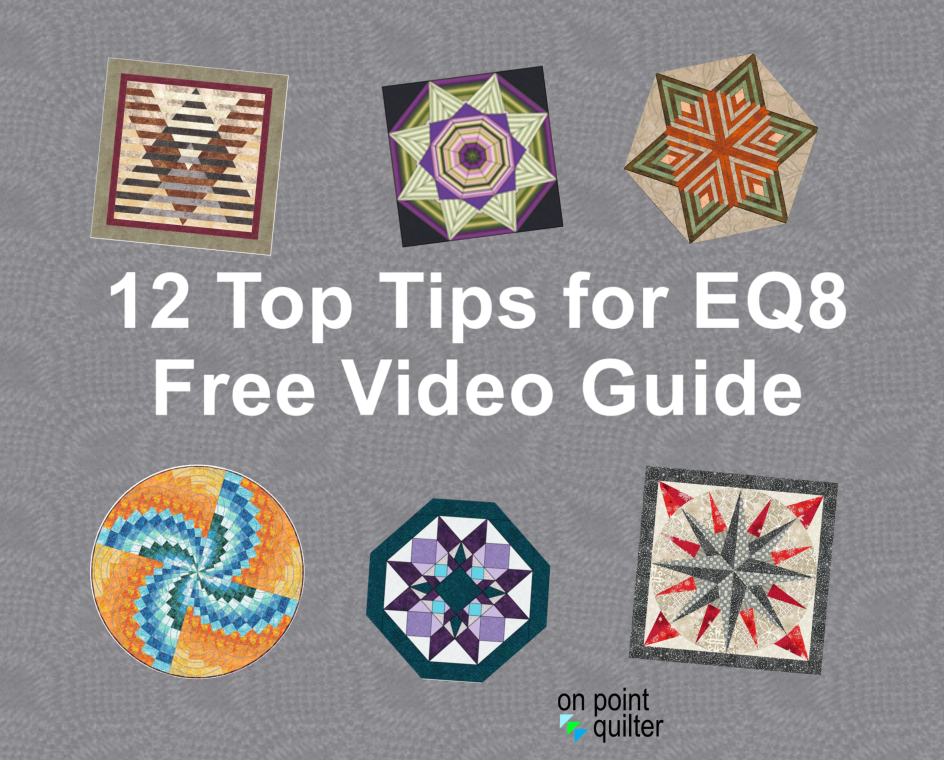
    Free guide available for newsletter subscribers
    Picture
    Picture
    Picture

    Kari Schell

    Electric Quilt Expert and Educator and Pattern Designer.

    Categories

    All
    Art And Stitch
    Cricut Maker
    Dear Jane
    Electric Quilt 7
    Electric Quilt 8
    Goose Goose Duck Challenge
    Inkscape
    Patterns
    Silhouette Cameo
    Stampin Up
    Tips And Techniques
    Tools And Rulers

    Archives

    January 2026
    December 2025
    November 2025
    October 2025
    September 2025
    August 2025
    July 2025
    June 2025
    May 2025
    April 2025
    March 2025
    February 2025
    January 2025
    December 2024
    November 2024
    October 2024
    September 2024
    August 2024
    July 2024
    June 2024
    May 2024
    April 2024
    March 2024
    February 2024
    January 2024
    December 2023
    November 2023
    October 2023
    September 2023
    August 2023
    July 2023
    June 2023
    May 2023
    April 2023
    March 2023
    February 2023
    January 2023
    December 2022
    November 2022
    October 2022
    September 2022
    August 2022
    July 2022
    June 2022
    May 2022
    April 2022
    March 2022
    February 2022
    January 2022
    December 2021
    November 2021
    October 2021
    September 2021
    August 2021
    July 2021
    June 2021
    May 2021
    April 2021
    March 2021
    February 2021
    January 2021
    December 2020
    November 2020
    October 2020
    September 2020
    August 2020
    July 2020
    June 2020
    May 2020
    April 2020
    March 2020
    February 2020
    January 2020
    December 2019
    November 2019
    October 2019
    September 2019
    August 2019
    July 2019
    June 2019
    May 2019
    April 2019
    March 2019
    February 2019
    January 2019
    December 2018
    November 2018
    October 2018
    September 2018
    August 2018
    July 2018
    June 2018
    May 2018
    April 2018
    March 2018
    February 2018
    January 2018
    December 2017
    November 2017
    October 2017
    September 2017
    August 2017
    July 2017
    June 2017
    May 2017
    April 2017
    March 2017
    February 2017
    January 2017
    December 2016
    November 2016
    October 2016
    September 2016
    July 2016
    June 2016
    May 2016
    April 2016
    March 2016
    February 2016
    January 2016
    December 2015
    November 2015
    October 2015
    September 2015
    August 2015
    July 2015
    June 2015
    May 2015
    April 2015
    March 2015
    February 2015
    January 2015
    December 2014
    November 2014
    October 2014
    September 2014
    July 2014
    June 2014
    May 2014
    April 2014
    March 2014
    February 2014
    January 2014
    December 2013
    November 2013
    October 2013
    September 2013
    August 2013

    RSS Feed

Contact:
On Point Quilter
e-mail:  [email protected]
phone:  763-566-6536

GET MY NEWSLETTER FOR REGULAR EQ AWESOMENESS!

* indicates required
  • Blog
  • About
  • EQ8 Training
    • Tech Know Quilters
    • EQ8 Made Easy
    • Electric Quilt 8 Sneak Peek
  • Store
  • Contact
  • Majestic View EQ8 Free Live Webinar