
|
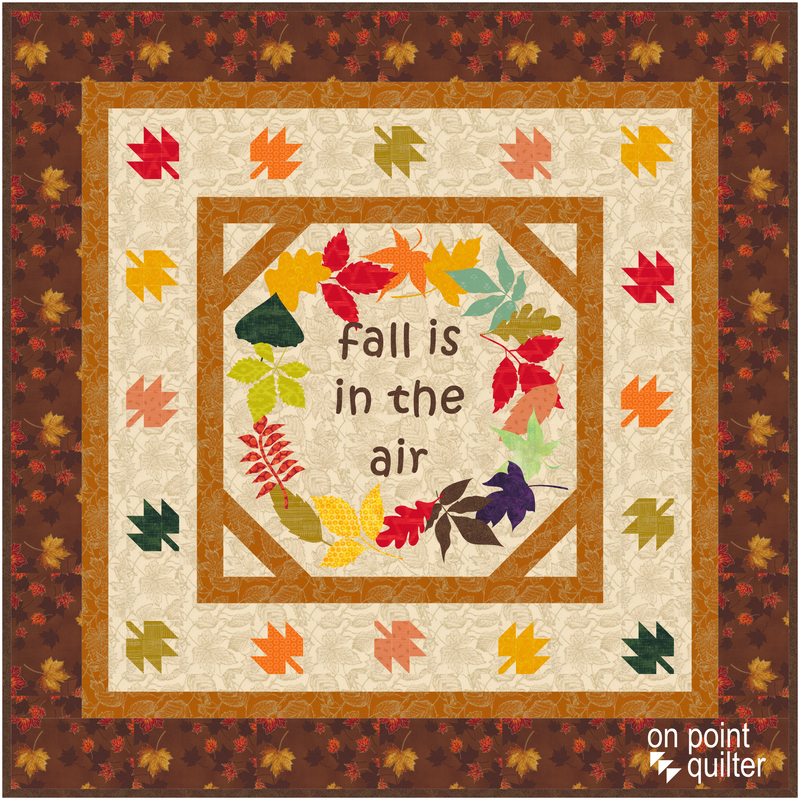
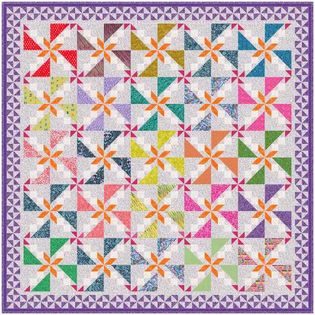
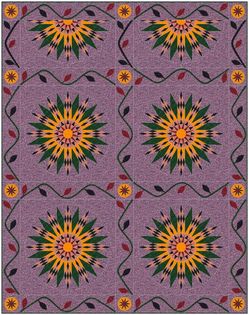
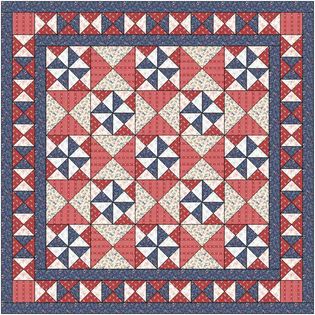
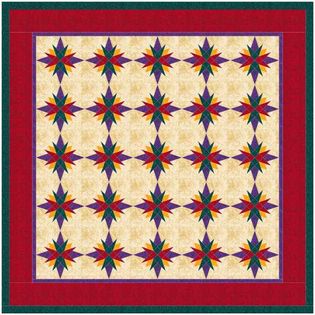
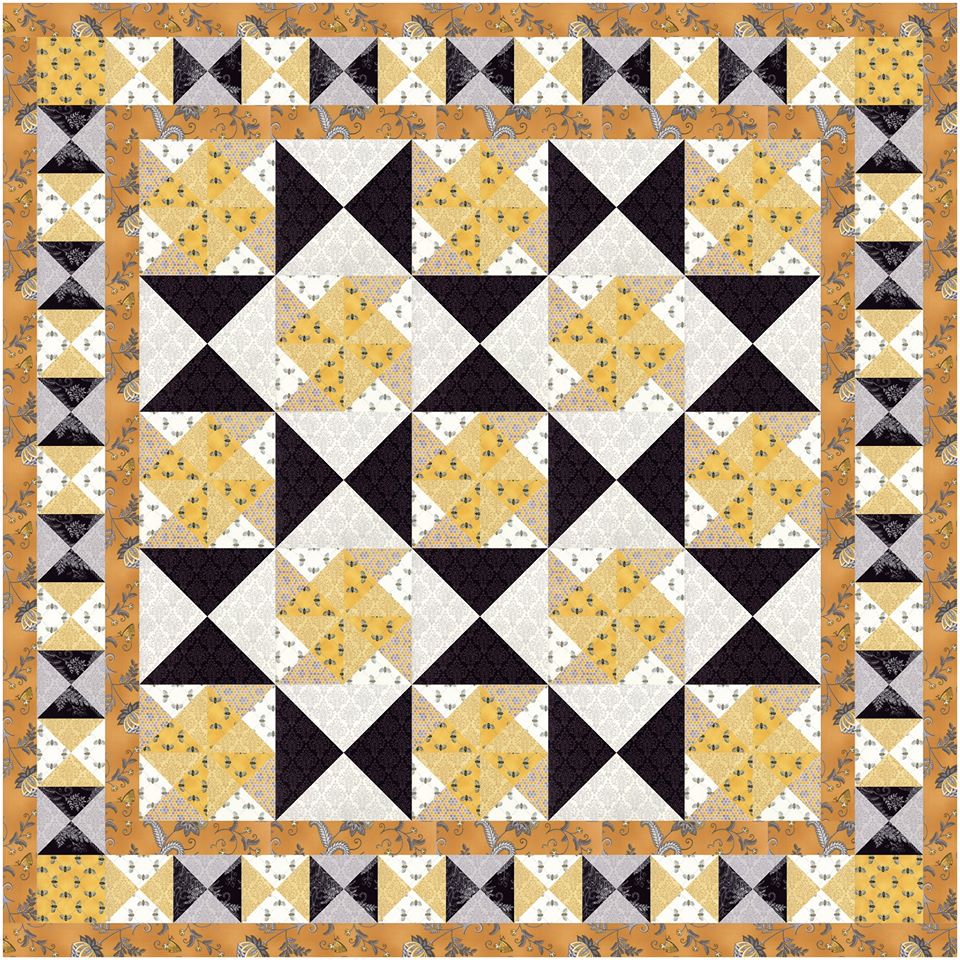
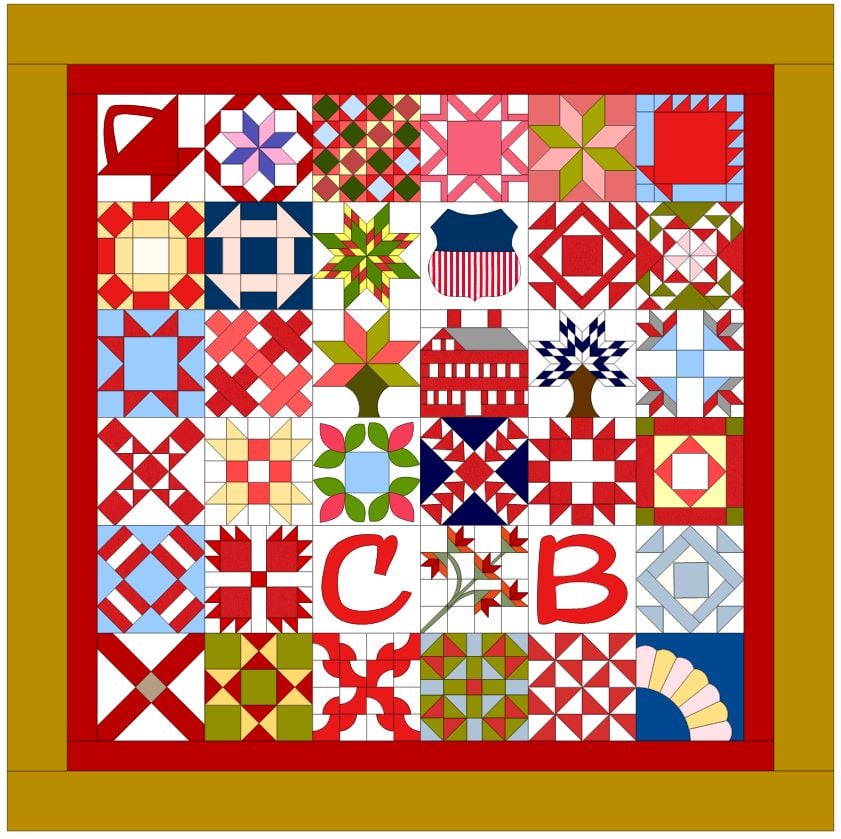
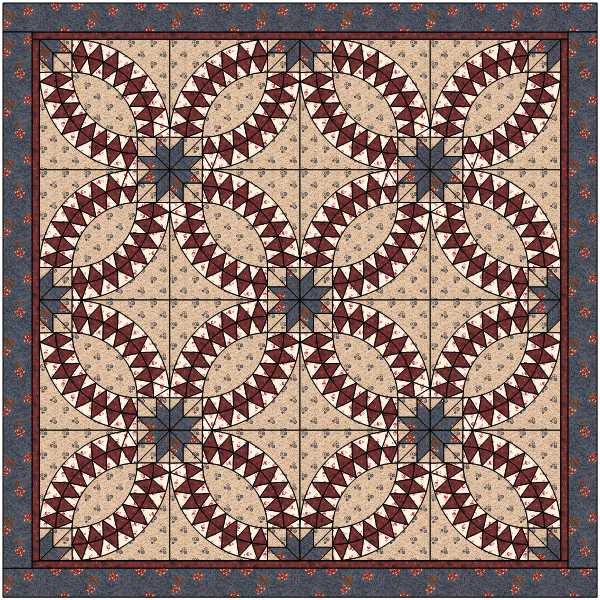
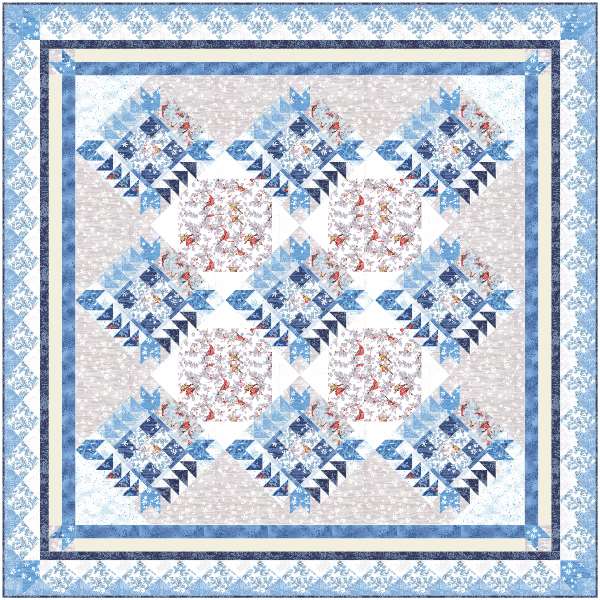
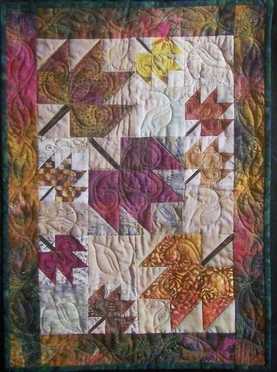
Do you decorate with quilts for fall? I love working with fall fabrics and quilts are my decoration of choice in my home. I created this fall quilt that could easily be stitched up before the snow starts to fall.
Fall is in the Air Quilt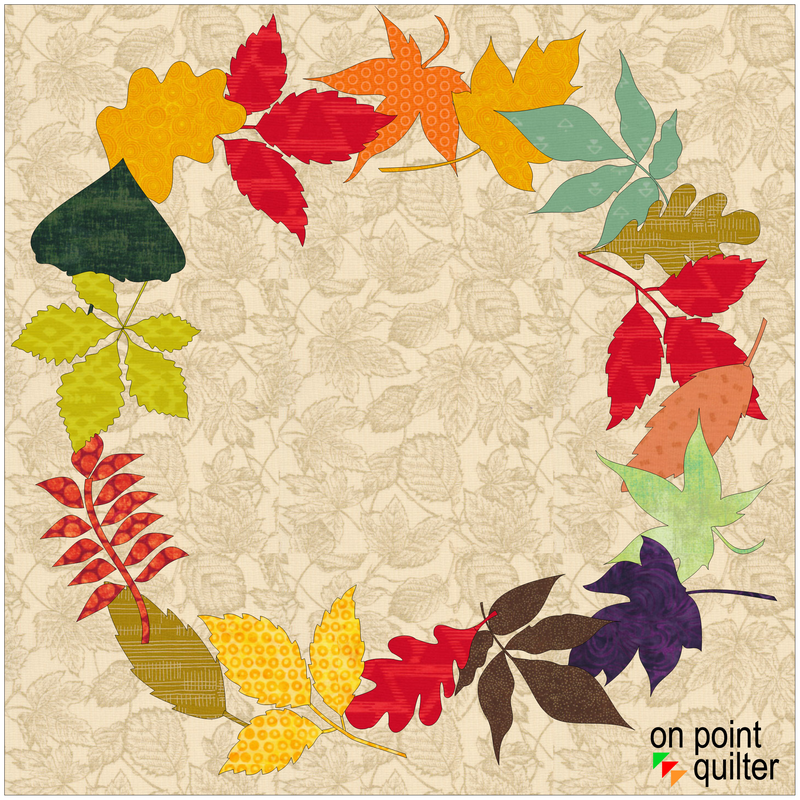
Last week I shared how to take a number of applique motifs from the EQ8 library and combine them to make a wreath. If you missed the tutorial you can catch it here.
In addition to sharing how to create the wreath, I also discussed how to convert the file to an svg format -- which is usable with Silhouette Cameo, Brother Scan n Cut and Cricut Maker cutting systems. So it would be super easy to make this 20 inch wreath.
This week I will share with you how to create a simple setting and some easy to piece blocks for a fun new fall quilt.
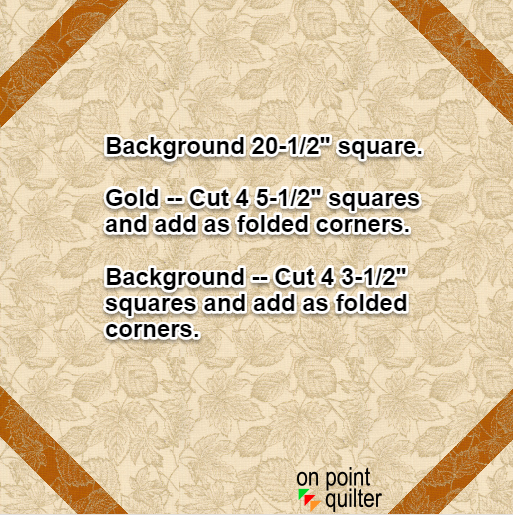
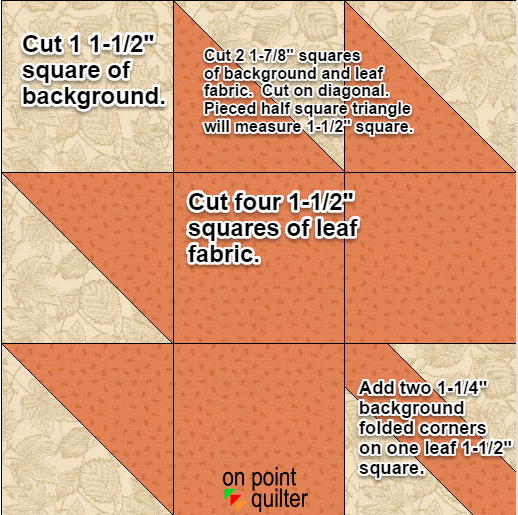
The maple leaf block is 3" finished and easy to rotary cut and the large 20" finished block would be conducive to foundation piecing -- or adding 5-1/2" and 3-1/2" squares for folded corners.
Additional Cutting Information for Borders
Quilt will finish 44" x 44" (without binding).
I am curious if you go with my design -- or come up with one of your own. Post a picture of what you ended up doing.
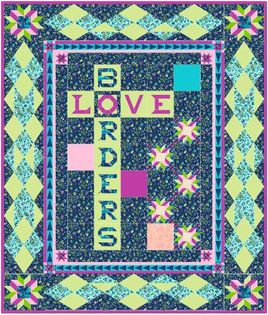
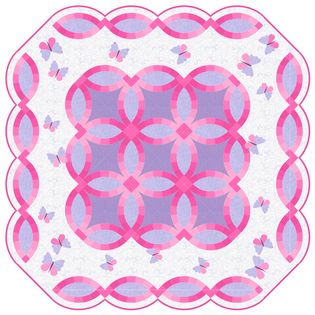
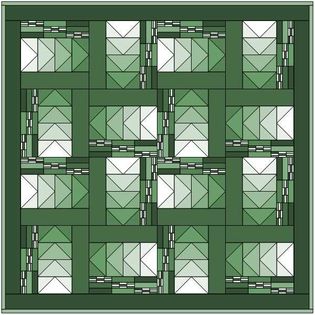
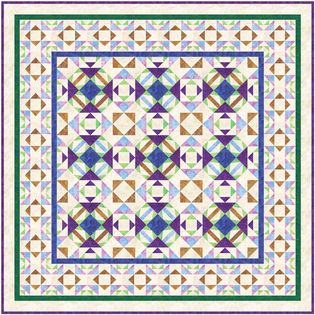
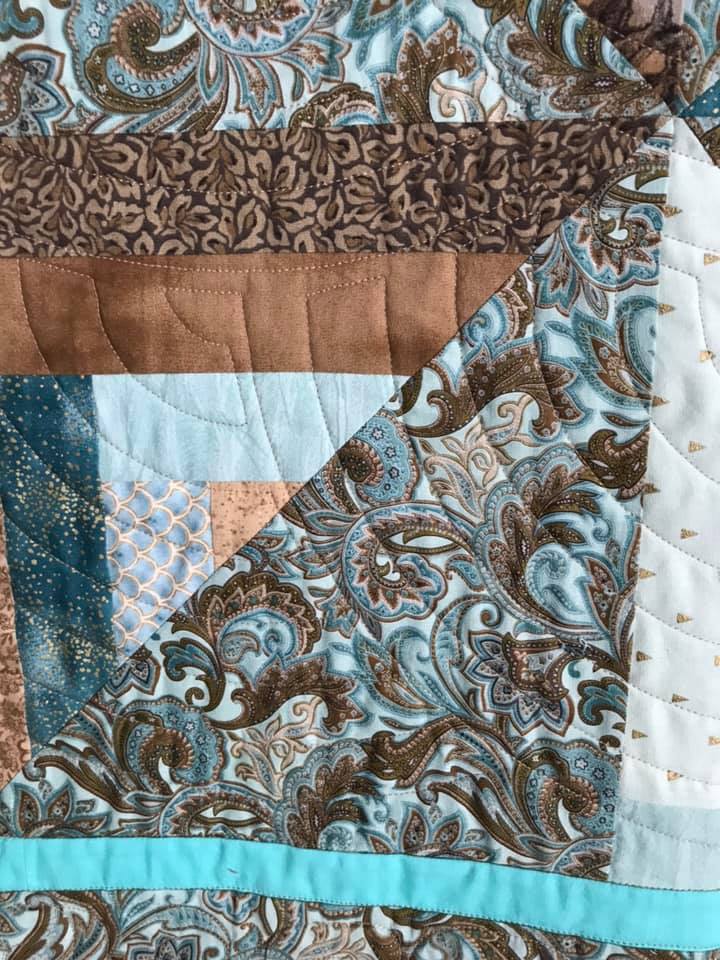
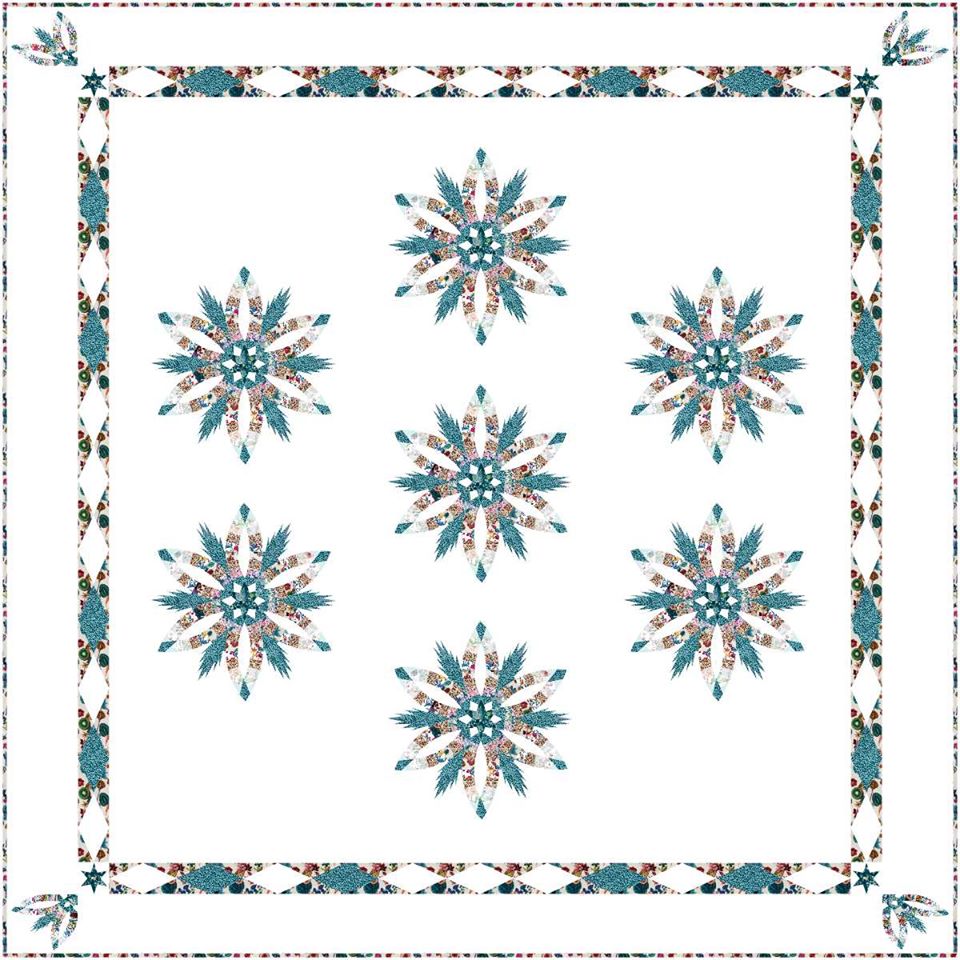
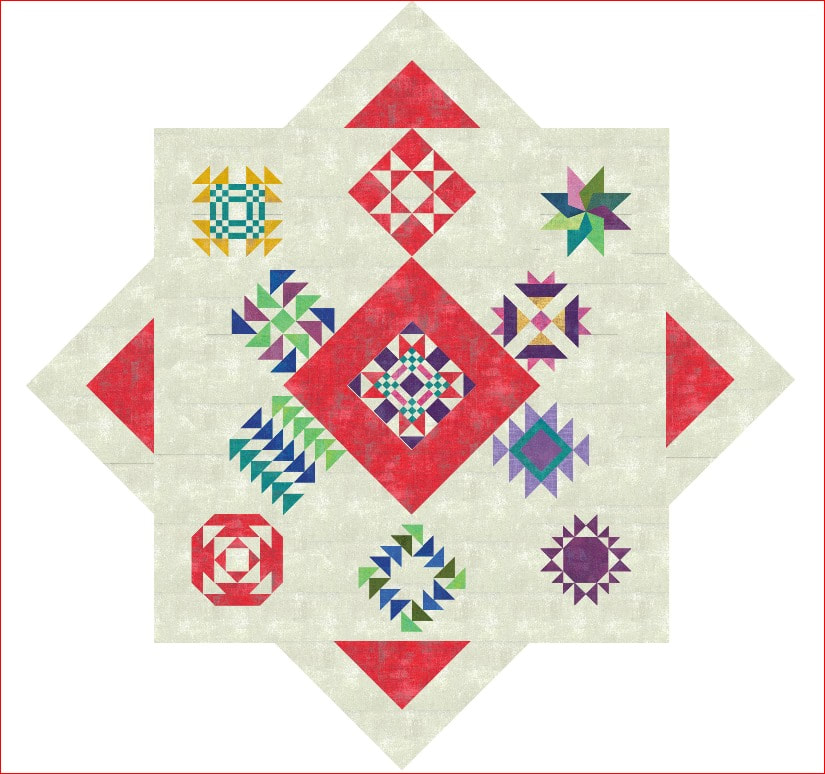
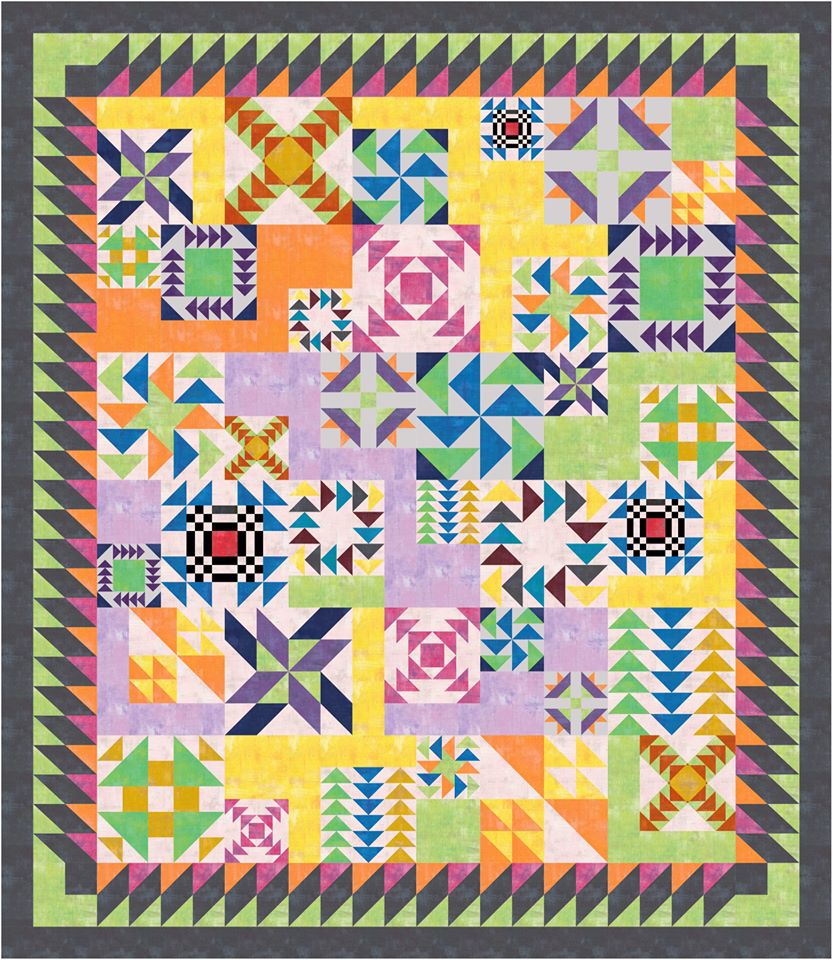
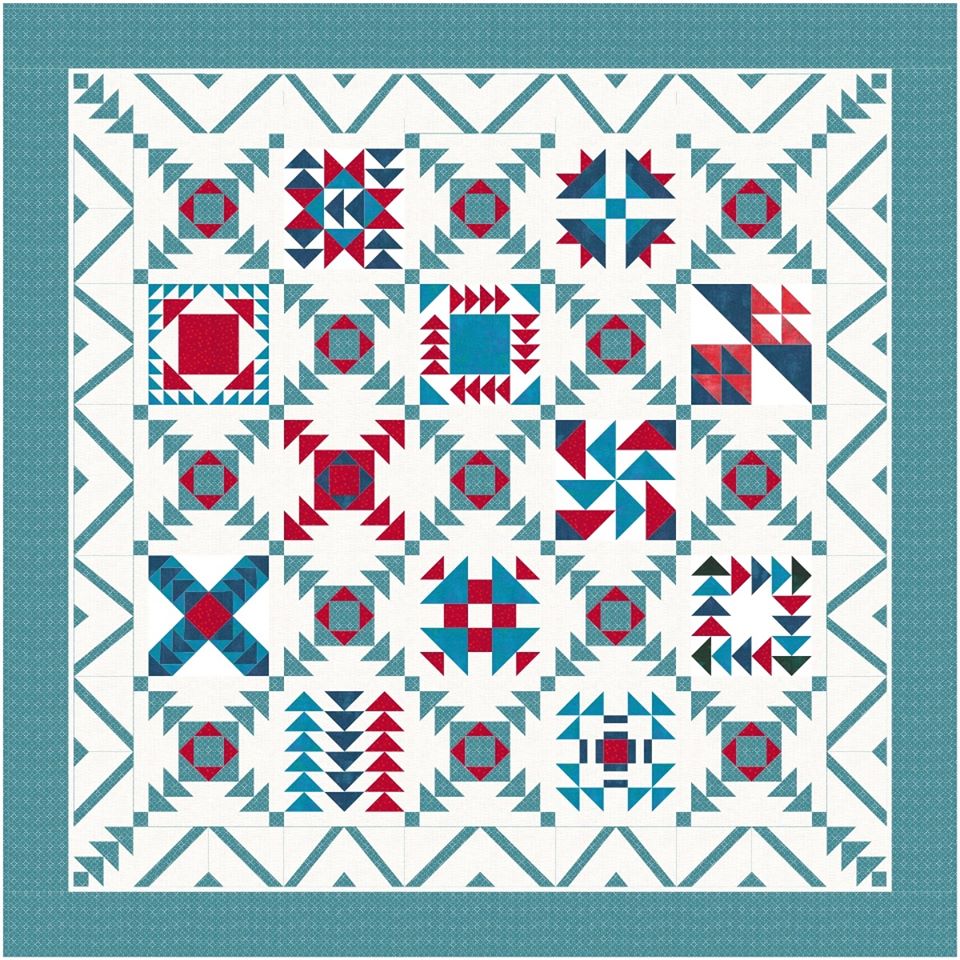
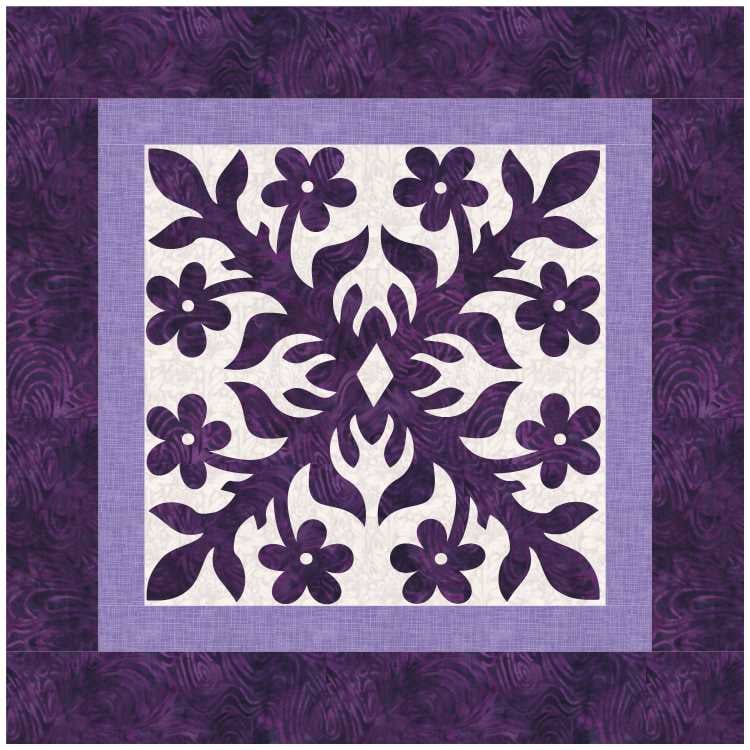
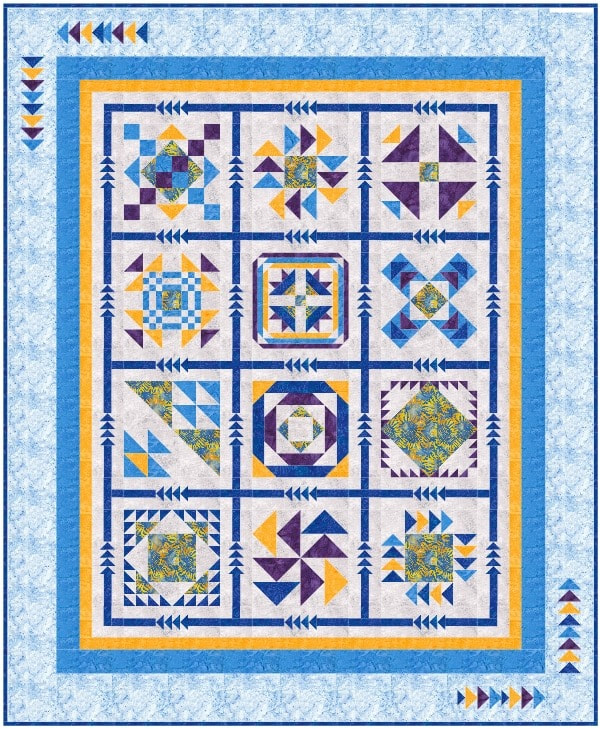
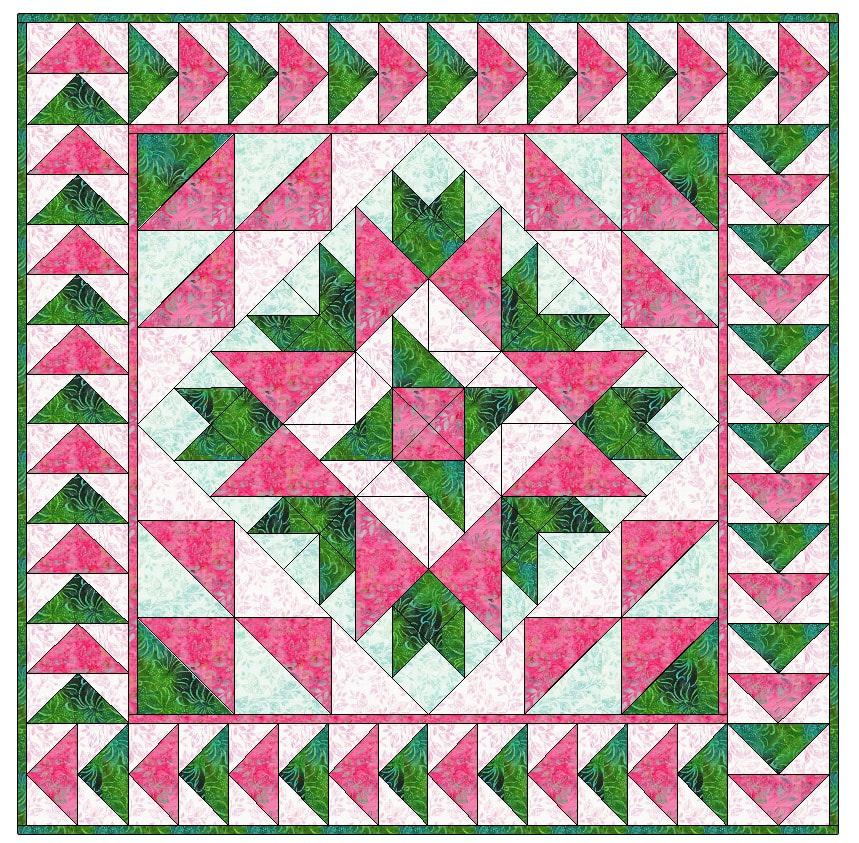
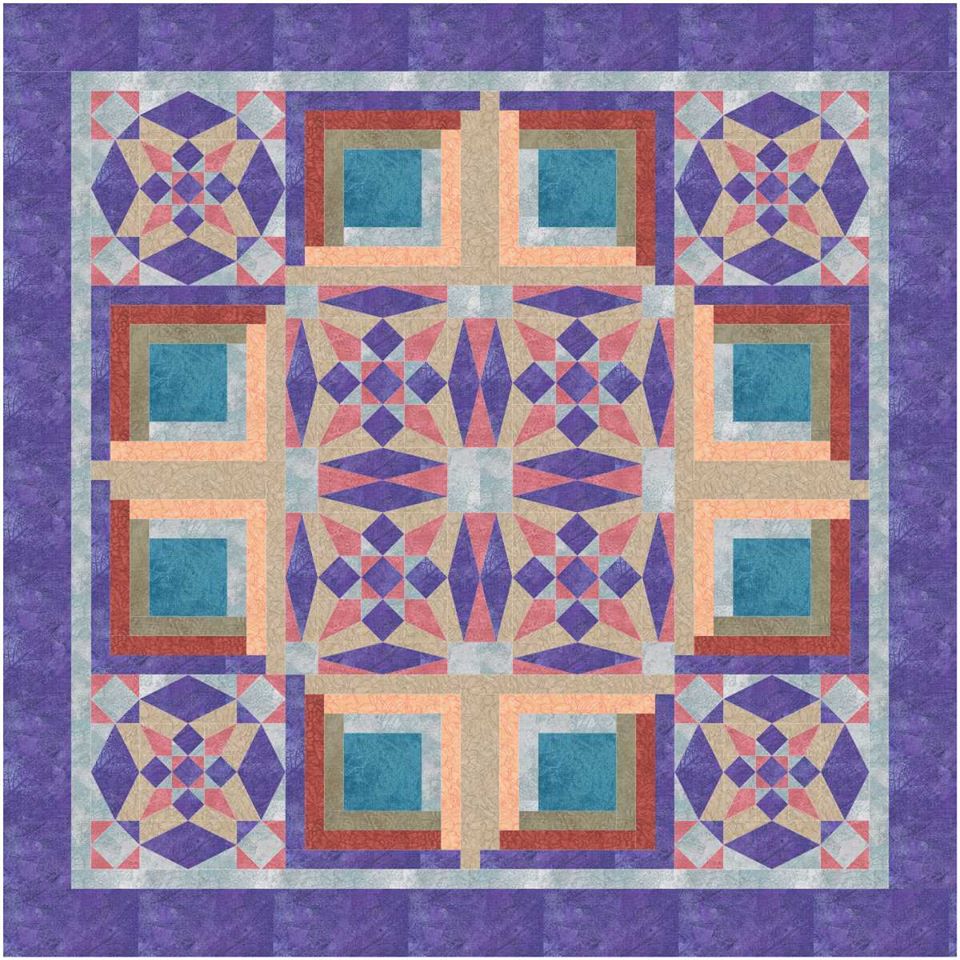
Tech Know Quilters Showcase
Tech Know Quilter members shared some of their favorite projects (along with their own designs) from their August class. You can learn more and sign up for the wait list to join this amazing group of designers here.
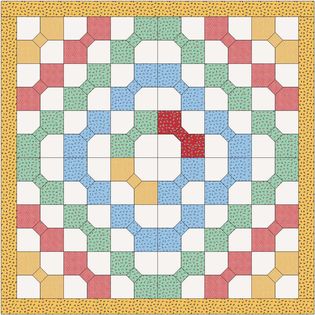
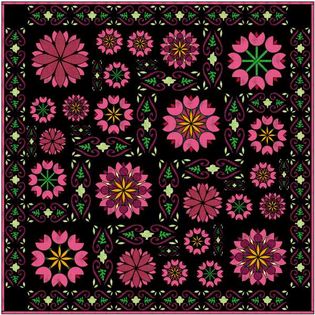
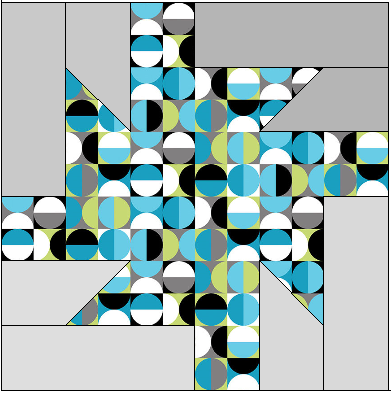
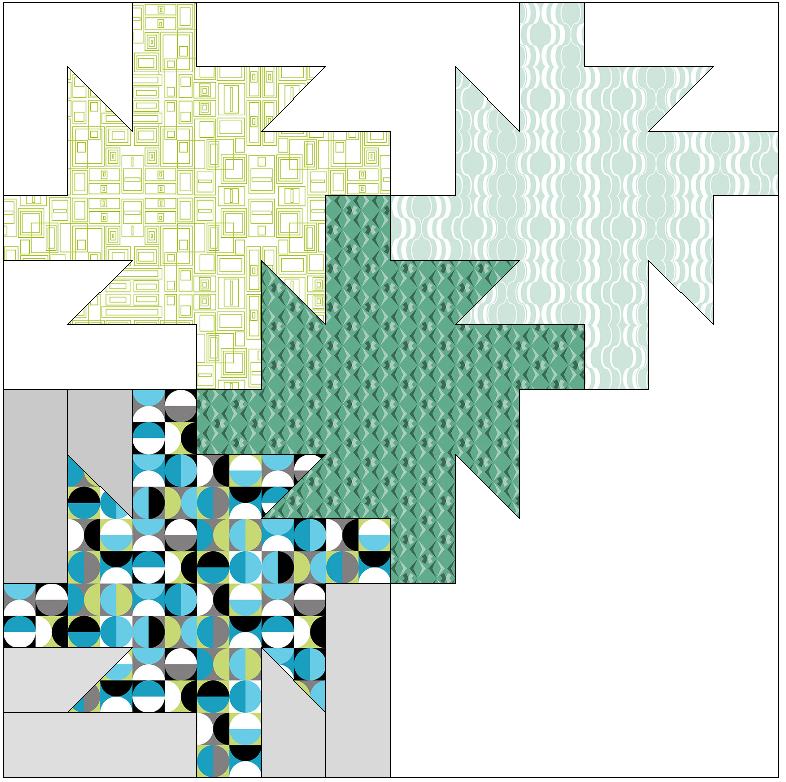
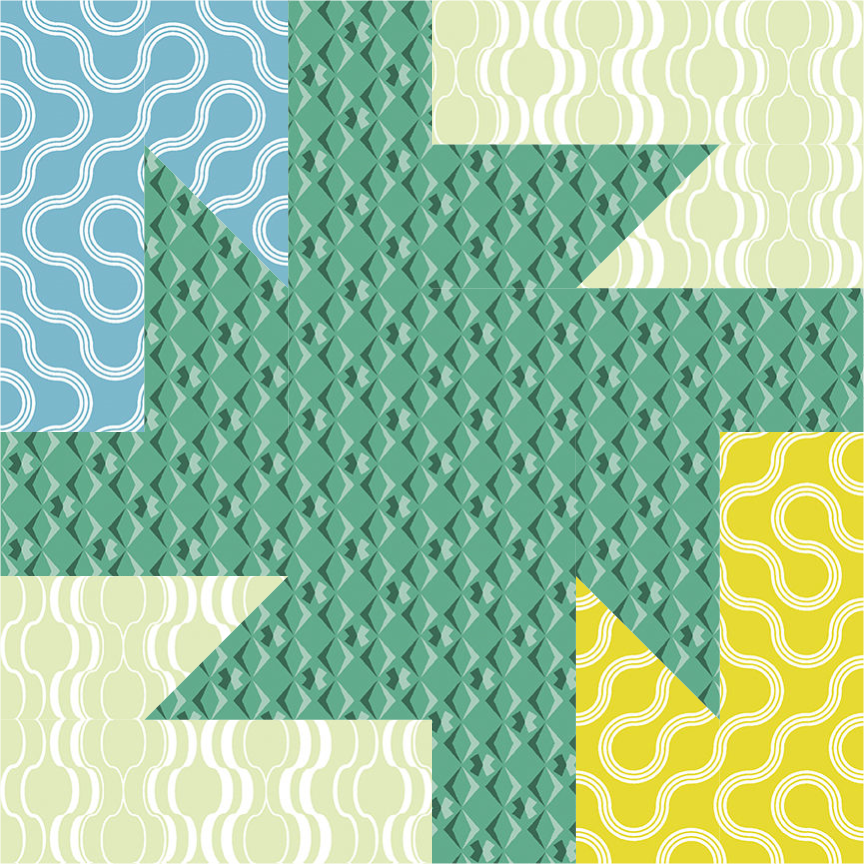
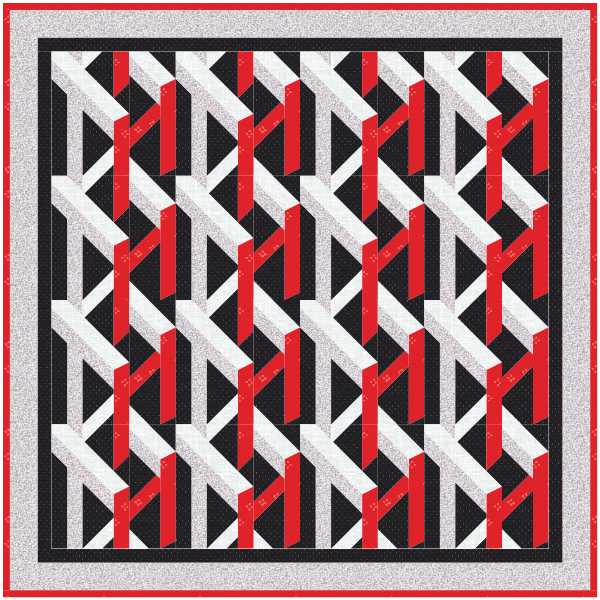
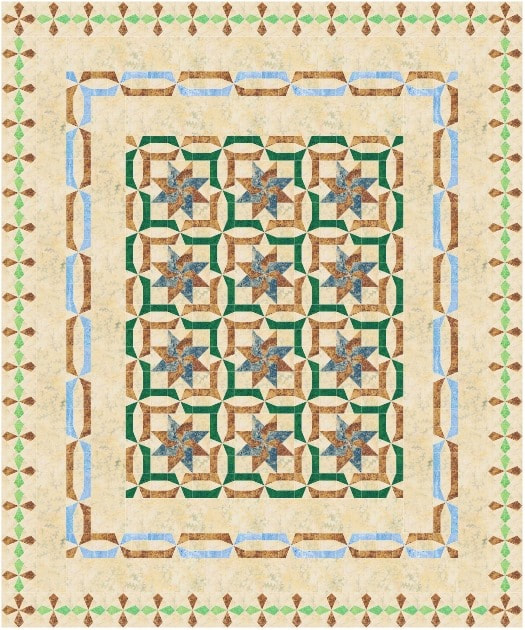
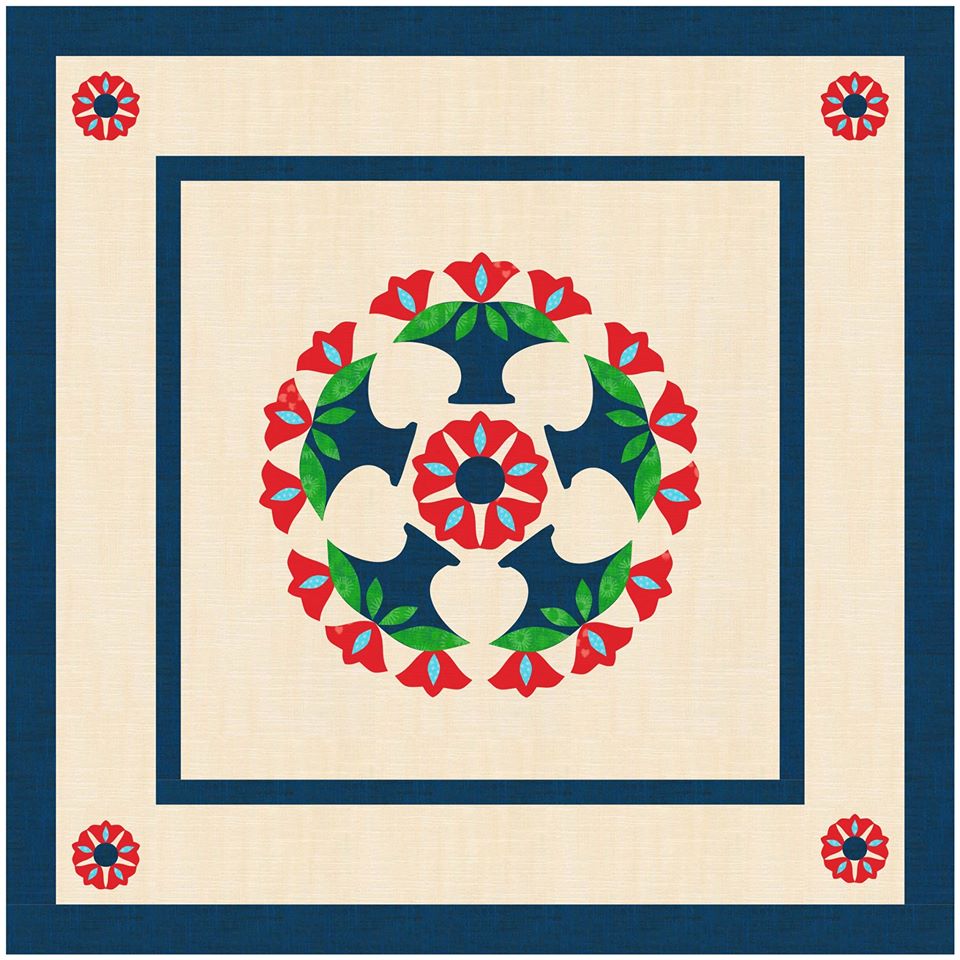
What is a tessellation? According to Jinny Beyer, a tessellation is a shape or combination of shapes which will indefinitely cover an area without any gaps or overlaps. Tessellations are most easily identified as interlocking motifs. However, any quilt block that repeats itself can be considered a tessellation.
The block drafted in today's tutorial has a tessellation shape within the block. Four corners come together for a repeat of the shape in the center -- giving the illusion of the interlocking pattern.
Because the tessellating unit was designed in a block with a 6 x 6 grid (note that there are six even divisions going across and down), it will be super simple to piece -- no inset seams required.
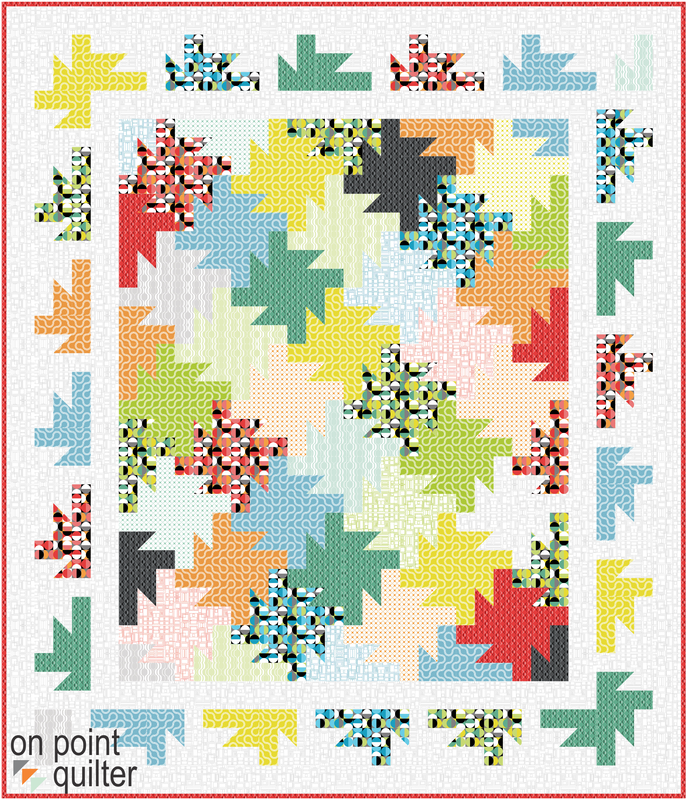
In the EQ8 video tutorial, learn to draft a smaller unit (1/4 of the block), use serendipity to create the larger block, and use some advanced coloring features to recolor the quilt.
Here is a link to the free fabric collection used in the video and available on the Do You EQ website. The collection is Good Vibes. It was designed by Crysta Watson and manufactured by Benartex.
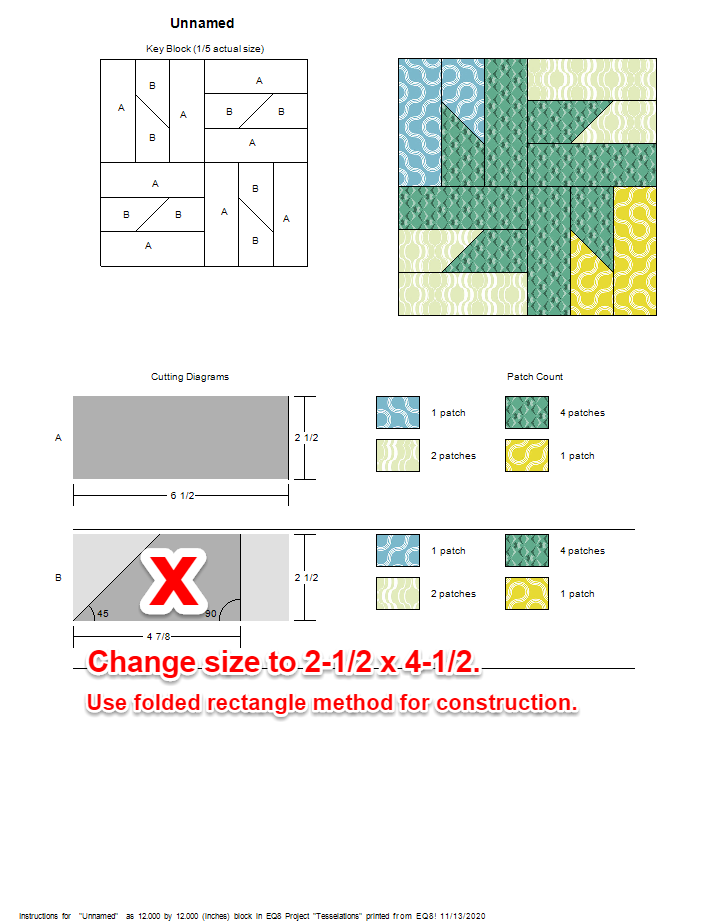
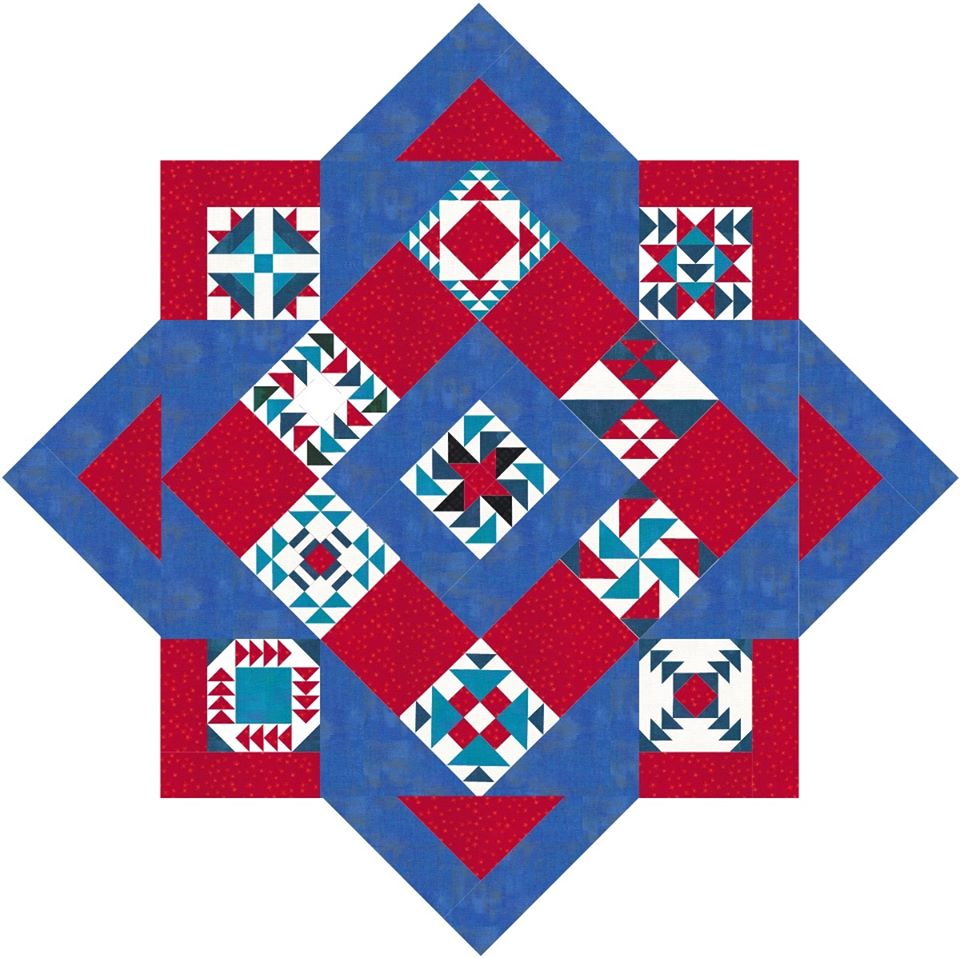
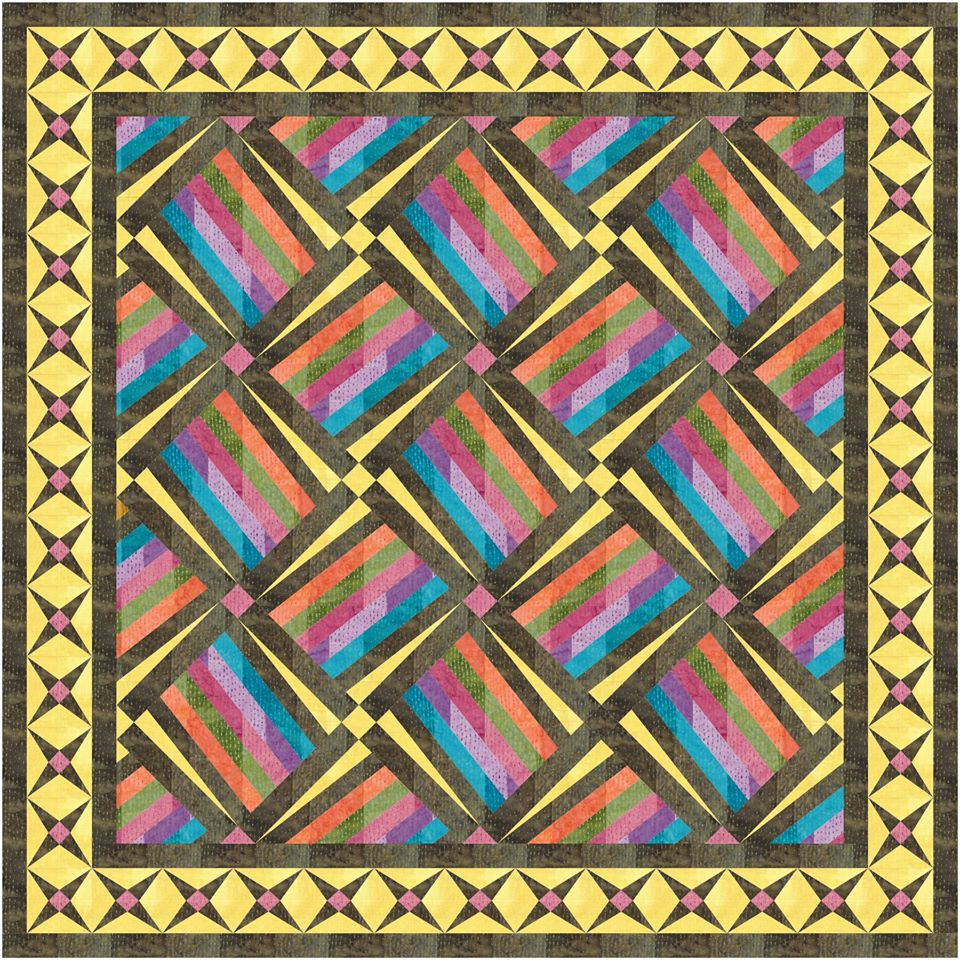
Jelly Roll Friendly Piecing
Folded Rectangle Construction
Combine with 6-1/2" x 2-1/2" strips (from the EQ8 Rotary Cutting Chart). The unit should measure 6-1/2" x 6-1/2". Combine and rotate four units for each block. Consider trying different rotation options for your block.
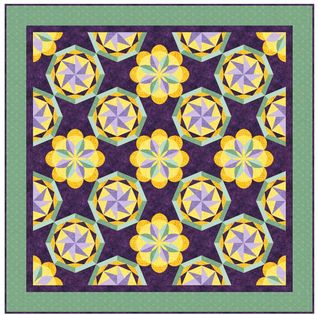
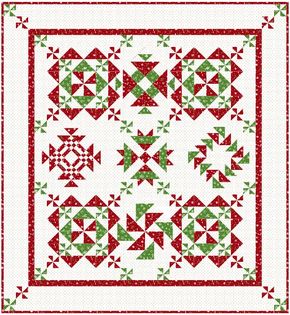
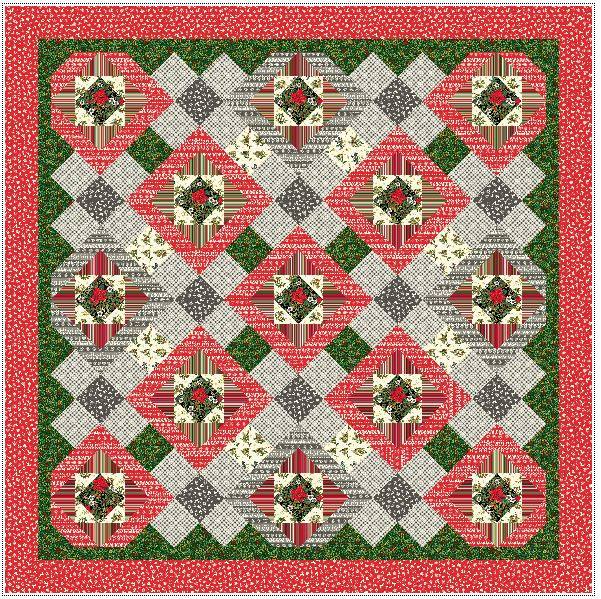
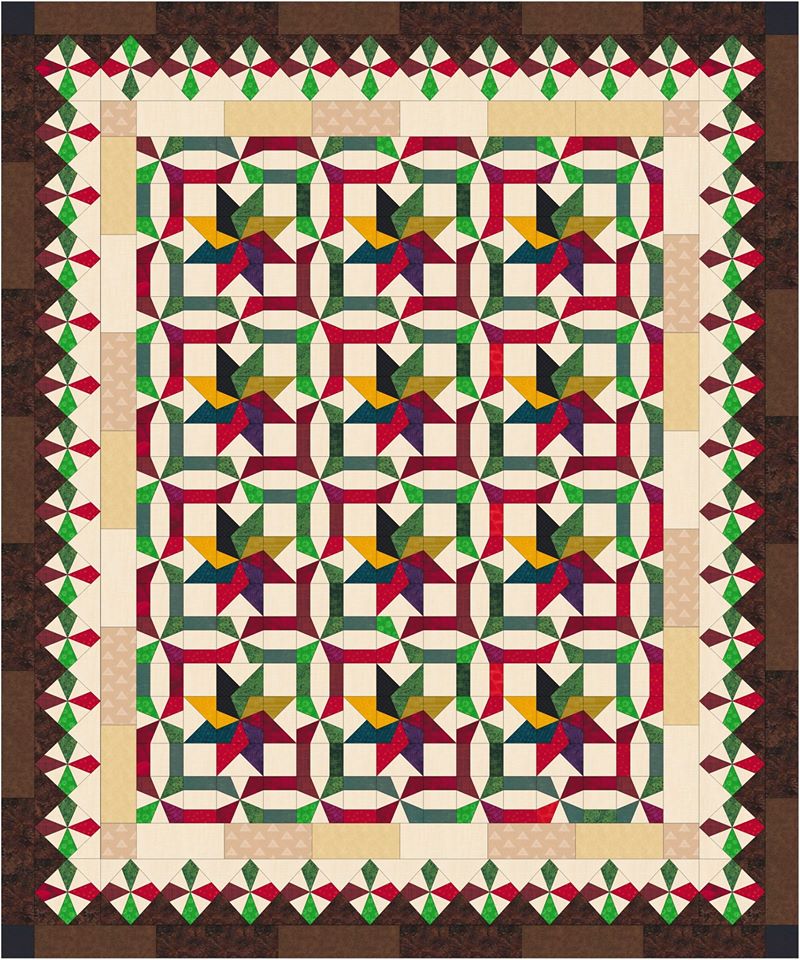
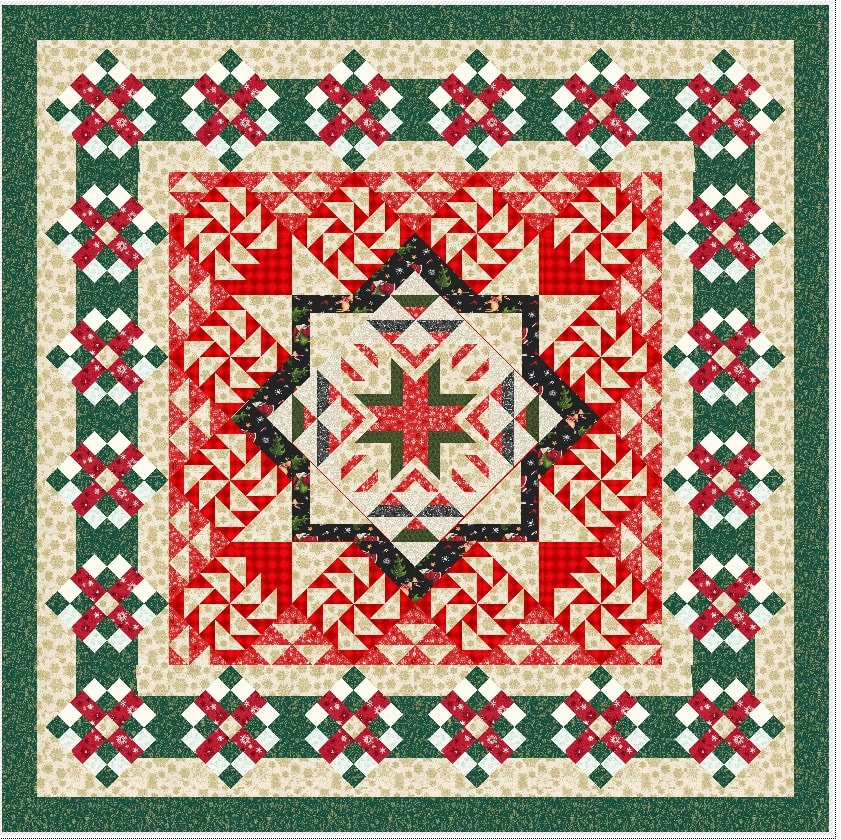
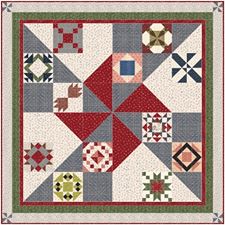
Merry Christmas Quilt
Last December, I presented an exclusive class to Tech Know Quilter's Masters members on designing their own folded corner friendly quilts. In the class, I shared with them how to draft Merry Christmas -- a folded corner friendly quilt that I developed. (Tech Know Quilter Master members have been in Tech Know Quilters for at least 12 months and are focused on applying their EQ knowledge to their own projects.)
Are you new to Tech Know Quilter's Masters Program? Masters members may purchase the series at a discount. Contact us for your discount coupon for the class.
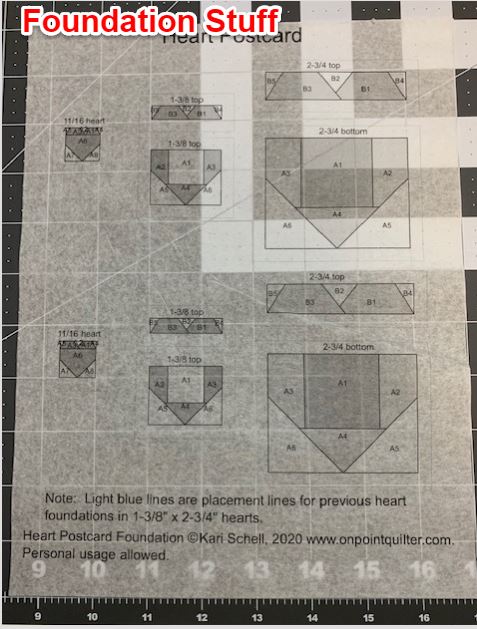
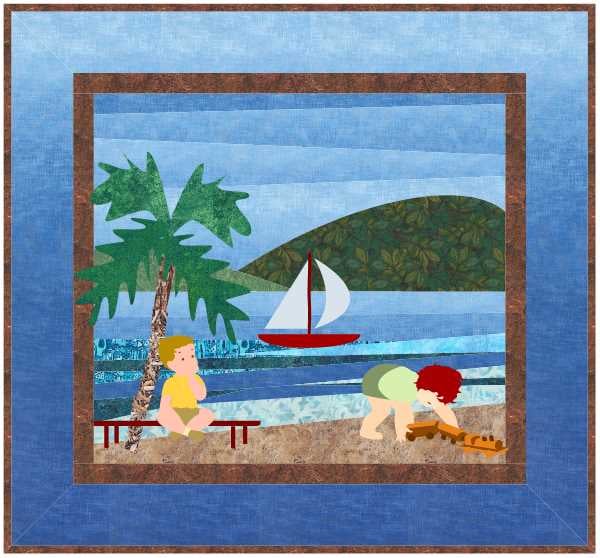
Last week, I shared drafting a postcard quilt that had a heart, in a heart, in a heart. If you would like to create this pattern for yourself, please check out the EQ8 tutorial in last weeks bog.
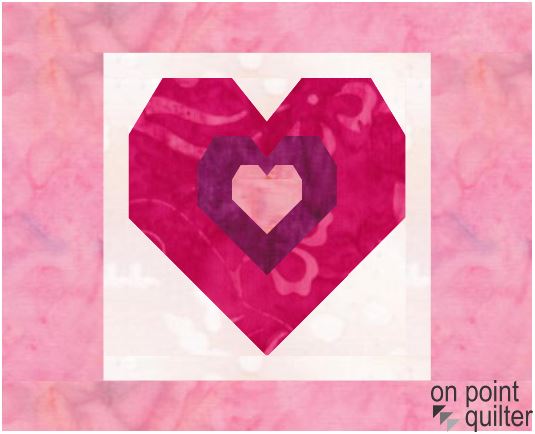
Teeny Tiny Heart Postcard Designed in EQ8 by Kari Schell
I mentioned I had purchased a couple of new items for foundation piecing and decided to try they out when constructing the postcard quilt.
Foundation Paper Comparison
When doing foundations, we need a base that has printed foundations that we will use as guidelines for sewing. The new product I tried was Foundation Stuff.
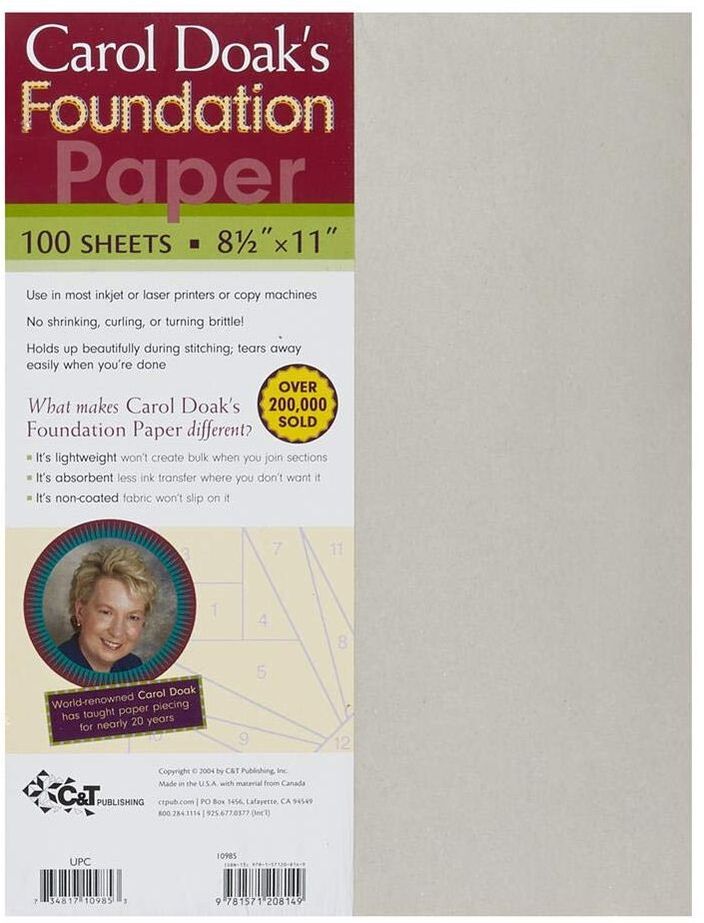
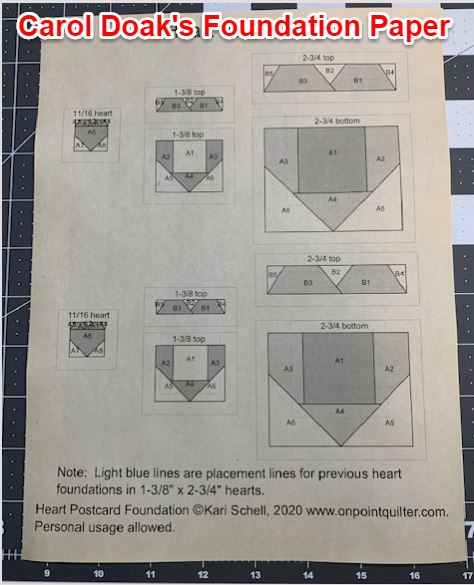
Here is a personal comparison of the three foundations I currently use. I printed out my Teeny Tiny Hearts foundations on all three. Carol Doaks Foundation Paper
This is the brand I have been using for the last five plus years. It goes through the printer without a problem and it is super easy to cut and to tear off. Of the brands I was comparing, it was the hardest to see through -- but newsprint will darken over time (and the paper was purchased a number of years ago). The biggest downside is that the paper can easily tear ahead of the removal process -- particularly when working with micro foundations.
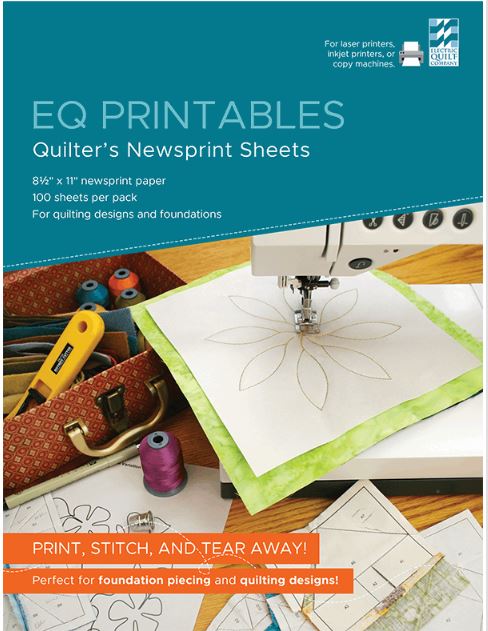
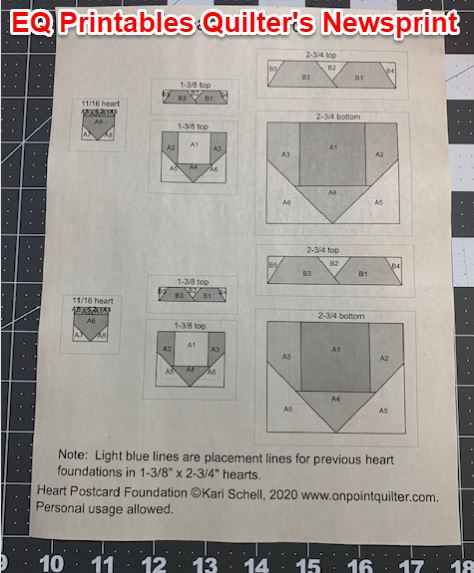
The current price of the paper on Amazon Prime is $13.92 for 100 sheets. EQ Printables - Quilter's Newsprint
The EQ Printables newsprint was a little lighter than color than the Carol Doak's paper (and as a result a bit easier to see through). This could be because the paper is stored in a sealed bag which gives it less exposure to light and air.
It printed beautifully and appears to handle just like the Carol Doak's newsprint. It retails for $9.95 for 100 sheets on the EQ website (and on my website as well). This does not include shipping. Foundation Stuff
This is lightweight foundation material created by George & Virgia Siciliano. The cover notes the following. "Stabilizes fabric during stitching allowing for accurate seam lines. It is durable, transparent and does not stretch. Can be left in your project for added stability. It's washable & dry-cleanable. Can be marked with pen, iron-on transfers & rubber stamps. Will go through printers and copiers."
When doing my miniature heart block (with the first heart foundation being under 3/4"), I found there was no splitting of the foundation during the sewing process. I had set my stitches to 1.2 on my machine since I had seams that were less than 1/8" in length. Very impressive. It is a nice white material and is much easier to see through than the other two brands. It was soft -- as a result I would be comfortable leaving it in my projects. But it also seemed as easy to remove as the other brands. So leaving it in versus removal can be your choice. It did do a nice job of printing -- however, my paper was slightly wrinkled when I removed it from my printer. The wrinkles appear to have happened after the print as I was able to iron them out and did not notice an issue with distortion. I ran three different sheets through my Brother Laserjet printer with similar results. I would recommend testing this will your own printer. It retails on www.georgesiciliano.com for $15 for 50 sheets plus a $3 charge for shipping. So this is the most expensive of the options. My Conclusion
For most of my foundations, I will use the EQ Printables Quilter's Newsprint. The ease of running through the printer and the price point being the biggest advantages.
For minis, I will use Foundation Stuff, as I did appreciate that the foundation didn't fall apart during the pull-back, nor did it split when sewing my very small stitches. Sewing the Heart Foundation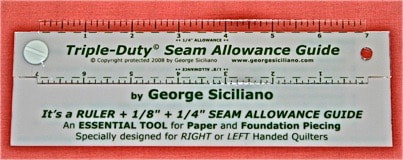
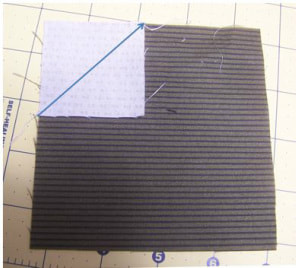
While purchasing Foundation Stuff, I also saw that George Siciliano had a Triple-Duty Seam Allowance Guide. I was curious how it compared to the Add-A-Quarter and Add-an-Eighth tools from CM Tools. I typically use the Add-A-Quarter guide for all my foundation blocks and it is the tool I recommend in my foundation patterns. .
I will share my experience with the Triple-Duty Seam Allowance Guide (along with using Foundation Stuff) in my video for the week.
I had a few nightmares with uploading videos from my phone to my computer and needed to abandon the first video where I sewed the center of my heart. However, since the primary purpose of the video was to share how I use the Triple-Duty 8" Seam Allowance Guide, this should give you a good idea of the process.
I've now completed two postcards. These are really a lot of fun.
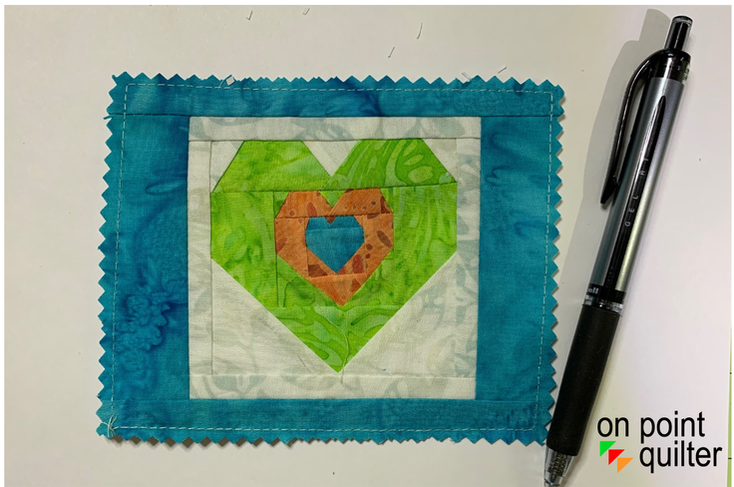
Teeny Tiny Hearts Postcard in Batiks by Kari Schell
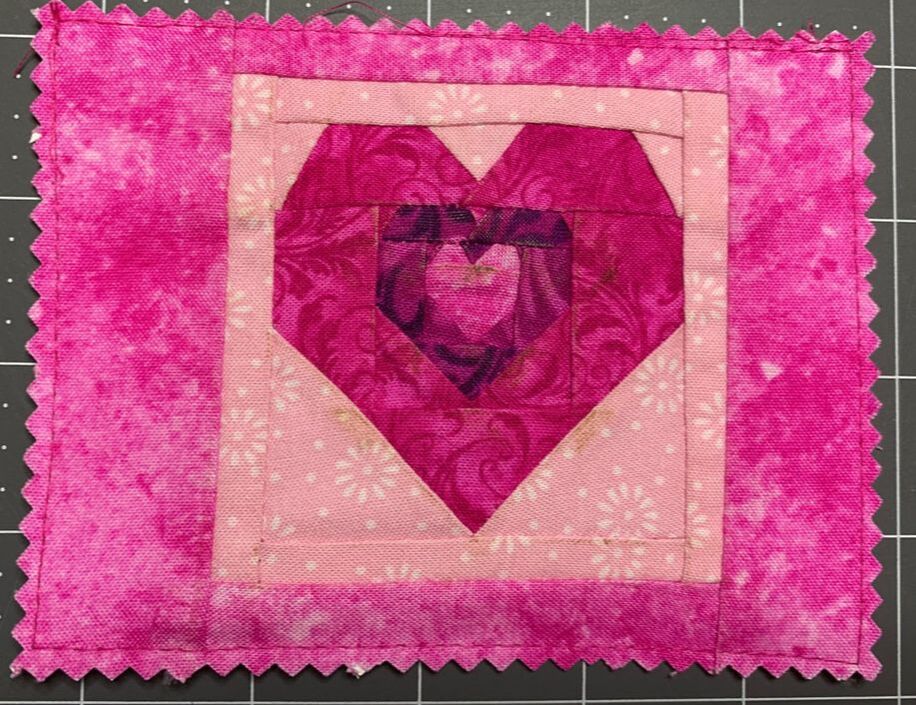
Tiny Tiny Hearts Postcard in Reds and Pinks by Kari Schell
Free Foundation Pattern
Would you like a downloadable copy of the foundation for the Teeny Tiny Heart block? You can download it here.
Make sure to double check the sizing before using the foundations asprinters can distort pdfs. Two copies of the block are included on the page. 
Included in this blog post:
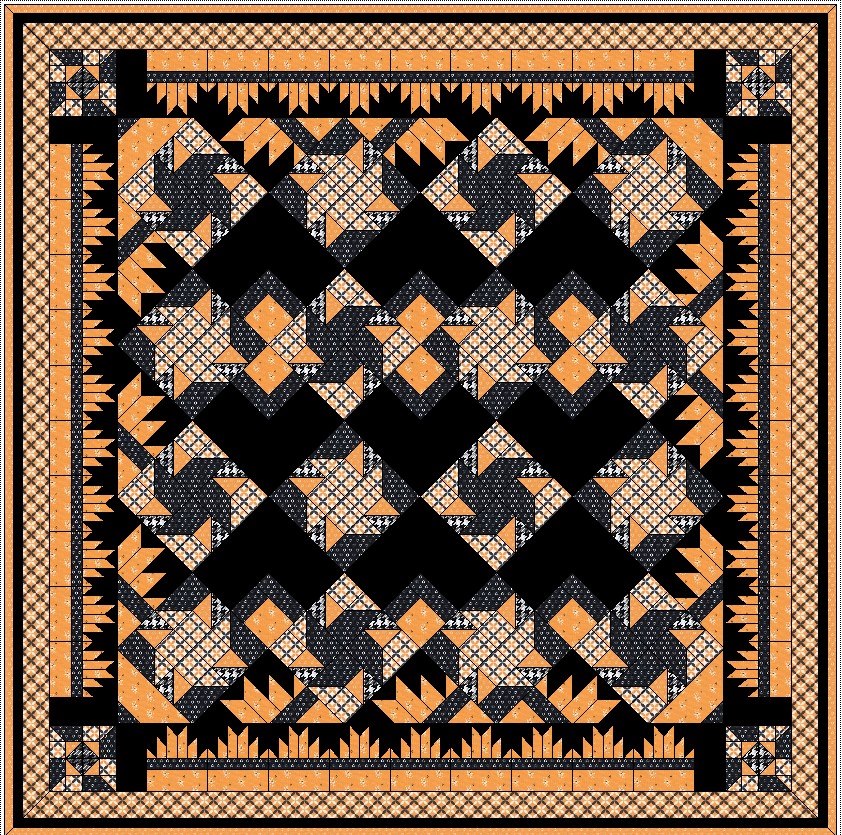
Merry Christmas - New Pattern Release
How to Construct a Quilt Designed in Electric Quilt using Folded Corners
One question I am frequently asked is -- "How do I make a quilt that I designed in Electric Quilt?"
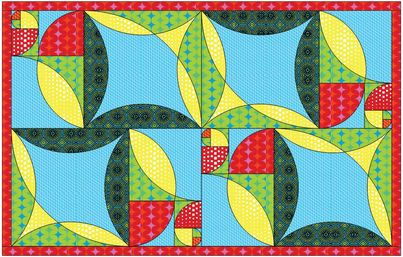
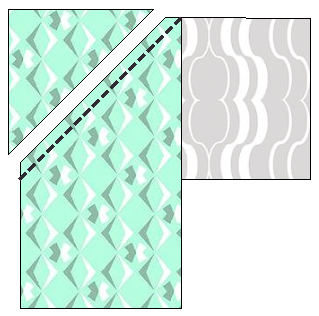
There are many ways to approach piecing a block. I love working with folded corners as all the pieces are squares and rectangles. No cut triangles are required when using this technique. I will share my suggestions for creating folded corner cutting charts for your Electric Quilt blocks. What is a Folded Corner?
Back when I started quilting, I had a book from Mary Ellen Hopkins entitled "It's OK if you Sit on My Quilt Book". In this book she introduced the quilting world to connector corners. I think this may have been one of the techniques that revolutionized modern day quilting. Over the years I have heard a number of names for the technique including "cheater corner" and "folded corner".
The technique refers to a method of adding triangles to a quilt block using only square or rectangle pieces of fabric. It is frequently the suggested method for creating snowball blocks, square within a square units and flying geese units.
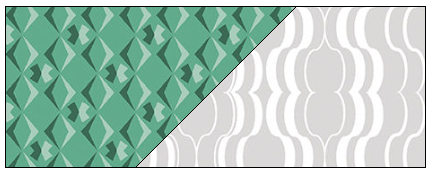
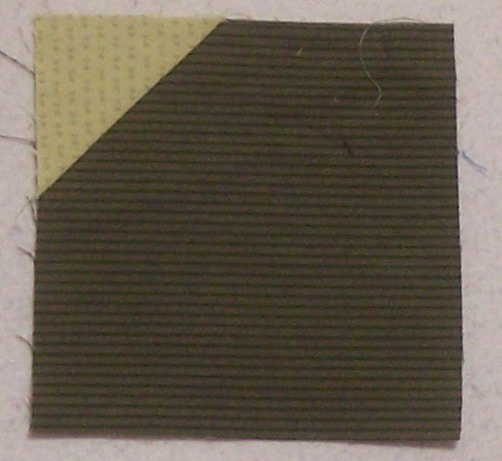
Simple Folded Corner Construction
Draw a diagonal line on the wrong side of a folded corner piece from corner to corner.
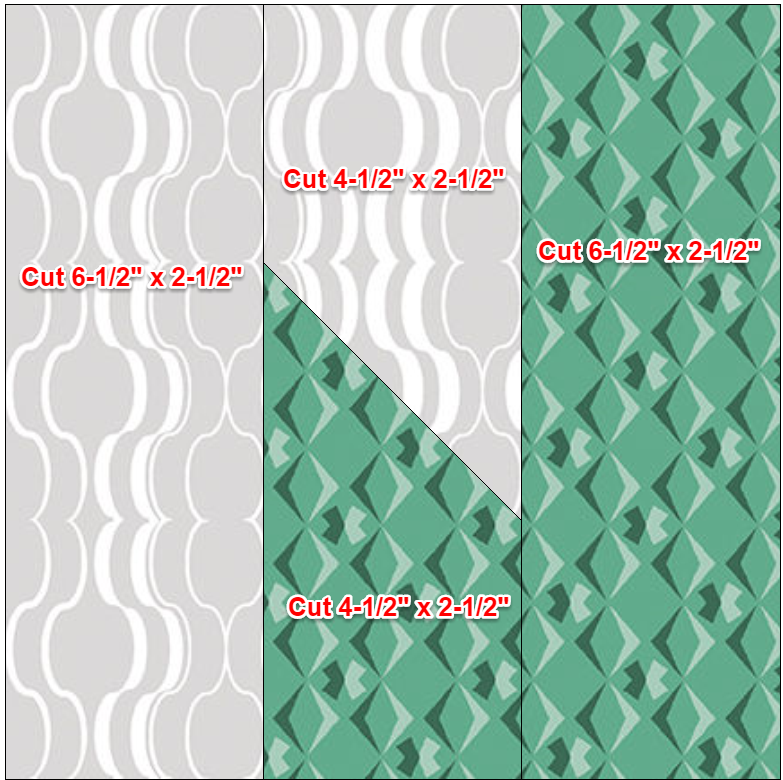
Drafting Cutting Charts for Folded Corner Blocks
As you can see, piecing a folded corner block is super simple!
However when we design in Electric Quilt, EQ does not give us rotary cutting measurements that are conducive to using the folded corner technique. My video tutorial will share with you how to create cutting charts that utilize the folded corner construction technique. This technique works best for blocks with patches that are square or rectangle and have 45 degree angles.
Here are the rotary cutting charts from the quilt in the video.
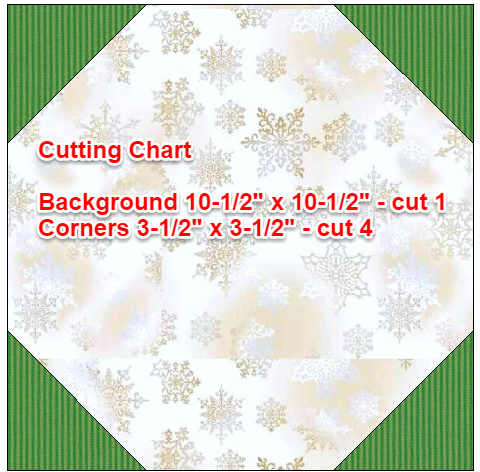
10" Snowball Block -- Folded Corner Cutting Chart
3" Chevron Block - Folded Corner Cutting Chart

10" Wild Goose Log Cabin - Folded Corner Cutting Chart
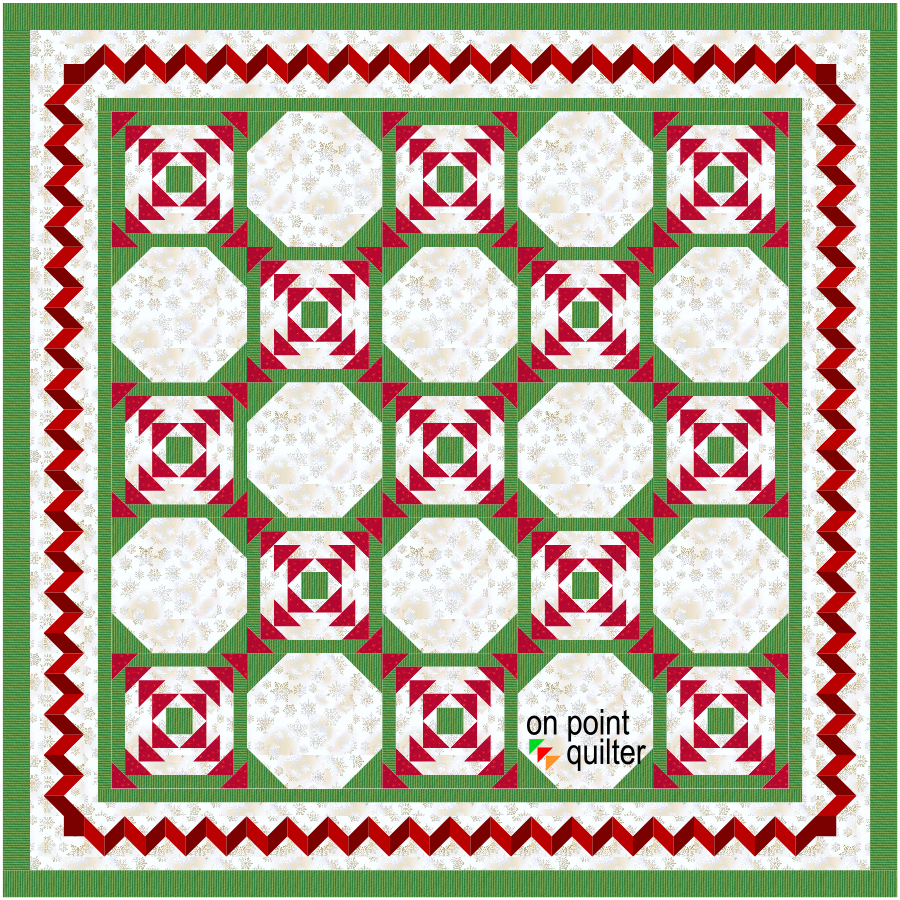
Folded Goose Crossings Quilt - Designed in EQ8 by Kari Schell
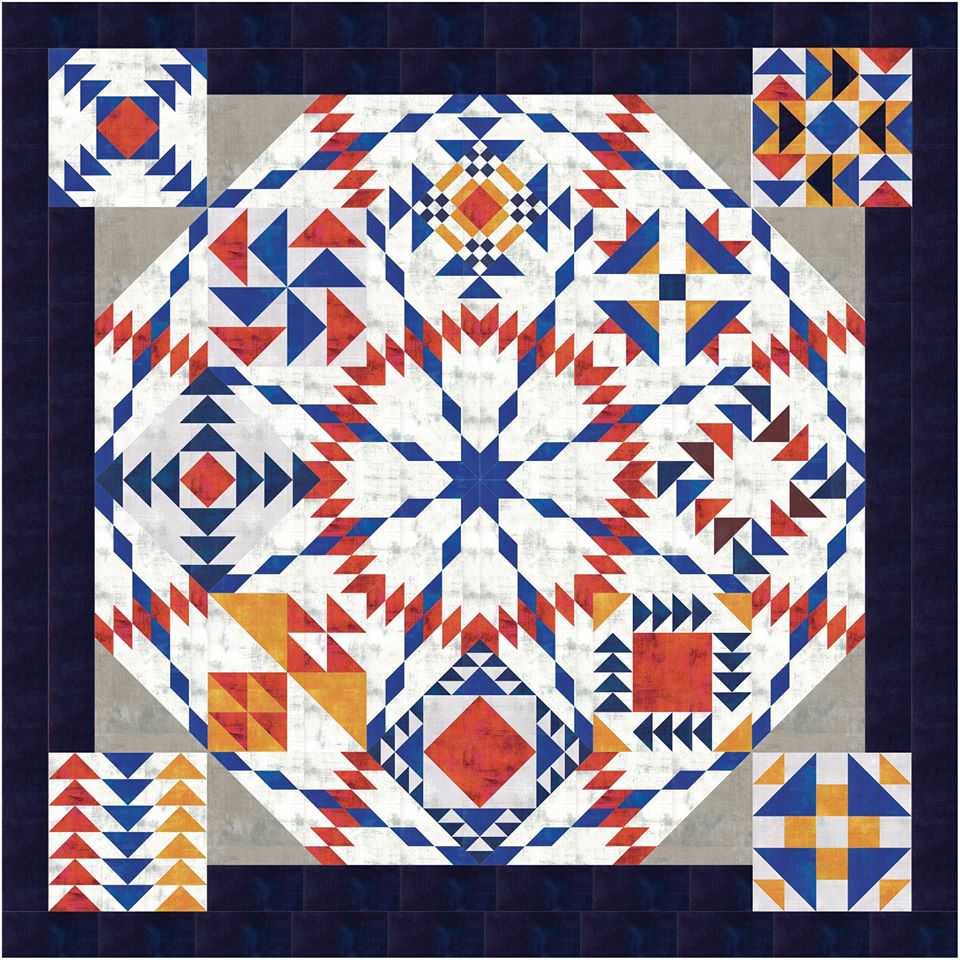
October Apply What You Learned
Enjoy the virtual quilt show as Tech Know Quilter members shared what they learned during October. If you would like to join the wait list for the next open enrollment for Tech Know Quilters, you may sign up here.
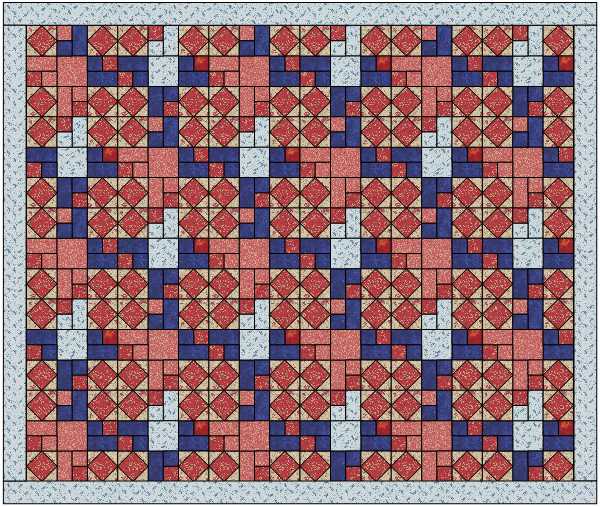
Tech Know Quilters Masters Challenge - Quilts Inspired by Your Favorite Quilting Tool
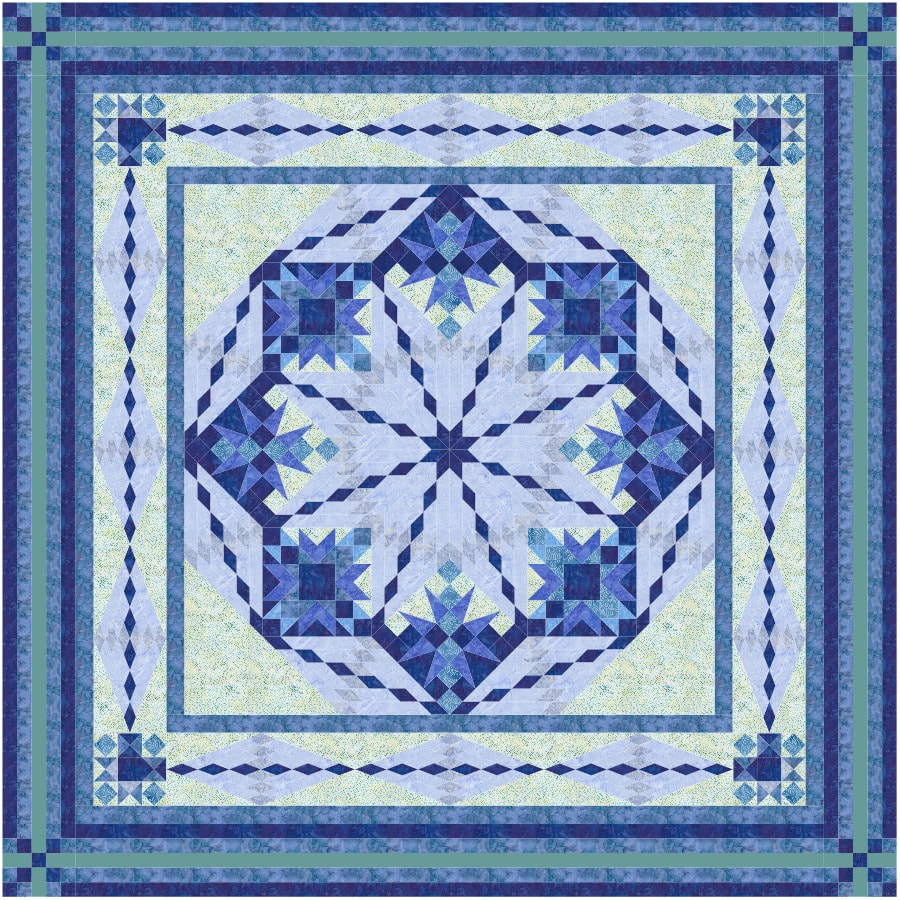
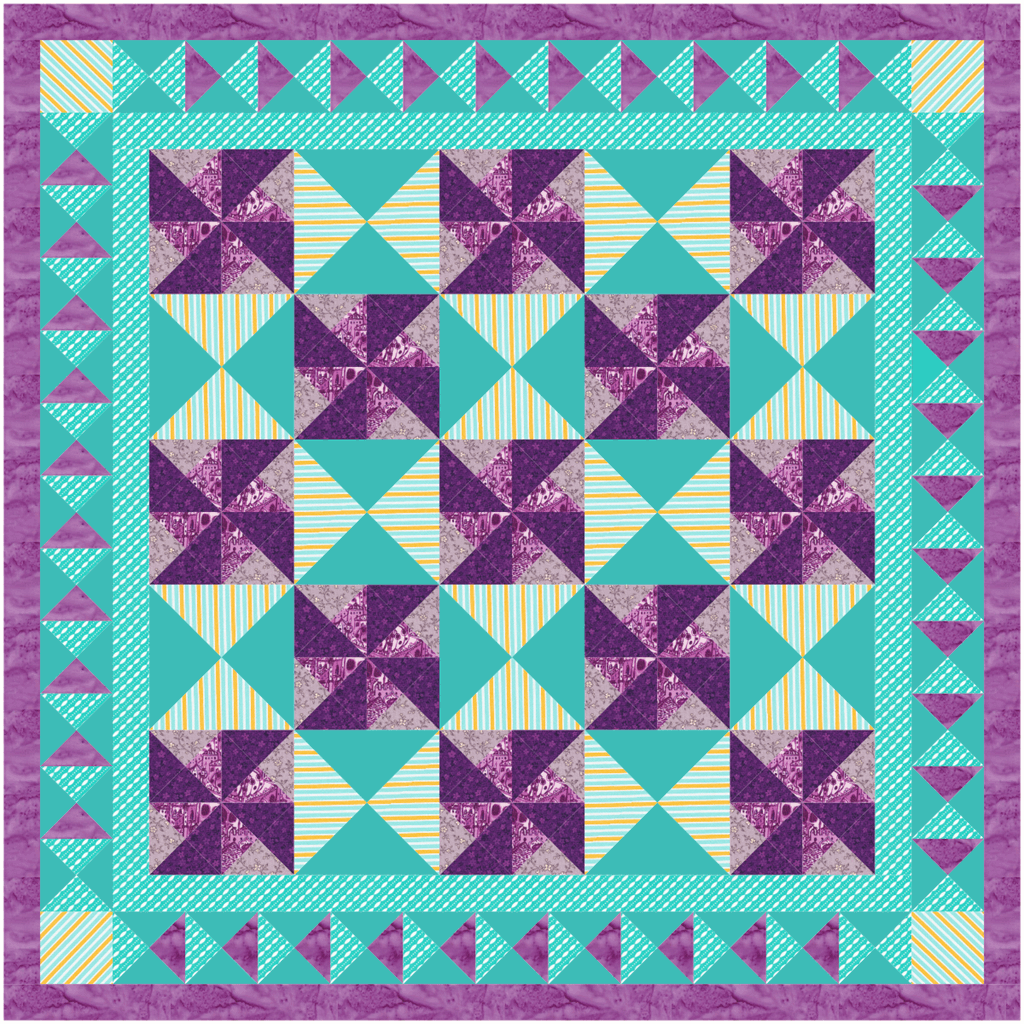
Other October Projects
I have some new great tips to share with you on the String Applique Circle quilt. Did you know that you can create applique shapes with "holes" in them in Electric Quilt? Read more below.
Also check out the next steps in constructing the String Applique quilt -- along with free templates for both the circles and the rings. But first....... New Online EQ Classes
Time is running out to get your early registration bonus for two brand new Electric Quilt classes.
What are the bonuses?
Early Sign-Up Bonus: As a special bonus, if you sign up by March 13, 2017 you will be entitled to a private 20 minute coaching call (value of $60) with Kari that may be used any time during the course of the class. Use it for extra help on a topic or to pick Kari's brain on something you wish to do in Electric Quilt.
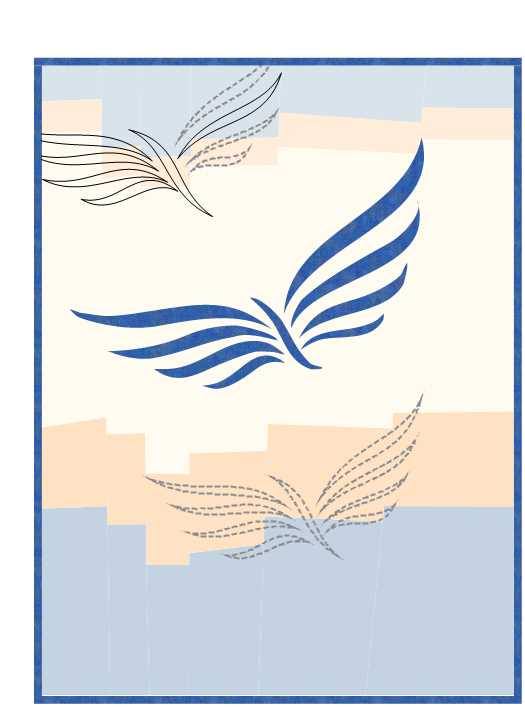
Double Up: Register for both classes Settings and Border 1 and Pieced Patch Draw and take an extra $20 off your total. Enter coupon code MarchMadness when checking out. Settings and Borders 1
|


|
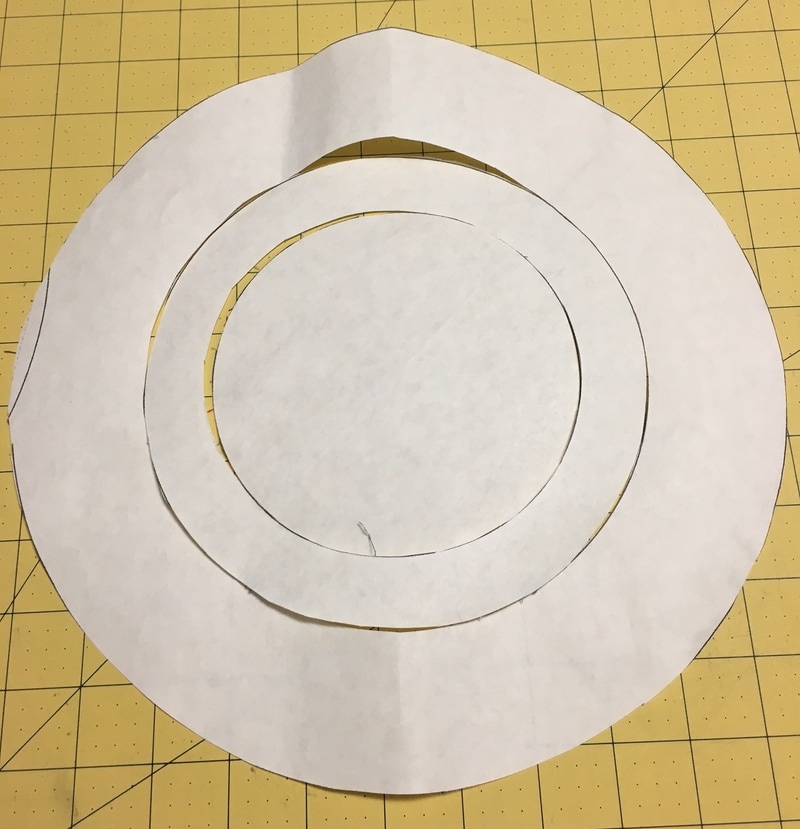
Then I printed the block (using the block size of 12" x 12") on 12" x 15" freezer paper sheets using my wide-carriage printer. Then I didn't have to tape any sheets together.
Carefully cut out the three circles. Iron on the back of a strip segment. Cut the strip segment. Here are the free downloadable freezer paper templates (pdf format).
You may get by with just one set of templates. I found they could be reused multiple times. |
|
|
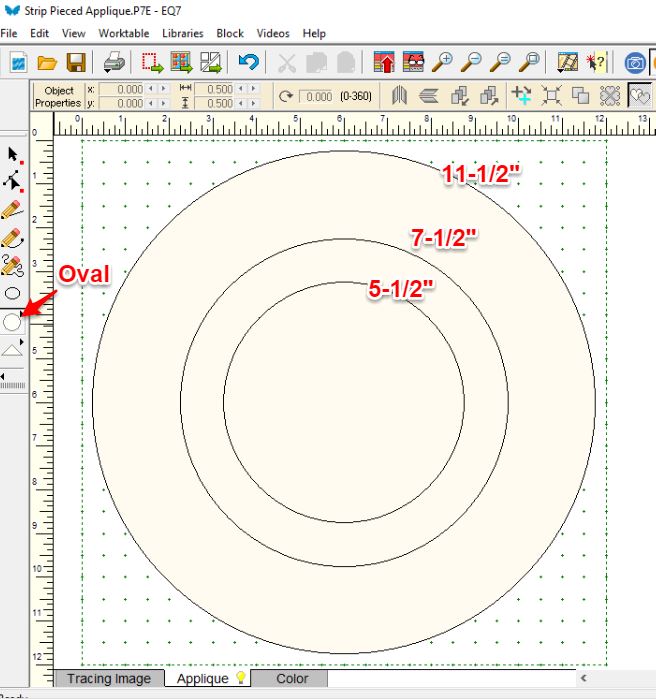
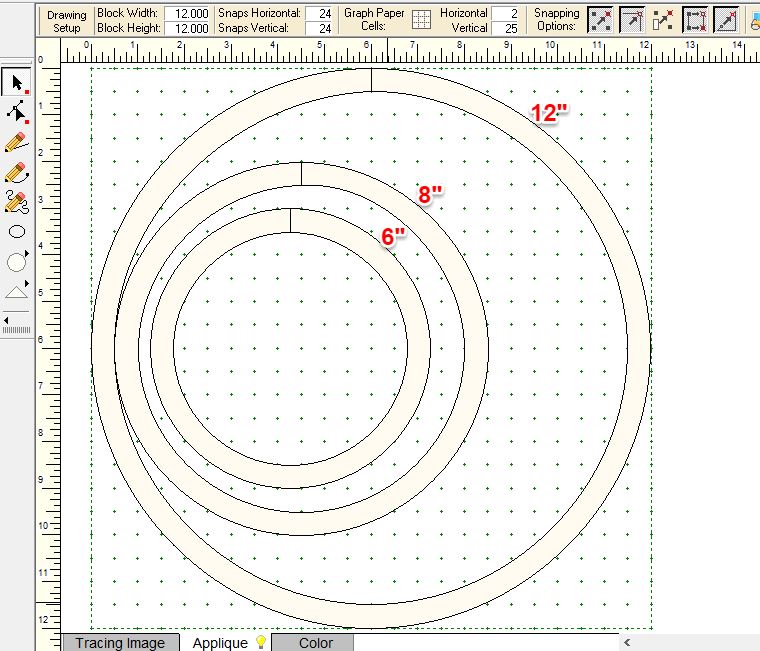
Create the Fusible Rings
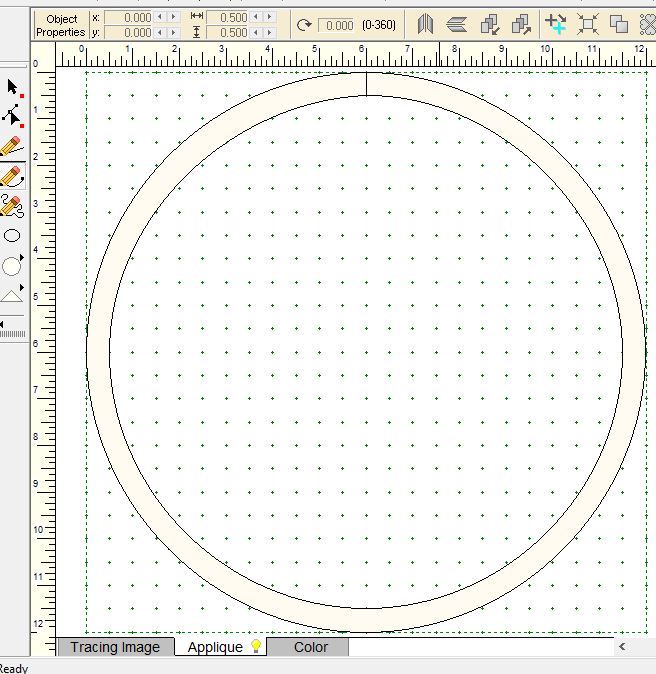
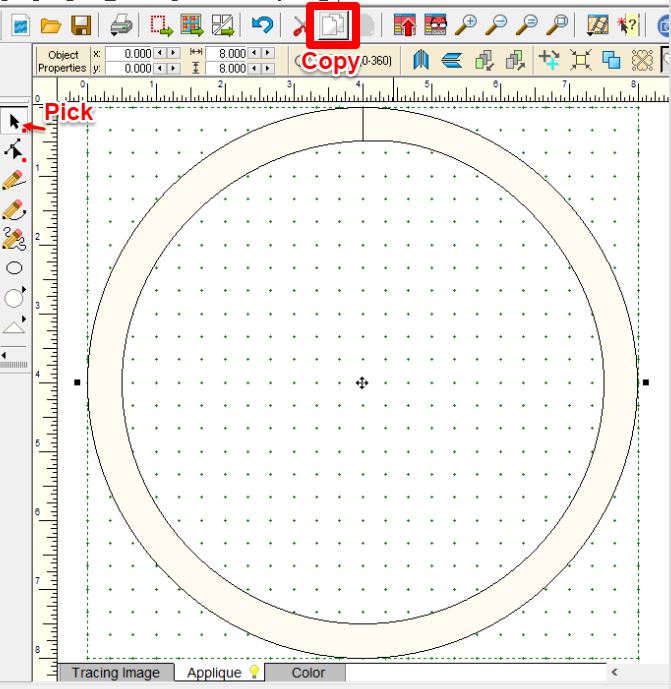
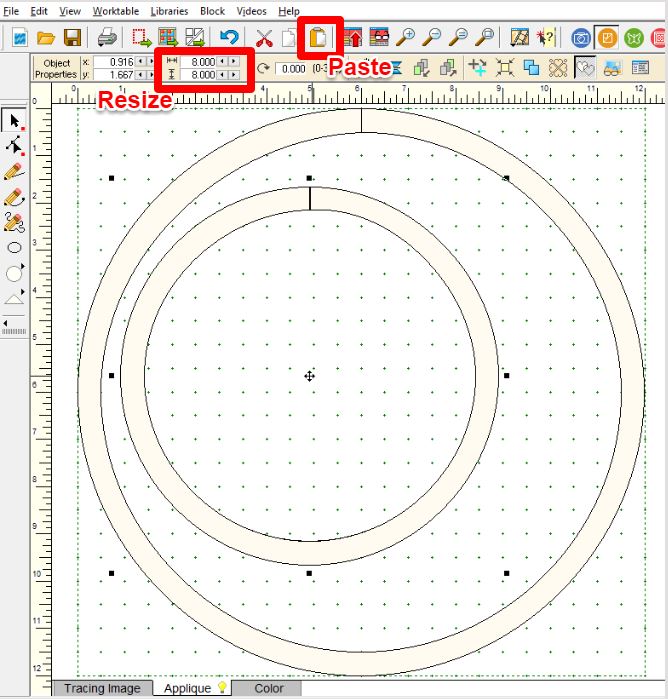
I had 3 separate ring blocks in Electric Quilt. One for each size of ring. Great for designing. Not so great on economizing on usage of Steam-A-Seam 2 (particularly since I only had one package of five sheets for the project). I used the large ring (12")as the base. I opened the 8" ring, selected it with the Pick tool and then selected Copy. Then opened the 12" ring and selected Paste. I then change the size of the copied ring to 8" x 8". Add to Sketchbook. Then I opened the 6" ring and repeated the process. Add to Sketchbook. |
|
|
Change your paper size to 9 x 12 (the size of the Steam-A-Seam sheets) and print. You will have to tape some of these together after printing.
Here are the free download pdfs for the Fusible Rings. These may be used for either tracing or printing on fusible webbing. Rough cut the rings. Peel and stick onto Ring fabric and cut out. |
|
|
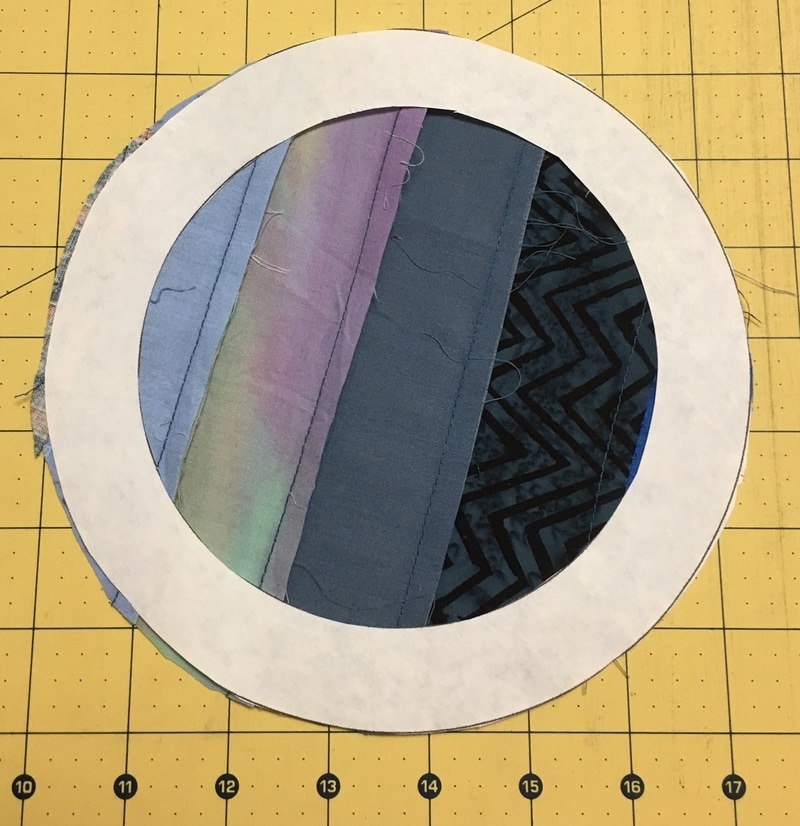
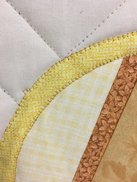
Place string pieced circles and rings on quilted background. Once you have a pleasing arrangement, fuse in place.
Using a blanket stitch, secure the rings. Here is my project with rings fused and stitched down. |
|
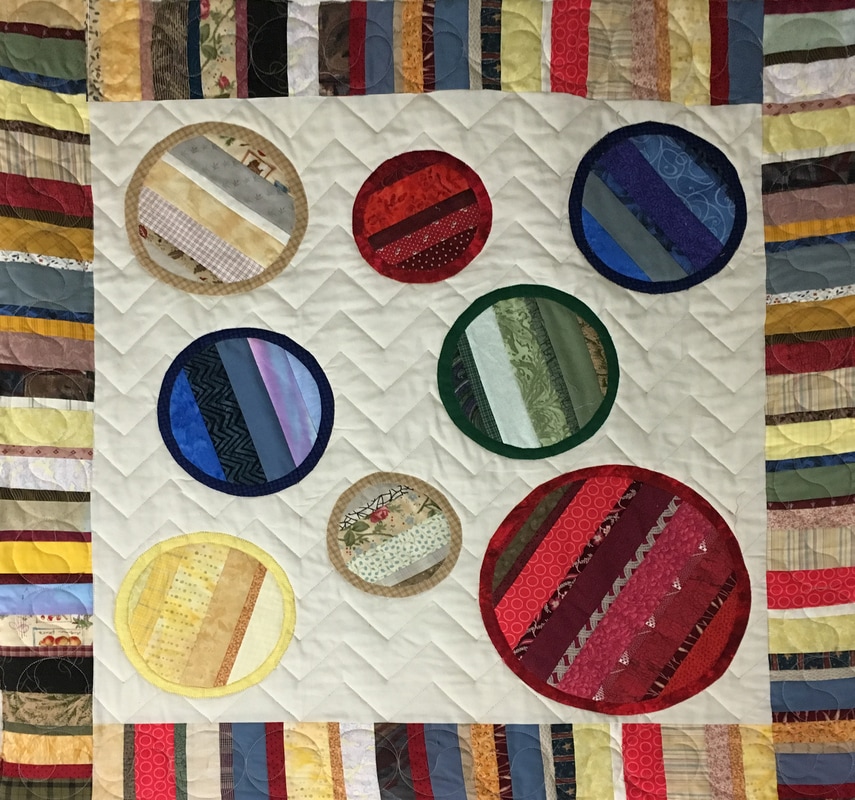
Now I am thinking I would like to add a quilting design on each of the string pieced circles. But I will save that for next week.
|
Happy quilting.
Kari Sign up for my newsletter to stay current on what's happening in my studio and learn more quilting tips. As a thank you, I'll send you a FREE pattern for this small maple leaf quilt. |


Free guide available for newsletter subscribers


Kari Schell
Electric Quilt Expert and Educator and Pattern Designer.
Categories
All
Art And Stitch
Cricut Maker
Dear Jane
Electric Quilt 7
Electric Quilt 8
Goose Goose Duck Challenge
Inkscape
Patterns
Silhouette Cameo
Stampin Up
Tips And Techniques
Tools And Rulers
Archives
July 2024
June 2024
May 2024
April 2024
March 2024
February 2024
January 2024
December 2023
November 2023
October 2023
September 2023
August 2023
July 2023
June 2023
May 2023
April 2023
March 2023
February 2023
January 2023
December 2022
November 2022
October 2022
September 2022
August 2022
July 2022
June 2022
May 2022
April 2022
March 2022
February 2022
January 2022
December 2021
November 2021
October 2021
September 2021
August 2021
July 2021
June 2021
May 2021
April 2021
March 2021
February 2021
January 2021
December 2020
November 2020
October 2020
September 2020
August 2020
July 2020
June 2020
May 2020
April 2020
March 2020
February 2020
January 2020
December 2019
November 2019
October 2019
September 2019
August 2019
July 2019
June 2019
May 2019
April 2019
March 2019
February 2019
January 2019
December 2018
November 2018
October 2018
September 2018
August 2018
July 2018
June 2018
May 2018
April 2018
March 2018
February 2018
January 2018
December 2017
November 2017
October 2017
September 2017
August 2017
July 2017
June 2017
May 2017
April 2017
March 2017
February 2017
January 2017
December 2016
November 2016
October 2016
September 2016
July 2016
June 2016
May 2016
April 2016
March 2016
February 2016
January 2016
December 2015
November 2015
October 2015
September 2015
August 2015
July 2015
June 2015
May 2015
April 2015
March 2015
February 2015
January 2015
December 2014
November 2014
October 2014
September 2014
July 2014
June 2014
May 2014
April 2014
March 2014
February 2014
January 2014
December 2013
November 2013
October 2013
September 2013
August 2013
 RSS Feed