
|
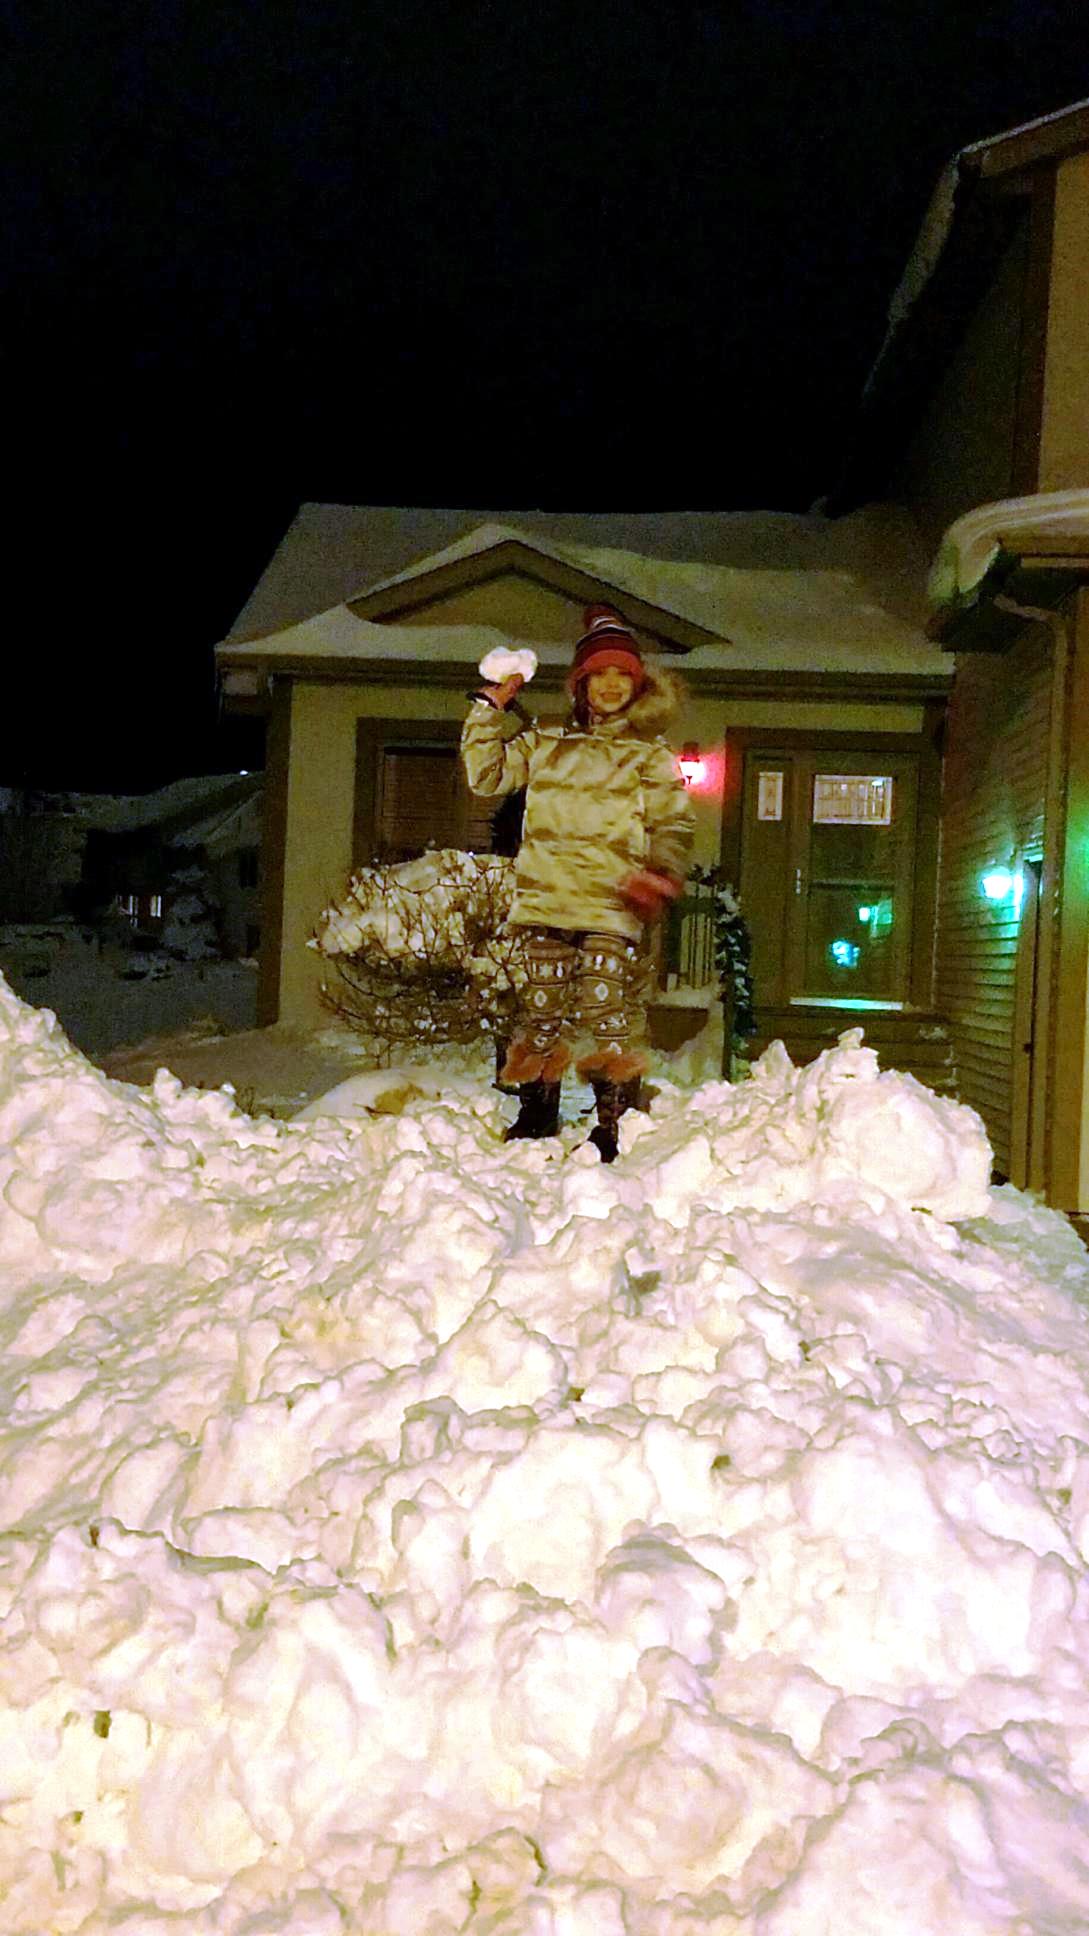
I took a few days away from quilting and the computer to enjoy Christmas with family in North Dakota. Unfortunately I got caught in a major blizzard while there.
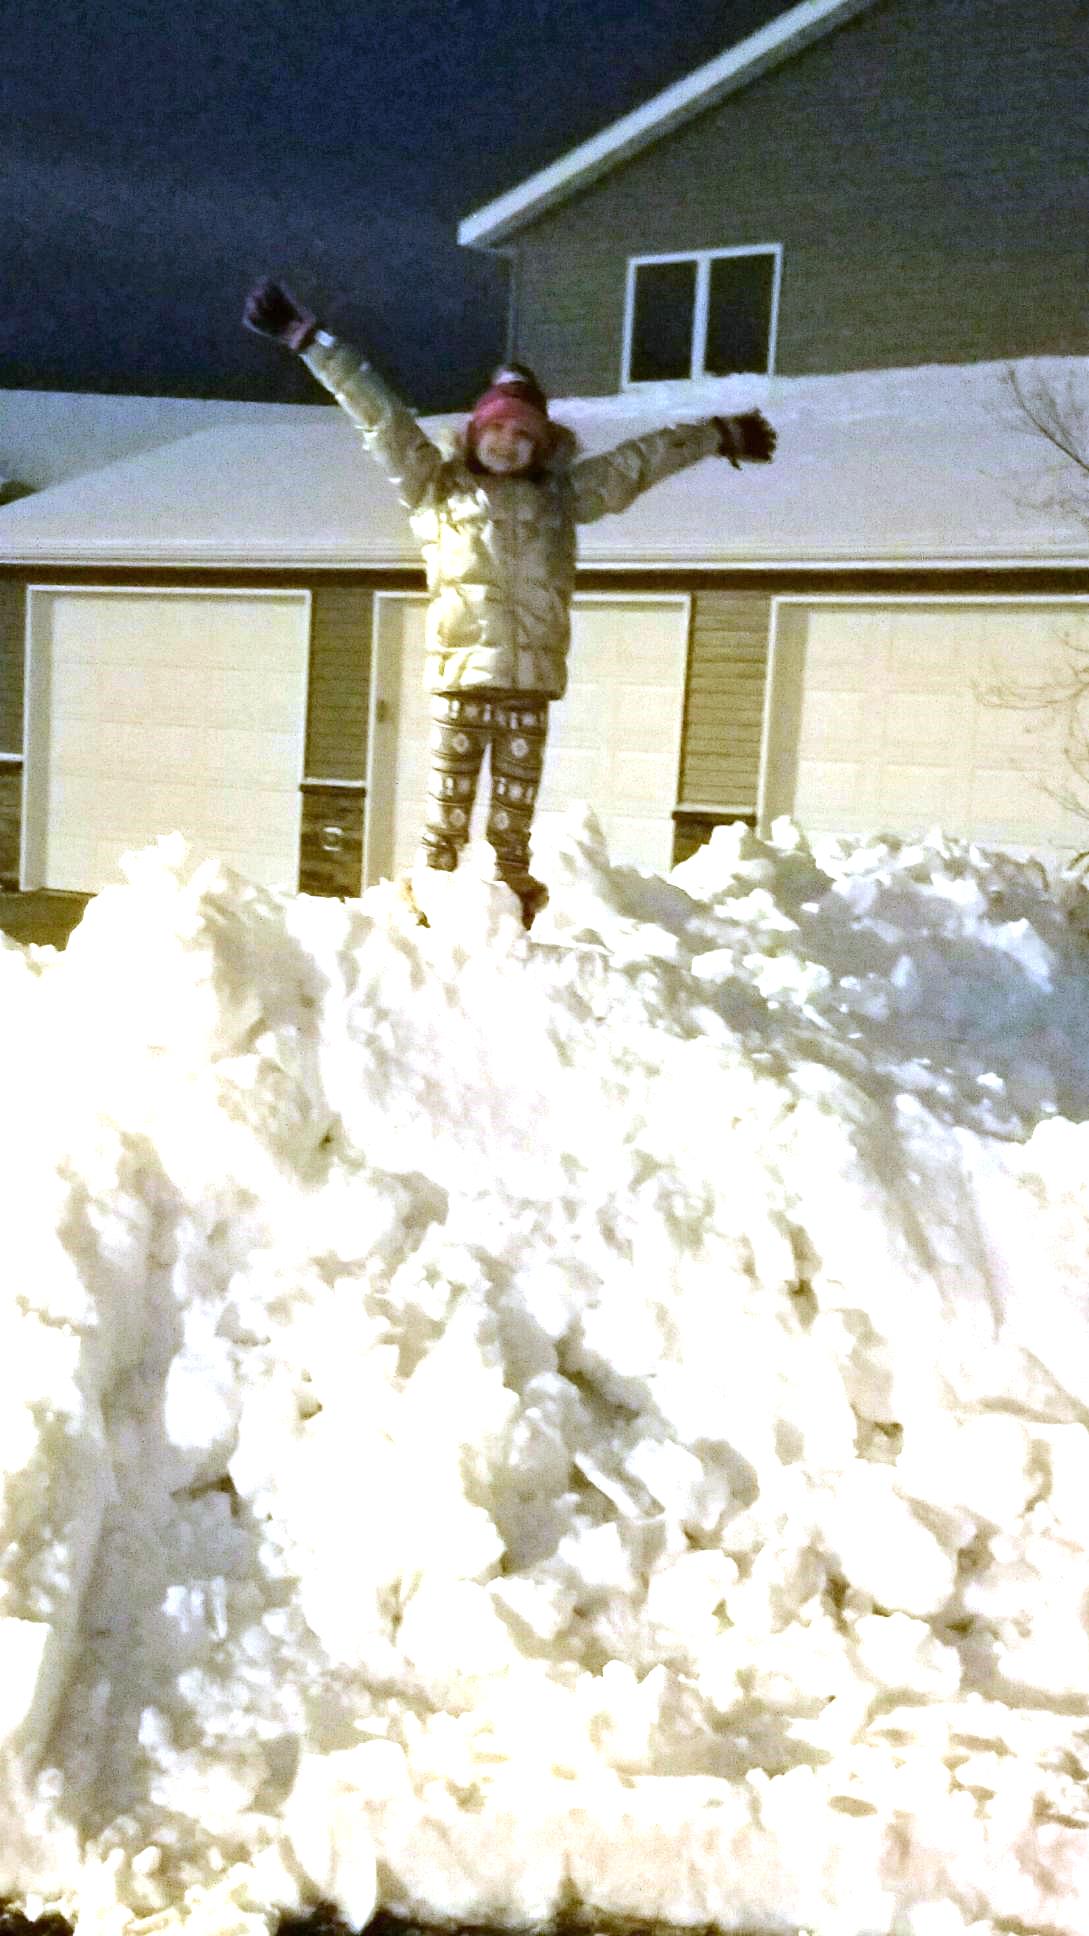
After driving Mom from her Assisted Living place to my brothers place to enjoy Christmas Day dinner, the storm hit in full force. It quickly became apparent that we weren't getting her home that night. Fortunately I had asked for a day of meds for Mom, so we were ok for the next 24 hours. Althought the storm let up on Monday, the streets were blocked, making travel impossible. Finally my brother and one of his neighbors were able to clear a large enough path in his cul de sac -- and I was able to confirm that they had plowed the street at the assisted living place because of an emergency ambulance run earlier in the day. With his big truck we were able to get her home. My car was still stuck for another day -- but I wasn't going anywhere with all major roads closed in North Dakota. Although the roads weren't great, I was able to leave by mid-day on Tuesday and I am now safely back in Minnesota. Here are a few pictures after the storm. Log Cabin LeMoyne Star Using Electric Quilt
I hope you are finding a bit of time to play with Electric Quilt during this holiday season. Judy T. was working on a block to merge a a series of Log Cabin blocks with a LeMoyne Star block. In this Electric Quilt video tutorial I provide two options on how to create this design using Electric Quilt 7.
Introduction to Electric Quilt -- Starting January 16, 2017
Is 2017 your year to finally master Electric Quilt 7?
This online class will cover basic navigation of the software, creating a new project, using the libraries, using Quick Quilts for fast projects, adding borders, coloring tools/fabrics, creating quilt labels and printing quilts, blocks, fabric yardage estimates, rotary cutting and foundation patterns. By the end of class you will be comfortable working with the program and be able to explore additional features on your own. Users of all levels are welcome, with special emphasis on beginners. Dates: January 16, 23, 30, February 6, 7 - 8:30 pm (Central time) (four sessions) Class size will be limited to 8 participants. Seats are available on a first come first serve basis. This class will be exactly like taking at "in person" class at a show or shop. We will use screen sharing technology -- so you will be able to see my screen and if you have specific questions, I will also be able to view yours as well. Early Sign-Up Bonus: As a special bonus, if you sign up December 31,2016 you will be entitled to a private 20 minute coaching call with Kari that may be used any time during the course of the class. Use it for extra help on a topic or to pick Kari's brain on something you wish to do in Electric Quilt. (Value: $60) Purchase here.
Check out my Facebook post on December 25th for a chance to relax for a few minutes with a special Christmas video.
When I did my post last week, I was focused on ornaments for the Christmas tree. After thinking a bit more, I realized that with a few modifications these would also make great gift card holders -- a personal touch that will stand out and be appreciated! Let's get started with Part 2 of the video, which covers adding stitches in the embroidery section. You will only be able to do this if you have EQ Stitch.
After playing with various settings, here is what I finally landed on for my project. These may be slightly different than what was in the video -- but I continued to enhance my stitch file after the video was done.

Applique Edge Stitch for Outside of Ornament

Applique Edge Stitch for Tree

Double Run Stitch for Garland
 Fill Stitch for star, trunk, ornaments, and text. Smooth fill type was used for all. Edge stitch was turned off (red X) for all of these items. Fill Stitch for star, trunk, ornaments, and text. Smooth fill type was used for all. Edge stitch was turned off (red X) for all of these items.
In the Hoop Gift Tag
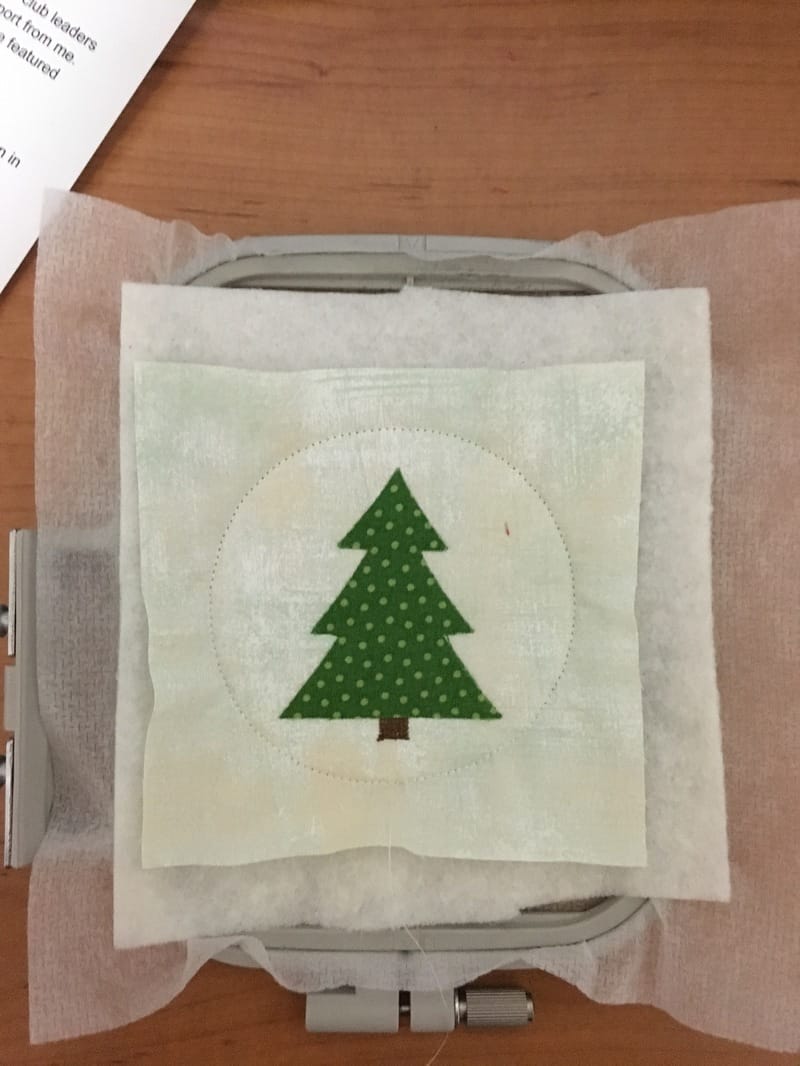
Here are my steps for creating an In the Hoop Machine Applique design and completing the gift tag. I am still learning this process -- so if you have suggestions to make this better, please feel free to post in the comments section.
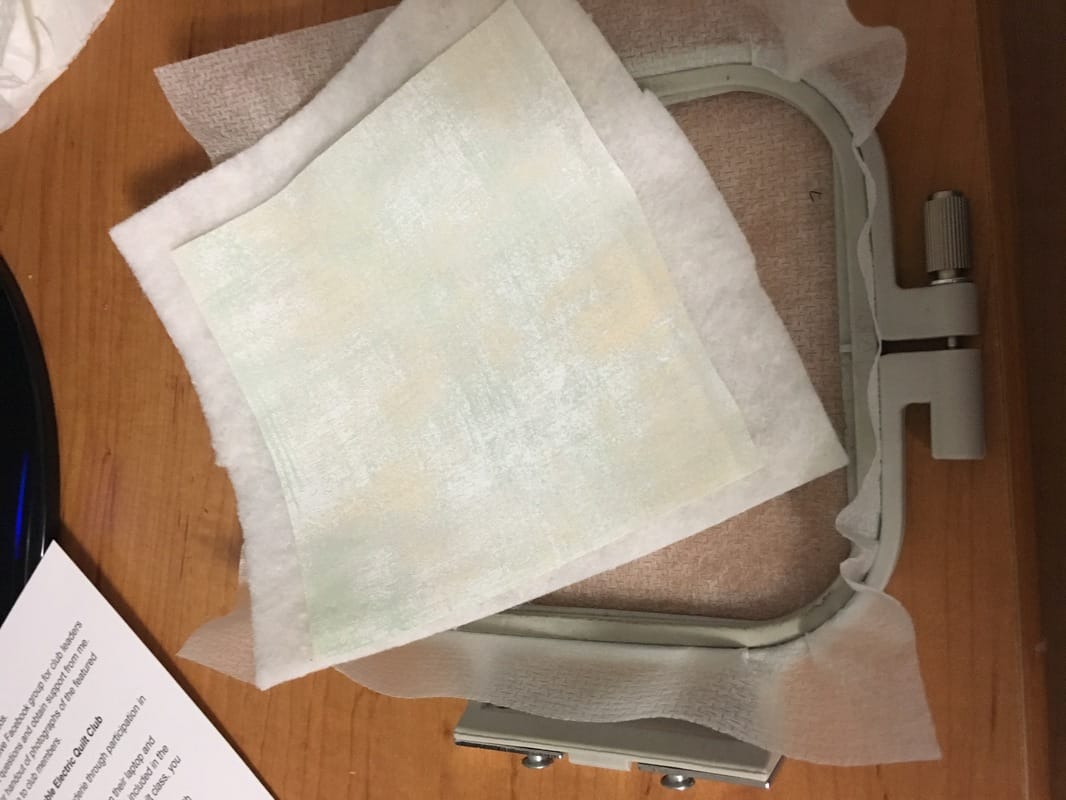
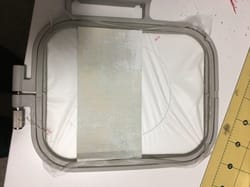
Step 1: Hoop a piece of No Show Poly Mesh Plus Machine Embroidery Stabilizer.
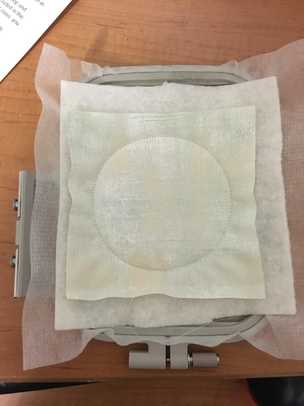
Step 2: Place a 5 x 5 piece of batting and a 5 x 5 piece of background fabric on top and sewed the placement circle using your embroidery machine. The top thread should match the color in the background fabric. (For my first projects, I sprayed both with Sullivan's Quilt basting spray -- but by the last ones I found I could eliminate that step and just hold the pieced in place while it sewed the circle.)
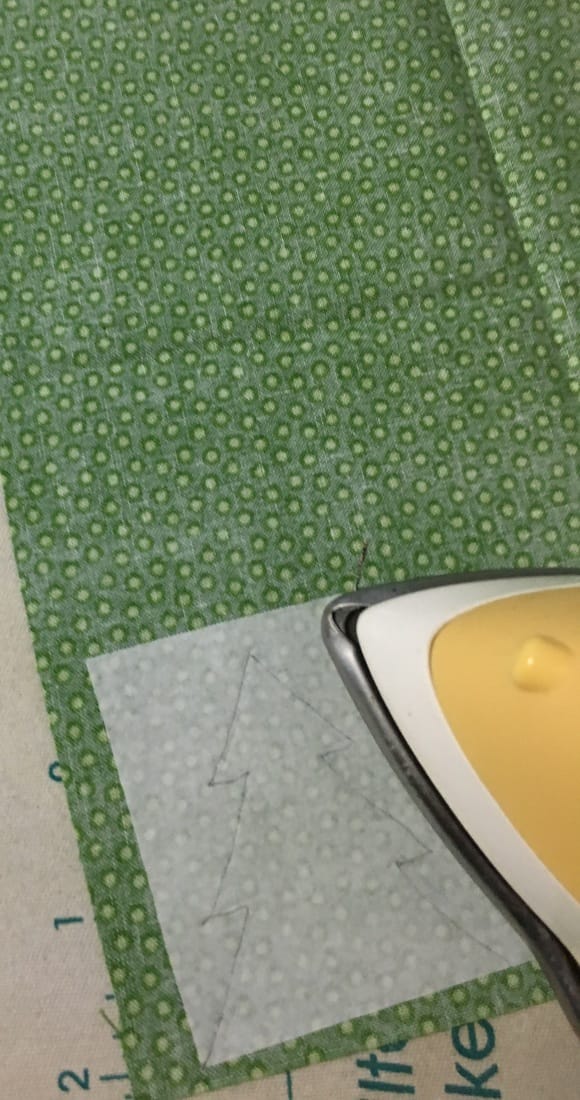
Step 5: Embroider the trunk and the tree placement line. Iron the tree to the background using the placement line as a guide.
Step 6: Embroider the rest of the the items (other than the outside edge).
Step 7: Remove from hoop and trim just outside the placement lines.
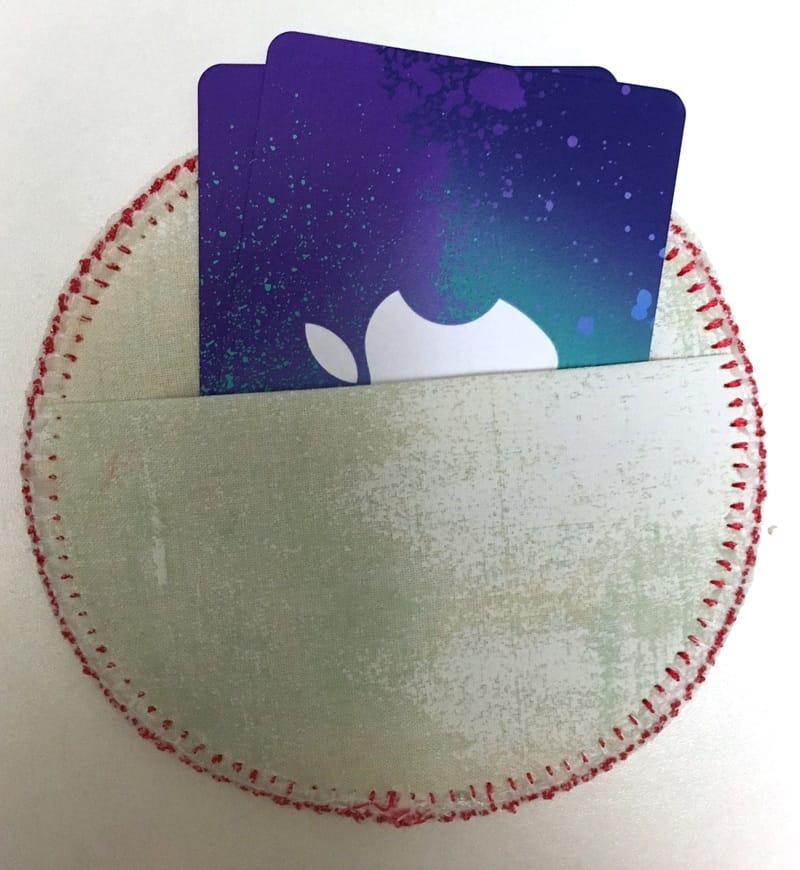
Oops -- forgot to take a photo of my sample project. This was from another ornament (without a name).
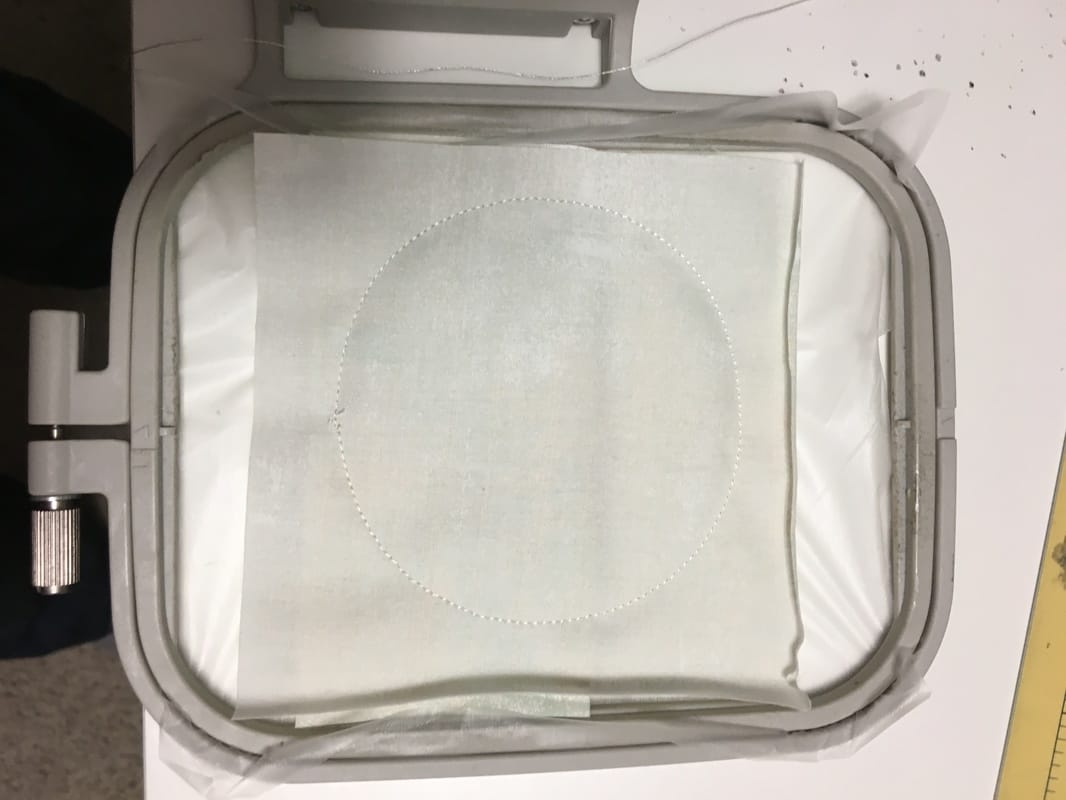
Step 8: Hoop a piece of Wash-away Water Soluable Stabilizer. I think a tear-away stabalizer would also work for this step.
Step 9: Sew the placement line (the same one you did for the first part of the ornament). 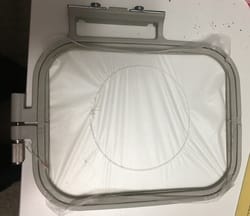
Step 10: Add Gift Card Pocket (a 5 x 5 piece of fabric folded in half with right sides together). The folded seam should be slightly above the center of the placement line.
Step 11: Add a 5 x 5 backing piece, right sides down. Step 12: Sew another placement line.
Step 13: Spray the embroidered ornament with Basting Spray and place on the hooped back using the placement lines as a guide.
Step 14: Sew the Tack Down. The tack down thread color should match the background fabric. Step 15: Sew the Blanket Stitch. The blanket stitch may be contrasting thread color. I like to double stitch the blanket stitch to give it more prominence. 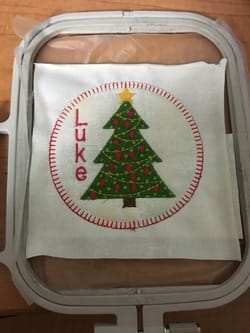
Step 16: Trim close to blanket stitch and remove Wash Away Stabilizer.
Step 17: Add gift cards and deliver! 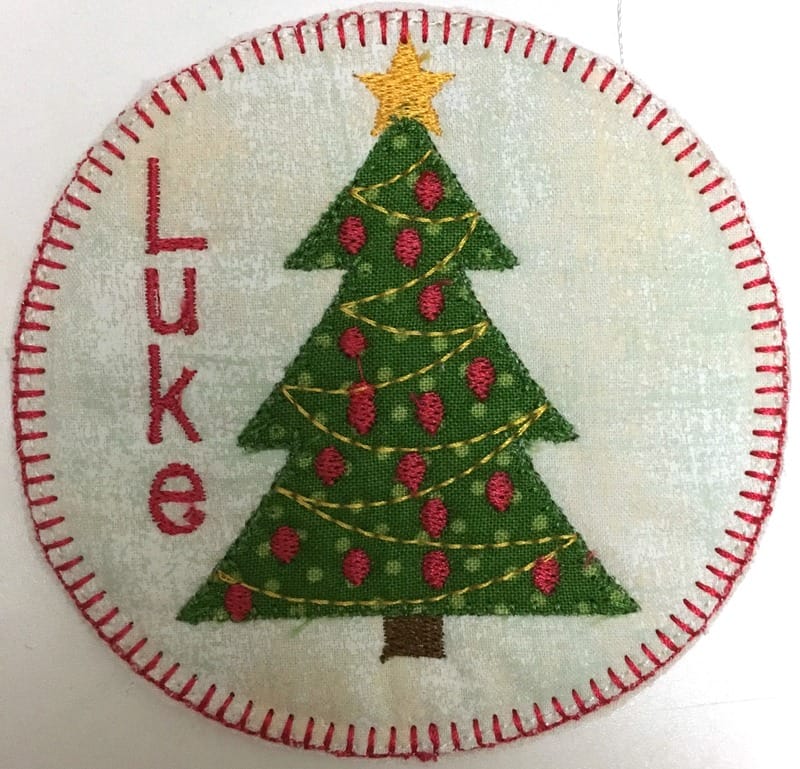
Introduction to Electric Quilt -- Starting January 15, 2017
This online class will cover basic navigation of the software, creating a new project, using the libraries, using Quick Quilts for fast projects, adding borders, coloring tools/fabrics, creating quilt labels and printing quilts, blocks, fabric yardage estimates, rotary cutting and foundation patterns. By the end of class you will be comfortable working with the program and be able to explore additional features on your own. Users of all levels are welcome, with special emphasis on beginners. Dates: January 16, 23, 30, February 6, 7 - 8:30 pm (Central time) (four sessions) Class size will be limited to 8 participants. Seats are available on a first come first serve basis. This class will be exactly like taking at "in person" class at a show or shop. We will use screen sharing technology -- so you will be able to see my screen and if you have specific questions, I will also be able to view yours as well. Early Sign-Up Bonus: As a special bonus, if you sign up December 31,2016 you will be entitled to a private 20 minute coaching call with Kari that may be used any time during the course of the class. Use it for extra help on a topic or to pick Kari's brain on something you wish to do in Electric Quilt. (Value: $60) Purchase here.
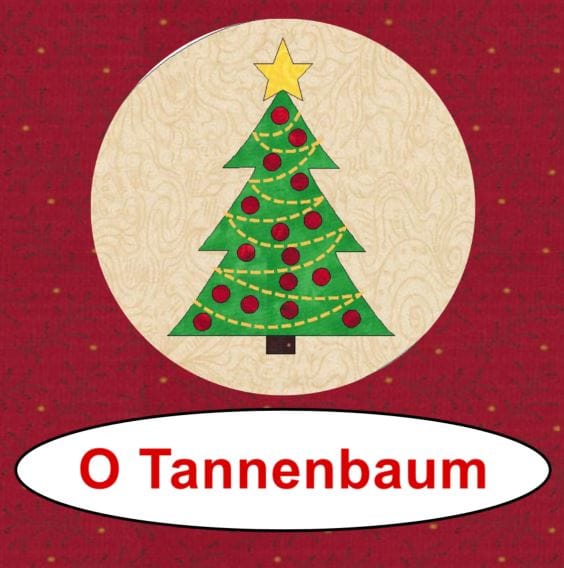
O Tannenbaum Designed in EQ by Kari Schell
It is less than 2 weeks until Christmas. Have you put up your Christmas tree yet?
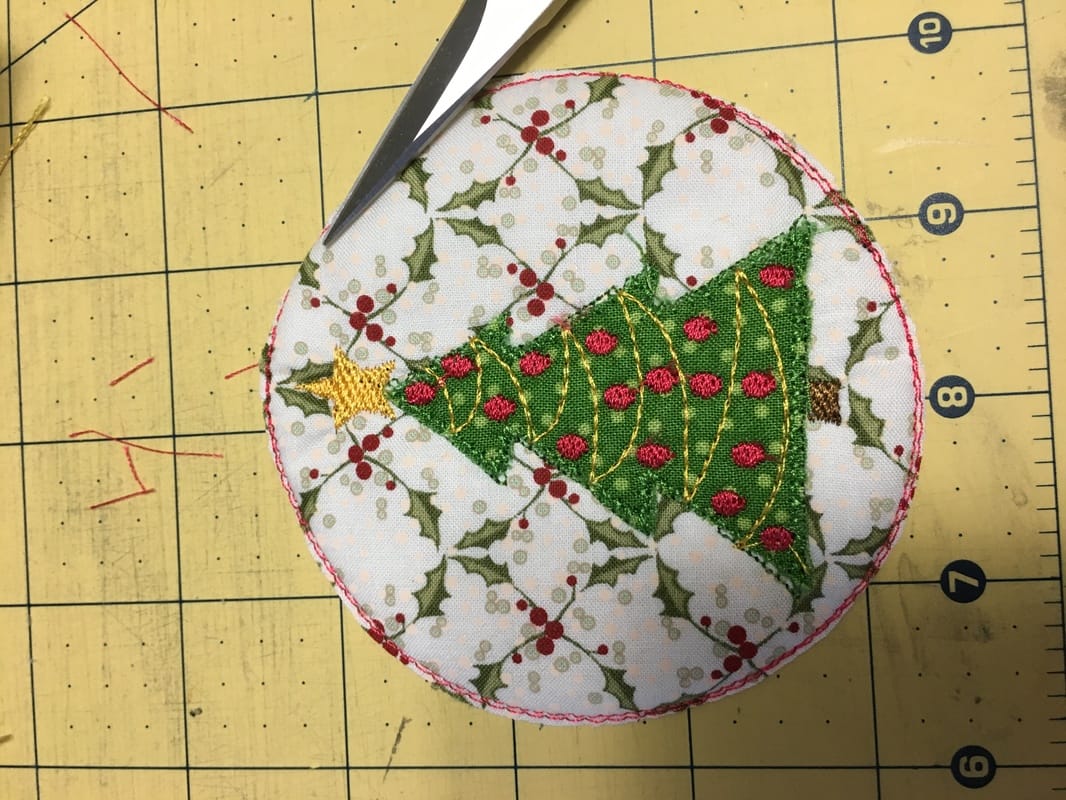
I am sorry to report that there is no tree in my house this year. It is not that I don't like the Christmas season -- I really enjoy it. I've been watching the Christmas movies on the two Hallmark channels since the beginning of November. And the Advent series at church is a reminder of why we really celebrate the season. But I really don't like the work (and the mess) associated with a tree. I've been known to purchase my share of Charlie Brown trees -- that mysteriously tip over in the middle of the night (...with no animals to blame). I decided that this year, my tree would be a quilty one. Just a small item that could be hung on a real tree -- the next time I put one up. Bernina USA had a post on Facebook with a number of Christmas coasters. They were super cute. After looking at them I though that they could be remade using a mixture of applique and embroidery -- and turned into ornaments. 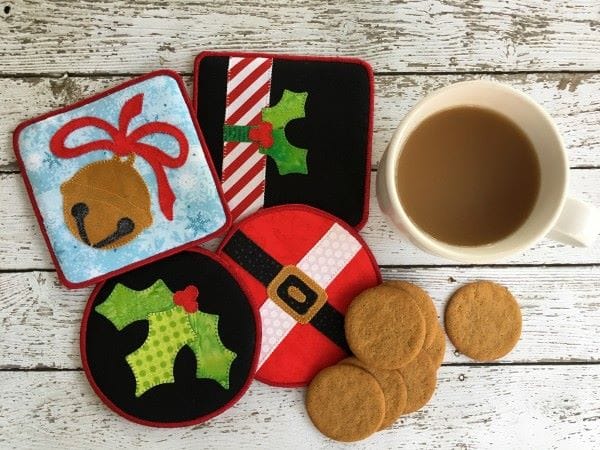
Make it Merry Holiday Coasters from We All Sew `
Here was my rendition of the Santa Claus, redone using Electric Quilt Stitch and my Brother PE500 Embroidery Machine.
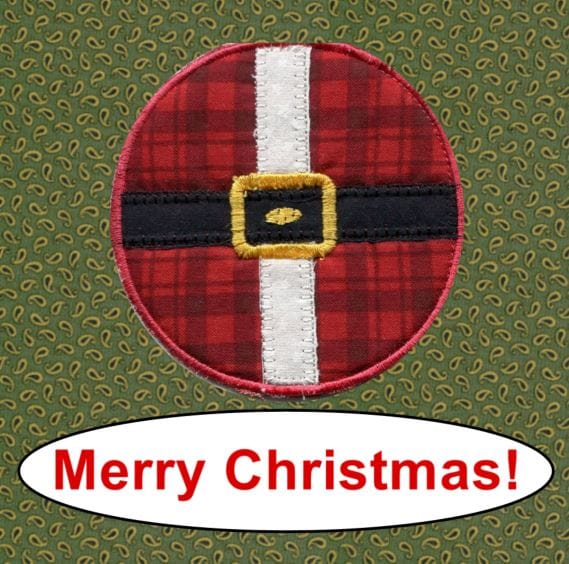
Santa Claus Ornament by Kari Schell, a variation on the pattern by Sandy Fitzpatrick of Hissyfitz Designs
Then I started to think about designing my own applique ornament. I decided to start with a very simple Christmas tree from the EQ library -- and proceeded to decorate it.
My video tutorial today will show you how I chose to decorate my tree. Everything in this tutorial was done in Electric Quilt (EQ Stitch is not required).
Would you like my free pattern for the Christmas Tree ornament?
Consider using small buttons or crystals for the small ornaments. Featured Product Thread Art Bundles
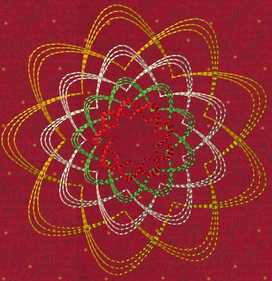
31 separate Spirograph-like designs for embroidery and computerized longarm machines. Watch the slideshow to see all of them. These were stitched at 4 inch on my embroidery machine.
Art and Stitch file included for those who wish to make other modifications of the designs.
I can see these stitched out as ornaments for your tree in the 3.9 inch size.
Bundles are available in the following sizes. Click on the link to be directed to the product in the store.
All Thread Art bundles are economically priced at only $45. Suggestion: Purchase the Miniature or Large Thread Art piecing patterns first. They include a $10 coupon that may be used for purchasing one of the Thread Art digital bundles.
I just received my copy of Fons and Porter's Love of Quilting. I am super excited to report that one of my quilts Snow Day is featured in their January-February issue. 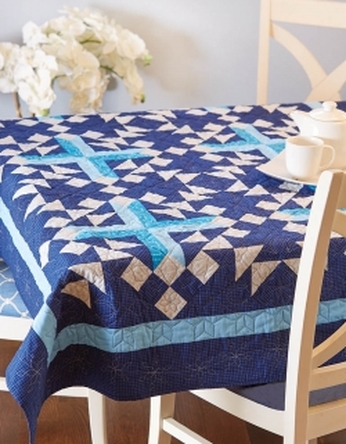 Snow Day by Kari Schell 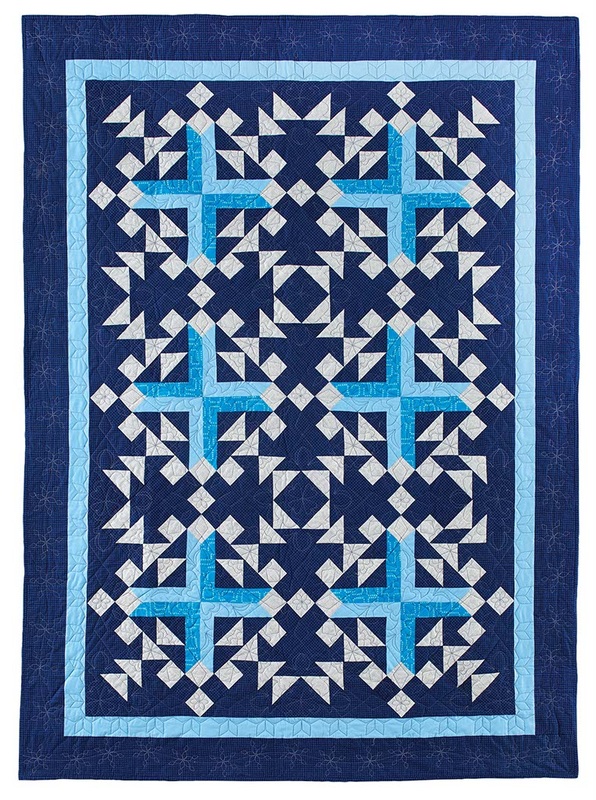 Snow Day Full Quilt Layout by Kari Schell I wish I could take photos of my quilts as well as they do! The blocks in this quilt reminded me of snowflakes. Growing up in North Dakota we had plenty of the white stuff from October through April. We always dreamed of a school snow day (i.e. unplanned vacation day). But living in a big town (35k people) we never had a snow day. We were very jealous of those coming via bus from the base or small outlying communities who frequently got the extra "vacation" day. Now that I work from home -- every day can be a snow day. And I can truly enjoy the white stuff (except when shoveling my driveway). :) Fons and Porter are offering kits if you wish to replicate the fabrics in this quilt. These fabrics are all from Hoffman of California. You may order directly from Fons and Porter here. Snow Day QuiltingMy quilting designs for Snow Day were done in Art and Stitch. Here is a video that shows how I developed my basic snowflake block. Here is a slideshow of the snowflake variations that were used in quilting my Snow Day quilt. I have packaged these digitized quilting designs together and am offering all eight designs at an introductory package price of $25 (regular price of $50). This package is sure to work for your next "winter" quilt. Purchase here.
I hope you had a great Thanksgiving. I had a fabulous time with family in North Dakota. And I made it home before they received 20 inches of snow. Here are a couple of pictures of my niece and nephew enjoying the snow (without me). :)
Last Day of Cyber Week Sale
This week has been all about new technology. New printer, DVD authoring software, new recording and editing software, new video hosting software. I've been putting it off because new software means lots of "learning" time and usually a fair amount of frustration when things don't work the way my brain thinks they should work. Can you relate?
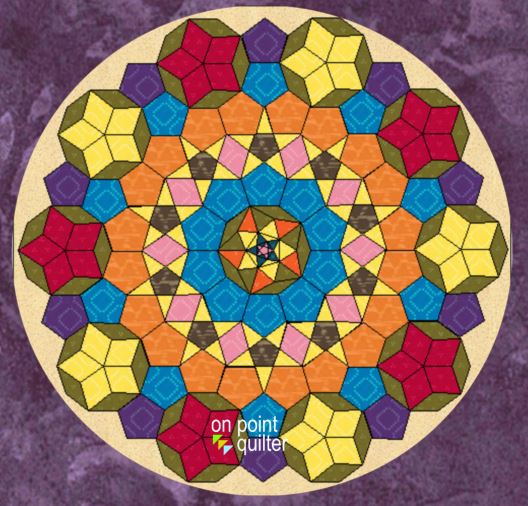
If you are currently feeling that way about Electric Quilt (or occasionally have those times when you just can't figure out how to draft your dream project), you may be interested in my one hour Electric Quilt coaching calls. These calls will involve screen sharing so I can help you create your project in Electric Quilt. And ... these sessions are on sale for 50% off for one more day. Purchase now and use within the next 12 months. Remember to use BlackFriday in the coupon code to receive savings. Purchase here. Pentagon Rosette
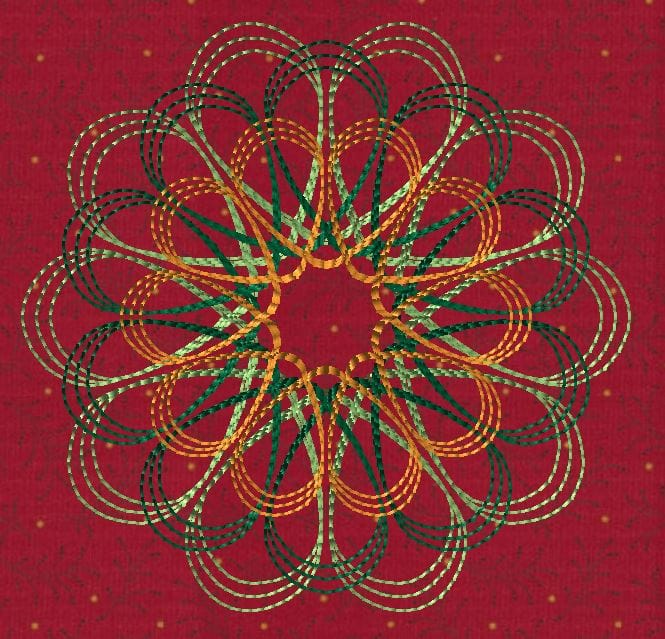
For the past couple of weeks we have been drafting pentagon and decagon blocks. Did you create some new pentagon blocks during your Electric Quilt time? This week's Electric Quilt video will cover how to set those block motifs in a quilt.
Here is the rosette from the video.
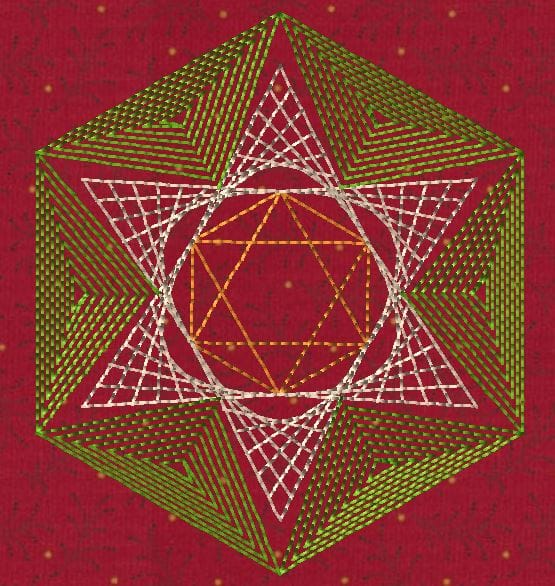
Rosette #1 created with Hoffman Indah Hand Died Fabrics
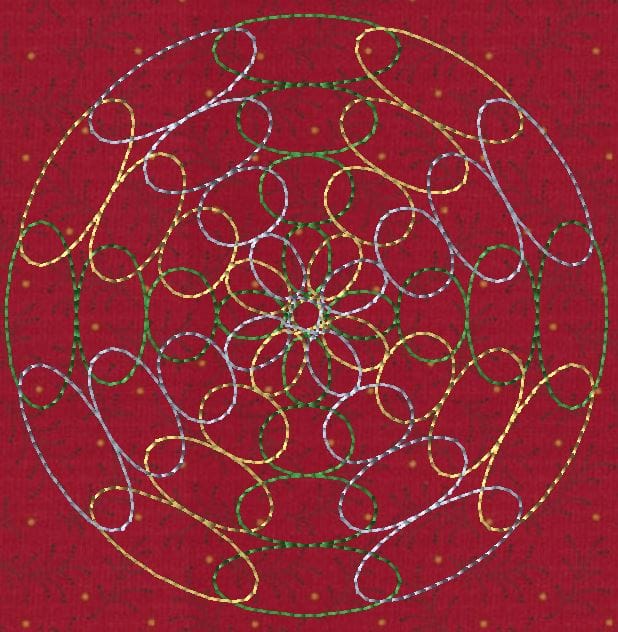
If you like playing with rosettes, here is another one for you to try.

Rosette #2 in Hoffman Indah Hand Died Fabrics
I hope you enjoyed this series.
|


Free guide available for newsletter subscribers


Kari SchellElectric Quilt Expert and Educator and Pattern Designer. Categories
All
Archives
July 2024
|


 RSS Feed