
|
If you haven't signed up for the free EQ8 webinar, here is your last chance. Even if you cannot attend live, sign up to receive the replay (which will be available for 48 hours).
Then scroll down to see the easiest way to use a custom set layout for your next quilt. This is so fun, it may become your go to method for future quilt designs. Easter Egg Hunt Free EQ8 Live Webinar is Sunday and Monday
Create a Fabulous Easter Quilt with Foundation Piecing and A Bit of Appliqué

How many times have you wanted to create a new quilt, but struggled with your own drawing skills? That blank piece of paper (or blank computer screen) can seem super intimidating. And often those initial efforts can cause us to give up.
But what if you could get beyond bad drawing skills?
Let me show you how to quickly get past the challenges of drawing both applique and foundation blocks using Electric Quilt 8. When you join my free Electric Quilt 8 webinar, I will take you step by step through the entire process to create your own Easter Egg Hunt quilt. In this live webinar, you will learn how to: 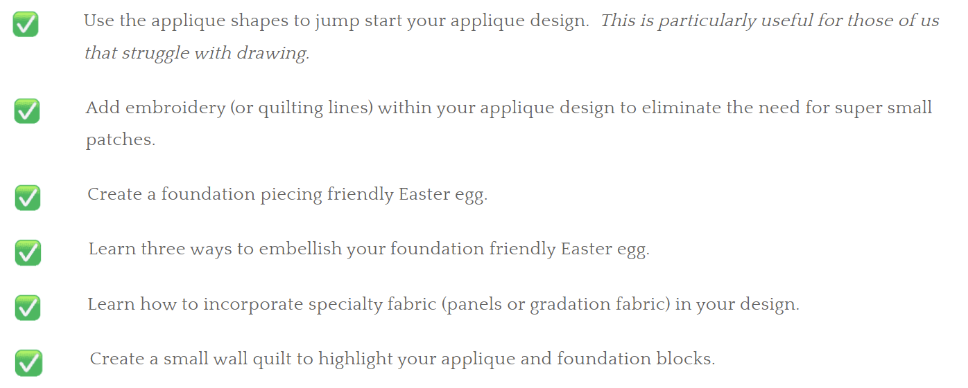
What are you waiting for? Join us today.
PLUS all participants will also receive a guidebook that you will be able to use as a reference both during and after the video. This will provide you with all the steps (complete with illustrations) to ensure that you can draft the blocks and quilt from the webinar. I am super excited to see your future Easter/spring quilt (either the Electric Quilt version or the real quilt). Join us now.
Free Webinar Registration Information
Choose the time that works the best below and register for this amazing fun webinar. You won't be disappointed. For all those that attend live, I will be offering a special bonus offer as well. Make sure to join me. I can't wait to see you there. A replay will be available for 48 hours if you cannot attend live.
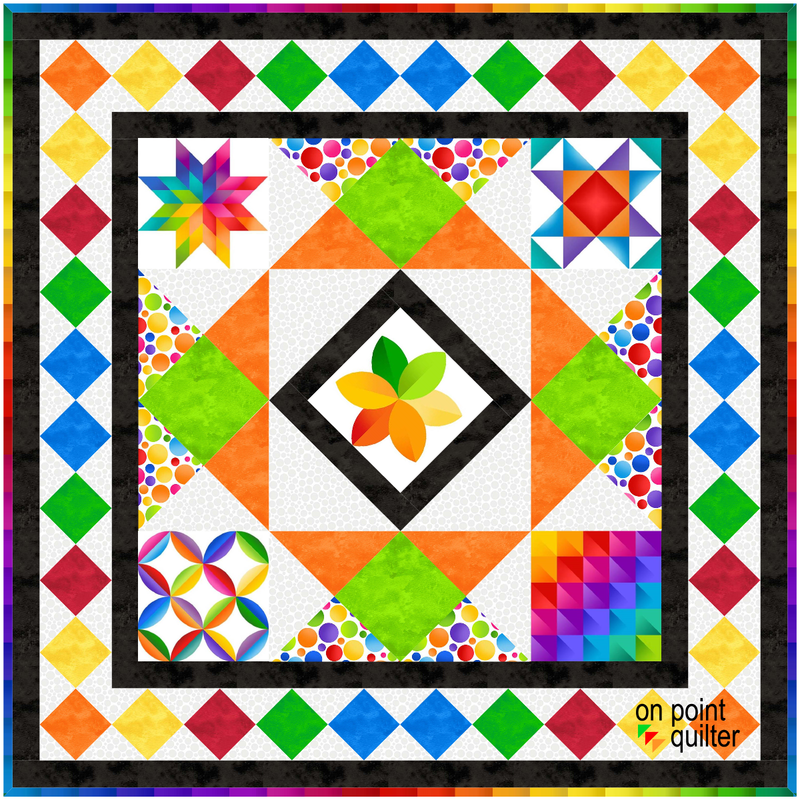
Pre-Made Custom Set Panel Quilt
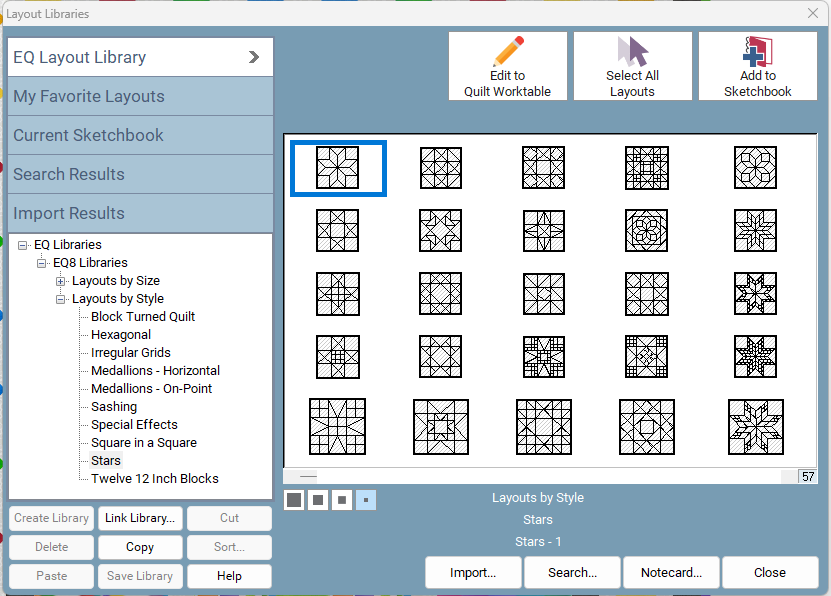
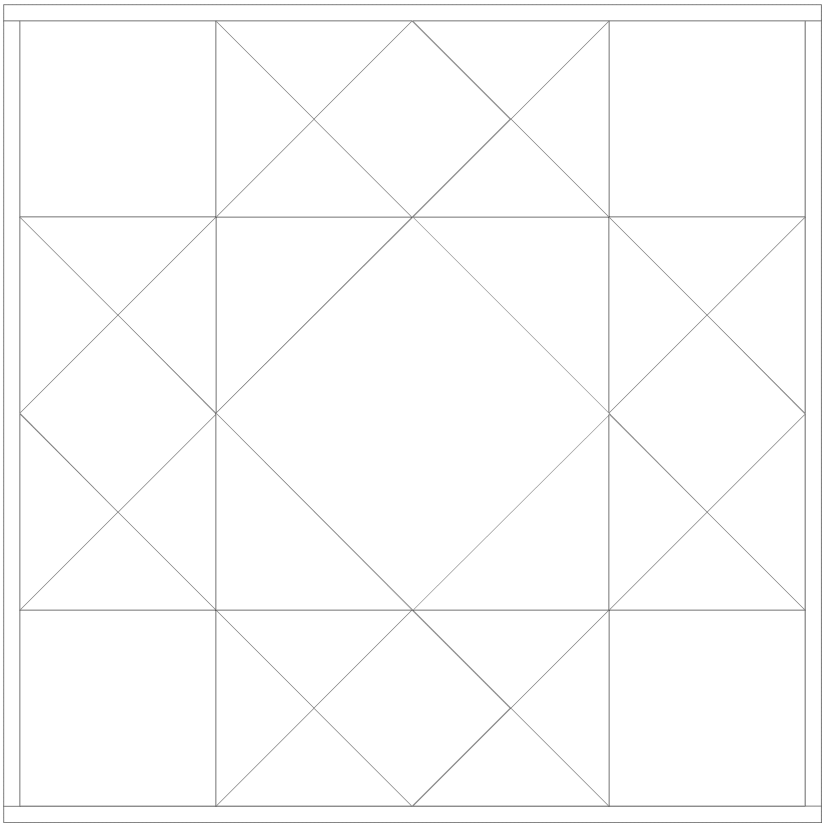
Did you know that Electric Quilt has a huge collection of pre-done custom set layouts? It gives us the benefit of being able to use unique designs for quilts that are not based on a standard quilt layout -- with a minimal amount of work.
Here is the final quilt from the video. Pretty fun and can you believe there is only one pieced block in the entire quilt.
I would love to see what you do with the concepts from this video. Consider trying it with a different set of fabrics or even a different layout. Post a picture in the Learning EQ Facebook post.
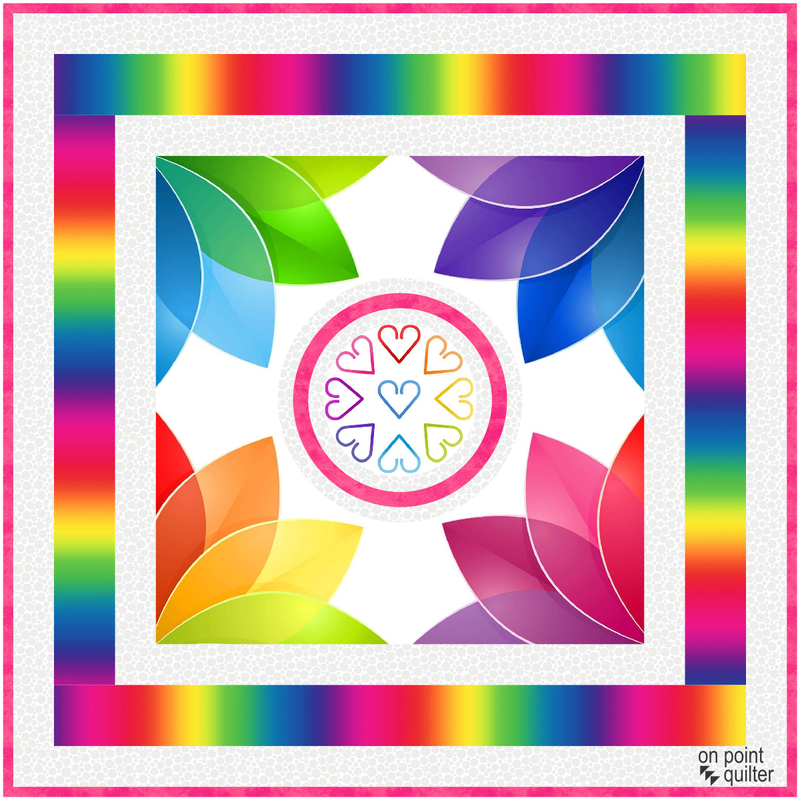
WARNING When the fabric arrived, I found that the size stated on the Northcott site was incorrect. The width of the actual panel was over 27". Not the 24" as stated on their website. From tip to tip the center flower measured 22-1/4". The individual blocks measured around 7-1/8" inches. So it is necessary to resize the panel image in Electric Quilt before using it in blocks or a quilt.
Within EQ there are two different options for working with panels. One is to treat them as a block and the other is to treat them as fabric. If the image is saved as fabric, it can be used to color a block -- or even color patches within a block. In this tutorial we will be treating the panel as fabric.
In the video, I include information on importing fabric from multiple sites, resizing the panel and creating the quilt.
Here is the quilt from the video. For those that are wondering, I would applique the finished PolyDraw block (with the hearts) on top of the four center blocks. Other than that block this would be super simple to piece -- a true quilt in an hour (minus the quilting of course).
Since I purchased the panels, I have decided to give one away. Create your own quilt that includes at least part of the panel and post in the Learning EQ Facebook group -- before Thursday March 23, 2023 at midnight. I will randomly select from quilts posted to the designated post on Friday and let you know the winner next week.
Easter Egg Hunt Free EQ8 Live Webinar Registration Now Open
Create a Fabulous Easter Quilt with Foundation Piecing and A Bit of Appliqué

How many times have you wanted to create a new quilt, but struggled with your own drawing skills? That blank piece of paper (or blank computer screen) can seem super intimidating. And often those initial efforts can cause us to give up.
But what if you could get beyond bad drawing skills?
Let me show you how to quickly get past the challenges of drawing both applique and foundation blocks using Electric Quilt 8.
When you join my free Electric Quilt 8 webinar, I will take you step by step through the entire process to create your own Easter Egg Hunt quilt. In this live webinar, you will learn how to:

What are you waiting for? Join us today.
PLUS all participants will also receive a guidebook that you will be able to use as a reference both during and after the video. This will provide you with all the steps (complete with illustrations) to ensure that you can draft the blocks and quilt from the webinar. I am super excited to see your future Easter quilt (either the Electric Quilt version or the real quilt). Join us now.
Free Webinar Registration Information
Choose the time that works the best below and register for this amazing fun webinar. You won't be disappointed.
For all those that attend live, I will be offering a special bonus offer as well. Make sure to join me. I can't wait to see you there. A replay will be available for 48 hours if you cannot attend live.
Two things to cover today.
Easter Egg Hunt Free EQ8 Live Webinar Registration Now OpenCreate a Fabulous Easter Quilt with Foundation Piecing and A Bit of Appliqué How many times have you wanted to create a new quilt, but struggled with your own drawing skills? That blank piece of paper (or blank computer screen) can seem super intimidating. And often those initial efforts can cause us to give up. But what if you could get beyond bad drawing skills?
Let me show you how to quickly get past the challenges of drawing both applique and foundation blocks using Electric Quilt 8. When you join my free Electric Quilt 8 webinar, I will take you step by step through the entire process to create your own Easter Egg Hunt quilt. In this live webinar, you will learn how to: 
What are you waiting for? Join us today. PLUS all participants will also receive a guidebook that you will be able to use as a reference both during and after the video. This will provide you with all the steps (complete with illustrations) to ensure that you can draft the blocks and quilt from the webinar. I am super excited to see your future Easter quilt (either the Electric Quilt version or the real quilt). Join us now. Free Webinar Registration Information Choose the time that works the best below and register for this amazing fun webinar. You won't be disappointed. For all those that attend live, I will be offering a special bonus offer as well. Make sure to join me. I can't wait to see you there. A replay will be available for 48 hours if you cannot attend live.
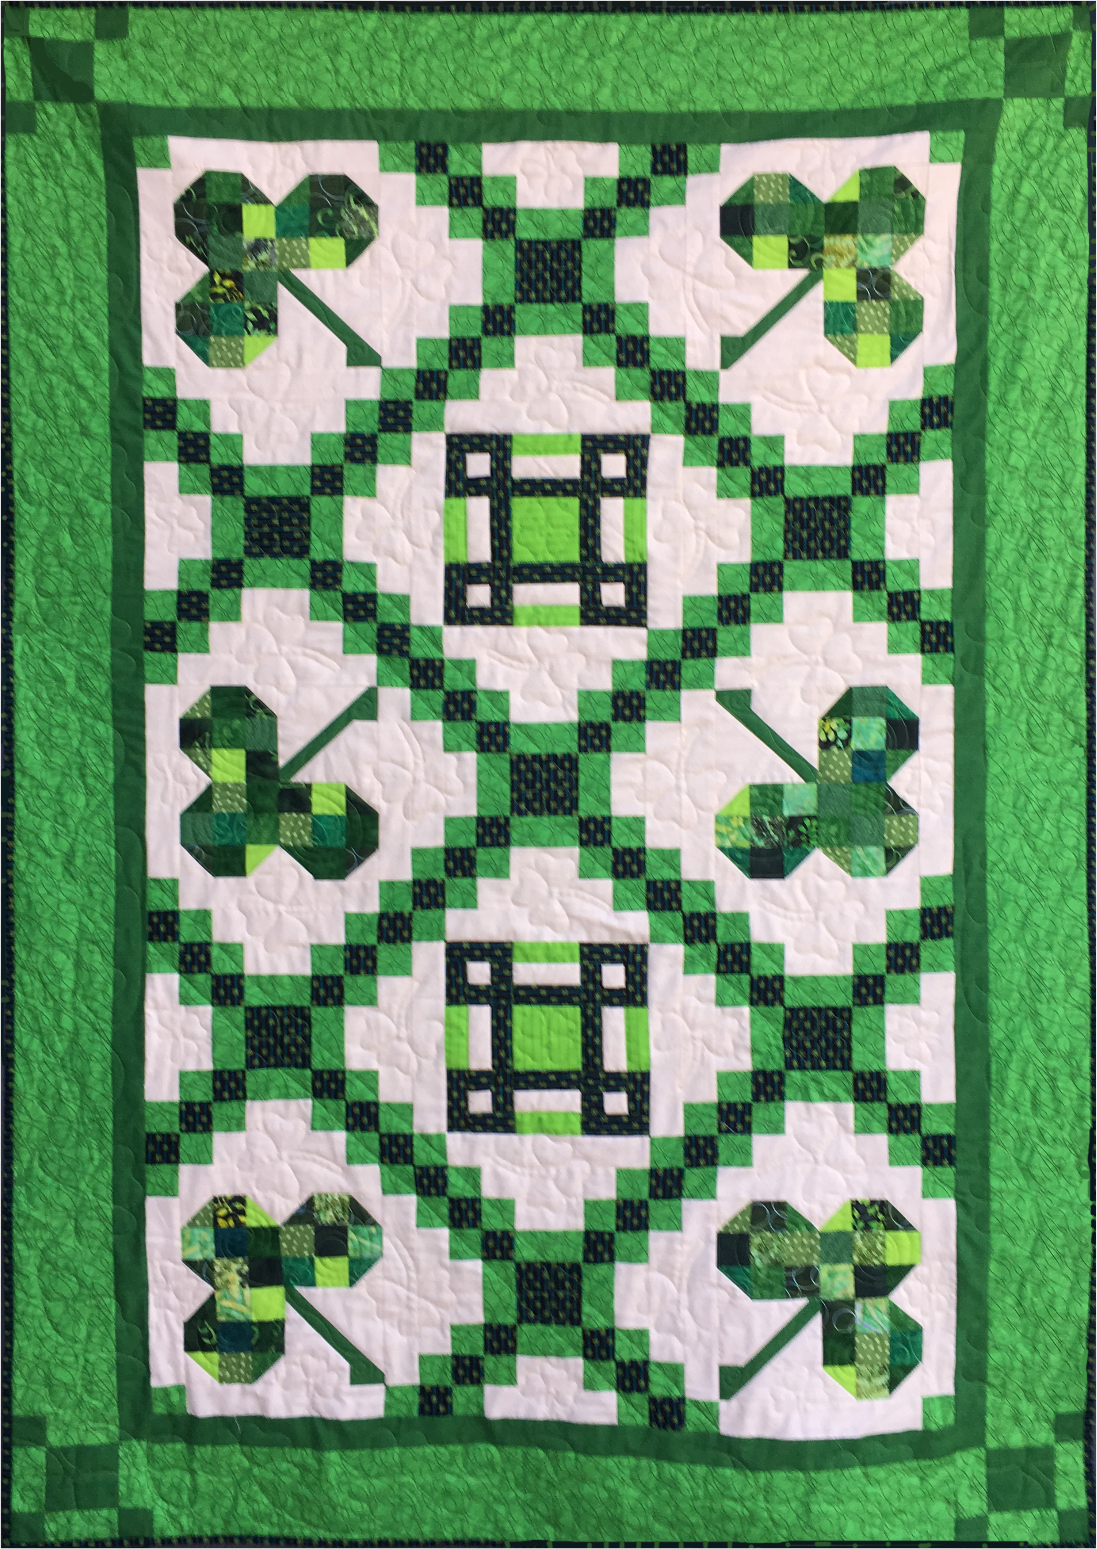
Shamrock Quilt - From Design to Production
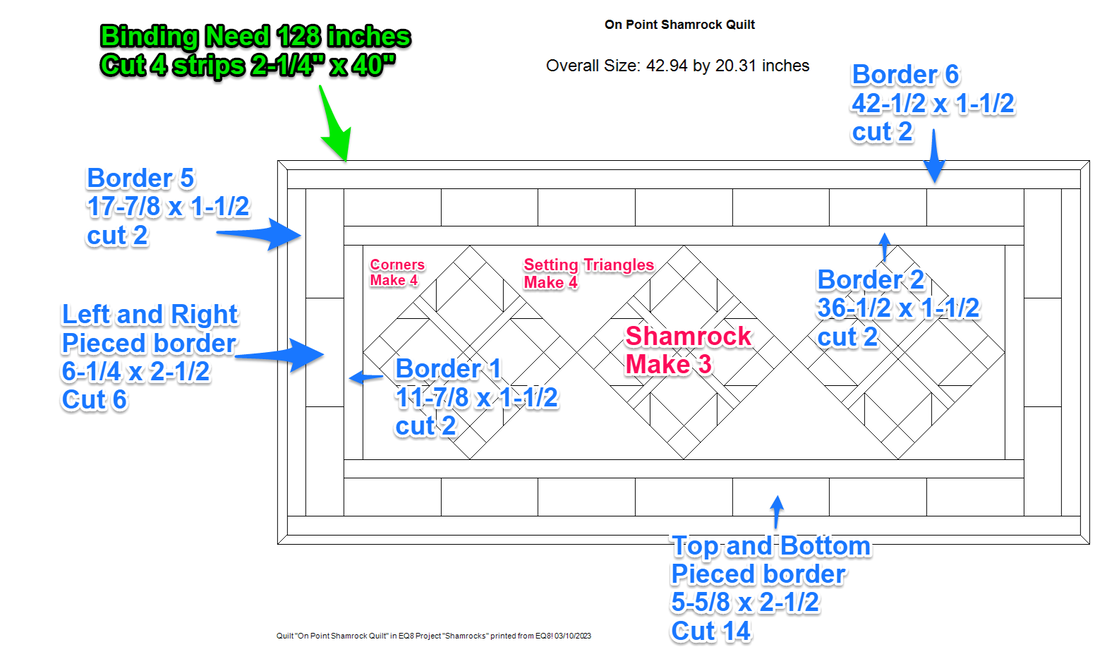
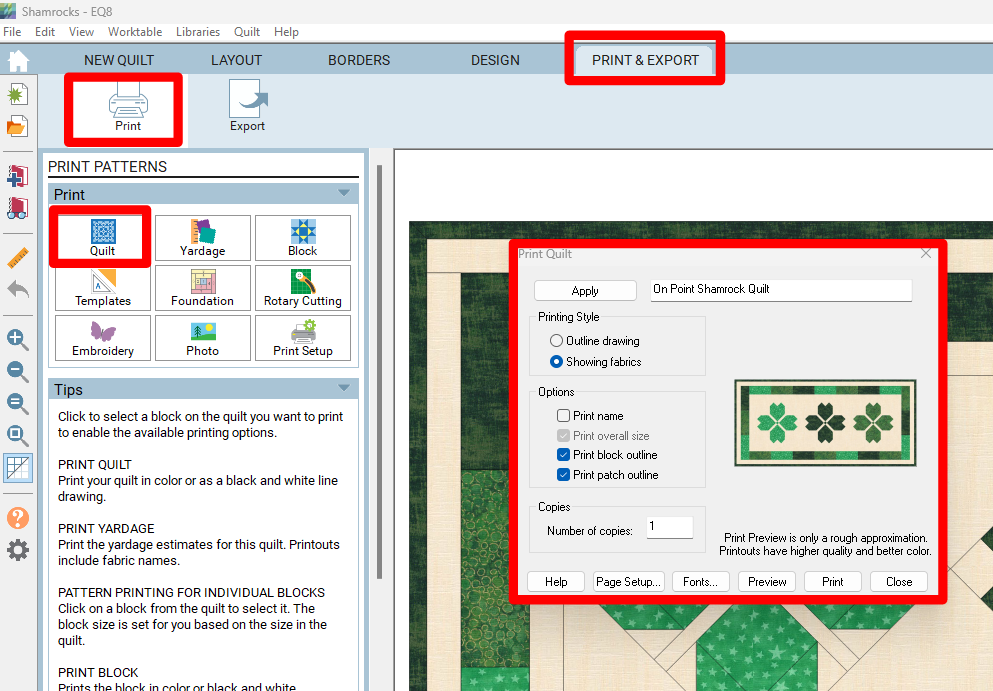
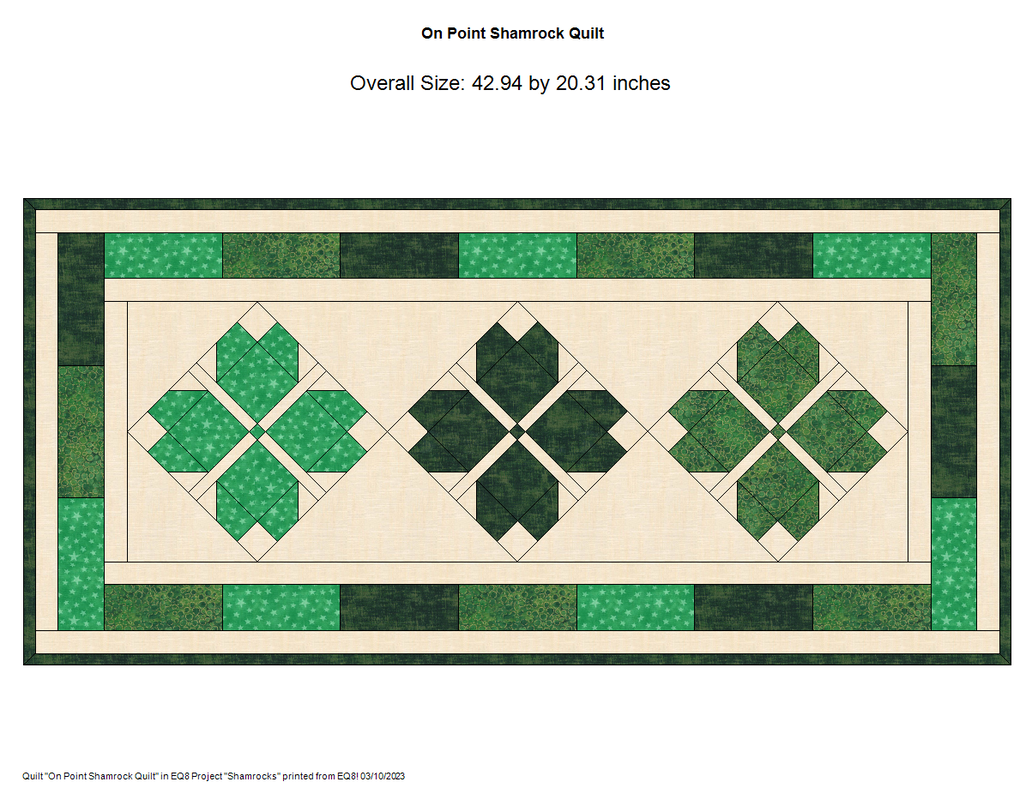
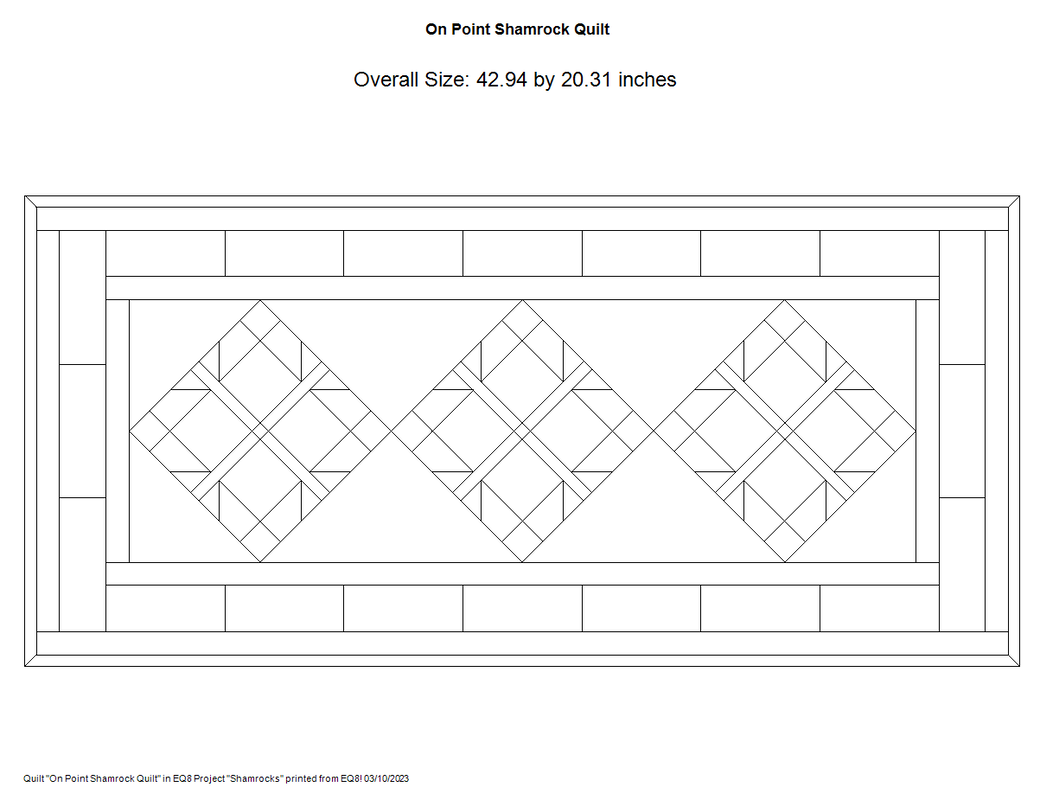
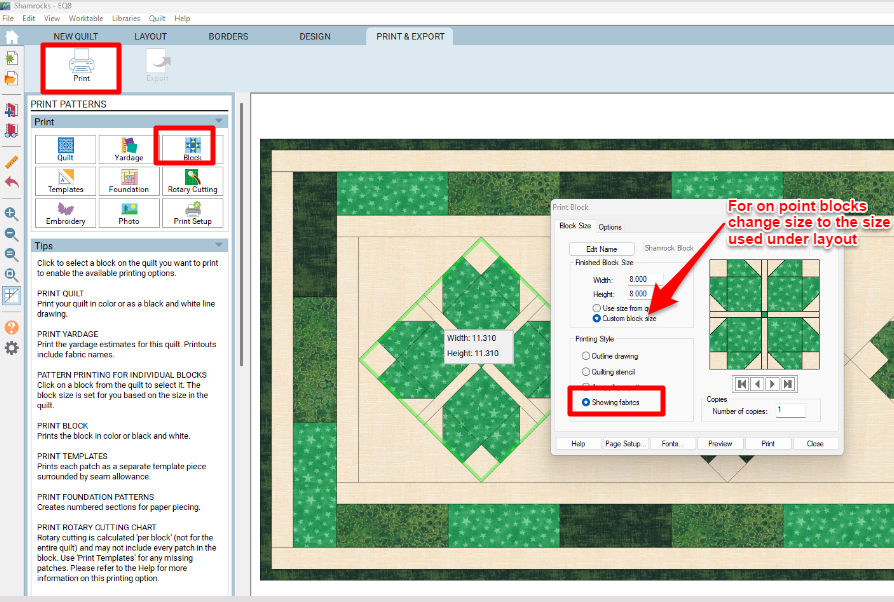
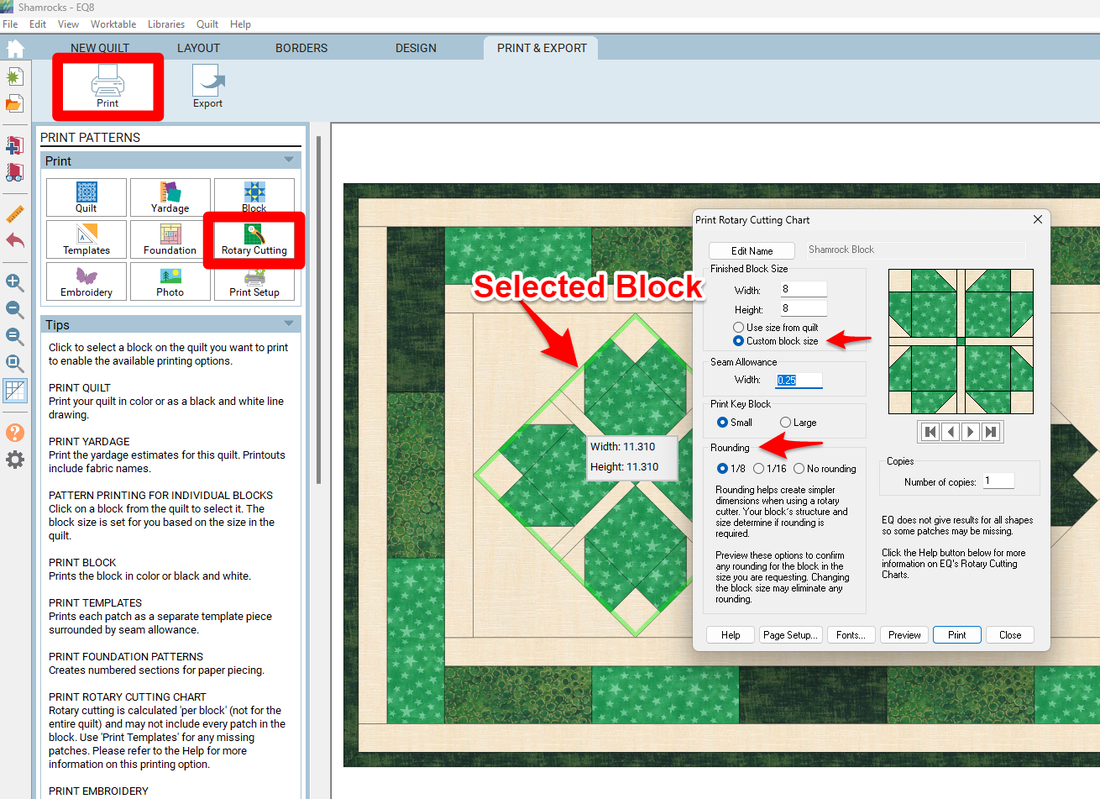
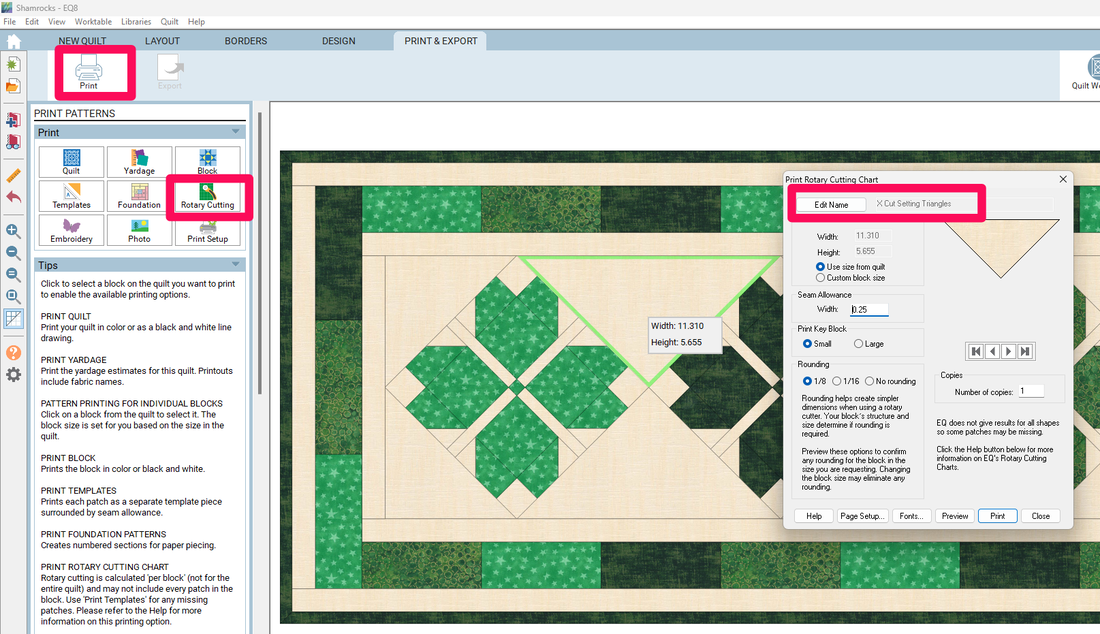
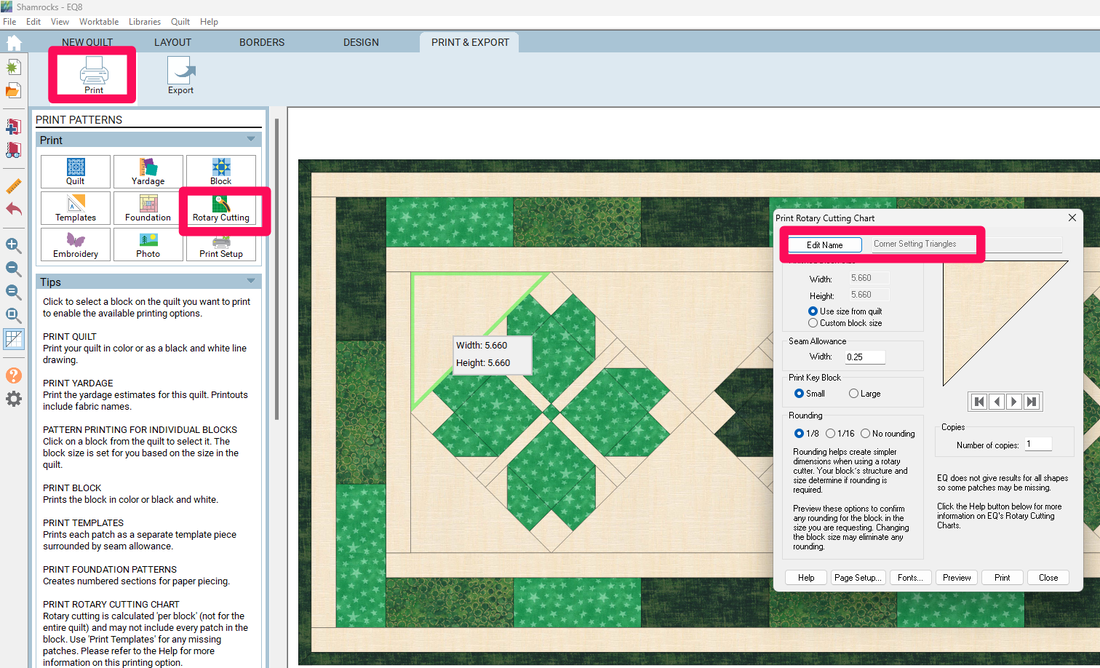
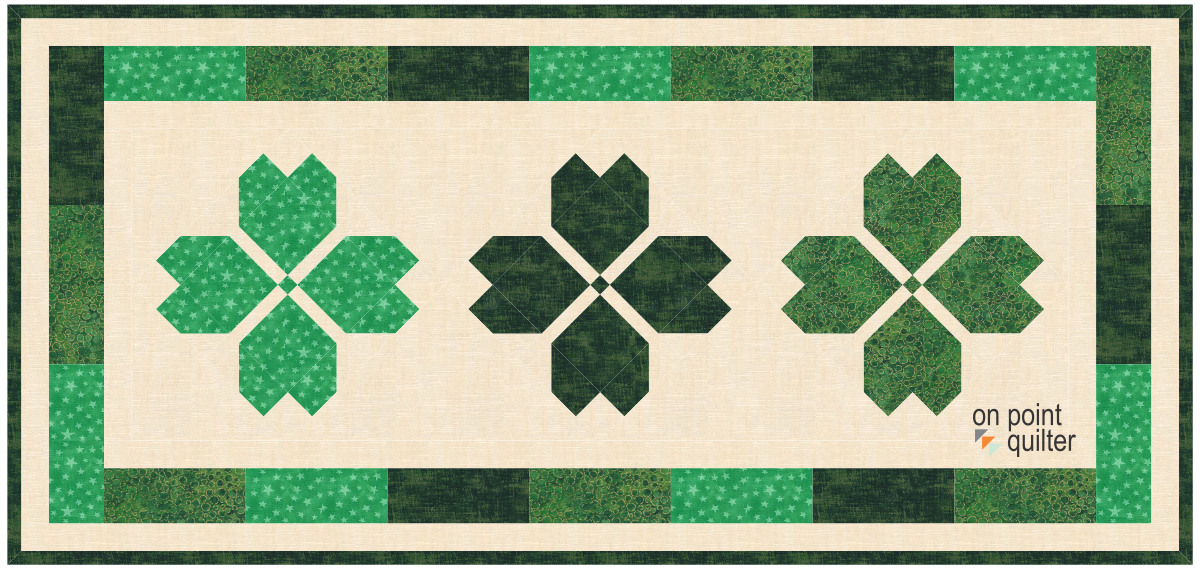 Shamrocks On Point Layout by Kari Schell Drawn in EQ8 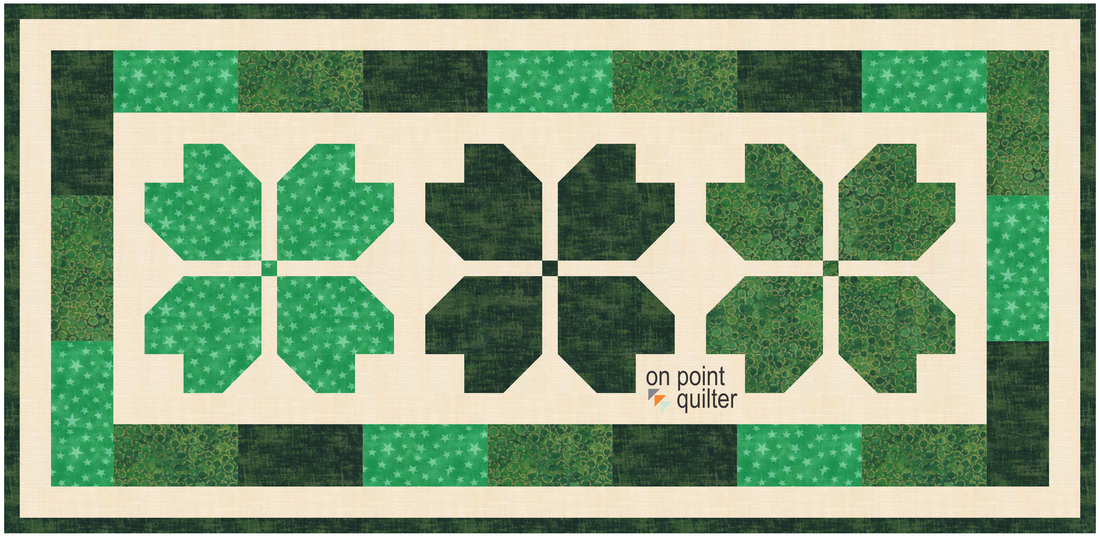 Horizontal Shamrock Quilt Drafted in EQ8 by Kari Schell Once you design a quilt in Electric Quilt, the challenge I frequently hear is how to piece your quilt. Electric Quilt does not spit out "patterns" similar to what we purchase at the quilt shop. But it does give us everything we need to make our quilts. I will take you through my "production" process for the on point shamrock quilt above. I've annotated this on my computer -- so you can easily read everything. But if this is for personal use only, I will just jot my notes on the printed versions. I will then keep everything together with my fabrics and whatever I have completed of the project.
Here are the two print exports I always produce for my quilts. More on how I use the outline drawing below.
Setting Triangles
Corner Triangles
Border and Binding Instructions
 Quilt Outline Annotation for Quilt Construction For those in Tech Know Quilters, there is an entire class on "From Design to Production". I was on a call with some of the members this week; where a number stated that this particular class was one they continue to go back to. Not only for the how to -- but the cheat sheets that are provided as well. Send me a note if you would like this as an add-on class. Either starting now or next month. For those not in Tech Know Quilters -- I would love to have you join us. There will be an opportunity to join at the end of the month. Make sure you are on my mailing list to get information when enrollment opens.
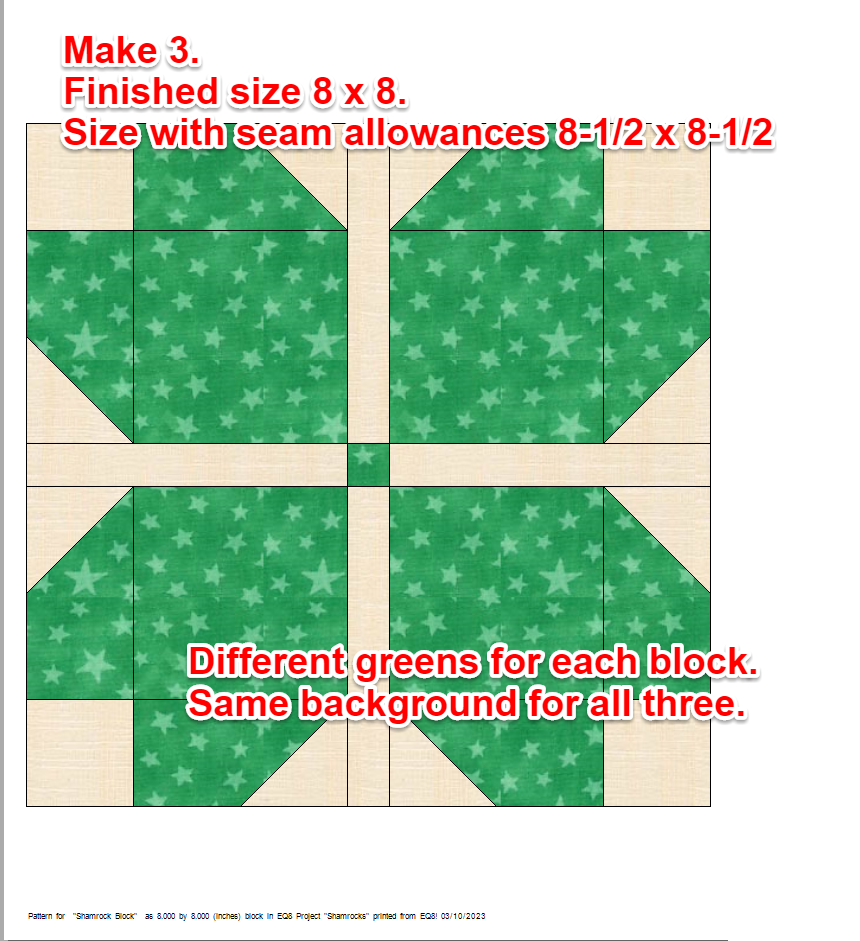
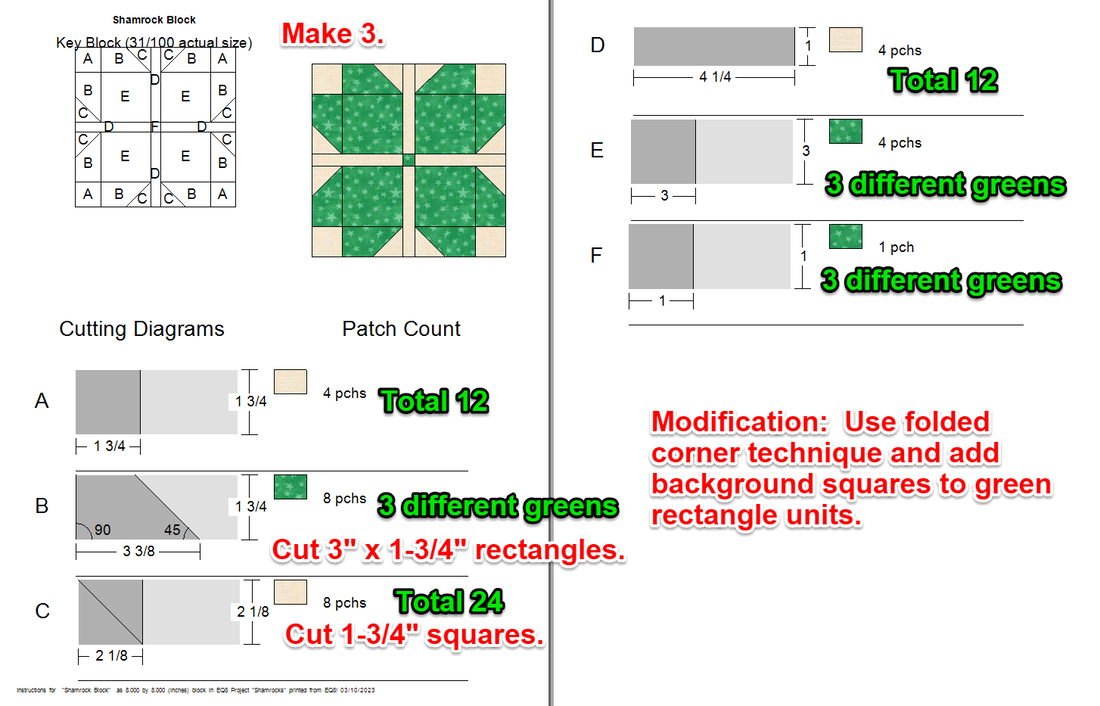
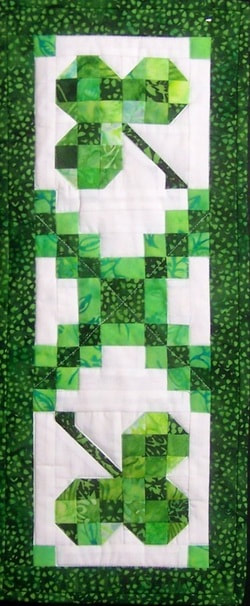
.Over the years I have done a number of Shamrock quilts. I tend to keep them small -- which works for some decorating around St. Patrick's Day.
These three were compiled in a pattern I released in 2017. You can purchase a digital version of the pattern here for $10.
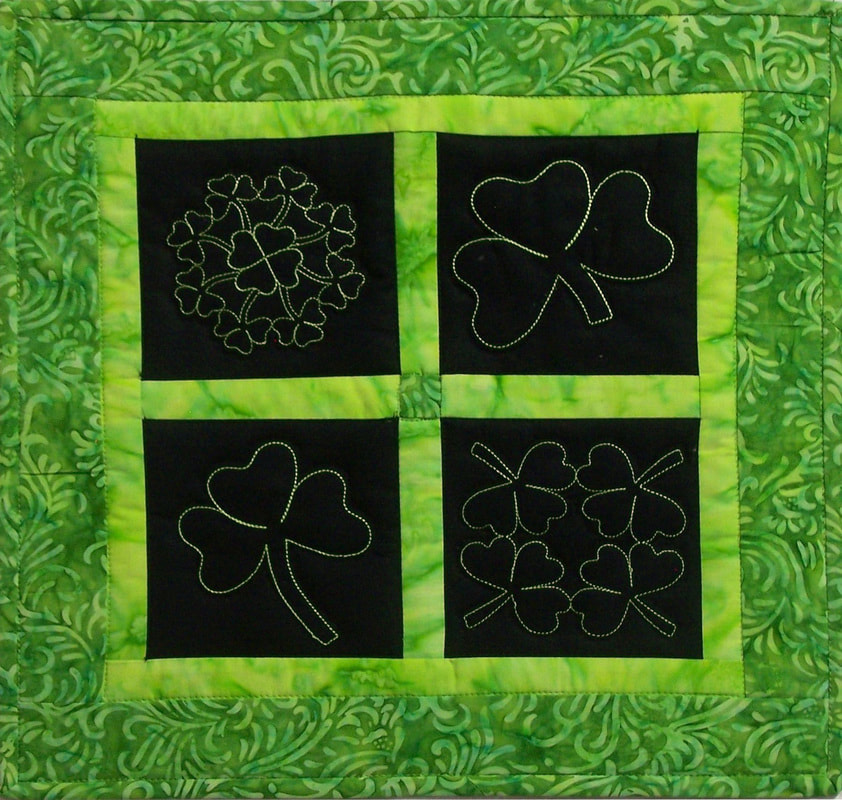
Here is my latest desktop design on my computer (from the Tech Know Quilter Calendar Quilts class.
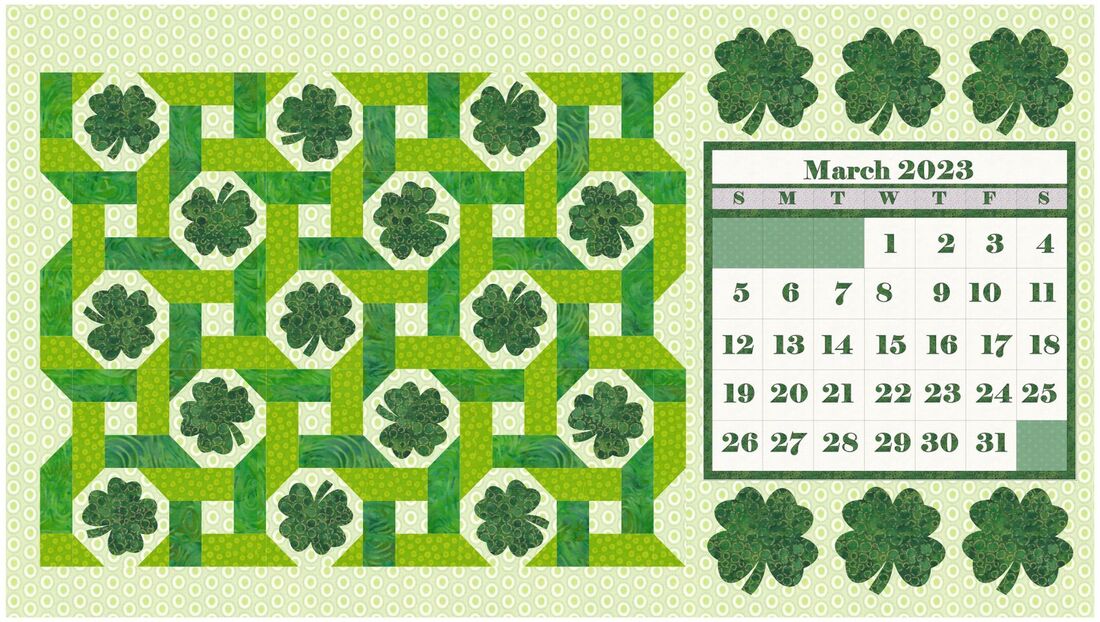
Shamrock Quilt Created for TKQ Calendar Quilt class
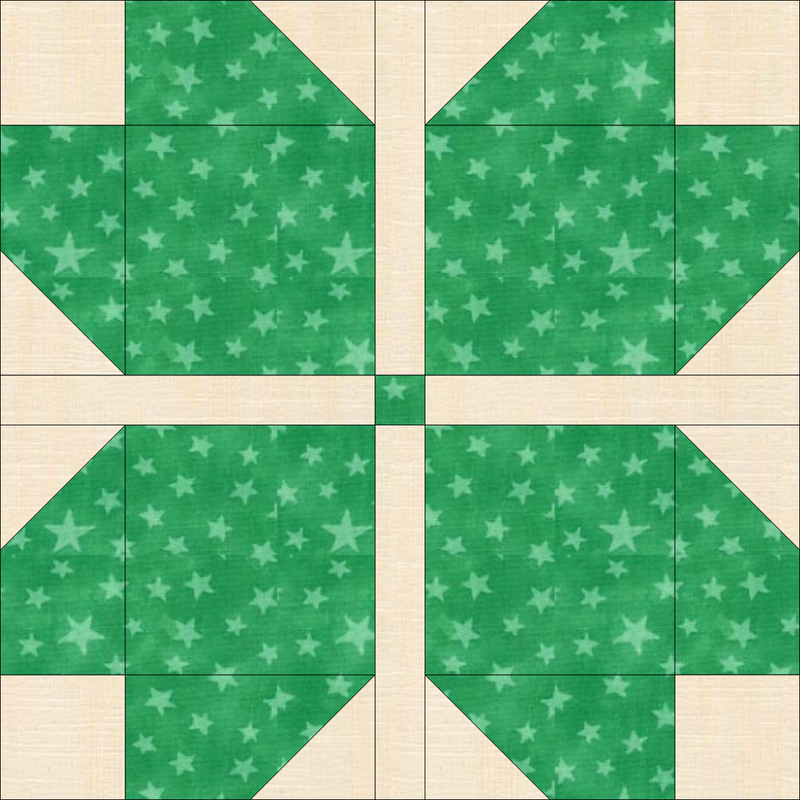
Shamrock Block and Quilts - EQ8 Tutorial
In my free tutorial this week, I will be sharing a new design. This one would be super simple to piece (and quilt in a day).
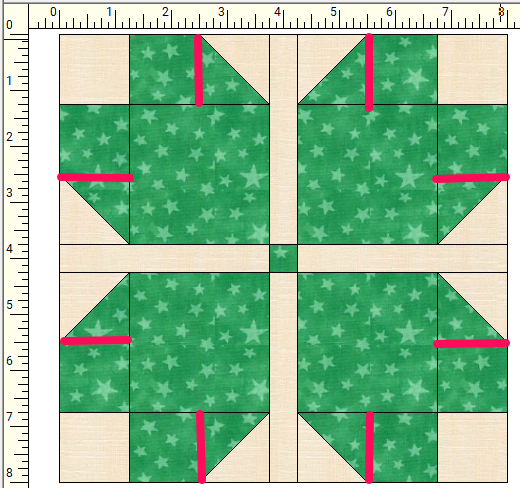
My one rule I gave myself for designing the quilt -- was only squares, rectangles, and triangles that are considered either half-square (two triangles per square) or quarter square (four triangles per square).
I ended up playing with two different quilt designs -- an on point version and a horizontal version. I think you will like my suggestion in the video on copying the borders from one layout to another.
The on point layout has a finished size of 42-1/2" x 20". The horizontal layout has a finished size of 35" x 17". I am curious which of the layouts you prefer. 
Shamrocks On Point Layout by Kari Schell Drawn in EQ8

Horizontal Shamrock Quilt Drafted in EQ8 by Kari Schell
One quick trick -- if you see those white seam lines on your image when exporting, try bringing the DPI up to 600. It will often eliminate those faint light lines.
Here is the video where I will walk you through creation of the block along with both quilts.
I think this would be a fantastic layout for more than just the shamrock block. Go ahead and experiment with another block -- either one you drew or a block from the EQ library. Share your designs in the Learning EQ Facebook post. I've set up a separate post for your designs.
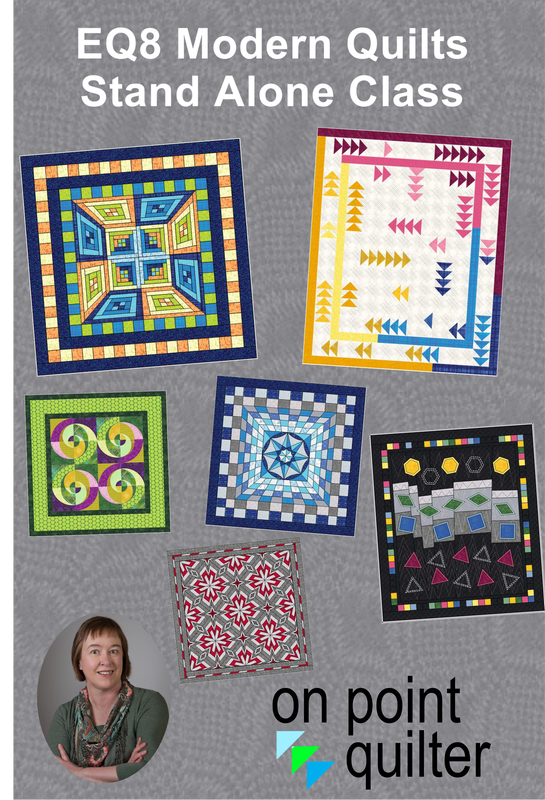
EQ8 Modern Quilts Class -- March Special Opportunity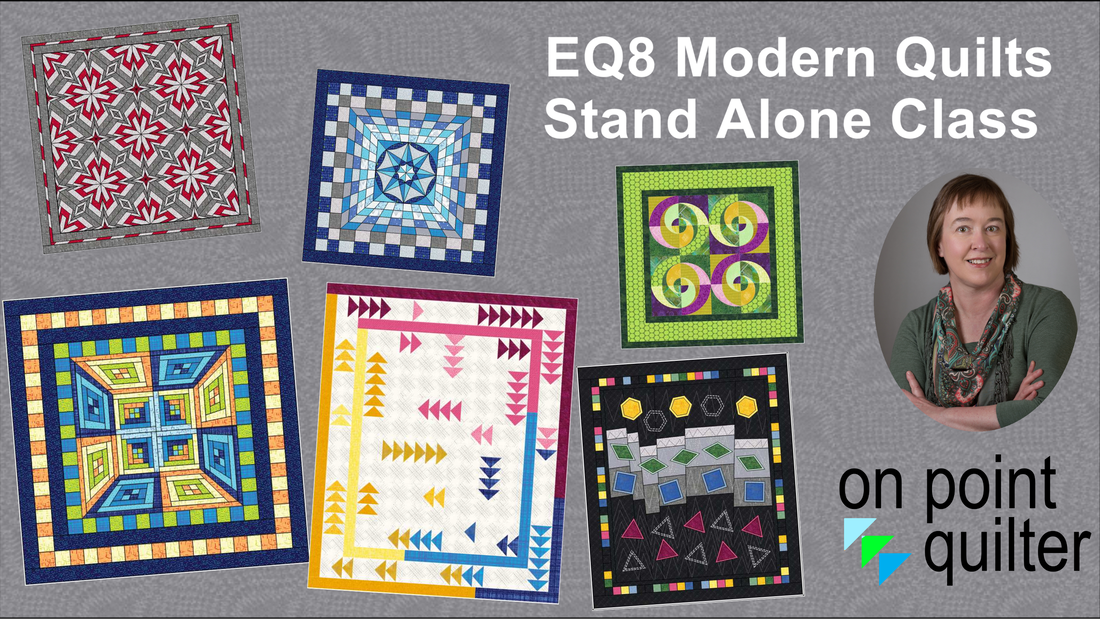
Would you like to take this class? I've decided to offer it as a stand alone class available for purchase during March 2023. The class is considered an Advanced Beginner class -- which means you have some experience in working in EasyDraw and have created some basic quilt layouts.
The Modern Quilt Guild notes that Modern quilts are primarily functional and inspired by modern design. Modern quilters work in different styles and define modern quilting in different ways, but several characteristics often appear which may help identify a modern quilt. These include, but are not limited to: the use of bold colors and prints, high contrast and graphic areas of solid color, improvisational piecing, minimalism, expansive negative space, and alternate grid work. "Modern traditionalism" or the updating of classic quilt designs is also often seen in modern quilting
Join me as we create our own modern quilts using EQ8 -- including a collection of quilts from a spiral square, improvisational designs (including a Gees Bend Challenge), fractured quilts, 3D quilts, and spiral art.
Current Tech Know Quilter members, please contact me if your wish to take this as an add-on class in March. The class currently exists in TKQ and there are added discounts for current TKQ members.
|


Free guide available for newsletter subscribers


Kari SchellElectric Quilt Expert and Educator and Pattern Designer. Categories
All
Archives
July 2024
|


 RSS Feed