
|
Included in this blog post:
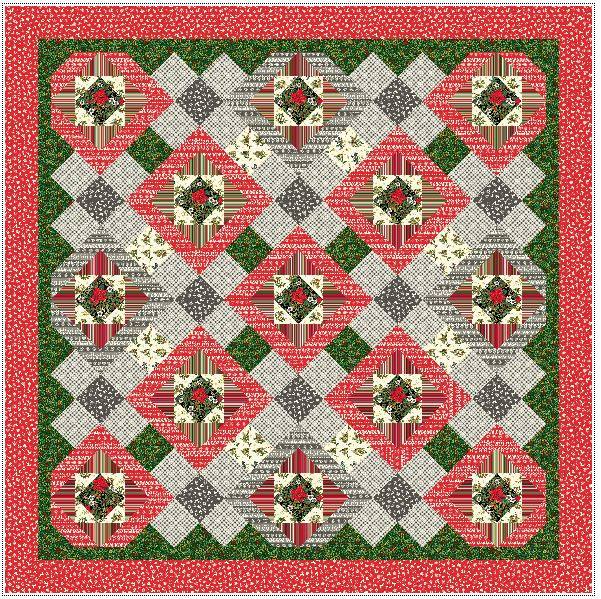
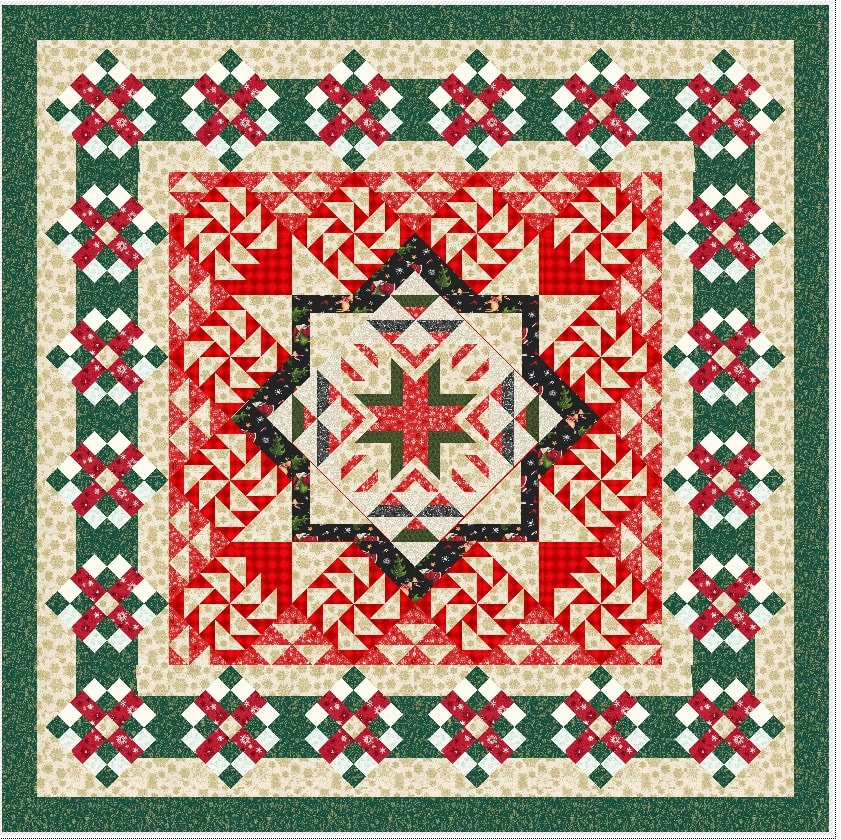
Merry Christmas - New Pattern Release
How to Construct a Quilt Designed in Electric Quilt using Folded Corners
One question I am frequently asked is -- "How do I make a quilt that I designed in Electric Quilt?"
There are many ways to approach piecing a block. I love working with folded corners as all the pieces are squares and rectangles. No cut triangles are required when using this technique. I will share my suggestions for creating folded corner cutting charts for your Electric Quilt blocks. What is a Folded Corner?
Back when I started quilting, I had a book from Mary Ellen Hopkins entitled "It's OK if you Sit on My Quilt Book". In this book she introduced the quilting world to connector corners. I think this may have been one of the techniques that revolutionized modern day quilting. Over the years I have heard a number of names for the technique including "cheater corner" and "folded corner".
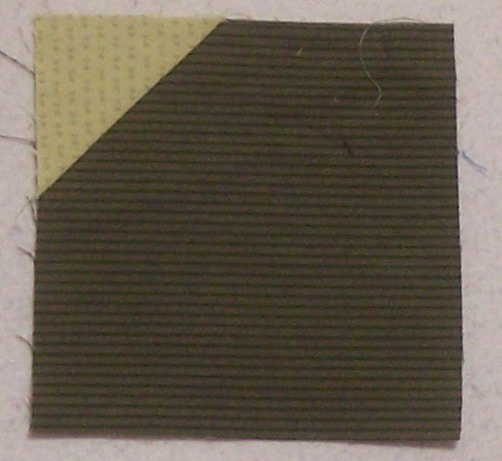
The technique refers to a method of adding triangles to a quilt block using only square or rectangle pieces of fabric. It is frequently the suggested method for creating snowball blocks, square within a square units and flying geese units.
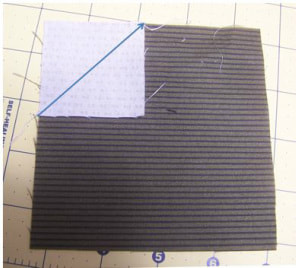
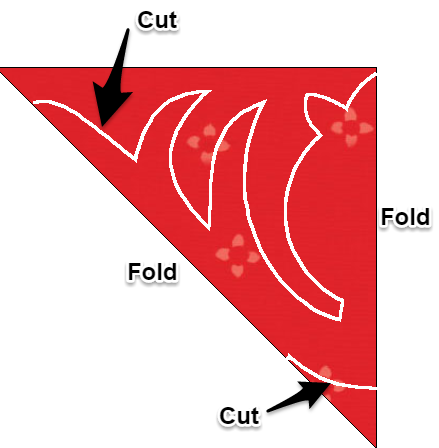
Simple Folded Corner Construction
Draw a diagonal line on the wrong side of a folded corner piece from corner to corner.
Drafting Cutting Charts for Folded Corner Blocks
As you can see, piecing a folded corner block is super simple!
However when we design in Electric Quilt, EQ does not give us rotary cutting measurements that are conducive to using the folded corner technique. My video tutorial will share with you how to create cutting charts that utilize the folded corner construction technique. This technique works best for blocks with patches that are square or rectangle and have 45 degree angles.
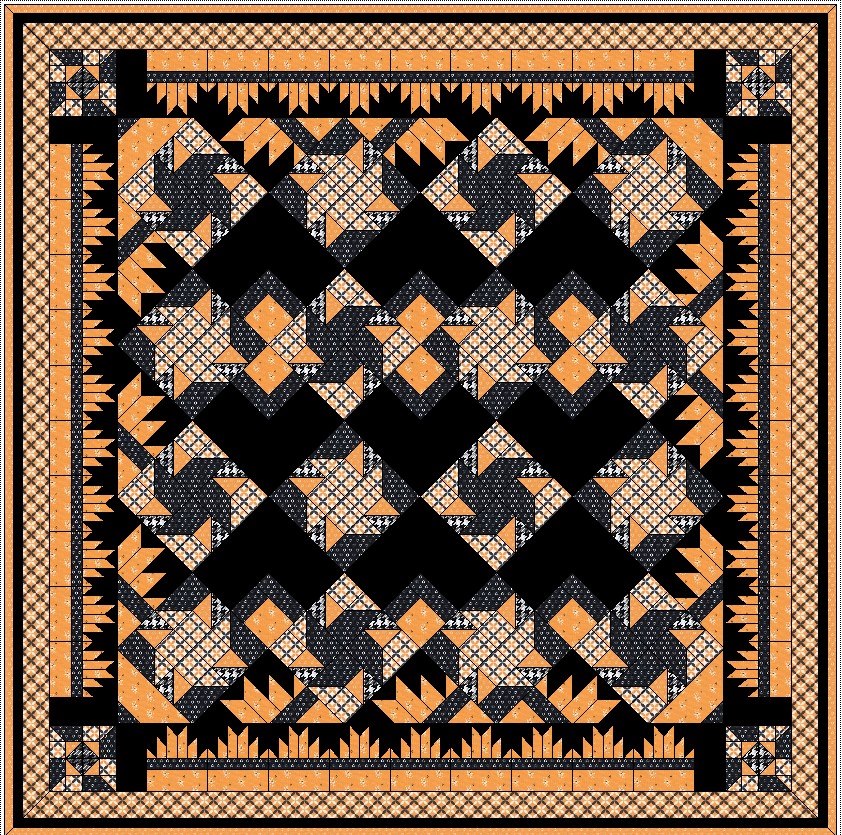
Here are the rotary cutting charts from the quilt in the video.
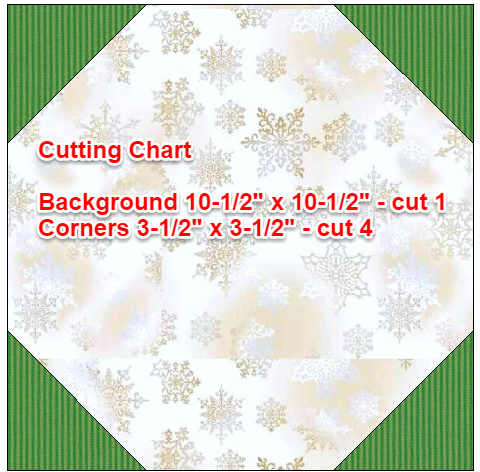
10" Snowball Block -- Folded Corner Cutting Chart
3" Chevron Block - Folded Corner Cutting Chart

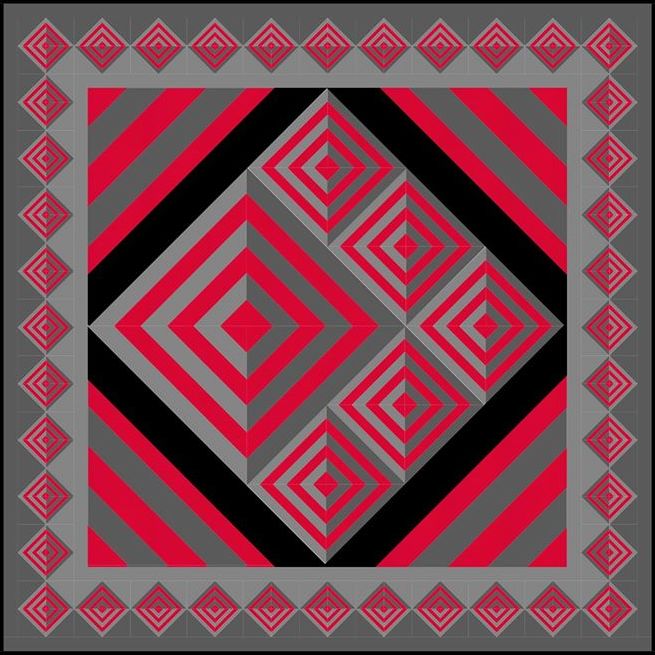
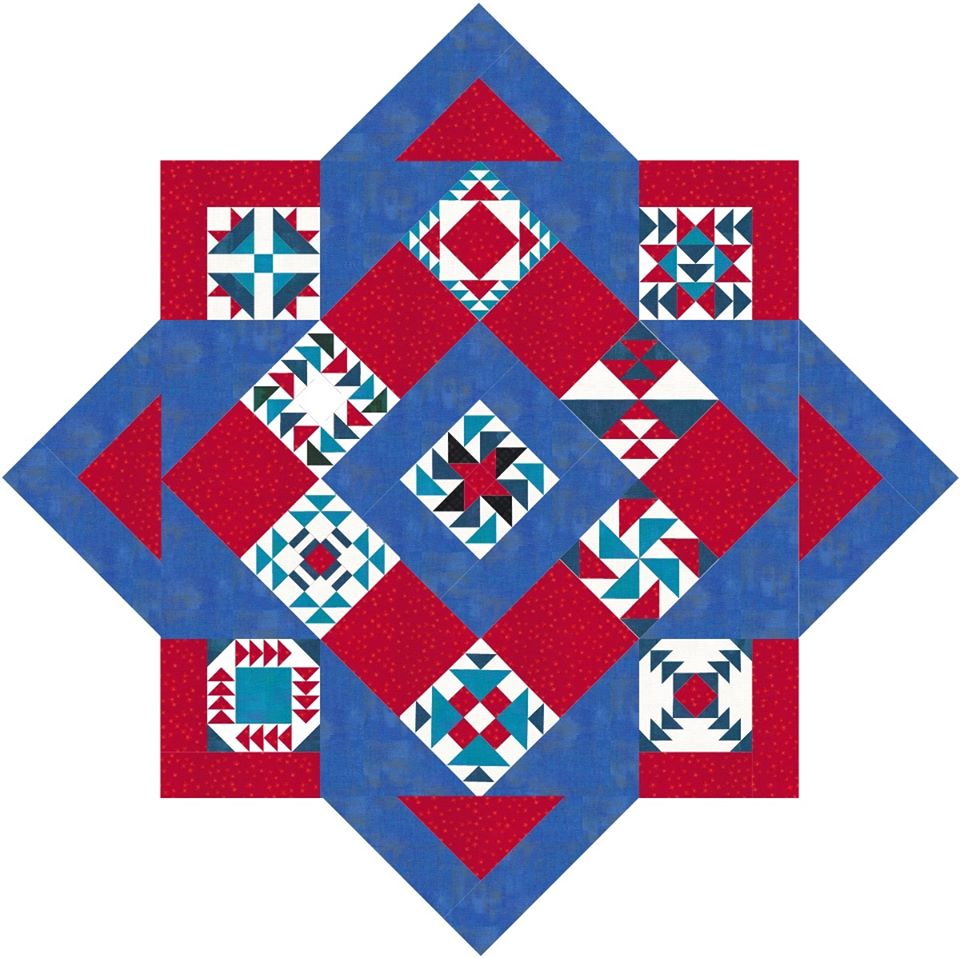
10" Wild Goose Log Cabin - Folded Corner Cutting Chart
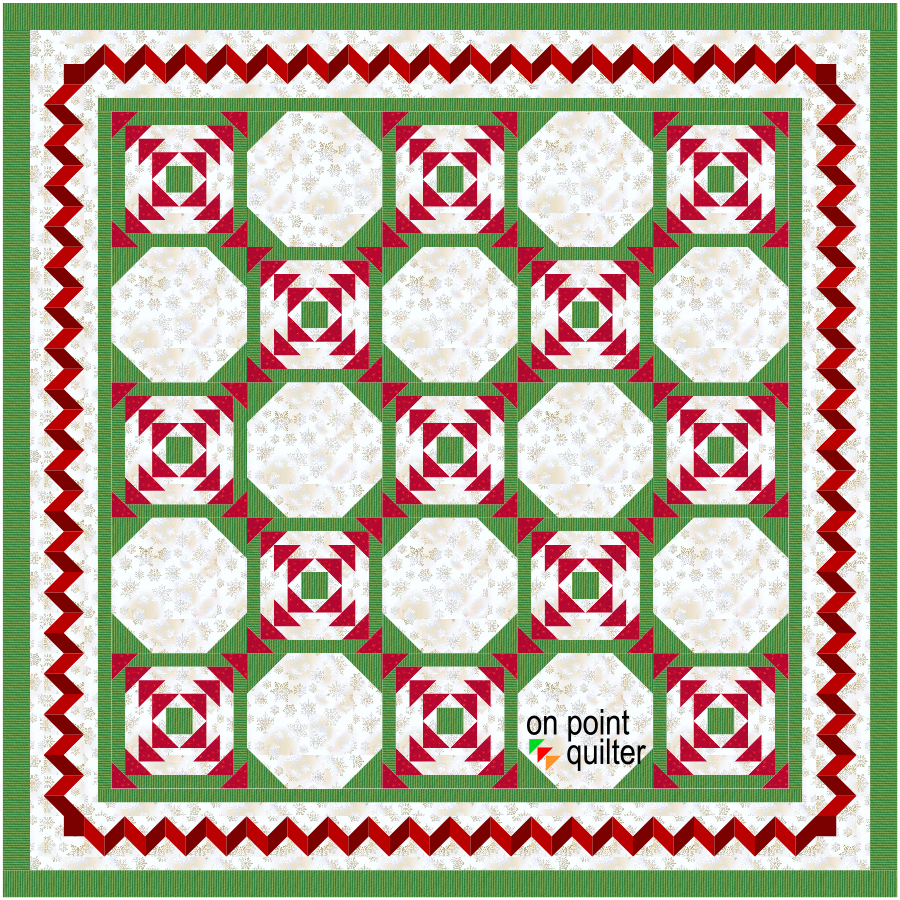
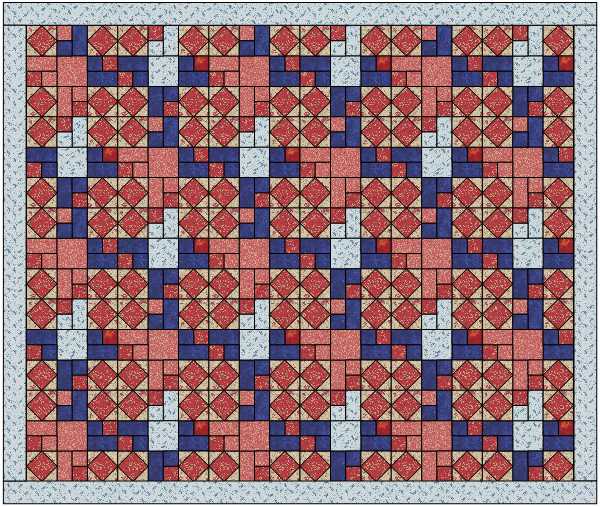
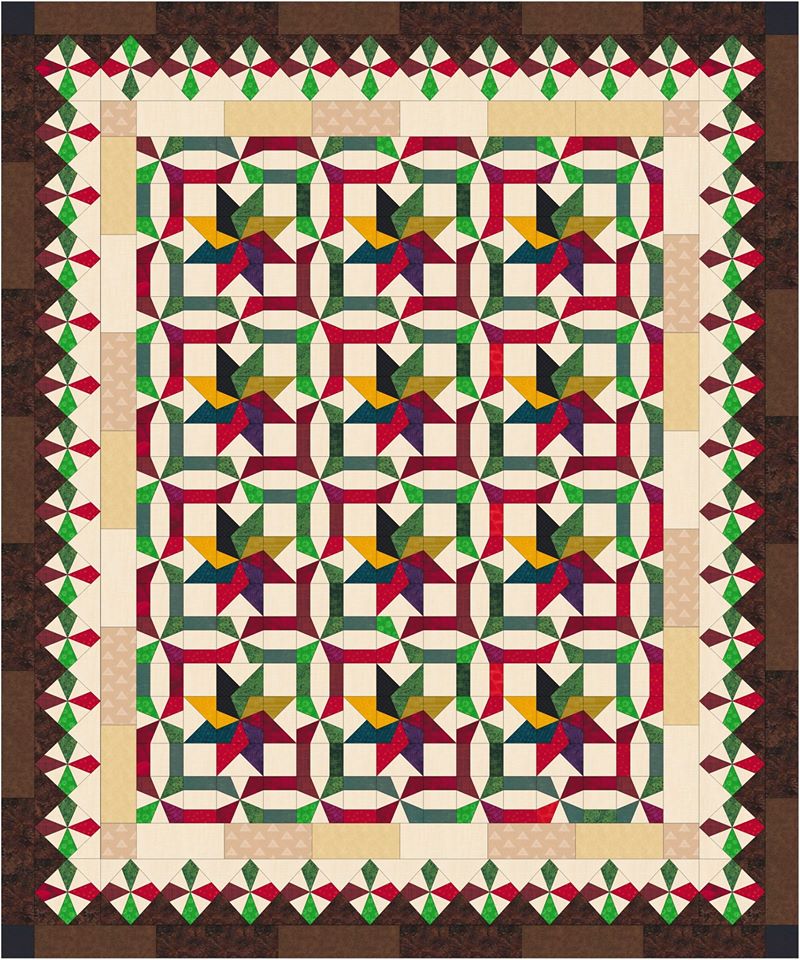
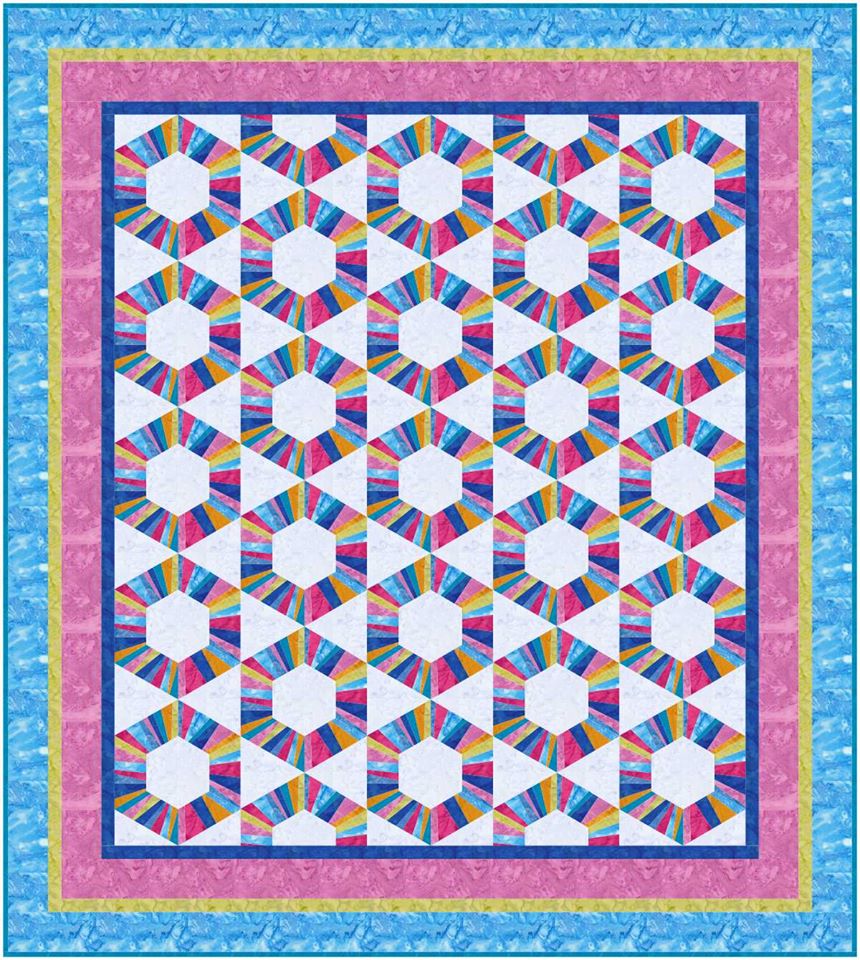
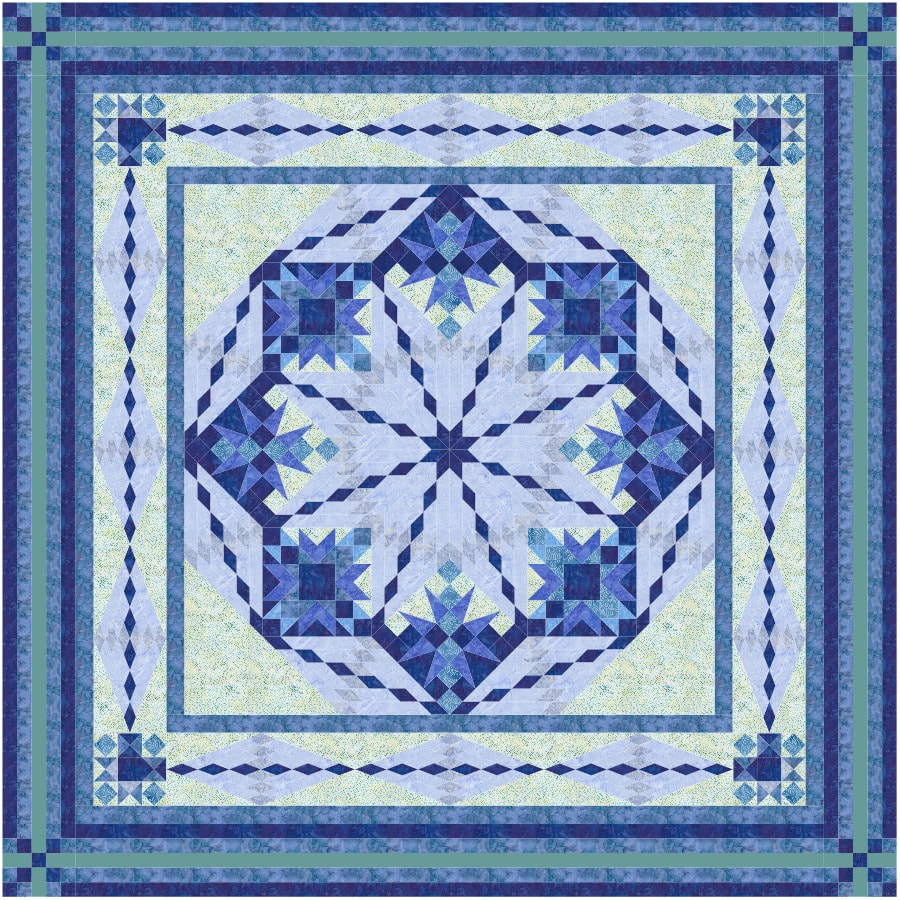
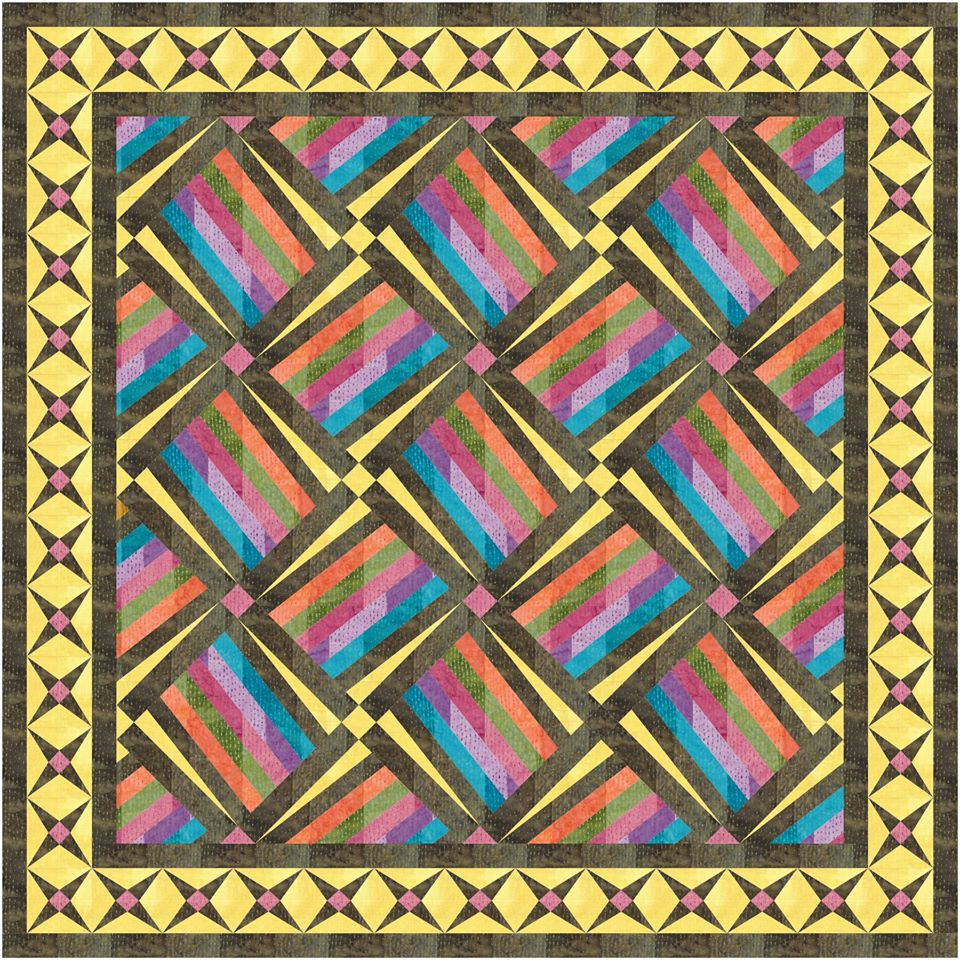
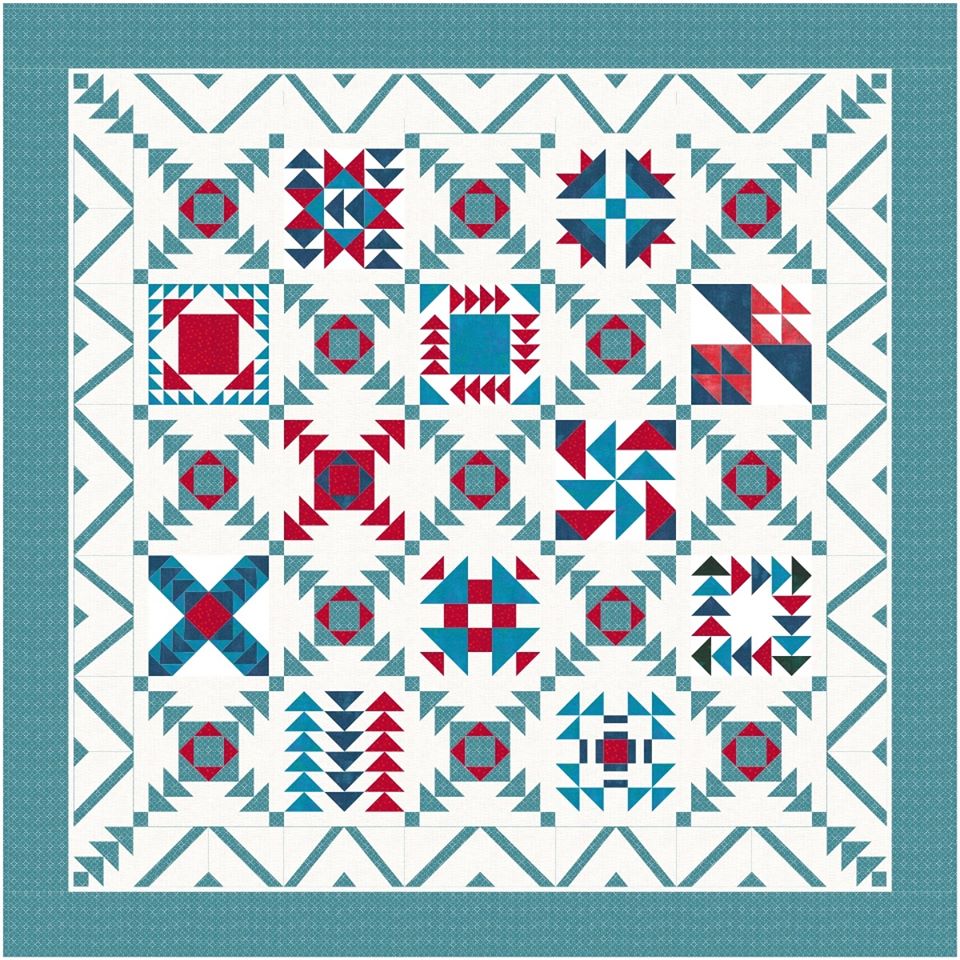
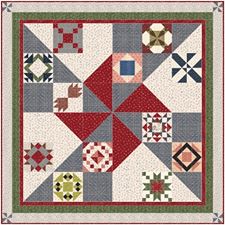
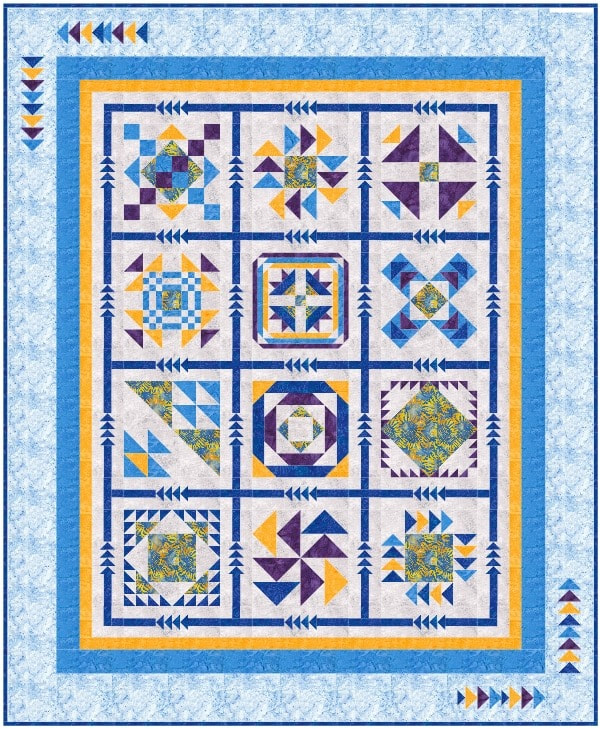
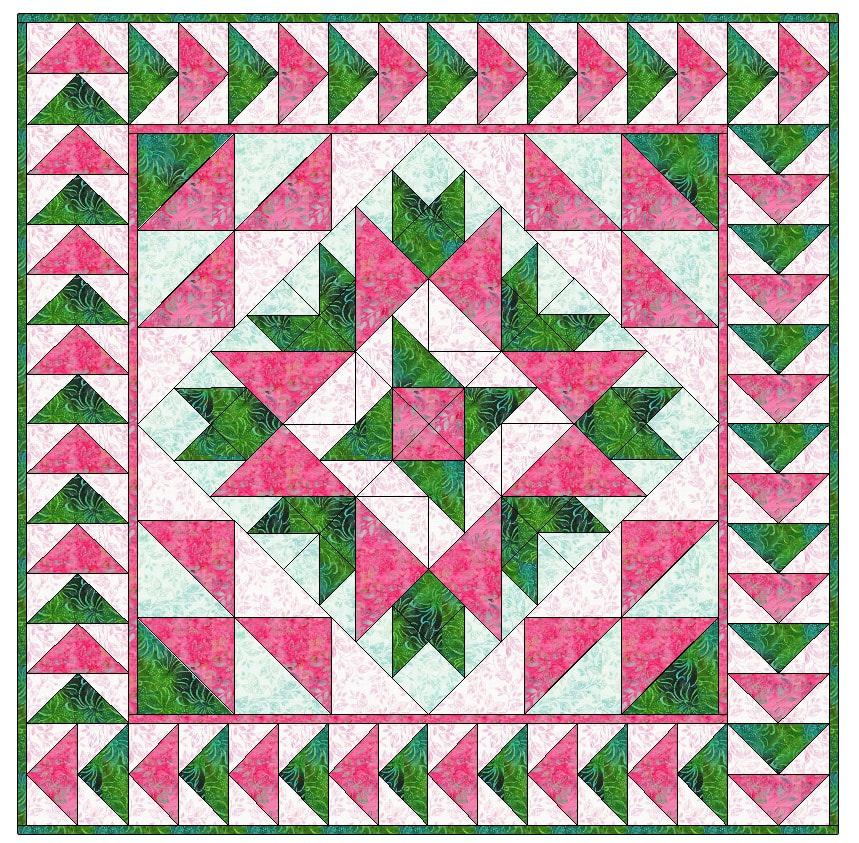
Folded Goose Crossings Quilt - Designed in EQ8 by Kari Schell
October Apply What You Learned
Enjoy the virtual quilt show as Tech Know Quilter members shared what they learned during October. If you would like to join the wait list for the next open enrollment for Tech Know Quilters, you may sign up here.
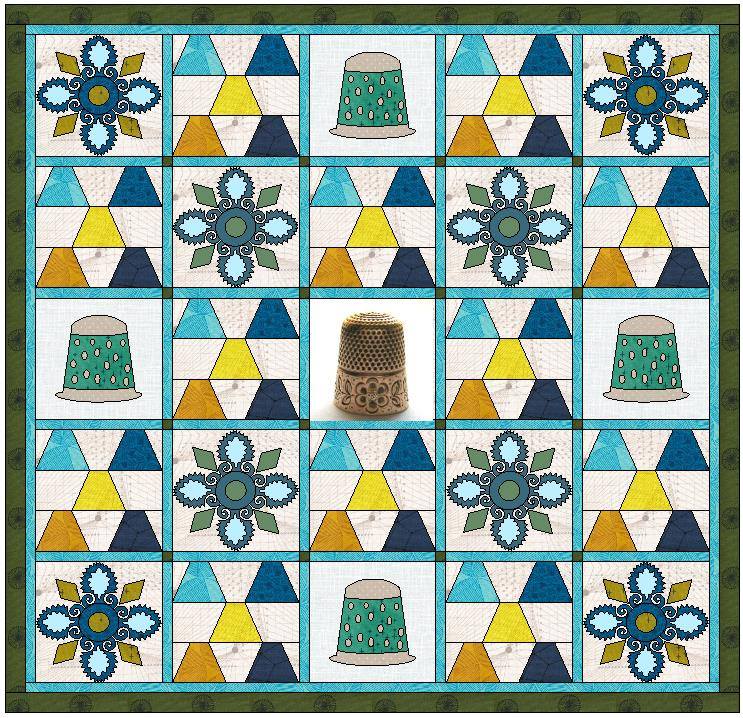
Tech Know Quilters Masters Challenge - Quilts Inspired by Your Favorite Quilting Tool
Other October Projects
In the US, we will celebrate Thanksgiving next Thursday. I will be joining much of my family in Bismarck for our traditional family celebration. As we approach this season, I am reminded of how much I truly have to be thankful for.
In this post:
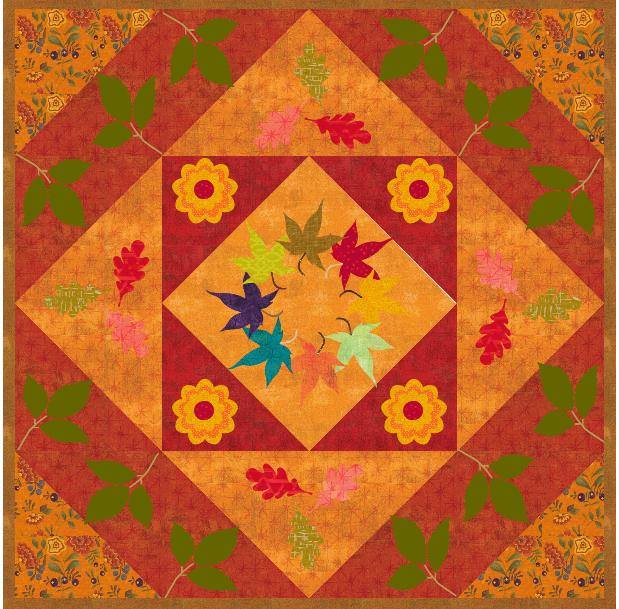
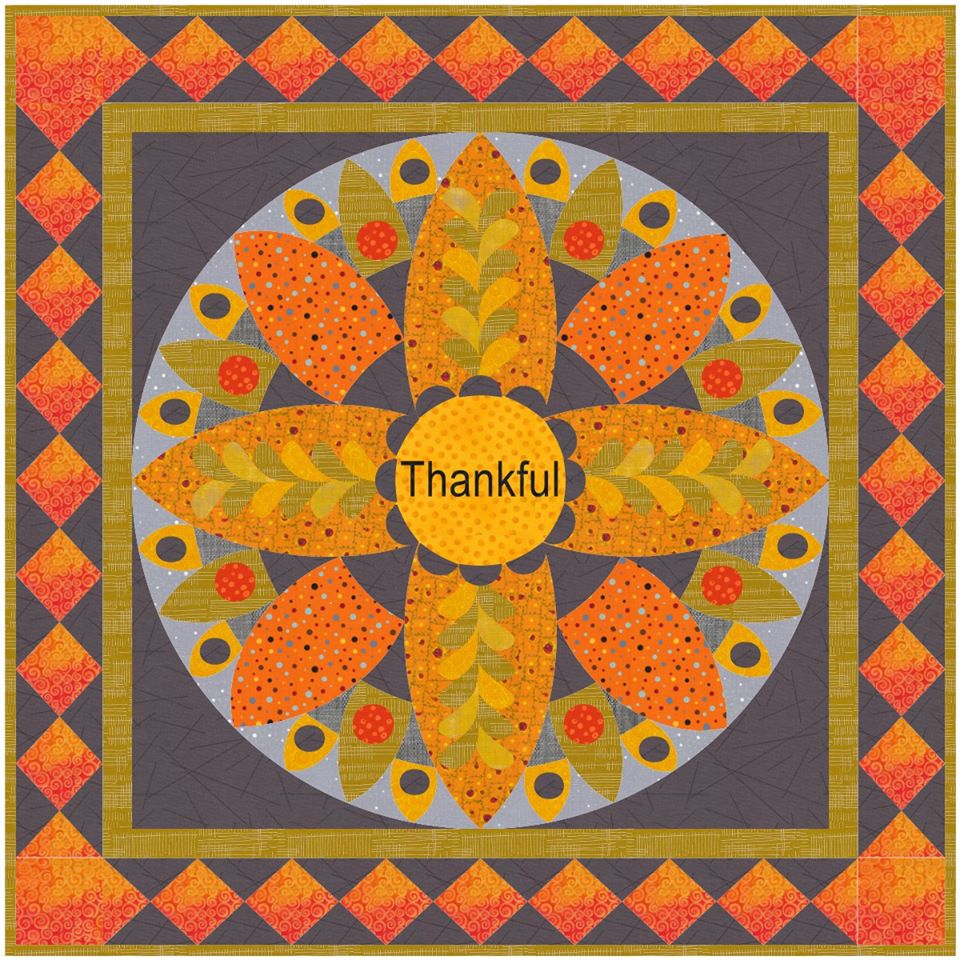
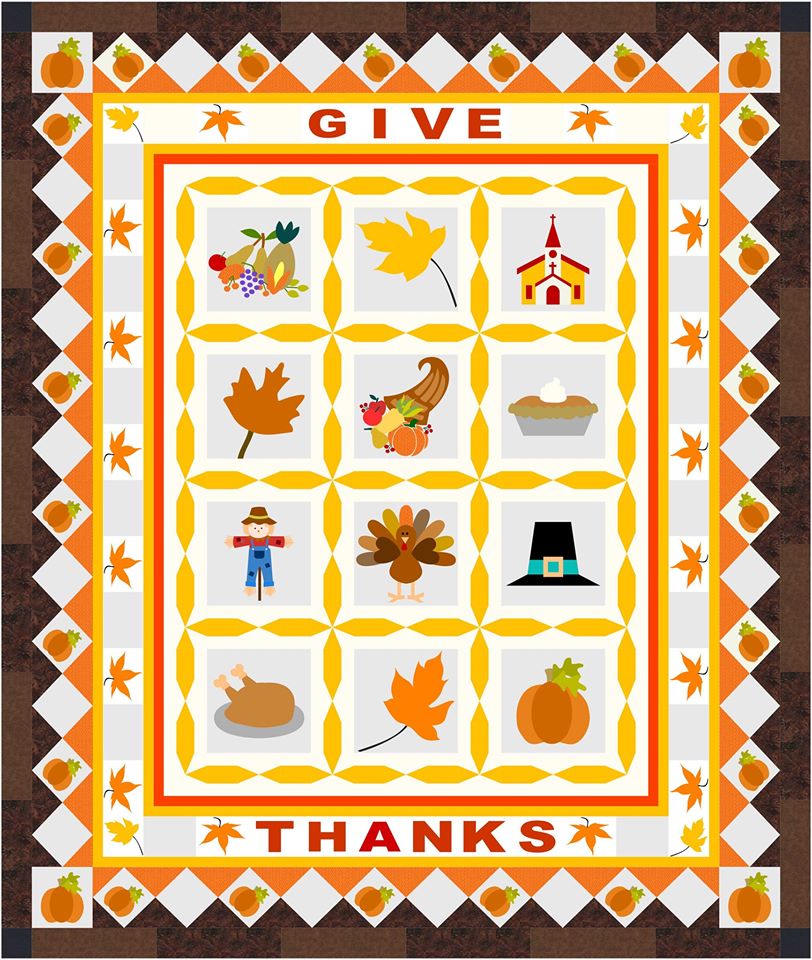
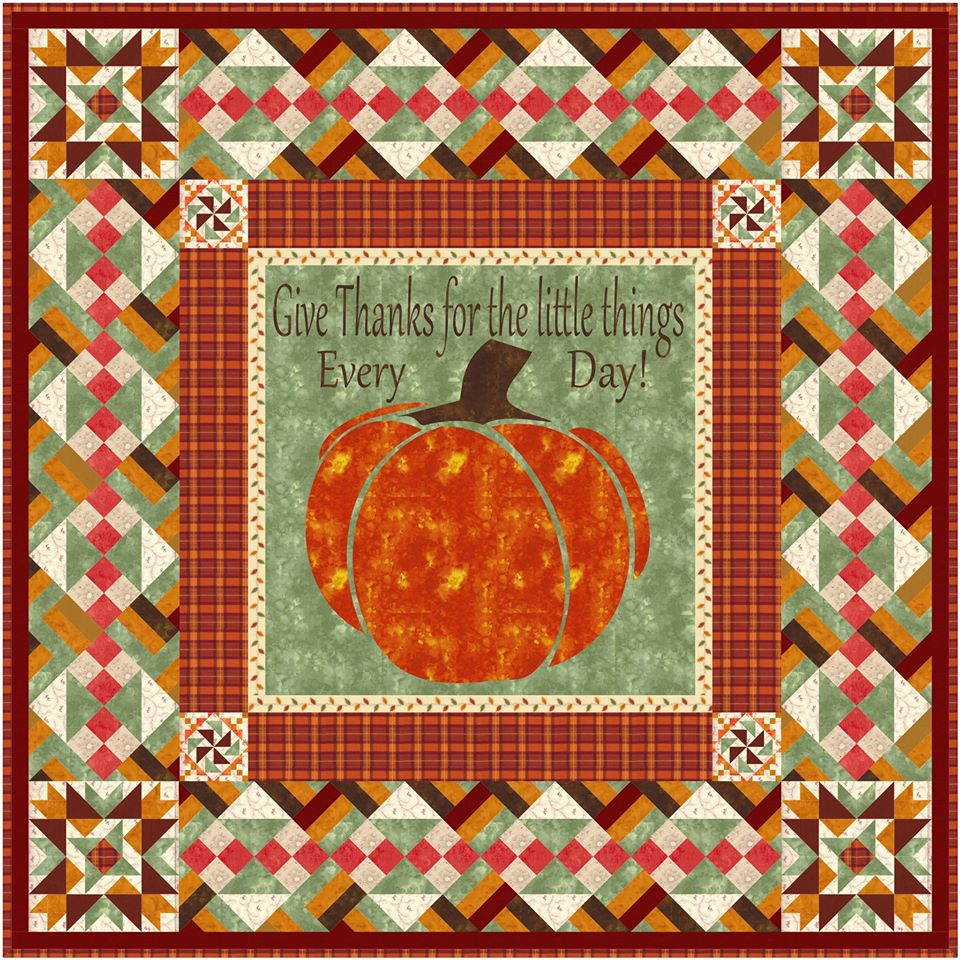
TKQ Masters Thankful Quilt Show
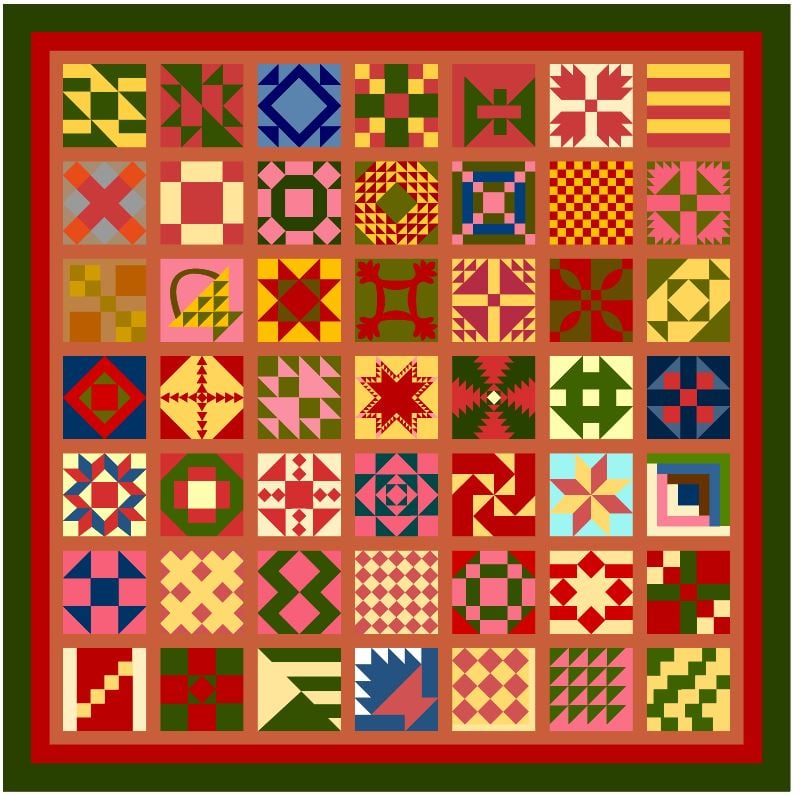
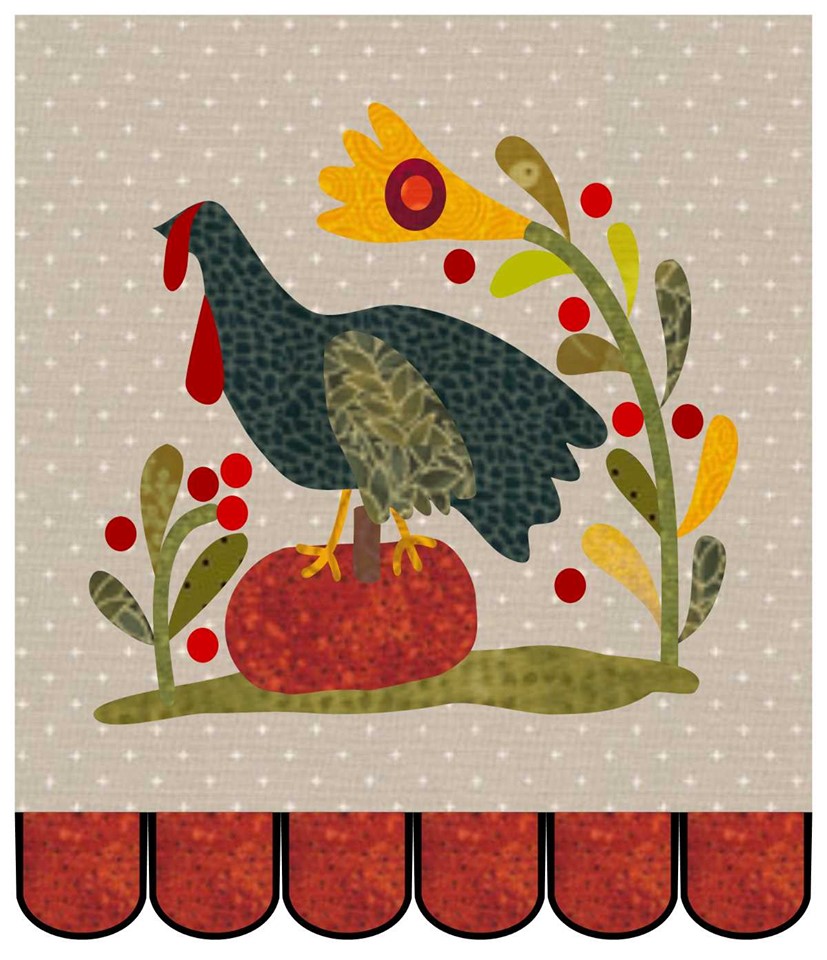
In my Tech Know Quilter's Masters group this month, I challenged them to draft a Thankful quilt. It could be related to Thanksgiving, or people or things they are thankful for.
Sharon Osborne This quilt was good practice for my PolyDraw skills. My goal is to get this done before Thanksgiving.
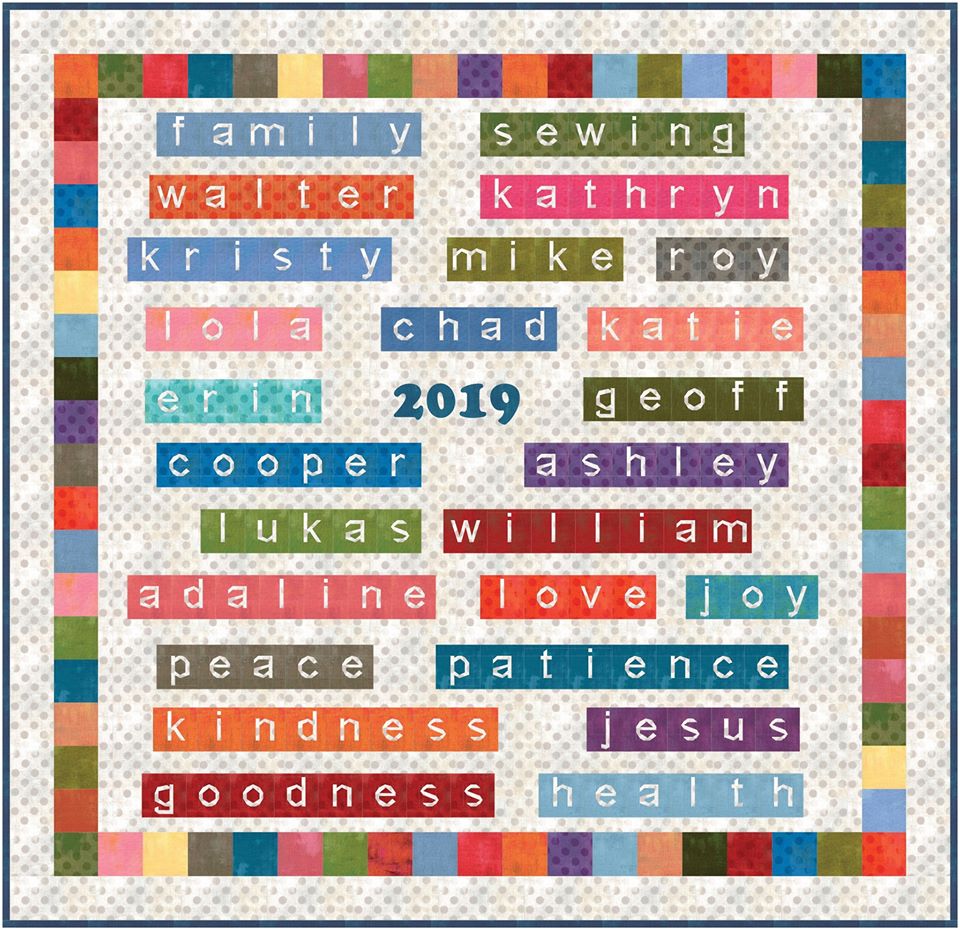
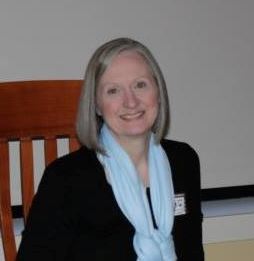
Introducing Kristy Goodin Soard
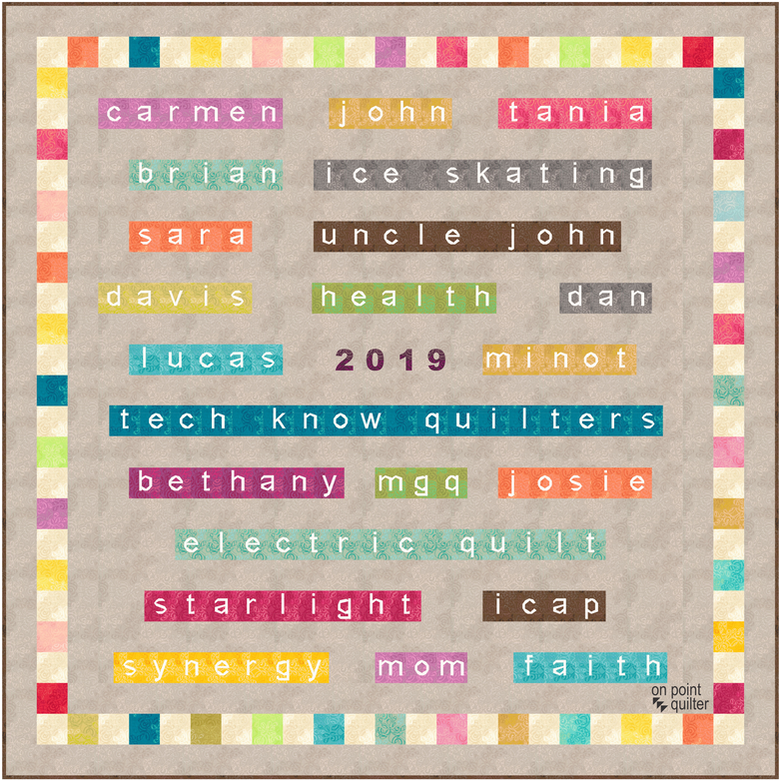
Kristy Goodin Soard designed the Thankful Word quilts above. I asked her to tell me a bit about her family and her background. I hope you will be as touched by her story as I was.
Kristy's Story
I was born Kristy Ann Goodin in a small town in Ohio. I was blessed with an idyllic life surrounded by family and friends. However, at age eight my dad died as a result of a tragic work-related accident. My maternal grandma came and stayed with us for a year as our now family of four created our new normal.
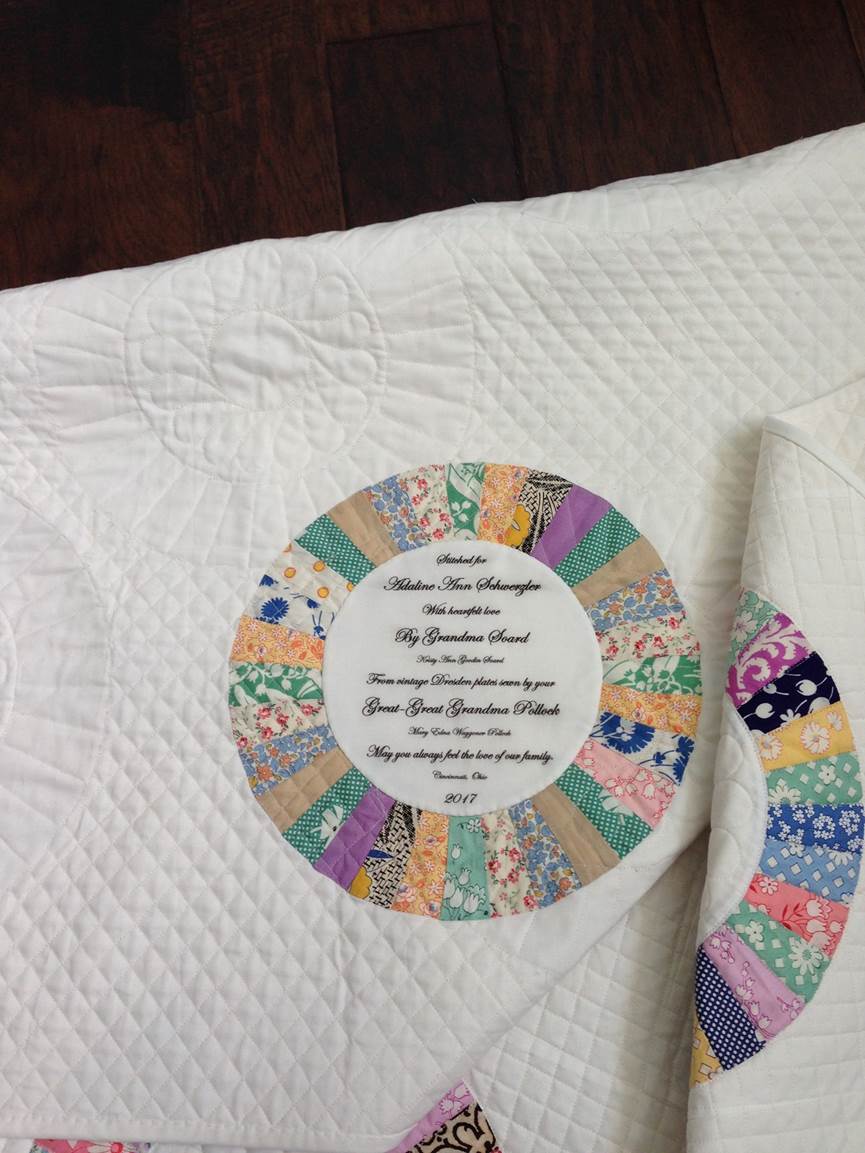
My mom always sewed all of our clothing and household accessories, but was not doing much quilting with three little ones to raise. During my grandma’s stay she and my mom exposed me to more and more sewing on the Kenmore machine. I would refer to those days as the true impetus for my lifelong passion for creating. Machine sewing right into my finger did not deter me from continuing, I was hooked. My mother had made a Dutch Girl quilt in her teens, and my Grandma made numerous quilts, all of which I still treasure to this day, but they didn’t start me quilting at that juncture. It was in my freshman year studying accounting at university when I chose my first elective as an art class, that quilting became a focus. We were given free rein to choose a topic for our major paper for that quarter. I chose quilts. It was around that time I made my first-full size quilt, a hand applique Rose of Sharon/Ohio Rose Quilt. It is in my living room to this day reminding me of my beginnings. Fast forward to eight years later and the birth of my first child when quilting became part of my life full time. My favorite parts about quilting are the prayers that are included with each stitch. Generally, I make each quilt with a purpose or specific recipient, and it is during its construction I focus my prayers for those people. I must admit I love the feeling of satisfaction I get when the recipient expresses an emotional response to my quilt for them. I do not have a favorite type of quilt, as that seems to change over time. However, it is my life endeavor to continue to learn in every aspect of life and to be open to where I am led. Circumstances in life change, and I like to think I adapt and continue to create a legacy for my family. So, with each new quilt, I try to learn and attempt something new. Quilting is the perfect art to allow my passion for creating to flow. In 2017, Joyce, my very dear long-time friend introduced me to Electric Quilt. I had previously designed my quilts with paper and pencil. She encouraged me to purchase EQ7, which I did and I have never looked back. We both decided to dive into the Tech Know Quilter classes by Kari, and we have not missed a single class to this day. It is important to me to be able to design my own quilts so I am able create exactly what I see in my mind’s eye (which often is very specific).
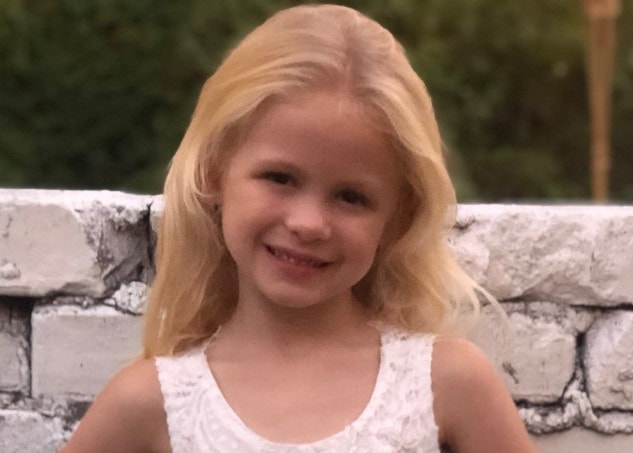
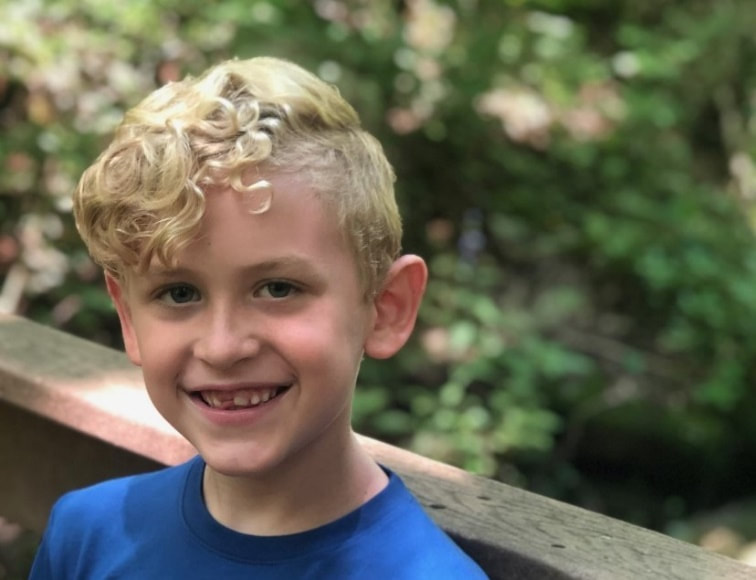
When asked to submit a photo of myself, I find that the best image of me is found in the faces of my dear grandchildren. I like to believe you will see “me” in them! In one it may be the smile, or eye color, or proclivity to be tall. Or perhaps if you know them you will recognize their creativity and artistic talent, or a love numbers or writing, or perseverance during a challenge, or an extremely quick wit, or compassion and empathy for others, or a desire to share the gifts and knowledge with which they’ve been blessed, or a striving to always do their best, or a deep sense of loyalty. I can only hope that each of them will carry a positive part of me in their heart and life.
Of course, above all it is my prayer that when I am gone and they wrap up in the quilts I made specifically for them, they will feel how very deeply they are loved.
-- Kristy Goodin Soard
As you can see, not only is Kristy a great quilter, but a lovely person. Here are some of my favorite designs by Kristy.
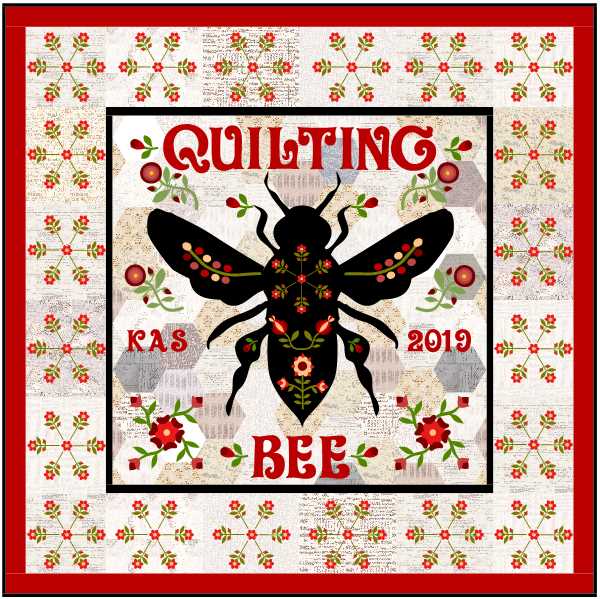
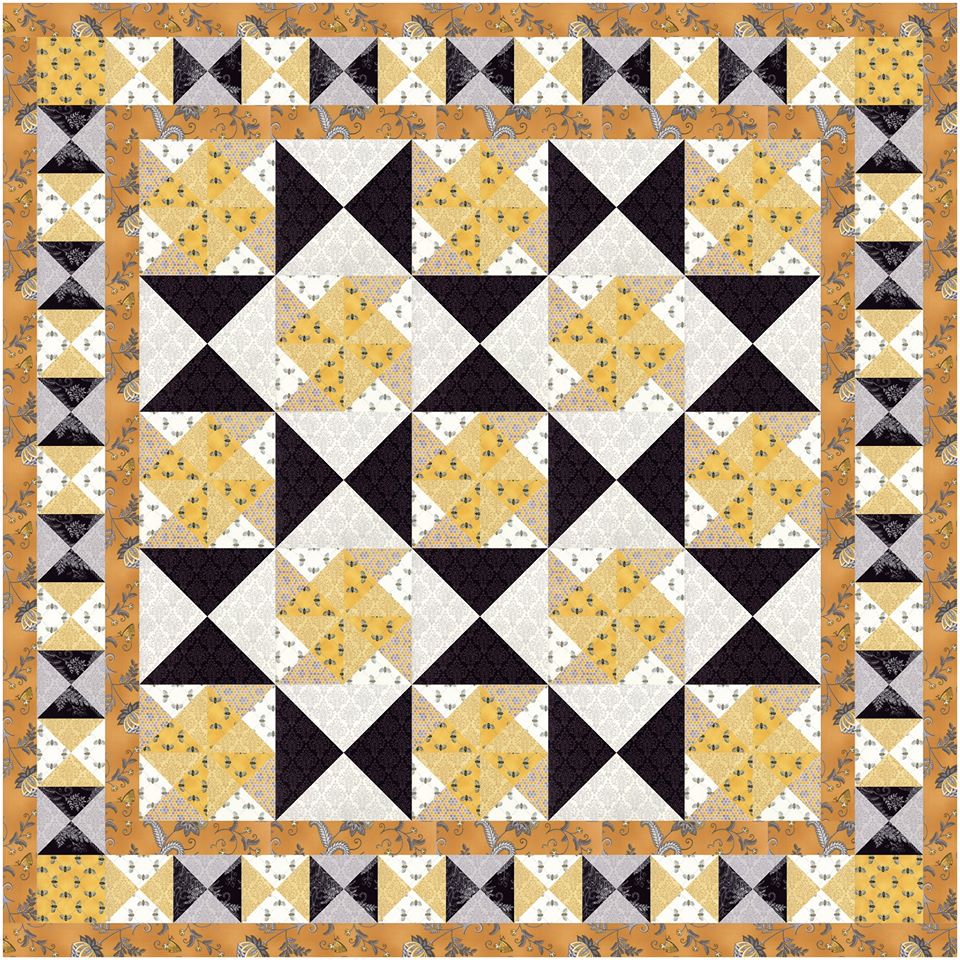
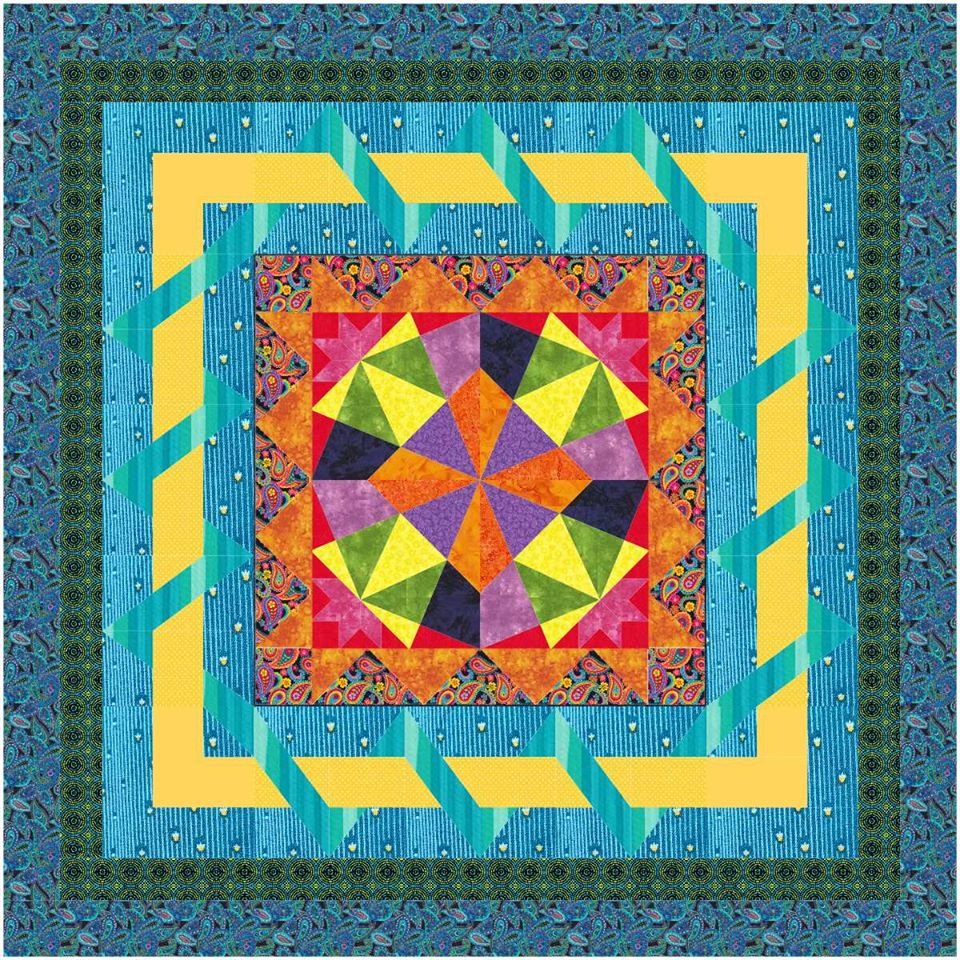
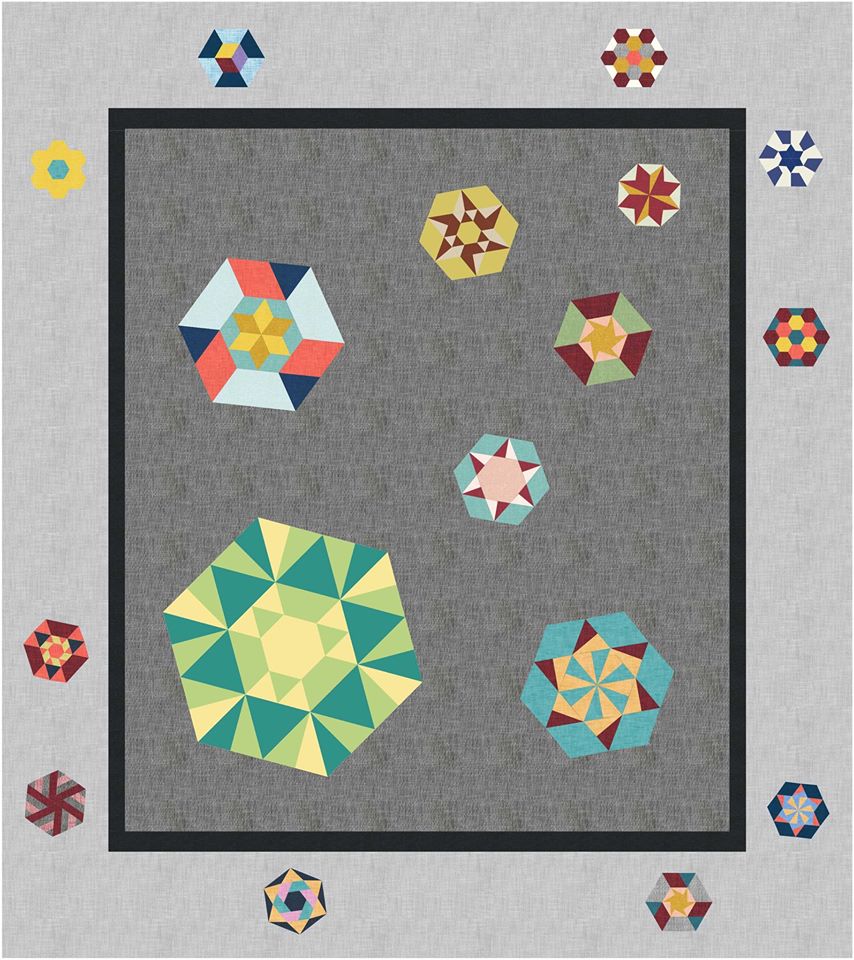
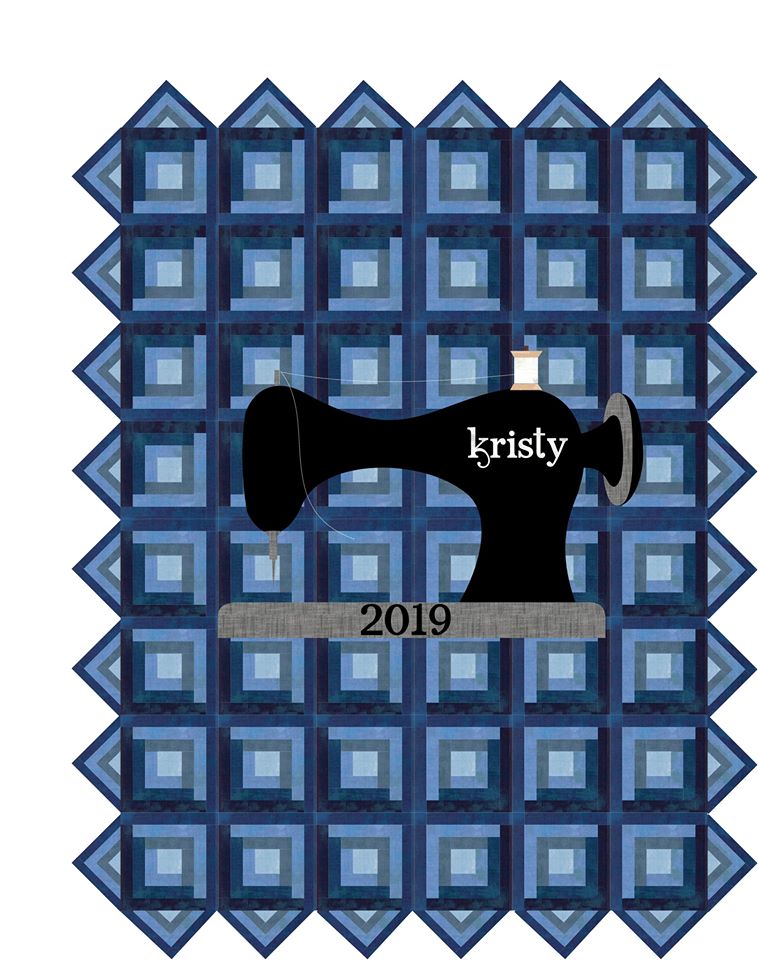
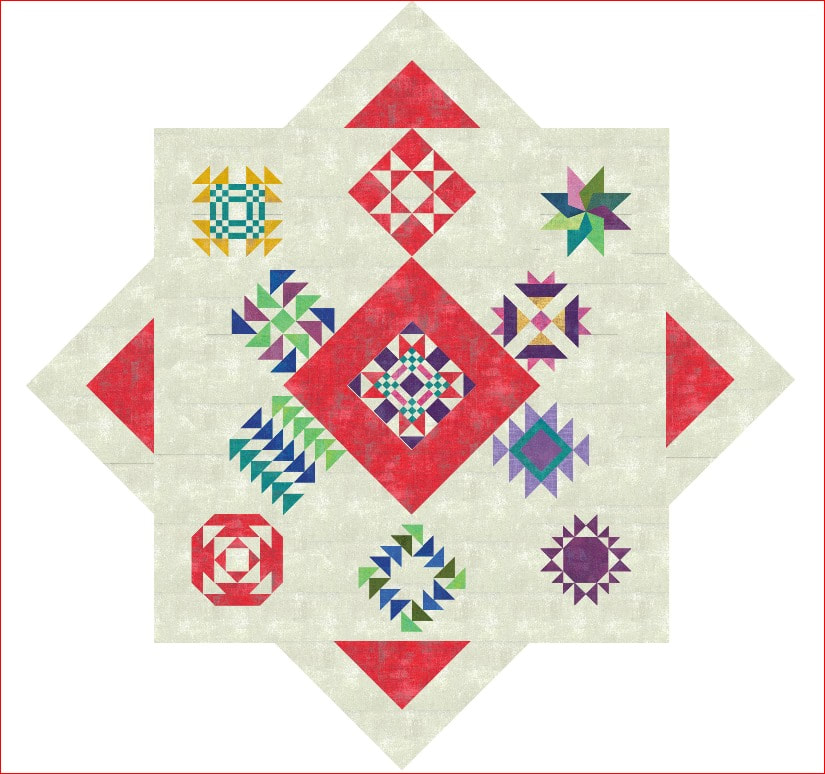
Kristy's Quilting Bee quilt evolved over a number of months. The center was inspired by the Laura Heine quilt with the bee and involved starting with a one patch quilt (the hexagon background) and adding motifs and more motifs plus text. And then carrying one of the motif's on the bee into the border.
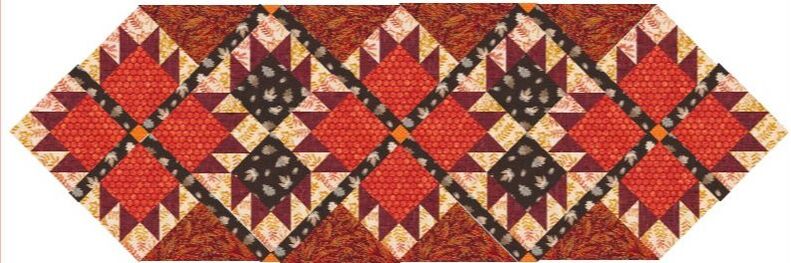
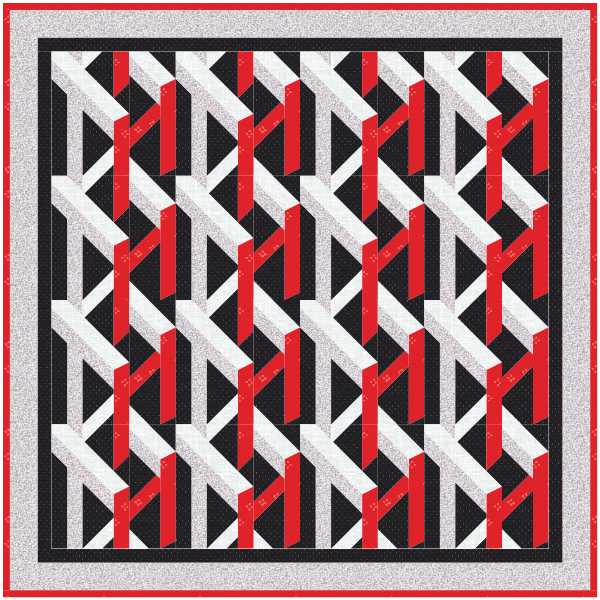
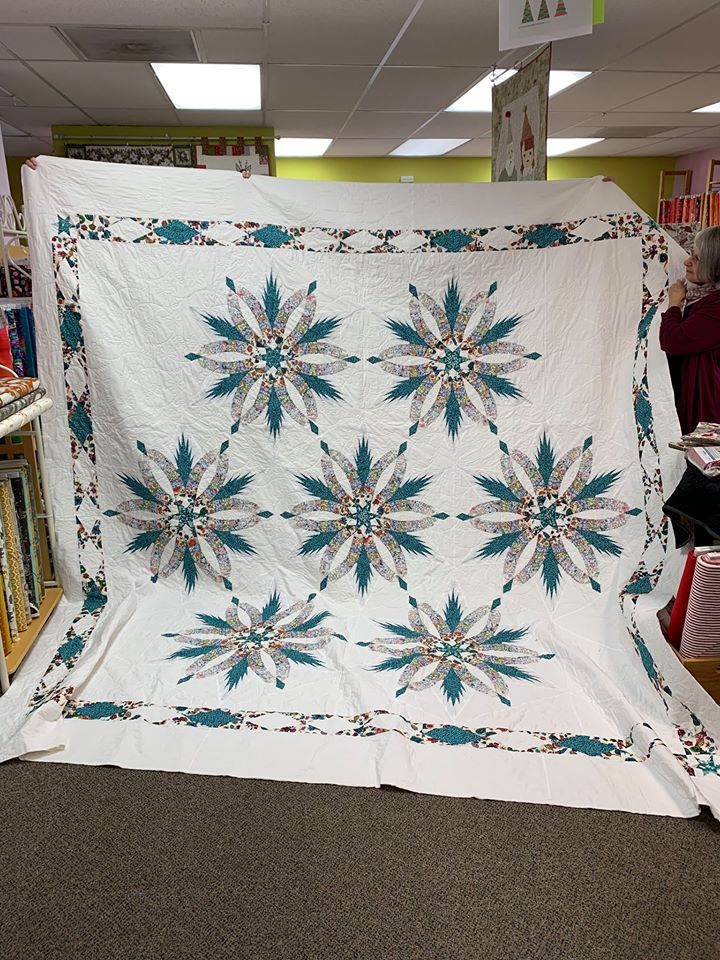
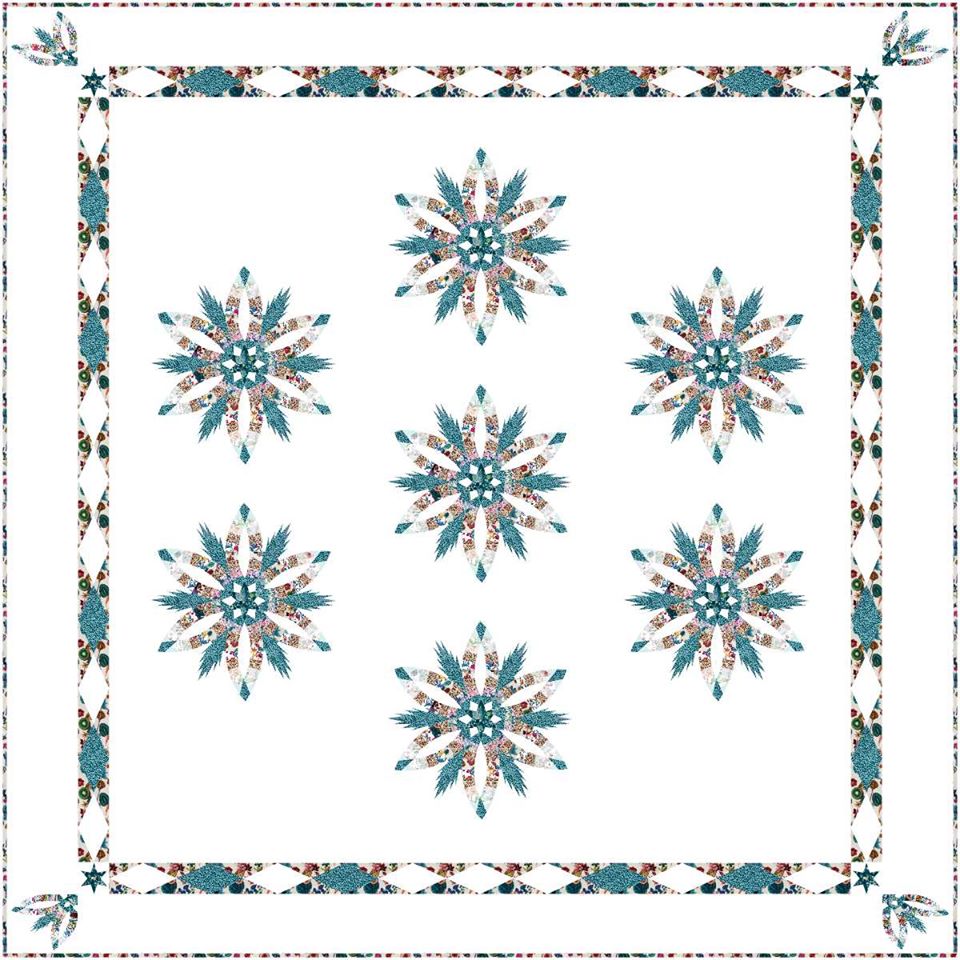
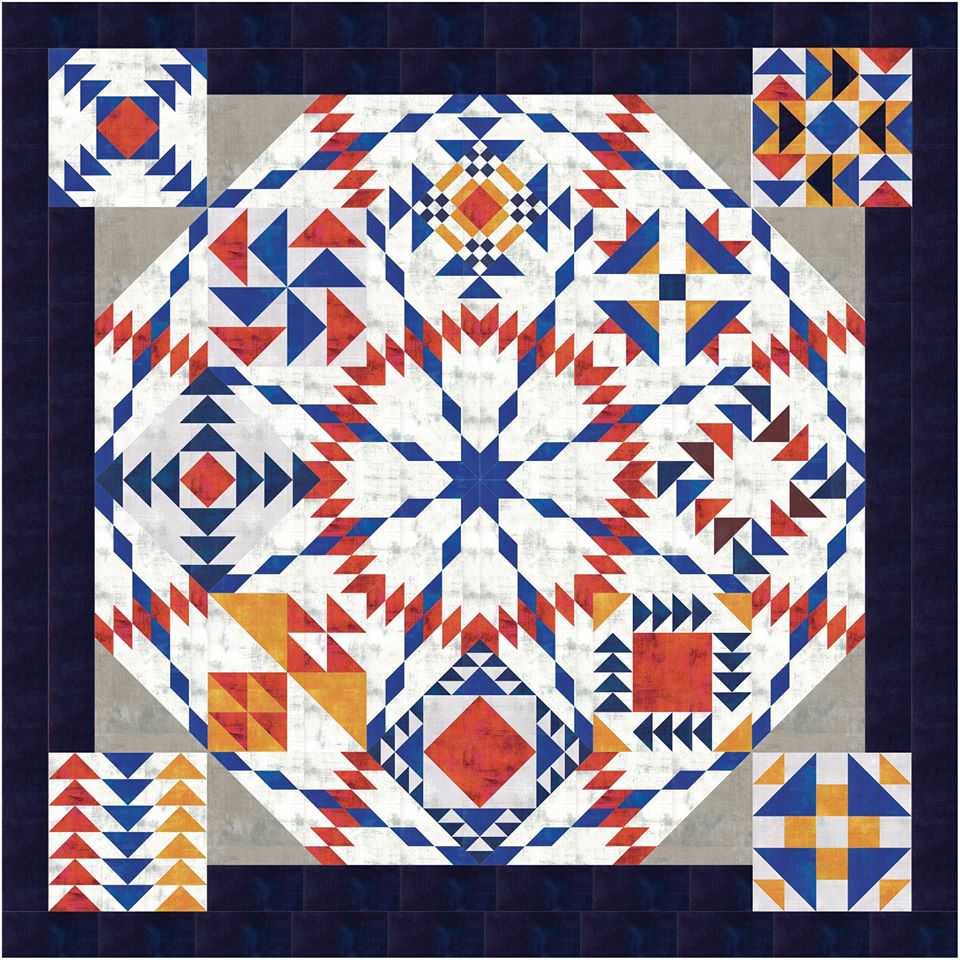
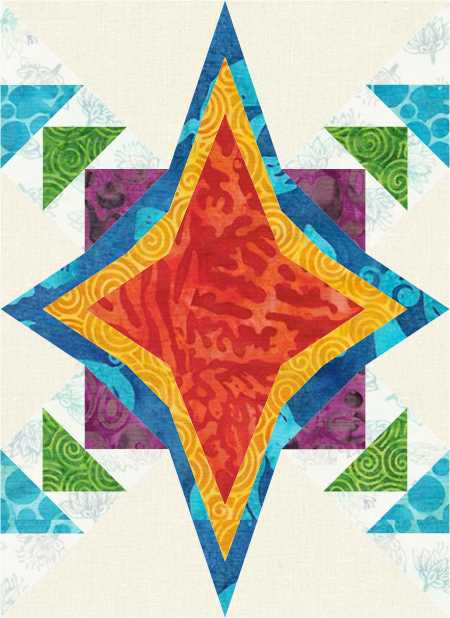
Kristy was inspired by a block on Pinterest and used a technique from Advanced EasyDraw to fragment the block. Edyta Sitar's Sequoia fabrics were used to color the quilt.
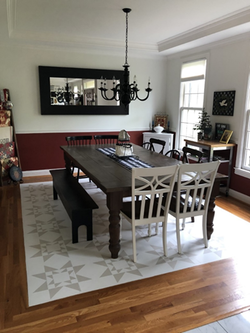
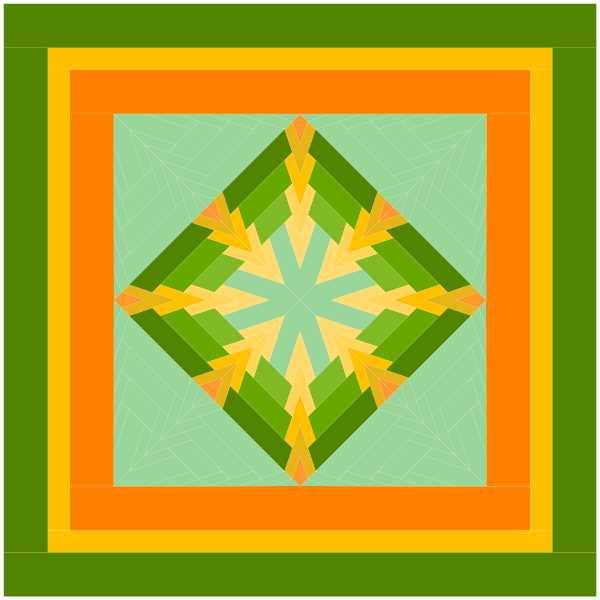
Kristy's daughter wanted to paint a quilt on her dining room floor. So, she designed several options for her to choose from, and then they created a stencil for her to begin painting.
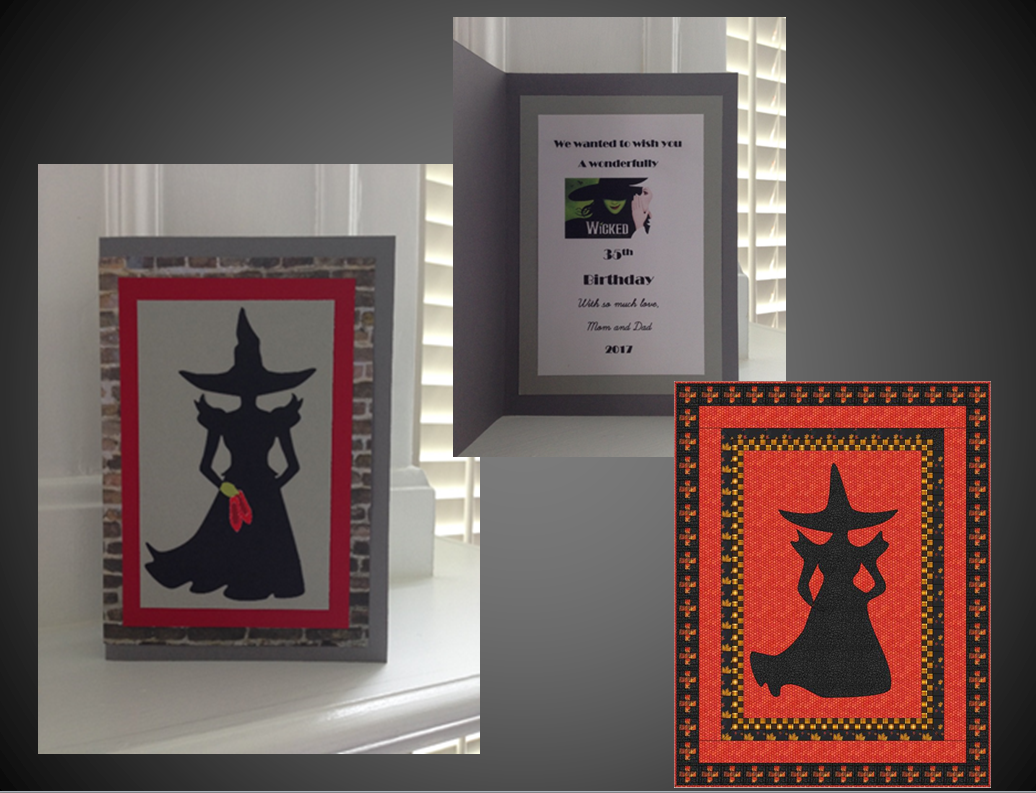
Wicked Witch was inspired by the musical Wicked. Kristy used this design to create a birthday card for her daughter the year they took her to see Wicked.
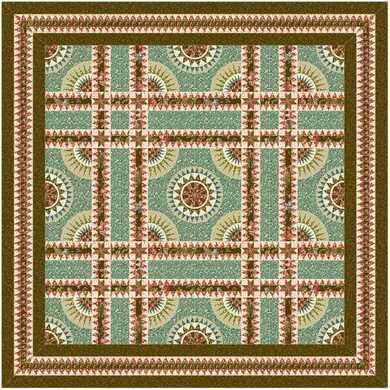
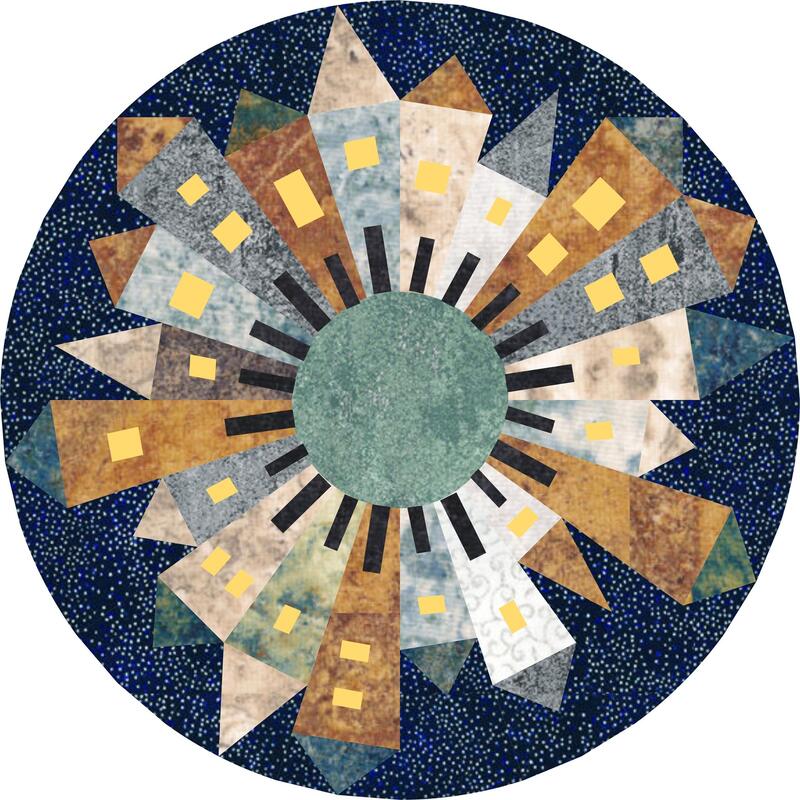
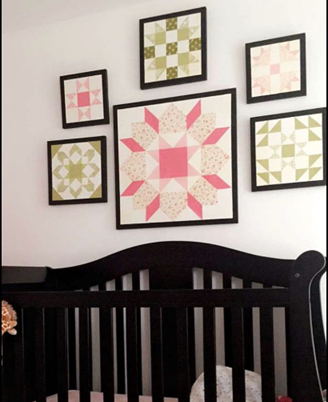
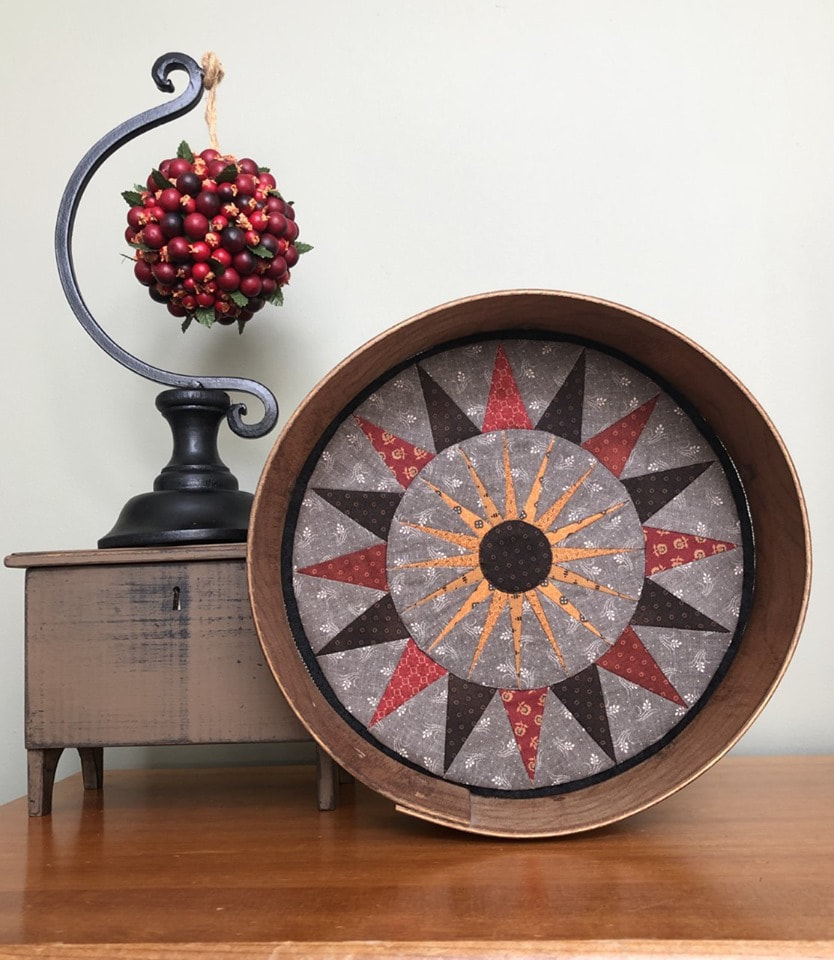
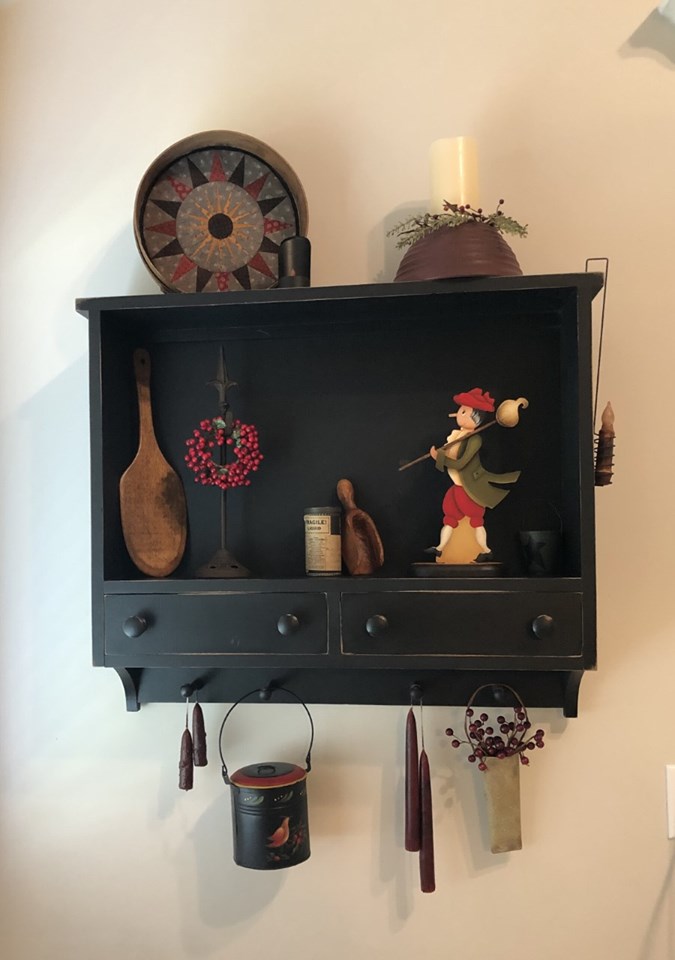
Kristy loves to come up with ways to decorate with her quilt. Look what she did with a mariners compass block.
Drafting Your Own Thankful Word Quilt
I loved the concept of a word quilt using Electric Quilt and Kristy agreed that I could share how to recreate her design with you.
When doing your own word quilt, start by coming up with a group of words that you want to feature in your quilt. I decided to stick with the thankful theme and included close family members, activities and groups that represented many of the close friends I have in my life. I found I needed many more words that I thought. You will find that you will want to move the words around as you work on your quilt. I wanted to have a certain balance to what I was drafting and it took a bit of playing to achieve that. Fortunately EQ is very accommodating to playing with a design.
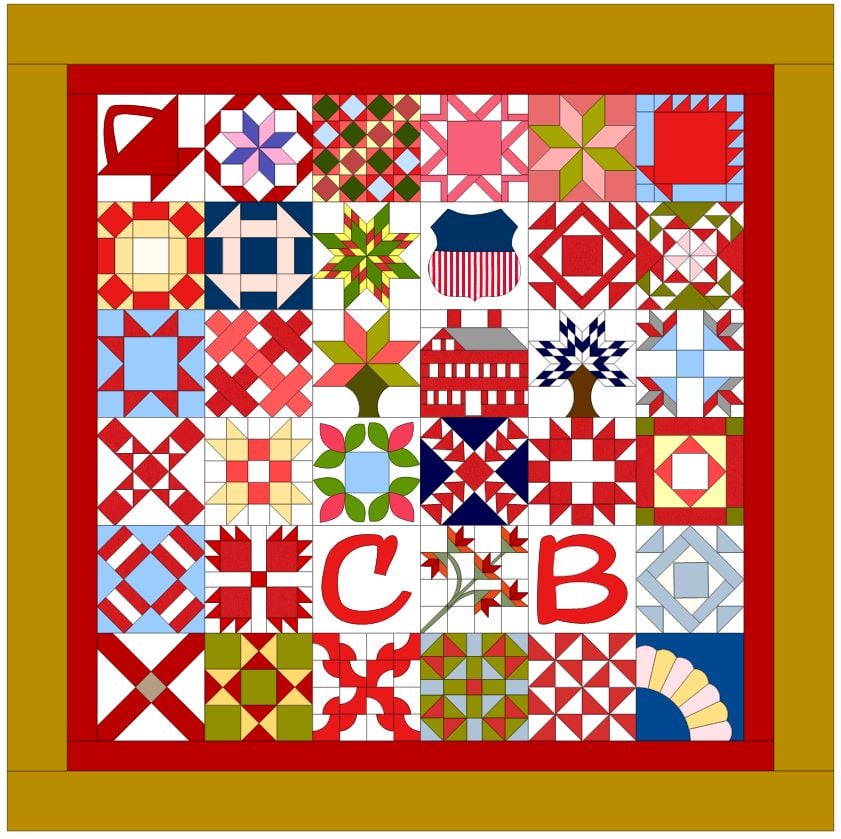
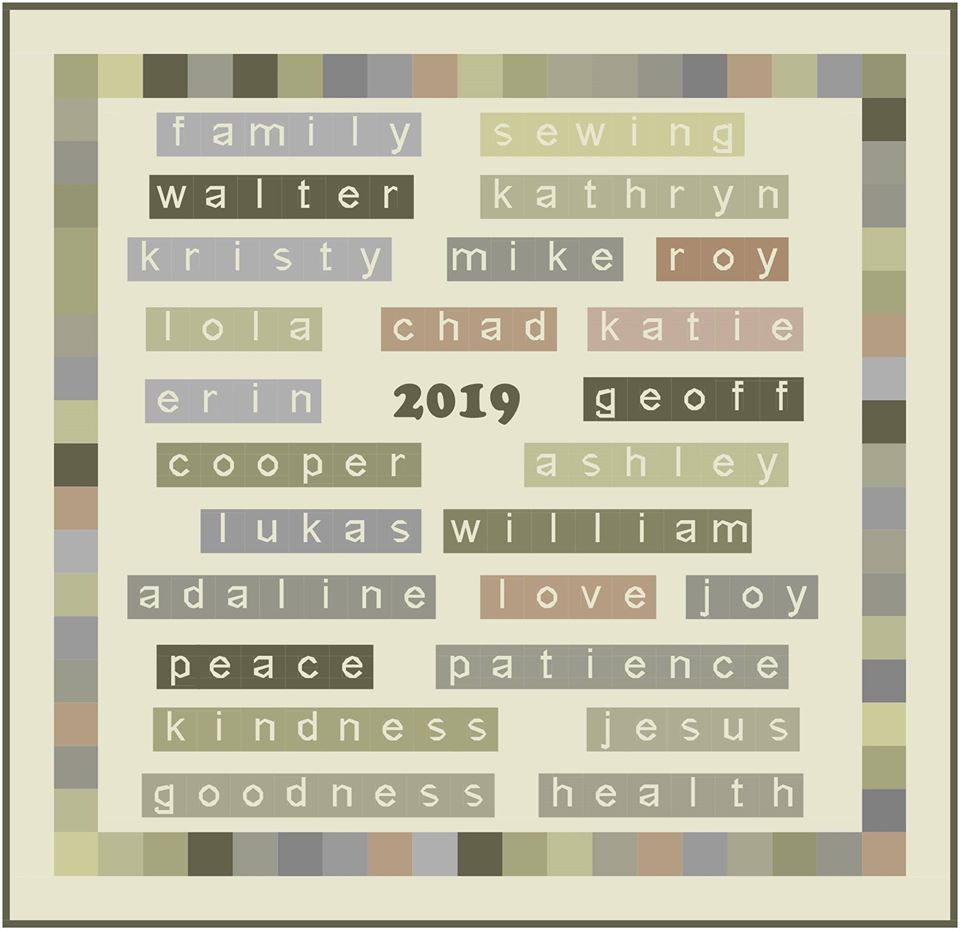
Here is my Thankful Words quilt.
As we close this post, I want to say how thankful I am that you allow me to share my love of quilting and Electric Quilt with you every week. I consider it an honor and a privilege to serve you.
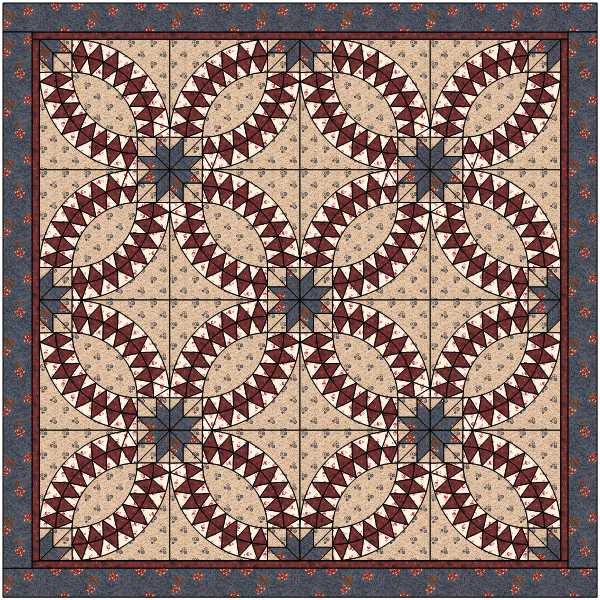
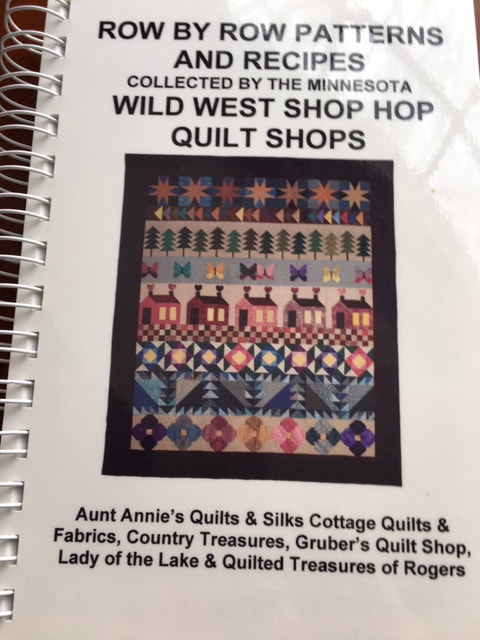
I frequently get asked how I went from being an accountant to a full-time quilter as that doesn’t seem like a natural progression. However the real story is how I moved from a craft imitator to a creative quilt designer. I never considered myself a very creative person. If someone gave me a coloring book, I was the one who colored within the lines. I completely failed at Pictionary (the game where you had to draw clues to get people to guess a word or a phrase). My artistic ventures included paint by number kits, string art kits and eventually counted cross stitch projects. In high school, my elective classes were business classes, not art or even home-ec. I majored in accounting in college and after graduating moved to Minneapolis to work for a large accounting firm. 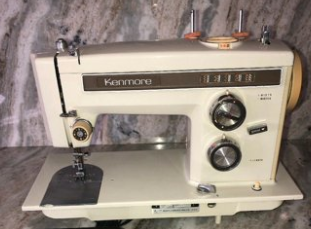 In my late 20s, a friend persuaded me to take a quilting class at a local chain store which introduced me to using a sewing machine as I struggled through my first quilt. After that class, I went and purchased my first sewing machine – a Kenmore. Here is my not so pretty quilt from that class -- never finished. If you zoom in, you can see the four stitches to an inch quilting.  Kari's first quilt -- never finished. A year later I walked into my first quilt shop and fell in love with a small double wedding ring wall hanging and asked the shop owner if I could take the class, and turn it into a queen size quilt for my bed. That quilt and learning the process to create it energized me in a way accounting never had done. 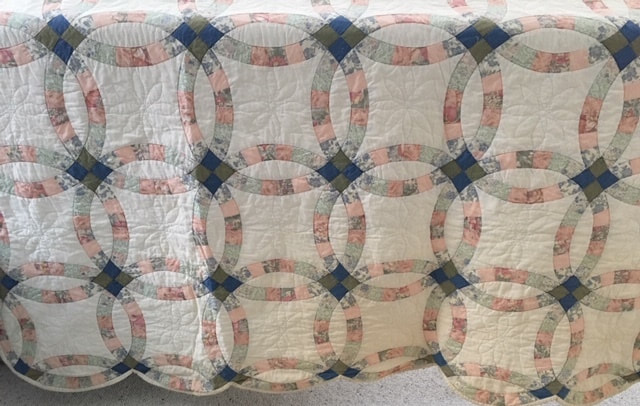 Kari's third quilt -- a Double Wedding Ring I began signing up for classes (a lot of them) and buying books, patterns and magazines. As I would look at a quilt, I would start to think about how I would like to make it different. Maybe change out the fabrics, maybe change to a more efficient piecing method, or maybe change the size. Have you ever had those thoughts? I purchased some graph paper and tried to sketch out my ideas. But I couldn’t make it work, and I would quickly wear a hole in my graph paper as I kept modifying my design. And I had no idea on how to work with designs that weren’t based on a square grid. 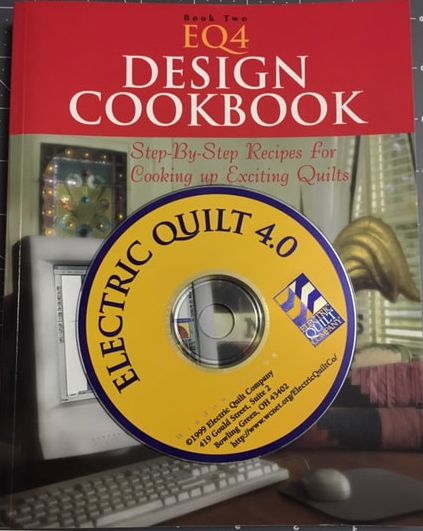 In April 1999, I heard of a program called Electric Quilt and thought that might be able to help me. EQ4 was pretty basic compared to EQ8, but I finally had a tool that I could use to redraft blocks from my purchased patterns and magazines.  As I began to use the tool, I found that I got more and more comfortable branching out and trying new things that weren’t included in a pattern or picture. I would do a lot of “what if” playing. This really is one of the best features of EQ. The more I played, the more I gained confidence not only in using EQ, but in my own creativity. On the right you can see one of my early designs. At the request of a local quilt shop, I began teaching Electric Quilt. This was before laptops – so we just toted a bunch of desktop computers into the shop and put two students at each computer. This branched into doing Block of the Month and shop hop patterns and even a row by row quilt for a cookbook sponsored by a group of shops. All of this was done using Electric Quilt and Word.
I eventually formalized my business with the name On Point Quilter and created a website. I started blogging weekly and began producing videos sharing how to use Electric Quilt. Electric Quilt found my videos and began sharing them in their newsletter. They also asked me to create an online class for them and teach at their EQ Academy. In May 2015, I made the very scary decision to leave my corporate job and become a full-time quilter. I began marketing some of my quilt patterns and began to look at options to expand my training of Electric Quilt. With the release of EQ8, I made the decision to focus my quilting business on educating quilt lovers to using the software I had come to love and use every day. I introduced Tech Know Quilters (an online membership that provides both training and support for those desiring to master Electric Quilt). Electric Quilt published my first book EQ8 Drawing Blocks. 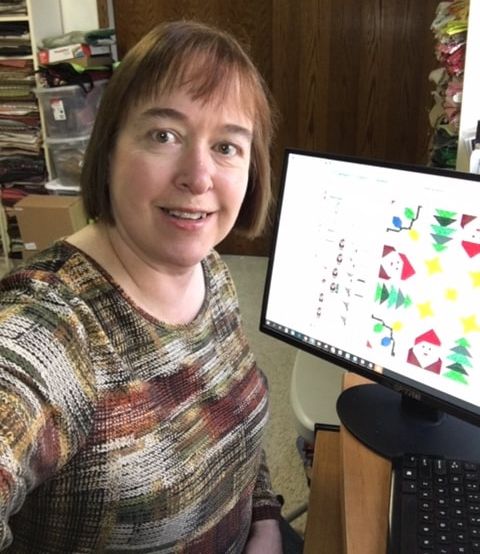 Kari working on a new project. Kari working on a new project. I now spend most of my days at the computer, developing new classes and videos and responding to questions on Facebook. I have created hundreds of quilts, both from patterns and my own designs. All my own designs (and a large % of those from purchased patterns) were drafted (or redrafted) in Electric Quilt. Whether you plan to “re-make” a pattern or design original works of art, I look forward to supporting you on your Electric Quilt journey.
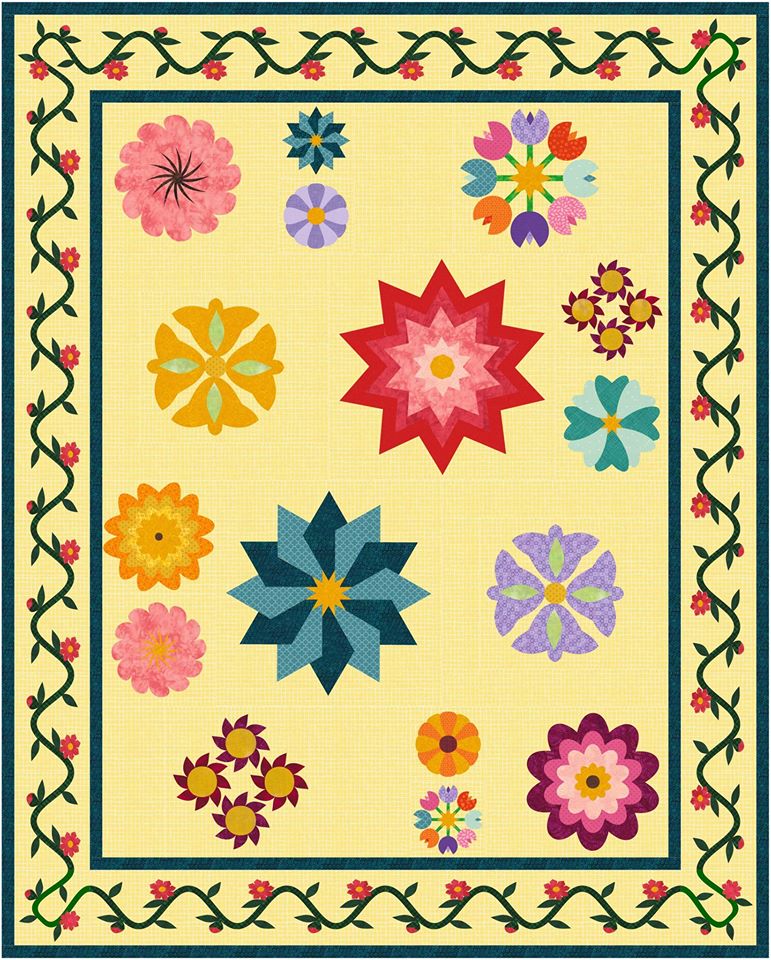
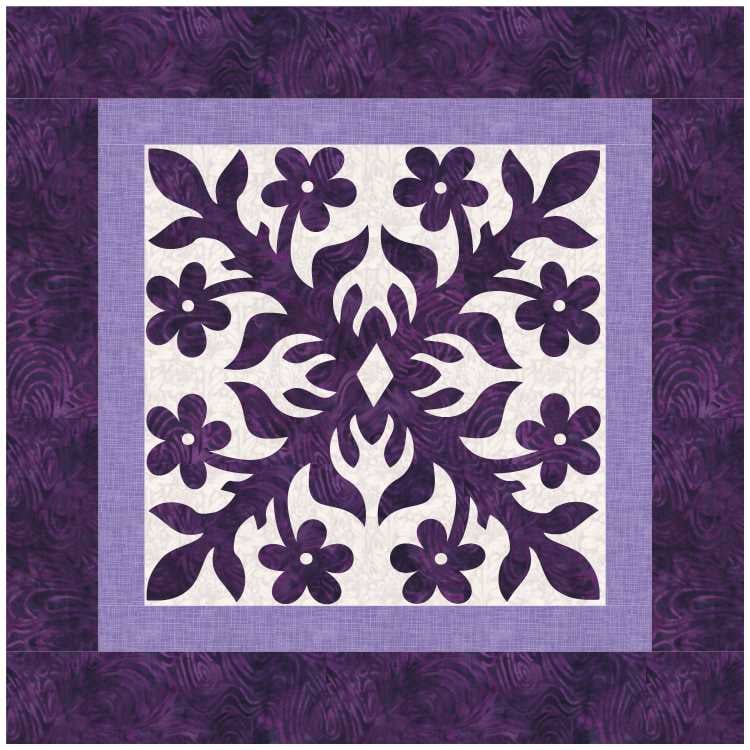
Learn about Hawaiian quilting
Be introduced to a Hawaiian quilt font Learn to design your first Hawaiian quilt in Electric Quilt Sale on EQ8 Drawing Blocks book Background on Hawaiian Quilting
Hawaiian Quilt Font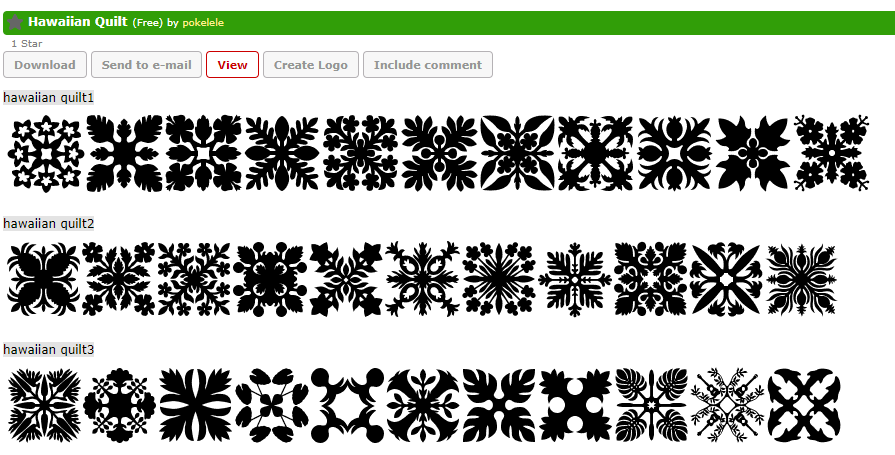
Hawaiian font from Netfontes.com
A number of years ago, I discovered a Hawaiian quilt font. Each letter provided a Hawaiian applique quilt block. When I looked on the Internet today, I discovered three different Hawaiian quilt block fonts.
You can download the fonts for free from Netfontes.com The fonts were designed by Pokelele.
I decided that these "letters" would make great quilt blocks, and would also be good practice for learning to use the applique tools in Electric Quilt 8.
Drafting a Hawaiian Quilt Block using EQ8
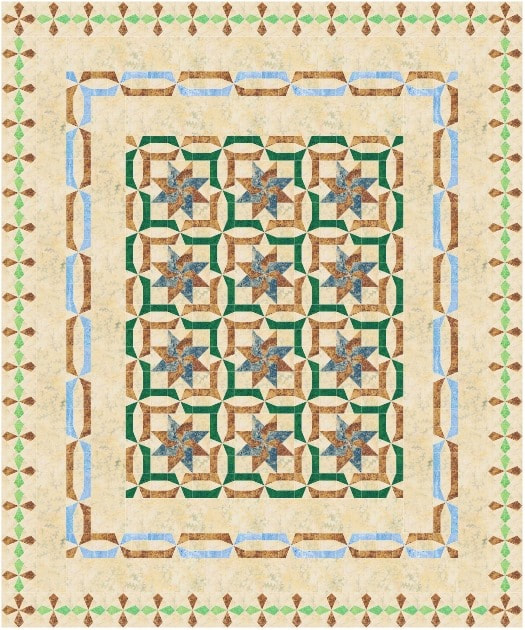
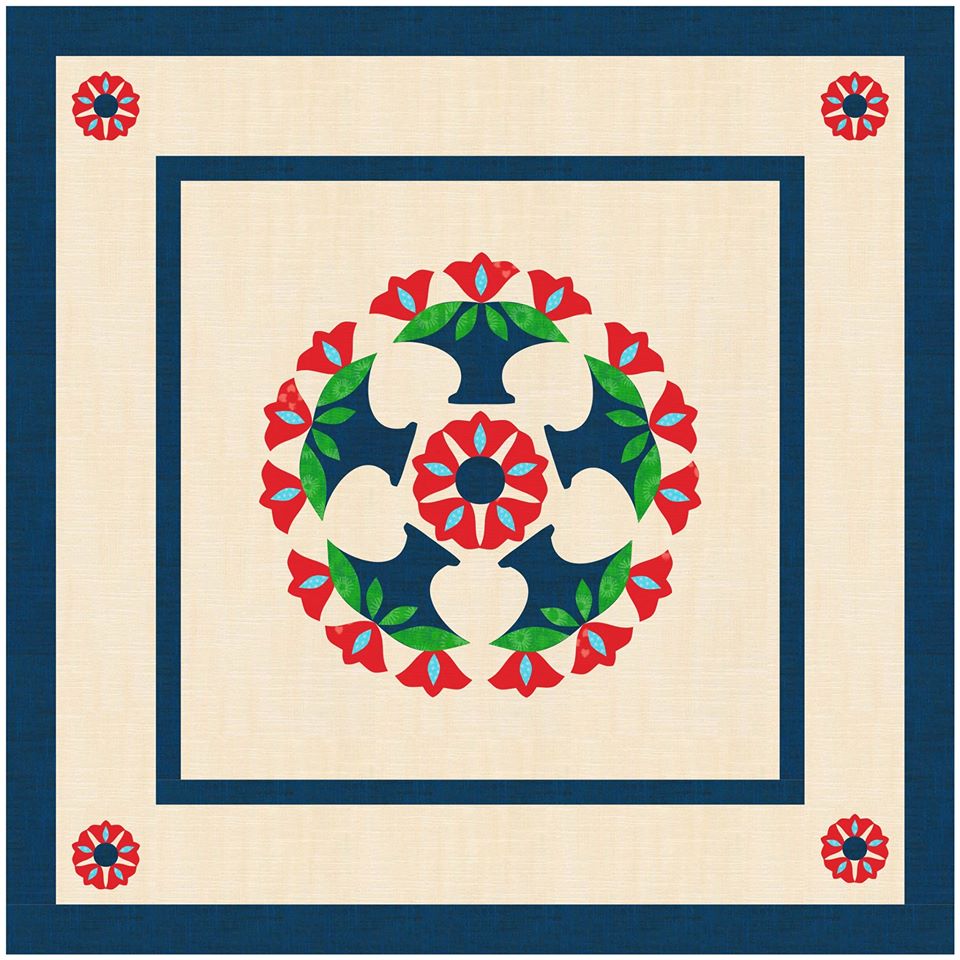
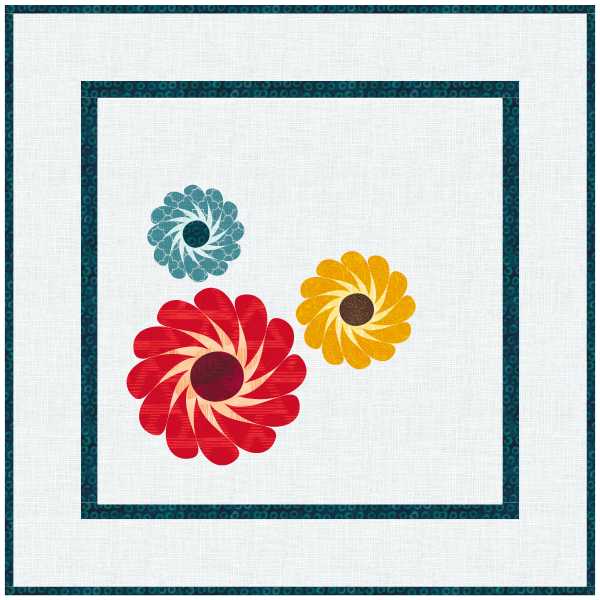
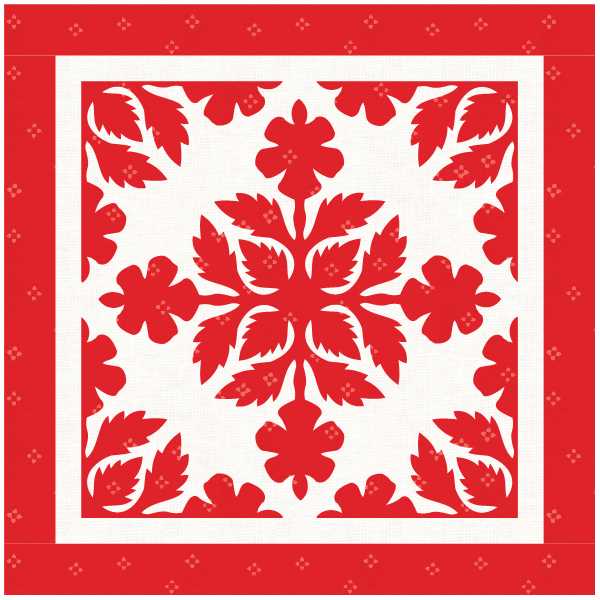
Here is the quilt from the video.
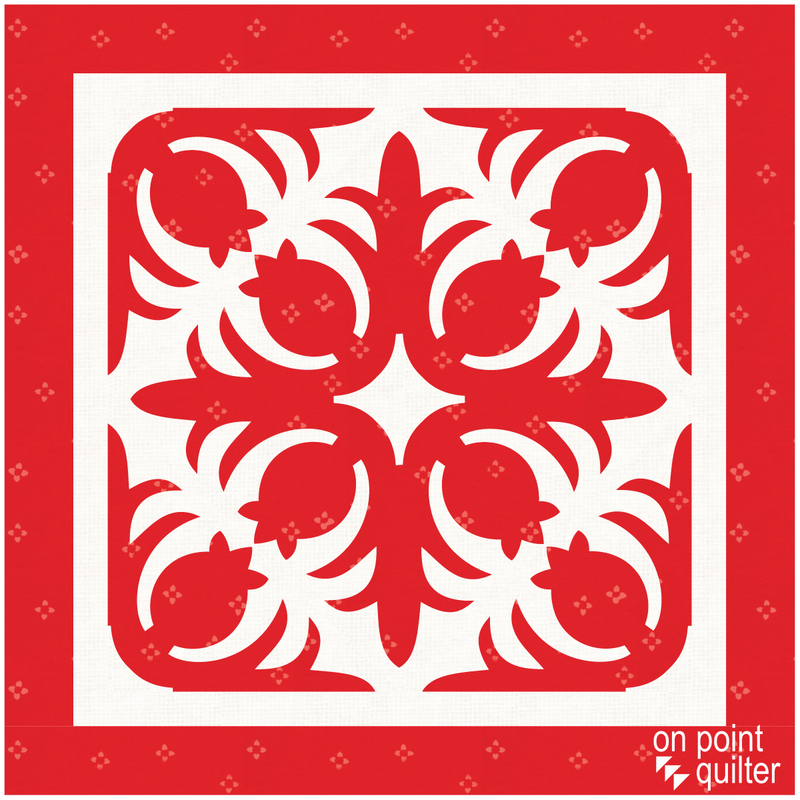
Hawaiian Quilt featuring the letter I designed by Kari Schell using EQ8
Are you ready to finally understand how to draft all types of blocks using EQ8?
EQ8 Drawing Blocks
Learn the fundamentals of block drawing.
If want to draw your own blocks in EQ8, this is the book for you! Experienced EQ educator, Kari Schell, takes you step-by-step through each of the drawing styles available in EQ8. You'll learn skills for both pieced and applique drawing while filling your Sketchbook with beautiful blocks! From drawing a simple nine patch to creating a beautiful floral applique wreath, this book will take your drawing skills to the next level! Regular Price: $29.95 On sale for $24.98 through November 15, 2019,
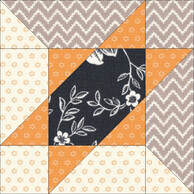
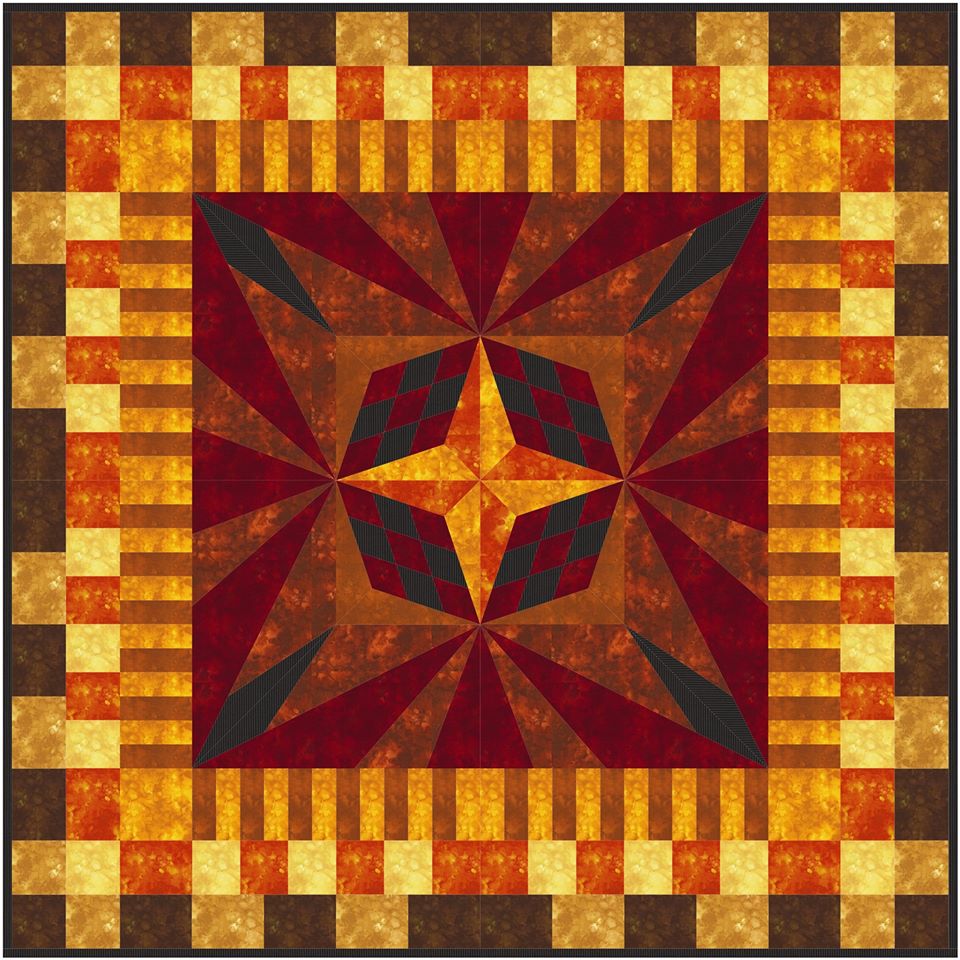
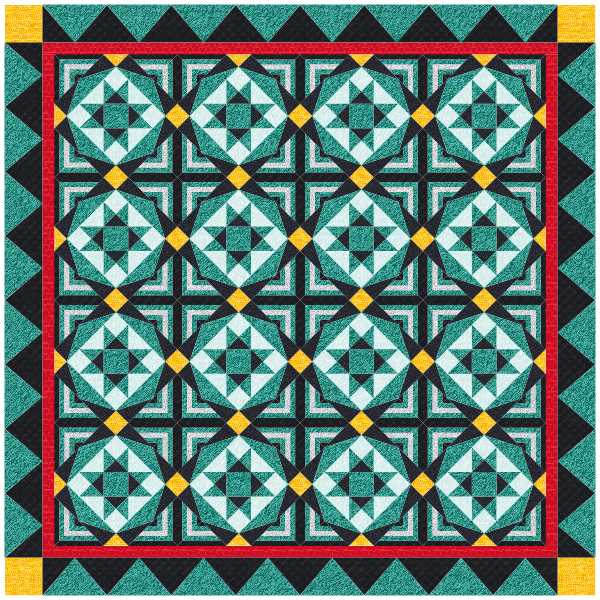
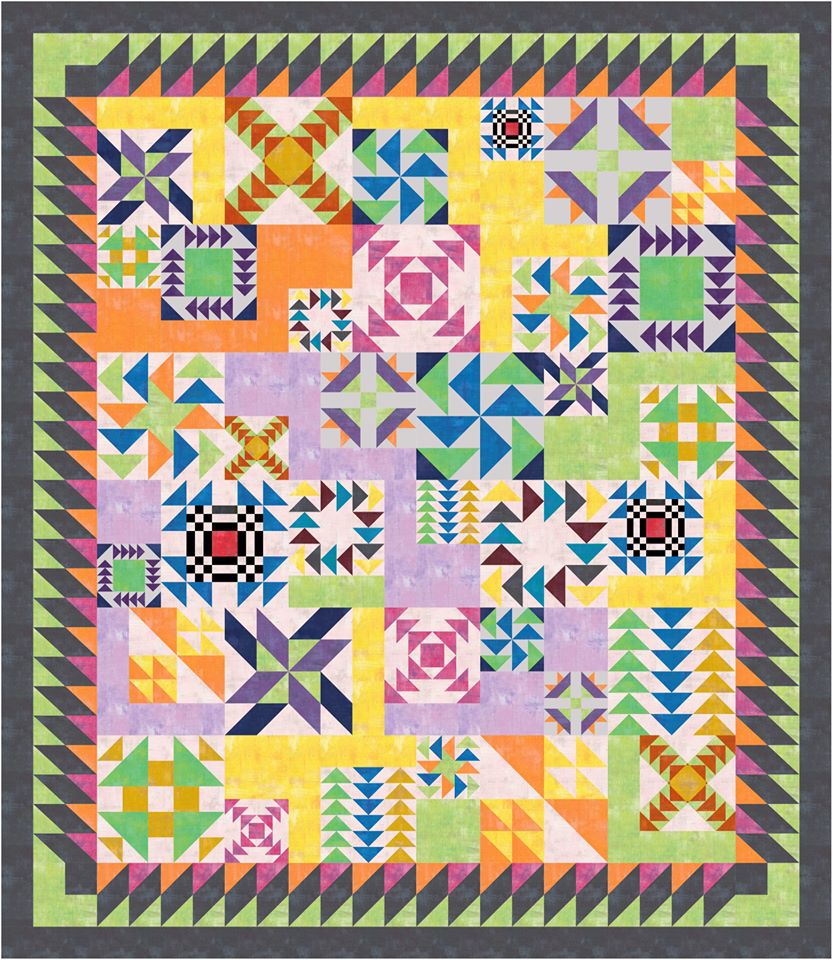
Last week I shared how to create an asymmetrical block. Harvest Stars was colored with All Hallows Eve, a Moda fabric collection by Fig Tree Design. I then created a number of quilt options using Symmetry in Electric Quilt 8.
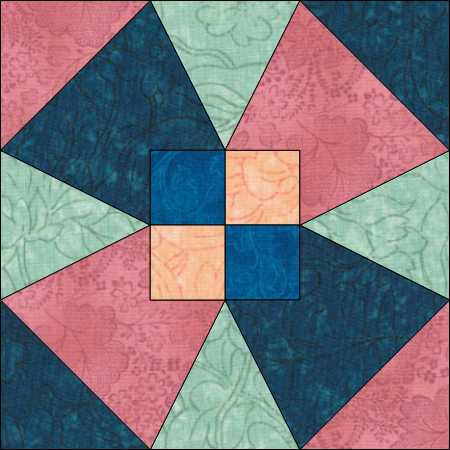
If you missed the tutorial, you can still catch it here. 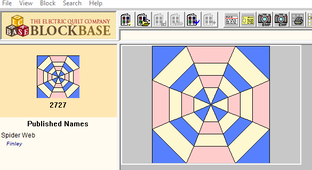 Spider Web by Ruth Finley published in 1929 (from Blockbase) Spider Web by Ruth Finley published in 1929 (from Blockbase)
This week I decided to create a quilting design for the Harvest Stars quilt. I originally pulled a quilt block called Spider Web from Block Base and set it on my quilt. But I wasn't super excited by all the straight lines.
Spider Web Quilt Video
In my Electric Quilt 8 video tutorial this week, I will show you turn a Kaleidoscope block from the EQ library into the Spider Web-like block designed by Finley. (If you have Block Base, you can import this block instead of drafting it as I did.)
Then we will use this block to create an applique motif that may be set on Layer 3 of a quilt in Electric Quilt.
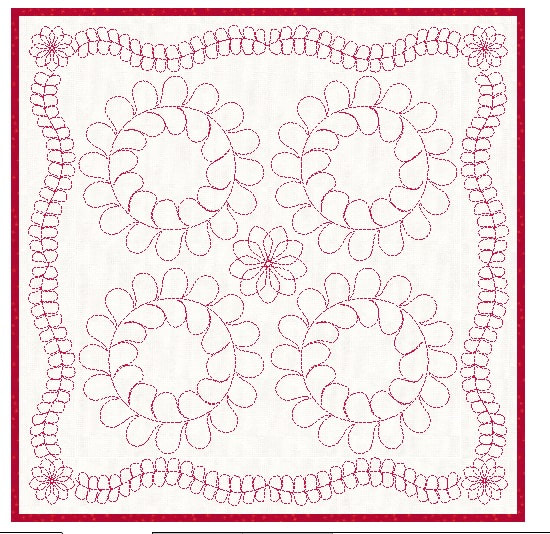
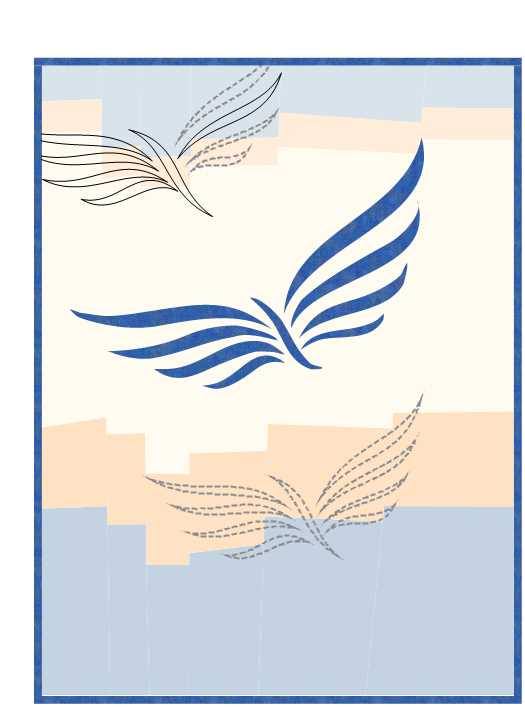
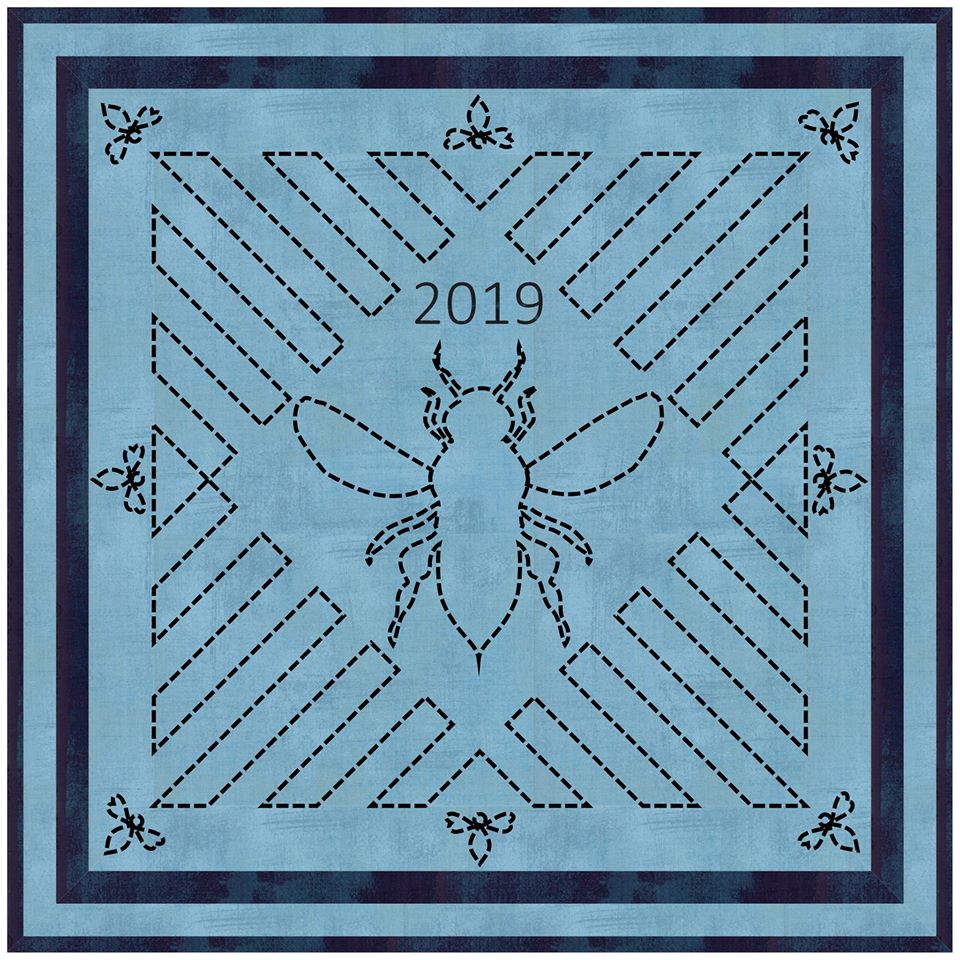
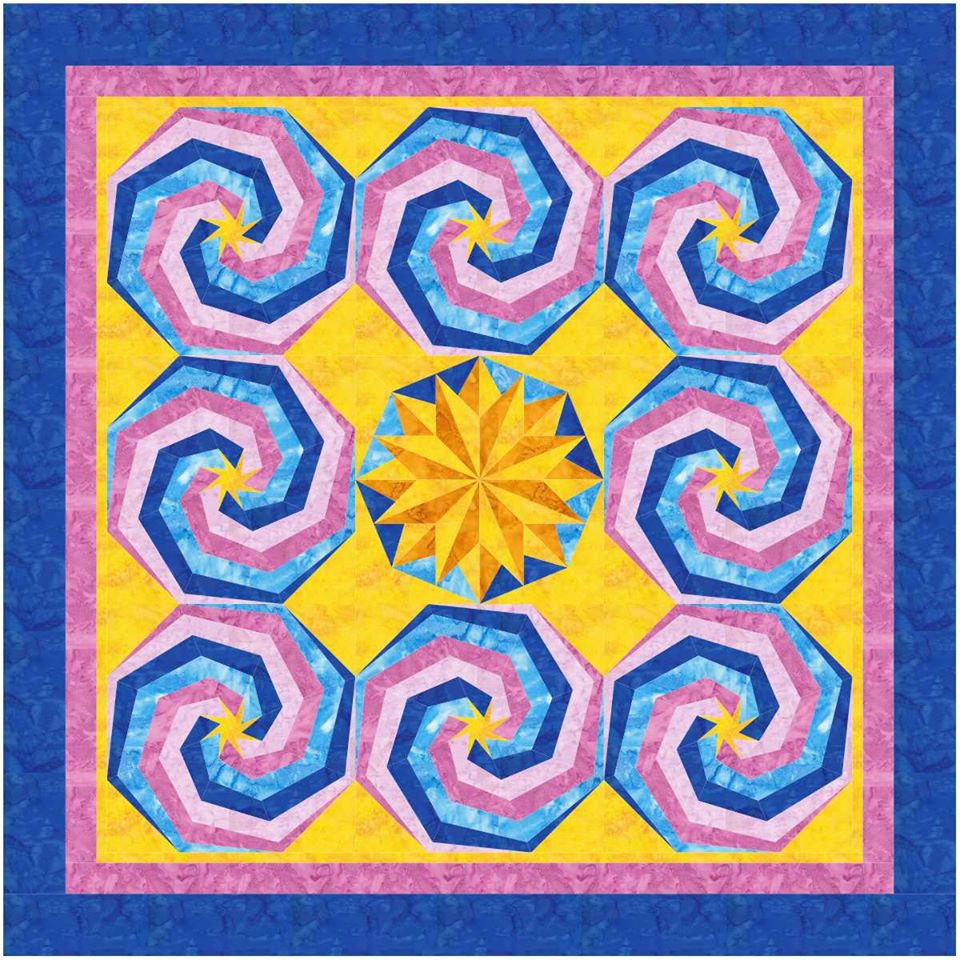
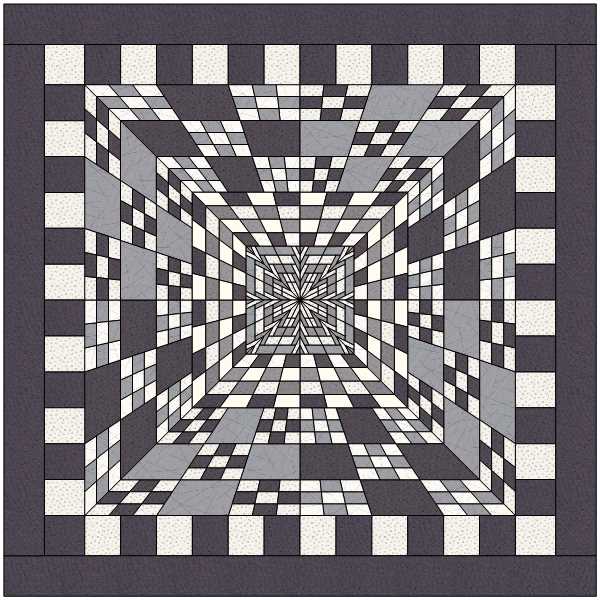
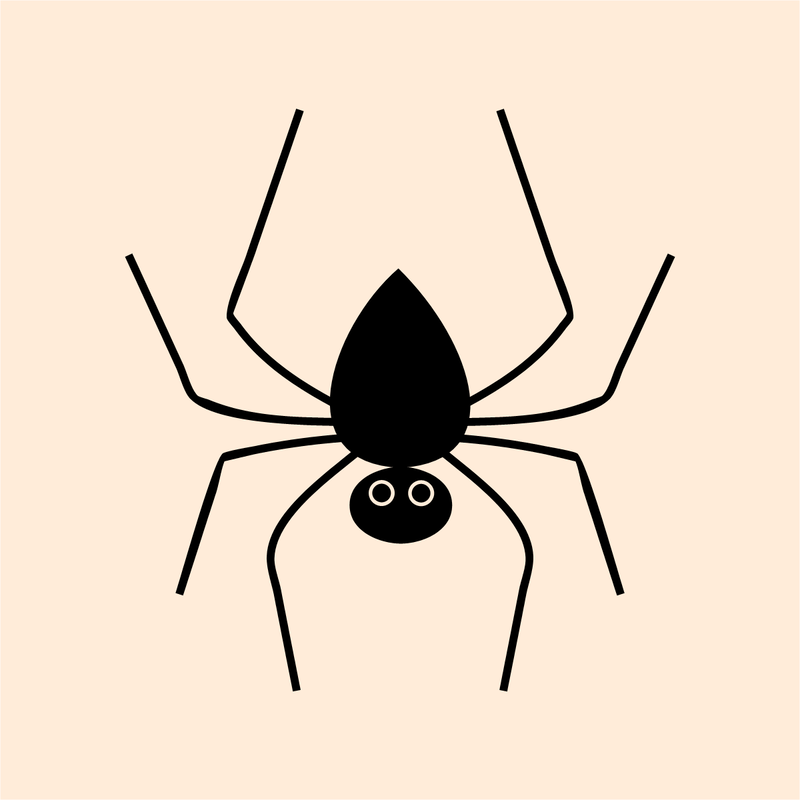
Here is my spider web quilting design.
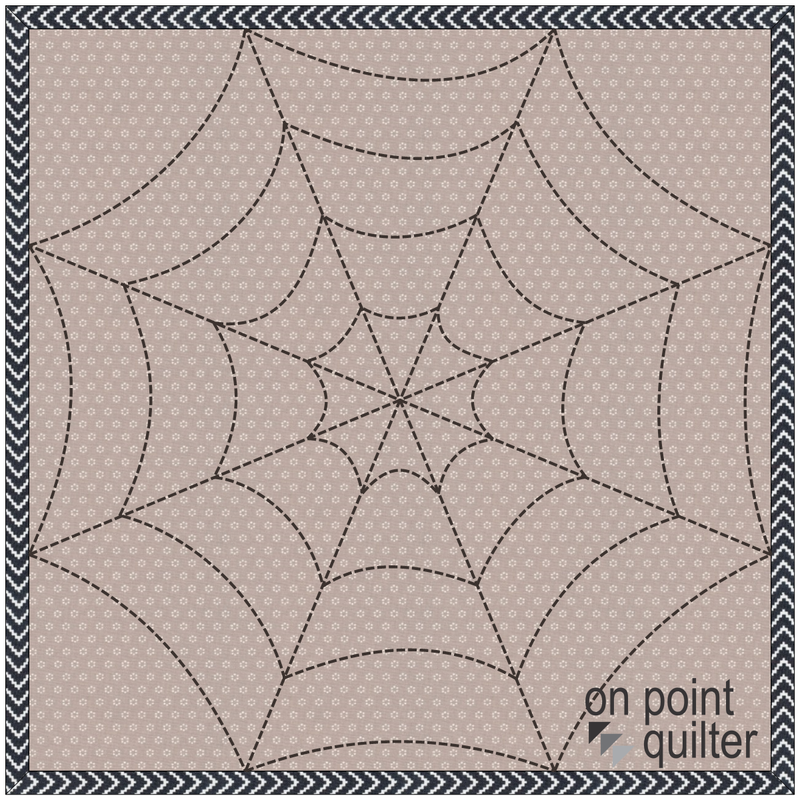
Spider Web Stencil by Kari Schell
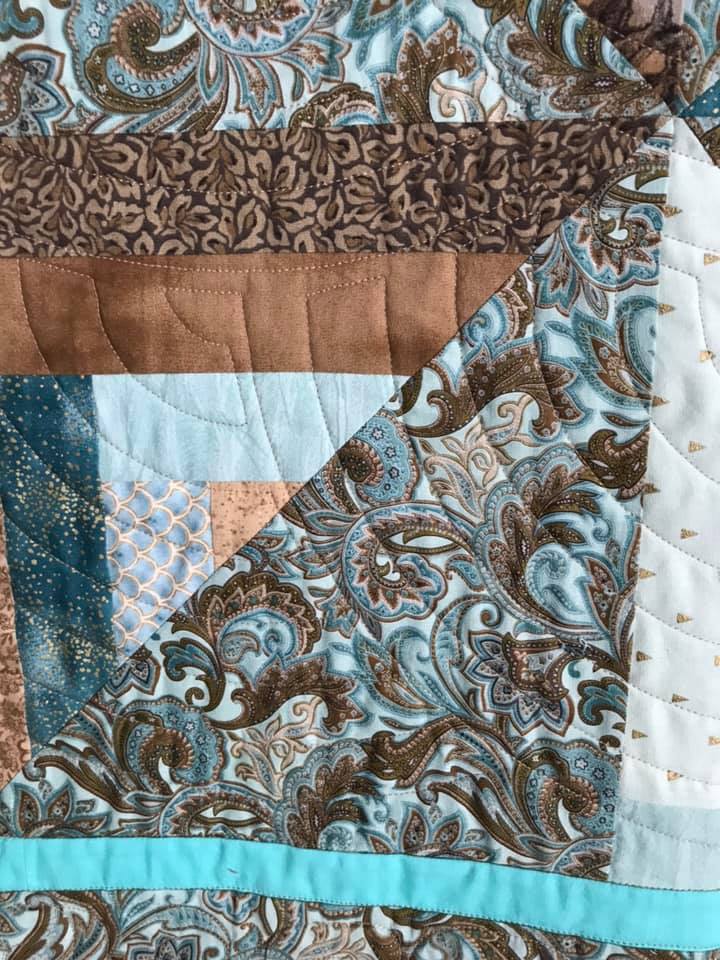
Quilting the Spider Web Design
This is one of those designs that would be super forgiving when stitching out either on a longarm or on a domestic quilting machine. Start by quilting the straight lines. Then add the continuous curves. The curved lines don't need to be "perfect" -- just sew a gentle curve from one straight line to the next.
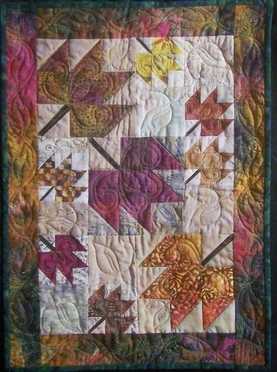
This design would work for a Halloween quilt, a fall harvest quilt -- or any quilt that could benefit from some gentle curves. I applied the Spider Web stencil to the Harvest Stars quilt from last week. The Spider Web stencil was set at 16 inches x 16 inches. 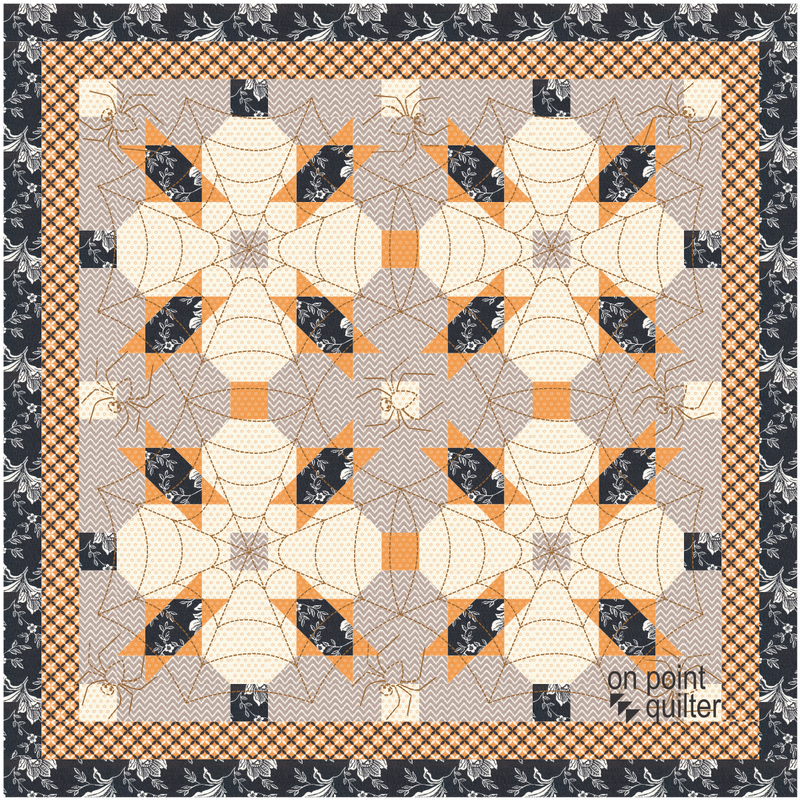
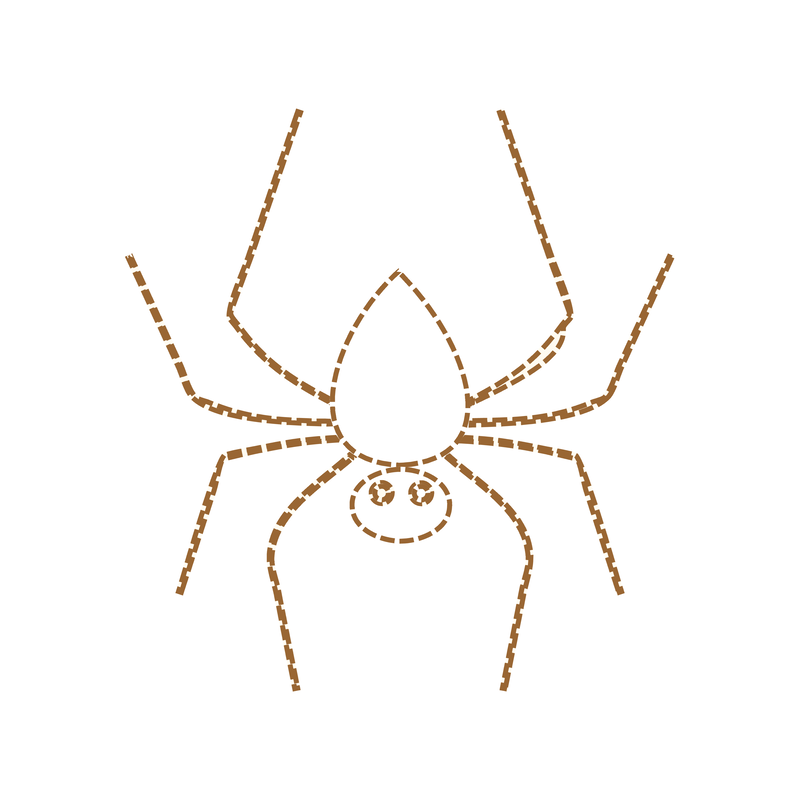
This did leave some holes in the corner that would need to be filled. I found a spider block in the EQ library that I modified to turn into a quilting design and added to the quilt. (Instructions for this were not included in the video tutorial.)
Just for fun, I tried the Spider Web stencil on a different pieced block.
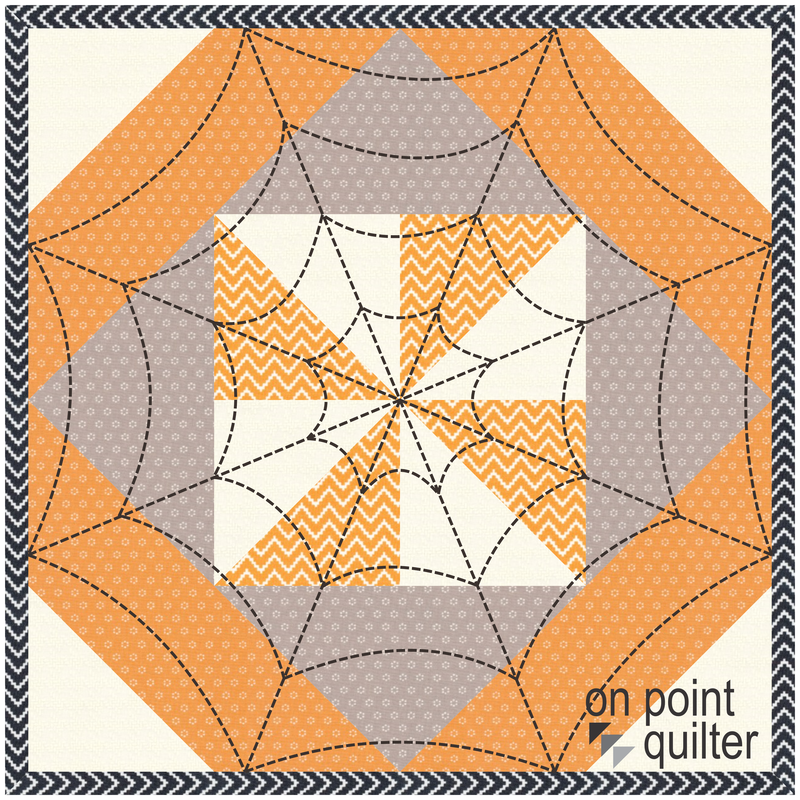
Where would you apply this stencil?
|


Free guide available for newsletter subscribers


Kari SchellElectric Quilt Expert and Educator and Pattern Designer. Categories
All
Archives
July 2024
|


 RSS Feed