• Blog
  • About
  • EQ Training
    • Tech Know Quilters Electric Quilt 8 Membership Training
    • Shoot for the Stars with EQ8
    • Electric Quilt 8 Sneak Peek
    • Scheduling a Workshop or Lecture
  • Store
  • Card Making
  • Contact
  • Free Stuff
    • Other Video Tutorials
Picture

Heads Up on a Free EQ8 Christmas Mystery

11/28/2020

 
Picture
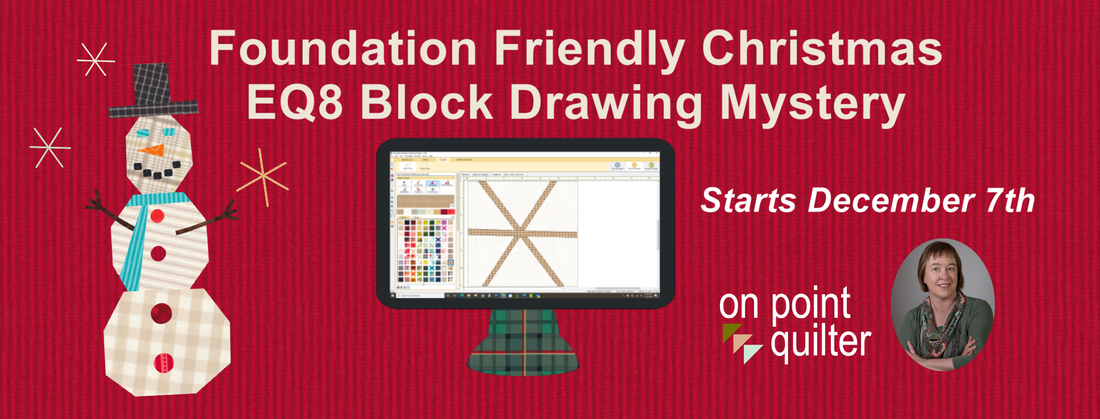
Are you ready to take your Electric Quilt 8 skills to the next level?  My early Christmas gift to you is a free Mystery project.  I will be sharing how to draft a series of newly designed foundation friendly blocks that would be suitable for a Christmas themed quilt.   You will be the first to see these new designs. 

This free challenge is designed for both beginners to Electric Quilt 8 and those that would like to expand their bock drawing skills to a whole new level. My goal is to encourage you to spend a small amount of time using Electric Quilt each day to allow you to become much more comfortable with the software.

Although the mystery is FREE, you must sign up to receive the video tutorials. The mystery will start on Monday, December 7th.
Learn More About the Mystery
EQ8 Foundation Friendly Christmas Sign-Up

Tech Know Quilters Virtual Showcase

Tech Know Quilters is a membership of Electric Quilt 8 owners who are mastering Electric Quilt through online training.  At the end of their October class, they were encouraged to apply what they learned during the month of October. 

Tech Know Quilters is open to new members only a few times a year.  You can sign up for the wait list here and we will notify you of the next open enrollment period.   ​

​I love having people at different stages of the EQ journey submitting designs.  I am so proud of this group of quilt designers.
Join the Wait List to Learn About the next Enrollment for TKQ
Picture
Rhonda Goss Quilt modeled after one found on the Quilt Index.
Picture
Julie Pedersen I took the Masters Advanced Medallion class this month. Here is the quilt that I designed.
Picture
Marlu Allan From Reproduction Quilts 2
Picture
Joyce Drenth I was in the Medallion class this month and decided I'd play with a tree of life focus. This could evolve into a family tree with all families joined from past generations.
Picture
Tina Rohde I have always tried not to have to sew flying geese. Learned new techniques in the working with precuts. Played with a flying geese block to create "Interrupted Migration"
Picture
Marijke Nieuwenhiujsen I took the class about modern quilts. This one I designed and worked on this month. It’s still under construction with rulerwork.
Picture
Charmaine Devaney This was really a fun design to build, and a very unusual way to approach it. I would have never thought to start with a triangle and diamonds. Way cool indeed!!
Picture
Nancy Haddad Lacey This is the quilt I designed based on lessons in the Master's medallion class.
Picture
Alice Hertel Mix and Match Medallions with Borders. The possibilities using borders are endless. Start with the centre and build from there. Great class!
Picture
Karen Eddie Neal I took several classes. This is the Masters Christmas folded corners. enjoyed it very much.
Picture
Karen Eddie Neal This is from the Masters Medallion borders. Learned a lot.
Picture
Carmen Sidlaruk I designed several from concepts learned in the Modern quilt class, but also gleaned from skills learned in previous classes. This first one is in memory of the many years I spent on the teaching skiing.
Picture
Cheryl Johnston I have enjoyed playing with More Optical Illusions. Here is one I particularly like in two color versions.
Picture
Cheryl Johnston I have enjoyed playing with More Optical Illusions. Here is one I particularly like in two color versions.
Picture
Connie Fairbrother Herbert This was my first month with Tech Know Quilters and I took the Modern Quilts class. This quilt was designed using techniques learned in Lesson 9 - 3D Quilts. I drew my own 3D block and then merged it with the Split Geometric Star block from the EQ Library and put it into the quilt added the Big and Little Points border for my second border.
Picture
Connie Fairbrother Herbert I felt like the first design was too busy so returned to the block I drew and removed some of the lines line we learned in lesson 2. The second image is the quilt with the lines removed. I like it much better and call it Star in the Mountains. I have also done this as a twin sized quilt also. It is one of several design during the class that I can see making.
Picture
Camille Lechliter This quilt is made up of one block of each block we studied in From Design to Production. Each block is the same size as the original but this quilt is only 46x46 - so you can tell the original is a lot bigger. What a super class!!! Lots of info but WELL worth it!
Picture
Lisa Ward Whew! finished the Reproduction Quilts Class this month. Such amazing hand pieced quilts created 150 years ago. This course really drives home the benefit to using images to assist in reproducing a design. Here is my Ships Wheel.
Picture
Jackie Rigert I took the working with fabrics unit this month. In doing so I was able to convert a quilt I had previously designed with EQ8 fabrics and put my actual fabric choices in it. It was an awesome lesson as what I thought would be fantastic really didn't work at all and I was able to make adjustments before I cut the fabric for the first block.
Picture
Jackie Rigert "versus..."
Picture
Linda Carlson My October Masters class was Designing Your Own Medallion Quilts. This is one of many great centers and quilts we did in squares and rectangles.
Picture
Linda Carlson Another options from the Design Your Own Medallion class.
Picture
Kristy Goodin Soard I was in the Advanced Medallion class last month, and wanted to enjoy the fall colors and it had to have a white pumpkin to keep me happy. I found an image as my inspiration online that appears to be needlepunch design by Michelle L. Painter. This is one I would really like to make and display in my home.
Picture
Barbara O'Brien worked out a smaller version of a medallion quilt.
Picture
Wanda Smith Hizer
Picture
Nancy Messuri Here is my idea for a square medallion quilt. We actually went from a queen to a king size mattress, so I am designing this for our bed. I haven't yet decided on the exact colors or fabrics.
Picture
Curryanne Hostetler Medallion
Picture
Carol Mallozzi Medallion
Picture
Maureen Feron Pinwill Medallion
Picture
Holly Wilson Medallion
Picture
Helen Hicks Medallion
Picture
Kathleen Scargle McCormick Corner was created with a block called optical illusion.
Picture
Kathleen Scargle McCormick Medallion Quilt
Join the Wait List to Learn About the next Enrollment for TKQ

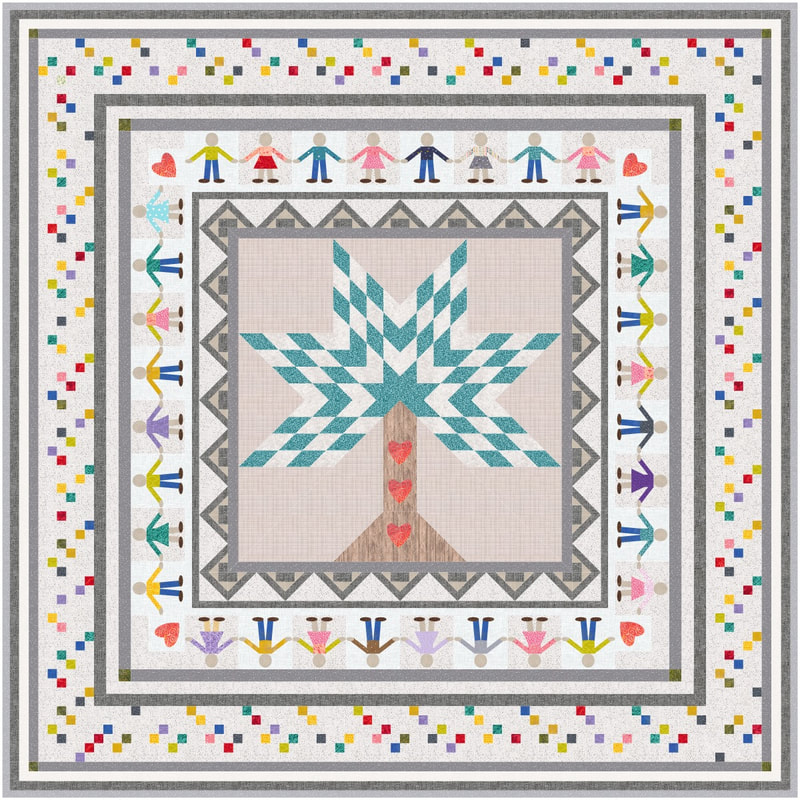
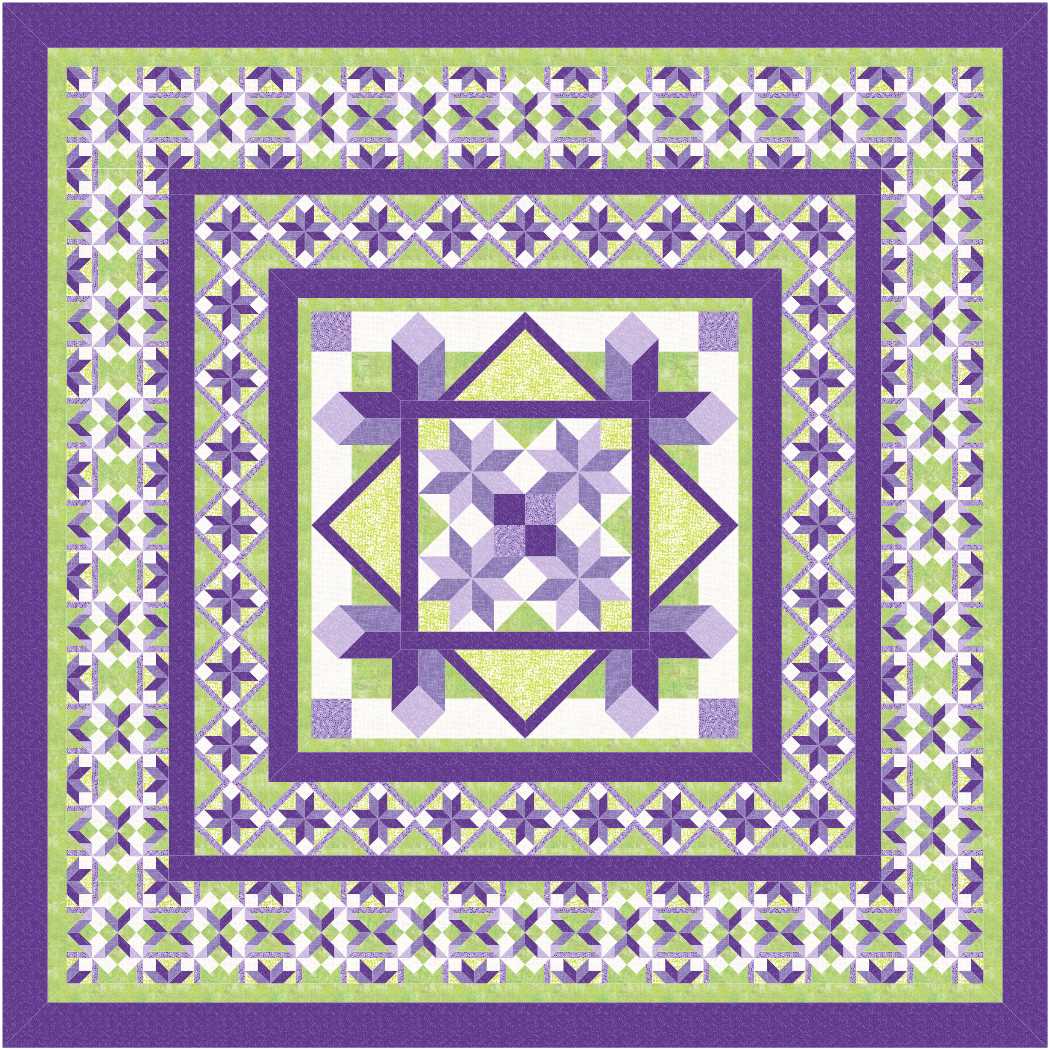
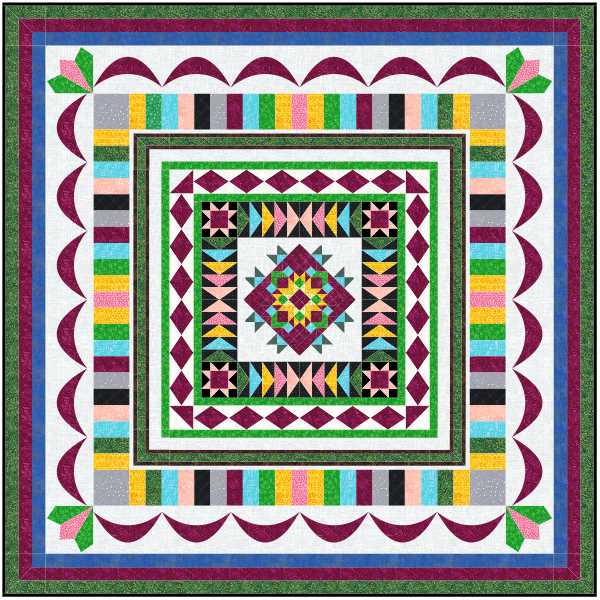
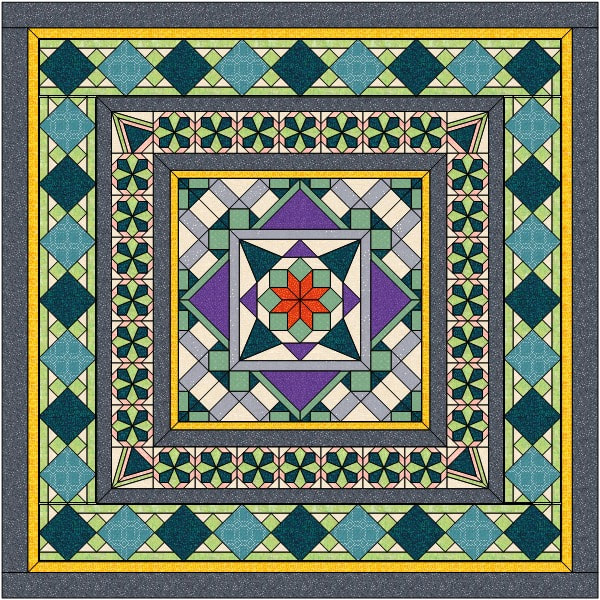
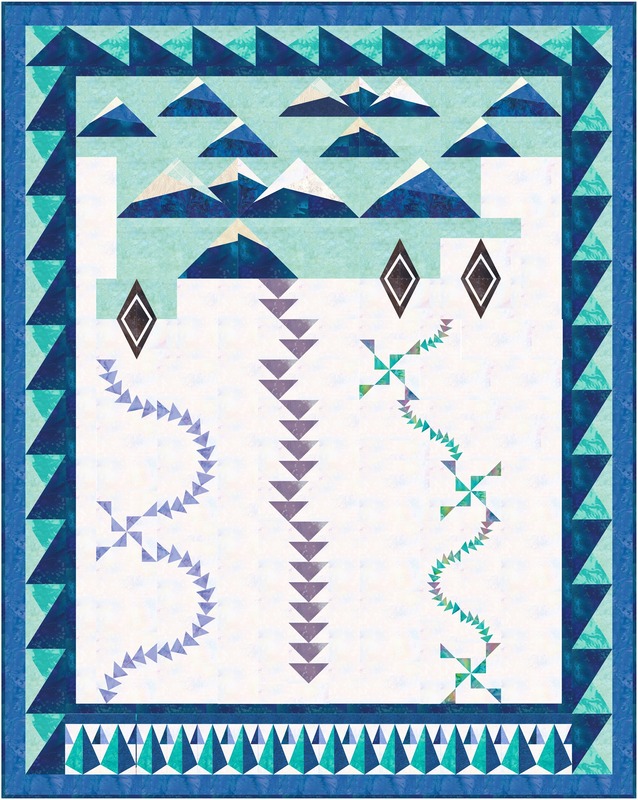
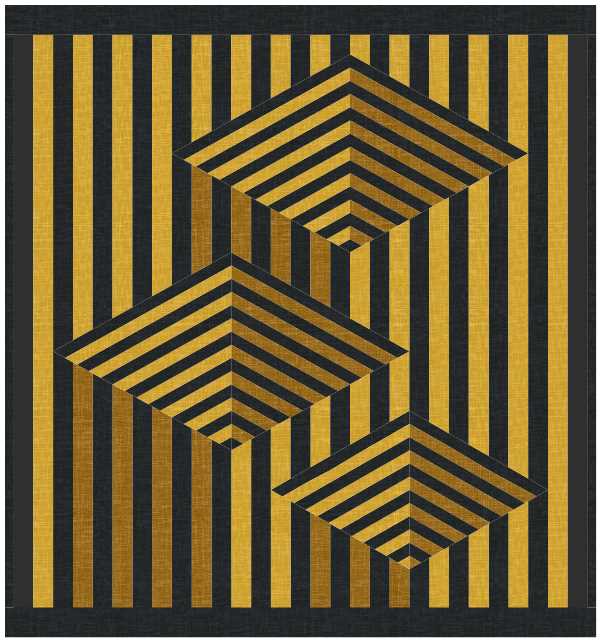
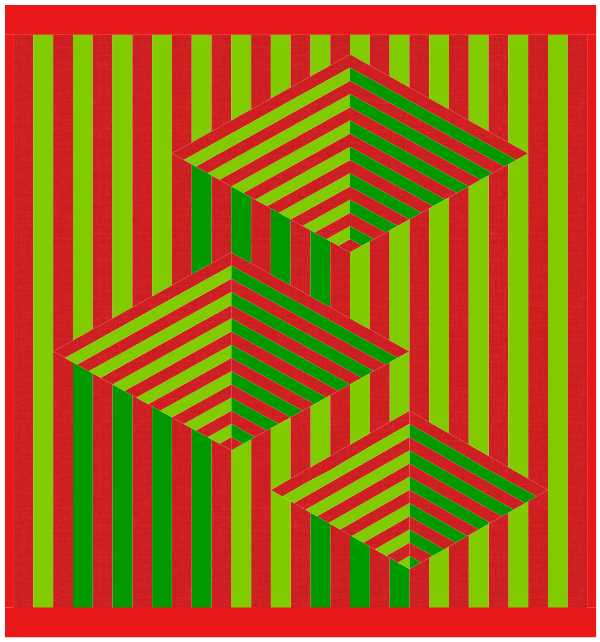
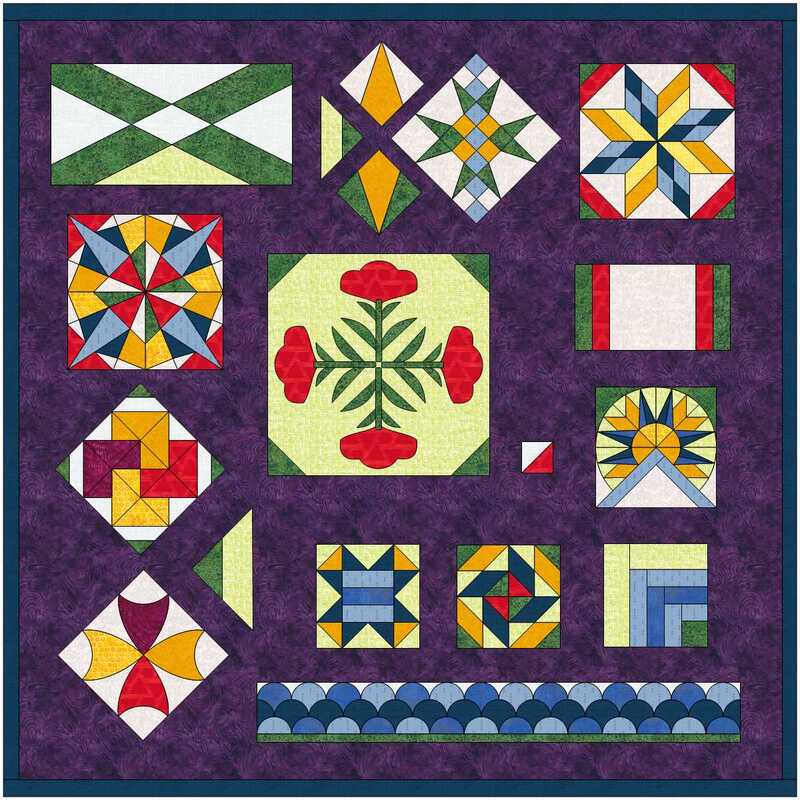
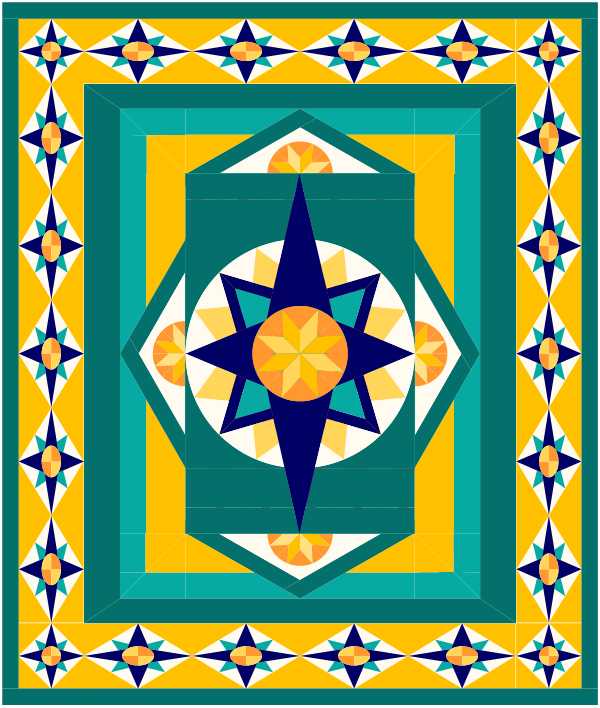
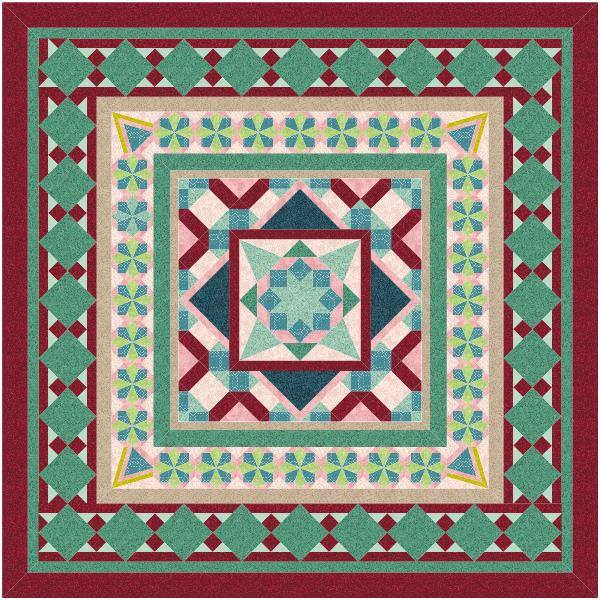
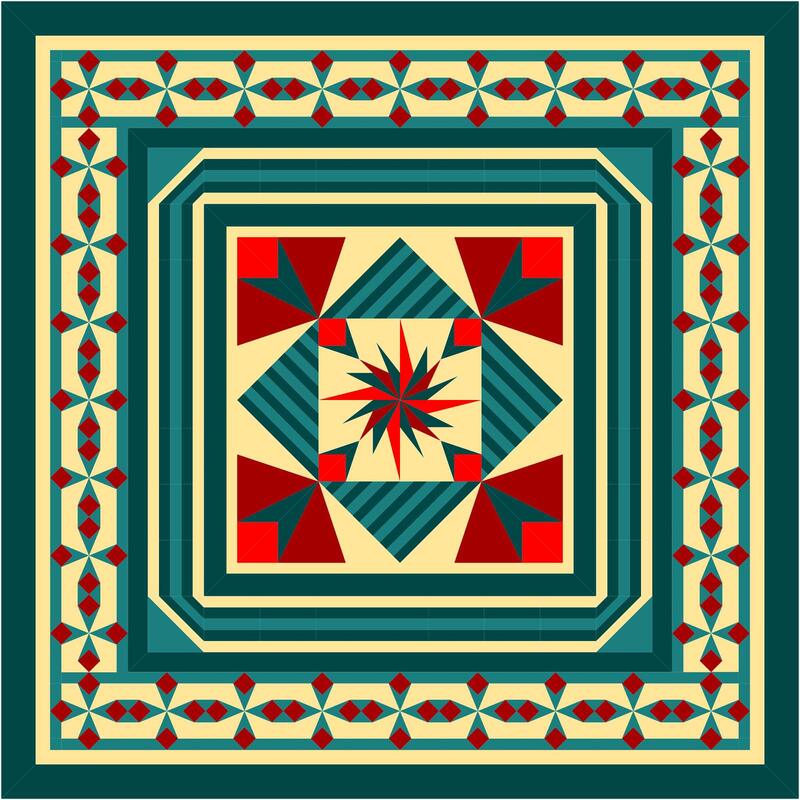
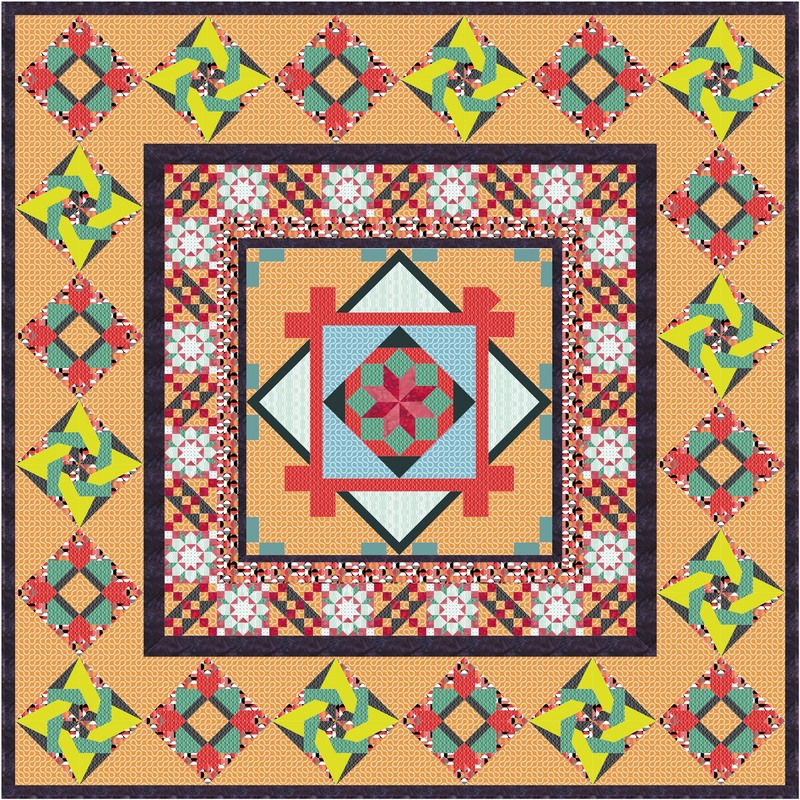
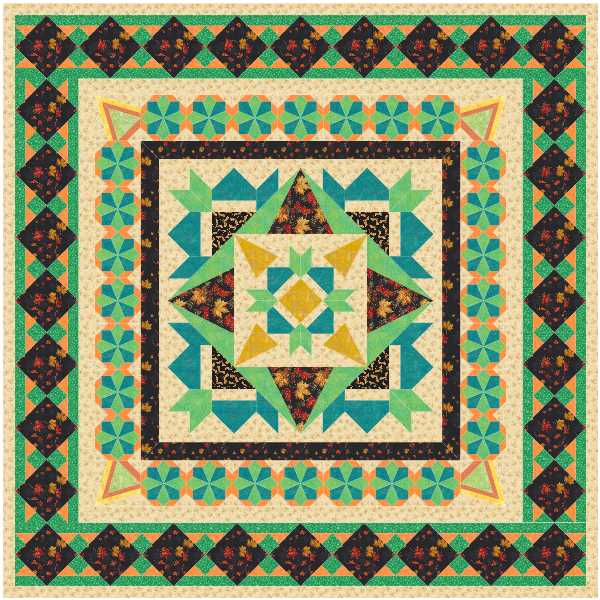
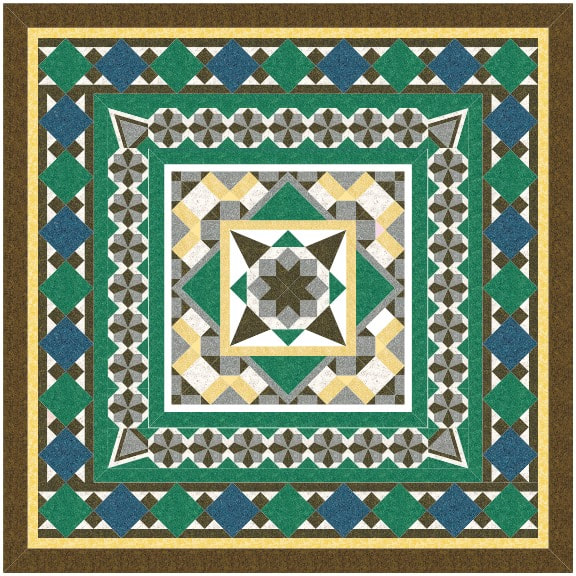
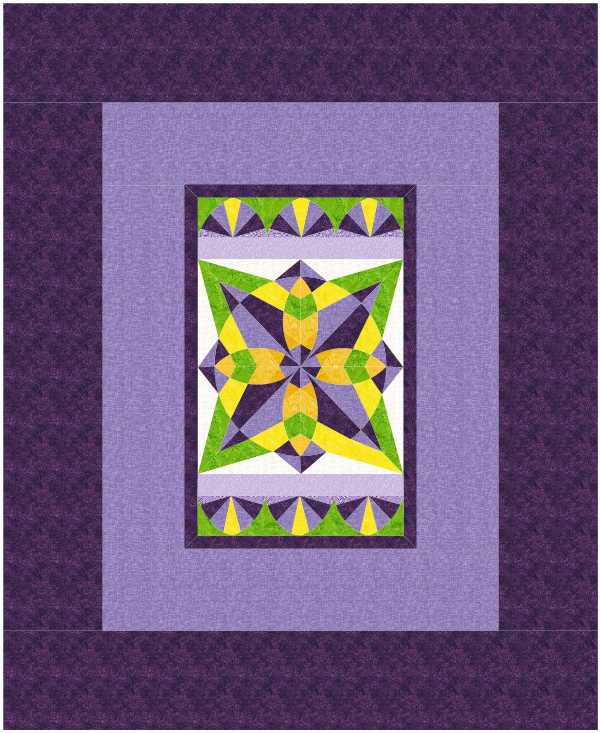
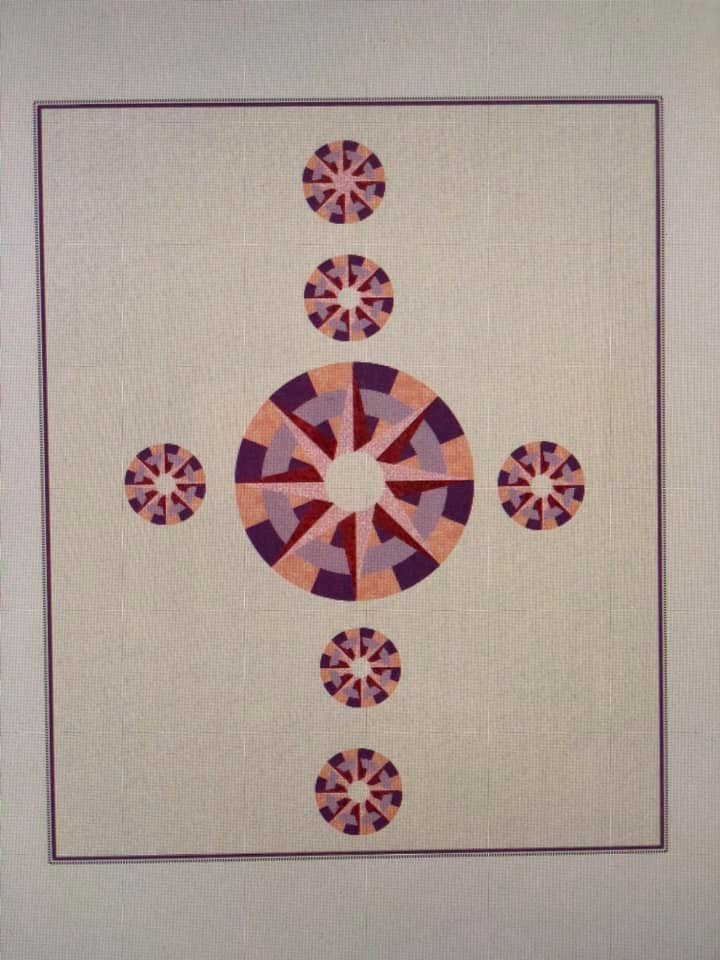
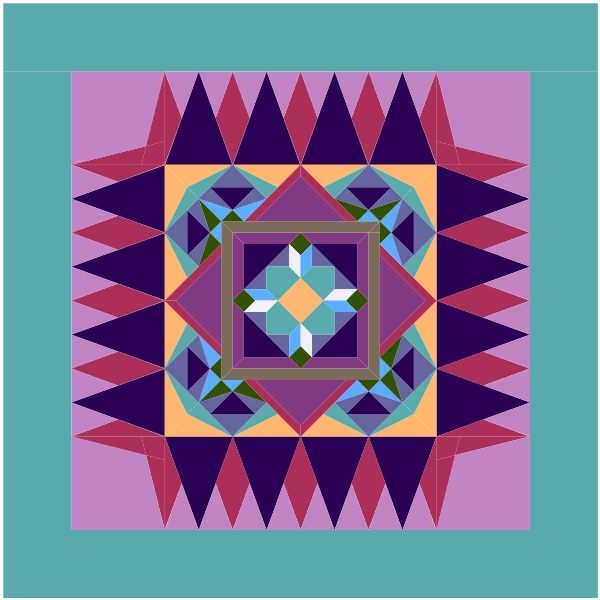
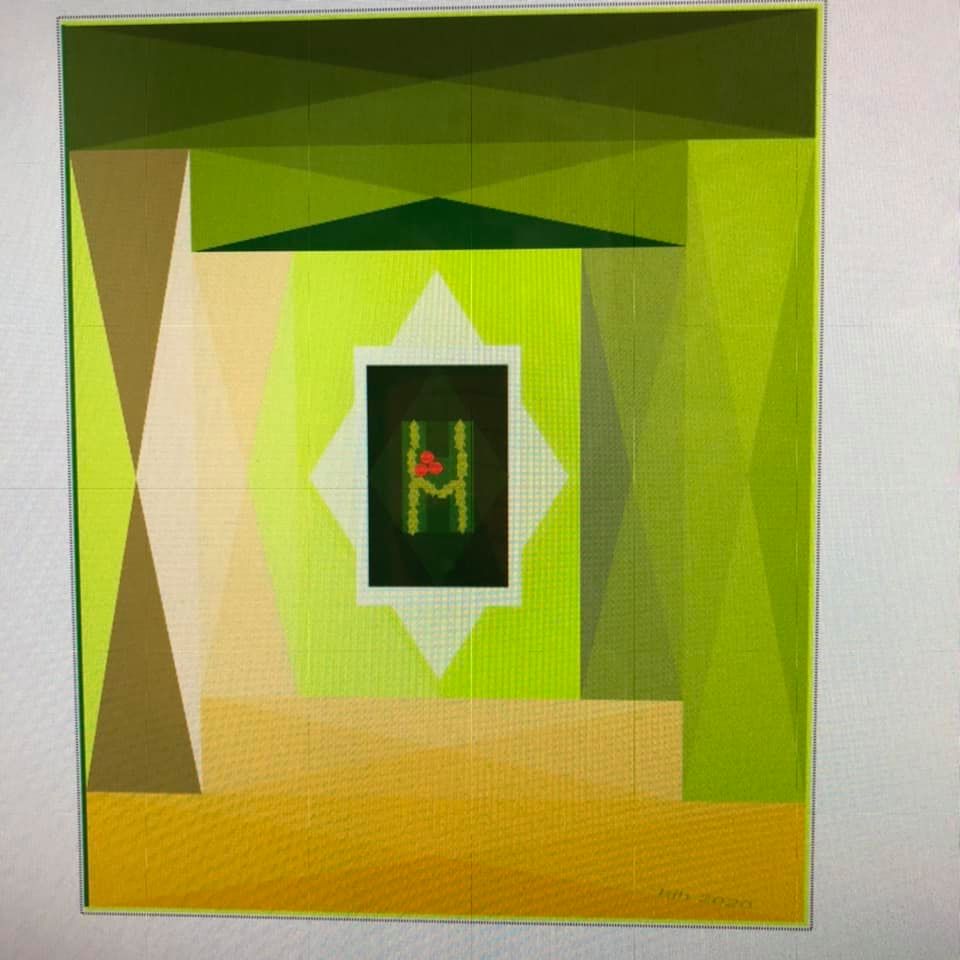
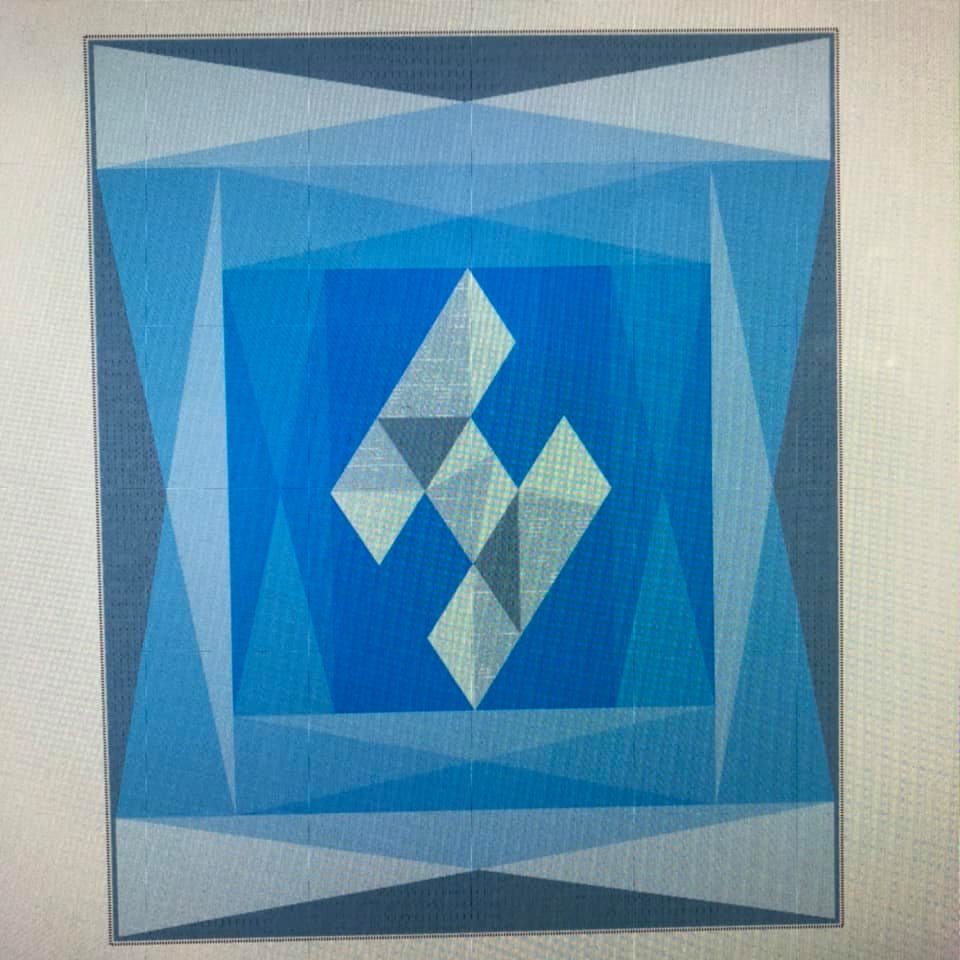
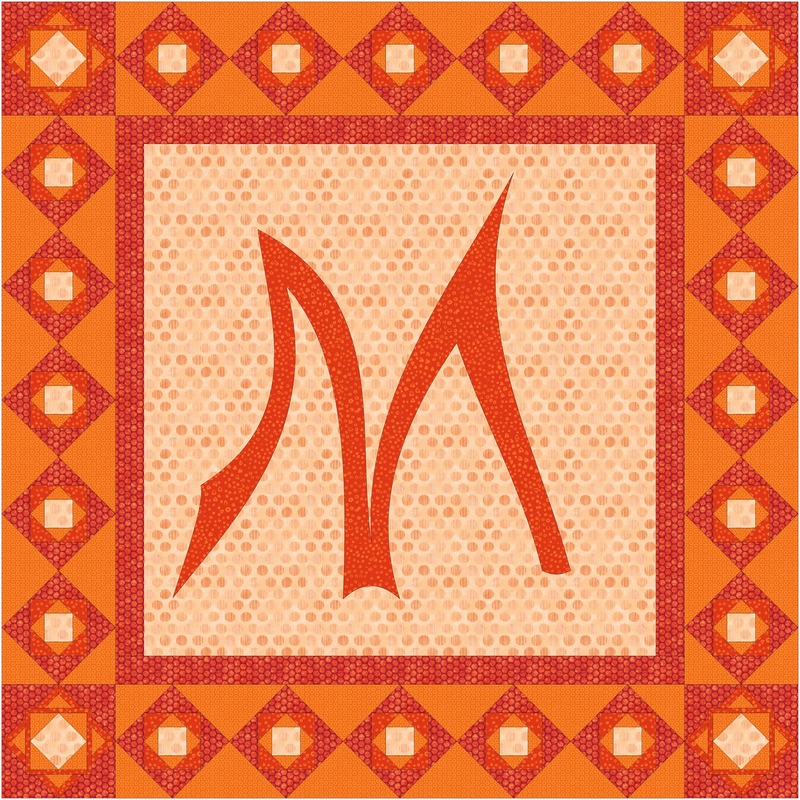
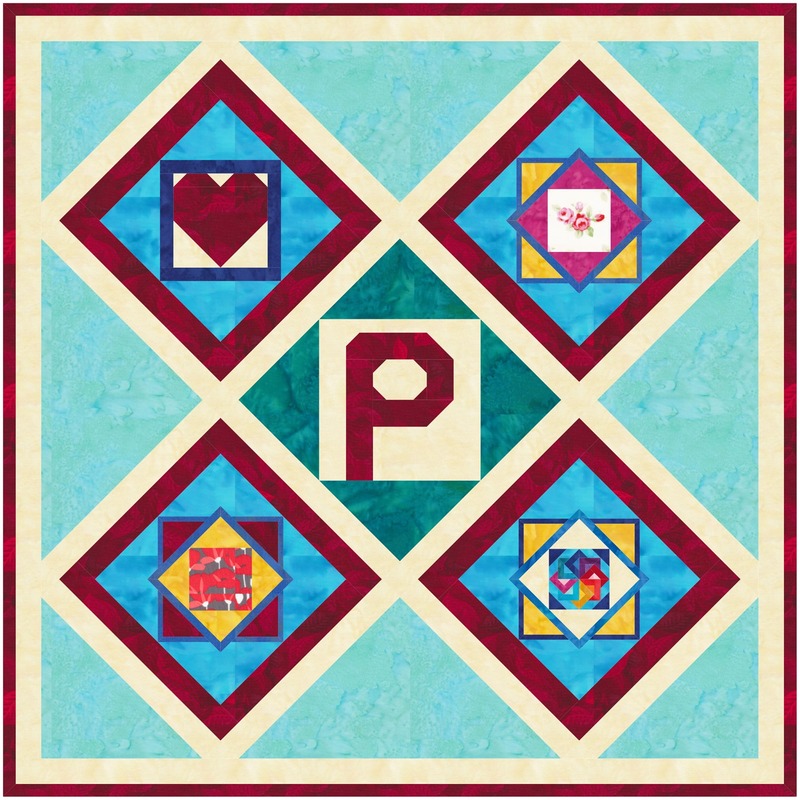
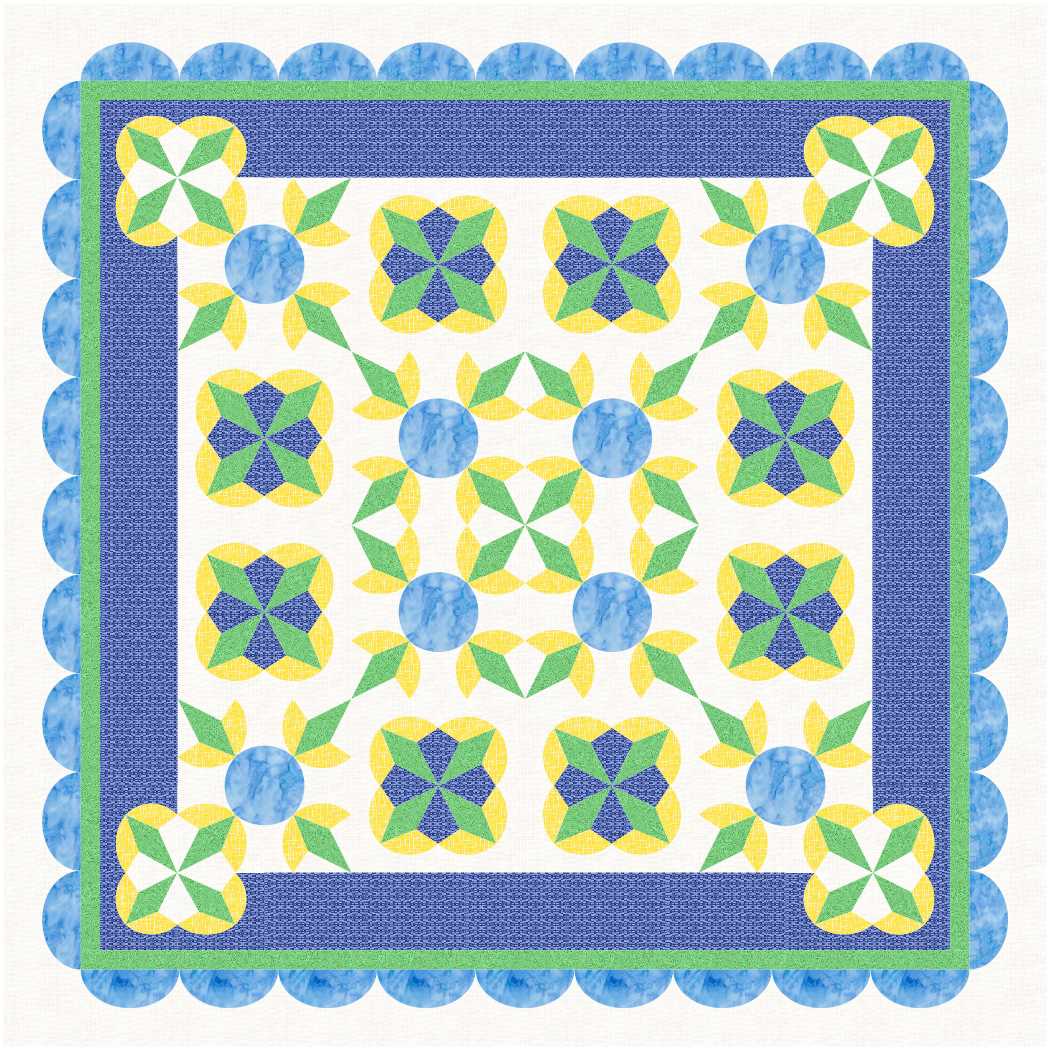
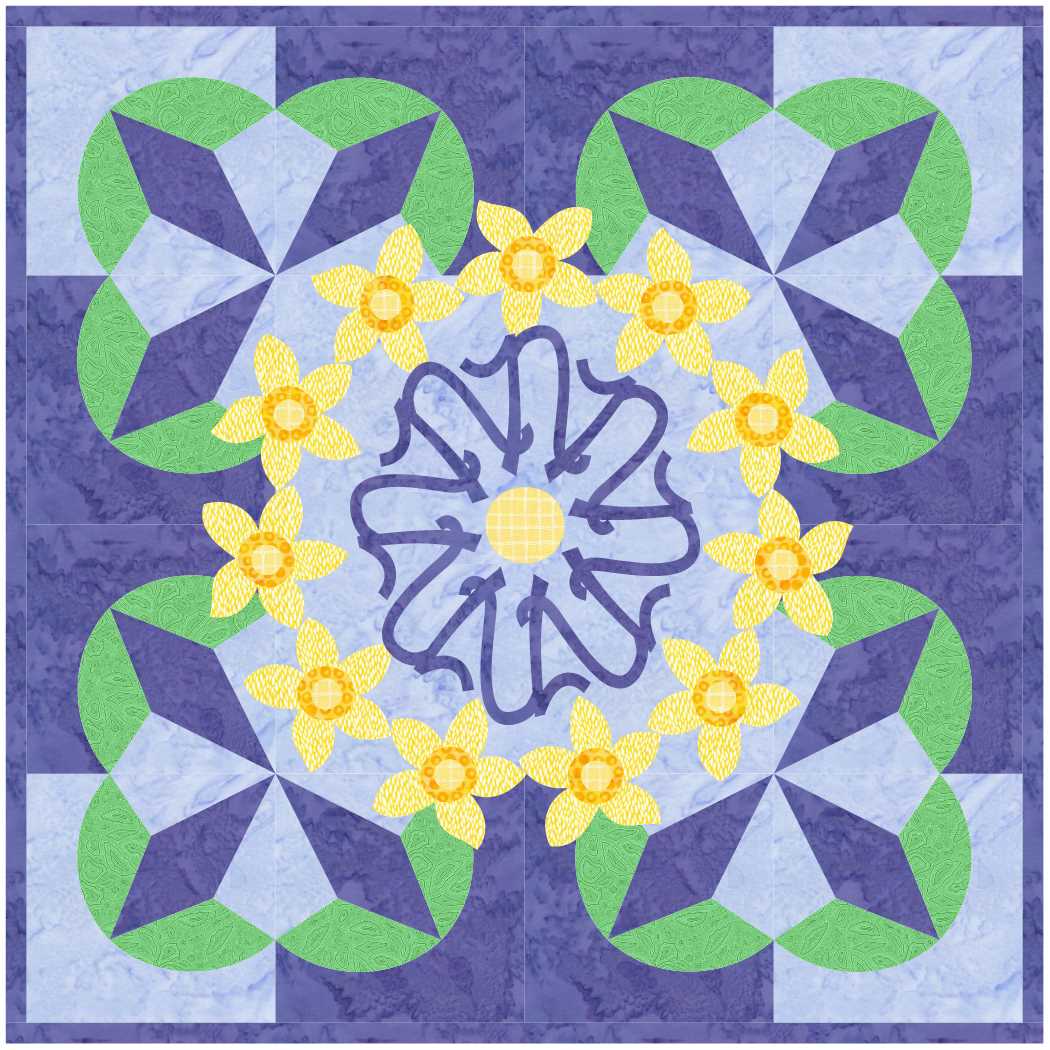
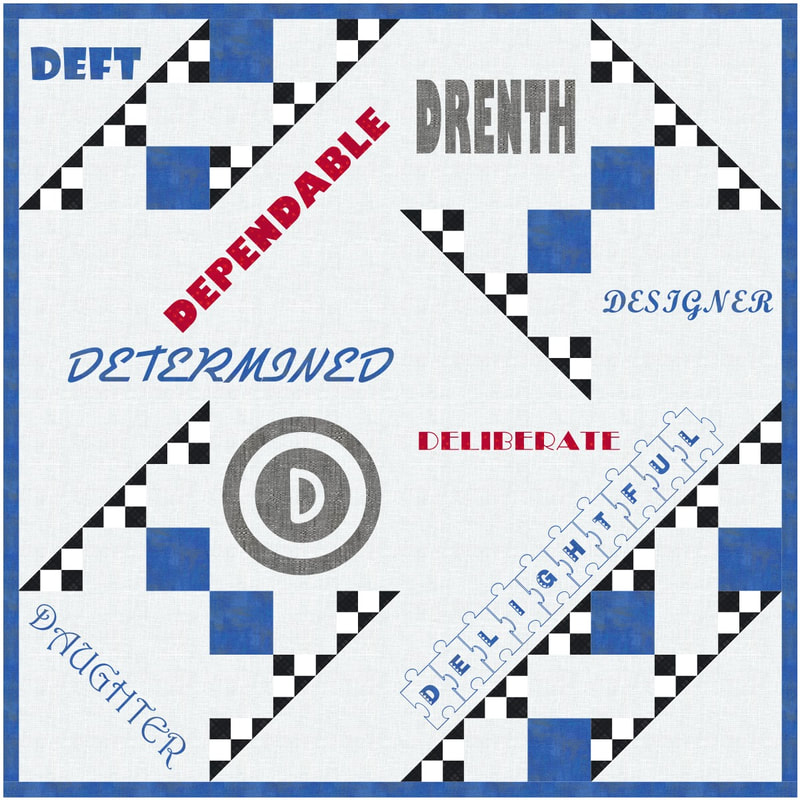
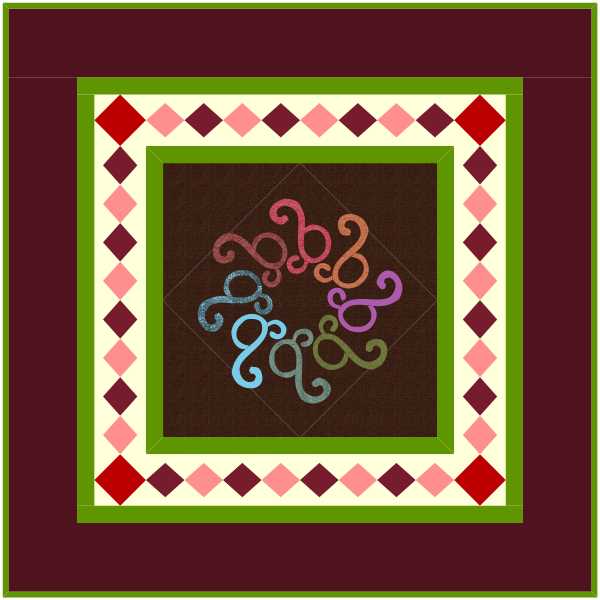
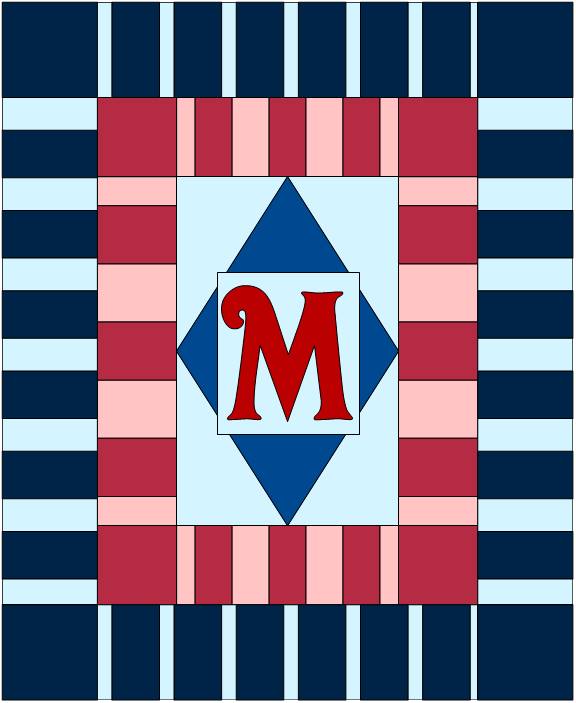
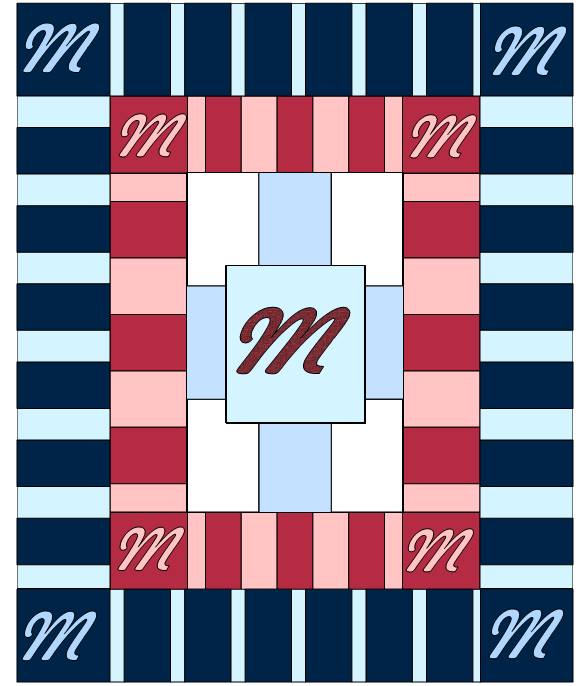
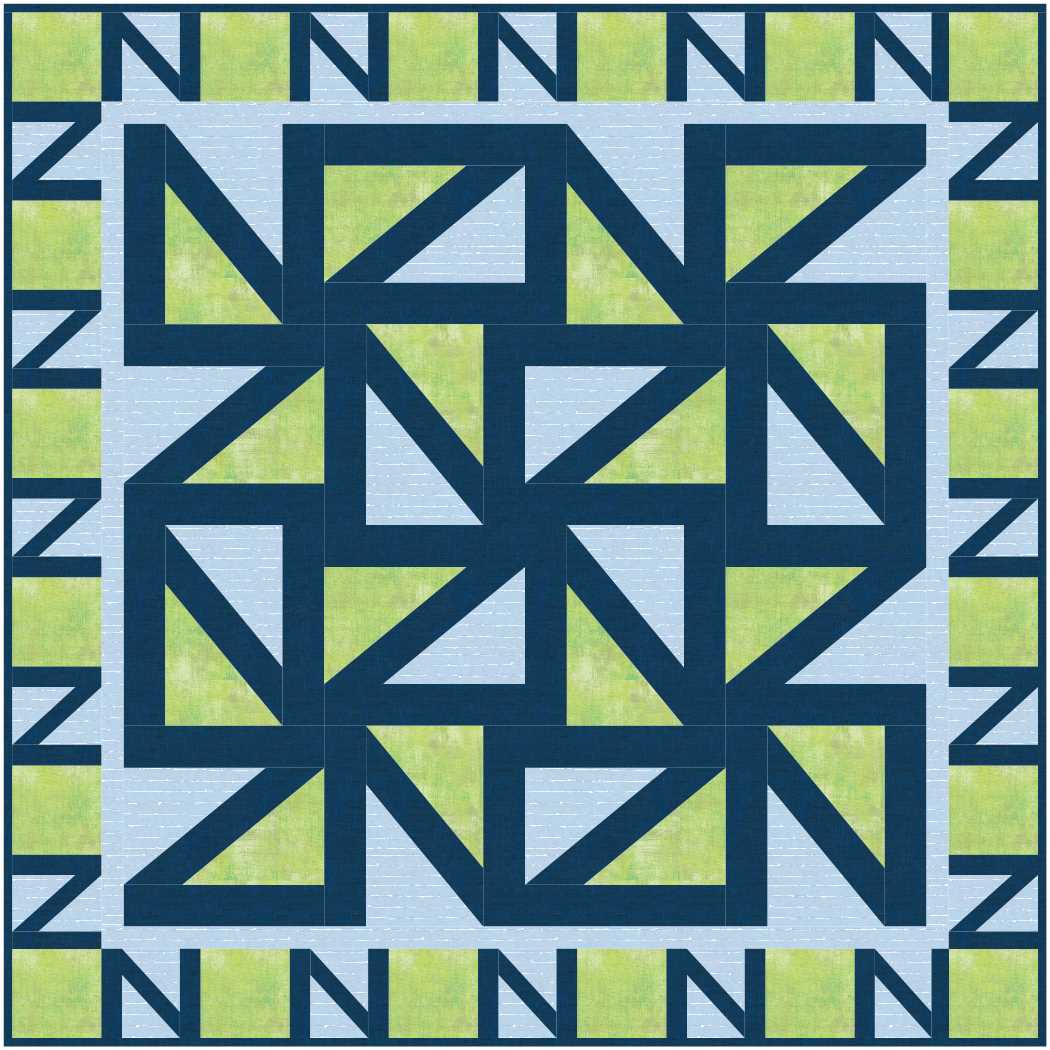
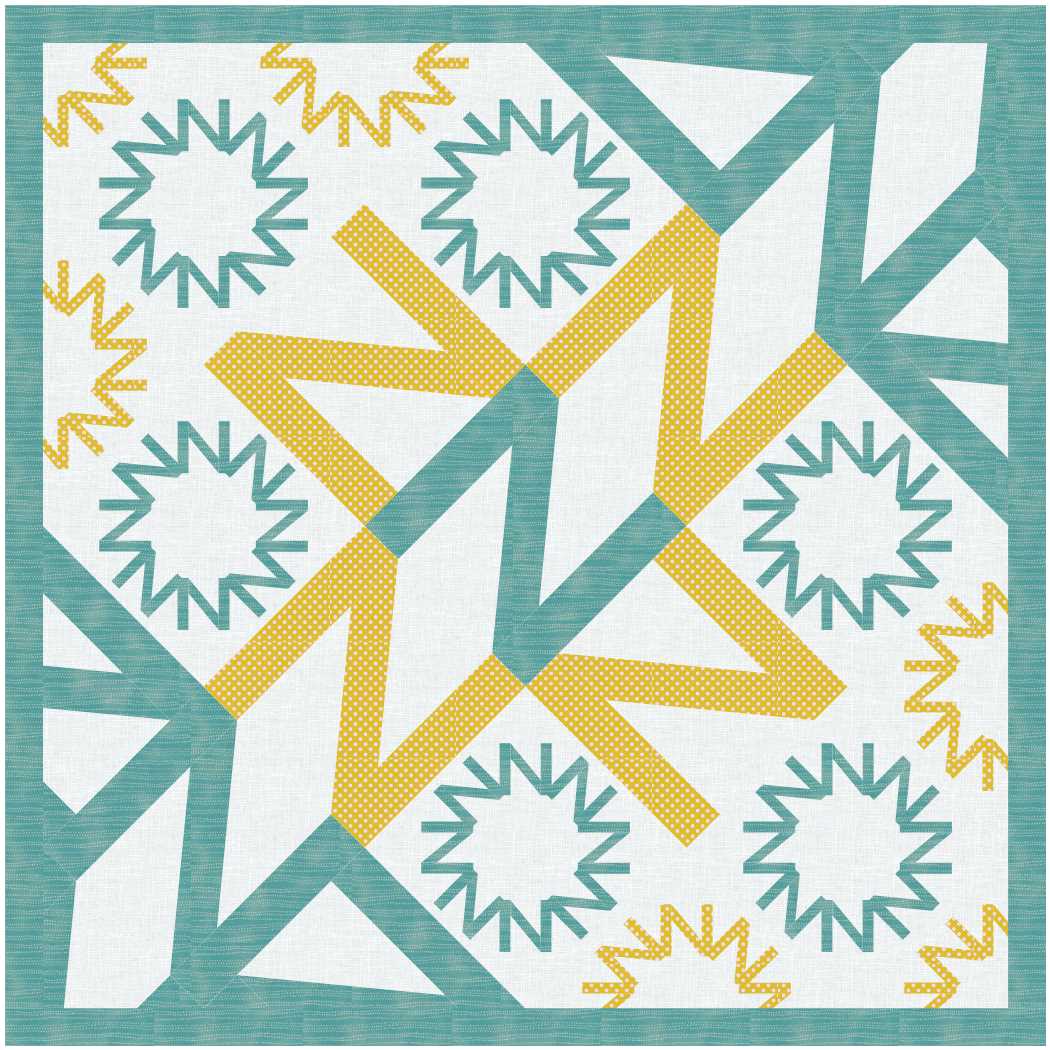
Tech Know Quilters Masters Letter Challenge

In October Tech Know Quilter Master's members were challenged to create a quilt around a letter.  The challenge was a month long process where they selected a letter during week 1, designed a block in week 2, and created the quilt layout in week 3.  I am so impressed by the creativity of this group.

​Tech Know Quilter Masters members have completed at least 12 months of classes in Tech Know Quilters and are some of the more advanced members in the group.

As you look through these quilts, try to figure out their letter (before reading the description).   Some are obvious -- but others take a bit of work to figure out. 

Picture
Helen Hicks "H"
Picture
Helen Hicks "H"
Picture
Marlu Allan "M"
Picture
Curryanne Hostetler Believe
Picture
Judy Oldenkamp Sawyer "J"
Picture
Julie Pedersen "P" I chose the letter P to honor my mother, Priscilla who died last week. I included Card Tricks as she loved playing cards when I was young, I added a heart for all who loved her, and the others were flowers added to the center of blocks as she loved flowers.
Picture
Nancy Haddad Lacey "N" I was tossing around various ideas and started thinking about the Narcissus flower (daffodils, jonquils). Since my birthday is in March, and jonquil is the flower of March, it cemented my decision to go with it.
Picture
Nancy Haddad Lacey I was very happy when I found this Narcissus block in Block Base. I used the block as is and then took parts of it to create other blocks.
Picture
Nancy Haddad Lacey "N" I designed another quilt with the edited blocks from the previous one and an "N" wreath in the center.
Picture
Joyce Drenth "D" I decided to do a Word Splash with the letter D for my last name.
Picture
Pat Harkin "P" quilt using wreath tool.
Picture
Part Harkin Using text tool center with the border as a P block. Pat used the Another Ornaments fond in the border and Alpha Music Man font for the center.
Picture
Maureen Feron Pinwill "M'
Picture
Maureen Feron Pinwill Decided to come back with a second block because in looking at the FALL video I wondered why I had not taken advantage of the TEXT function.
Picture
Nancy Haddad Lacey I was trying out some other ideas. I never thought about the fact that I could make pinwheels with N's.
Picture
Nancy Haddad Lacey And one last quilt.
Picture
Linda Carlson "L" using the baby blocks layout
Picture
Kristy Goodin Soard I chose S for my last name as my initial for my quilt design. My son obviously has the same monogrammed S, and my daughter wisely married a man whose last name started with S. So should I ever really make this quilt it could be passed down and still carry their own current monogram. I may actually be tempted to create just one block and create a decorative item for each of them.
Join the Wait List to Learn About the next Enrollment for TKQ
Picture
Happy quilting.

​Kari

Join the On Point Quilter weekly newsletter and receive regular tips and inspiration on using Electric Quilt 8 along with the  Free 12 Top
Tips for EQ8 video guide.
Picture

Turkey Time

11/21/2020

 
Would you like to learn two easy techniques for working with applique blocks.​
  • Adding a frame
  • Turning an applique block into an applique motif

See how to do both in this first tutorial.
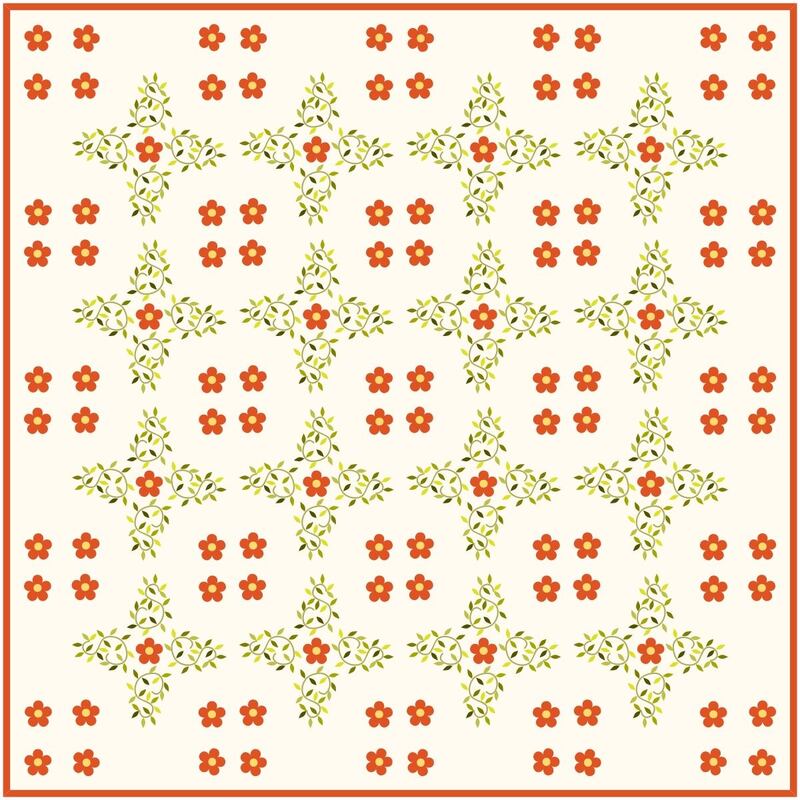
The second tutorial will provide a quilt option for those reworked applique blocks. The blocks look great in an on point layout and are complemented with an on point tile square border filled with turkey track blocks.
​These videos were originally developed in 2017 -- right after the release of EQ8.

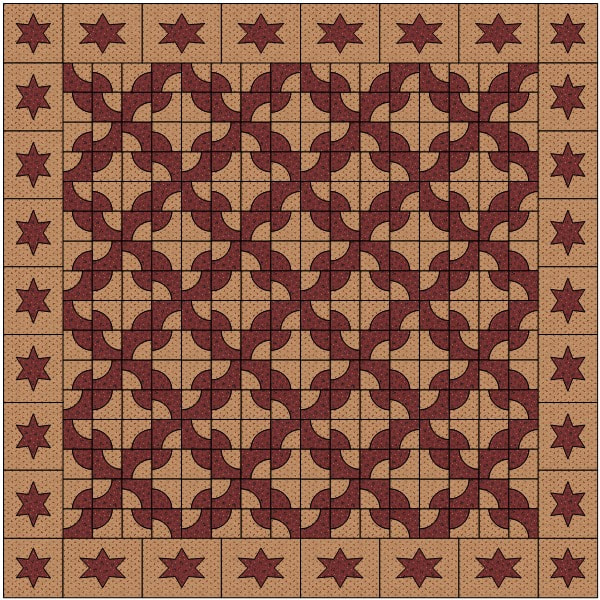
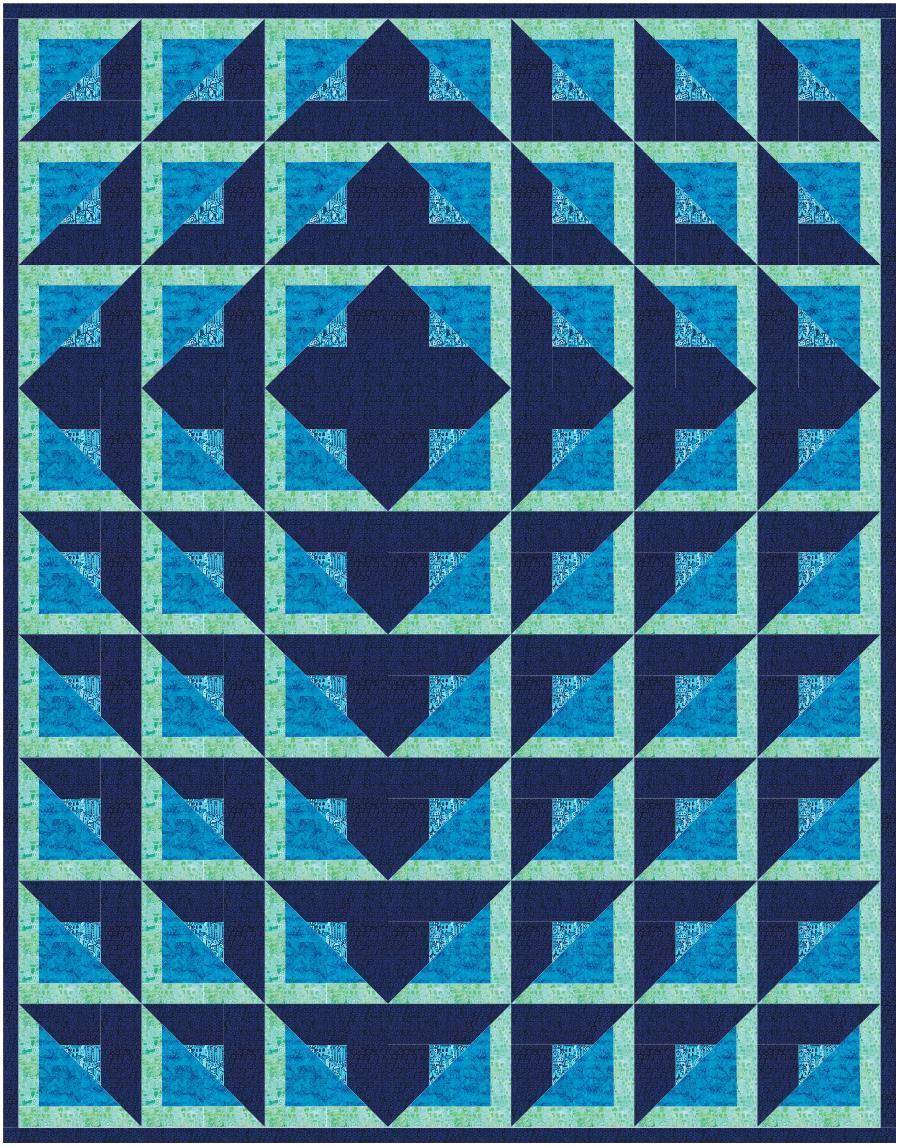
Here is the quilt from the video.  The Turkey Time quilt finished at 50.75" x 50.75".  
Picture
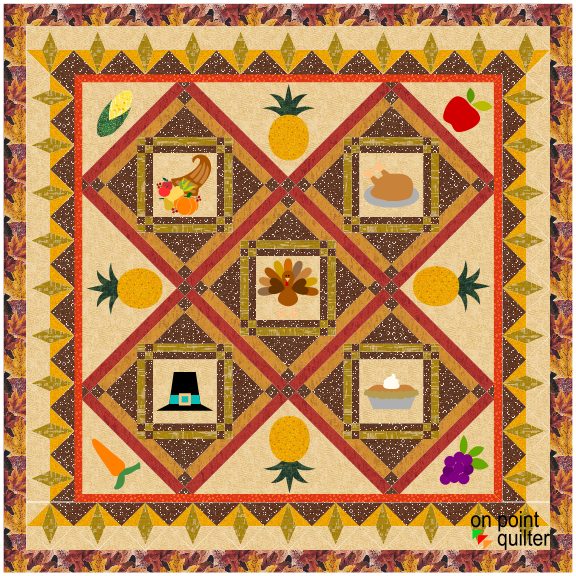
Turkey Time Designed by Kari Schell using EQ8
I know that there are those in the audience that don't reside in the United States.  Feel free to swap out the applique images to reflect a favorite season or holiday.  I would love to see pictures.

Picture
Shoot for the Stars with EQ8 Video Series

Are you ready for a great start with EQ8?
​

This video series is designed for both beginners to Electric Quilt  and those that have just migrated to Electric Quilt 8. 

This would be a great gift for an EQ lover on your Christmas list.
Black Friday Pricing (good all week)
Regular Price:  $49

Sale Price:  $30
Purchase Shoot for the Stars with EQ8

Picture
Happy quilting.

​Kari

Join the On Point Quilter weekly newsletter and receive regular tips and inspiration on using Electric Quilt 8 along with the  Free 12 Top
Tips for EQ8 video guide.
Picture

Tessellations Quilt

11/14/2020

 
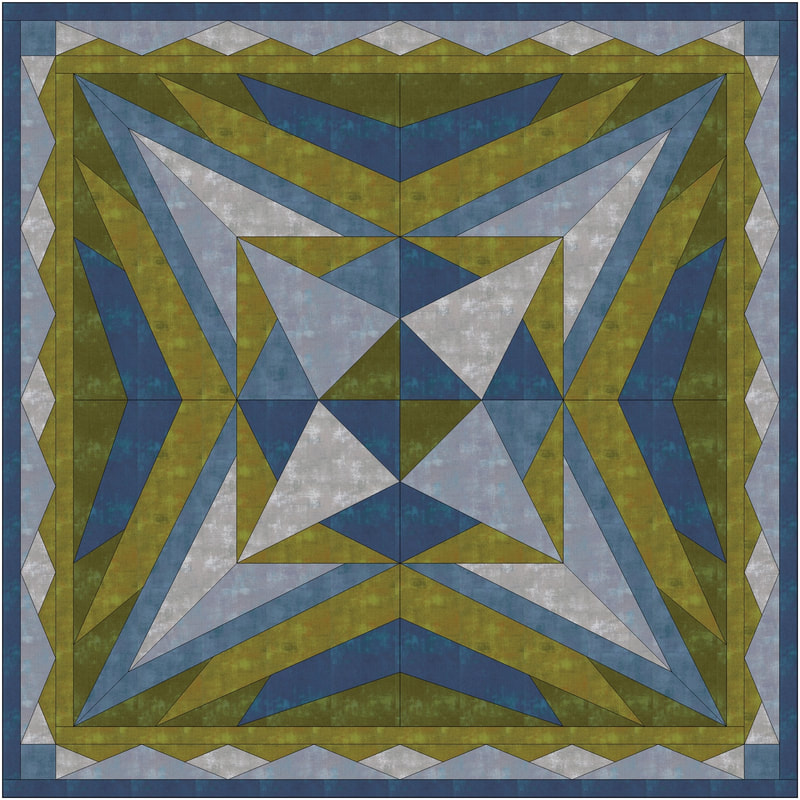
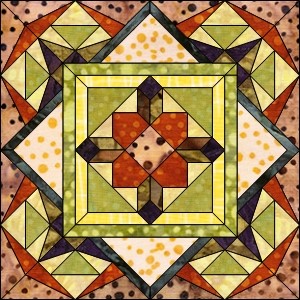
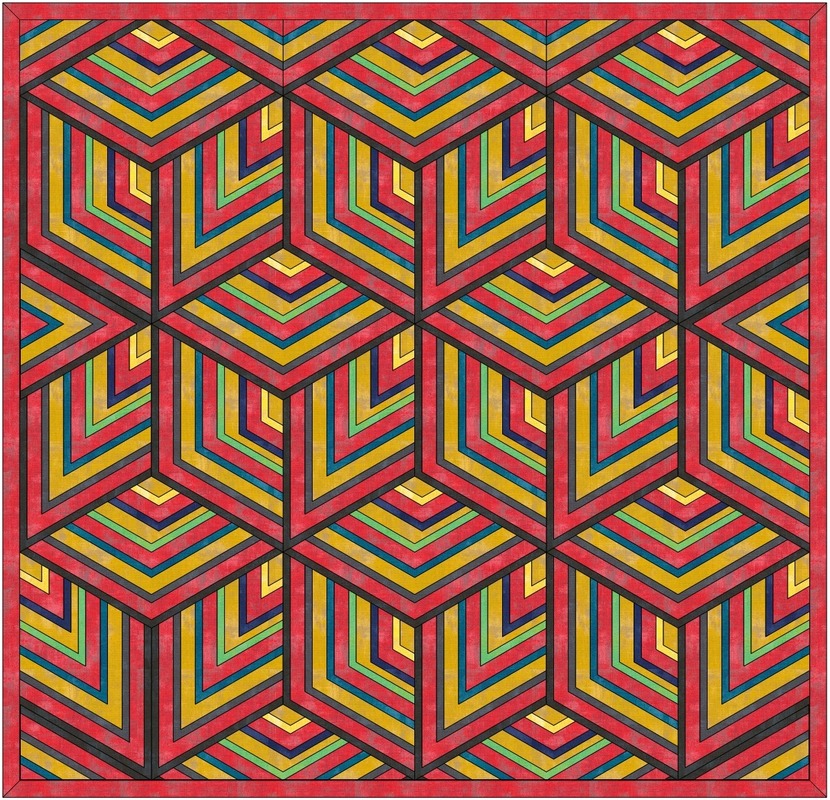
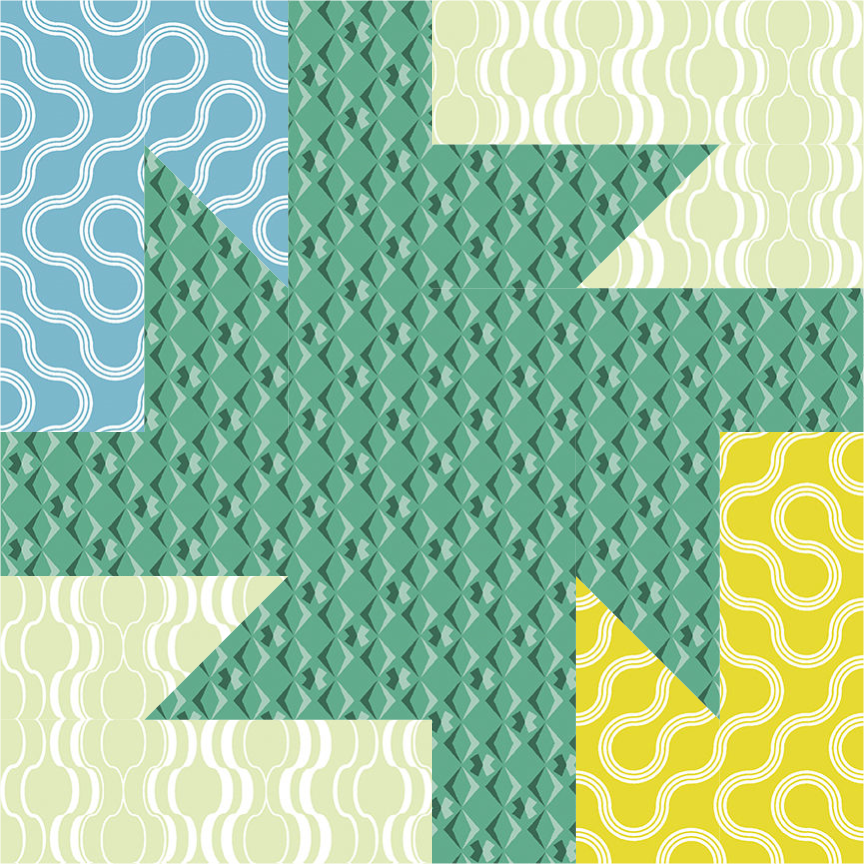
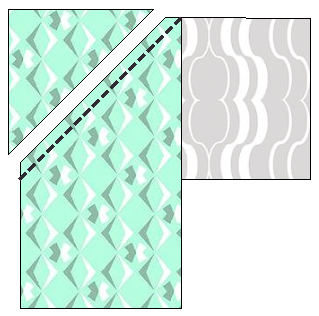
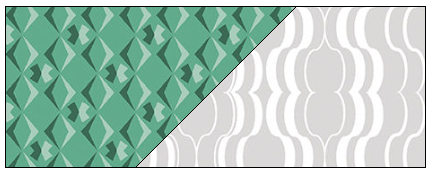
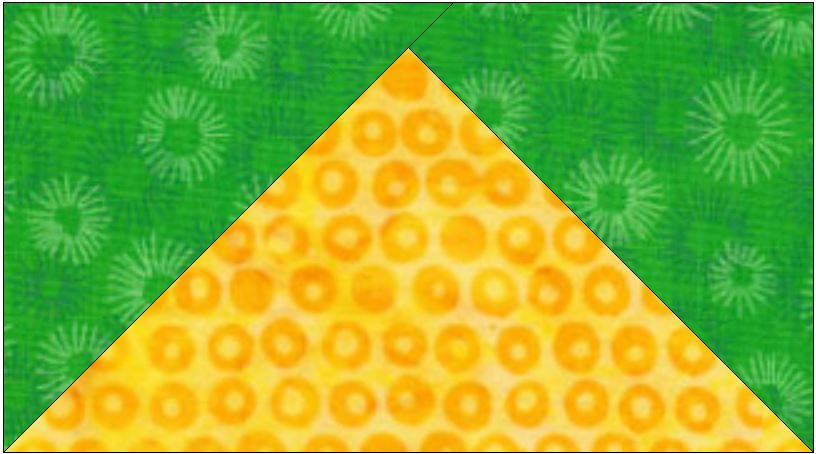
What is a tessellation? According to Jinny Beyer, a tessellation is a shape or combination of shapes which will indefinitely cover an area without any gaps or overlaps.  Tessellations are most easily identified as interlocking motifs.  However, any quilt block that repeats itself can be considered a tessellation.

The block drafted in today's tutorial has a tessellation shape within the block.  Four corners come together for a repeat of the shape in the center -- giving the illusion of the interlocking pattern.  
Picture
Tessellating Unit in Block
Picture
Interlocking Tessellating Units
Because the tessellating unit was designed in a block with a 6 x 6 grid (note that there are six even divisions going across and down), it will be super simple to piece -- no inset seams required. 

In the EQ8 video tutorial, learn to draft a smaller unit (1/4 of the block), use serendipity to create the larger block, and use some advanced coloring features to recolor the quilt.
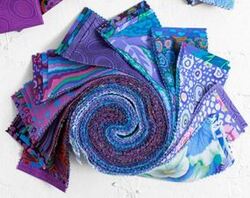
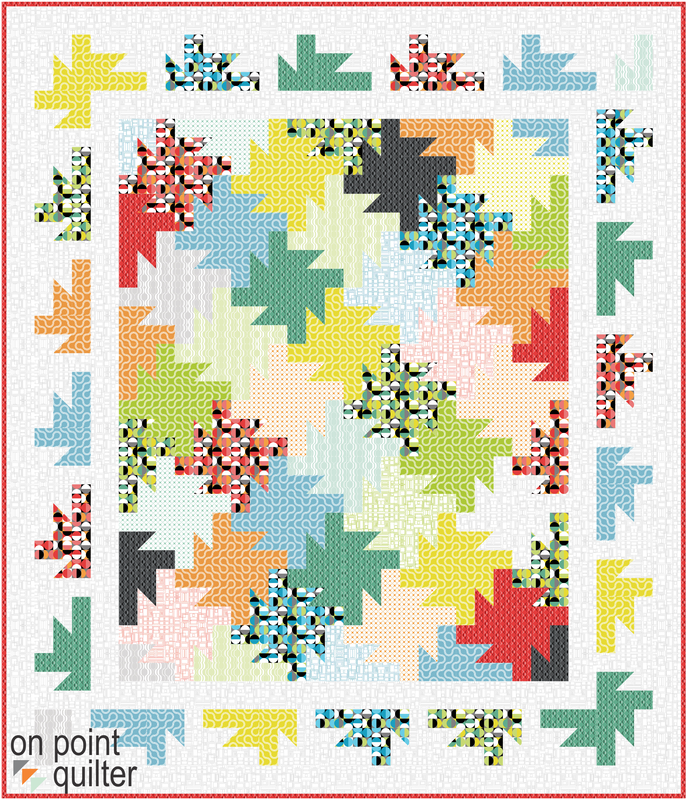
Here is a link to the free fabric collection used in the video and available on the Do You EQ website.  The collection is Good Vibes.  It was designed by Crysta Watson and manufactured by Benartex.
Picture
Tessellation Block by Kari Schell
Picture
Tessellation Quilt by Kari Schell

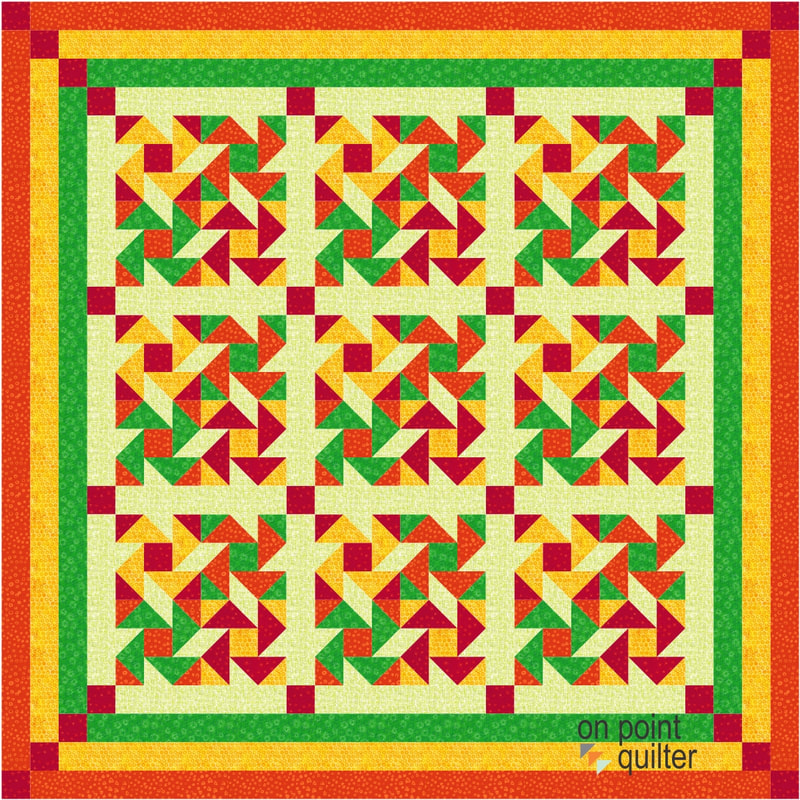
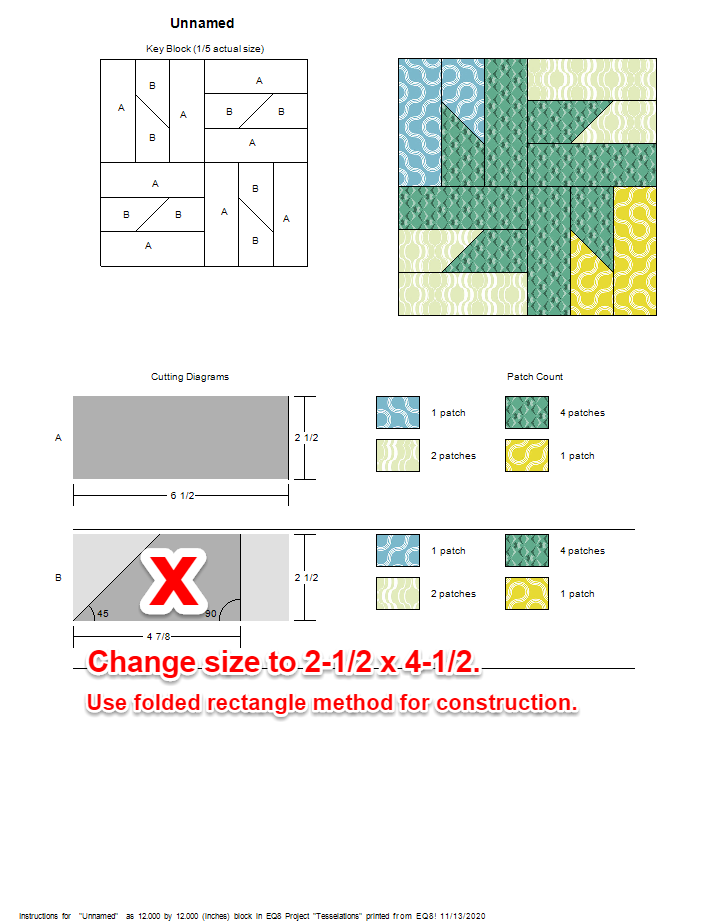
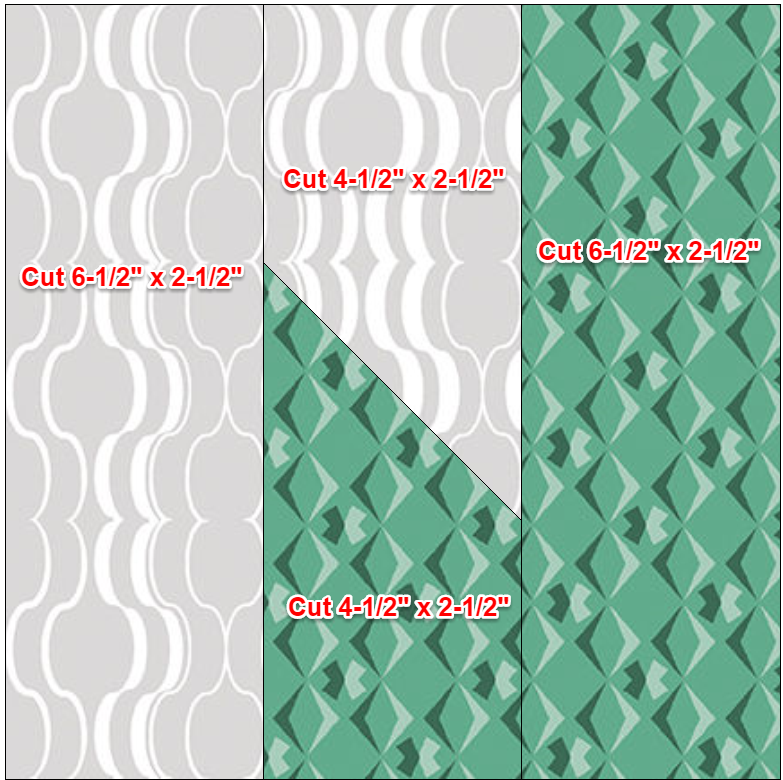
Jelly Roll Friendly Piecing

Picture
Modified Rotary Cutting Chart from EQ8
When piecing these blocks, I prefer using a folded rectangle method of construction.  So I will modify the rotary cutting charts produced by EQ.

Rather then cutting pieces 4-7/8 x 2-1/2 as called for in the rotary cutting chart, I will cut a rectangle 1/2 inch larger than the drafted size.  It is always a good idea to add personal notes when modifying the rotary cutting chart.  

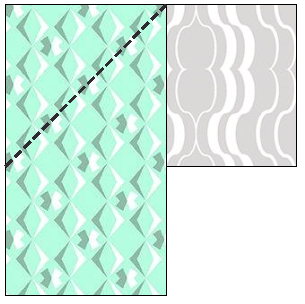
Folded Rectangle Construction

Picture
Place the two 4-1/2" x 2-1/2" pieces right sides together as shown in the diagram.  Use a ruler with a 45 degree angle as a guide, draw a diagonal line.  The line will start at the corner of the top patch and end at the corner of the bottom patch.  Sew on the drawn diagonal.
Picture
Trim back two pieces leaving 1/4″ seam.  
Picture
Press toward the dark fabric.  The unit should measure 6-1/2" x 2-1/2" (with seam allowances).  
Picture
Picture
Combine with 6-1/2" x 2-1/2" strips (from the EQ8 Rotary Cutting Chart).  The unit should measure 6-1/2" x 6-1/2".  Combine and rotate four units for each block.  Consider trying different rotation options for your block.

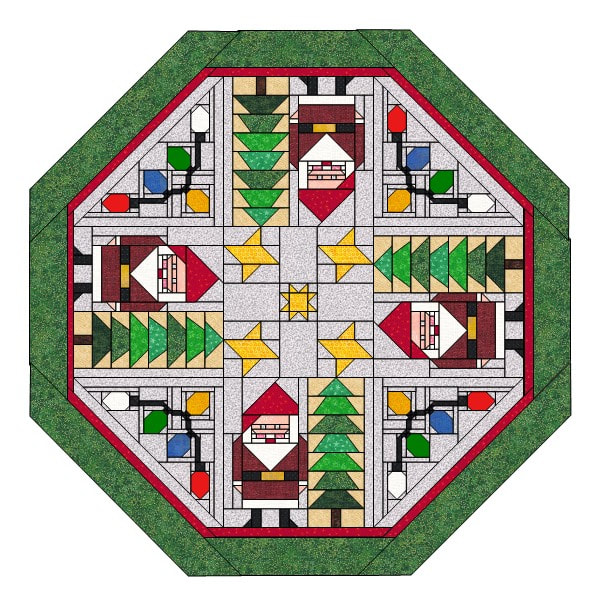
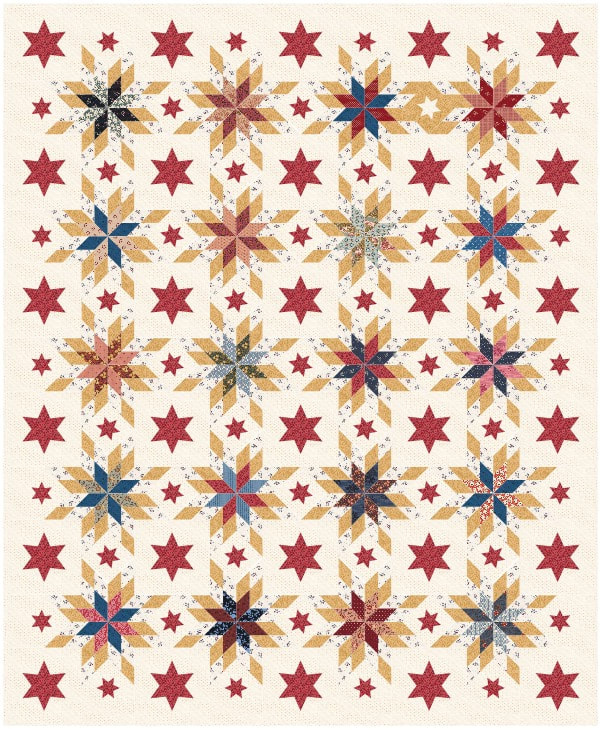
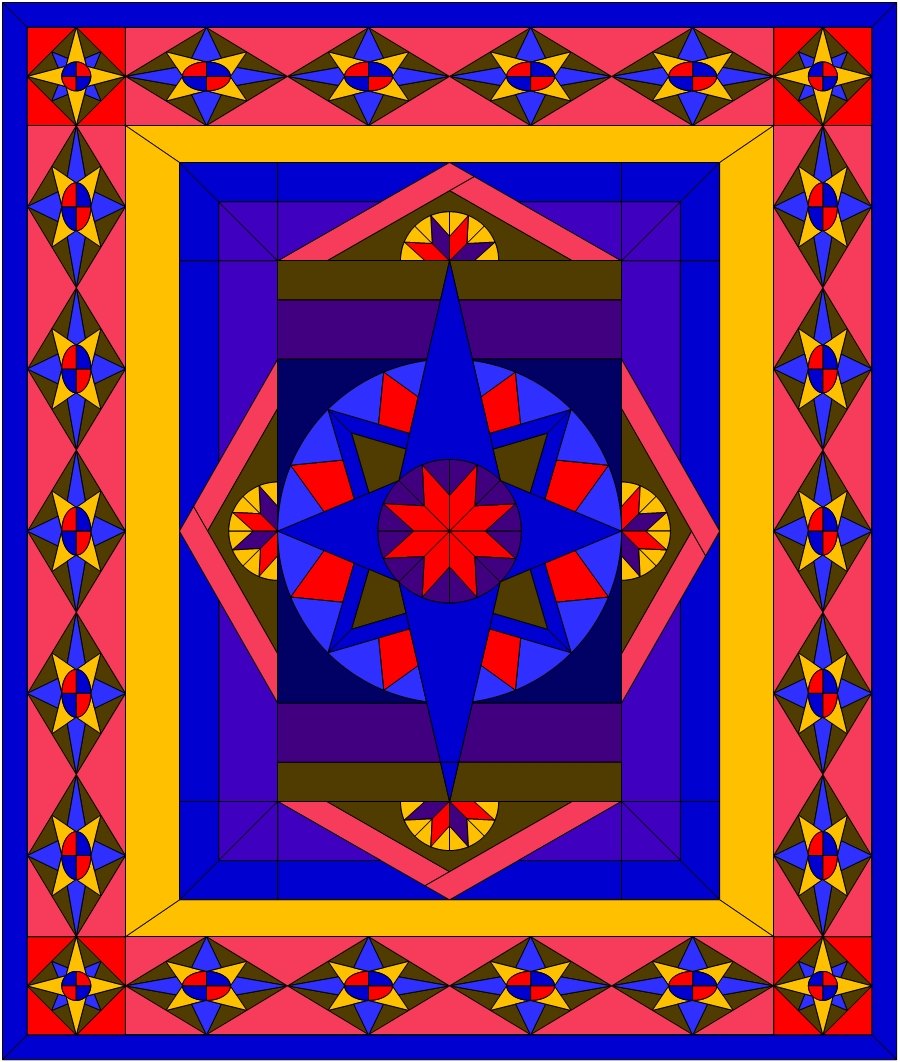
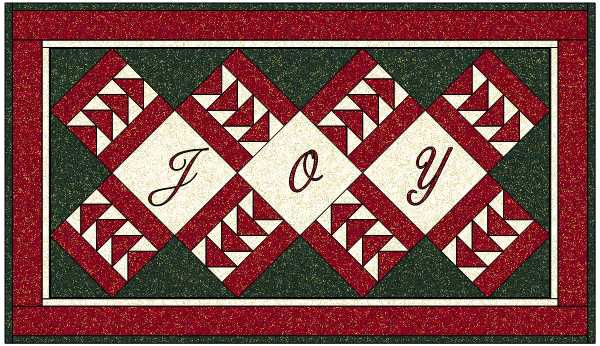
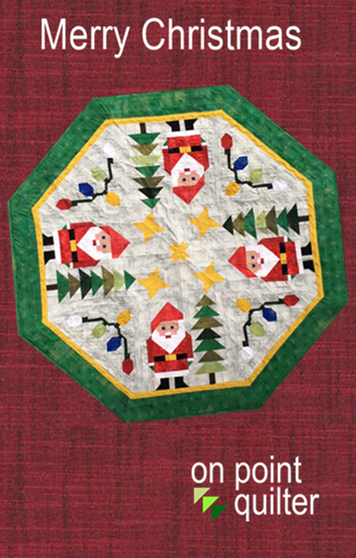
Merry Christmas Quilt

Last December, I presented an exclusive class to Tech Know Quilter's Masters members on designing their own folded corner friendly quilts.  In the class, I shared with them how to draft Merry Christmas -- a folded corner friendly quilt that I developed.  (Tech Know Quilter Master members have been in Tech Know Quilters for at least 12 months and are focused on applying their EQ knowledge to their own projects.)

Are you new to Tech Know Quilter's Masters Program?  Masters members may purchase the series at a discount.  Contact us for your discount coupon for the class. 
Learn More About Tech Know Quilters
Picture
Merry Christmas Pattern
​
This tree skirt is sure to be a hit with everyone when celebrating Christmas.  Santa Claus, Northwoods Trees, Holiday Light and Starry Night blocks are all pieced using square and rectangle fabrics using a folded corner technique. No foundation piecing is required. 

 
Three sizes are included. 
Purchase Merry Christmas pattern for $12
Picture
Happy quilting.

​Kari

Join the On Point Quilter weekly newsletter and receive regular tips and inspiration on using Electric Quilt 8 along with the  Free 12 Top
Tips for EQ8 video guide.
Picture

Jelly Roll Friendly Blocks

11/7/2020

 
Picture
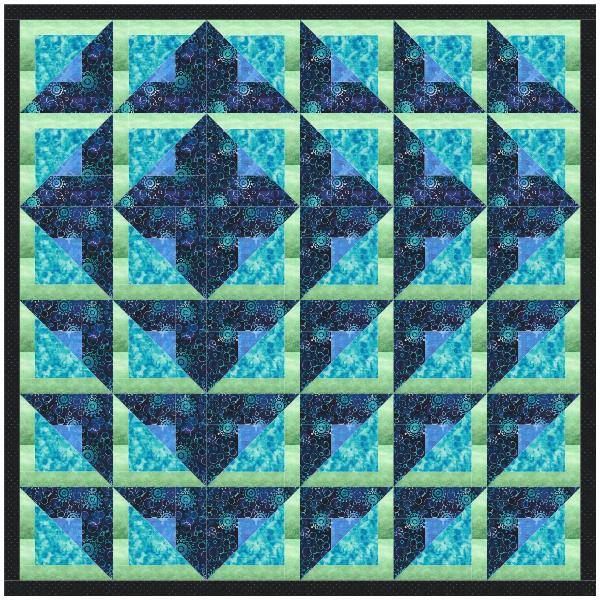
Is Electric Quilt Jelly Roll friendly?  (A jelly roll is a group of strips that have been cut 2 1/2" wide.)

My answer is typically "Yes, but....".  

Electric Quilt has a lot of flexibility.  As a result you can easily design blocks that work well for working with jelly rolls or other pre-cuts.  However, it is usually useful to apply some of our general quilting knowledge to make blocks we design in Electric Quilt jelly roll friendly.

The EQ8 video tutorial today will be on creating a jelly roll friendly 12 inch block.  I will then share my thoughts on piecing this block in a Jelly roll friendly manner.

Here is the quilt designed in the video.  Every bit of it can be pieced with 2 1/2" strips.  Really!
Picture

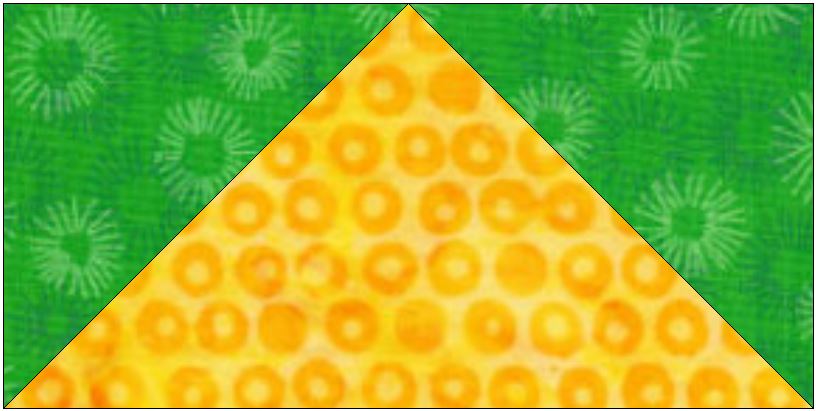
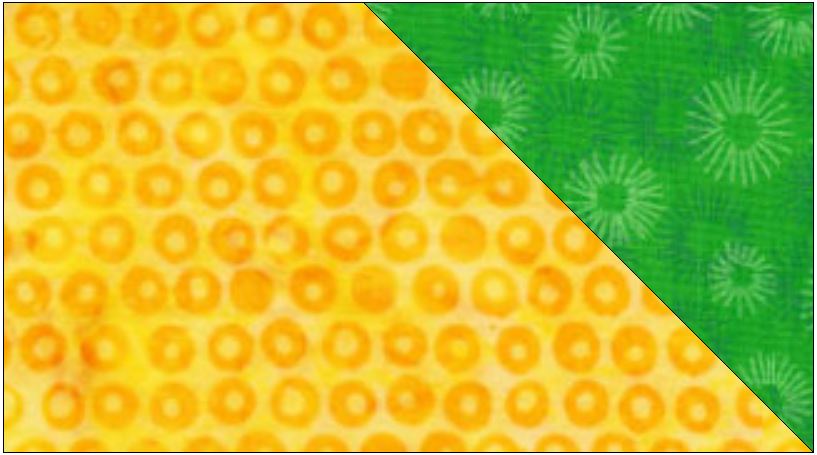
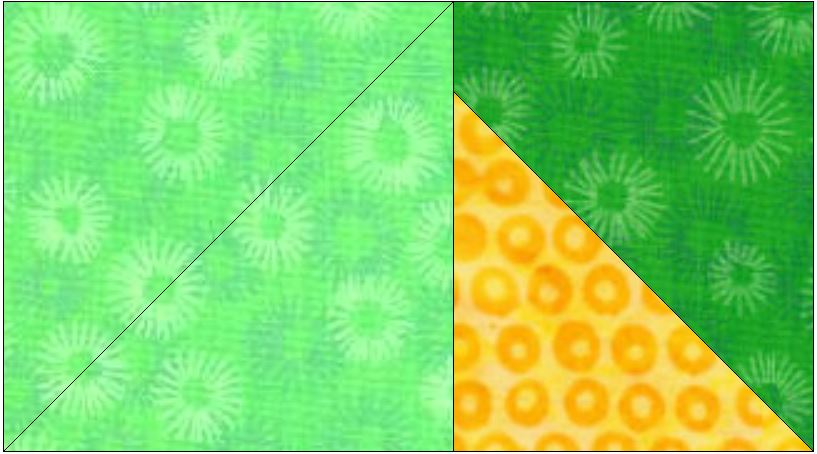
Reworking a Flying Geese Unit to be Jelly Roll Friendly

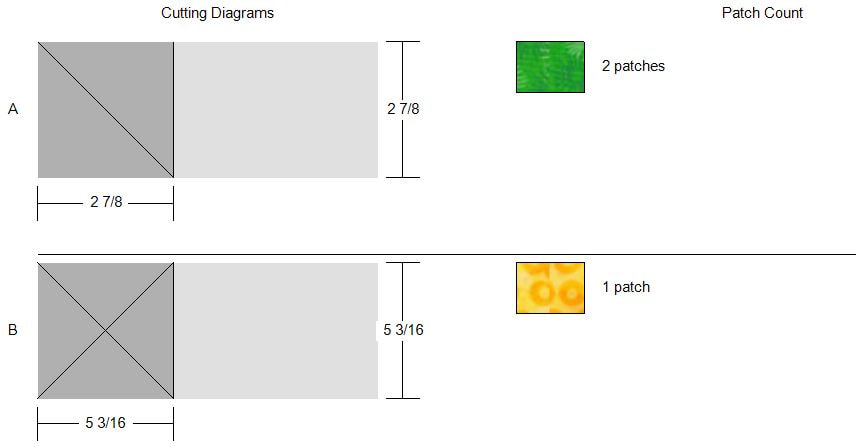
When designing a basic 2 x 4 inch flying geese unit in Electric Quilt, for rotary cutting purposes, Electric Quilt assumes you will use standard squares that are converted to quarter and half square triangles.
Picture
Picture
However that exact same unit can be produced with a jelly roll.  To do that cut:  
  • 1 Yellow  2 1/2 x 4 1/2 
  • 2 Green  2 1/2 x 2 1/2
Picture
Step 1: With right sides together, place green on upper right corner of yellow. Draw a diagonal line on green and sew on the line.
Picture
Step 2: Press green to upper right corner.
Picture
Step 3: With right sides together, place green on upper left corner of previous unit. Draw a diagonal line on green and sew on the line.
Picture
Step 4: Press green to upper left corner.
Or Alternatively, you could print templates in EQ and use them as guides to cut your jelly roll strips.

I would love to see your jelly roll friendly block (or quilt).  Feel free to post pictures over at the Learning Electric Quilt Facebook page.

Want to Learn More About Adapting EQ to Your Favorite Piecing Methods?

Picture
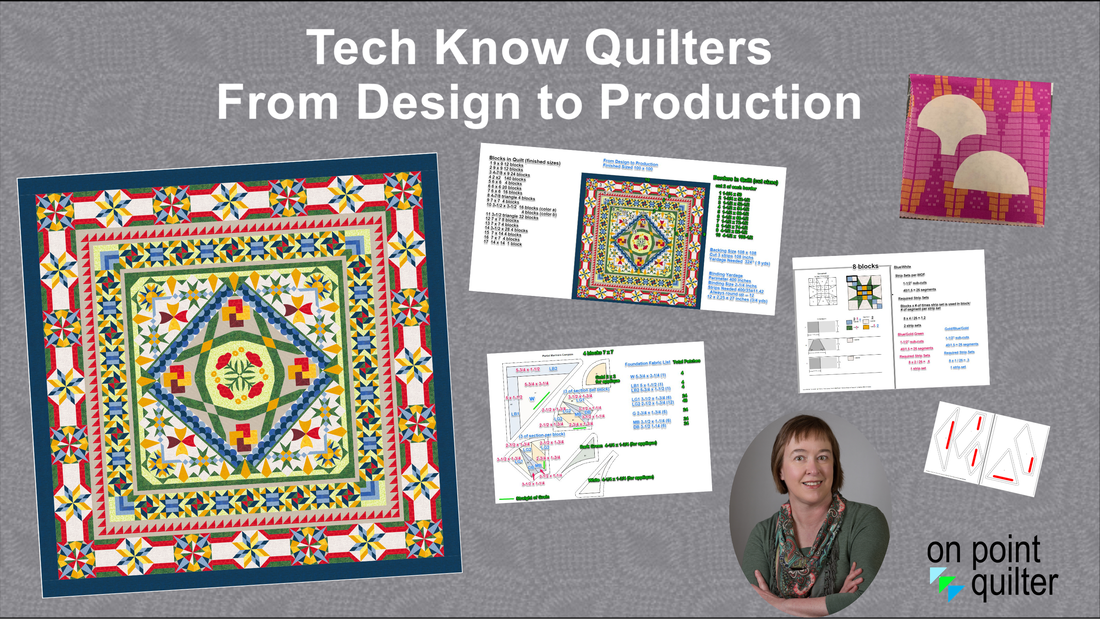
In the From Design to Production Class (available only to Tech Know Quilter members), we include a lesson on some simple rules to select an appropriate piecing method for your blocks.  And even provide cheat sheets that can be used in keeping track of everything related to "making your quilt with fabric".  

Sign Up for Tech Know Quilters Wait List

Picture
​Happy quilting.

​Kari

Join the On Point Quilter weekly newsletter and receive regular tips and inspiration on using Electric Quilt 8 along with the  Free 12 Top
Tips for EQ8 video guide.
Picture
    Picture
    Picture
    Picture
    Free guide available for newsletter subscribers
    Picture
    Picture
    Picture

    Kari Schell

    Electric Quilt Expert and Educator and Pattern Designer.

    Categories

    All
    Art And Stitch
    Cricut Maker
    Dear Jane
    Electric Quilt 7
    Electric Quilt 8
    Goose Goose Duck Challenge
    Inkscape
    Longarm Quilting
    Patterns
    Silhouette Cameo
    Stampin Up
    Summer Games
    Tips And Techniques
    Tools And Rulers

    Archives

    March 2023
    February 2023
    January 2023
    December 2022
    November 2022
    October 2022
    September 2022
    August 2022
    July 2022
    June 2022
    May 2022
    April 2022
    March 2022
    February 2022
    January 2022
    December 2021
    November 2021
    October 2021
    September 2021
    August 2021
    July 2021
    June 2021
    May 2021
    April 2021
    March 2021
    February 2021
    January 2021
    December 2020
    November 2020
    October 2020
    September 2020
    August 2020
    July 2020
    June 2020
    May 2020
    April 2020
    March 2020
    February 2020
    January 2020
    December 2019
    November 2019
    October 2019
    September 2019
    August 2019
    July 2019
    June 2019
    May 2019
    April 2019
    March 2019
    February 2019
    January 2019
    December 2018
    November 2018
    October 2018
    September 2018
    August 2018
    July 2018
    June 2018
    May 2018
    April 2018
    March 2018
    February 2018
    January 2018
    December 2017
    November 2017
    October 2017
    September 2017
    August 2017
    July 2017
    June 2017
    May 2017
    April 2017
    March 2017
    February 2017
    January 2017
    December 2016
    November 2016
    October 2016
    September 2016
    August 2016
    July 2016
    June 2016
    May 2016
    April 2016
    March 2016
    February 2016
    January 2016
    December 2015
    November 2015
    October 2015
    September 2015
    August 2015
    July 2015
    June 2015
    May 2015
    April 2015
    March 2015
    February 2015
    January 2015
    December 2014
    November 2014
    October 2014
    September 2014
    July 2014
    June 2014
    May 2014
    April 2014
    March 2014
    February 2014
    January 2014
    December 2013
    November 2013
    October 2013
    September 2013
    August 2013

    RSS Feed

Contact:
On Point Quilter
e-mail:  onpointquilter@comcast.net
phone:  763-566-6536

GET MY NEWSLETTER FOR REGULAR EQ AWESOMENESS!

* indicates required
  • Blog
  • About
  • EQ Training
    • Tech Know Quilters Electric Quilt 8 Membership Training
    • Shoot for the Stars with EQ8
    • Electric Quilt 8 Sneak Peek
    • Scheduling a Workshop or Lecture
  • Store
  • Card Making
  • Contact
  • Free Stuff
    • Other Video Tutorials