
|
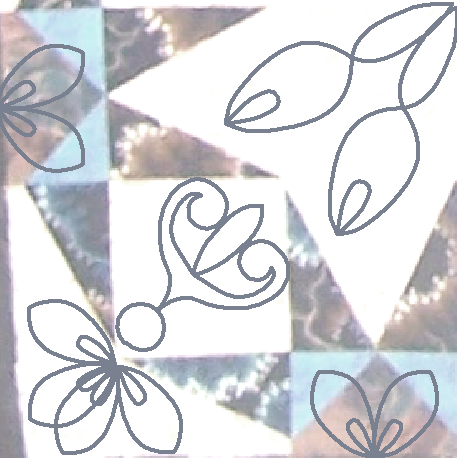
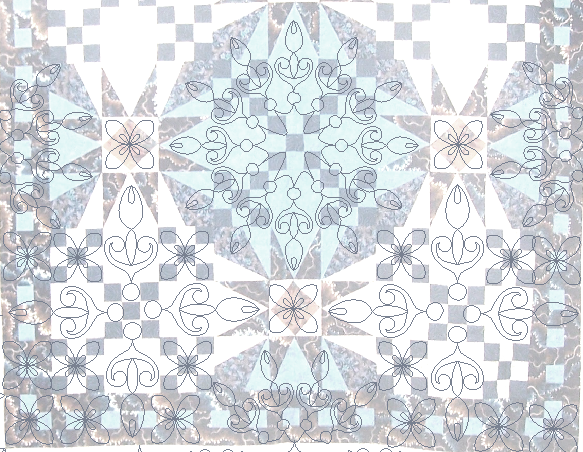
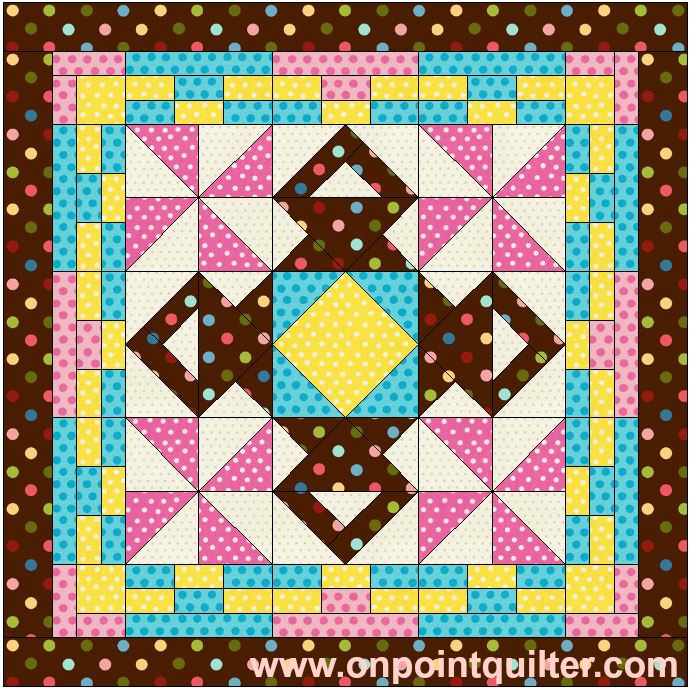
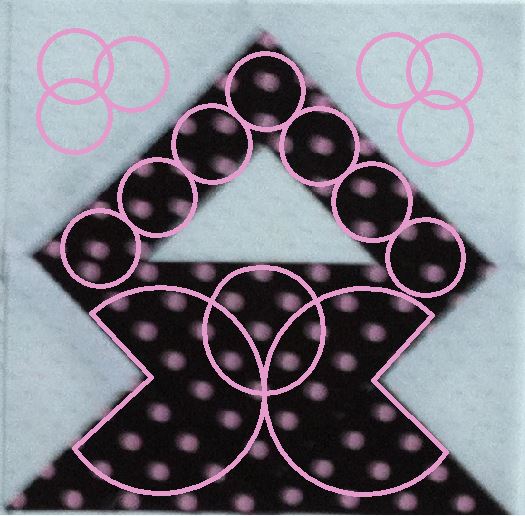
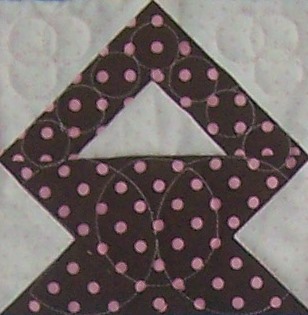
Last week I offered a free pattern/tutorial for my Easter Basket quilt. I think this one would also work for a May Day basket -- particularly if it is done is these fun bright polka dot fabrics. 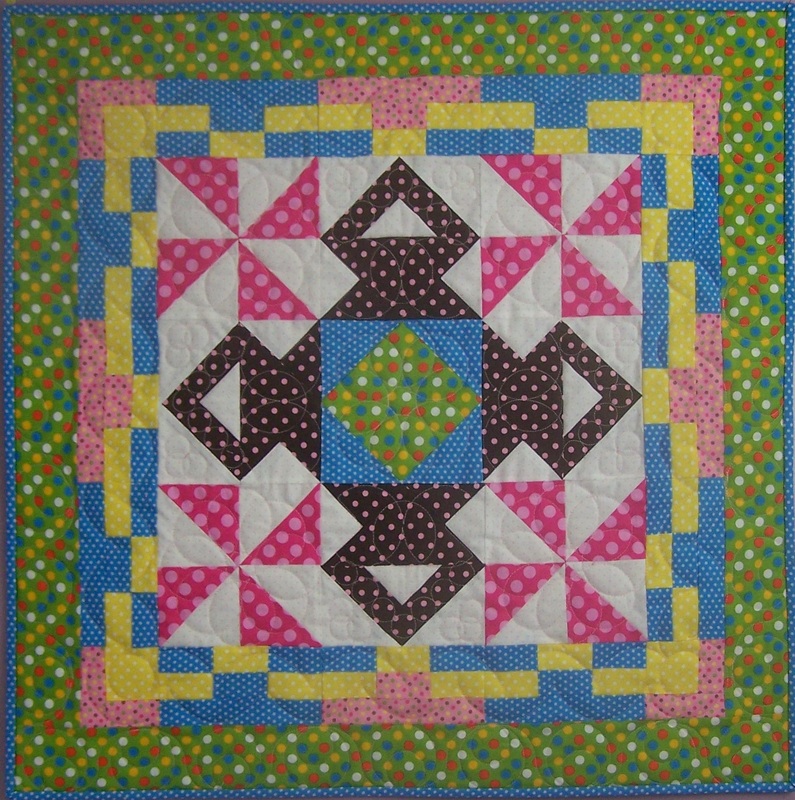 This week I wanted to discuss how to quilt the project. Since all the fabrics have "polka dots" in them, I thought the theme for quilting this project should be circles and dots. For the pinwheels and the square within a square, I went with a spirograph type of design. To keep the design continuous, I traveled from one circle to the next to the next by overlapping the center section. 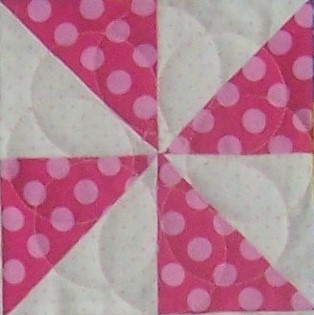 For the outer border I created a double circles point to point design. Each set of circles is repeatable. They would be easy to adjust -- just vary the size of the circles for added interest.   The basket design was easy to draft -- just overlapping circles. However it took a bit of work to make the design continuous without overlaps. Check out my Art and Stitch tutorial for how I did this. (4/28 Note -- I deleted the music background. However, you still may need to turn the volume all the way up to hear the video.)
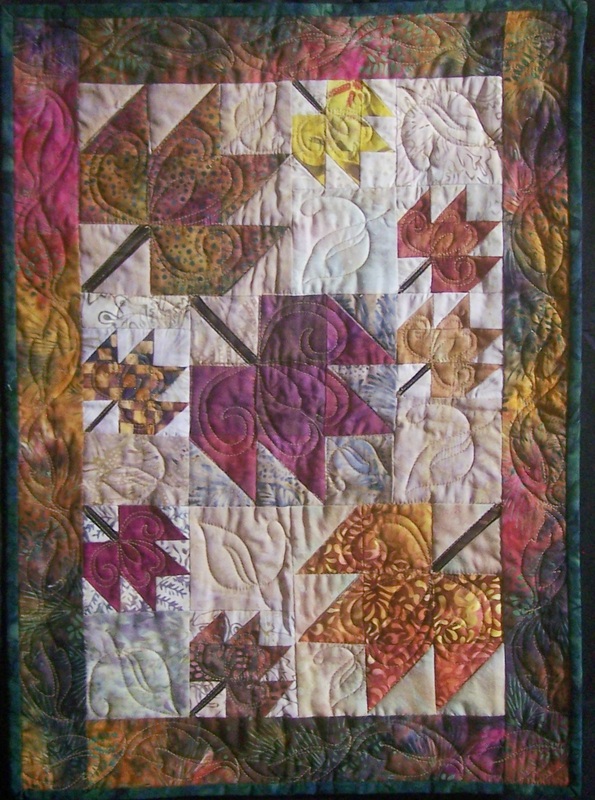
For the pieced border, I just did some arcs and added a circle to the corners.  For those that would like copies of some of my quilting designs , the files are here: I would love to see photos if you make the quilt. Happy quilting. Kari Sign up for my newsletter to stay current on what's happening in my studio and learn more quilting tips. As a thank you, I'll send you a FREE pattern for this small maple leaf quilt.
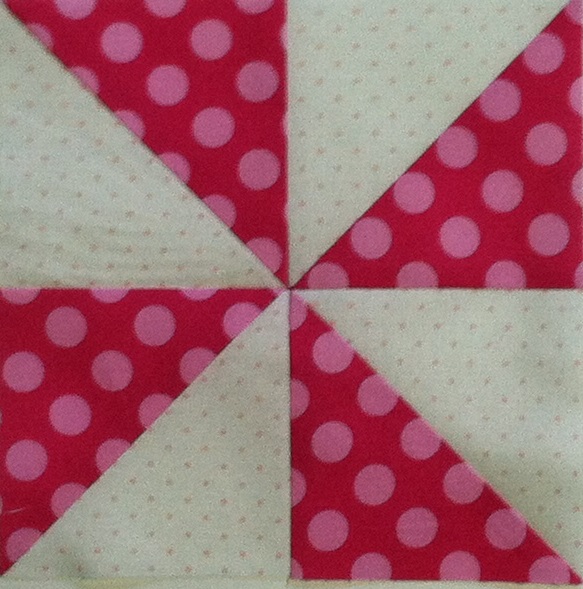
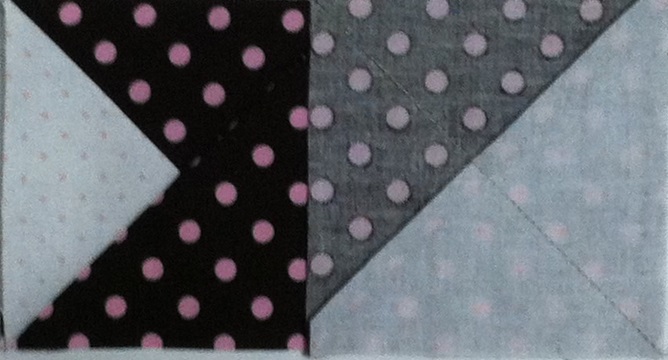
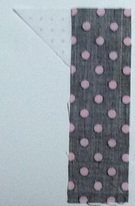
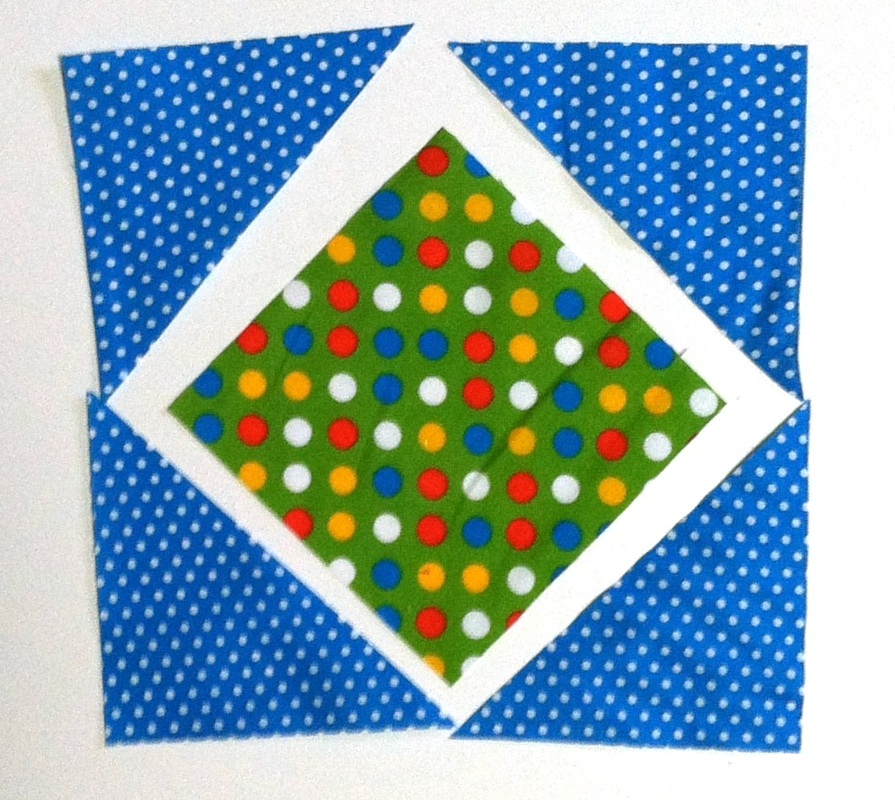
Last week I showed you a quilt I had drafted in Electric Quilt - Easter Baskets. After a shopping trip to my local quilt shop, I decided to make some adjustments to the pattern. Here are the fabrics I found. 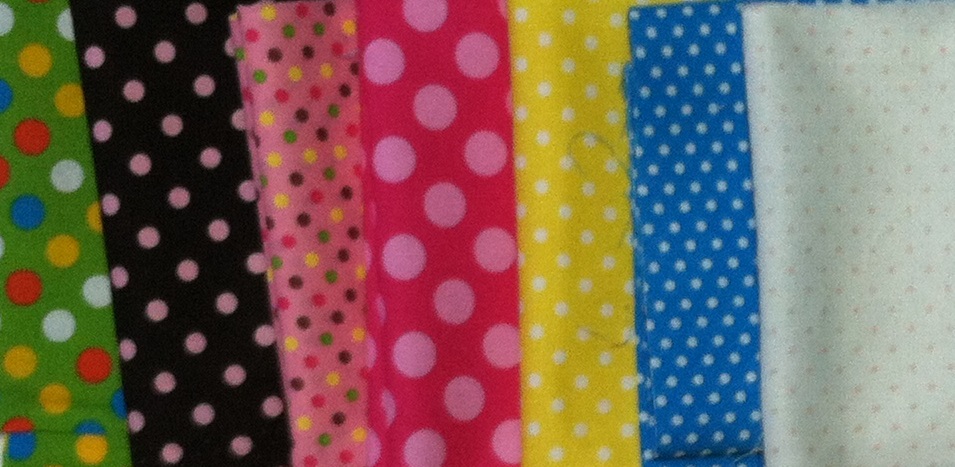 Here is my updated design. 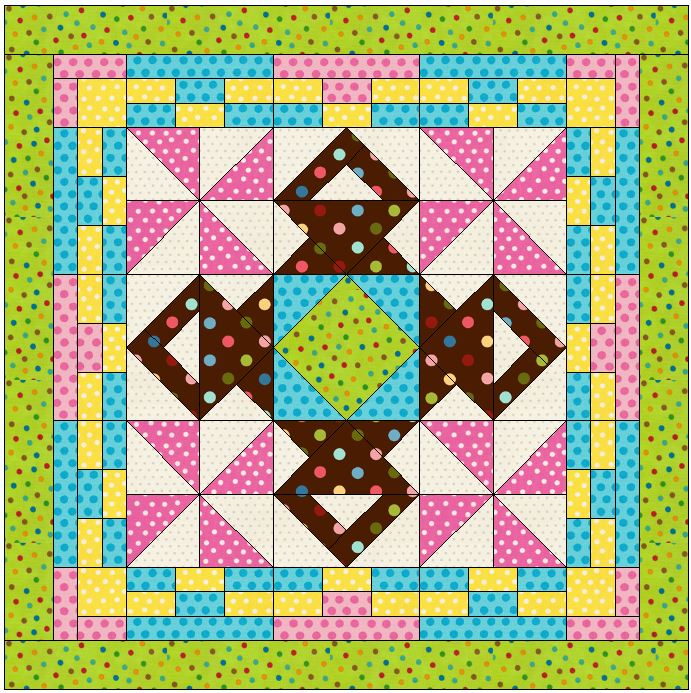 This week I want to provide some a tutorial on how I pieced this quilt. Pinwheels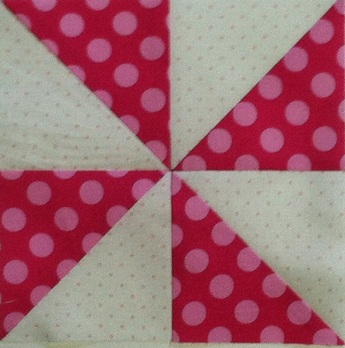 Cut:
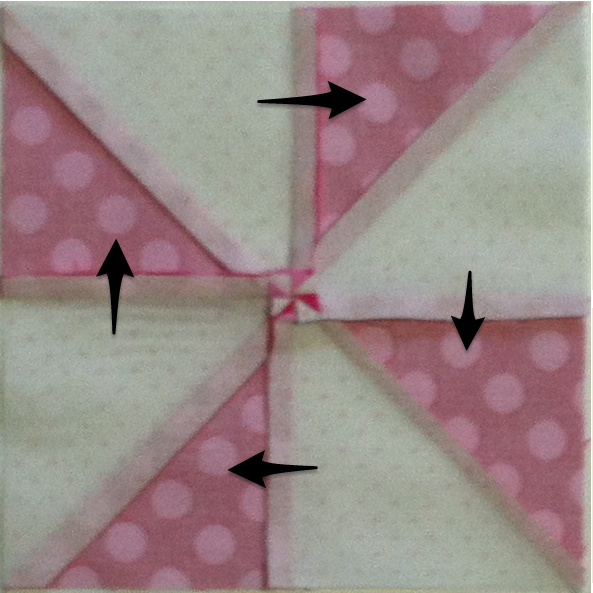
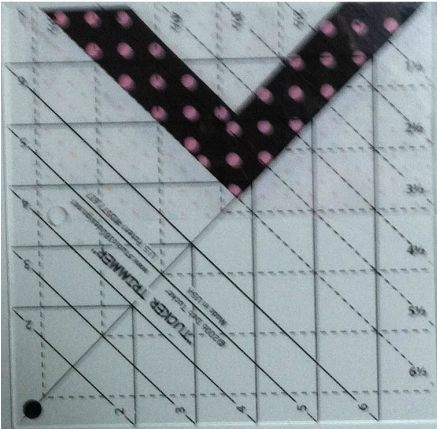
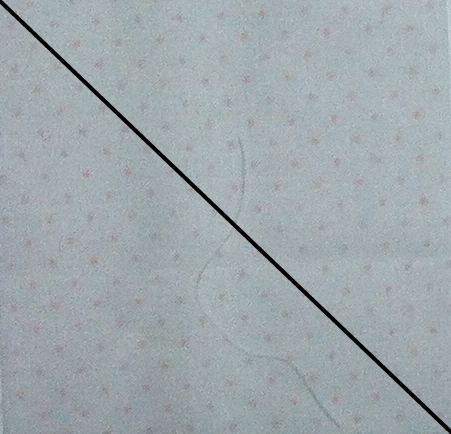
Put white and pink fabrics right sides together. Draw a diagonal line down the center and stitched 1/4" on both sides of the diagonal line. 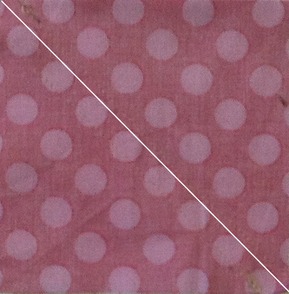 Cut on the drawn line and press toward the pink. Trim the units to 3-1/2" x 3-1/2" using Tucker Trimmer 1. Trim two sides, rotate the unit and then trim the other two sides.  Combine the units for a four patch. I then pressed using a split seam. If you need more information on this, check out my video.
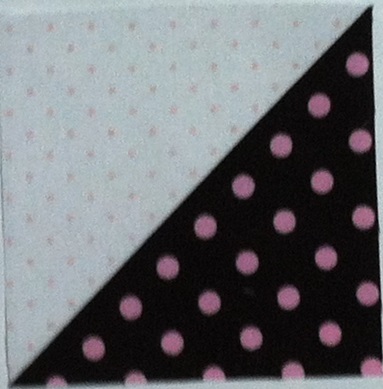
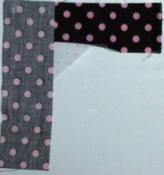
 BasketBasket Bottom Cut: Background 4-1/4" x 4-1/4" (cut 4) Basket 4-1/4" x 4-1/4" (cut 4) Basket 6-1/2" x 3-1/2" (cut 4) Place Background and Basket 4-1/4" x 4-1/4" pieces right sides together. Draw a diagonal line down the center and stitch 1/4" on both sides of the diagonal line. Cut on drawn line. Press toward Basket. Trim the units to 3-1/2" x 3-1/2" using Tucker Trimmer 1. Trim two sides, rotate the unit and then trim the other two sides.
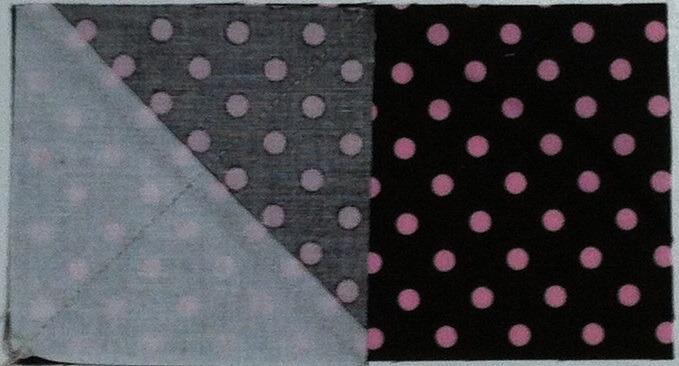
Add half square triangles on lower right and lower left of Basket 6-1/2" x 3-1/2" as folded corners. Trim bottom two layers.
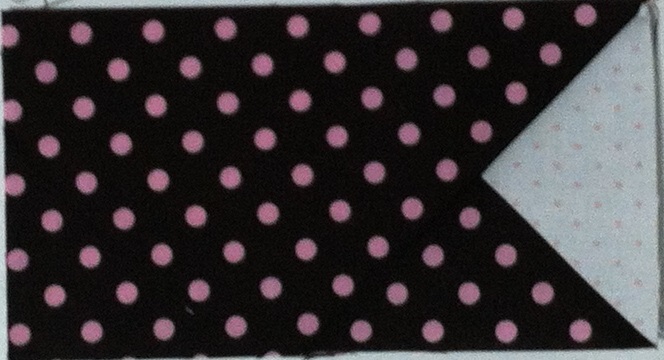
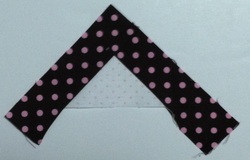
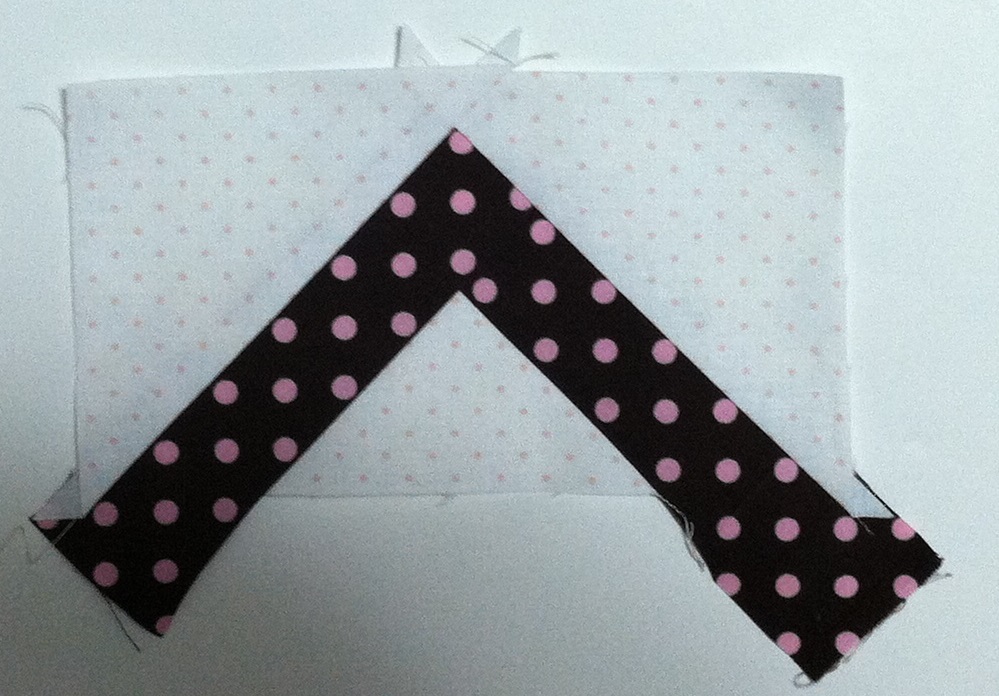
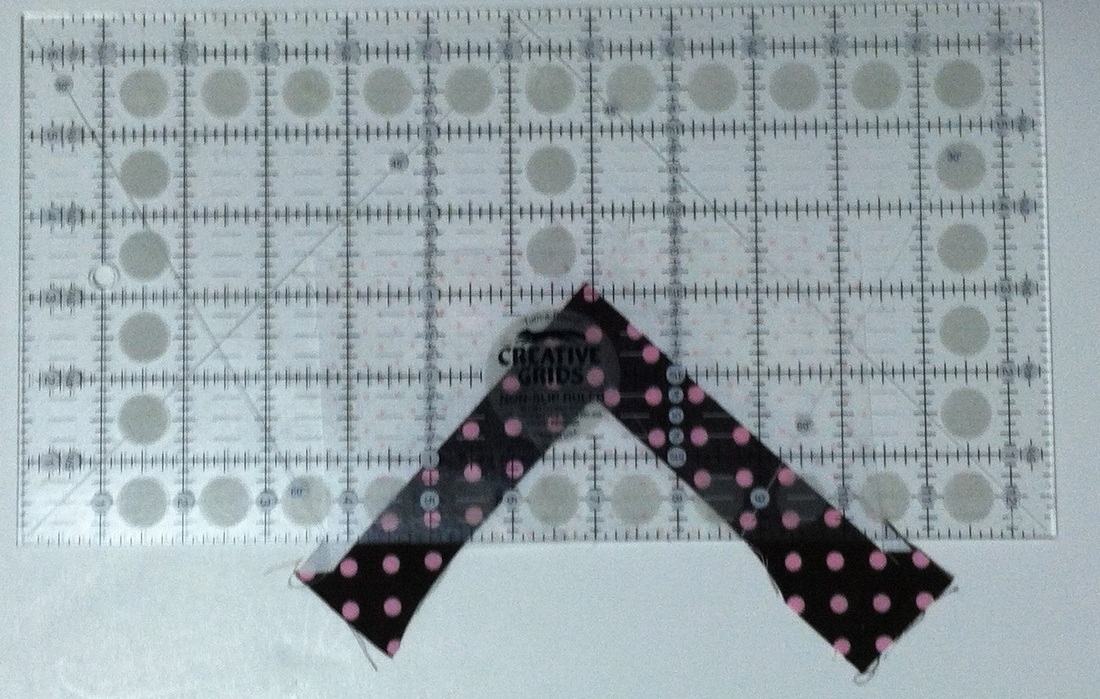
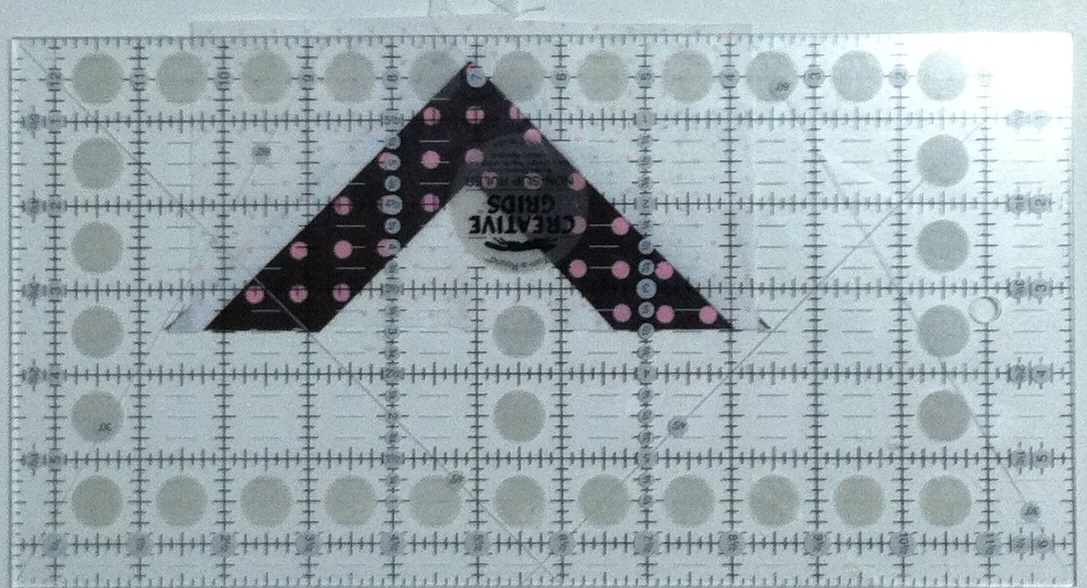
Basket Top Cut: Background 4-1/4" x 4-1/4" (cut 1) Basket 1-9/16 x 4-1/2" (cut 4) Basket 1-9/16" x 5-1/2" (cut 4) (Hint - 9/16" is just a bit larger than 1-1/2".) Background 4-1/2" x 4-1/2" (cut 4) X-cut Background 4-1/4" x 4-1/4" for four triangle pieces. Add short Basket Handle to one side of X-cut Background triangle. Add long triangle to the other side.
Cut Background 4-1/2" x 4-1/2" once on diagonal for two triangles. Add one to left of handles and one to right.
Trim to 6-1/2" x 3-1/2".
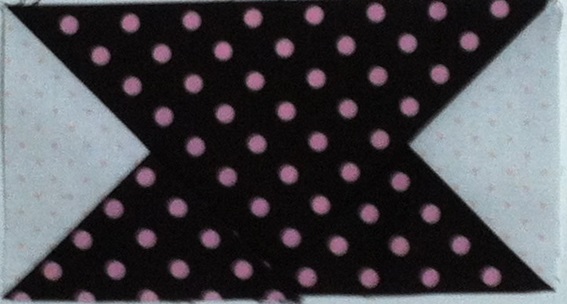
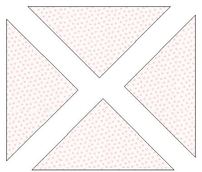
 Add top and bottom sections together. Basket section measures 6-1/2" x 6-1/2".  Make 4 Square within a Square Cut:
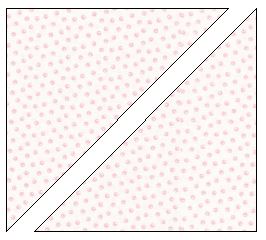
Cut Blue Corners once on diagonal for two triangles.
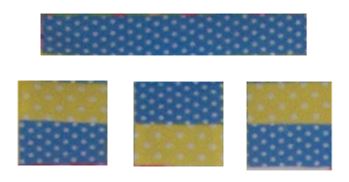
Add triangles to all four sides. Use the Square 2 ruler from Studio 180 Design to trim unit to 6-1/2" x 6-1/2". Align Center points with alignment marks on the ruler. Trim right and top sides. Rotate unit 180 degrees and trim other two sides. 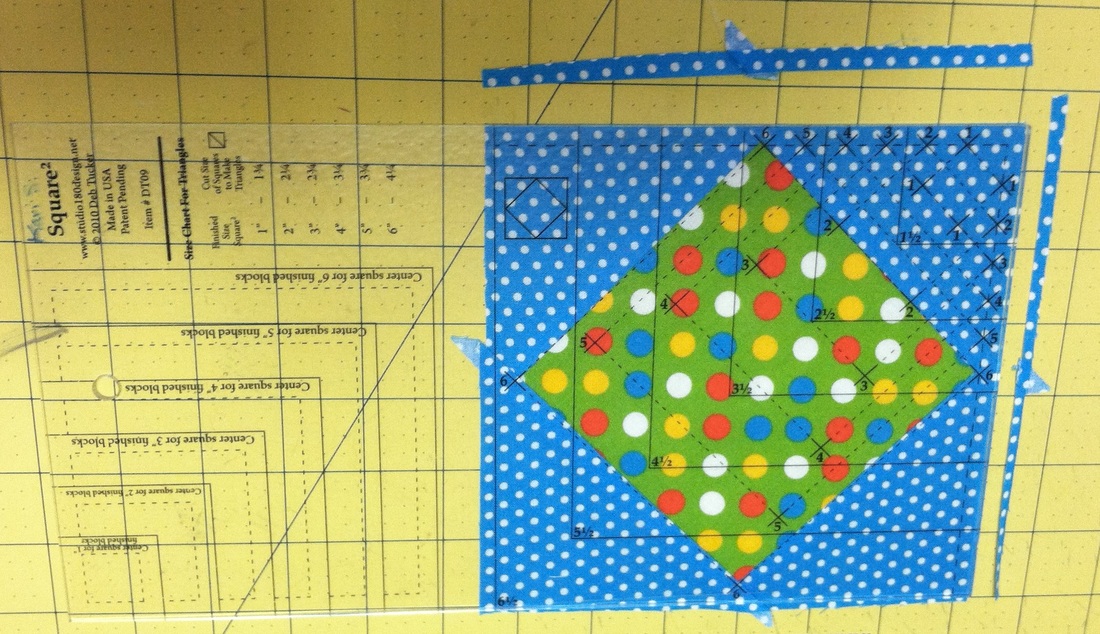 Complete center section. It will measure 18-1/2" x 18-1/2"  Pieced Border Cut 1-1/2" strips of border fabrics (yellow, blue and pink). Combine blue and yellow strips. Cross-cut at 2-1/2". Cut 32. Combine pink and yellow strips. Cross-cut at 2-1/2". Cut 4.  Cut blue and pink pieces 6-1/2" x 1-1/2" for top of pieced border sections. Combine 2-1/2" cross cut units. Add tops. Each section measures 6-1/2" x 3-1/2".
Corners:
Add Pink 2-1/2" x 1-1/2" to Yellow. Add Pink 3-1/2". Corner unit measures 3-1/2" x 3-1/2"  Make 4. Combine pieced units. Add corners to top and bottom. Add pieced borders to quilt center. 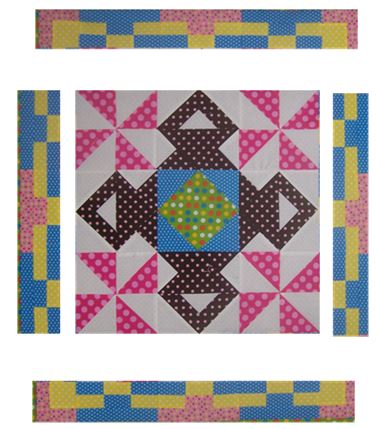 Cut outer border strips
Add borders to quilt center. Quilt finishes 29-1/2" x 29-1/2". 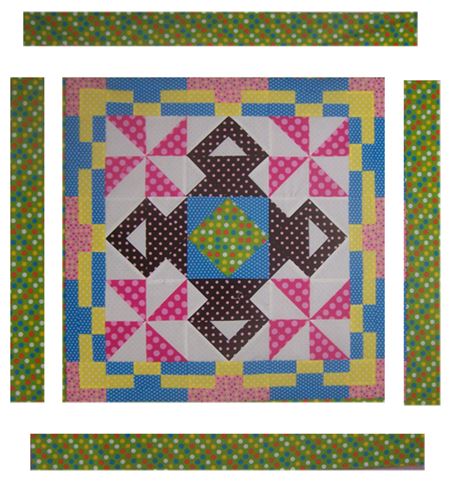 Final quilt. Now that I look at the quilt, I think it would also work nicely for May Day as well. 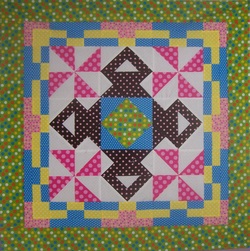 Happy Easter! Kari
Have you been contemplating how you would quilt my Irish Eyes top? For those that were working in Electric Quilt or Art and Stitch, I hope my mini-tutorials from last week were helpful.

Irish Eyes Quilt top by Kari Schell - Inspired by a Quilt by Irma Gail Hatcher.
Let me share how I approached coming up with quilting designs for this top. I worked in Art and Stitch for my quilting solution.
The quilt has a fair number of "open spaces". So I decided to go with custom. I identified the potential quilting zones in the quilt. 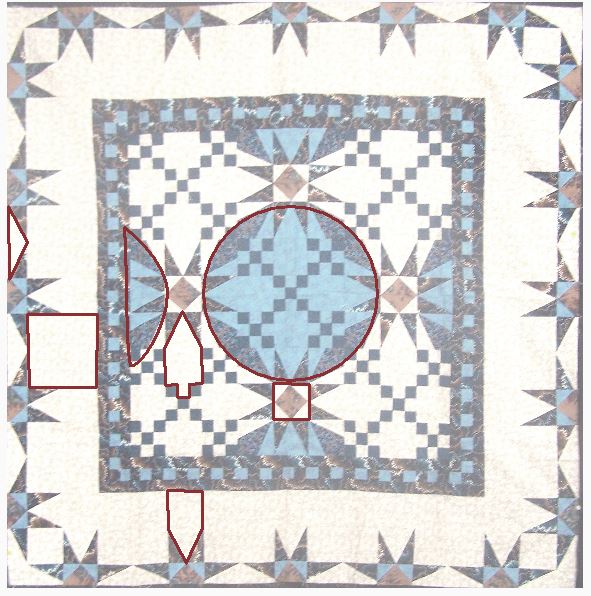
Irish Eyes quilt top by Kari Schell. Inspired from quilt by Irma Gail Hatcher.
I then came up with a quilting design to fill one of the unique spaces. I knew I wanted some curves in the quilting and frankly I just doodled a bit until I found something I liked.
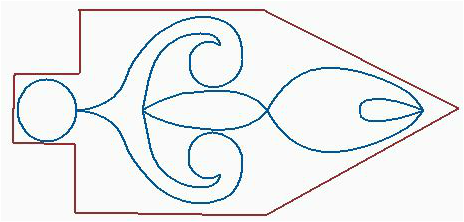
The other elements were pretty much based on this particular element. For the center circle, I created a magic circle.
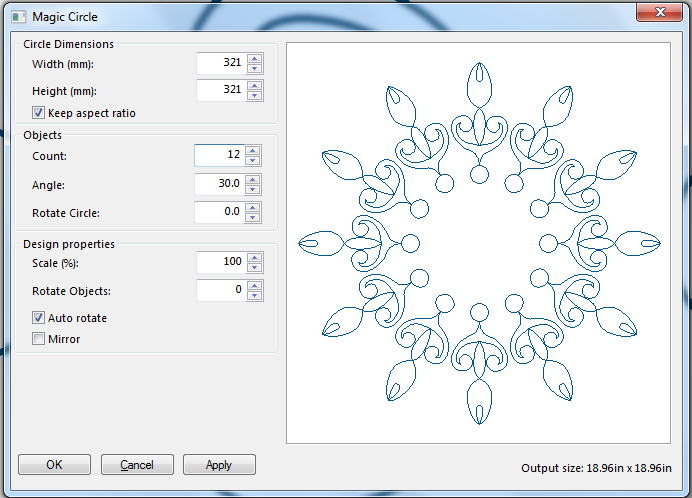
I connected the images. I needed to add one more line to connect the final image back to the beginning image.

Then I added smooth nodes at the center of all the connecting line segment. I also put a couple of placement circles in the center of the block. Then I dragged the smooth nodes to one of the circles.
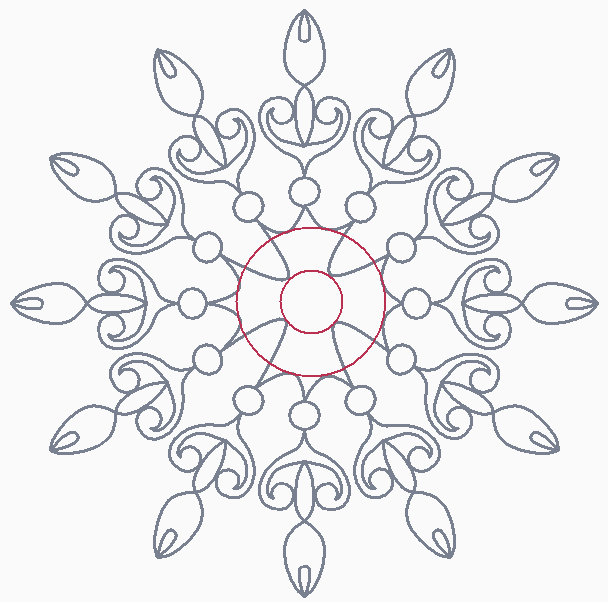
For the half circles, I took a section of the wreath block.

I created a smaller less complex wreath for the smaller blocks in the border.

I just used the top of the original element for the square within a square unit and the half blocks in the border.
The corner was a little wonky, so I played with a number of these elements to fill the space.
The overall look is as follows:
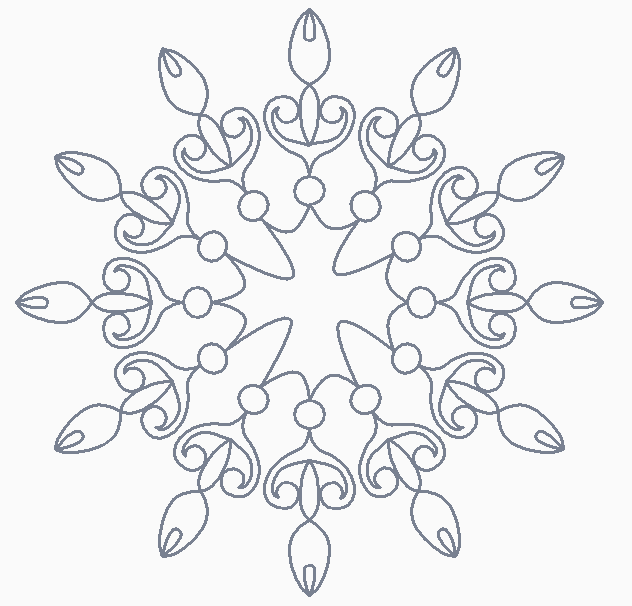
Borders were filled as follows:

Overall, I am pleased with the results. I just now need to find some time to get the quilt on the machine to get it finished.
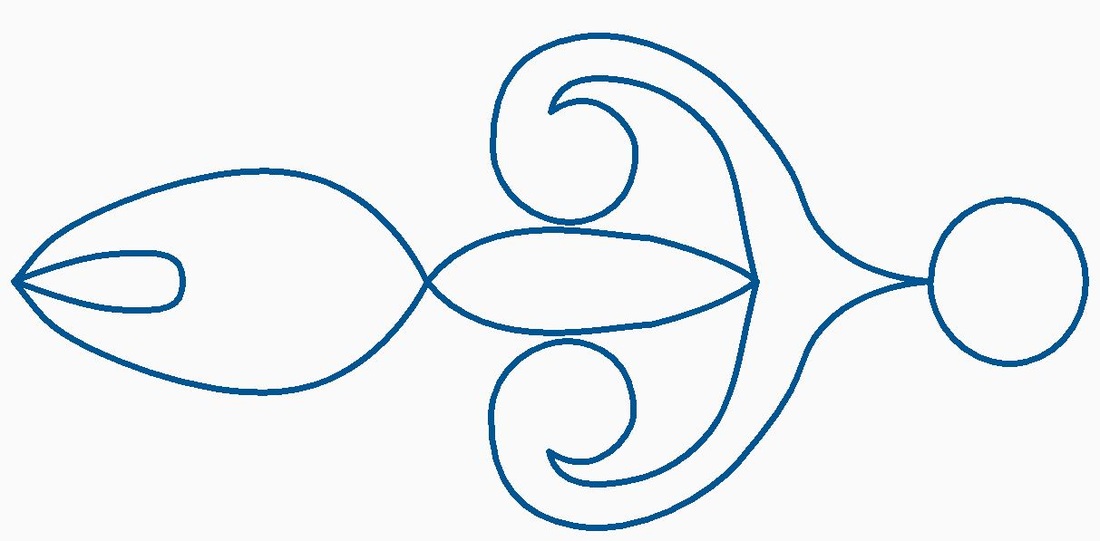
Free Quilting Design
Would you like to play with my primary motif. I've included a pdf of the image along with the Art and Stitch file.
Time to Party
Did you come up with some ideas on how you would quilt this? Maybe a pantograph or edge to edge design? Or some other favorite designs from your collection?
If you blogged about it, I am hoping you would be willing to share your blog here. If not blogging, come back later in the week to see the other blogger's posts. Here are the guidelines: New Easter Quilt Idea
I was playing in Electric Quilt this week and decided this would make a nice Easter quilt. Stay tuned for more about this quilt.
Happy Quilting.
Kari
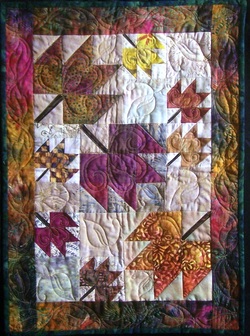
Sign up for my newsletter to stay current on what's happening in my studio and learn more quilting tips. As a thank you, I'll send you a FREE pattern for this small maple leaf quilt.
The top is done. Now on to what often is considered the biggest challenge in finishing your quilt – how to quilt it.
One of my favorite parts of a longarm group I was a part of was the show and tell. Members were encouraged to bring quilt tops they were struggling with. The group would typically throw out a number of ideas on how they would quilt the top – often feeding on suggestions from the other machine quilters.
I want to bring this concept to the internet. My plan is to post a photo of an unfinished quilt top. You will be encouraged to blog about how you would quilt the top. Others can read your post and you can read theirs.
Here is the quilt: 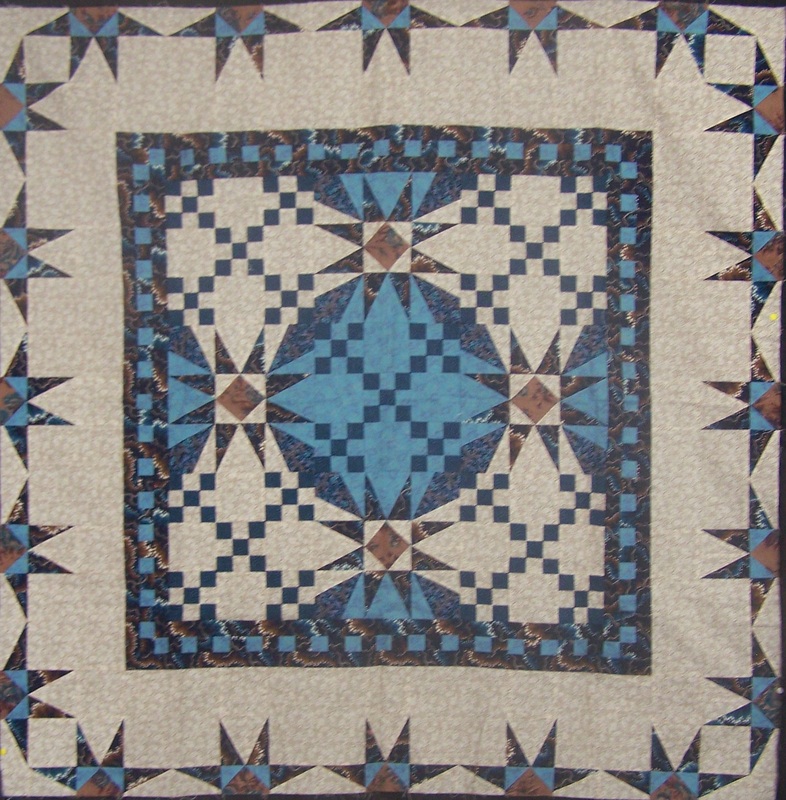
Irish Eyes Quilt Top by Kari Schell - Inspired by a quilt by Irma Gail Hatcher
About the quilt
This quilt has been sitting in my unfinished top pile for at least a decade. The name of the quilt is Irish Eyes. I think I saw the quilt in Quilter's Newsletter Magazine. I'm not even sure if instructions were provided. The quilt that inspired this was made by Irma Gail Hatcher. It was part of the 40 finalists in Quilter's Newsletter Magazine's Contest: Discovery - A New World in Quilting. It won a Judge's Award, and appeared on the cover of The Quilter, a magazine published in London, England. It was selected as Fairfield's Batting Christmas quilt and appeared in their ads in October, November, and December, 1992.
Blog Party Guidelines
1. Create a blog post between April 12-18 focused on how you would quilt this top. You can use any media you want to draw out your planned solution. Art and Stitch, Electric Quilt or any basic drawing program would work. Or just print out a photo of the quilt and draw your solution by hand. Take a photo of your results and upload it to your blog. 2. On April 12th, I will set up the party on my blog. Post a link to your blog post through the inlinkz button on that blog. Include a link back to the party (i.e. the April 12th post) in your blog. 4. Review and comment on at least two other participant’s blog posts. 5. Agree to be notified about subsequent link-ups. (I will add you to a mail list to keep you informed about these link-ups.)
Suggestions if Using Art and Stitch
Copy the photo of the quilt top. Within Art and Stitch, select Paste Backdrop. This is in the "Edit" section. Select where you would like to save the image. FYI - I believe Paste Backdrop is a new feature in Version 3. It makes savings backdrops even easier as you can do it on the fly as developing a project.
Select the backdrop and change the width to 47 inches. This will give you an approximate quilt size to work with.
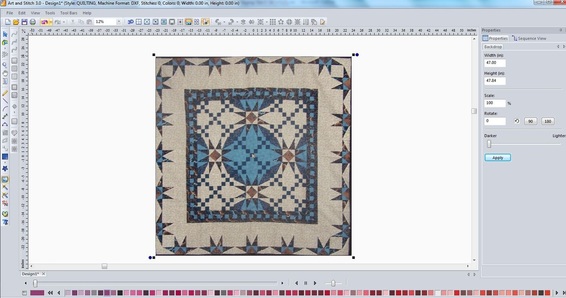
You can now draw your quilting option directly on the quilt image. I did find it easier to lighten the backdrop a bit. I also changed the pen size to 2.0 so that it stands out a bit.
Suggestions If Using Electric Quilt
Save the image on your computer. Within EQ, go to the "Work on Image" tab. Import this image. 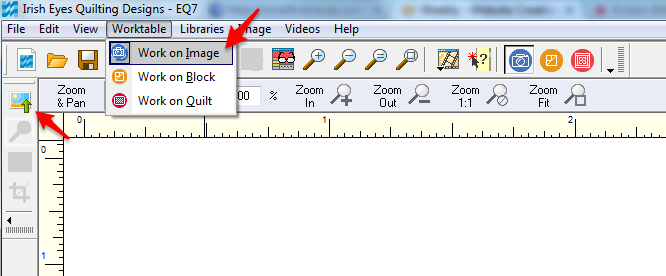
Resize the image to 10" wide.
I did try to resize the photo to to 38 x 38 (the maximum block size). However it made the image way too large and it no longer worked within the program. So I decided to work with a smaller size for the block and the quilt.. 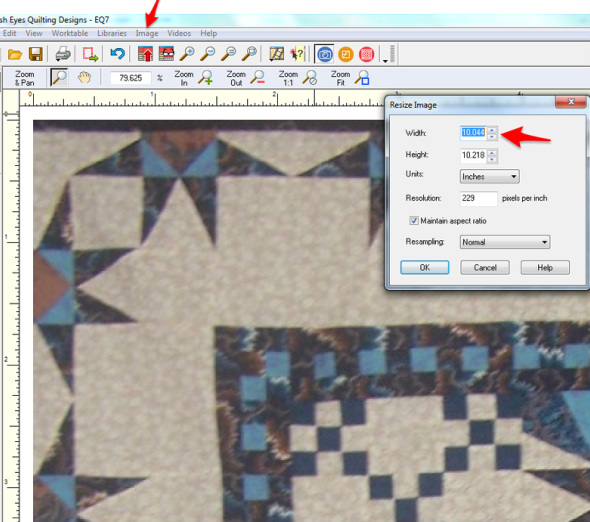
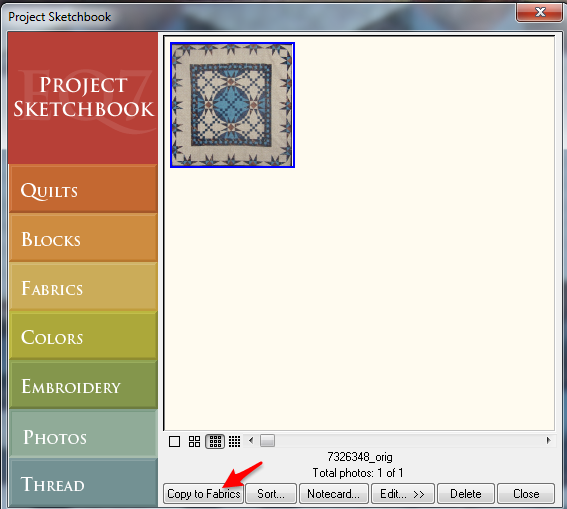
Save to Sketchbook. In the Sketchbook photo tab, copy the image to fabrics.
In the "Work on Quilt" tab, set up a new quilt using the Horizontal Layout. Set the number of blocks to 1 horizontal and 1 vertical. Set the size of the block to 10 inches. Delete the border.
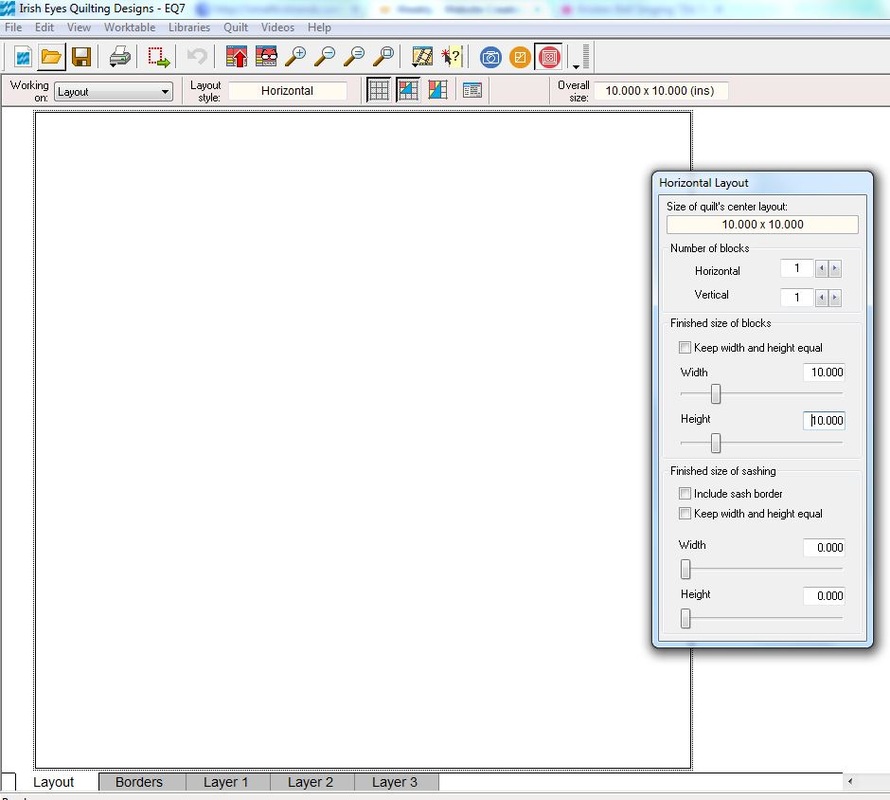
In Layer 1, color your block with the new fabric you just created. Now you can add quilting motifs via layer 2. You can create your own or you could add motifs from the library.
You could also import the image on the "Work on Block" tab. Crop a section of the quilt image to work with a smaller area at a time. 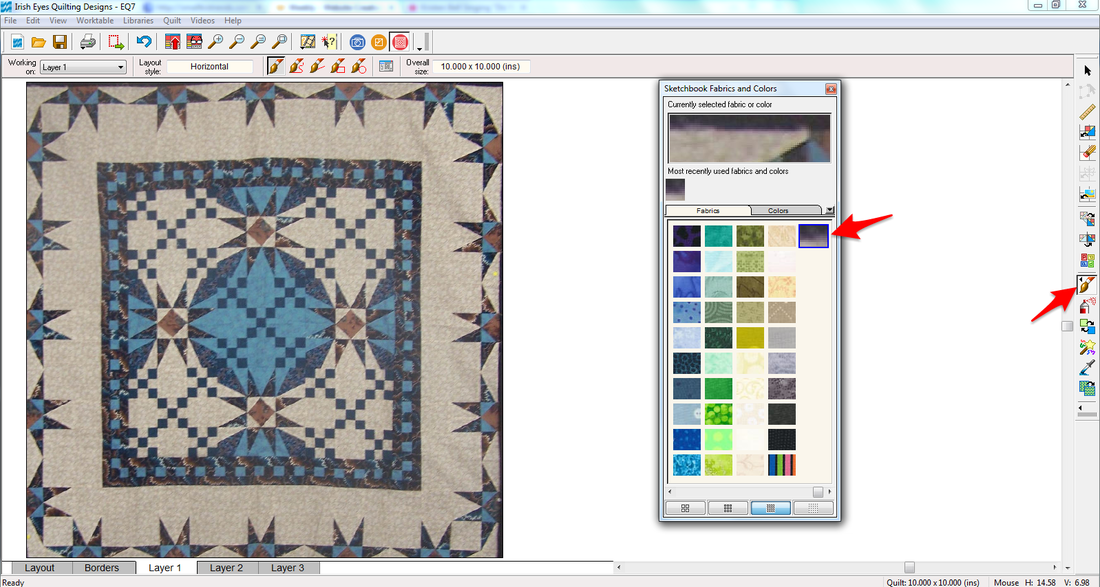
I'm hoping this quilt is inspiring you to create some designs of your own, or use some of your existing designs and stencils.
I would love to see what you develop and look forward to your linking your blogs to next Saturday's post. I will be working on my own design ideas this week. If you aren't blogging, come back to see all the ideas quilters have developed. Happy Quilting. Kari
Sign up for my newsletter to stay current on what's happening in my studio and learn more quilting tips. As a thank you, I'll send you a FREE pattern for this small maple leaf quilt.
|


Free guide available for newsletter subscribers


Kari SchellElectric Quilt Expert and Educator and Pattern Designer. Categories
All
Archives
July 2024
|


 RSS Feed