
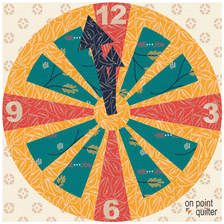
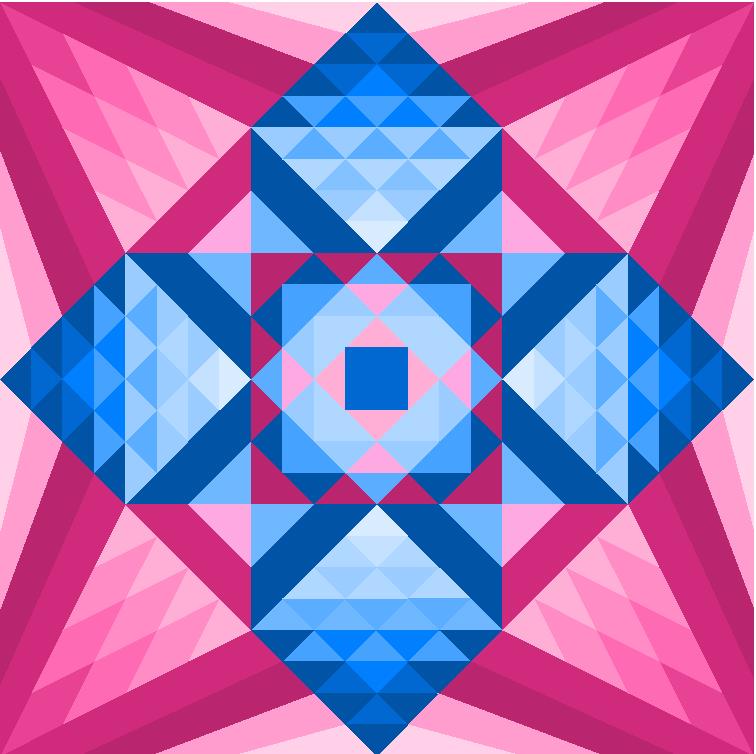
Watching the Clock - A New Years Eve Quilty Tutorial
If you are a clock watcher on New Year's eve, here is your chance to create your own clock using Electric Quilt 8.
This tutorial will share how to use PolyDraw and add some simple Applique shapes. PolyDraw has some unique features that often makes is the best option for working with blocks based on a circular grid.
I would love to see pictures of your New Year Clock quilt -- or do you have a different New Year design. Feel free to share on the Learning EQ Facebook group. I've set up a dedicated post.
Tech Know Quilter Month-End Show
Prepare to be amazed by the incredible creativity on display in our latest showcase featuring student projects from the Tech Know Quilter community.
A recurring sentiment we've encountered is the delightful surprise expressed by many: "I didn't know you could do that with Electric Quilt 8!" Breaking free from any limitations, our talented members have harnessed the full potential of this versatile software,
Tech Know Quilters is a membership program focused on mastery of Electric Quilt 8. We have members at all stages of their Electric Quilt journey.
Now is the time to join and lock in on 2023 pricing. Enrollment is only only 3-4 times a year. Click here to learn more and enroll.
One week before Christmas and counting. I am gifting one quilt this year -- and I still need to tack down the binding. And still a little bit of shopping. But actually in better shape than I normally am at this time of the year.
Scroll down to see the free EQ8 tutorial on a new way to use flying geese units. Make sure you have signed up for the free webinar -- it is right after Christmas. I am looking forward to
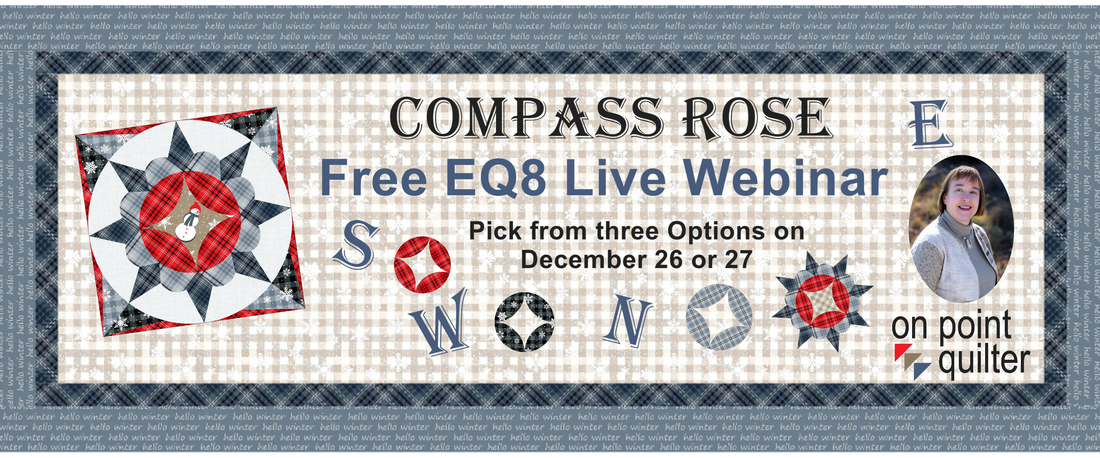
Whether you are new to Electric Quilt 8, or a seasoned user, this webinar is for you. Expand Your Creativity with the EQ8 "What If" Game
|


|
|
Learn to draft multiple variations of a Compass Rose block using Electric Quilt 8's powerful EasyDraw toolset.
|
|
|
Discover the art of creating a coordinating applique motif, adding a touch of sophistication to your design.
|
|
|
Play the "what if" game and design five unique layouts, alternating between two different fabric collections, because choices matter.
|
|
|
Master the use of Custom Set for a unique on-point setting option that sets your quilt apart.
|
|
|
Learn the art of incorporating text into your quilt for that extra touch of personalization.
|
Why wait? Join me today and receive a BONUS!
All participants will be gifted a comprehensive guidebook, serving as your go-to reference during and after the video. Packed with detailed step-by-step instructions and illustrations, this guidebook ensures you can confidently draft the blocks and bring your dream quilt to life.
I'm excited to witness your future Compass Rose quilt, whether it blooms in Electric Quilt 8 or becomes a tangible masterpiece. Don't miss out – join me now and let's turn your creative visions into quilting magic!
Free Webinar Registration Information
Select the time that suits you best below and register for this exciting webinar. You won't be disappointed!
Make sure to be part of this transformative experience. I look forward to seeing you there.
Can't make it live? Don't worry, a replay will be available for 48 hours for all registrants.
Select the time that suits you best below and register for this exciting webinar. You won't be disappointed!
Make sure to be part of this transformative experience. I look forward to seeing you there.
Can't make it live? Don't worry, a replay will be available for 48 hours for all registrants.
|
Date and Time
|
Registration Link
|
Your Local Time
|
Corner Pop Christmas Quilt Design
Do you have any extra flying geese units layout around? This project is perfect for using those extra units. Or you may find you are ready to create some new ones for a totally new and different quilt.
Here you can see the before photo of my flying geese block -- and the after photo after applying corners with a ratio of 2:1.
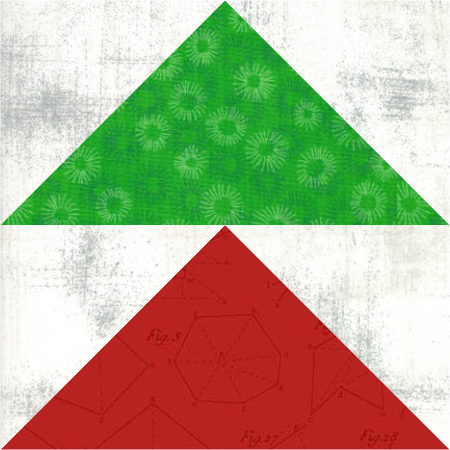
Stacked Flying Geese Units
|
Flying Geese with Corner Pop 2
|
|
Those of you that regularly read my blog posts, know that I like drawing blocks that are "folded corner" friendly. These are units that can be added by placing a square piece of fabric on a block (or segment of a block and sewing from diagonal to diagonal to add a piece with a 45 degree corner). Think of this as one of the methods to add those while corners to the flying geese units above.
Deb Tucker's Studio 180 Design has a tool called Corner Pop that more efficiently adds these types of folded corners. But she also has tools that expand on the concept. |
|
|
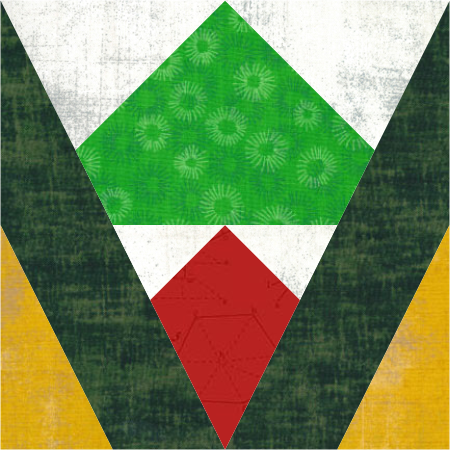
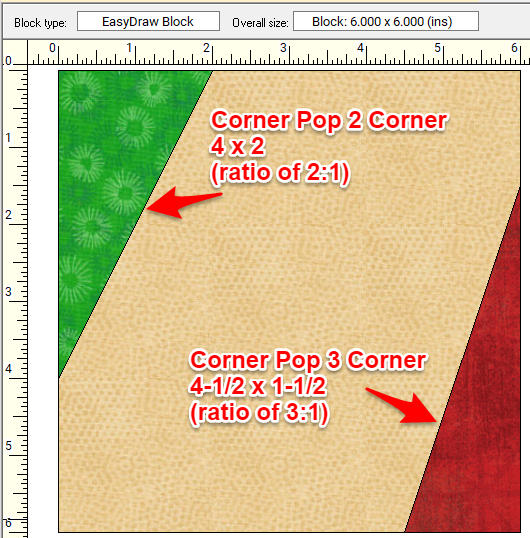
Corner Pop 2 will allow you to add popped corners with a 2:1 ratio. What that means is that Corner Pop 2 will make pops that are twice as tall as they are wide
Corner Pop 3 will allow you to add popped corners with a 3:1 ratio. Both of these units will give you a nice spiky effect.
|
|
These corners don't need to be restricted to simple squares and rectangles. In the video, I explain the process of adding them to a pieced block.
In addition to designing the Corner Pop 2 friendly block, learn how to use Shrink and Fit for a new block and Serendipity to play with block rotation in the Quilt Worktable.
In addition to designing the Corner Pop 2 friendly block, learn how to use Shrink and Fit for a new block and Serendipity to play with block rotation in the Quilt Worktable.
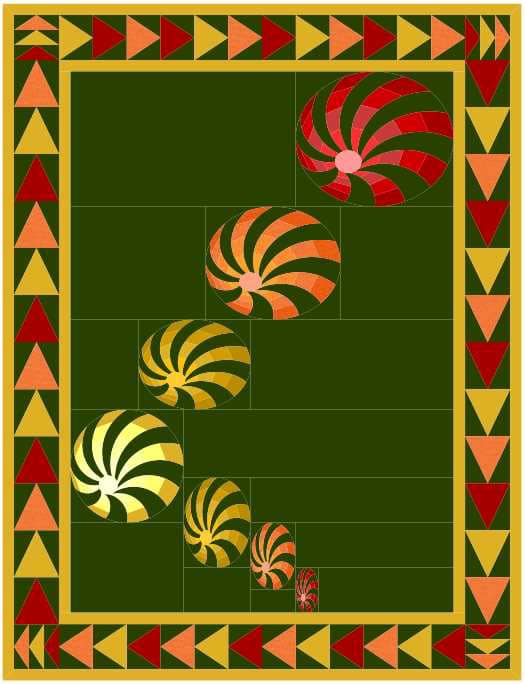
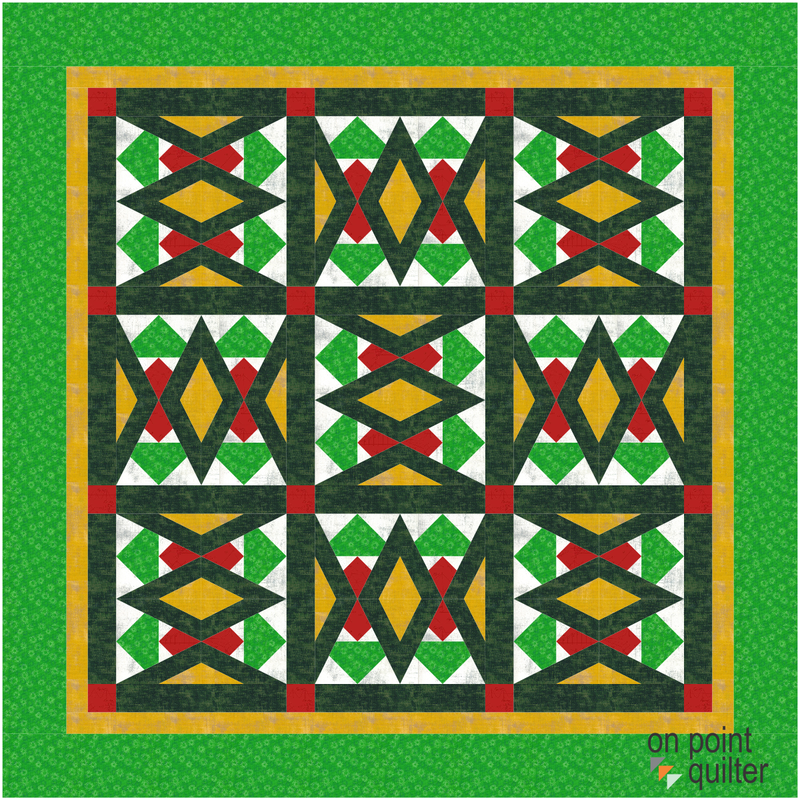
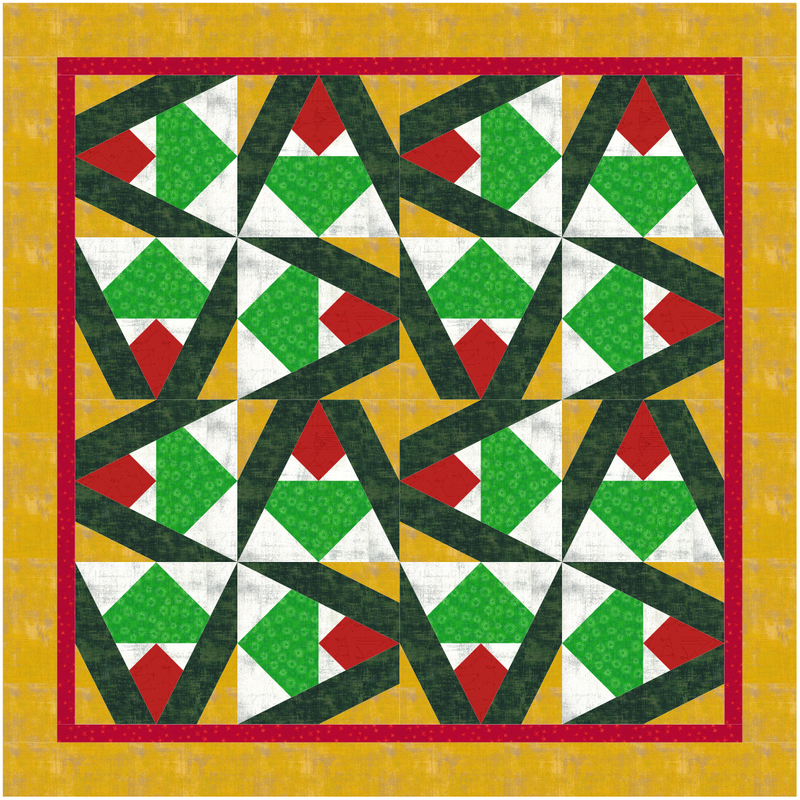
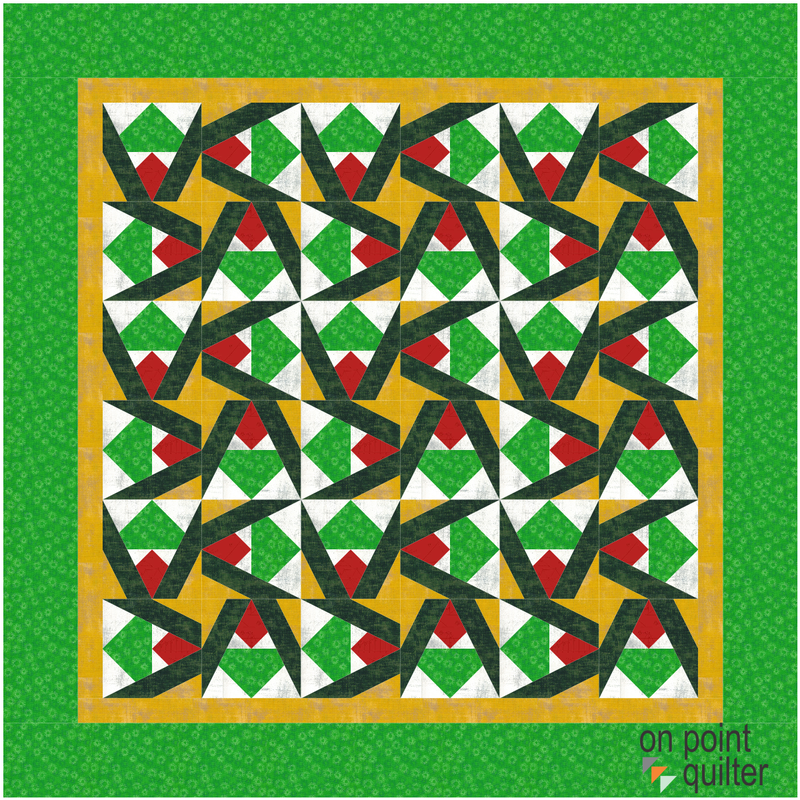
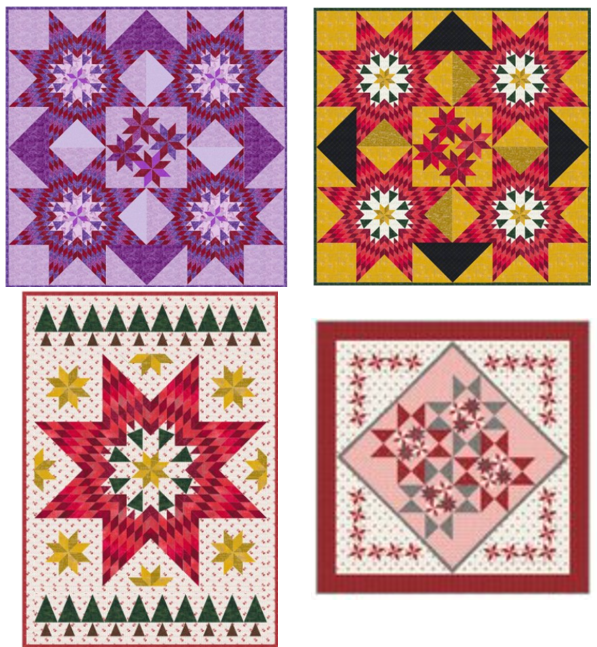
Here are some quilt ideas using the block from the video.
If you are not into using the specialty rulers, these designs would also be very conducive to foundation paper piecing.
If you are not into using the specialty rulers, these designs would also be very conducive to foundation paper piecing.
|
|
|
|
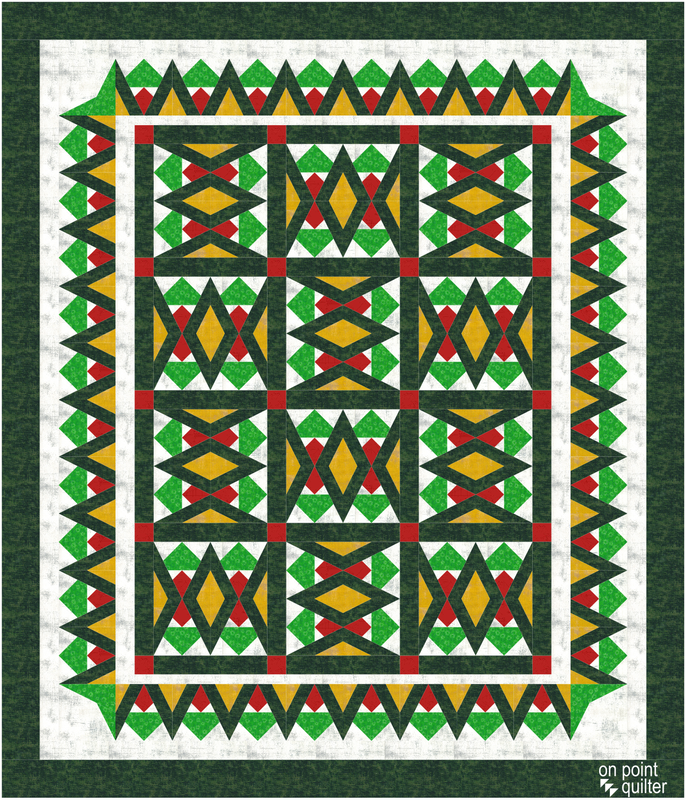
In the last option, you can see how you can carry the block design into the border as well. Make sure to use Tile Square border for blocks that are square. Otherwise, they may not be Corner Pop 2 friendly.
There are so many ways to expand on this concept. For fun start with a different simple block for the center. I look forward to seeing what you do with the idea.
Share your ideas in the Learning EQ8 Facebook group. I've set up a post for you pictures and ideas.
Share your ideas in the Learning EQ8 Facebook group. I've set up a post for you pictures and ideas.

|
Happy quilting.
Kari Join the On Point Quilter weekly newsletter and receive regular tips and inspiration on using Electric Quilt 8 along with the Free 12 Top Tips for EQ8 video guide. 
|
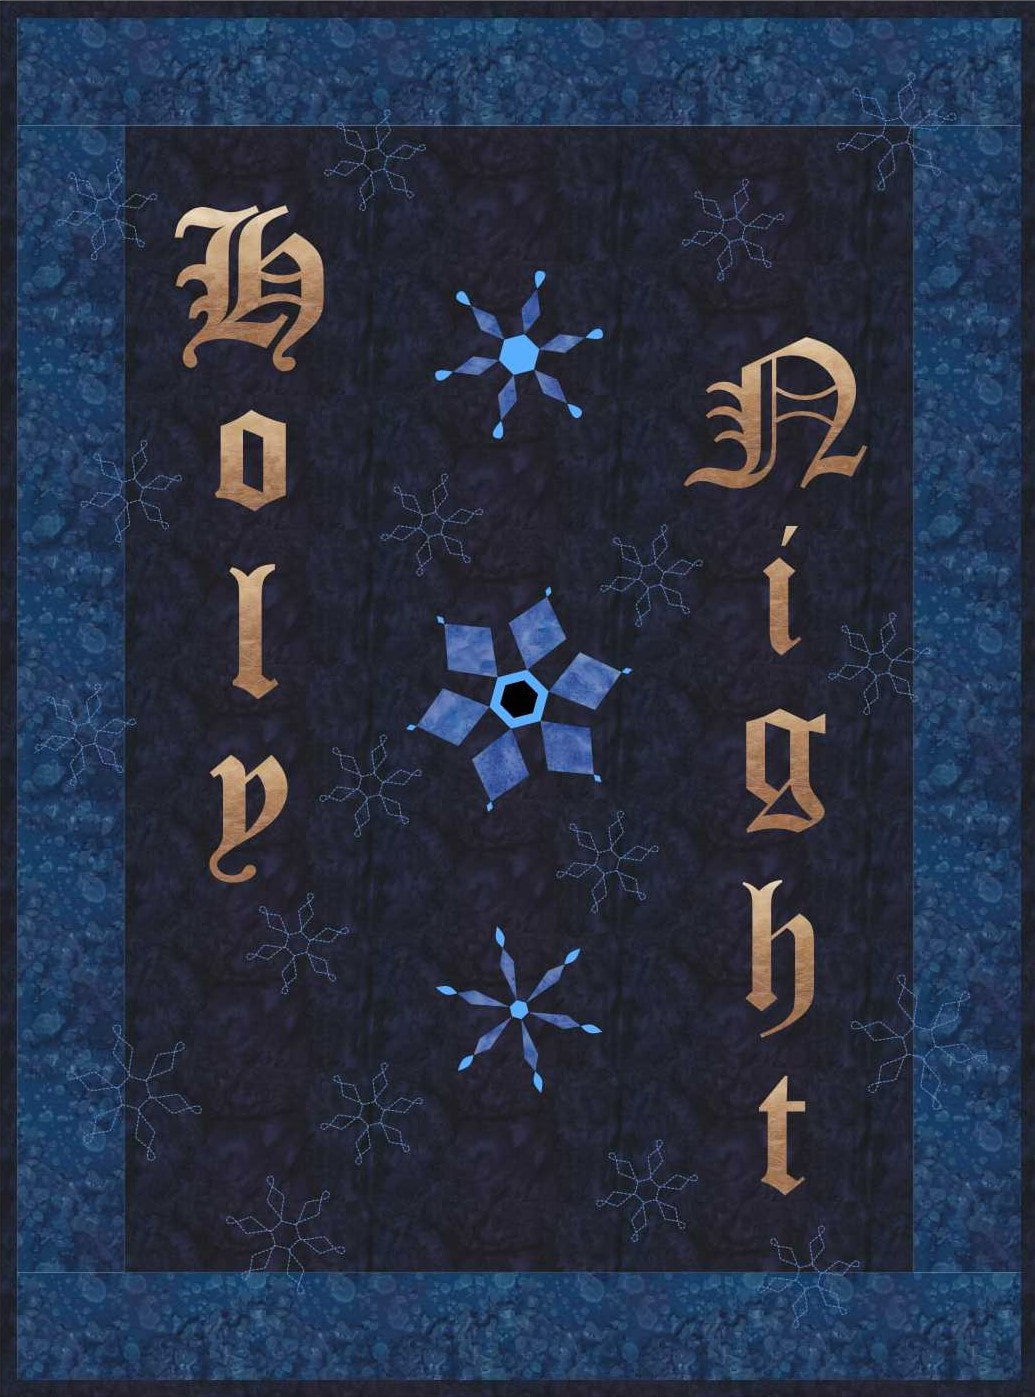
Earlier this week I was on a live call with my Tech Know Quilter Masters members. After going through all the pre-submitted questions, we had some extra time. So we began playing with the Winter Icons font from DaFont.com.
The group collaborated on the process of turning one letter into an applique snowman motif and then created a quilt around the motif. They were super creative and we were all energized after working together on the project.
The group collaborated on the process of turning one letter into an applique snowman motif and then created a quilt around the motif. They were super creative and we were all energized after working together on the project.
Selecting a Font for the Applique Angel
|
After I got off the call, I decided to experiment with a more Christmas themed font.
After downloading and installing the Christmas-i font, I couldn't get it to work in Electric Quilt. Sometimes the glyph fonts just are not compatible with the software. However, it was usable in Word and in Inkscape. So I typed the capital S with the font and saved it as a png image on my computer. |
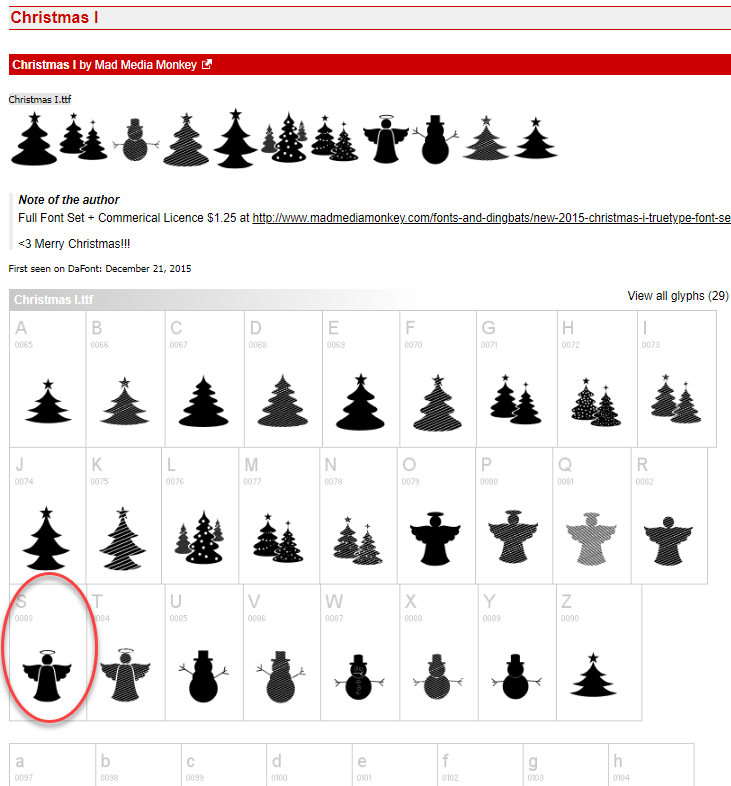
Christmas I Font
|
|
Png images can be imported into Electric Quilt and used for tracing.
You are welcome to download this image and use it in your own Electric Quilt project. FYI -- If you have problems with importing selected .png images into EQ, it is possible you have a corrupt .png image. (A problem I experienced for the first time this week.) There is a program called RIOT that can be used to fix these issues. (Thank you Matt and the EQ staff for sharing information on this program.) If you look closing at the image below, you can see the recommended settings I received from Matt. |

Angel Glyph Image
|
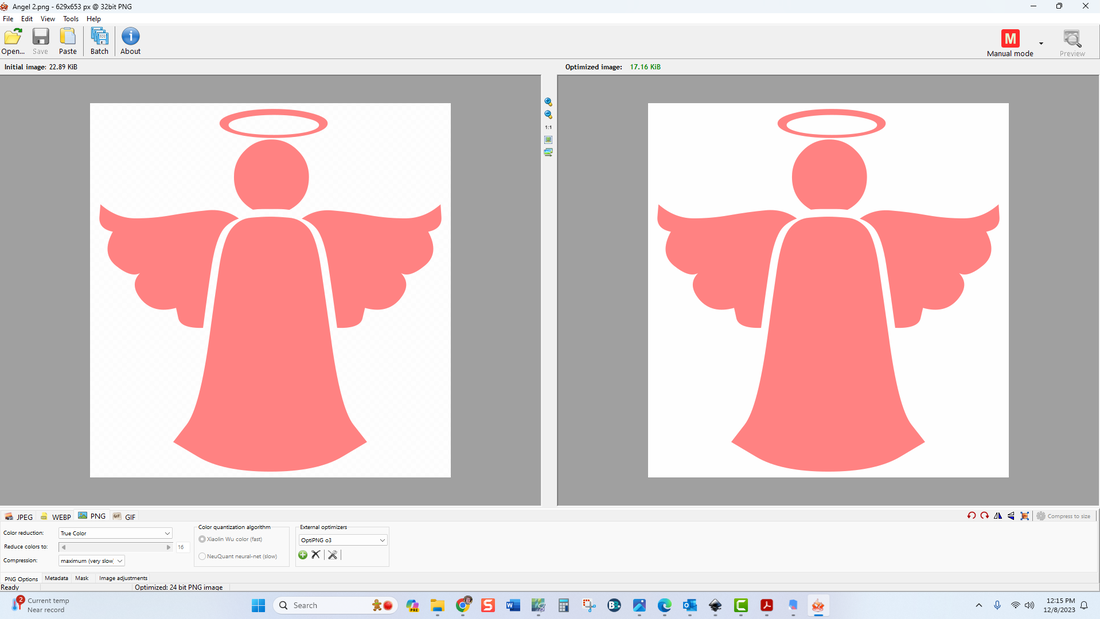
Repairing a corrupt .png image using Riot software
Drawing the Applique Angel
|
In the video I share how to trace this image as an applique motif.
I suggest using the circle under shapes for the halo. Then use the Bezier curve for the wing, body and head. The key when using the Bezier curve is to start and stop at each sharp point in the drawing. Don't worry if the curve looks terrible. That can be fixed. Once you have roughly traced a shape, make sure it is a fillable shape. You can do this by turning on the autofill on closed patches. Then zoom in and move any of the nodes to match the sharp points in the drawing. Then fix the curves. You can either move the curve itself or the handles on both sides of the curve. Color the image and add to sketchbook. |

Angel Traced from Capital S in the Christmas-i font.
Fabrics for the Quilt
The fabrics for this project came from a collection called Angels on High by Cathy Squire for Northcott fabrics. I discuss how to download these fabrics in the blog post on December 12, 2023. I also used a neutral from the default palette for the head. |
Wreathmaker
Use Wreathmaker to turn the Angel motif into a wreath of angels. Set the number of clusters at 6, cluster spacing at 100%, and then move the slider bar for resize cluster to get the amount of overlap desired. I chose to have no overlap.
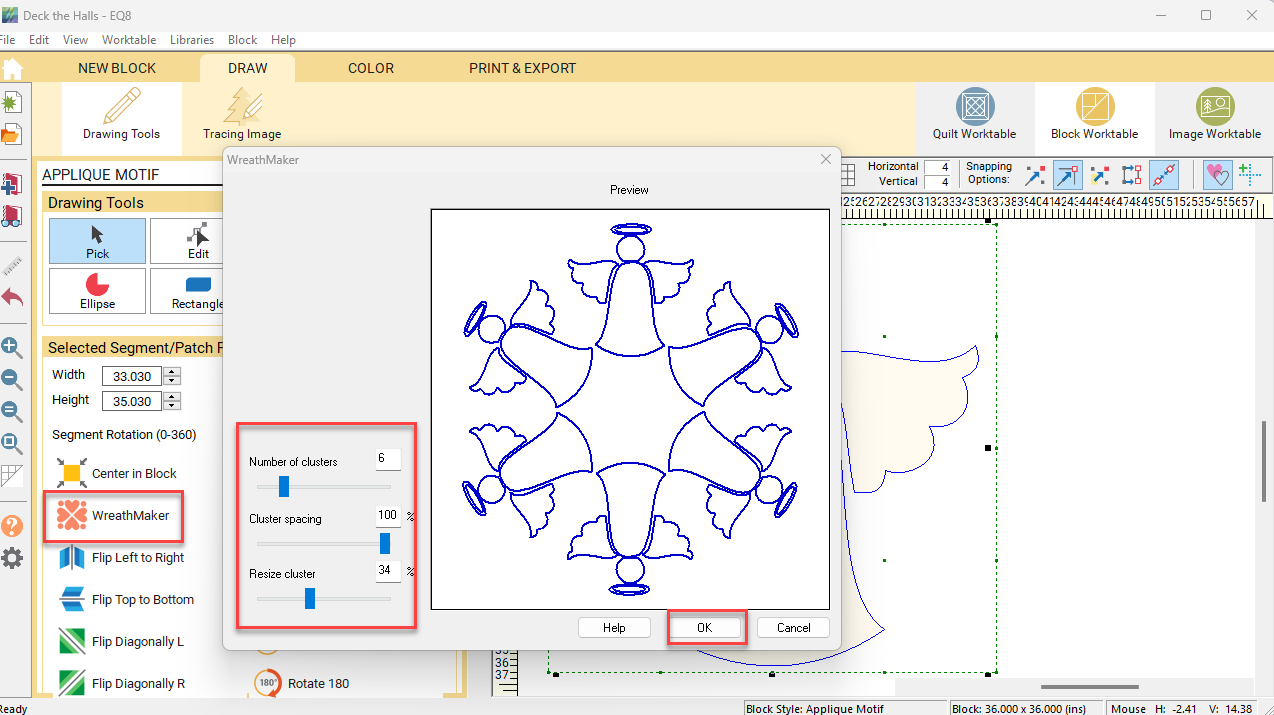
Angel Wreathmaker Settings
To create a round table topper, create a second applique block. Use the circle (under the Shapes tool). Resize to fill the block worktable. Color with the background and Add to Sketchbook.
Surrounding Angels Quilt
On the quilt worktable, set up a new quilt with the style Custom Set.
On the Layout tab, change the size to 37" x 37".
Under Block Tools, Set Block, locate the circle under Motifs and drag on the quilt. Change the size to 37" x 37" and recolor. Center horizontally and vertically. The represents the binding in the drawing.
Under Block Tools, Set Block, locate the circle under Motifs and drag on the quilt. Center horizontally and vertically. The represents the background in the drawing.
Under Block Tools, Set Block, locate the Angel Wreath under Motifs and drag on the quilt. Center horizontally and vertically.
|
For the snowflakes, I used a different font (from Dafont.com). This one is named Christmas Icons.
I loved the options and was able to use this font in Electric Quilt 8. Note that glyph fonts are not always able to be used in Electric Quilt. However I did find that this one worked on my PC with Windows 11. Give it a try. You will probably need to close EQ8, download and install the font and then reopen EQ8 for it to be usable in the program. I used the small c from the font for my snowflakes. If you are having a problem accessing the font, consider using one of the applique snowflakes from EQ8 library. Check out a few options I found in the library. 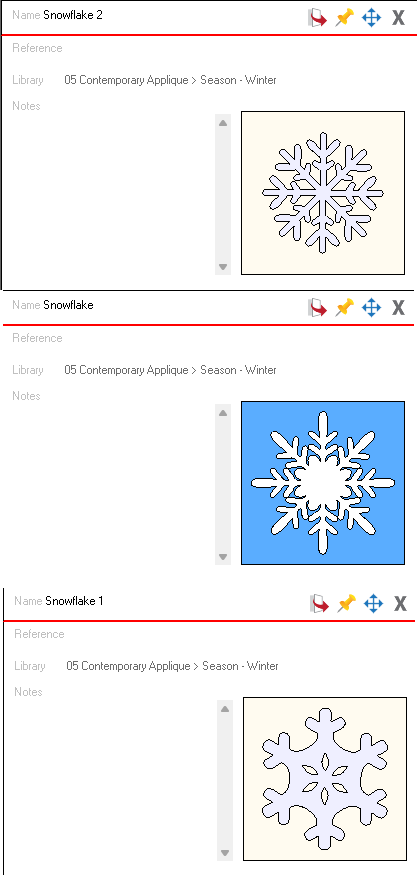
Snowflakes from the EQ8 Library
|
Christmas Icons Font from Dafont.com
|
Here is the final quilt. Wouldn't it make a stunning table topper?
The angel could also grace some placemats (a suggestion from my TKQ Masters members) -- for a fun project with the kids or grandkids.
The angel could also grace some placemats (a suggestion from my TKQ Masters members) -- for a fun project with the kids or grandkids.

Surrounding Angels Table Topper Created using EQ8
Learn how to draft the quilt in the following video.
I look forward to seeing what you choose to do with a Christmas font -- either the ones I shared or a different font. I've set up a post in the Learning EQ Facebook Group, where you can share your design.

|
Happy quilting.
Kari Join the On Point Quilter weekly newsletter and receive regular tips and inspiration on using Electric Quilt 8 along with the Free 12 Top Tips for EQ8 video guide. 
|
Thanksgiving is over. So it is now time to decorate for Christmas. For me that means pulling out my Christmas quilts along with a few winter quilts.
For gift giving, I particularly enjoy creating table runners and smaller wall quilts. I find recipients appreciate items that focused on a particular season and it is less important to "match" their "current colors" or "decorating style". It is a great opportunity to experiment with a new fabric collection or even a new "style" of quilt.
The project today will be a fabulous gift option -- in either traditional or non-traditional Christmas fabrics? I look forward to seeing what you do with the design.
Deck the Hall Table Runner using EQ8
New Fabrics
|
It is always fun working with a new fabric collection. When I am working on Christmas projects, I will often go to my favorite manufacturer websites and search for their latest fabric collections.
After Google searching I located the Christmas fabrics on the Northcott site. Click on the photo to access this page. |
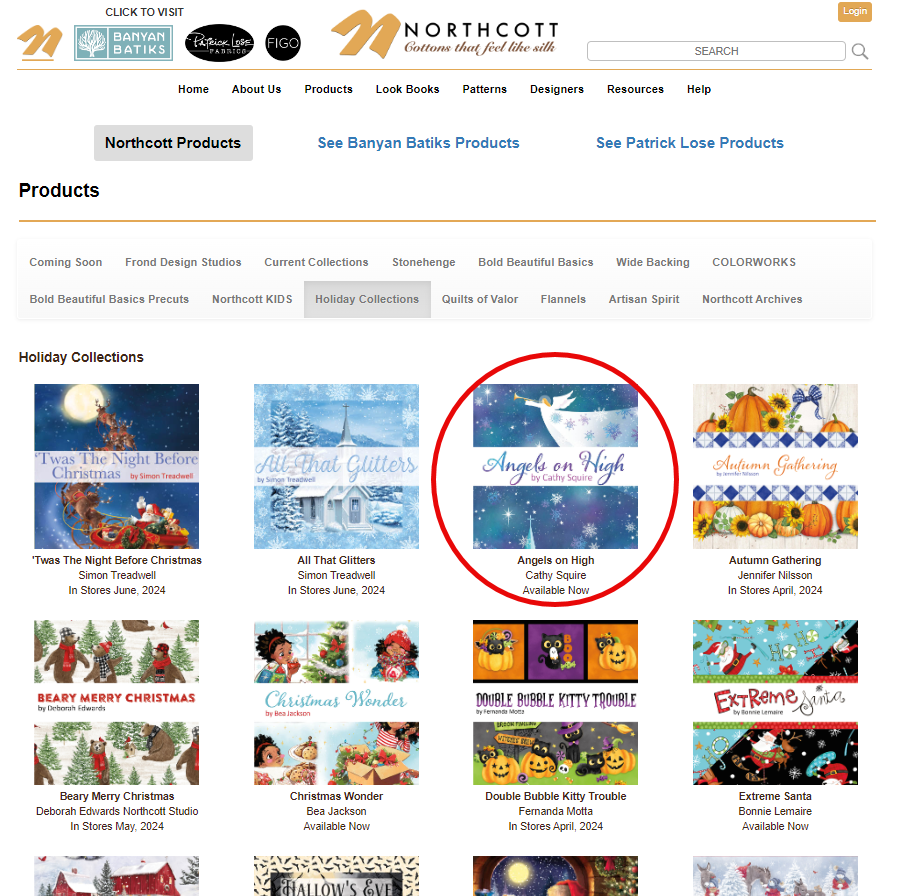
Northcott Christmas Fabrics
|
|
If you click on any of the photos on the page you will be able to see the fabrics in the collection.
I picked the Angels on High by Cathy Squire, The fabrics are vibrant and shimmery. On the Northcott page, click on the link to Download Fabric Files. This will give you a zip (compressed) file. On your computer, you will need to unzip the images. This process will differ depending on the type of computer (PC versus MAC) and even the operating system your are on within the PC or MAC environment. If you haven't done this before, do a google search for un-compress or unzip and note your current operating system to see how it is done. Although the location is not required, I typically suggest putting the fabrics in a folder under My EQ8>Images. The key is being able to locate it once your have EQ8 open. |
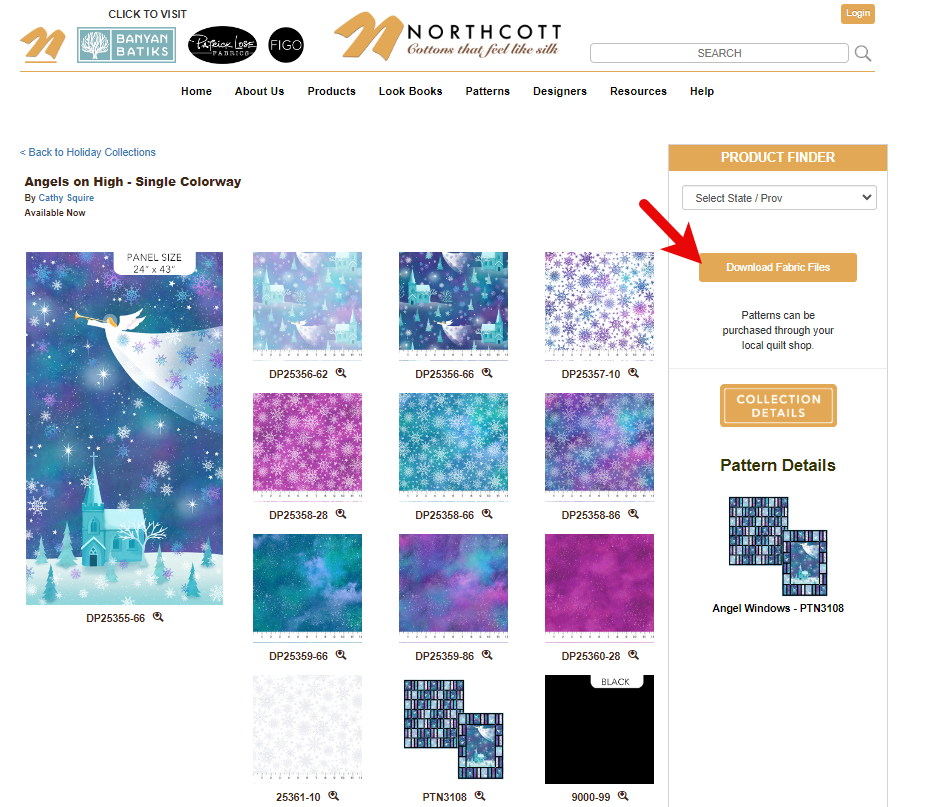
Northcott Angels on High Fabric Collection
|
|
For my block, I also needed some "silver" neutrals.
You could use some greys in the EQ8 Fabric library. I did find an older collection that included a few greys on Northcott. So I downloaded a few of those fabric as well. |
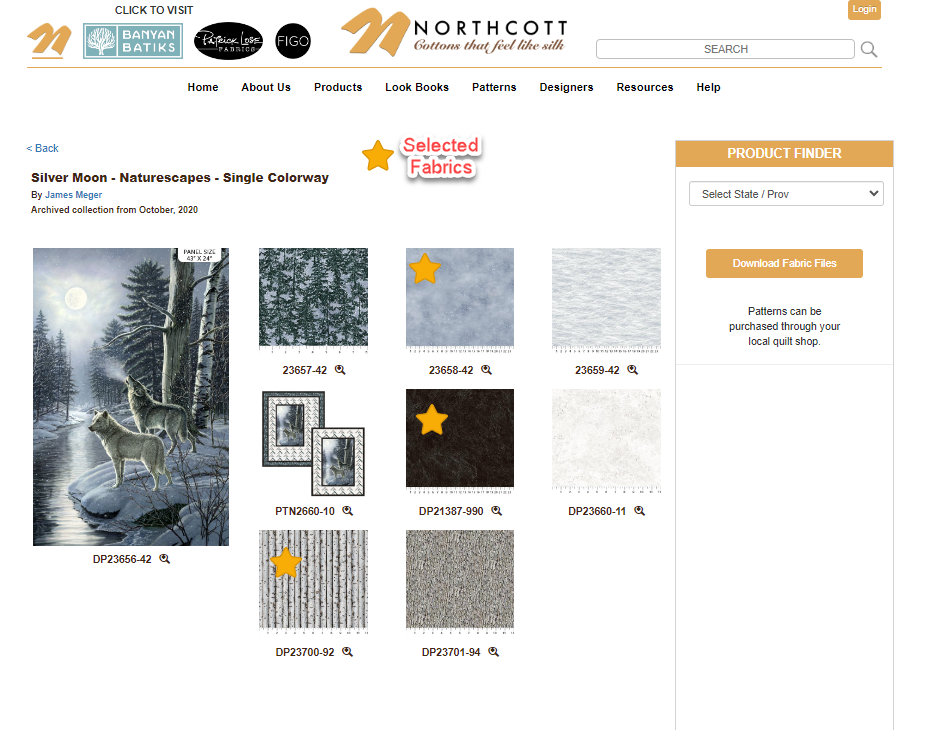
Northcott Silver Moon Fabric Collection
|
Note that the video does not include information on downloading and importing the fabric into your EQ project. Feel free to use the default fabrics for the project or a collection from the EQ8 Fabric Library.
Draw the Ornament Block
|
On a Christmas tree, those shiny ball type of ornaments offer a degree to glitz along with sophistication.
Notice that lines on this block are all horizontal, vertical, or diagonal lines (45 degree angles). That makes the patches conducive to either rotary cutting or foundation piecing. |
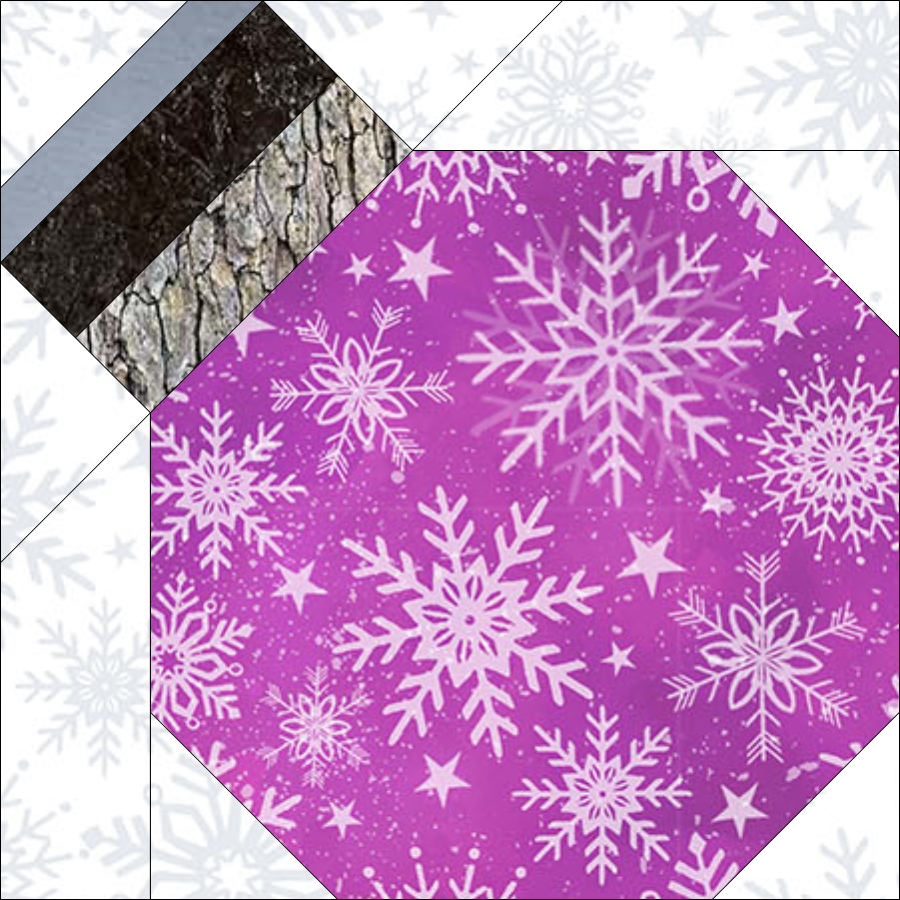
Ornament Block Drawn using EasyDraw
|
Create the Quilt Layout
|
Horizontal Layout
Layout Tab Number of Blocks 1 x 4 Size 6 x 6 Sashing 1" Borders Tab #1 - 1" Long Horizontal (background) #2 - 1" Long Horizontal (blue/teal) #3 - 3" Long Horizontal #4 - 1" Long Horizontal (blue/teal) #5 - .5" Mitered (binding) Design Tab Set the ornament block. Rotate individual blocks for a random look. Print and Export Click on the plain blocks in the 3" border and note the finished sizes. |
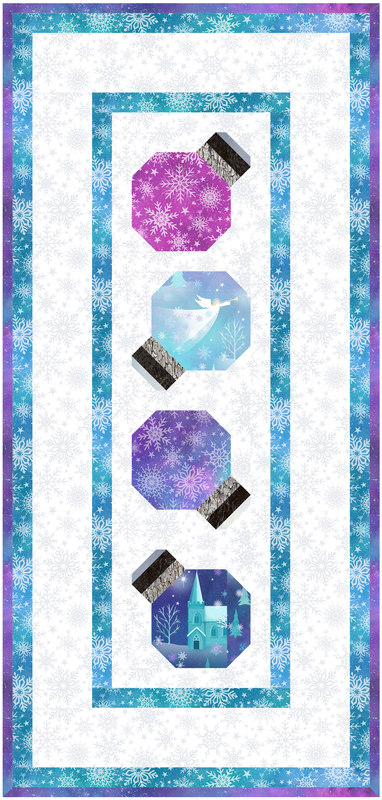
Deck the Halls - Initial Quilt Layout
|
Applique Border Blocks
Create a new block with the style EasyDraw Plus Applique.
The block should be sized at 31" x 3" -- the finished size of the left and right borders.
Set the snaps at 12 by 6 to provide guidelines to place both the leaves and the circles.
Under Shapes, you can find both the leaf and the circle. Drag them on the block worktable with the Ctrl or Command key.
One you've drawn one of each, you can clone, flip and reposition for the remaining patches. In the video I include some tips for getting everything centered in the block.

Left and Right EasyDraw & Applique Border Block
The second block, can be created, using the first six leaves and two circles from the first applique block.
Make sure to note the size of your patches (under selected segment properties) before changing the size of the block to match the finished size the top and bottom borders.
The top and bottom applique block will measure 16" x 3".
Make sure to note the size of your patches (under selected segment properties) before changing the size of the block to match the finished size the top and bottom borders.
The top and bottom applique block will measure 16" x 3".

Top and Bottom EasyDraw & Applique Border Block
Finish the Quilt
|
Place the applique blocks in the quilt and rotate each block so the circles face in.
Add to sketchbook to save your quilt and all the block colorings. |
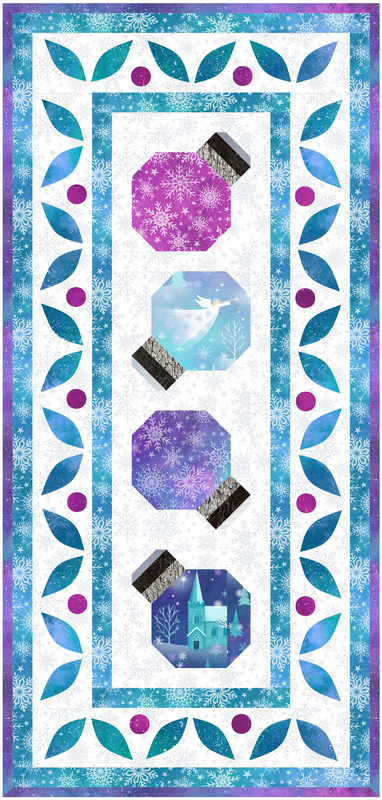
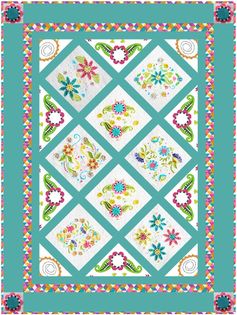
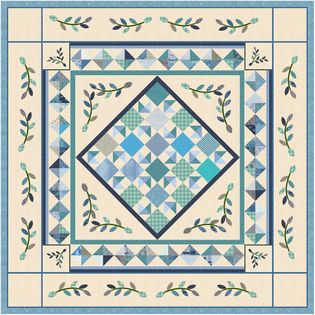
Deck the Halls Final Quilt Drafted using EQ8
|
Check out the full video tutorial.
As I look at my finished quilt, I am already thinking about possible modifications including:
- Swap the ornament block for a different block (it doesn't have to be Christmas).
- Try a different fabric collection.
- Change out the number of blocks or the size of the blocks.
- Try a different layout.
What changes would you make to personalize the project?
Feel free to share your design in the Learning EQ Facebook group.
Deck the Halls Construction Tips
I suggest using either foundation pattern or rotary cutting for the ornament block.
You will notice that piece E is missing from the rotary cutting instructions. That is because there are 8 sides to the piece -- which EQ considers not to be rotary cutting friendly. I would cut a 5-1/2" x 5-1/2" piece. Then add 1-3/4" x 1-3/4" folded corners to all three sides.
Alternatively you could use the template for Piece E to trace and cut the fabric.
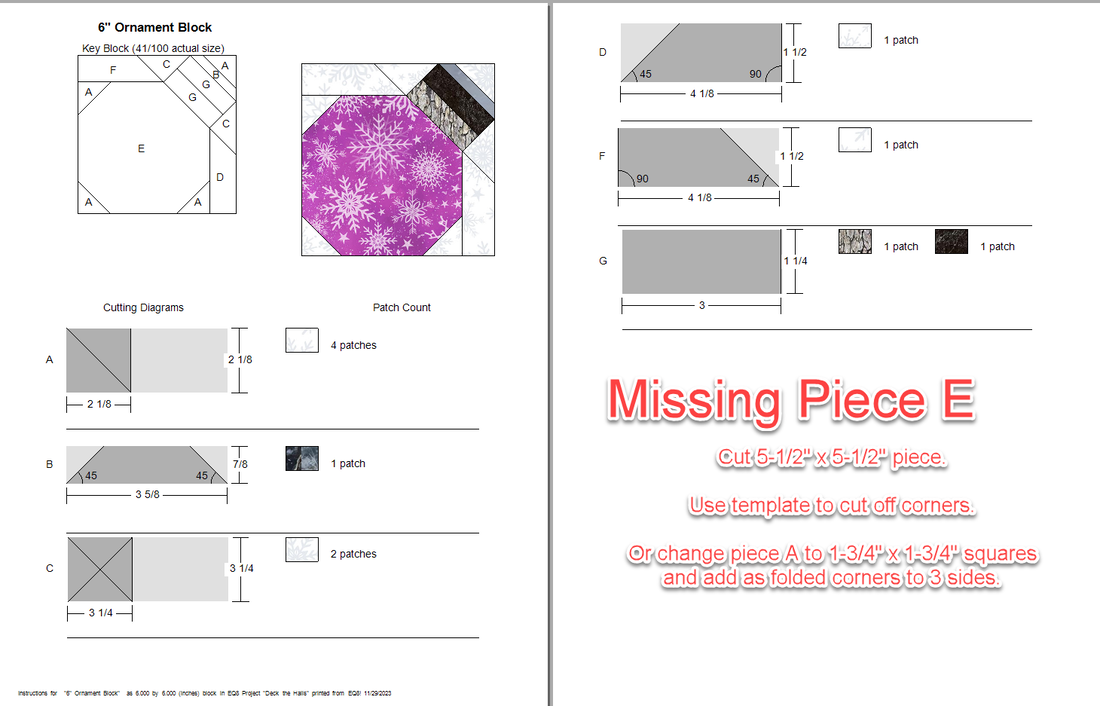
Ornament Block Rotary Cutting with Suggested Modifications
For the applique blocks, I suggest using templates. The templates could also be used with an electronic cutting system, if that is your preferred method to cut applique shapes. You can include or exclude seam allowances on your templates.
Tech Know Quilters Showcase
One thing I hear over and over again is -- I didn't know you could do "that" using Electric Quilt 8. One thing that holds us back from truly using Electric Quilt 8 is just not understanding that this versatile software can help you create any type of quilt. In this showcase, be inspired by the quilts created by Tech Know Quilter members using Electric Quilt 8.
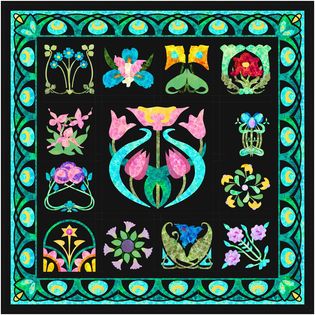
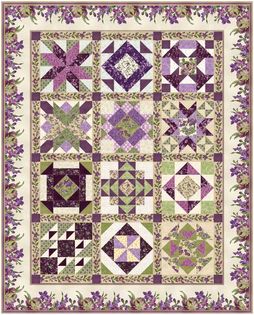
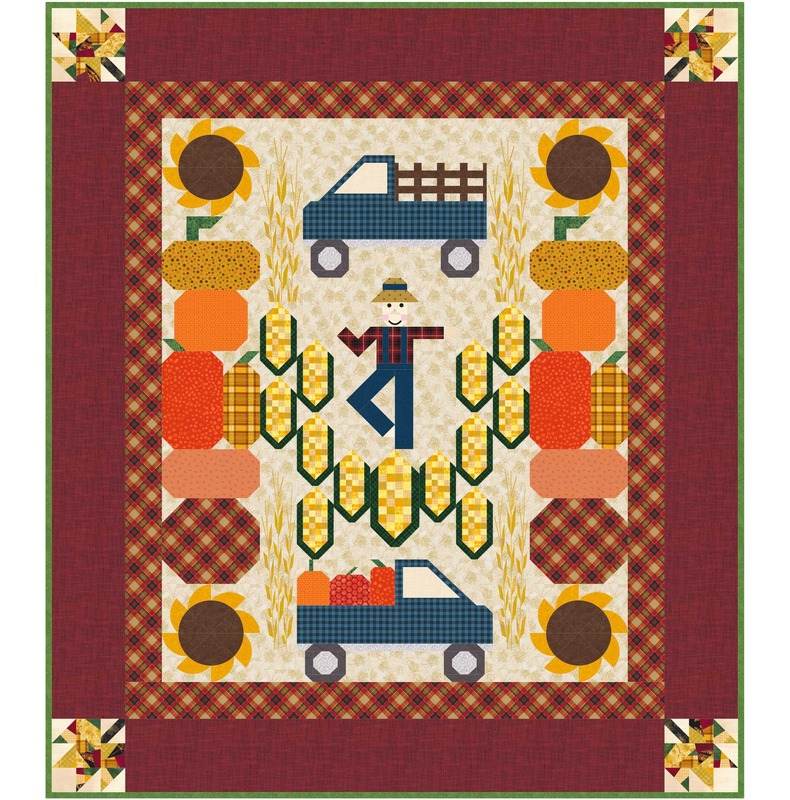
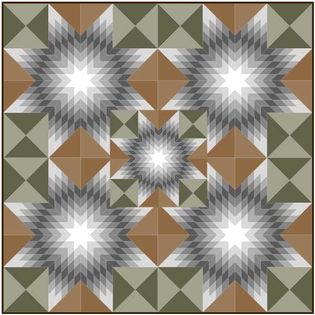
Jane Perri While playing around with putting quilting designs on various blocks in my Art Nouveau add on library, I like them so much that I put this quilt together. The quilting designs are excluded because they blurred the image of the blocks. This one may just be made.
|
Rhonda Goss Lemoyne Stars
|

Sandy Dingman Wells Just a beginner with EQ8... In this month's lesson we learned about fabrics and colors, as well as bringing in blocks and editing quilts. For some reason, this particular color combination "speaks to me".
|
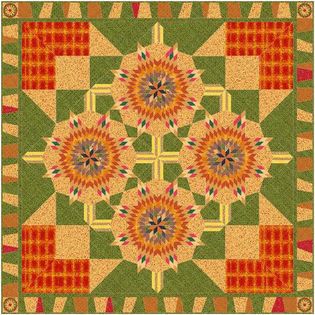
Lee Wiencki The inspiration quilt is one found at the International Quilt Museum. The quilt made by Dora M. Oehrke Redeker was created around 1910. It is part of the Linda Giesler Carlson and Dr. John V. Carlson collection.
|
Curryanne Hostetler
|
Terry McCaskey This was my favorite sampler quilt from my October class. Thank you Kari for helping me figure out the math to "simplify" the design elements in my Spider Web Sampler.
|
Kristy Goodin Soard Lone and Lemoyne Star Class
|

Kathleen Lemon Pawlik My quilt from the Modern Quilt lessons. I like the simplicity - and I think I could actually make it!
|
Loronda Schuler I reworked my quilt pattern that goes with my embroidery BOM for 2023. It was good to review techniques such as setting in photos and taking a picture of my fabric and using it in the quilt. Overall a refresher.
|
Margo Reppert I enjoyed doing this design.
|
Julie Pedersen I did the Masters Lone Star/LeMoyne Star class this month. It was a bit challenging at times, but with Kari's great directions, I finished it. Here are my quilts that are a combination of several blocks from the lessons. The ones on the bottomare the quilts we created using the videos and the ones on the top are my creations using pieces from the lessons.
|
Edith Craig
|
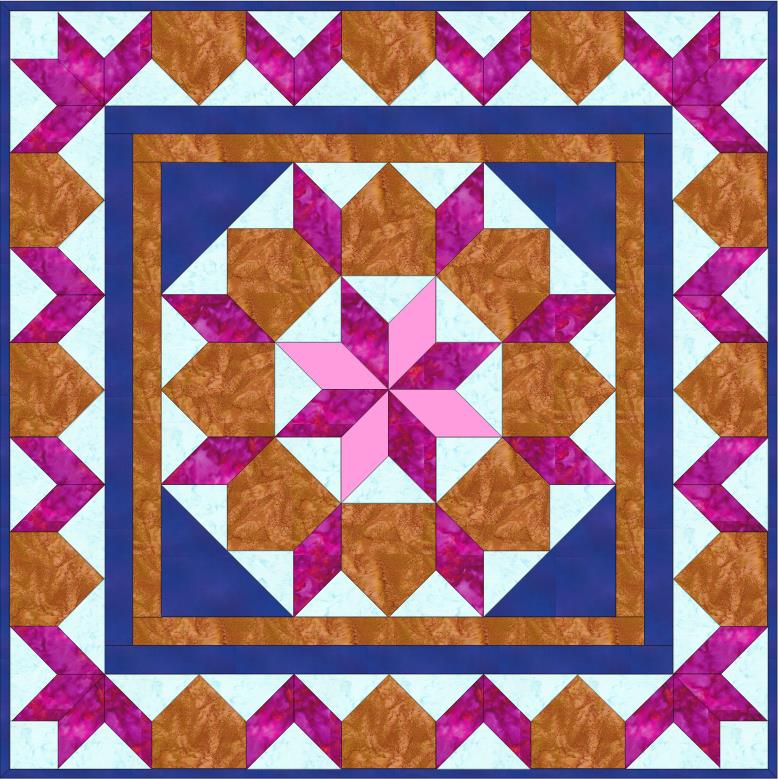
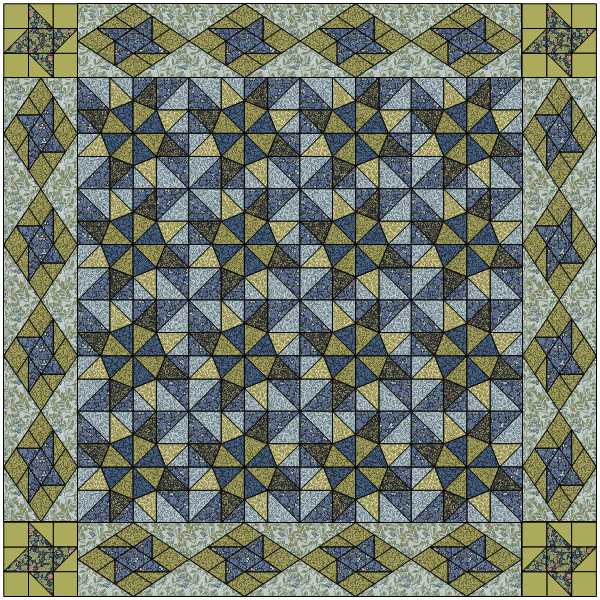
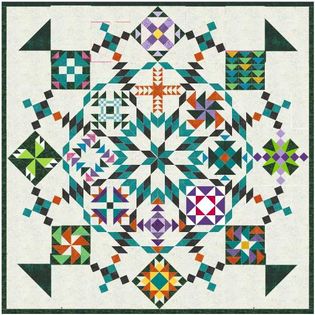
Dorothee Ilgner In October I was in the Lone Star and LeMoyne Class where I learned how to draw an extended border around an on-point middle block. This came handy in designing this medallion quilt. The quilt is based on a foto I found in an old Australian magazine made by a group of quilters.
|
Tech Know Quilters is a membership program focused on mastery of Electric Quilt 8. We have members at all stages of their Electric Quilt journey.
If you would like to join this amazing group of quilters, you can sign up for the wait list here.
If you would like to join this amazing group of quilters, you can sign up for the wait list here.

|
Happy quilting.
Kari Join the On Point Quilter weekly newsletter and receive regular tips and inspiration on using Electric Quilt 8 along with the Free 12 Top Tips for EQ8 video guide. 
|


Free guide available for newsletter subscribers


Kari Schell
Electric Quilt Expert and Educator and Pattern Designer.
Categories
All
Art And Stitch
Cricut Maker
Dear Jane
Electric Quilt 7
Electric Quilt 8
Goose Goose Duck Challenge
Inkscape
Patterns
Silhouette Cameo
Stampin Up
Tips And Techniques
Tools And Rulers
Archives
July 2024
June 2024
May 2024
April 2024
March 2024
February 2024
January 2024
December 2023
November 2023
October 2023
September 2023
August 2023
July 2023
June 2023
May 2023
April 2023
March 2023
February 2023
January 2023
December 2022
November 2022
October 2022
September 2022
August 2022
July 2022
June 2022
May 2022
April 2022
March 2022
February 2022
January 2022
December 2021
November 2021
October 2021
September 2021
August 2021
July 2021
June 2021
May 2021
April 2021
March 2021
February 2021
January 2021
December 2020
November 2020
October 2020
September 2020
August 2020
July 2020
June 2020
May 2020
April 2020
March 2020
February 2020
January 2020
December 2019
November 2019
October 2019
September 2019
August 2019
July 2019
June 2019
May 2019
April 2019
March 2019
February 2019
January 2019
December 2018
November 2018
October 2018
September 2018
August 2018
July 2018
June 2018
May 2018
April 2018
March 2018
February 2018
January 2018
December 2017
November 2017
October 2017
September 2017
August 2017
July 2017
June 2017
May 2017
April 2017
March 2017
February 2017
January 2017
December 2016
November 2016
October 2016
September 2016
July 2016
June 2016
May 2016
April 2016
March 2016
February 2016
January 2016
December 2015
November 2015
October 2015
September 2015
August 2015
July 2015
June 2015
May 2015
April 2015
March 2015
February 2015
January 2015
December 2014
November 2014
October 2014
September 2014
July 2014
June 2014
May 2014
April 2014
March 2014
February 2014
January 2014
December 2013
November 2013
October 2013
September 2013
August 2013
 RSS Feed