
|
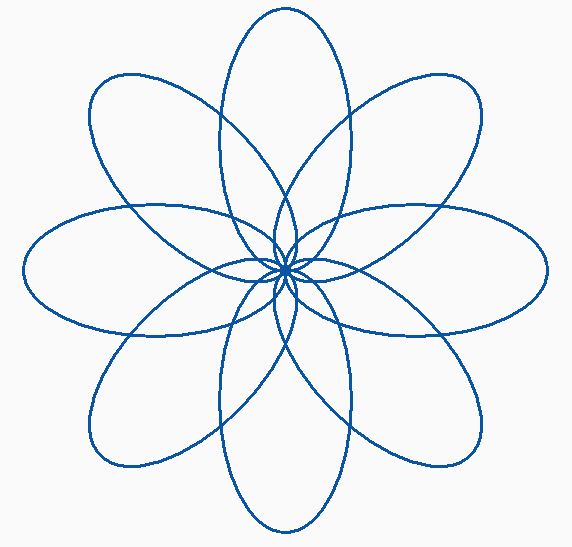
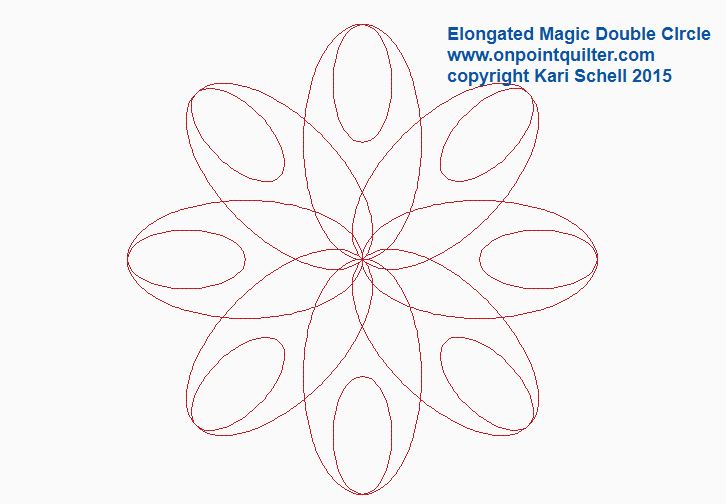
I've been obsessed with ellipses this week -- you know those elongated circles. I've been working on a new quilt (not quite yet ready to share it yet) that called for some modern quilting. I think these elongated circles really fit the bill.
They are so easy to create in Art and Stitch, since it is one of the standard shapes in the toolbar. Just drag and drop. I then did some fun playing with magic circle. Everything looked great.
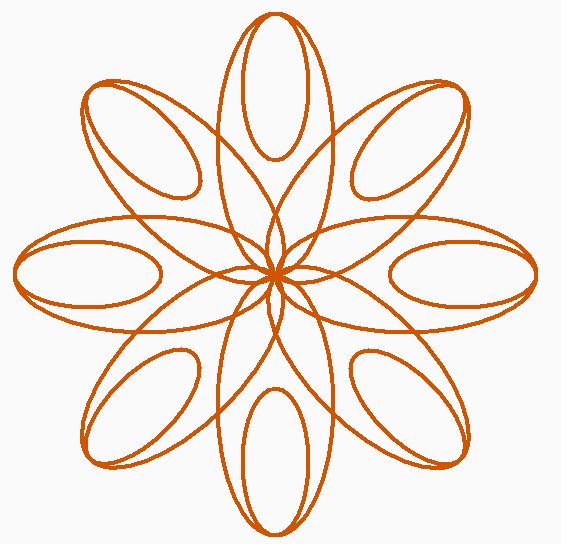
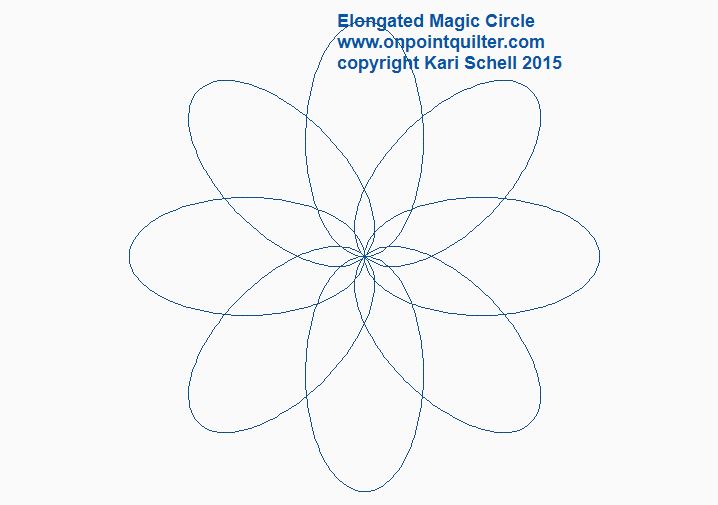
The challenge came when I wanted to connect everything up and make it continuous. I also wanted my lines to cross to ensure I didn't have gaps when quilting it out. I also didn't want to loose the "symmetrical" points when doing so. (Connect Objects was not my best friend for this exercise.) Let me share some valuable tips I learned when creating this design. Part 1 shows the drafting of the basic elongated magic circle. Part 2 shows the double elongated magic circle along with a tip from Loes on how to preserve my stitch out despite all those pesky points coming together in the center. Featured Product - Elongated Magic Circle Set (on sale for $5)After I finished these designs, I realized that many of you would probably like to have them for your own quilts. So I decided to offer the set of them for only $5 this week. This will provide you the files in formats for all major quilting systems.
Happy quilting. Kari Sign up for my newsletter to stay current on what's happening in my studio and learn more quilting tips. As a thank you, I'll send you a FREE pattern for this small maple leaf quilt. 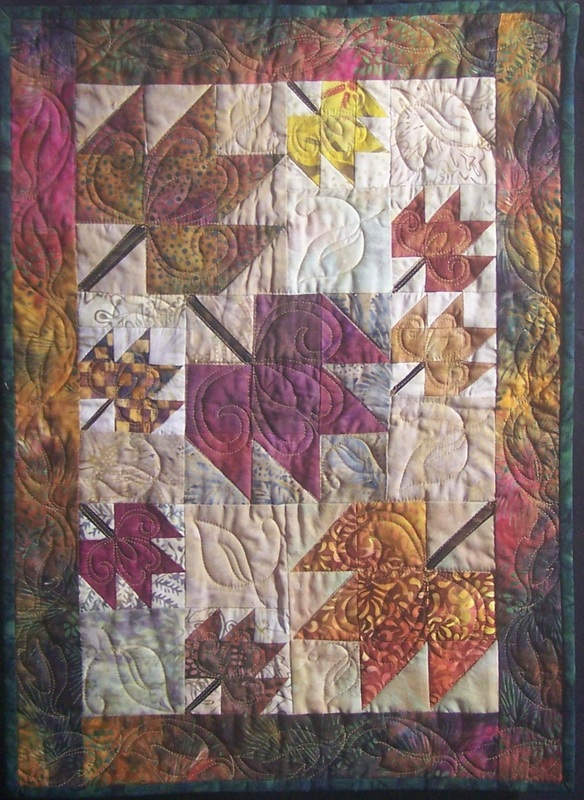
Melanie Gillette
9/19/2015 09:05:55 am
Hi Kari. I love it when I see you have made a new video (or two!)
Cathy
9/19/2015 10:17:11 am
Grateful thanks for all your wonderful videos.
Siena Van Brabant
9/20/2015 09:01:55 pm
Thank you for the videos. I did wonder though why you would create eight copies of the original element, then delete four of them. Why not just create four instead?
Liz Pennington
9/24/2015 08:42:39 pm
Great video! Thank you for sharing. Was wondering how to create this same design and not have the thread build up in the center? That is, make the center area open a bit.
Jan Guerard
9/26/2015 10:18:12 am
Great tutorial, as always clear and consise guiding. I also agree with your choice to leave in your unexpected outcome and how you corrected that. You inspire me! Thank you. Comments are closed.
|


Free guide available for newsletter subscribers


Kari SchellElectric Quilt Expert and Educator and Pattern Designer. Categories
All
Archives
July 2024
|


 RSS Feed