ON POINT QUILTER
  • Blog
  • About
  • EQ8 Training
    • Tech Know Quilters Electric Quilt 8 Membership Training
    • EQ8 Made Easy
    • Electric Quilt 8 Sneak Peek
  • Store
  • Contact
Picture

Duck Pond

4/29/2023

 
Last week I shared how to draft two super simple duck blocks -- Mama Duck and Baby Duck.  Both are foundation friendly -- with only a few pieces making them quick and easy to do.  

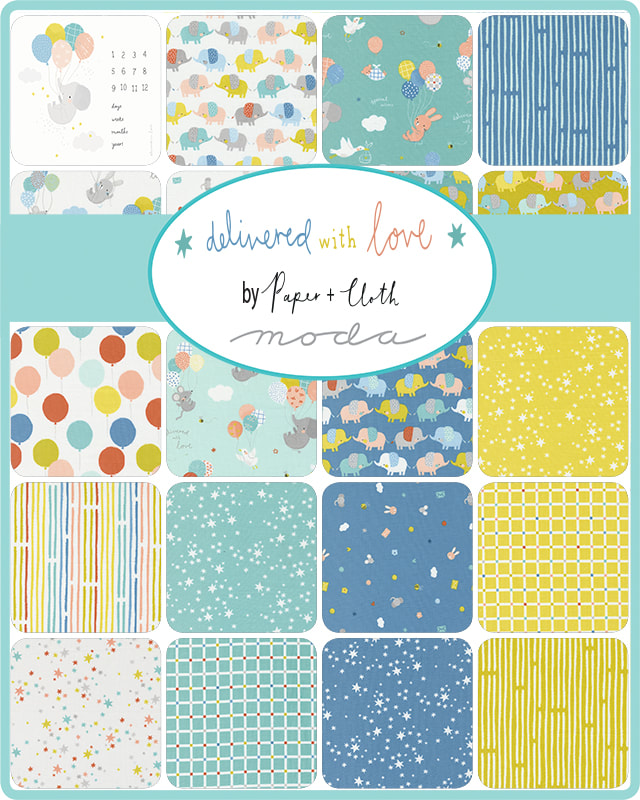
You can find the tutorial here -- along with how to bring in and use Delivered in Love -- a brand new Moda fabric collection.

​Here were the final drafted blocks.  FYI -- you will love the technique for making the Baby Duck.
Picture
Mama Duck 4" x 4"
Picture
Baby Duck 4" x 4"
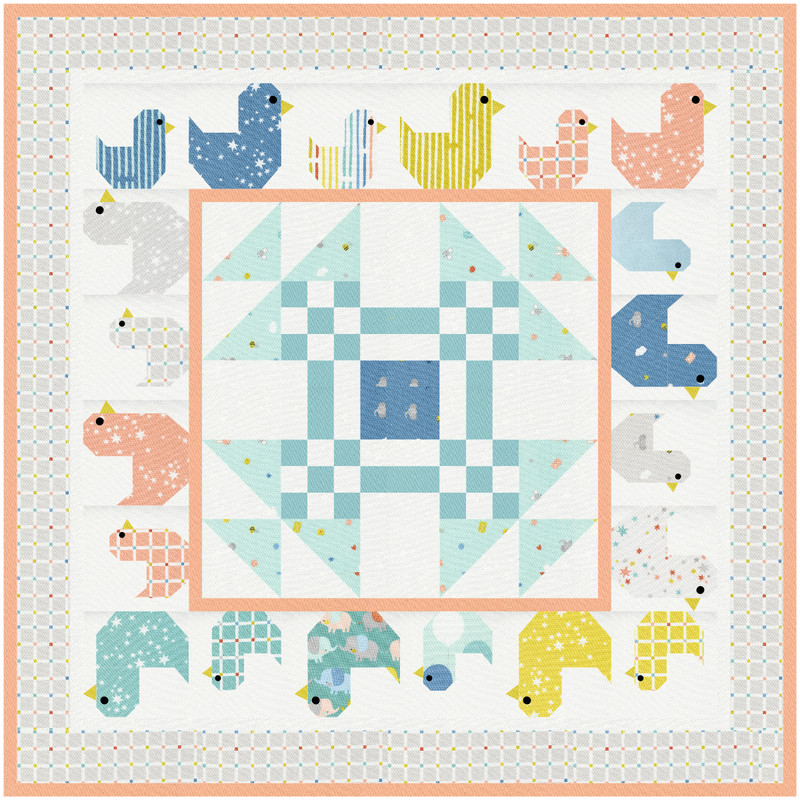
As promised, this week I have a video on how I incorporated these blocks in a quilt.  

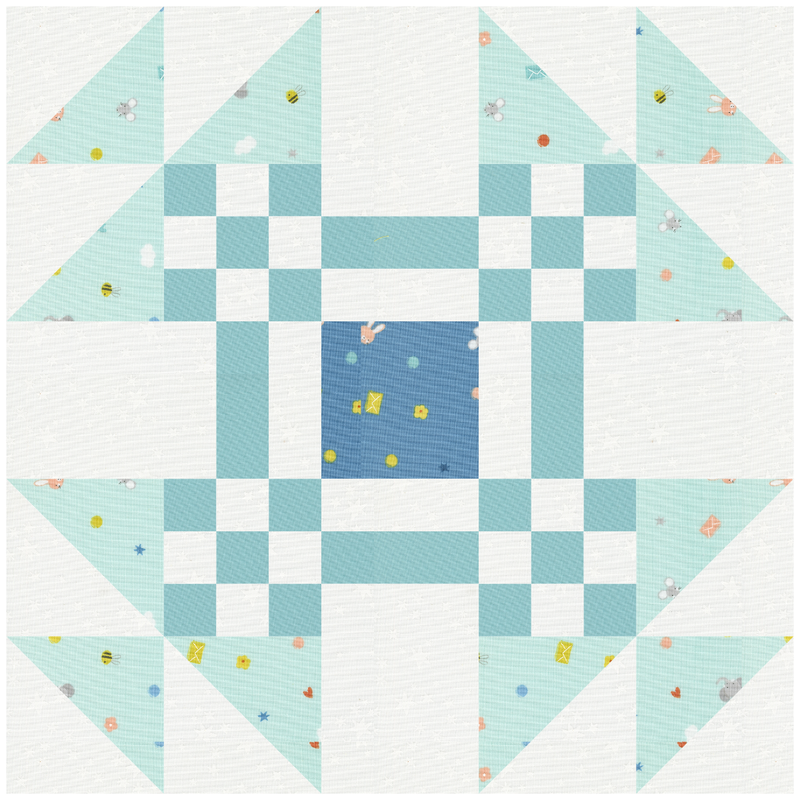
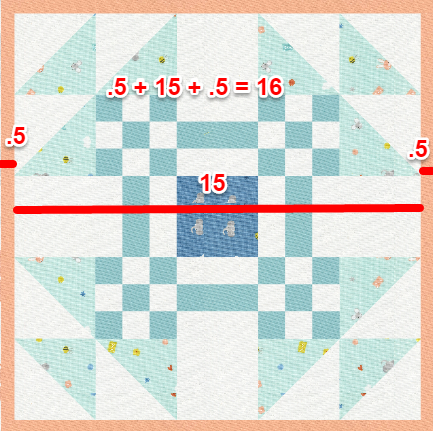
However -- they are not in the main section of the quilt.  Instead I placed them in the border.

For the center of the quilt, I found the block - Goose in the Pond.  It is a block under 01 Classic Pieced>Five Patch.  When doing a search make sure to type the name exactly as written.  EQ does not look for "similar" names in a search.

Getting Everything to Fit

Picture
Center Block Size

The block was drafted in a five by five grid.  Count the equal division across the top -- four half square triangles plus a square that is the same size.   For a total of five.

Next look at the 9 patches.  They are the same size as the half square triangle.  They have three divisions both horizontally and vertically.

Because of this, an ideal size for the block would be 15" x 15".  (Multiple the 5 for the major division by the 3 for the smaller section division.) 

So I used 15" for the size for the center of the quilt. 

As previously mentioned, the blocks for the ducks would be best done at 4".  If I wanted to fit them exactly around the center block, they would need to be resized to 3-3/4" x 3-3/4".  (15 inches for the center divided by 4).  Since the plan is to foundation piece, this is doable.  But a 4" block would accommodate other types of blocks as well.

So to use four inch blocks we need to make the size of the center 16 inches.  I chose to do this by adding a 1/2" border to the center.  
Picture
Picture
Layout for Duck Pond Quilt in EQ
Then we are ready to add the blocks border.  The number of blocks in border is defined as the number next to the previous center.  it does not include the corners in the count.  So for four inch blocks we would set the number of blocks at 4 x 4.  (16 inches total divided by the size of 4" for the blocks).

From there you can place, rotate and color the blocks.  And add and color any additional borders.
See more on how to draft the entire quilt in this video.
I ended up with two versions.  Do you prefer cantaloupe or spray for the first narrow border and binding? 

​The body for each of the ducks (both Mama and Baby) can be cut from a 5" x 5" square -- making this quilt charm friendly.  You will need additional yardage for the background, borders and the Duck in the Pond block.
Picture
Duck Pond Option 1 by Kari Schell
Picture
Duck Pond Option 2 by Kari Schell
I am curious what you decide to do -- either with the layout or the blocks.  Feel free to share pictures in the Learning EQ Facebook post.
Learning EQ Facebook Post for Duck Pond

Picture
Happy quilting.

​Kari

Join the On Point Quilter weekly newsletter and receive regular tips and inspiration on using Electric Quilt 8 along with the  Free 12 Top
Tips for EQ8 video guide.
Picture

Just Ducky

4/22/2023

 
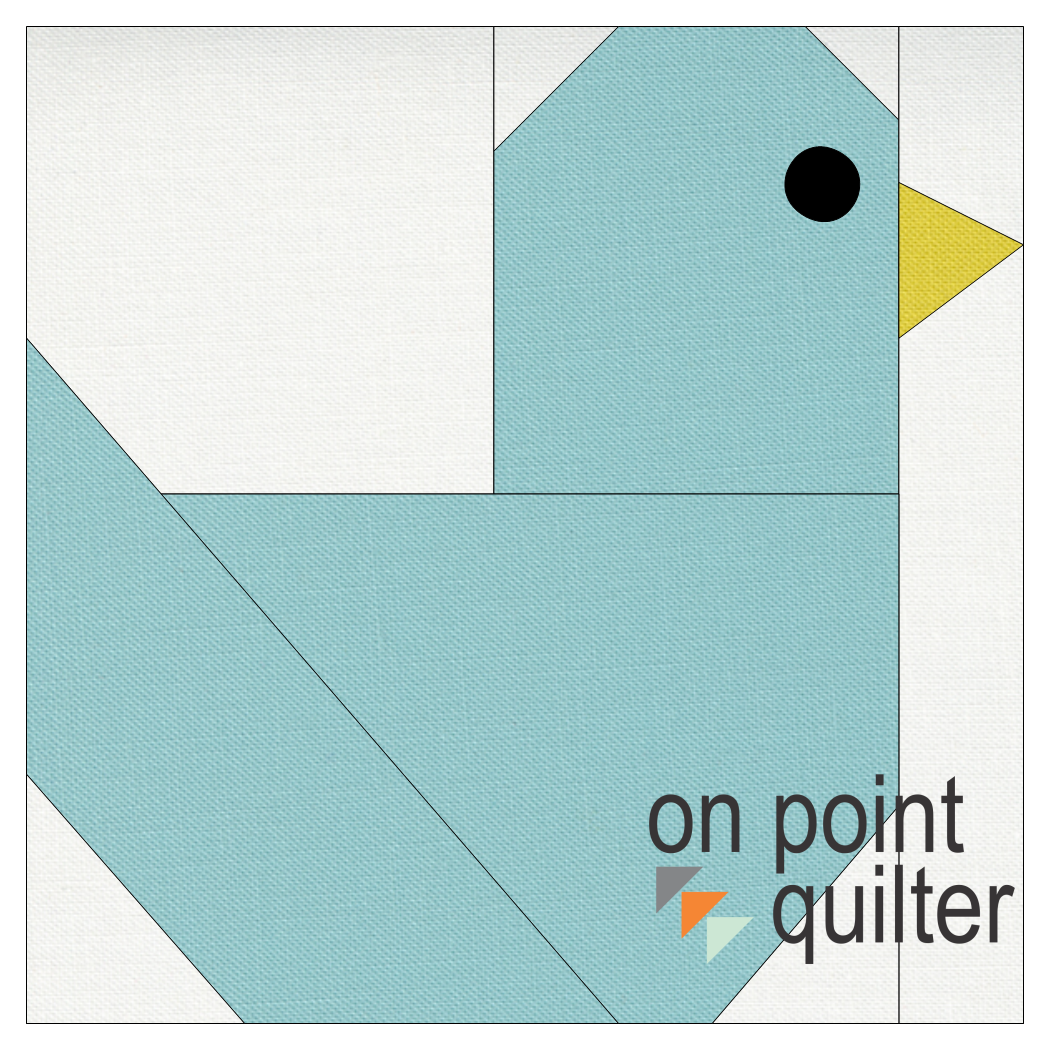
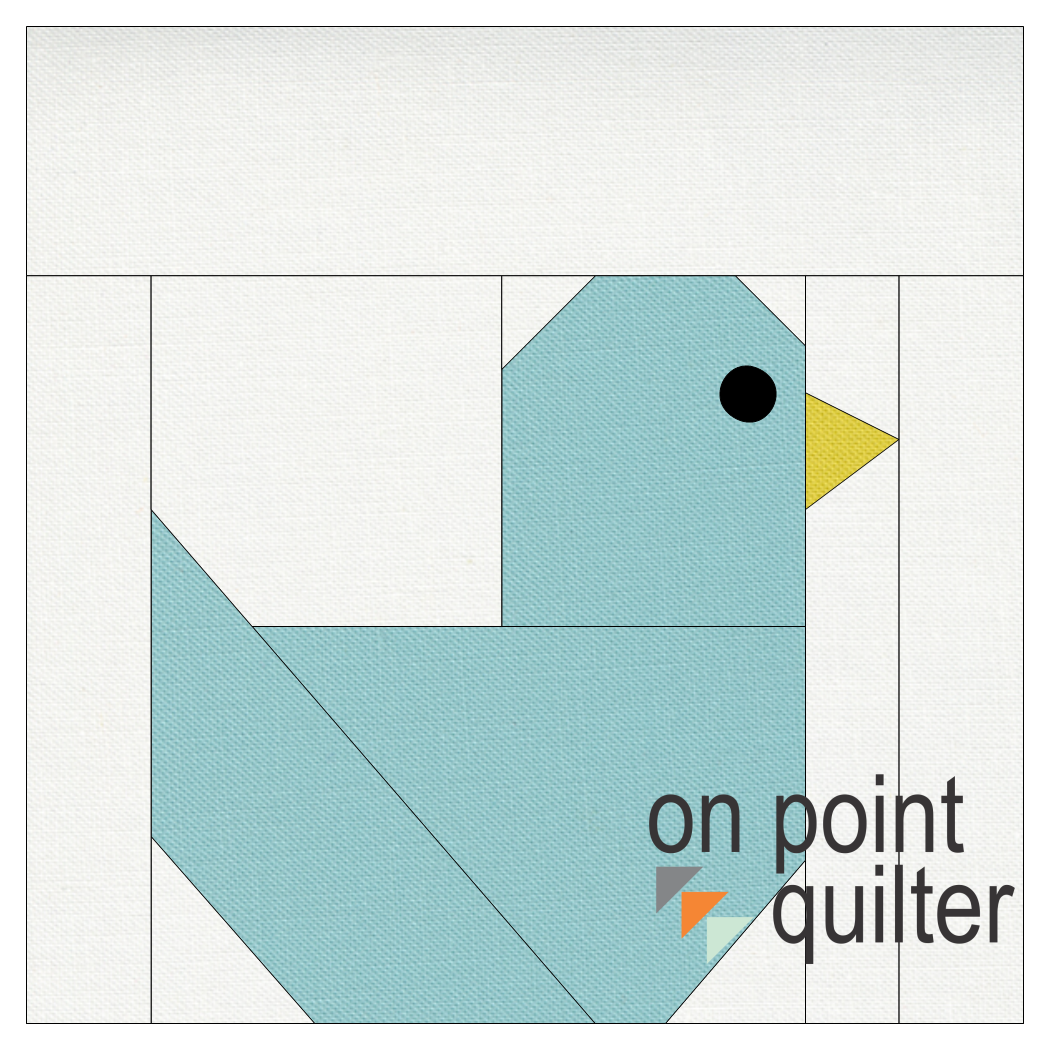
It is cold and rainy in Minnesota.  So no visiting the ducks at the nearby creek.  Instead I decided to make my own ducks -- using Electric Quilt 8.  These will be super simple to foundation piece.  And are even charm friendly.  And I even have free foundations for you to use to create your own blocks.
Picture
Delivered with Love Moda Fabric Collection
To get started, I thought I new fabric collection might be in order.  I went to the Moda website and found this collection that was just released.  I thought it would be the perfect fabric for my little duckies. 

I even figured out how both the Mama and Baby Ducks could be cut from charms.  More on that below.   

Here is the link to the Moda site to download the collection to your computer.

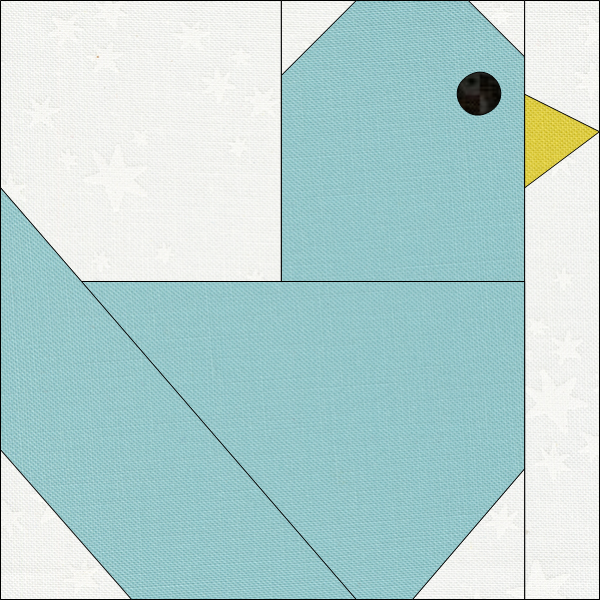
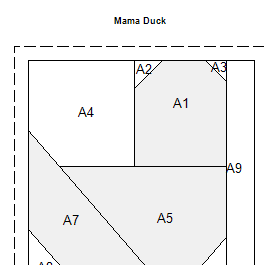
Mama Duck Tracing Image

I was debating providing the tracing image.   But for those trying to match my design exactly, it is the easiest way to ensure success.  It is also easier for me to be consistent between a "recorded" design and the original design.​
Here is the Mama Duck block you can use for tracing purposes.  Download and save on your computer under the My EQ8>Images folder.
Picture
Mama Duck Block for Tracing
In the video, I share drafting the Mama Duck block which is 4" finished and the Baby Duck block which is also 4" finished. ​
Picture
Mama Duck
Picture
Baby Duck
I am curious how you would use these blocks in a quilt?  I also have an idea -- but I am saving it for next week.

​Share your suggestions for a quilt using these ducks in the Learning EQ Facebook group post.  Or post a picture of your ducks using a favorite fabric.
Just Ducky Learning EQ Facebook Group Post

Free Foundation Patterns for the Mama and Baby Ducks

Click on the photo the access and download the free pdfs for each of the foundations.  Note that the foundations should measure 4-1/2 x 4-1/2 with seam allowances and 4 x 4 without the seam allowances.
Picture
Mama Duck Foundation Pattern
Picture
Baby Duck Foundation Pattern
I figured out that the bodies of the ducks could be cut from 5" charm squares.  However there isn't a lot of excess fabric after accounting for the 1/4 seam allowances (particularly for the Mama duck).  So keep that in mind if using charms for your project.
Picture
Placement of Mama Duck Templates on 5" charm Square for Cutting

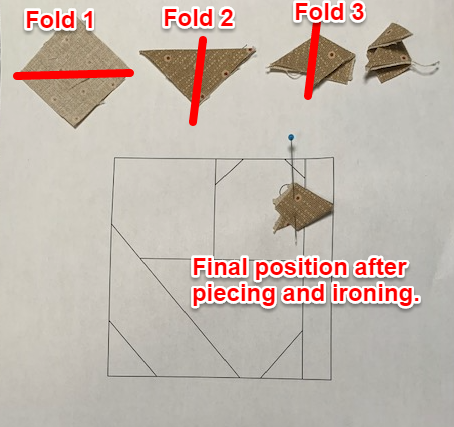
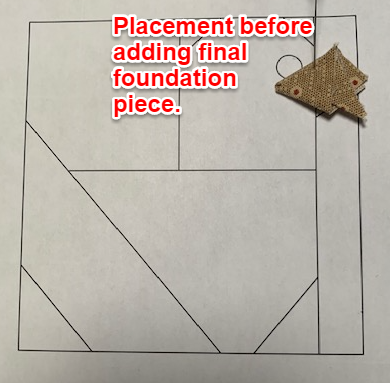
Constructing the Beak and Eye

I decided to use a folded fabric piece for the beak as I think it is less work than foundation piecing it. 

​If you wish to include the beak in the regular foundation piecing, I suggest drawing it on the EasyDraw tab.  This would result in 2 foundation sections rather than one.  The beauty of drafting in EQ is we get to pick our favorite construction techniques.

For constructing the beaks, I started with a 1-1/2" fabric square.  Folded it in half on the diagonal.  Then folded the two folded edges in toward the center.  The amount of the fold was dictated by the size of the beak.    Before ironing the final piece of the foundation, I would flip the seam as it will lay much better if pressed toward the duck.
Picture
Picture
For the eyes you could use a small button.  Or embroider or applique a small circle.  The size is a around 1/4" -- so it is pretty small.

Picture
Happy quilting.

​Kari

Join the On Point Quilter weekly newsletter and receive regular tips and inspiration on using Electric Quilt 8 along with the  Free 12 Top
Tips for EQ8 video guide.
Picture

Signature Quilts

4/15/2023

 
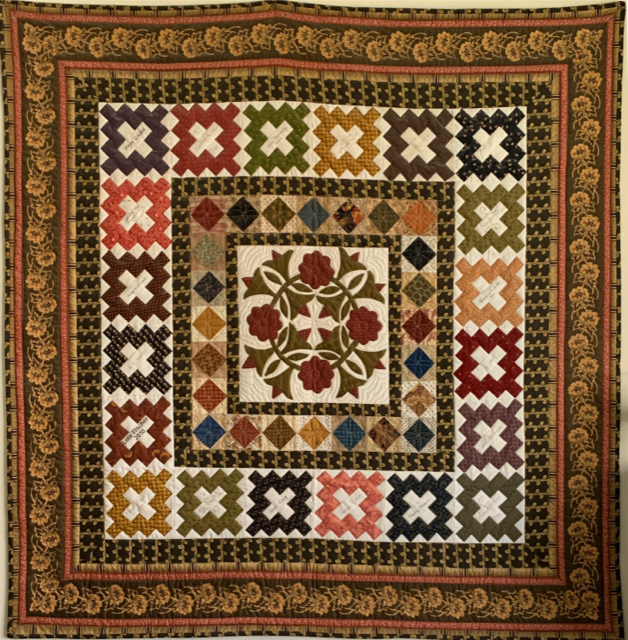
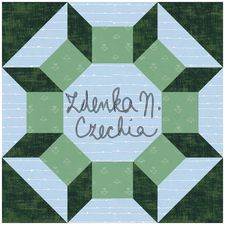
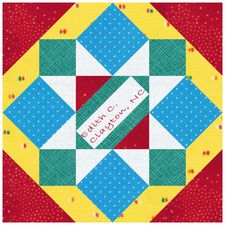
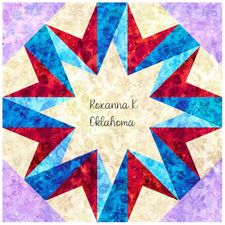
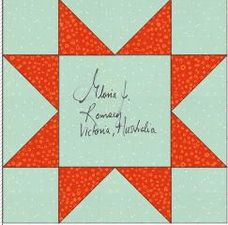
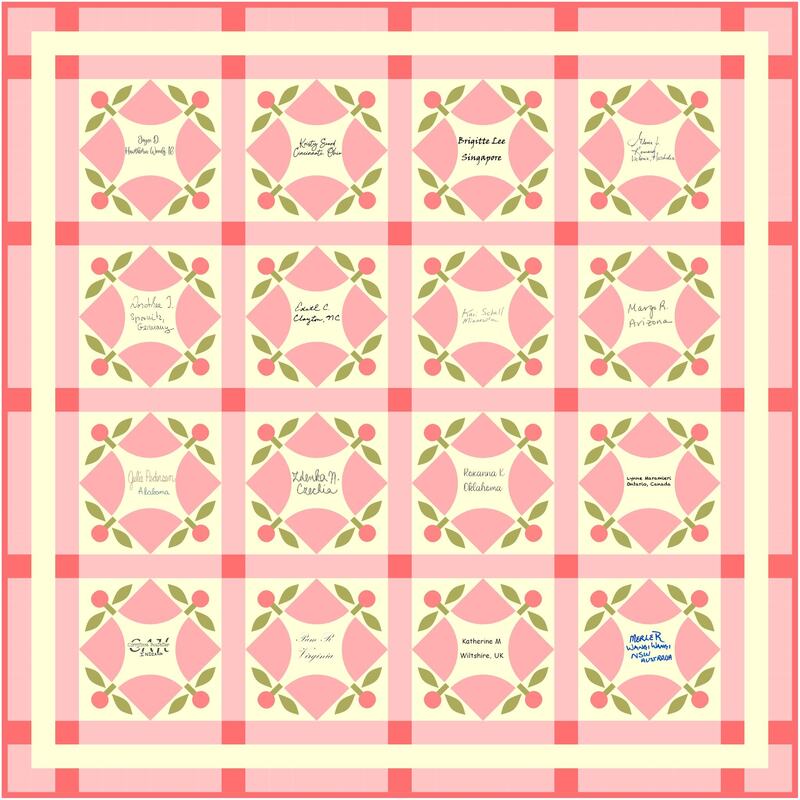
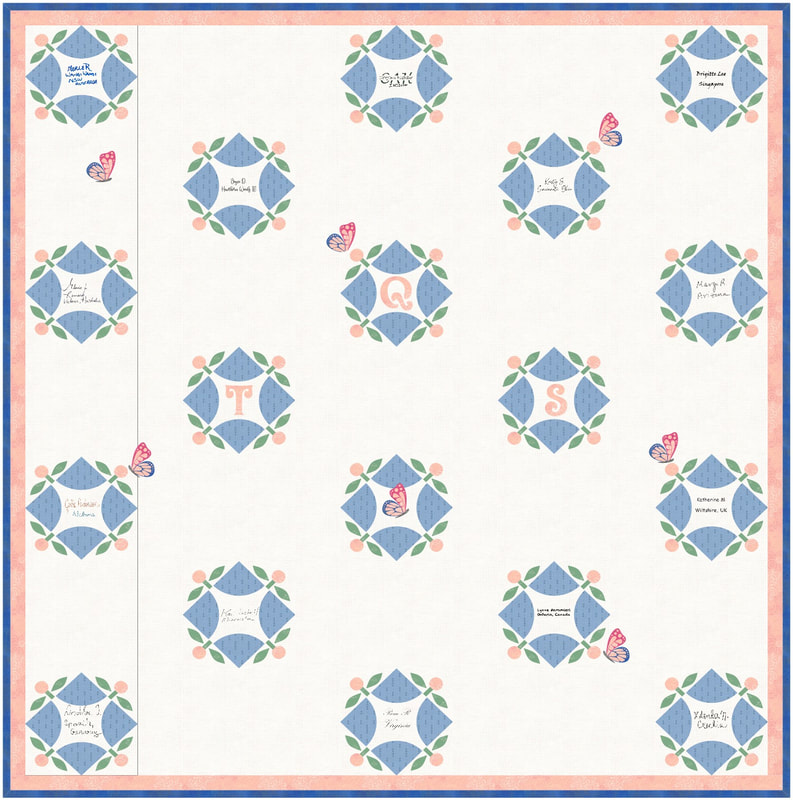
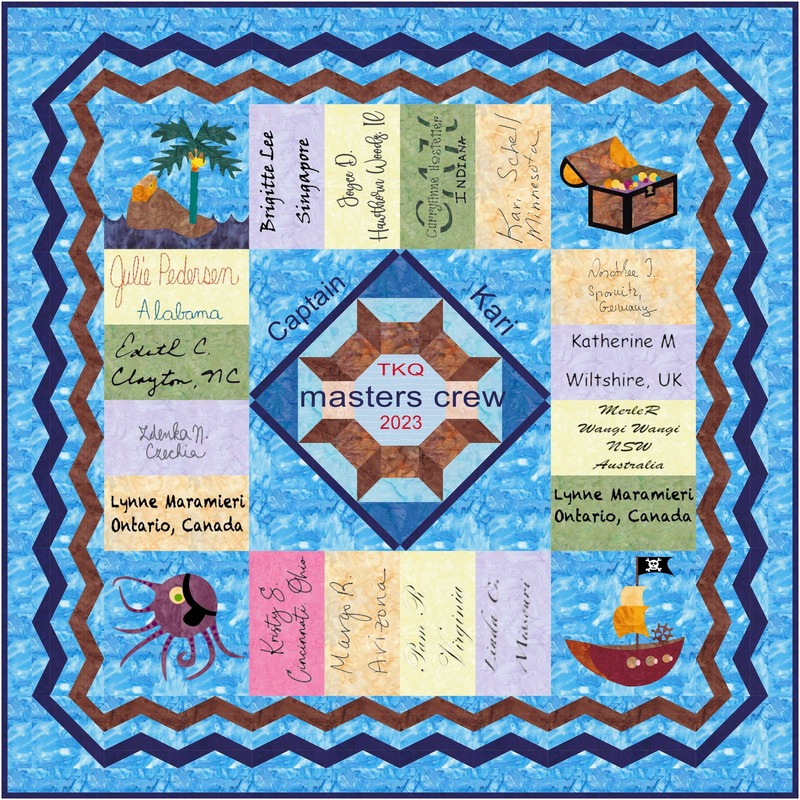
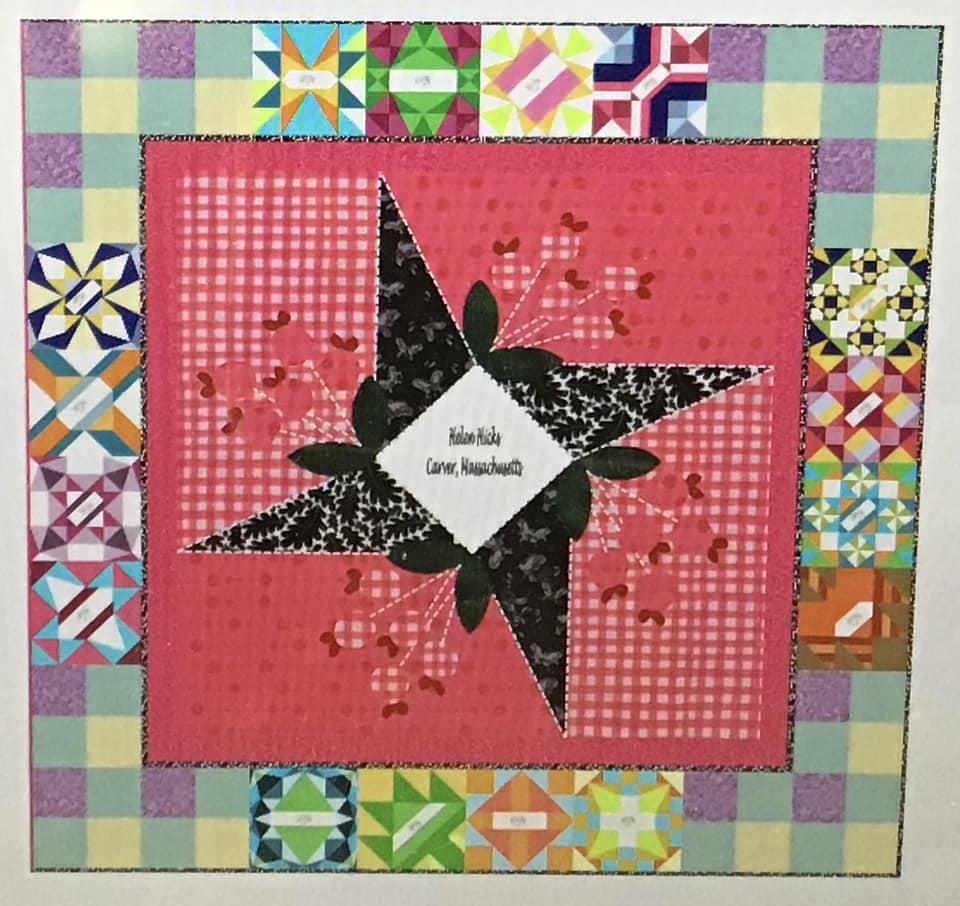
Over the years I have participated in a number of signature block exchanges.  Those signature blocks provide such good memories of my quilty friends and the great times we have had together in meetings and at retreats.  However, I have found it a bit of a challenge to figure out the best way to use those blocks.
Dear Jane Signature Exchange

​
In this exchange, each participant did the same block   All blocks needed to be signed and dated.  Each participant was required to produce a block that was representative of their larger “Jane quilt”. 

​Since there were many different fabric themes, the biggest part of the challenge was figuring out how to put them all together.

See some additional exchanges done by my Dear Jane Minnesota group here.
Picture
Dear Jane Minnesota Signature Exchange Quilt created by Kari Schell
Picture
Heritage Club Signature Exchange created by Kari Schell
Heritage Cub Album Block Exchange

For many years I was a member of Heritage Club.  This club was run by Four Season Quilts - a local quilt shop and each month we learned a bit about the history of quilting and received a pattern for a small quilt.  

In 2010, members decided to do an album block exchange.  For everyone who chose to participate in the exchange, we did an album block using a muslin fabric for the background and a "civil war-like" fabric.  
Scroll down for more on drafting the album block  along with this quilt layout using Electric Quilt 8.

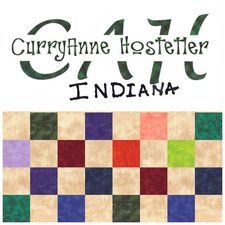
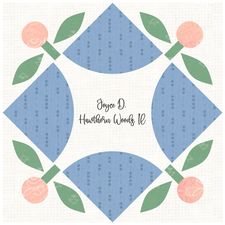
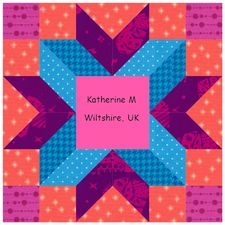
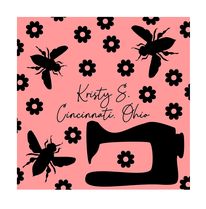
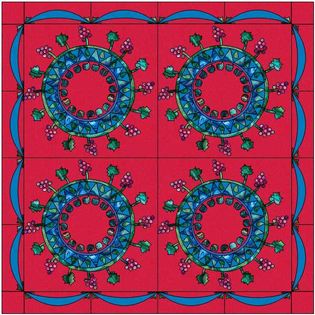
Tech Know Quilters Masters Signature Block Exchange

Last month the challenge for Tech Know Quilter Masters members was to create a virtual signature quilt.  There were three parts to the challenge:
  • A signatures exchange.  This could be a hand created signature or one using fonts or embroidery.  The suggestion was to include a state or country so we could celebrate our friendships from around the world.
  • A signature block exchange.  Members were encourage to incorporate their signature into a signature block.  We placed no restrictions on fabric,  but did request that the block be a square.
  • A signature quilt.  Members were encouraged to create a quilt that utilized either the exchanged signatures or the exchanged signature blocks.
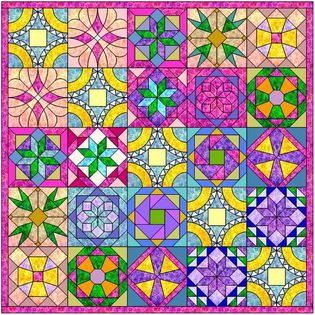
The group really outdid itself this month.  Having a chance to revisit the blocks and quilts as I posted them here, made me super proud of this exceptional group of designers.

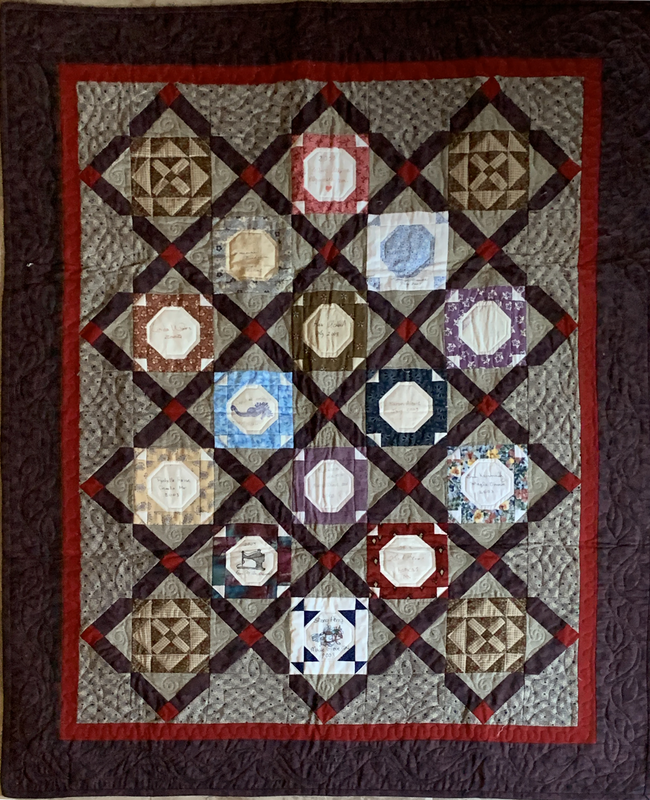
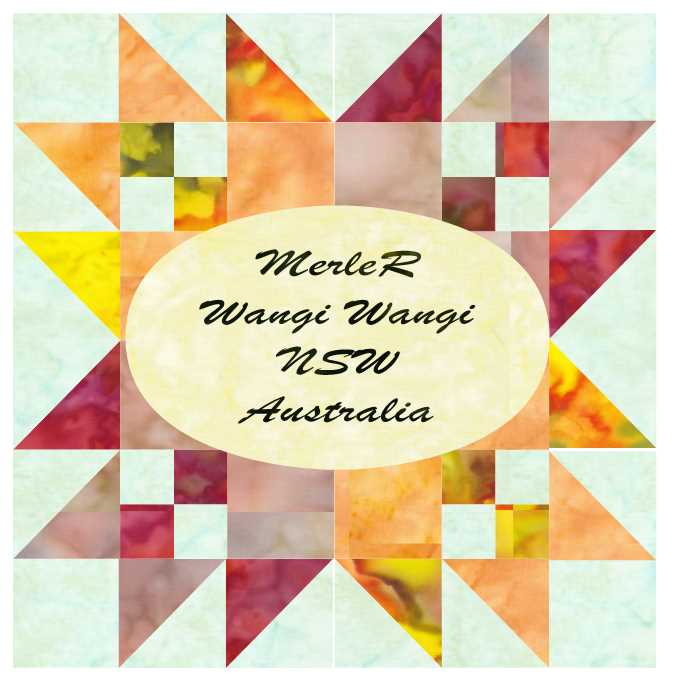
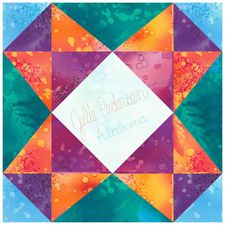
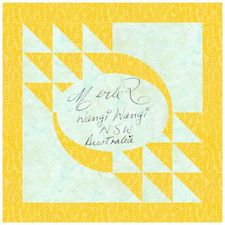
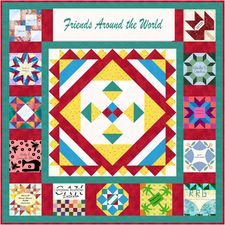
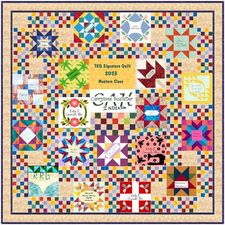
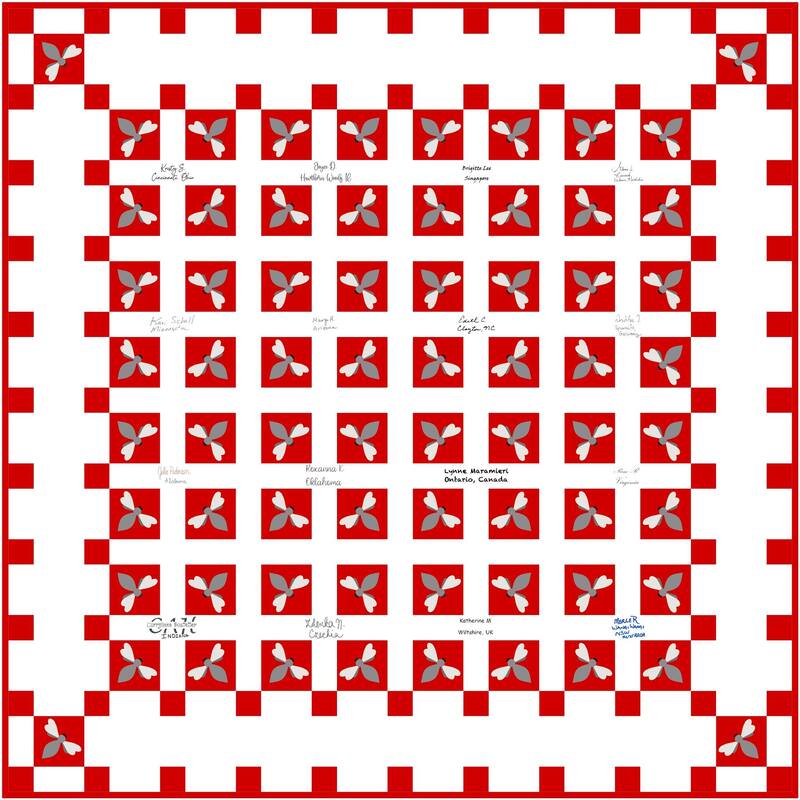
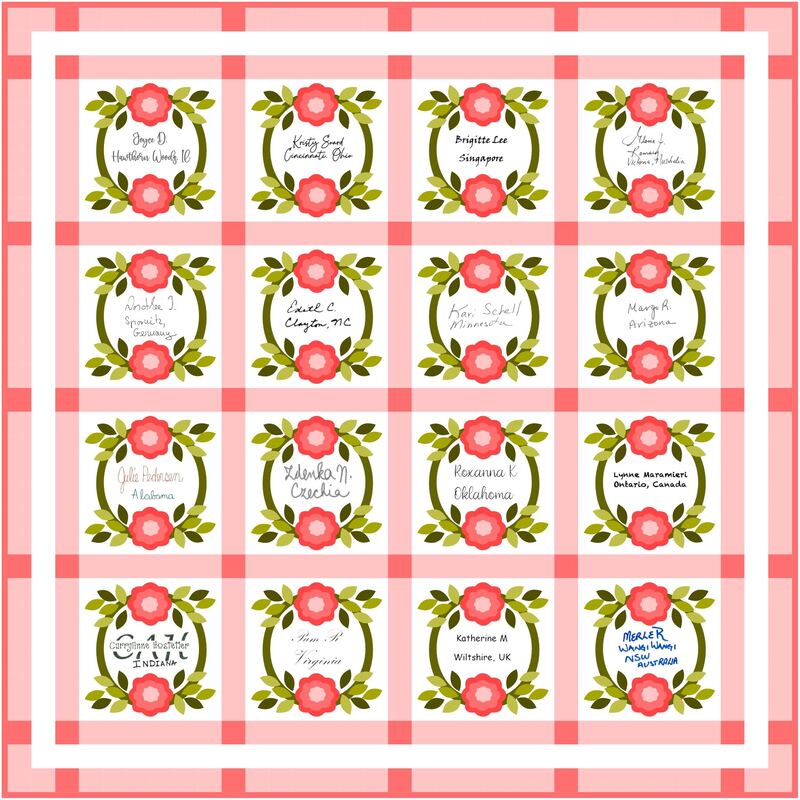
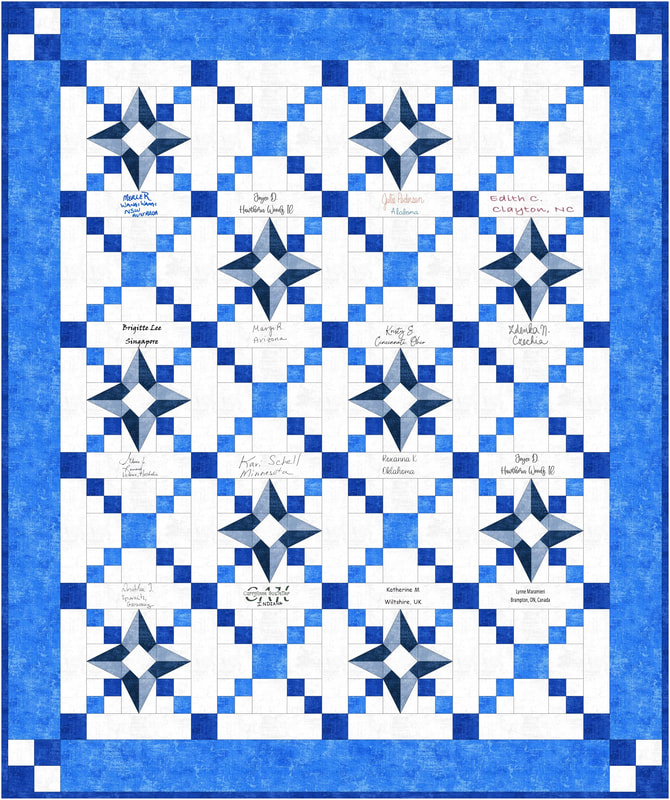
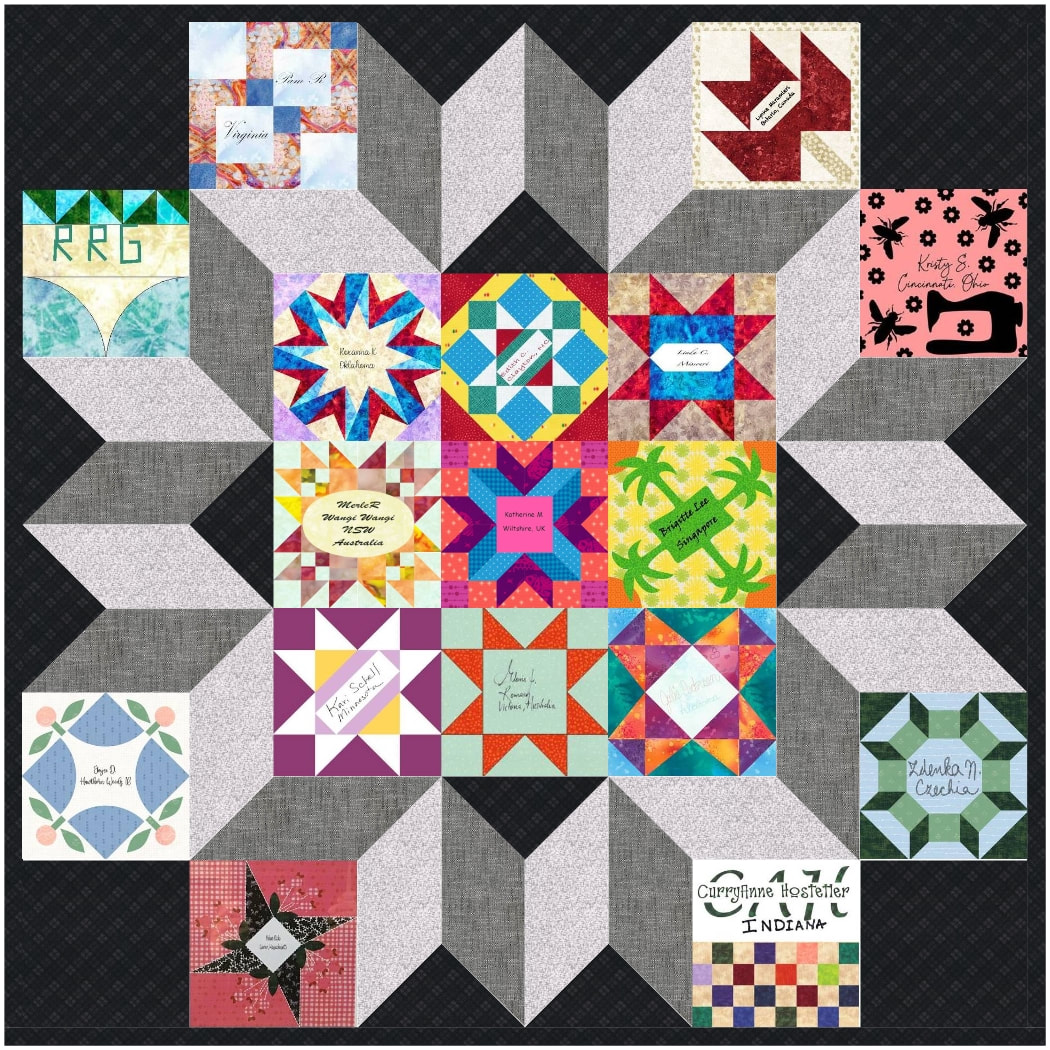
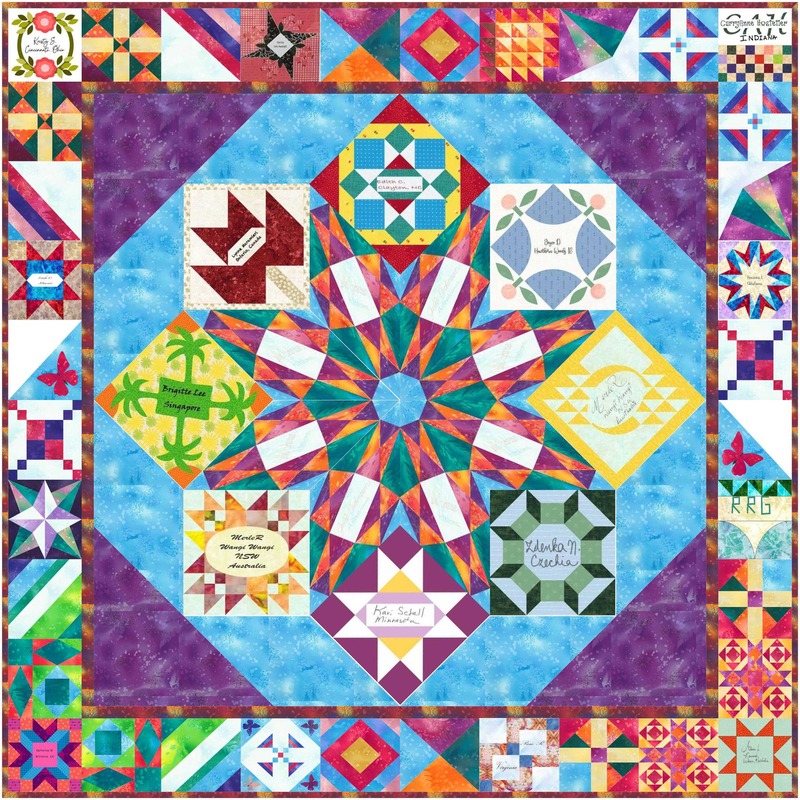
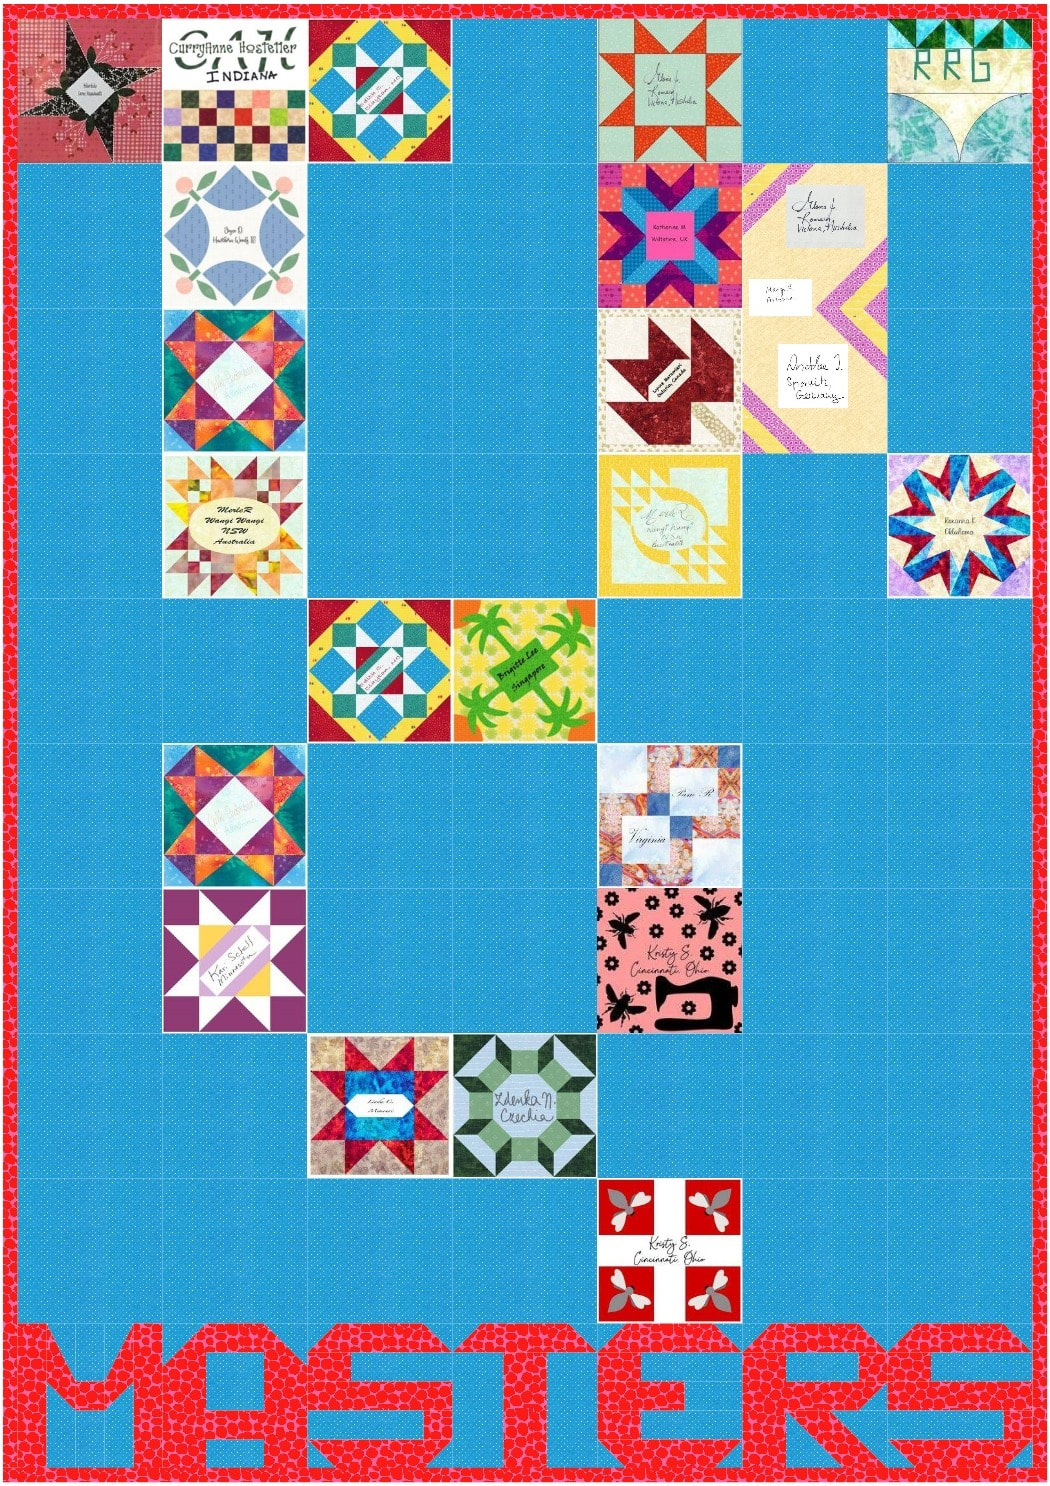
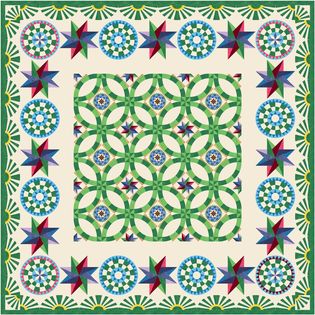
​I chose to use the signatures in a quilt -- so if you scroll down you will be able to see the signatures in my virtual quilt.

Here are the blocks that were shared during the challenge.
Picture
Merle Rawson NWS Australia
Picture
Julie Pedersen
Picture
Linda Carlson Missouri
Picture
Merle Rawson (option 2)
Picture
Lynne Maramieri Ontario Canada
Picture
Brigitte Lee Singapore
Picture
Curryanne Hostetler Indiana
Picture
Joyce Drenth Illinois
Picture
Katherine Martin Wiltshire UK
Picture
Kristy Goodin Soard Ohio
Picture
Kristy Goodin Soard Option 2
Picture
Kristy Goodin Soard Option 3
Picture
Rhonda Goss
Picture
Pam Riggs Virginia
Picture
Zdenka Nemethova - Czechia
Picture
Edith Craig North Carolina
Picture
Roxanna Khoury Oklahoma
Picture
Gloria Jacobs Romsey Australia
Picture
Helen Hicks Massachusetts
Here are the signature block quilts that were shared on Facebook.  Notice that some members used their own blocks with the signatures of the participants.  Others incorporated the submitted blocks in their quilts.  And this was all done virtually!
Picture
Edith Craig
Picture
Curryanne Hostetler
Picture
Kristy Goodin Soard
Picture
Kristy Goodin Soard
Picture
Kristy Goodin Soard I loved Joyce Drenth's block so much, I used it in my setting to try it out! Thanks Joyce!
Picture
Joyce Drenth
Picture
Zdenka Nemethova
Picture
Helen Hicks
Picture
Lynne Maramieri I chose a different route and placed the signatures in the sashing of this quilt.
Picture
Katherine Martin
Picture
Julie Pedersen
Picture
Brigitte Lee
Want to Know More About TKQ Masters?

Tech Know Quilters members are eligible for the Masters program after completing 12 months of Tech Know Quilter classes.  Masters members receive fewer lessons each month, with more time to devote to their own projects and challenges.

Drop me a note if you have completed over 12 months of Tech Know Quilters and are interested in learning more about the Masters program.
​
You can learn more about the regular Tech Know Quilters membership program and sign up for the wait list for the next open enrollment period here.

Album Block Signature Quilt

In the tutorial today, I decided to share how to draft the album block I used in my Heritage Club exchange quilt.  Along with the process to incorporate the Tech Know Quilter signatures in the virtual quilt.
A Few Notes on Removing the Background
  • The site I used to remove the background is remove.bg   There is no need to use the paid version for images that will be imported in EQ.  In fact EQ will really appreciate the smaller sizes.
  • It is critical that you follow the process outlined in the video for importing images into EQ.  Do not use the image worktable or it will add a black background -- which will not be useful.
  • If you zoom in on my quilt image, you can see the signatures posted by TKQ members -- all with the background removed.  I love my Tech Know Quilter friends from around the world.
Picture
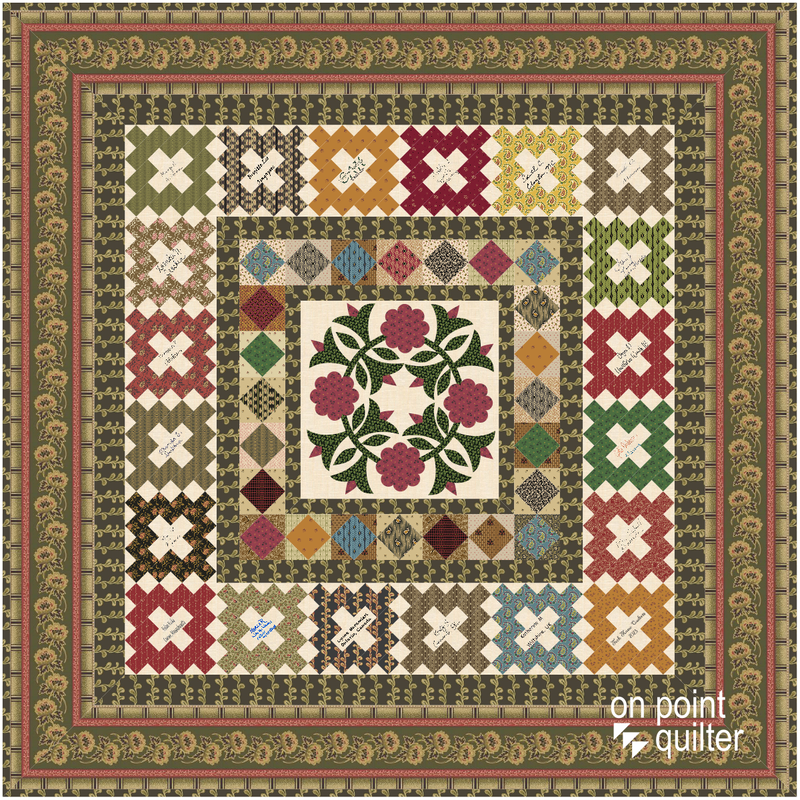
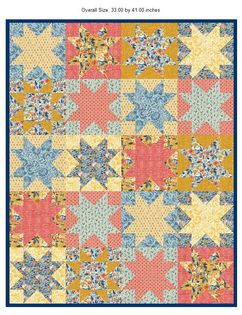
Album Quilt designed by Kari Schell using EQ8
Album Quilt Layout
  • In the video, I shared the layout and borders I used in the quilt along with the sizes.  Just a reminder that we always design quilts at finished sizes (without seam allowances). The quilt center size was calculated so that I could use 3" blocks for Border #2 and a narrow border #1.  Sometimes it pays to think ahead.
  • You can always double check your border math by recoloring the block spaces and going to Print and Export and selecting the block.
In the video, I did not include information on drafting the other blocks, or working with the fabrics.  The fabrics I used were old Jo Morton fabrics from Andover.  I collected them at least 10 years ago -- and they still match fabrics in my personal collection.  :)
Have you every done a signature quilt?  I look forward to seeing pictures in the Learning EQ Facebook group.
Learning EQ Facebook Group Post for Signature Quilts

Picture
Happy quilting.

​Kari

Join the On Point Quilter weekly newsletter and receive regular tips and inspiration on using Electric Quilt 8 along with the  Free 12 Top
Tips for EQ8 video guide.
Picture

Easter Postcard

4/8/2023

 
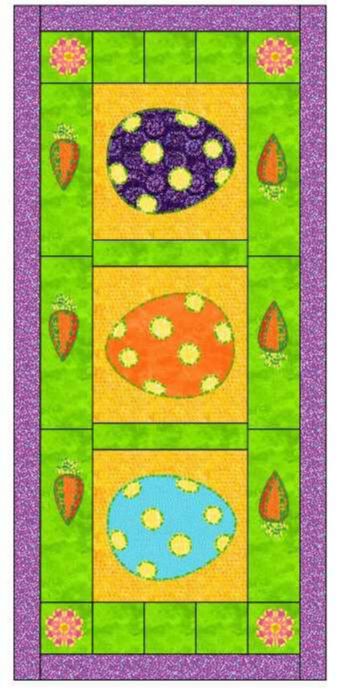
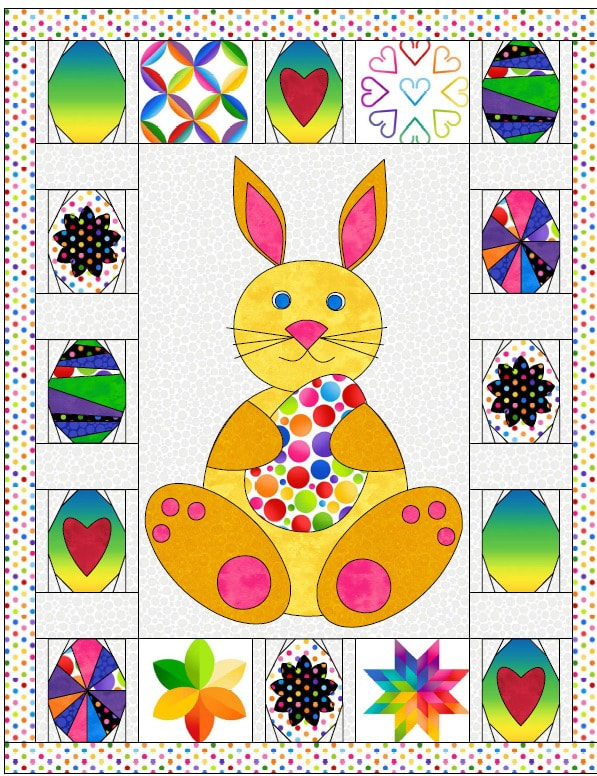
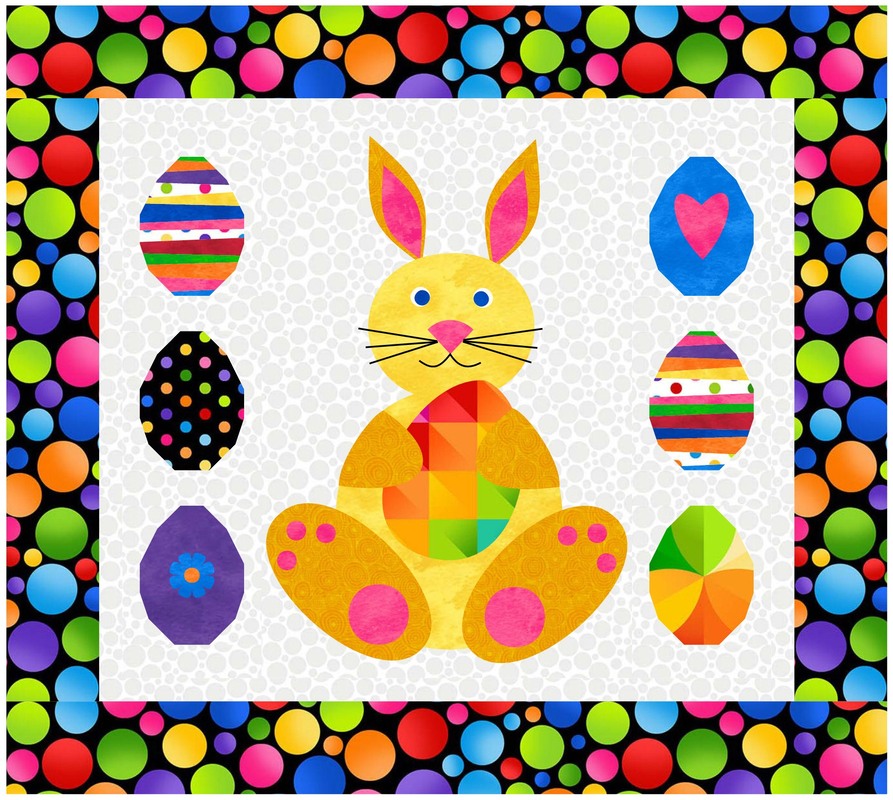
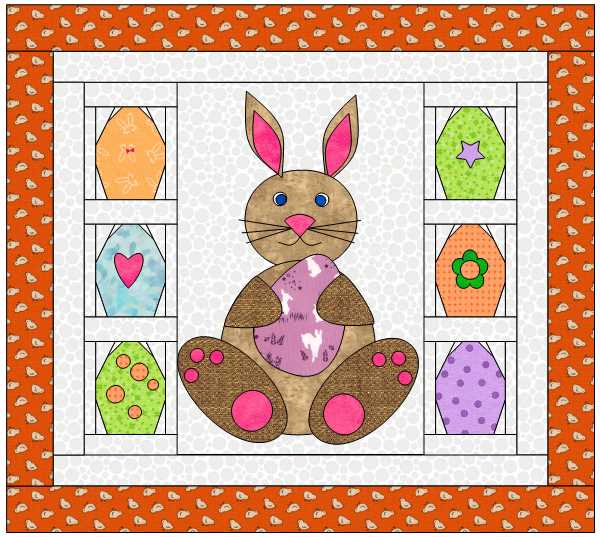
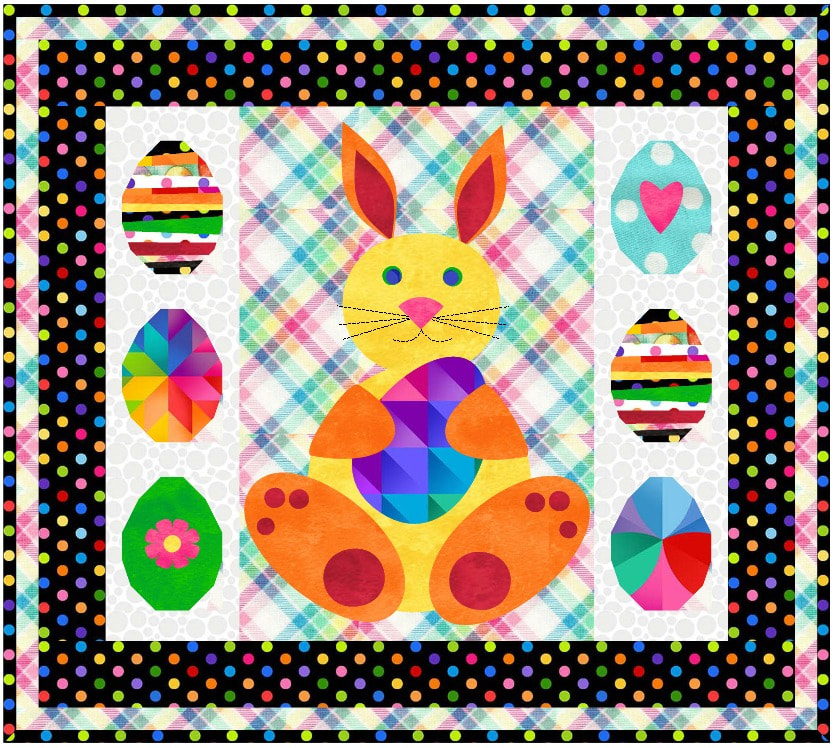
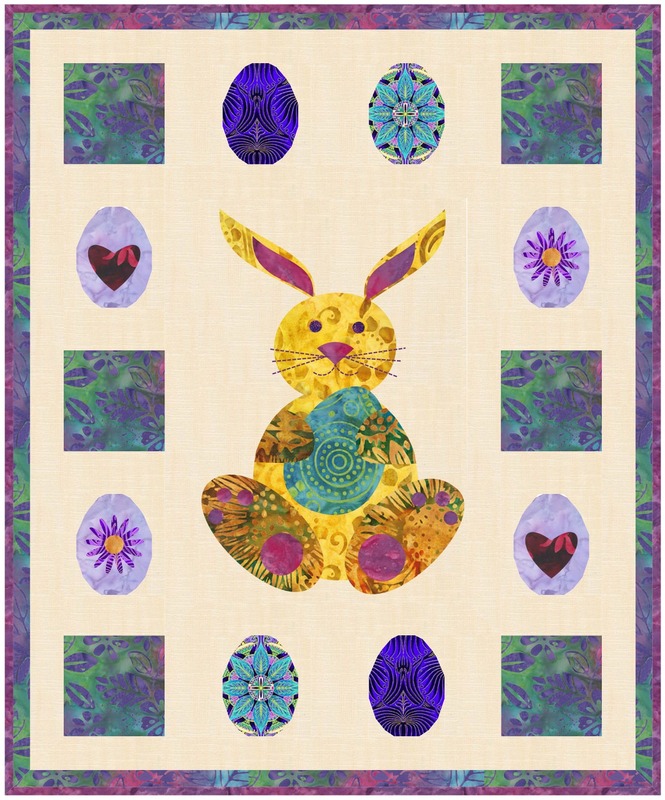
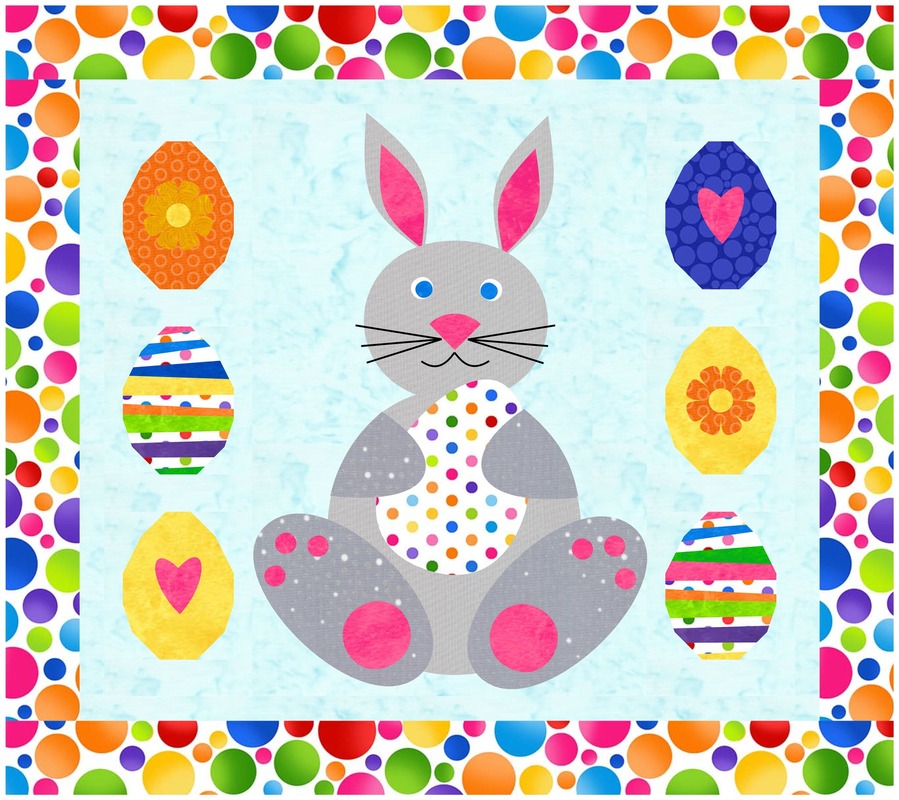
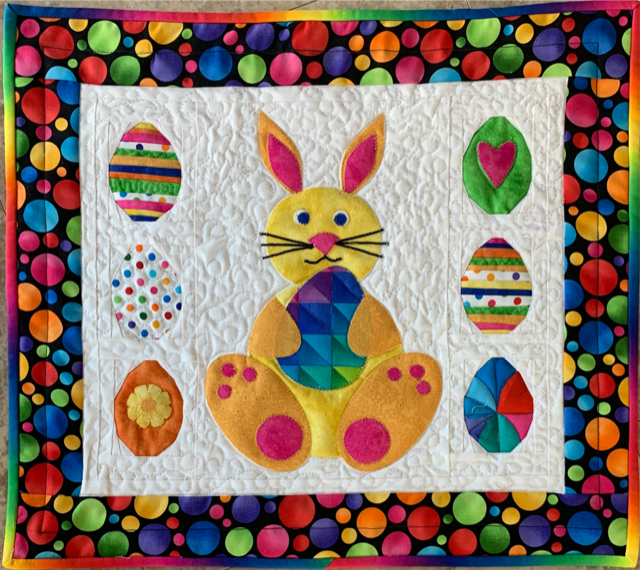
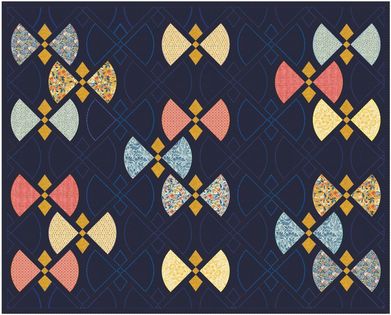
I thought you might enjoy seeing some of the Easter Egg Hunt projects shared on social media.  The videos are no longer available as they are now an exclusive benefit to the current Tech Know Quilter members.  For those that created the Easter eggs from the webinar, you could draft them to fit in the side block of the postcard below. 
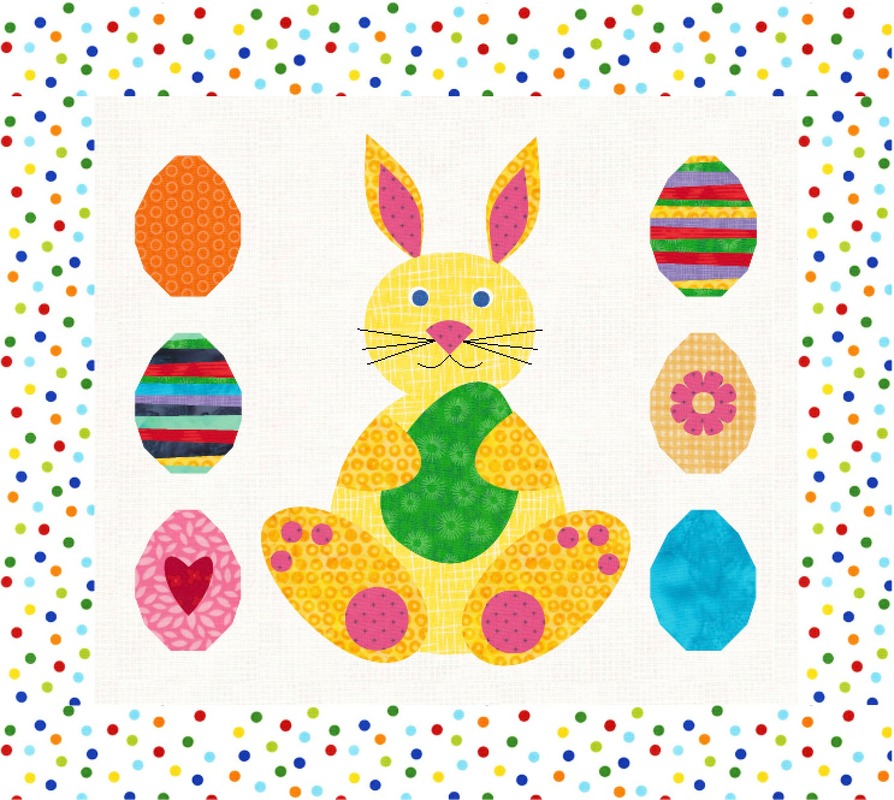
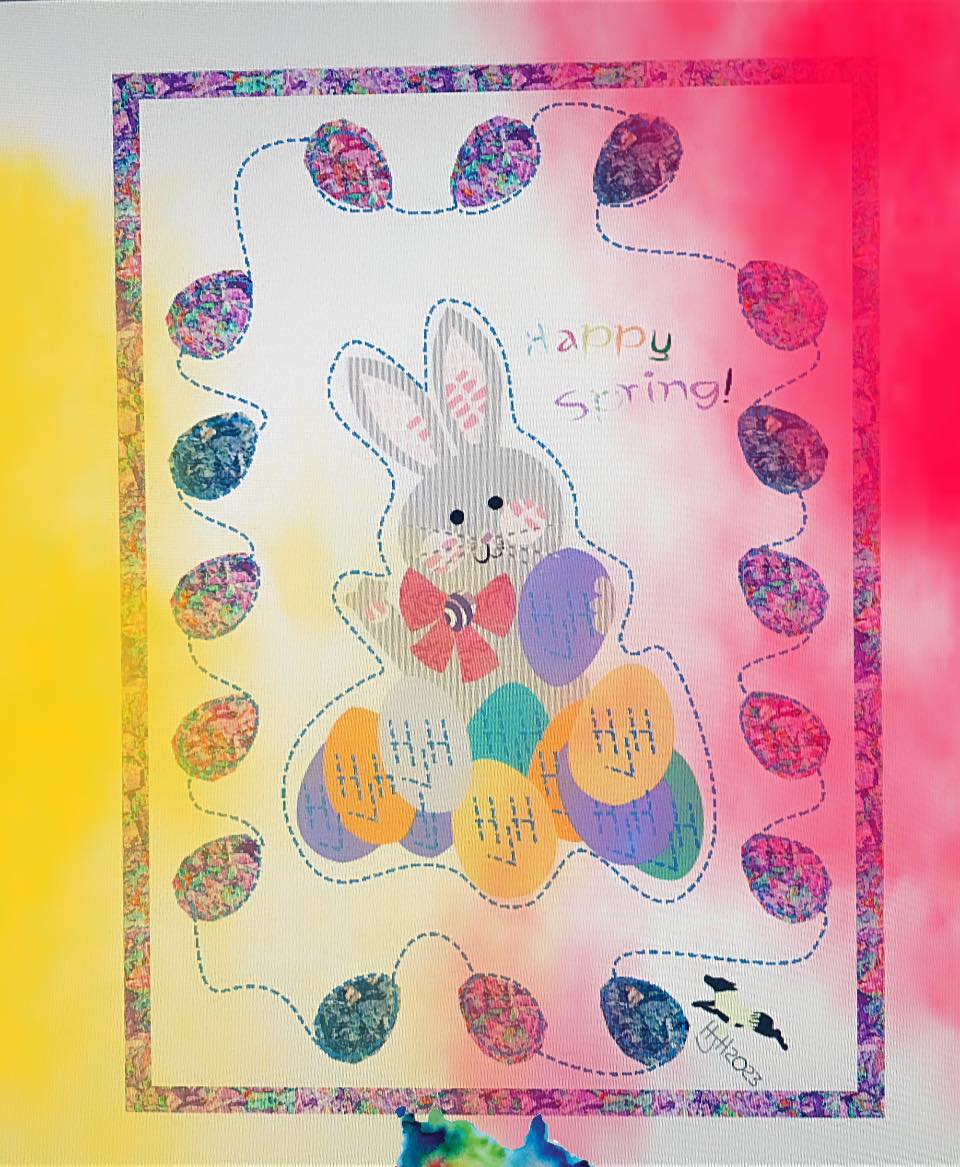
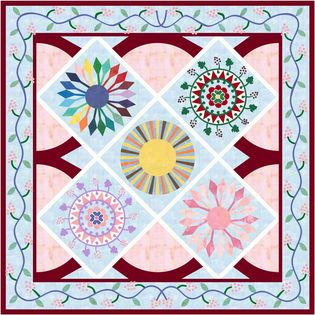
Picture
Melissa B.
Picture
Shirley Y.
Picture
EWlla da Siva
Picture
Margo Reppert
Picture
Dottie G.
Picture
Zdenka Nemethova
Picture
Karen G.
Picture
Helen Hicks
You can learn more about Tech Know Quilters and sign up for the wait list here.
Picture
Mary Groesbeck
Picture
Lynne Maramieriiii

Easter Postcard

Picture
On Easter weekend, I thought a quick project (to both draft and to make) was in order.  This one is foundation friendly and could even be done with the kids or grandkids.

In the video tutorial, I will share how to draft this in EQ8.
Here is the quilt from the video.
Picture
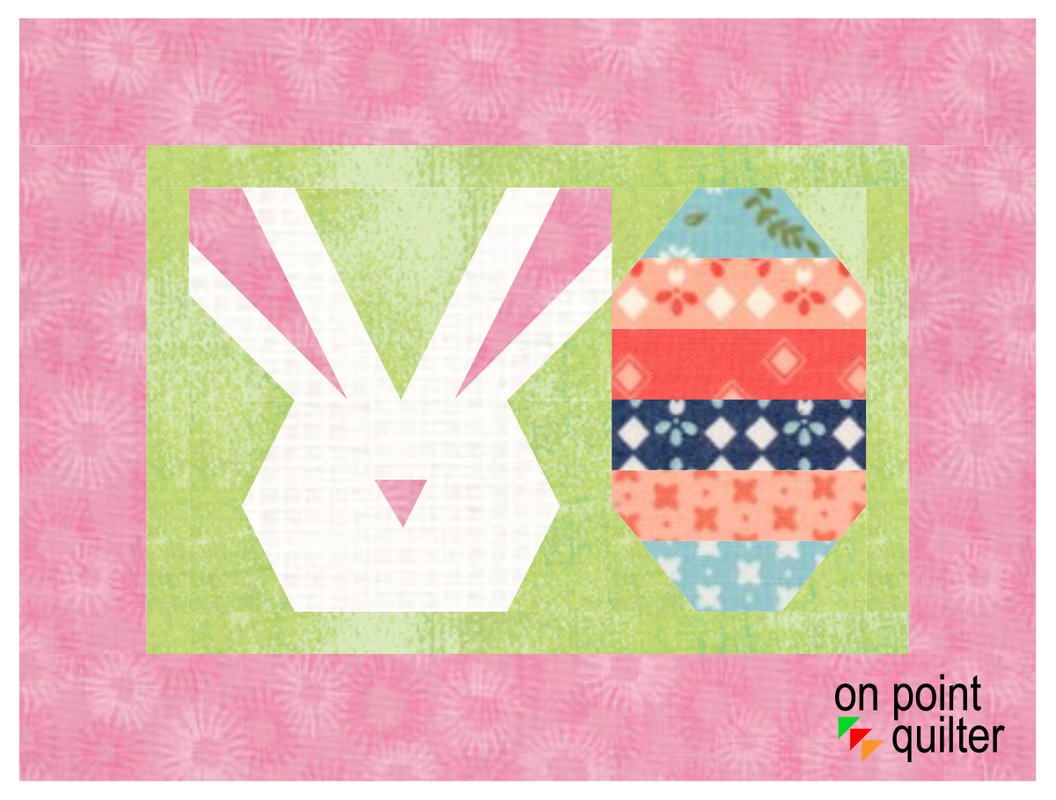
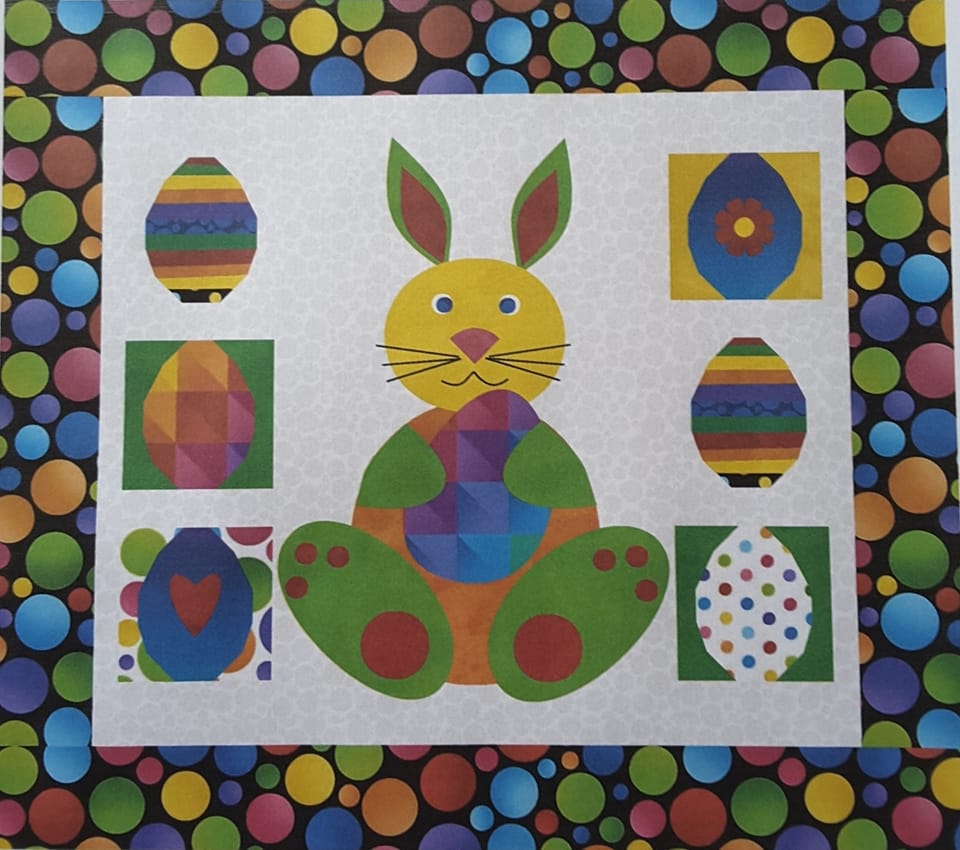
Happy Easter Postcard created in EQ8 by Kari Schell
I chose to foundation piece the blocks.  If you are new to foundation piecing, I share some of my favorite foundation piecing tips and products in this tutorial.

If you would like the foundations and some basic instructions for this project, please download the pdf instructions by clicking on the picture below.
Picture

Picture
Happy quilting.

​Kari

Join the On Point Quilter weekly newsletter and receive regular tips and inspiration on using Electric Quilt 8 along with the  Free 12 Top
Tips for EQ8 video guide.
Picture

Tech Know Quilter Members Showcase Their Work

4/1/2023

 
Wow.  It has been an amazing week.  It was so fun seeing so many of you at the my free EQ webinars on Sunday and Monday.  I hope you enjoyed creating your own Easter Egg Hunt quilt. 

​I even had fun finishing my quilt with the foundation friendly eggs.  The applique shapes all cut with my Cricut Maker which made even the applique super simple on this one.  

After the webinars, I moved into open enrollment with a flash sale for Tech Know Quilters.  I am super excited to be able to welcome a great group of new members to Tech Know Quilters.  They are all ready to start their first class next Monday.


Picture
Easter Bunny Hunt Quilt - Designed and created by Kari Schell
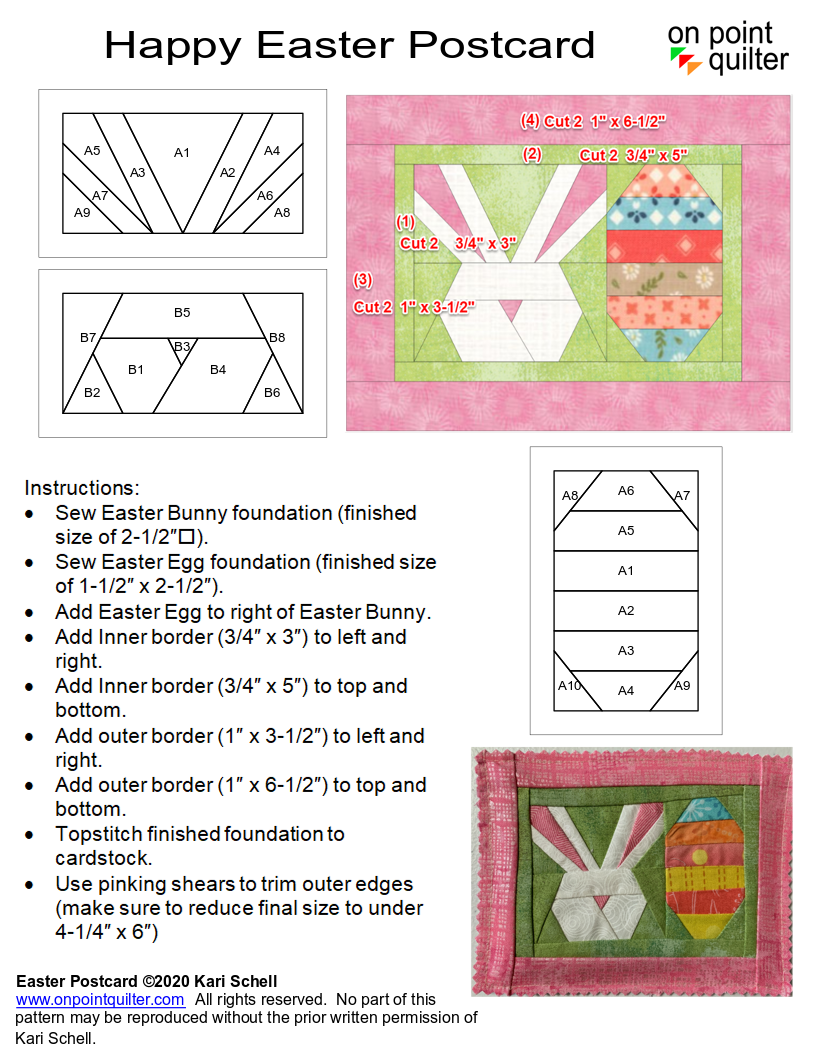
I don't have a video today -- but wanted to share some pretty amazing designs by those currently in Tech Know Quilters.  At the end of each month, I ask them to share a project to showcase what they learned during the month.  Their projects both inspire me and make me proud to be a part of teaching them about Electric Quilt.
Learn More About Tech Know Quilters and Sign Up for the Wait List
Picture
Marcia Jensen I am a new student in learning all the ins and outs of EQ8 – four of us from my neighborhood have all purchased the program, and are meeting every other Saturday to work our way through the “EQ8 Lessons for Beginners” workbook; and each of us is taking one (or more) of your classes right now! So, February has been a very EQ8 kind of month for us! Our local quilt guild will celebrate its 40th anniversary this summer, and we have been challenged to make a red and white quilt (ONLY red and white) to commemorate the occasion. So, I used this challenge opportunity to create a quilt in EasyDraw, and plan to make it! The design is very simple, but like the look of the pattern it makes! Hope it works out to look as good in real life!
Picture
Lee Wiencki Working with Precuts. Every colour except the white and binding can be made with one fat quarter. I spent more time designing with basic blocks, half square triangles and square within a square, to get a bigger block.
Picture
Curryanne Hostetler Here is my challenge with two new blocks
Picture
Curryanne Hostetler also did one using all the blocks in the lesson
Picture
Rhonda Goss Circles by design-Masters classes
Picture
Merle Rawson Circles by Design. This is my homage to Ukraine, blue and yellow are their National colours and the sunflower is their National flower. I have called the quilt "Sunflowers For Ukraine"
Picture
Jane Perri This was created using the bargello course. The original tube was from a coloring book page that I have been waiting to learn how to draw. It took me over 8 hours to figure out how to do it. Eventually, it came together. I am looking forward to the 3D course.
Picture
Mary Groesbeck I've always loved circles. Masters Quilters by Design was just a month full of joyful days. Here's my Master's Challenge (from a Pineapple Pack). I had enough fabric allotted to make a pieced border and to include binding. Difficult challenge, but I like the result.
Picture
Brigitte Lee End of the word. Or can we make it better?
Picture
Julie Pedersen This was my favorite quilt from the Circles by Design Masters Class.
Picture
Edith Craig My class this month was Master's Circles. I designed this first quilt as part of the Master's Challenge which required us to use 10 fabrics, but only a 12" x 44" piece of each color plus a border. It was difficult to judge how far that small amount of fabric would go and the EQ8 yardage guide was a good tool for this.
Picture
Edith Craig For the end of the month challenge, I started with the same quilt, but without the fabric restrictions. This enabled me to enlarge the quilt and add additional borders. I drafted additional border blocks inspired by the original quilt and kept the basic coloring the same. It was fun to see where this would take me. This quilt was the result that I liked best.
Picture
Fran Heisey This quilt was inspired by a print I saw on the internet. I wondered if I could achieve the Swiss cheese effect. The top two blocks are essentially rectangular applique rings with more than one hole.
Picture
Fan Heisey I couldn't resist posting a second colorway. The original print looked very 3D. I didn't add shadow lines in EQ; it would have been really fiddly. However, if I make this quilt, I would like each layer to actually have depth.
Picture
Linda Carlson
Picture
Zdenka Nemethová My favourite from Master´s Circles
Picture
Candy Huddleston Lesson 3 - Special Effects 19 Layout: Used a Modified Star Friendship block with chain.
Picture
Candy Huddleston Lesson 3 - Square-in-a-square Layout: Used a 9-patch Friendship Star in the center square
Picture
Candy Huddleston Lesson 3 - Special Effects 18 Layout: Used Serendipity to create the 9-patch Friendship Star
Picture
Candy Huddleston Lesson 3 - Star 35 Layout: Used Single Star blocks & 9-patch Friendship Star in center
Picture
Candy Huddleston Lessons 8 & 9: Square-in-a-square Layout: Used Pickle Dish from Lesson 8 & Wheel Design from Lesson 9 in center Medallion
Picture
Helen Warwick I am using the lesson info that I learned in Panel quilts. A friend that volunteers for the fire dept. mentioned that she was going to make a quilt for the fire dept auction. She wondered if I had any ideas on how to go about doing that. Lucky her, I had just taken your panel quilt classes and said if see sent me a picture of the panel I would try to come up with some ideas. The panel is of Smokey the Bear. I have made two layouts and will probably do one more and then see what she thinks. This is really fun.
Picture
Helen Warwick Option 2

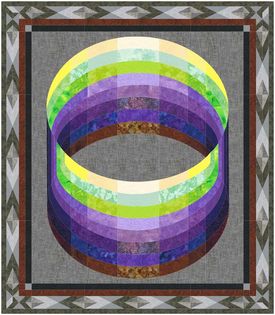
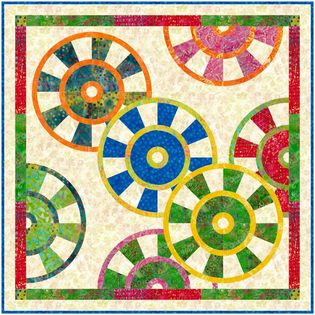
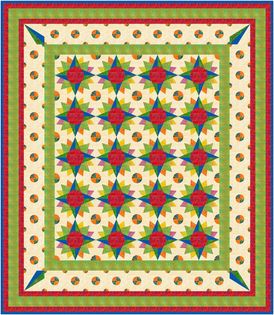
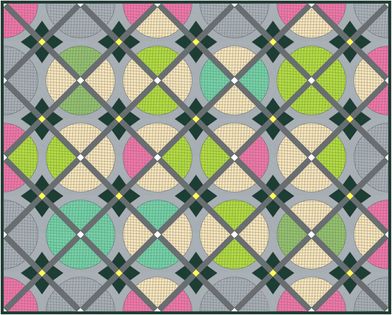
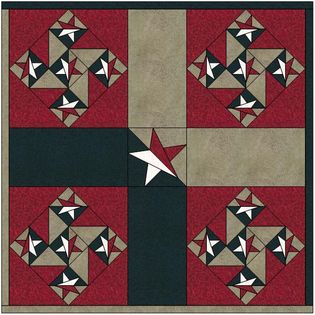
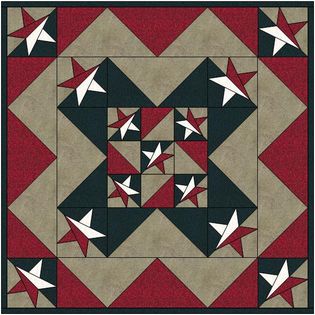
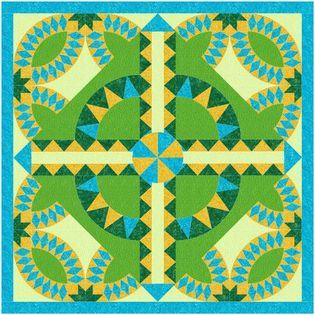
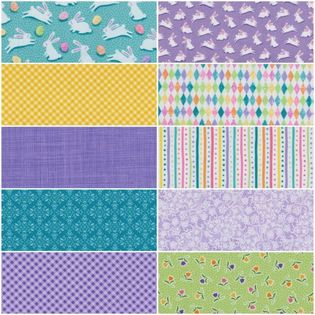
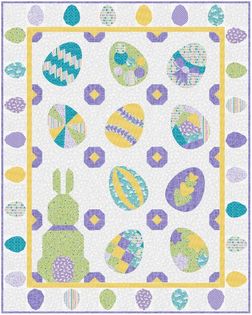
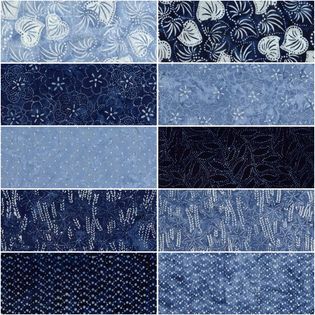
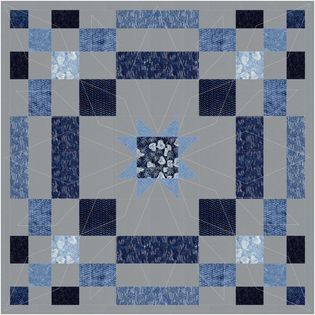
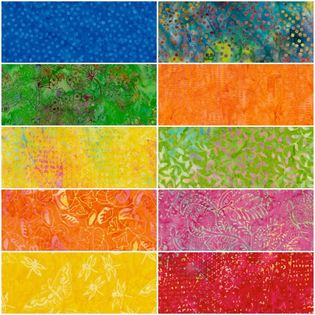
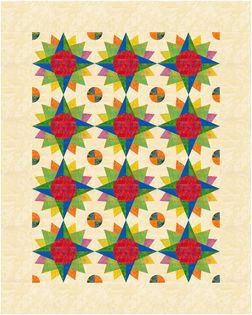
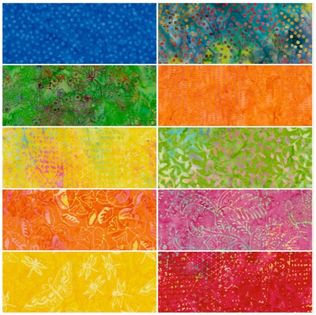
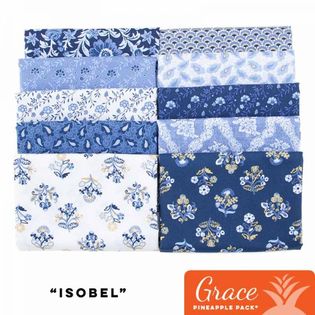
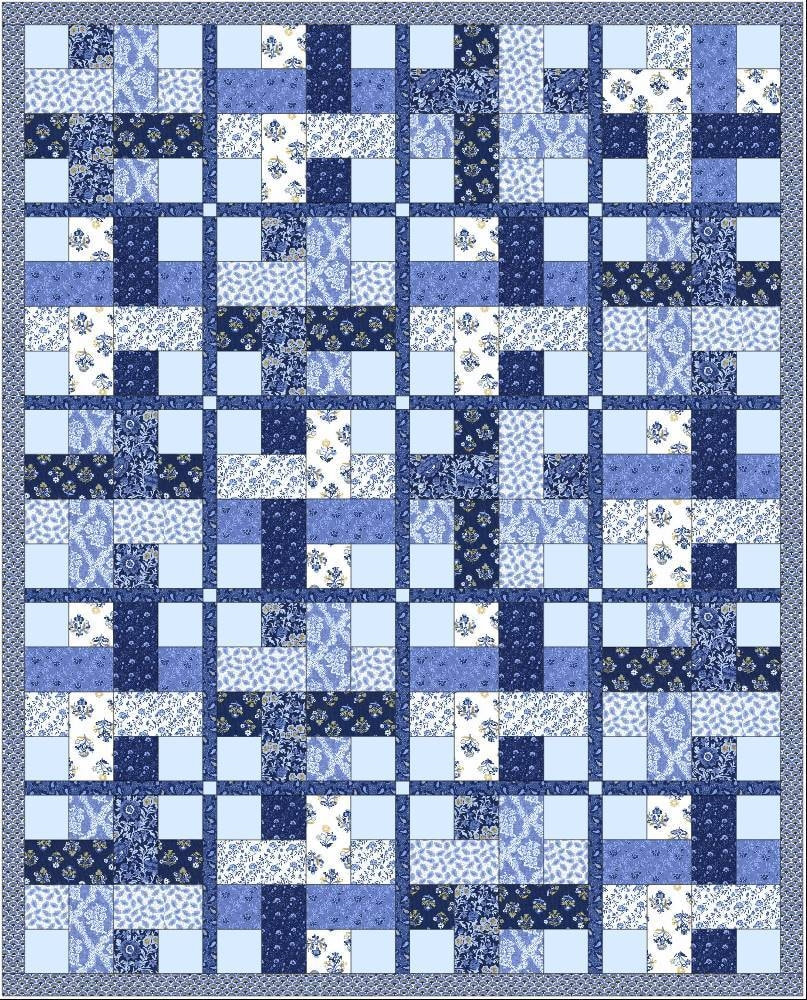
Tech Know Quilters Pineapple Pack Masters Challenge

Mary Groesbeck introduced me to Pineapple Fabrics in North Carolina and suggested this challenge idea.  Pineapple Fabrics sells pre-cut sets of coordinating fabric.  They have different fabric options for each type of pre-cut and even have free patterns that are available if you purchase the fabric kit.   

After perusing the options, I decided to challenge TKQ Masters member to design a quilt using the  Grace Pineapple Pack. Each Grace Pineapple Pack includes 10 different 12" x 43" strips.  


The goal was to design a quilt that uses just the fabric collection -- plus one additional background fabric.  And to use only 12 inches of each of the fabrics (other than the added background).  Many posted their fabric yardage charts to prove their compliance with the rules.
Picture
Brigitte Lee started her design with the quilt with the bunny and eggs (far right).  To meet the rules of the challenge, she redid her quilt and submitted the design on the left.
Picture
Picture
Picture
Julie Pedersen  
​Here is my quilt. I used gray for the background fabrics and added quilting to it using a paler gray thread.
Picture
Rhonda Goss

​I chose Florish as a color palette.
Picture
Picture
Edith Craig
I love Pineapple Fabrics. I have selected Fiesta Batiks for this challenge.  I used the batik collection plus a background and chose this block to stay with the circle theme. I modified the block so the pieces were small enough and varied enough to only use a quarter of a yard of fabric, leaving a little left over from the 12 inch Pineapple strips.
Picture
Picture
Katherine Martin
Basic Grey Nutmeg fabric collection.  The binding could be pieced from scraps left over or from stash or allowed background fabric!
Picture
Picture
Mary Groesbeck
I did it...and using our Masters class for an idea. The fabric requirements show the yellow fabric to be 3/8 yd, but I know it can be done within 1/4 because you know how EQ takes into account a rectangle for everything. I had to piece the border, but did have enough for the binding. This was a hard one to figure out...I had to change the layout a few times. I think this may have to be the practice for my bigger one with only 3 fabrics.
Picture
Curryanne Hostetler 
I picked a grace pineapple with only 8 fabrics so I grabbed 2 from another one.
Picture
Picture
Fran Heisey
Here's my quilt. I used the block from the Quilt Index quilt. The fabric is Basic Grey's Nutmeg. I had to hand calculate the yardage for the butterfly bodies from the block. EQ overcalculated, by nearly double, probably because the patches are on point.
Picture
Picture
Anne Hurlburt
Here's my baby-sized quilt. I used a simple block (don't know the name, a quilting client recently made it) with 4 fabrics plus a small amount of background. I did two colorings, each with 4 fabrics of the 10. Then I did a horizontal layout and figured out how many blocks I could make and stay within 1/4 yard (I perhaps could have gotten more, but wanted to make sure I was within 1/3.) Then I added a narrow sashing-- as wide as would fit in the yardage, and a border, using the last 2 of the 10 fabrics.
Picture

Want to Know More About TKQ Masters?

Tech Know Quilters members are eligible for the Masters program after completing 12 months of Tech Know Quilter classes.  Masters members receive fewer lessons each month, with more time to devote to their own projects and challenges.

Drop me a note if you have completed over 12 months of Tech Know Quilters and are interested in learning more about the Masters program.
​
You can learn more about the regular Tech Know Quilters membership program and sign up for the wait list for the next open enrollment period here.

Picture
Happy quilting.

​Kari

Join the On Point Quilter weekly newsletter and receive regular tips and inspiration on using Electric Quilt 8 along with the  Free 12 Top
Tips for EQ8 video guide.
Picture
    Picture
    Picture
    Picture
    Free guide available for newsletter subscribers
    Picture
    Picture
    Picture

    Kari Schell

    Electric Quilt Expert and Educator and Pattern Designer.

    Categories

    All
    Art And Stitch
    Cricut Maker
    Dear Jane
    Electric Quilt 7
    Electric Quilt 8
    Goose Goose Duck Challenge
    Inkscape
    Patterns
    Silhouette Cameo
    Stampin Up
    Tips And Techniques
    Tools And Rulers

    Archives

    April 2025
    March 2025
    February 2025
    January 2025
    December 2024
    November 2024
    October 2024
    September 2024
    August 2024
    July 2024
    June 2024
    May 2024
    April 2024
    March 2024
    February 2024
    January 2024
    December 2023
    November 2023
    October 2023
    September 2023
    August 2023
    July 2023
    June 2023
    May 2023
    April 2023
    March 2023
    February 2023
    January 2023
    December 2022
    November 2022
    October 2022
    September 2022
    August 2022
    July 2022
    June 2022
    May 2022
    April 2022
    March 2022
    February 2022
    January 2022
    December 2021
    November 2021
    October 2021
    September 2021
    August 2021
    July 2021
    June 2021
    May 2021
    April 2021
    March 2021
    February 2021
    January 2021
    December 2020
    November 2020
    October 2020
    September 2020
    August 2020
    July 2020
    June 2020
    May 2020
    April 2020
    March 2020
    February 2020
    January 2020
    December 2019
    November 2019
    October 2019
    September 2019
    August 2019
    July 2019
    June 2019
    May 2019
    April 2019
    March 2019
    February 2019
    January 2019
    December 2018
    November 2018
    October 2018
    September 2018
    August 2018
    July 2018
    June 2018
    May 2018
    April 2018
    March 2018
    February 2018
    January 2018
    December 2017
    November 2017
    October 2017
    September 2017
    August 2017
    July 2017
    June 2017
    May 2017
    April 2017
    March 2017
    February 2017
    January 2017
    December 2016
    November 2016
    October 2016
    September 2016
    July 2016
    June 2016
    May 2016
    April 2016
    March 2016
    February 2016
    January 2016
    December 2015
    November 2015
    October 2015
    September 2015
    August 2015
    July 2015
    June 2015
    May 2015
    April 2015
    March 2015
    February 2015
    January 2015
    December 2014
    November 2014
    October 2014
    September 2014
    July 2014
    June 2014
    May 2014
    April 2014
    March 2014
    February 2014
    January 2014
    December 2013
    November 2013
    October 2013
    September 2013
    August 2013

    RSS Feed

Contact:
On Point Quilter
e-mail:  [email protected]
phone:  763-566-6536

GET MY NEWSLETTER FOR REGULAR EQ AWESOMENESS!

* indicates required
  • Blog
  • About
  • EQ8 Training
    • Tech Know Quilters Electric Quilt 8 Membership Training
    • EQ8 Made Easy
    • Electric Quilt 8 Sneak Peek
  • Store
  • Contact