
|
A special welcome to the visitors from Seams Like a Dream. I hope you enjoy my Electric Quilt tutorial along with the wonderful braid quilts you may create. I have a passion for sharing my love of quilt design with you and offer both online and in person classes along with private coaching to assist you in designing your dream quilts. 
My friend Kate Colleran of Seams Like a Dream recently shared a tutorial on her website on using this really cool braid-making tool. I wouldn't be surprised to find Kate's best selling book, Smash your Precut Stash book in your library.
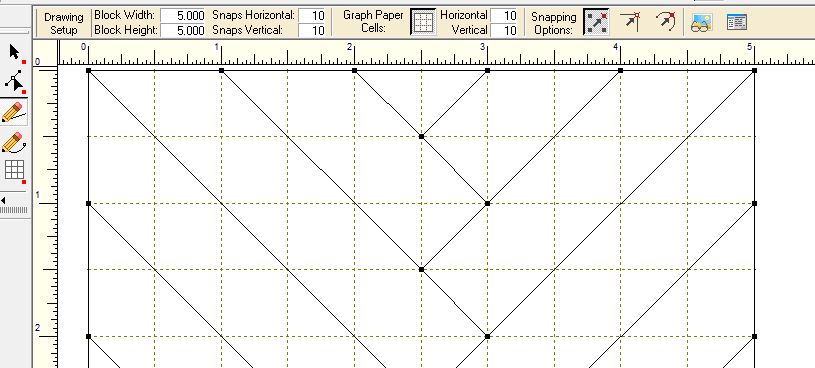
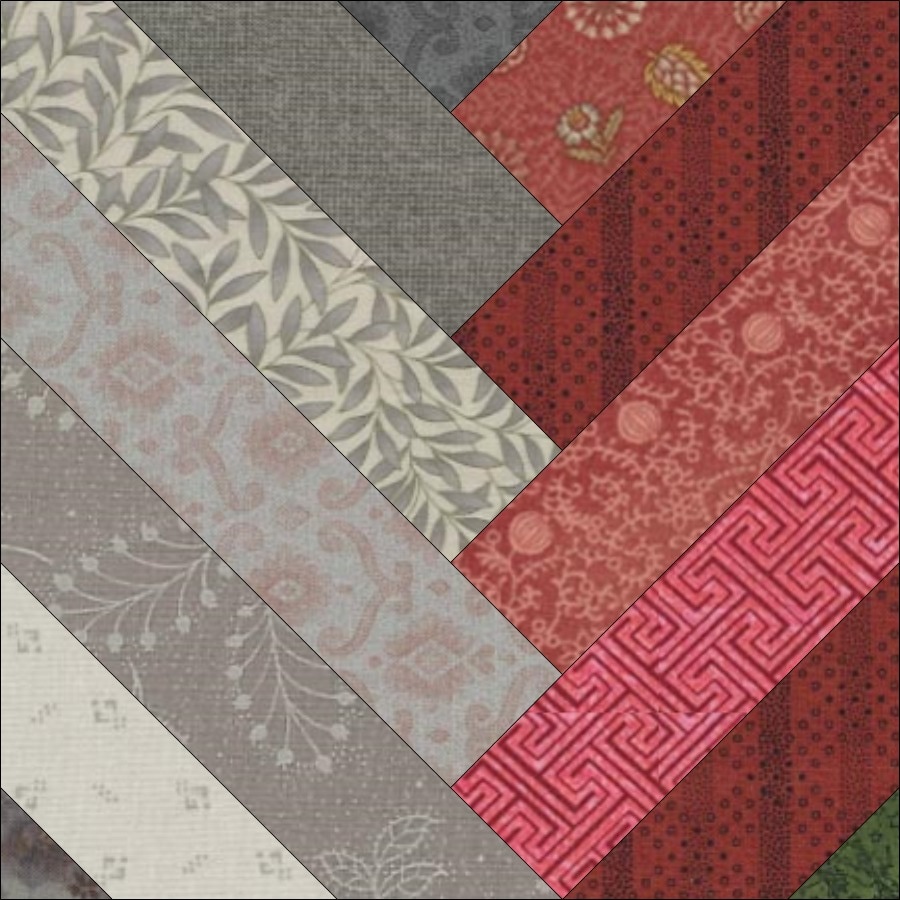
After watching the video and looking at her tutorials, I decided that I wanted to be able to play with a braid block in Electric Quilt. For this block I wanted to be able to use either 1-1/2" strips (sometimes called Honey Buns) or 2-1/2" strips (sometimes called Jelly Rolls). I also wanted the design to be tessellating. What is a tessellation? It is a shape that is repeated over and over again without any gaps. This would allow be to set my blocks together in a row that looks like it was designed as a single block. See how I designed my pre-cut friendly braid blocks in this week's Electric Quilt video tutorial. Then hop over to Kate's blog and see how her ruler works. She also has a special sale for the next week on her ruler. So take advantage of it, while you are there. Block and Setting Ideas
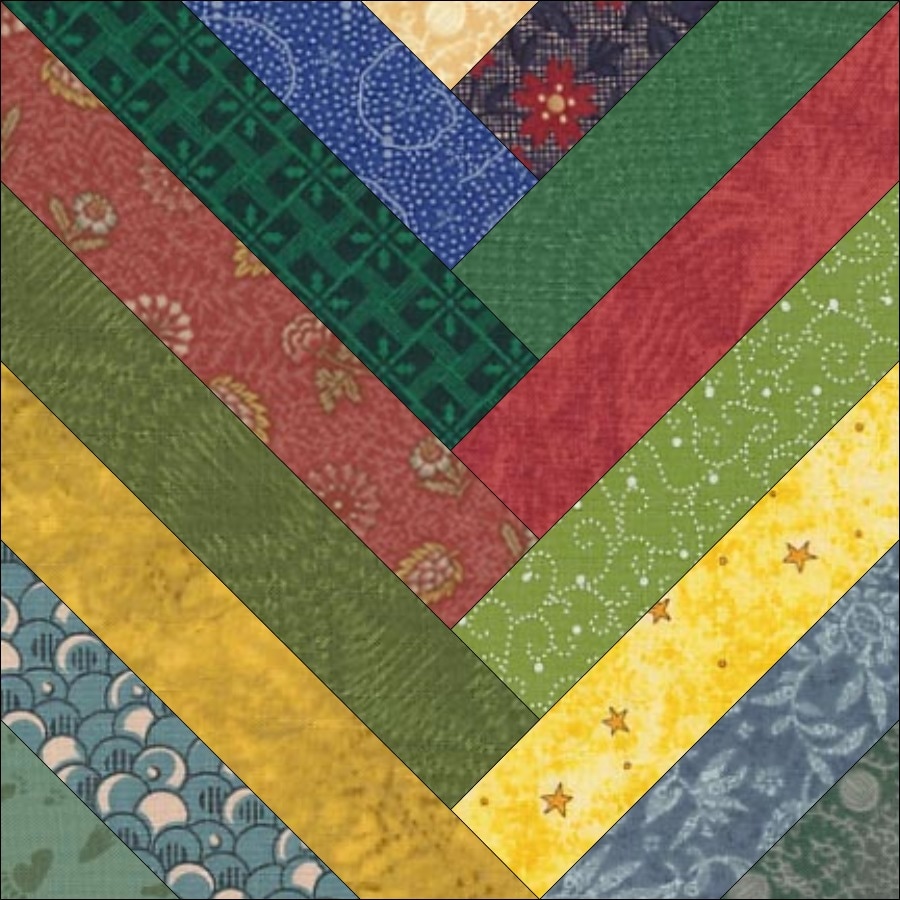
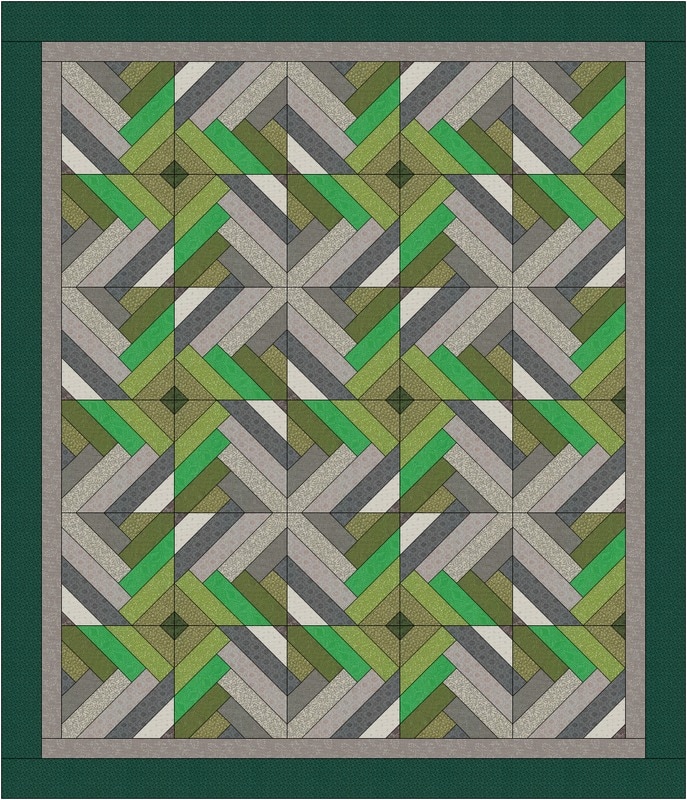
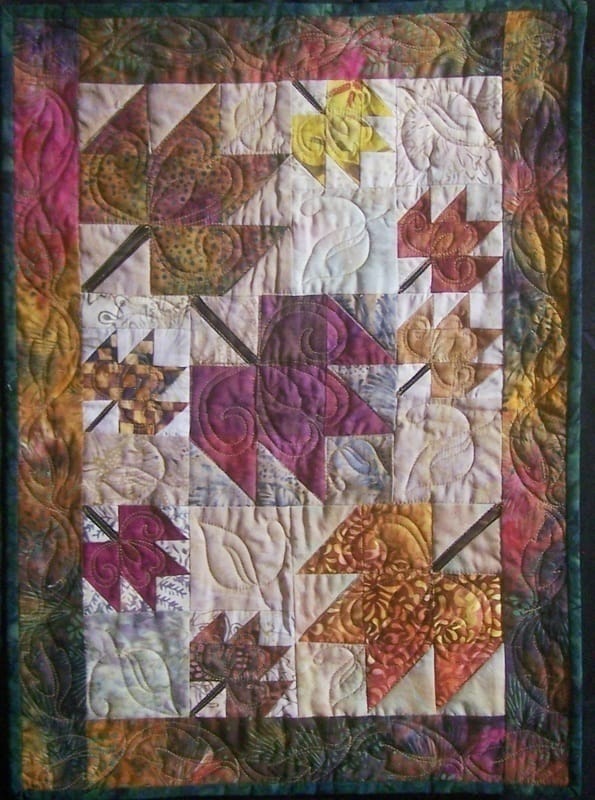
I just couldn't stop playing with this block. Here are a few of the braids I designed, plus the proposed setting.
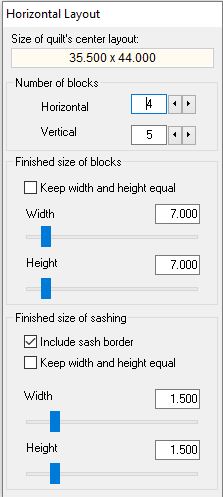
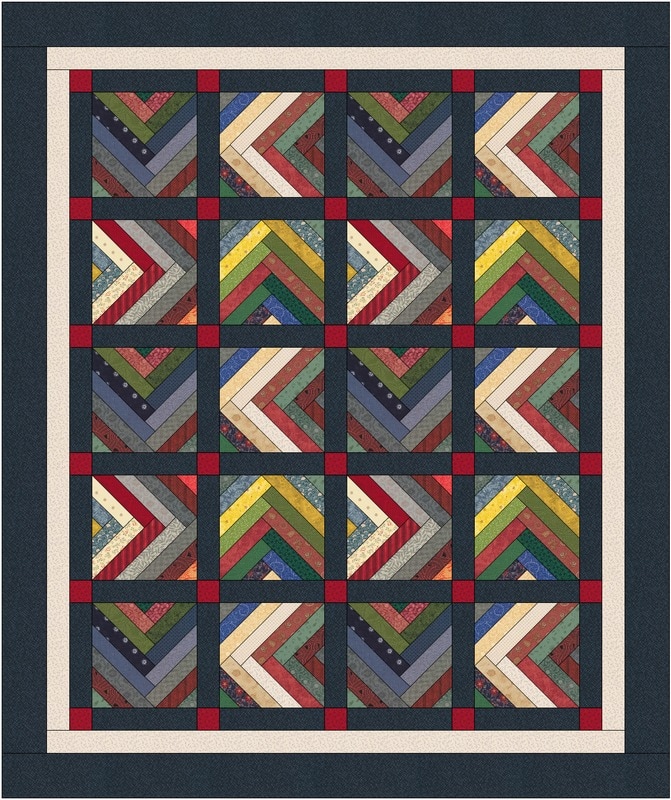
For those that own either EQ7 or EQ Stitch, I would like to offer a download of all my braid projects. For the next two weeks the download is free. Just click here. (At the end of two weeks the cost is $9.99.) Horizontal 4 x 5 Layout
Braid designed with 5 x 5 braid. Block (sized at 7" x 7") made with 1-1/2 inch strips.
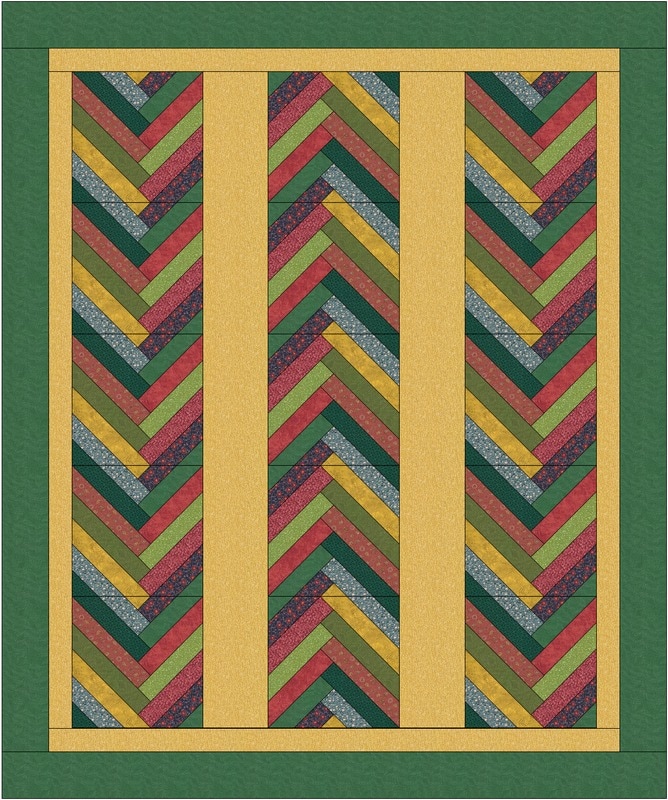
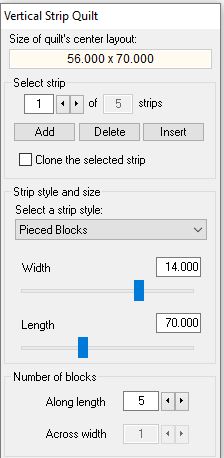
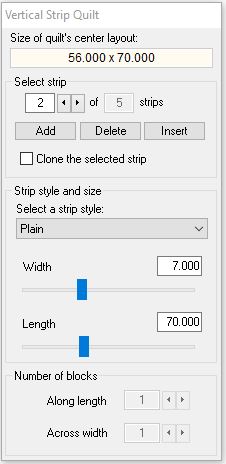
Vertical Strip Quilt
Braid designed with 5 x 5 braid. Block (sized at 14" x 14") made with 2-1/2 inch strips.
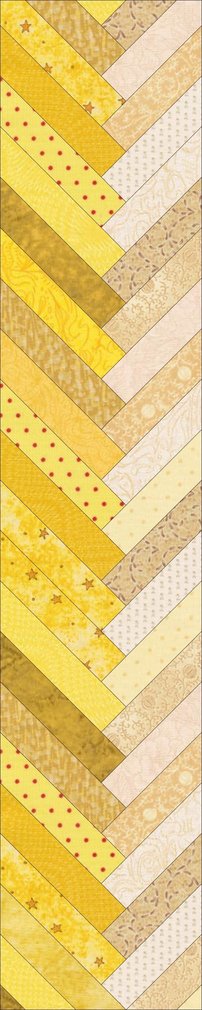
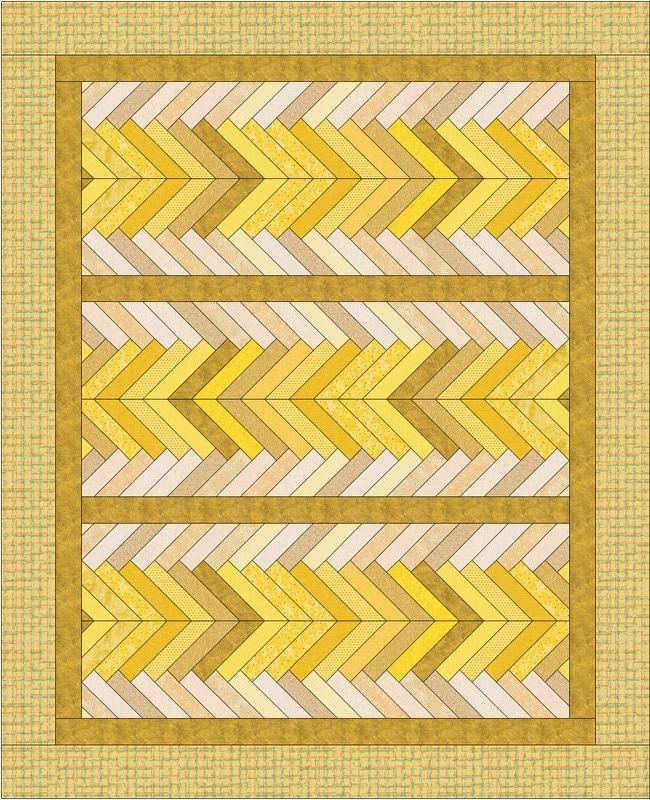
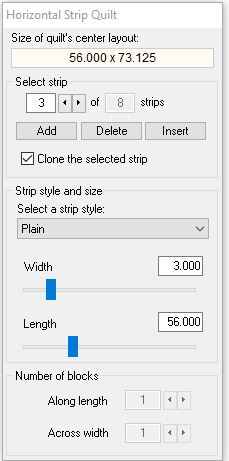
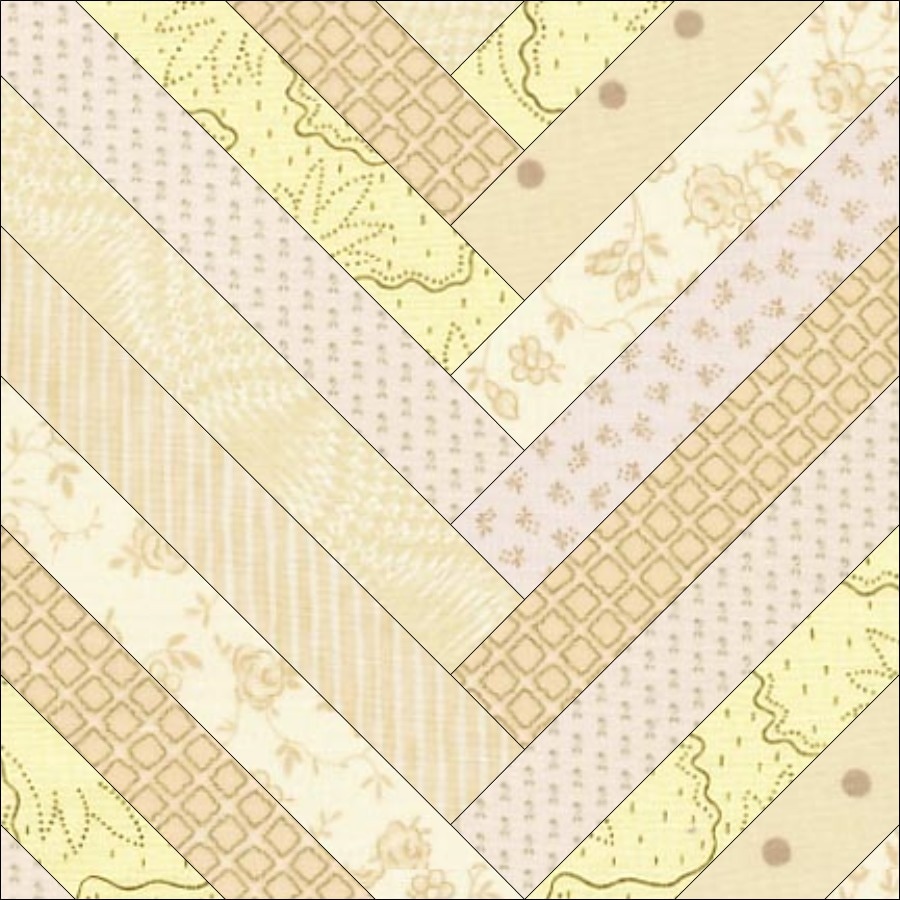
Horizontal Strip Quilt
Braid designed with 4 x 20 braid. Block (sized at 11.2" x 56") made with 2-1/2 inch strips.
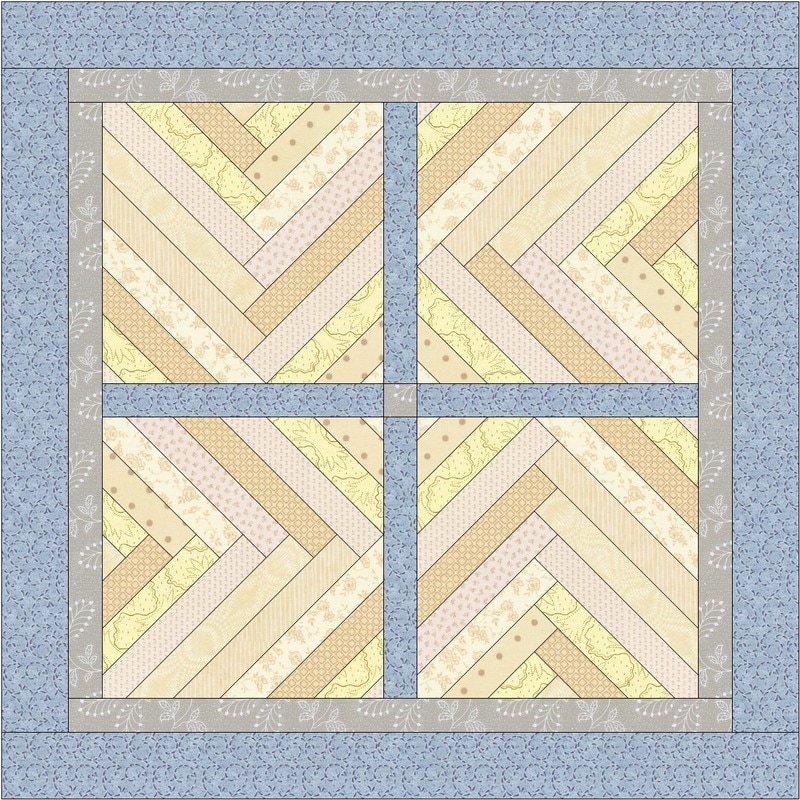
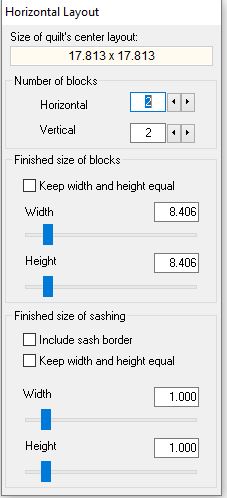
Horizontal Layout with Sashing
Braid designed with 6 x 6 braid. Block (sized at 8.4" x 8.4") made with 1-1/2 inch strips.
Horizontal Layout Serendipity
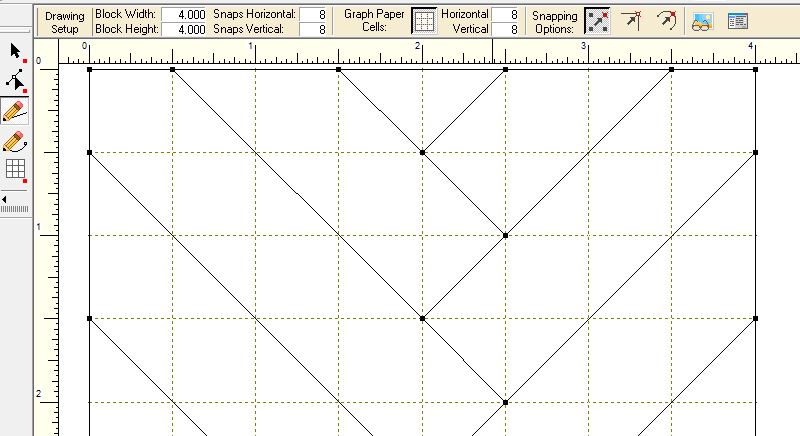
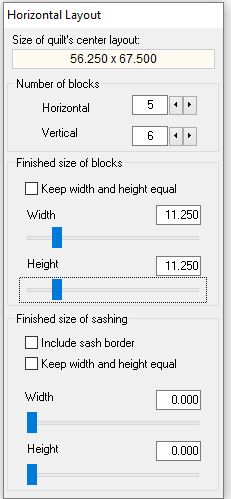
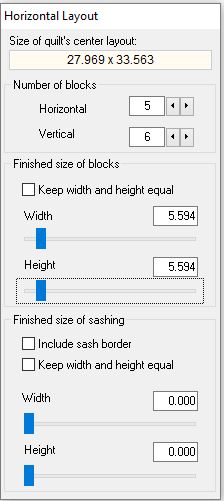
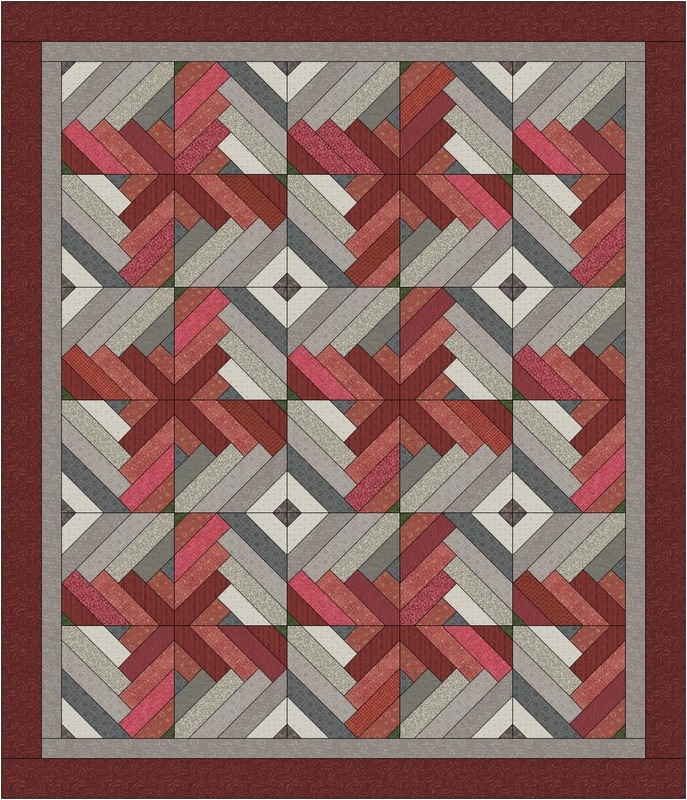
Braid designed with 4 x 4 braid. Blocks were sized at either 5.6" (made with 1-1/2 inch strips) or 11.2" (made with 2-1/2 inch strips). For this layout I played with the Serendipity option to find different block rotations.
Upcoming ClassesEQ Academy - Last Chance to Register
Three day in person, instructor-led workshop allowing participants to deep dive into the Electric Quilt subject of their choice. I will be teaching the drawing tools and participants will become proficient in:
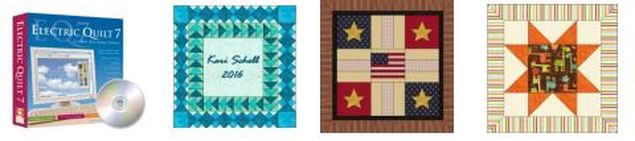
I will also include layouts to complement each of the blocks! You will be amazed at how much you can learn in this concentrated setting away from life's distractions. Cost: $300 Learn more here. Introduction to Electric Quilt 7
|


|
Happy quilting.
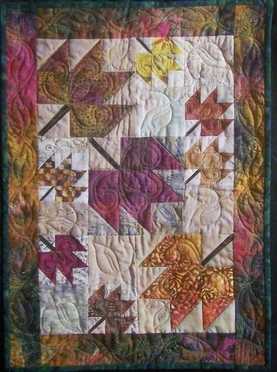
Kari Sign up for my newsletter to stay current on what's happening in my studio and learn more quilting tips. As a thank you, I'll send you a FREE pattern for this small maple leaf quilt. |
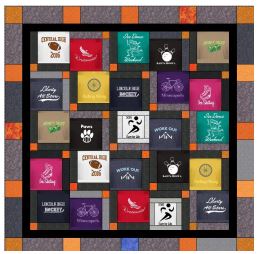
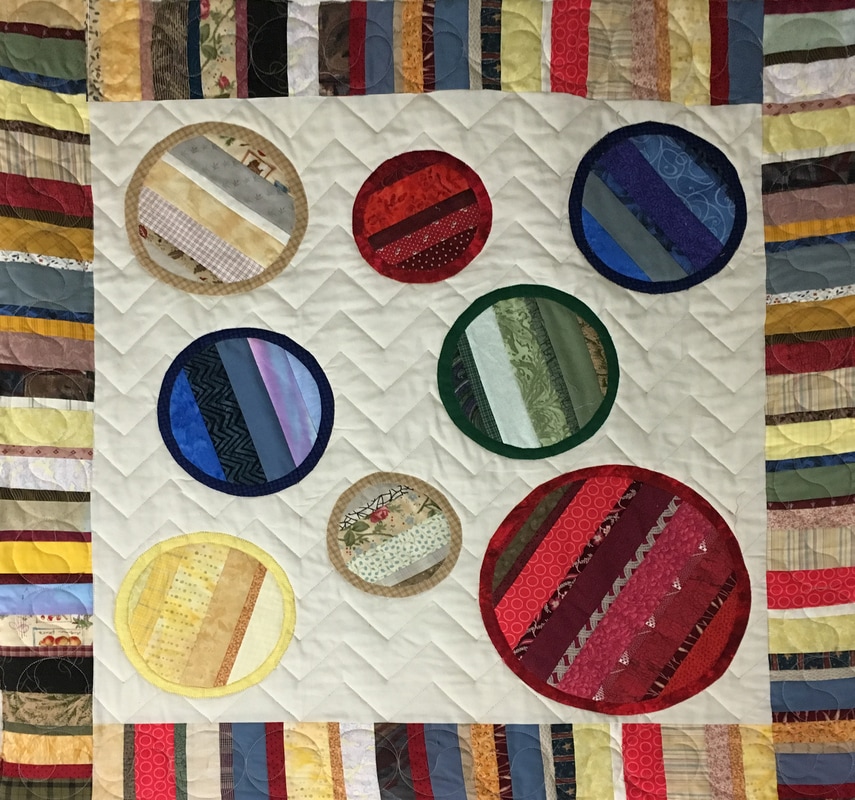
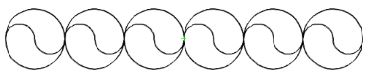
I just finished my String Applique quilt. I reloaded it on my longarm and quilted the circles using a new cog design. I think it has a modern look -- do you agree? In my video tutorial this week (which you can find later in this post), I will share how easy this design was to create using Art and Stitch.
I will also share free pdfs of the designs created in the video tutorial -- which you will definitely want to add to your quilting collection.
I will also share free pdfs of the designs created in the video tutorial -- which you will definitely want to add to your quilting collection.
New Electric Quilt Classes Start this Week
I still have a few openings in my brand new Electric Quilt online classes. What is included in these classes:
Are you ready to take your quilt design skills to the next level? Select the class that interests you. (Watch the videos below to see the quilts and designs included in each class and click on the link to register.)
For you over achievers (you know who you are) who wish to sign up for both classes-- there is a $20 discount that may be applied when checking out. The code is MarchMadness.
- Hands on Instructor Training that will guide you through the blocks and quilts in the class. This will be exactly like taking an in person class at a shop or show -- but from the comfort of your home.
- Small Class Sizes (limited to 8)
- Detailed Handouts that will assist when recreating the quilts
- Downloadable Video of the session that allows you to replay the class over and over again -- until you get it. :)
Are you ready to take your quilt design skills to the next level? Select the class that interests you. (Watch the videos below to see the quilts and designs included in each class and click on the link to register.)
For you over achievers (you know who you are) who wish to sign up for both classes-- there is a $20 discount that may be applied when checking out. The code is MarchMadness.
Dates: March 20, 27 and April 3, 10 7 - 8:30 pm (Central time) (four sessions)
Cost: $100
Register here.
Cost: $100
Register here.
Dates: March 21, 28 and April 4, 11 7 - 8:30 pm (Central time) (four sessions)
Cost: $100
Register here.
Cost: $100
Register here.
String Circle Applique Quilt - Part 5
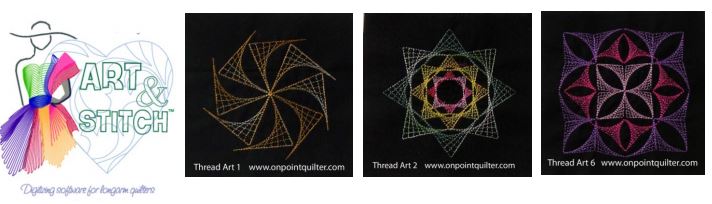
Have you tried Art and Stitch? It is a program for digitizing designs for a longarm or an embroidery machine. I used it to create the cog designs in my string quilt.
These designs were inspired by a template created by Circle Lord. Circle Lord creates templates/boards for use with longarm systems. I purchased and used many of these before purchasing my Intelliquilter and Art and Stitch.
See how easy it was to create my own cog-like design using Art and Stitch in this weeks video tutorial.
No computerized system -- no problem. These designs could also be easily executed with a domestic machine or non-computerized longarm. If you mark the circles, the cogs would be easy to freehand (and would be very forgiving.)
Here are free pdfs of the three designs included in the video. Permission is granted for personal use by quilters.
Here are free pdfs of the three designs included in the video. Permission is granted for personal use by quilters.
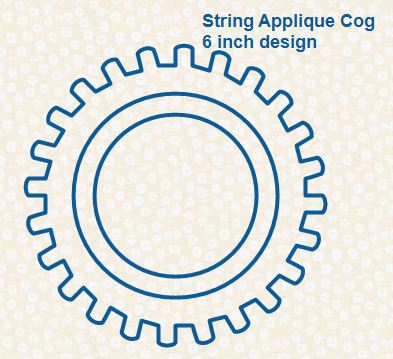
String Applique Cog 6 Inch
|
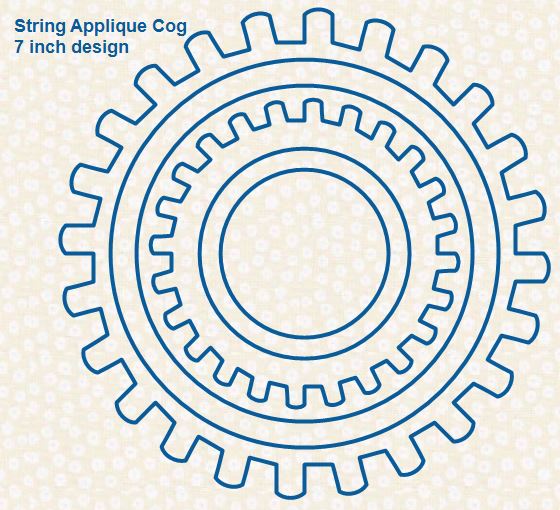
String Applique Cog 7 inch
|
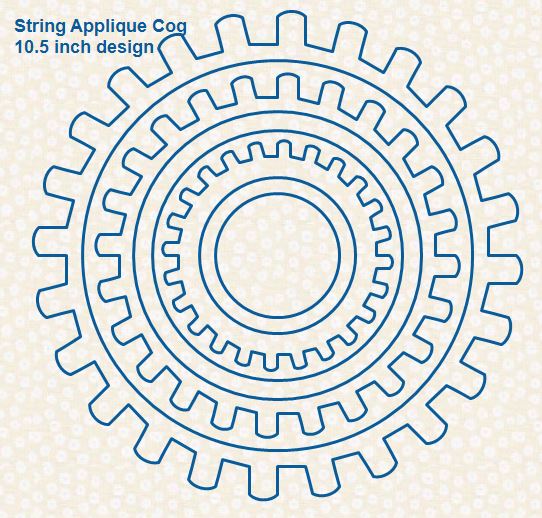
String Applique Cog 10-1/2 inch
|
Here is my final quilt.
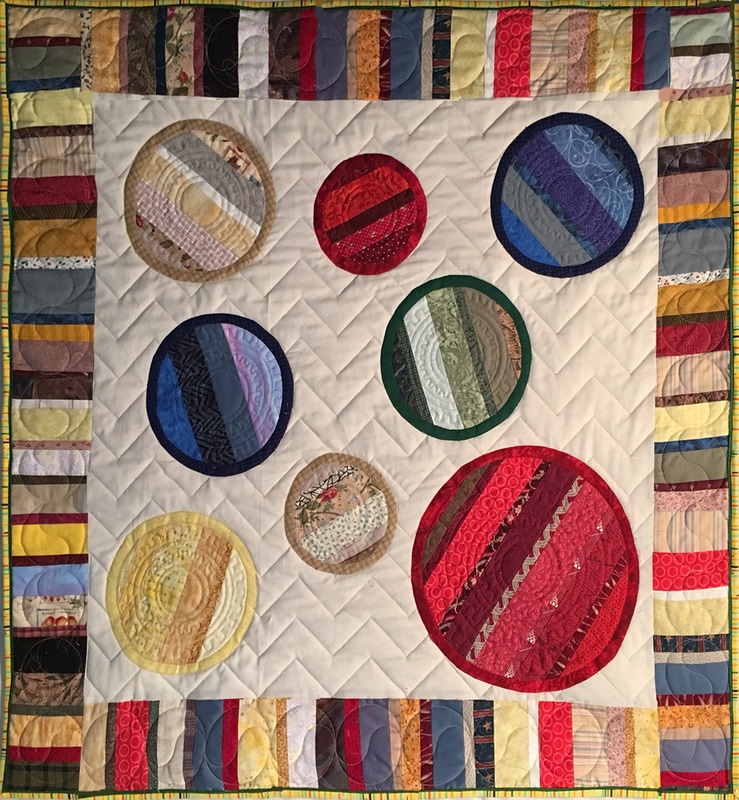
String Pieced Circle Applique Quilt by Kari Schell
Cog quilting close-ups:
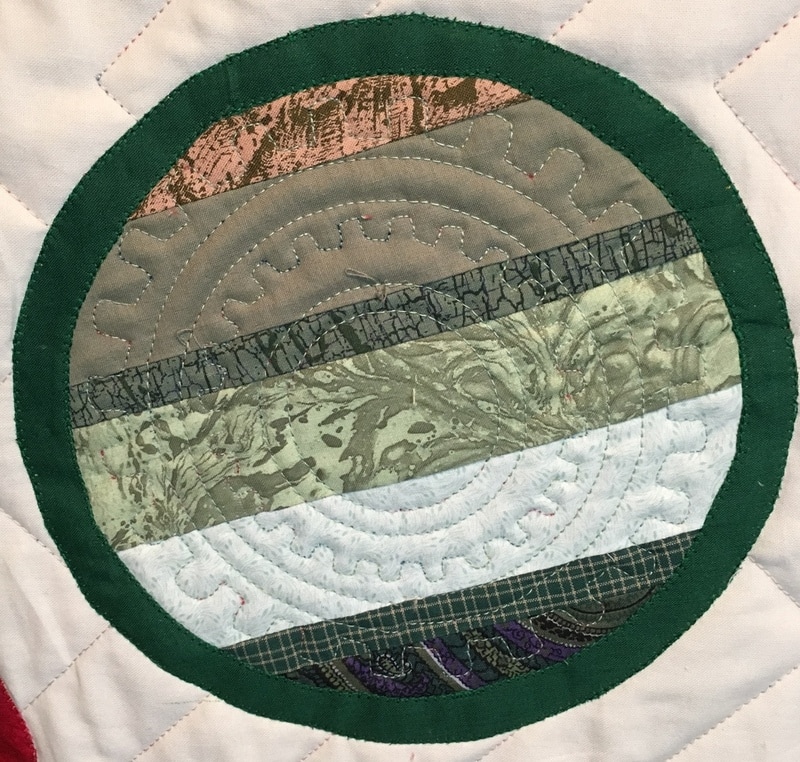
Cog Quilting Close-Up 7 inch design
|
Quilted by Kari Schell
|
For those that are new to Art and Stitch (or just wanting to expand your skills), I will be teaching a full day class on Art and Stitch at MN Quilt Show in Duluth. The class will be on Wednesday, June 7th from 8:30-4:30.
You don't even need to purchase the software to take the class.
There is a trial version that may be downloaded for the class -- so you can see if the program is for you before purchasing.
Read more and register here.
You don't even need to purchase the software to take the class.
There is a trial version that may be downloaded for the class -- so you can see if the program is for you before purchasing.
Read more and register here.

Happy quilting.
Kari
Sign up for my newsletter to stay current on what's happening in my studio and learn more quilting tips. As a thank you, I'll send you a FREE pattern for this small maple leaf quilt.
Kari
Sign up for my newsletter to stay current on what's happening in my studio and learn more quilting tips. As a thank you, I'll send you a FREE pattern for this small maple leaf quilt.
I have some new great tips to share with you on the String Applique Circle quilt. Did you know that you can create applique shapes with "holes" in them in Electric Quilt? Read more below.
Also check out the next steps in constructing the String Applique quilt -- along with free templates for both the circles and the rings.
But first.......
Also check out the next steps in constructing the String Applique quilt -- along with free templates for both the circles and the rings.
But first.......
New Online EQ Classes
Time is running out to get your early registration bonus for two brand new Electric Quilt classes.
What are the bonuses?
Early Sign-Up Bonus: As a special bonus, if you sign up by March 13, 2017 you will be entitled to a private 20 minute coaching call (value of $60) with Kari that may be used any time during the course of the class. Use it for extra help on a topic or to pick Kari's brain on something you wish to do in Electric Quilt.
Double Up: Register for both classes Settings and Border 1 and Pieced Patch Draw and take an extra $20 off your total. Enter coupon code MarchMadness when checking out.
Double Up: Register for both classes Settings and Border 1 and Pieced Patch Draw and take an extra $20 off your total. Enter coupon code MarchMadness when checking out.
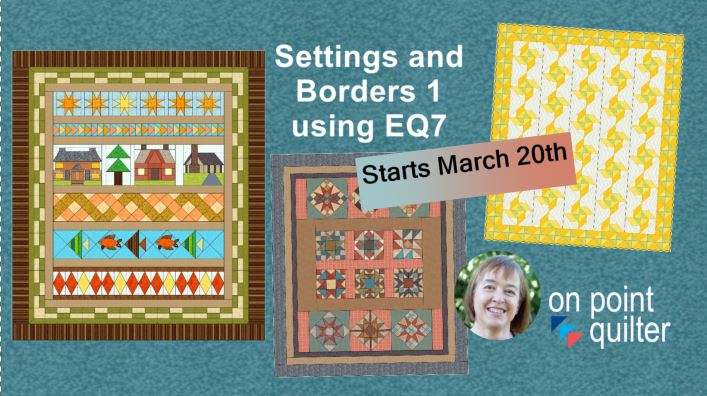
Settings and Borders 1
Instructor Led Online Class
Class starts March 20, 2017. Price $100. Register here.
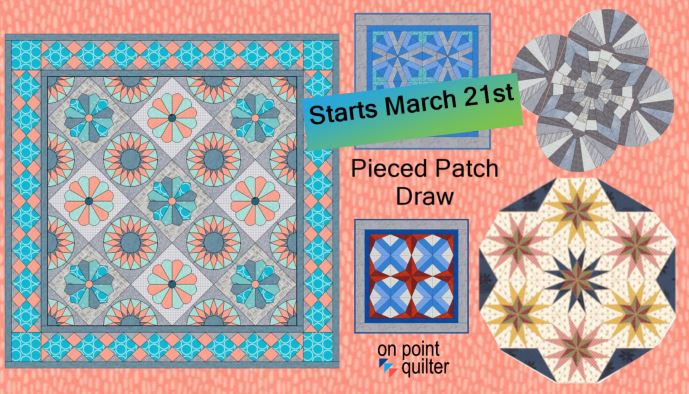
Pieced Patch Draw
Instructor Led Online Class
Class starts March 21, 2017. Price $100. Register here.
For those attending EQ Academy, the Pieced Patch Draw material will be included in my blocks class. Click here to register for EQ Academy.
For those attending EQ Academy, the Pieced Patch Draw material will be included in my blocks class. Click here to register for EQ Academy.
String Circle Applique Quilt - Part 4
I've been pondering construction of my Circle Applique String quilt. The problem (after having designed all those string pieced circles) was figuring out how best to attach them to the quilt.
After some contemplation, I decided I would create a 1 inch wide ring to surround each string pieced circle. If I fused the surrounding circle (connecting the string pieced circle with the background), I would have something that would be very doable to machine applique.
However, before adding the fusible fabric to my quilt, I wanted to add the same to my Electric Quilt project as well.
The challenge was creating an applique shape with a hole in the center. Check out my latest Electric Quilt video to see how I tackled this.
String Quilt Construction - Adding Circles
If you missed any of the previous posts on the construction process, check them out:
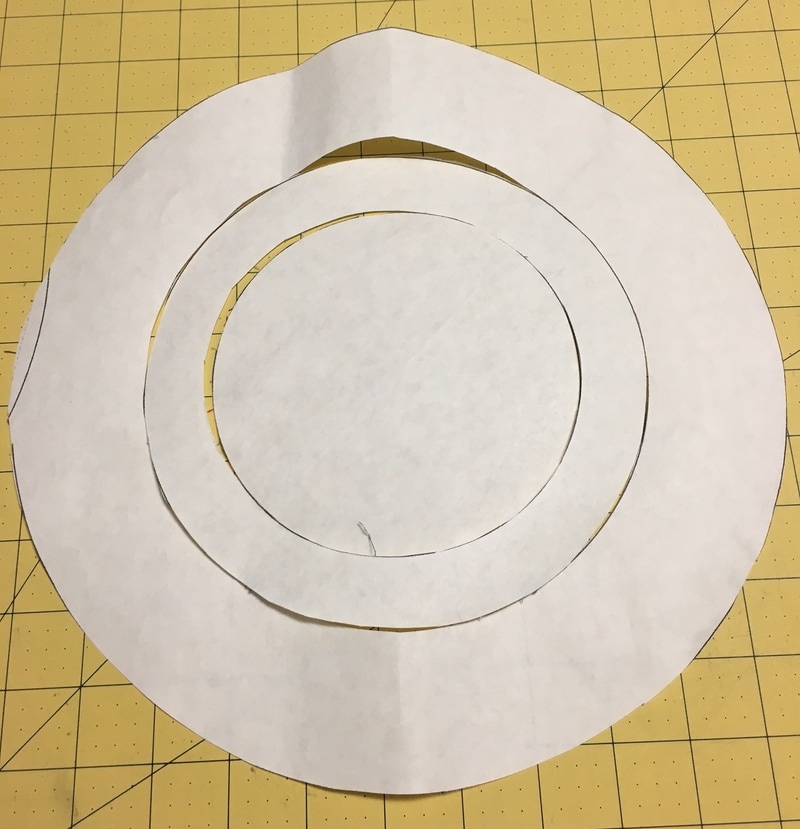
Cut out the String Applique circle blocks.
For this I created templates in Electric Quilt which I printed out on freezer paper. The size of the circles were 1/2 inch smaller than the original design -- so I could allow for the overlap of the fused rings.
For this I created templates in Electric Quilt which I printed out on freezer paper. The size of the circles were 1/2 inch smaller than the original design -- so I could allow for the overlap of the fused rings.
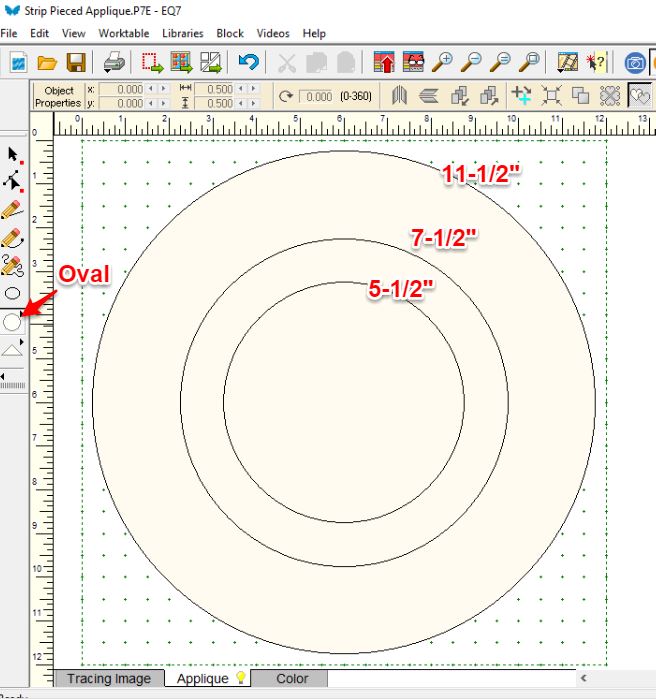
Designed Circle Templates in Electric Quilt
|
Then I printed the block (using the block size of 12" x 12") on 12" x 15" freezer paper sheets using my wide-carriage printer. Then I didn't have to tape any sheets together.
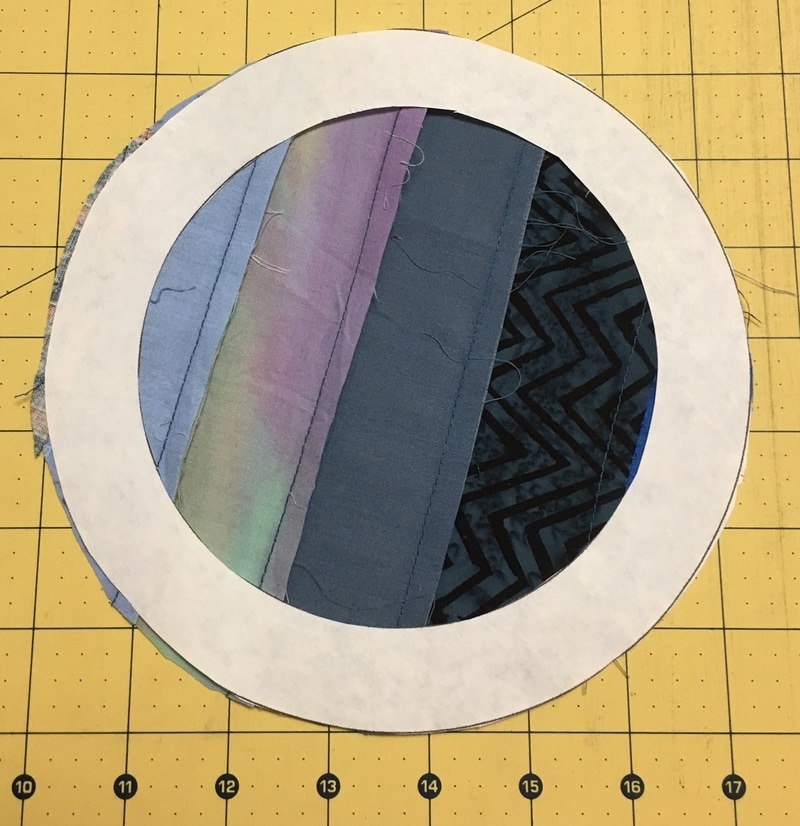
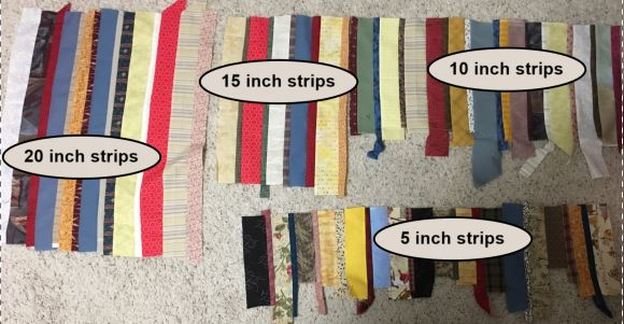
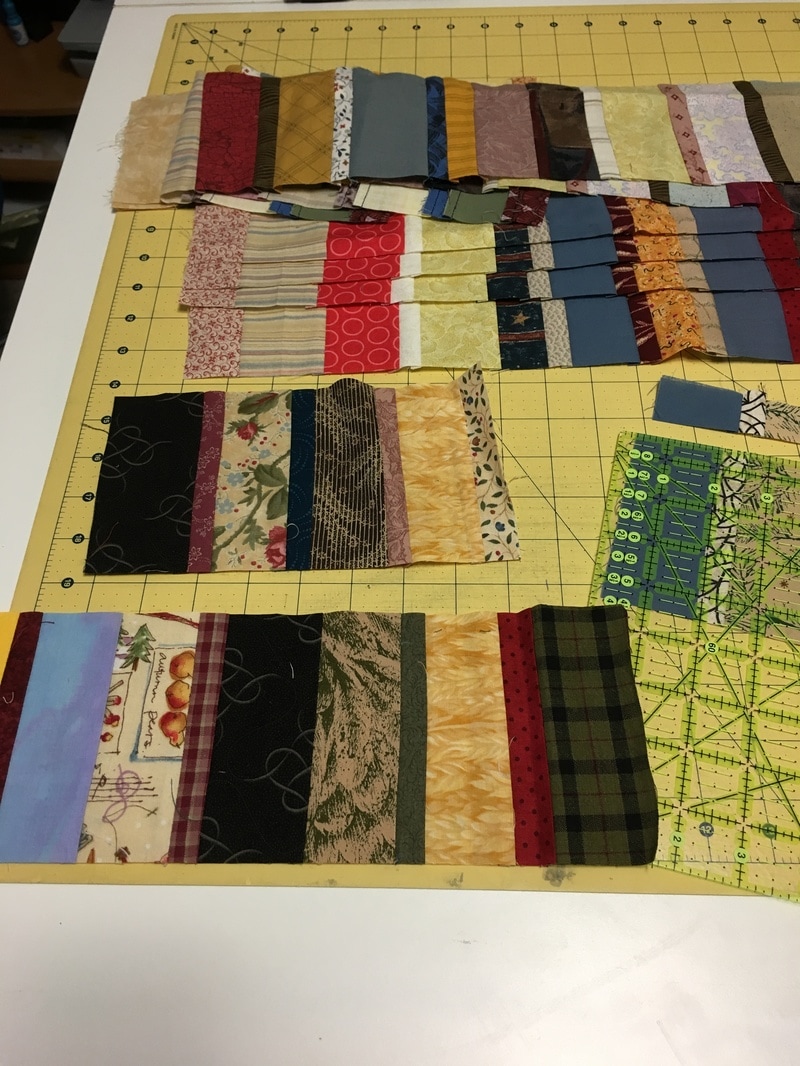
Carefully cut out the three circles. Iron on the back of a strip segment. Cut the strip segment. Here are the free downloadable freezer paper templates (pdf format).
You may get by with just one set of templates. I found they could be reused multiple times. |
|
|
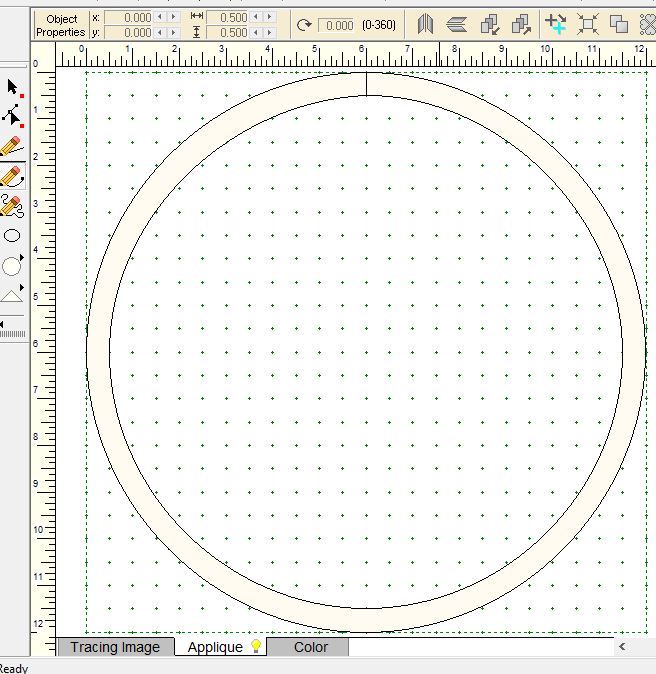
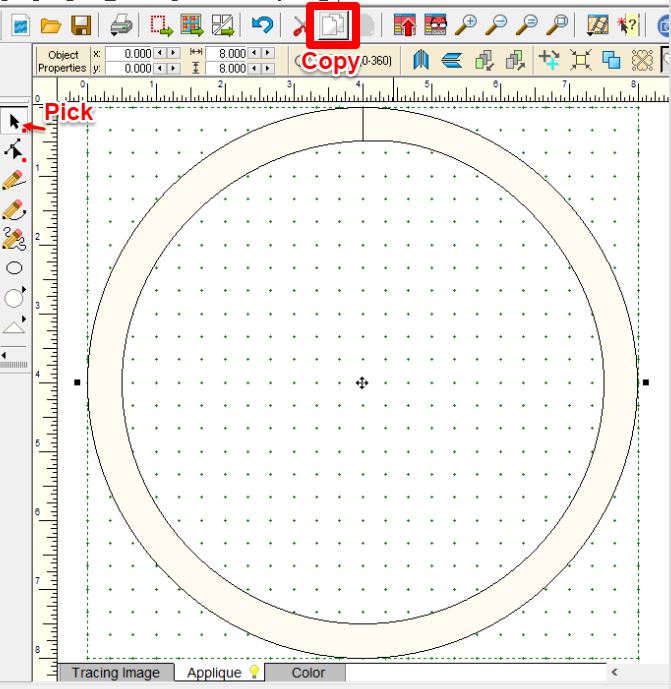
Create the Fusible Rings
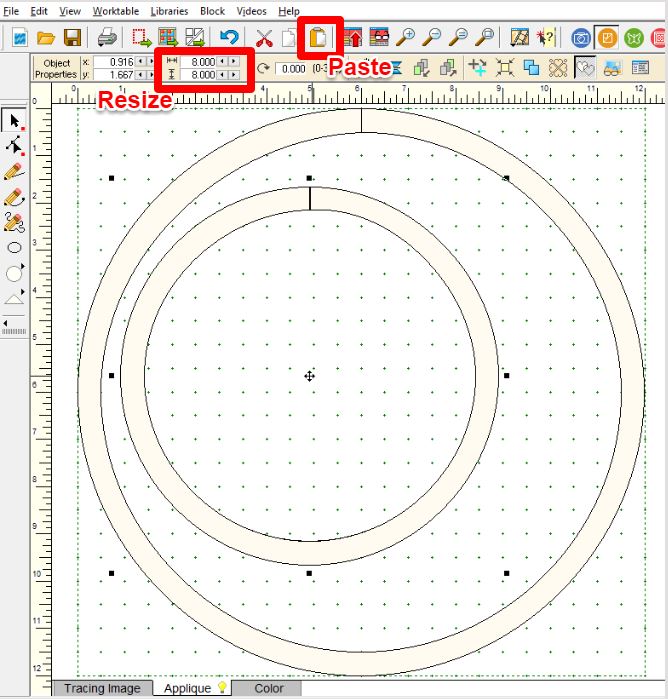
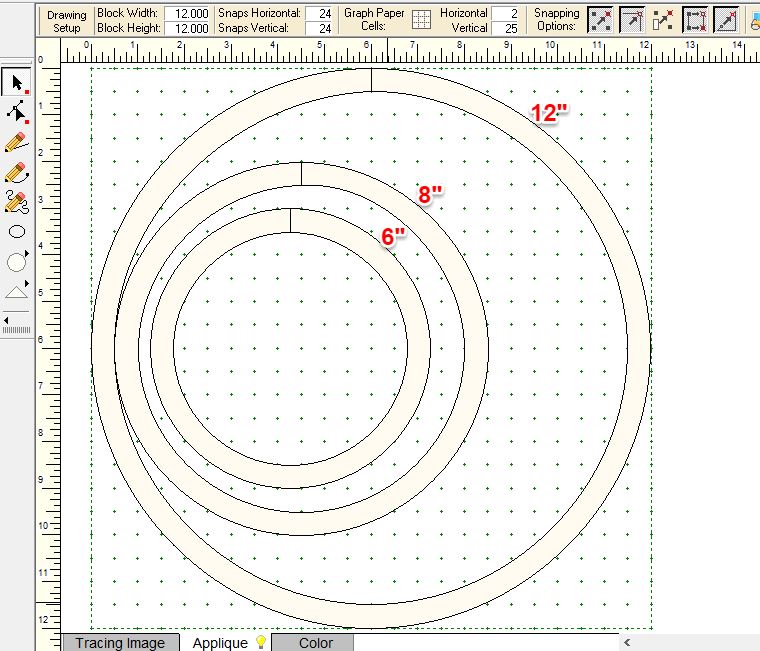
I had 3 separate ring blocks in Electric Quilt. One for each size of ring. Great for designing. Not so great on economizing on usage of Steam-A-Seam 2 (particularly since I only had one package of five sheets for the project). I used the large ring (12")as the base. I opened the 8" ring, selected it with the Pick tool and then selected Copy. Then opened the 12" ring and selected Paste. I then change the size of the copied ring to 8" x 8". Add to Sketchbook. Then I opened the 6" ring and repeated the process. Add to Sketchbook. |
|
|
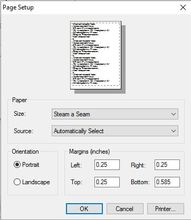
Change your paper size to 9 x 12 (the size of the Steam-A-Seam sheets) and print. You will have to tape some of these together after printing.
Here are the free download pdfs for the Fusible Rings. These may be used for either tracing or printing on fusible webbing. Rough cut the rings. Peel and stick onto Ring fabric and cut out. |
|
|
Place string pieced circles and rings on quilted background. Once you have a pleasing arrangement, fuse in place.
Using a blanket stitch, secure the rings. Here is my project with rings fused and stitched down. |
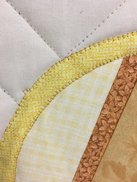
|
Now I am thinking I would like to add a quilting design on each of the string pieced circles. But I will save that for next week.

|
Happy quilting.
Kari Sign up for my newsletter to stay current on what's happening in my studio and learn more quilting tips. As a thank you, I'll send you a FREE pattern for this small maple leaf quilt. |
I am making progress on my string pieced applique quilt.
While playing with the design in Electric Quilt, I learned a few new items on working with quilting designs that totally blew me away.
In this weeks Electric Quilt tutorial, I will share them with you.
I will also share my piecing and quilting progress (along with instructions for creating your own string pieced applique quilt).
Class Updates
I have been busy finalizing the material for the next two classes. There are so many projects in these classes, I have been struggling with how best to share them with you. These short videos will hopefully provide a snapshot to aid in your review.
Are you ready to learn how to do all of these blocks and quilts?
Registration links are at the bottom of each video. But make sure you also check out the early enrollment bonuses later in this post.
Are you ready to learn how to do all of these blocks and quilts?
Registration links are at the bottom of each video. But make sure you also check out the early enrollment bonuses later in this post.
Settings and Borders 1
Instructor Led Online Class
Class Starts March 20, 2017. Price $100. Register here.
Pieced Patch Draw
Instructor Led Online Class
Class Starts March 21, 2017. Price $100. Register here.
For those attending EQ Academy, the Pieced Patch Draw material will be included in my blocks class. Click here to register for EQ Academy.
For those attending EQ Academy, the Pieced Patch Draw material will be included in my blocks class. Click here to register for EQ Academy.
Bonuses
Early Sign-Up Bonus: As a special bonus, if you sign up by March 11, 2017 you will be entitled to a private 20 minute coaching call (value of $60) with Kari that may be used any time during the course of the class. Use it for extra help on a topic or to pick Kari's brain on something you wish to do in Electric Quilt.
Double Up: Register for both classes Settings and Border 1 and Pieced Patch Draw and take an extra $20 off your total. Enter coupon code MarchMadness when checking out.
EQ Tutorial: Creating Easy Background Fills in Electric Quilt
If you missed any of the prior sessions, you may catch up here.
String Pieced Applique Constructing and Quilting the Base
|
Cut 4-1/2" segments from the border strip sets.
Combine 4-1/2" segments.
Press. I like to use lots of steam for this. Complete the following Border Segments:
|
|
Cut Background 30-1/2" x 30-1/2".
Add 30-1/2" borders to 2 sides.
Add 38-1/2" borders to the other 2 sides.
Add 30-1/2" borders to 2 sides.
Add 38-1/2" borders to the other 2 sides.
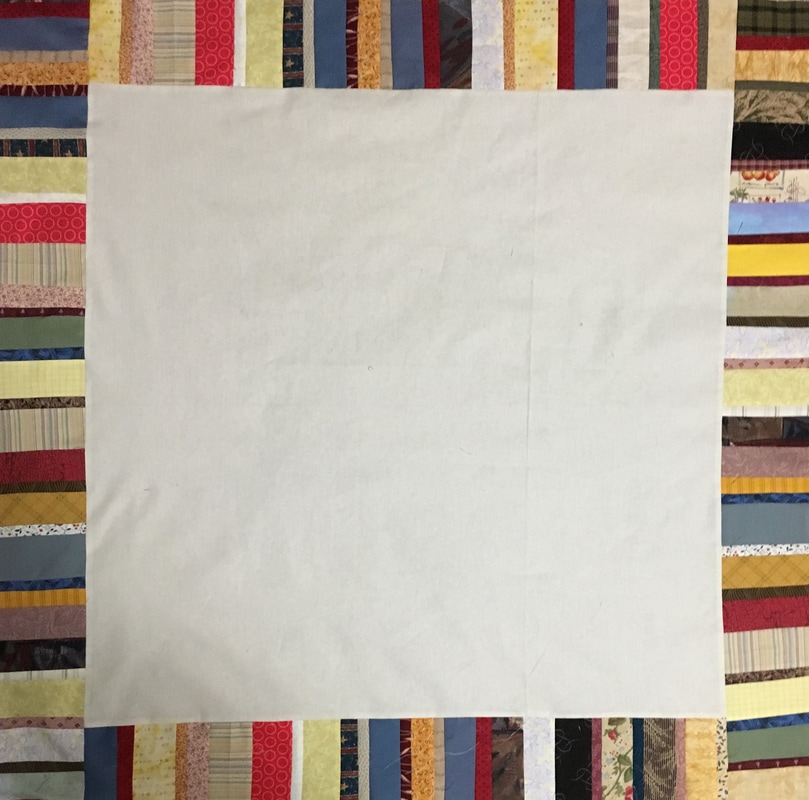
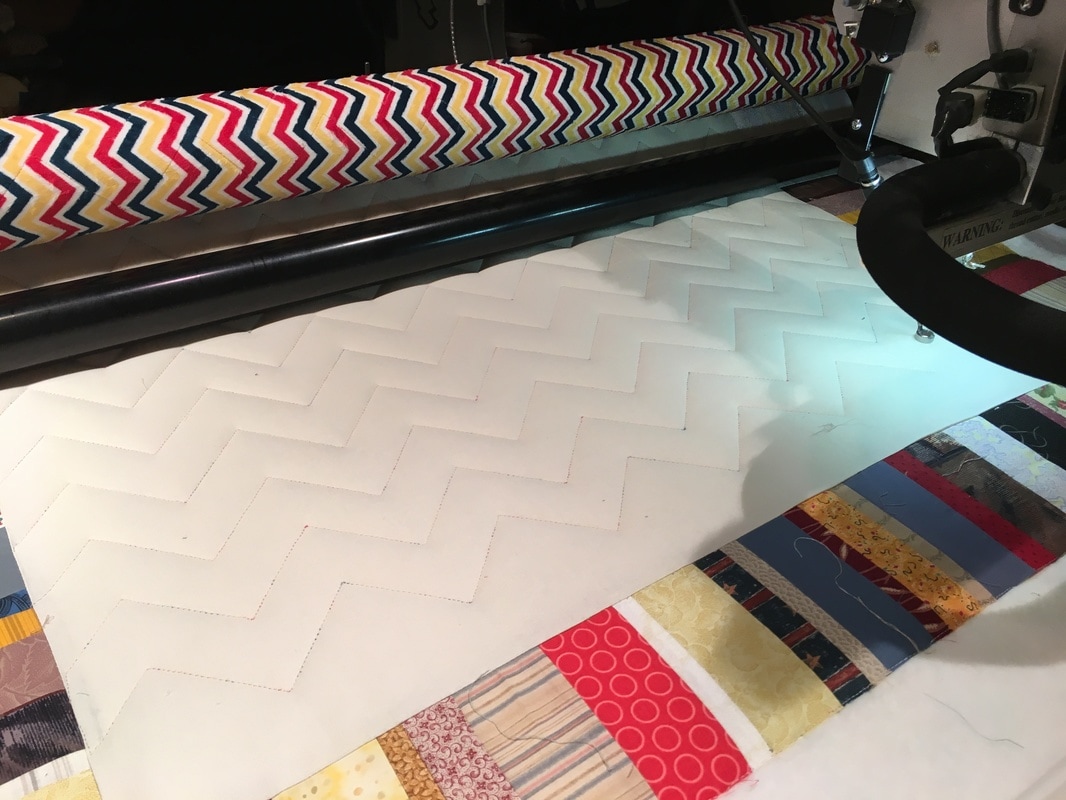
Quilt a background filler. On a domestic machine, cross-hatching works well. On a longarm machine, I like to do zigzags.
Go ahead and quilt the borders as well. I used a design that came with my Intelliquilter called Ying Yang Border. It was designed by Helen Baczynski.
Go ahead and quilt the borders as well. I used a design that came with my Intelliquilter called Ying Yang Border. It was designed by Helen Baczynski.

Cross Hatch 1 inch spacing on 30 inch background square. This could easily be adjusted to 2 inch for a less intense design.
|

Zigzag with 2 inch spacing on 30 inch background.
|
Ying Yang Border by Helen Baczynski.
I have some ideas on attaching the string pieced circles -- but that will need to wait until next week.
|
Happy quilting.
Kari Sign up for my newsletter to stay current on what's happening in my studio and learn more quilting tips. As a thank you, I'll send you a FREE pattern for this small maple leaf quilt. |


Free guide available for newsletter subscribers


Kari Schell
Electric Quilt Expert and Educator and Pattern Designer.
Categories
All
Art And Stitch
Cricut Maker
Dear Jane
Electric Quilt 7
Electric Quilt 8
Goose Goose Duck Challenge
Inkscape
Patterns
Silhouette Cameo
Stampin Up
Tips And Techniques
Tools And Rulers
Archives
July 2024
June 2024
May 2024
April 2024
March 2024
February 2024
January 2024
December 2023
November 2023
October 2023
September 2023
August 2023
July 2023
June 2023
May 2023
April 2023
March 2023
February 2023
January 2023
December 2022
November 2022
October 2022
September 2022
August 2022
July 2022
June 2022
May 2022
April 2022
March 2022
February 2022
January 2022
December 2021
November 2021
October 2021
September 2021
August 2021
July 2021
June 2021
May 2021
April 2021
March 2021
February 2021
January 2021
December 2020
November 2020
October 2020
September 2020
August 2020
July 2020
June 2020
May 2020
April 2020
March 2020
February 2020
January 2020
December 2019
November 2019
October 2019
September 2019
August 2019
July 2019
June 2019
May 2019
April 2019
March 2019
February 2019
January 2019
December 2018
November 2018
October 2018
September 2018
August 2018
July 2018
June 2018
May 2018
April 2018
March 2018
February 2018
January 2018
December 2017
November 2017
October 2017
September 2017
August 2017
July 2017
June 2017
May 2017
April 2017
March 2017
February 2017
January 2017
December 2016
November 2016
October 2016
September 2016
July 2016
June 2016
May 2016
April 2016
March 2016
February 2016
January 2016
December 2015
November 2015
October 2015
September 2015
August 2015
July 2015
June 2015
May 2015
April 2015
March 2015
February 2015
January 2015
December 2014
November 2014
October 2014
September 2014
July 2014
June 2014
May 2014
April 2014
March 2014
February 2014
January 2014
December 2013
November 2013
October 2013
September 2013
August 2013
 RSS Feed