
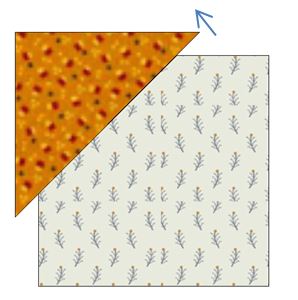
One of my favorite uses of Electric Quilt is to draft a block in EQ using the technique I plan to use to piece the block and then create my own quilt layout for the block.
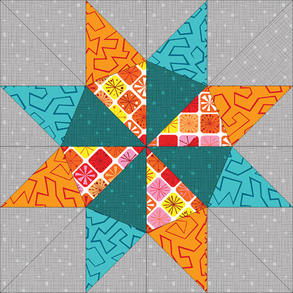
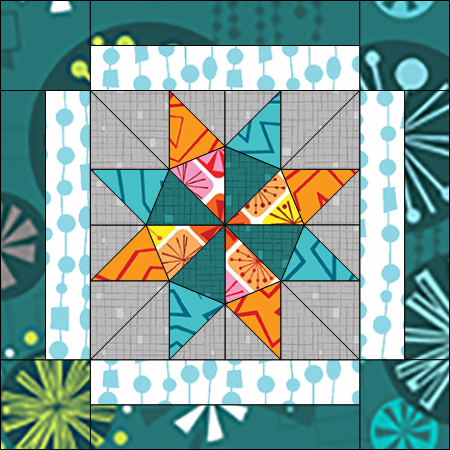
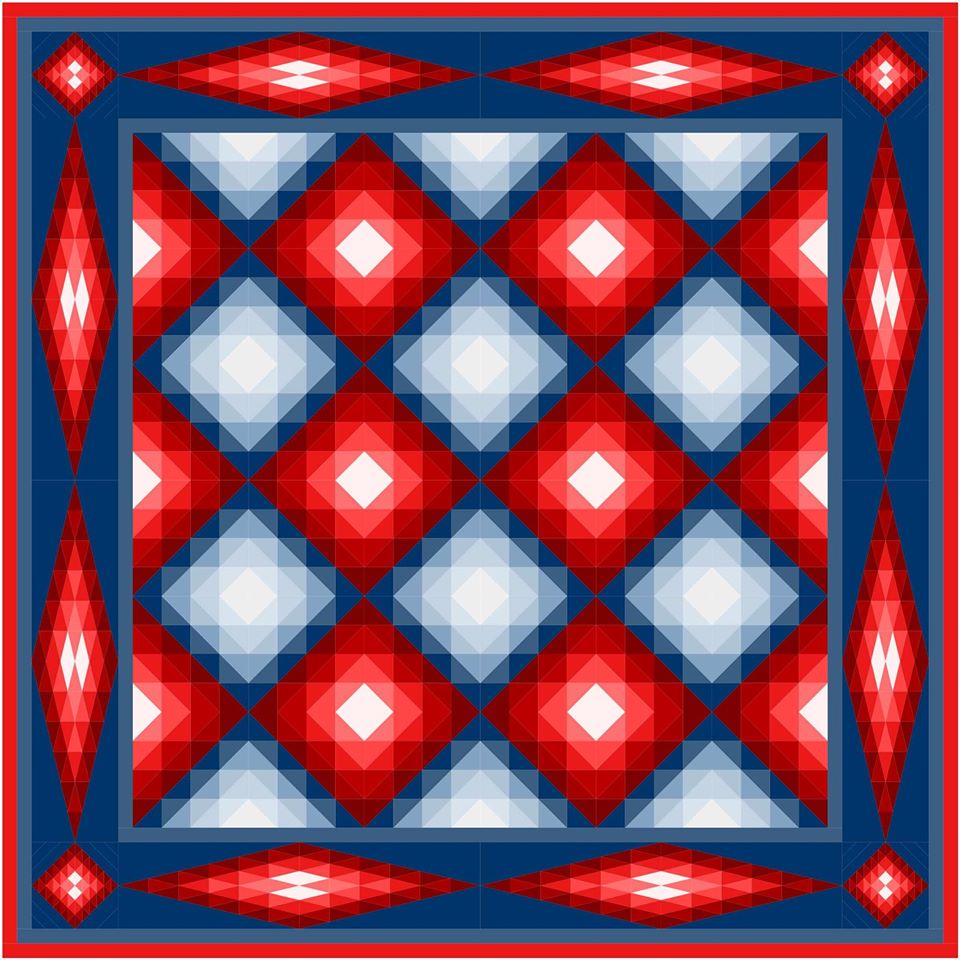
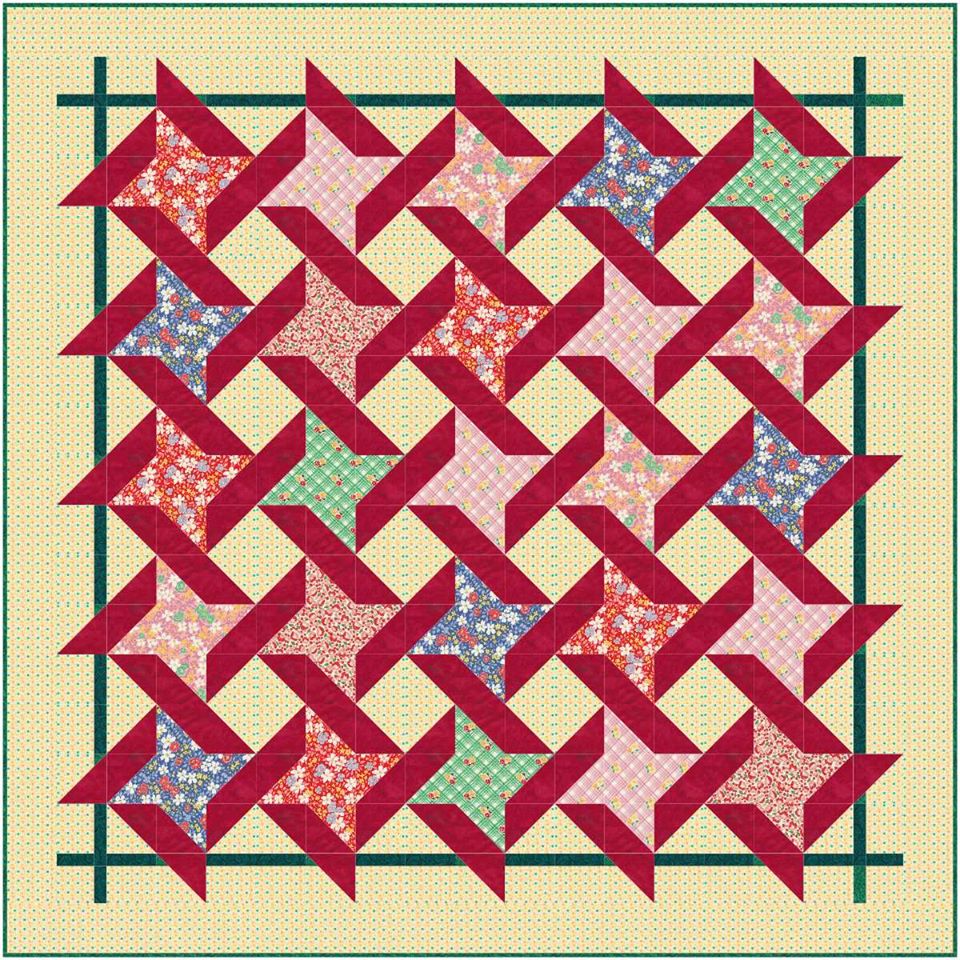
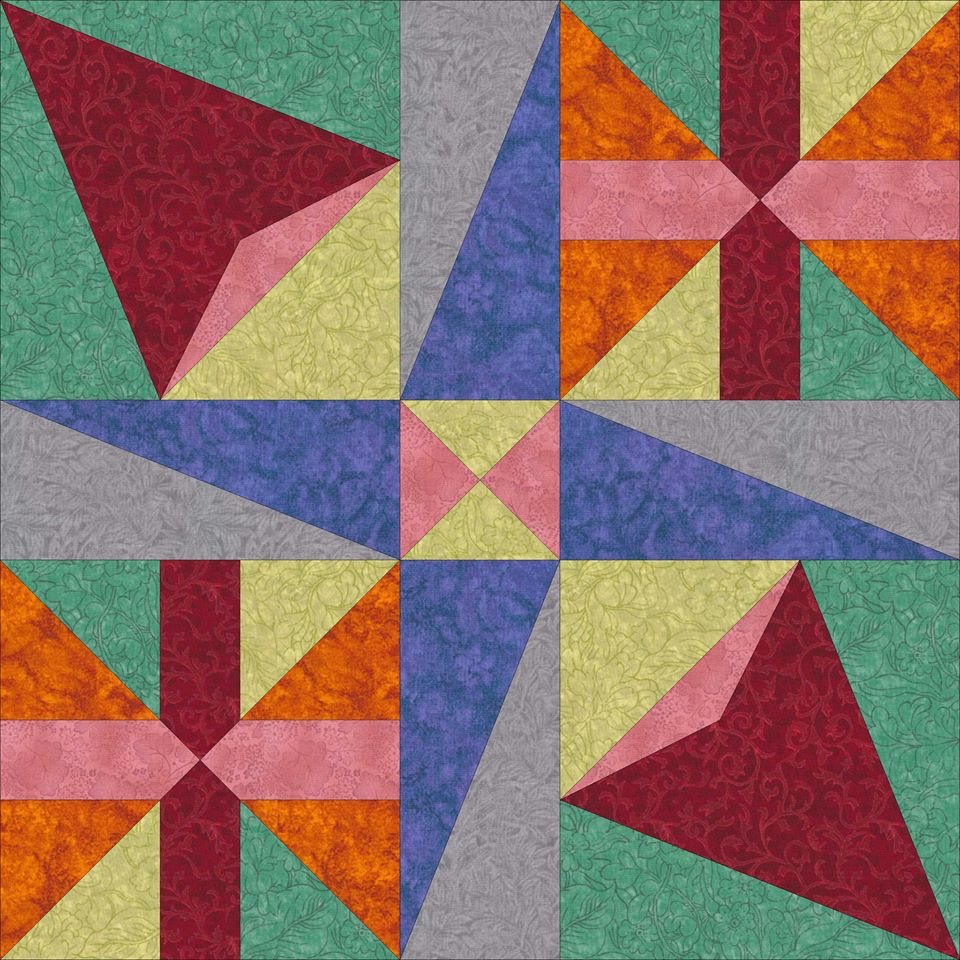
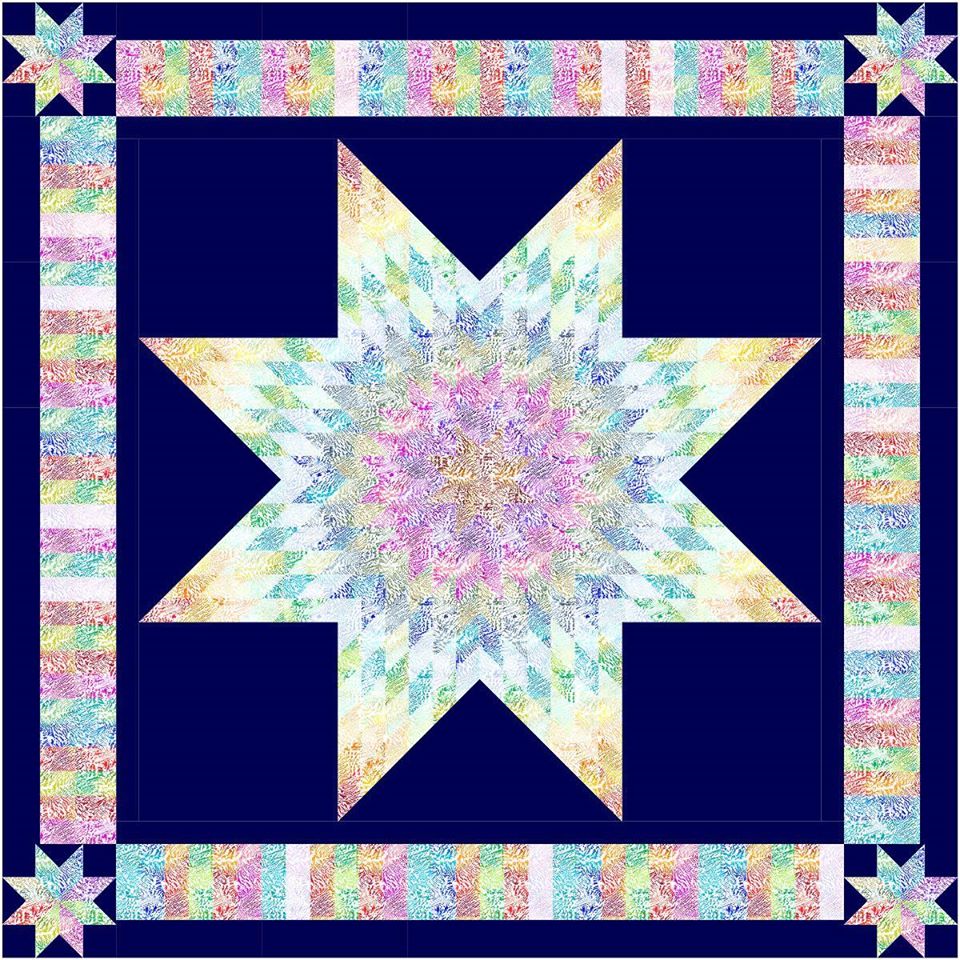
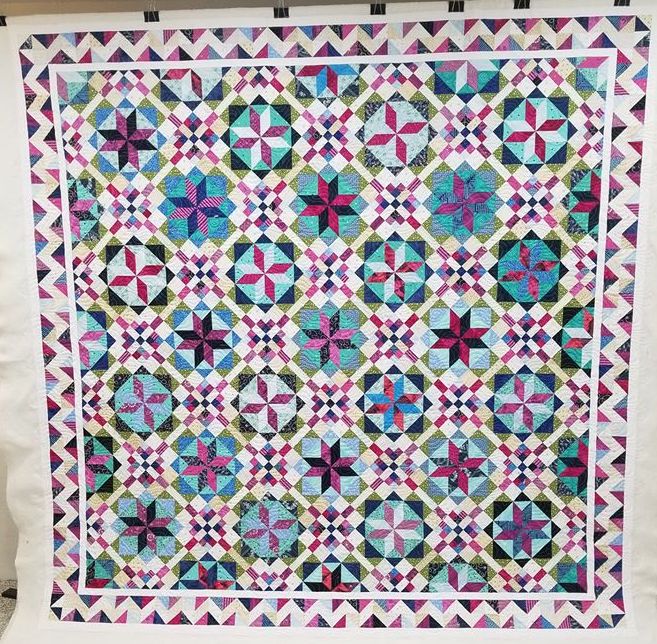
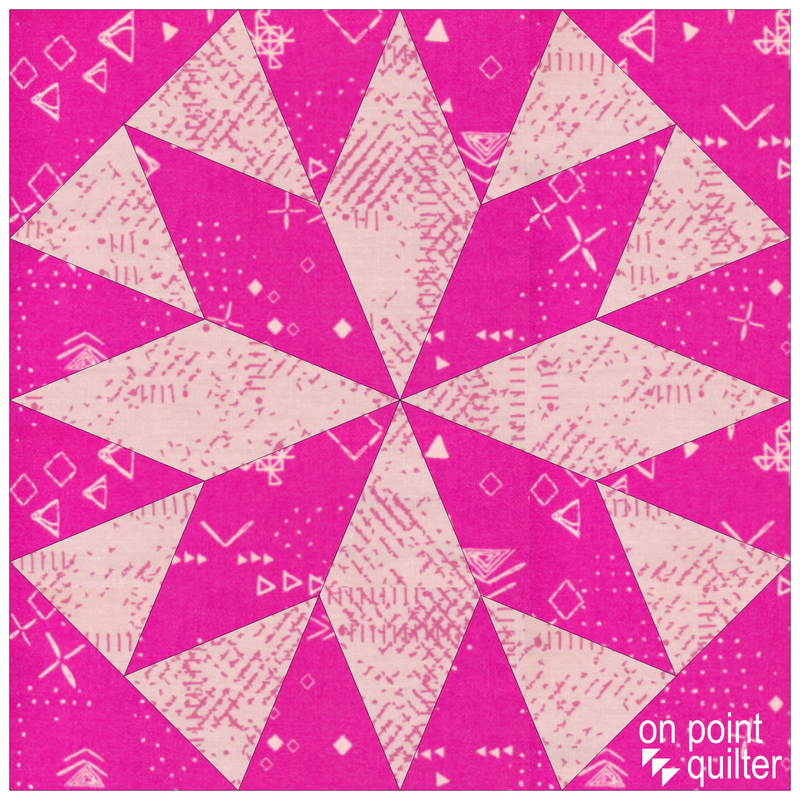
The video tutorial this week was inspired by the Studio 180 Design Rapid Fire Lemoyne Star tool along with the Starburst Technique Sheet. I loved how easy it is to piece this block using Deb Tucker's over-sized piecing/trim down techniques. No need for foundation patterns, templates or set-in seams. My kind of block! In this video I will cover drafting the block using PolyDraw, using Serendipity to frame the block for a fun complementary design and creating a quilt using an On Point setting.
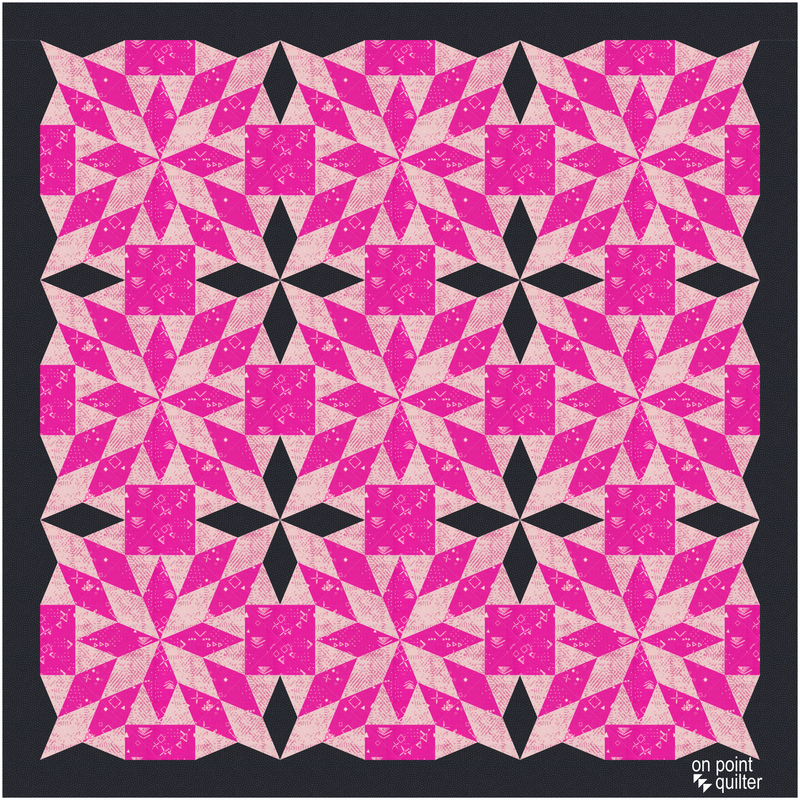
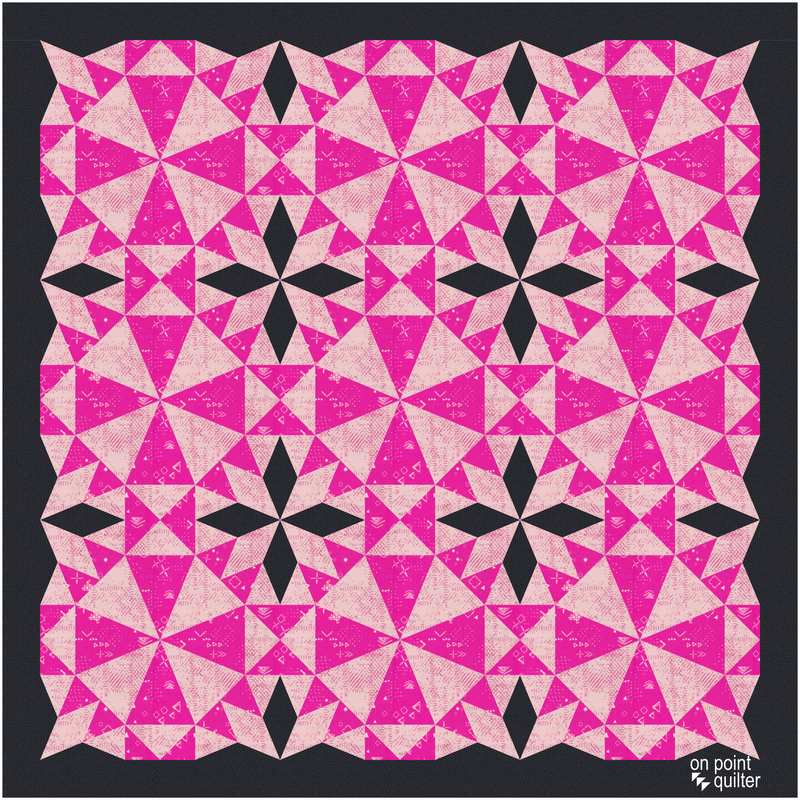
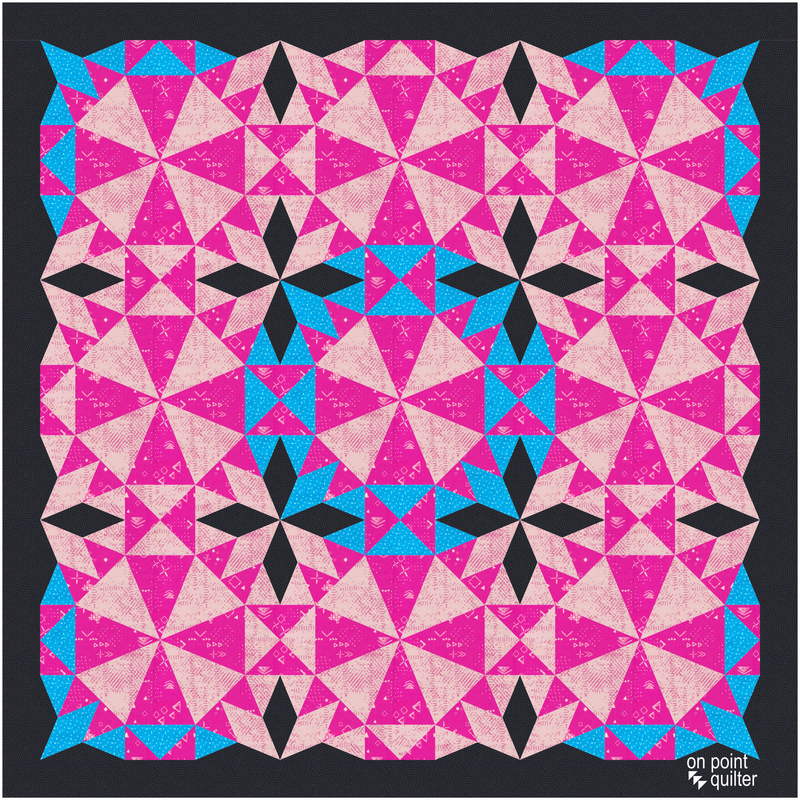
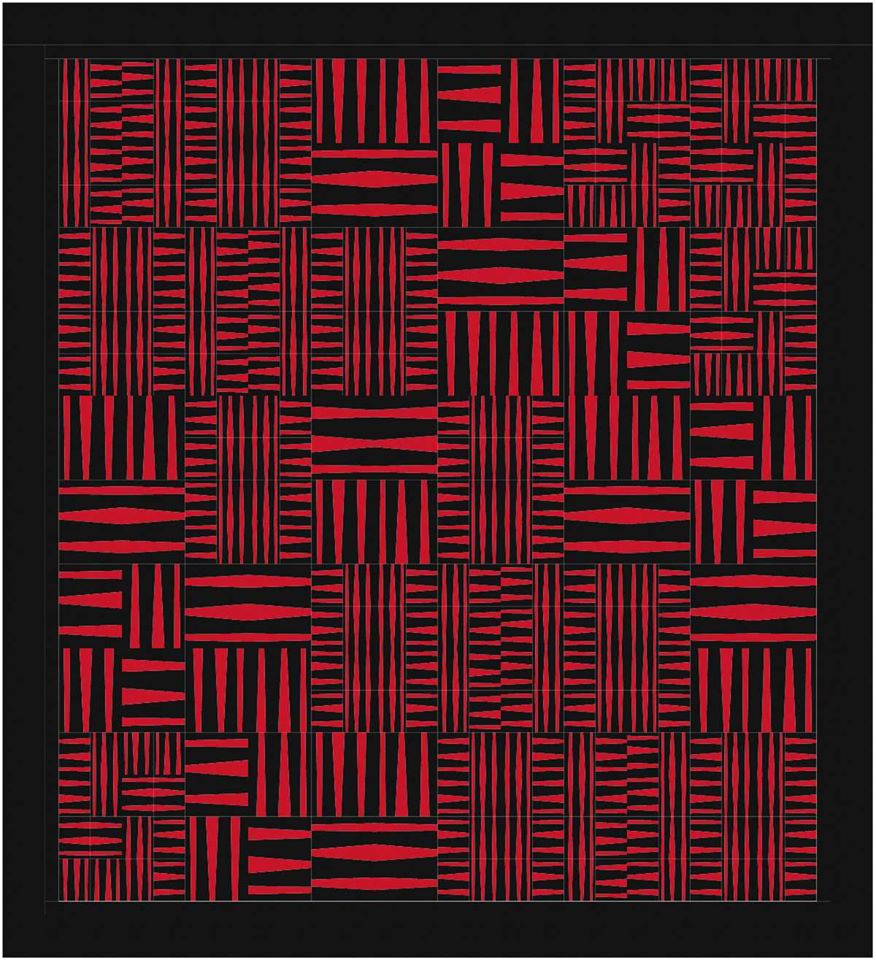
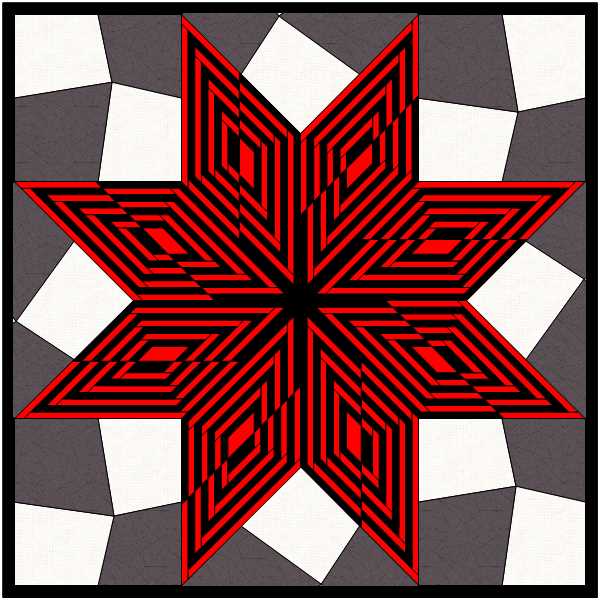
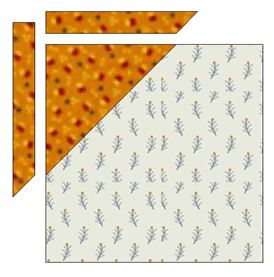
Here are the blocks and quilts from the video.
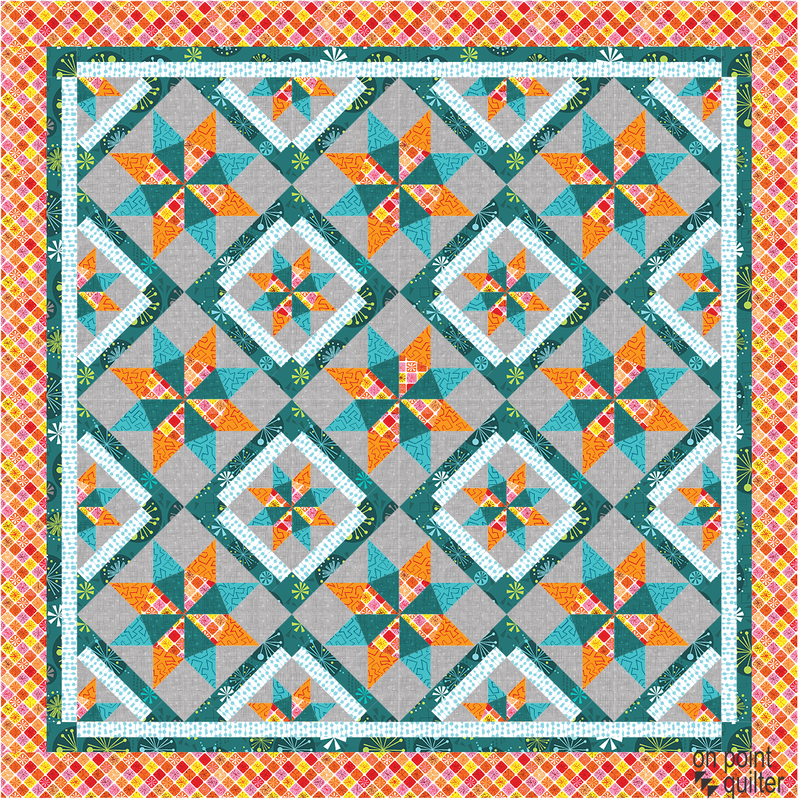
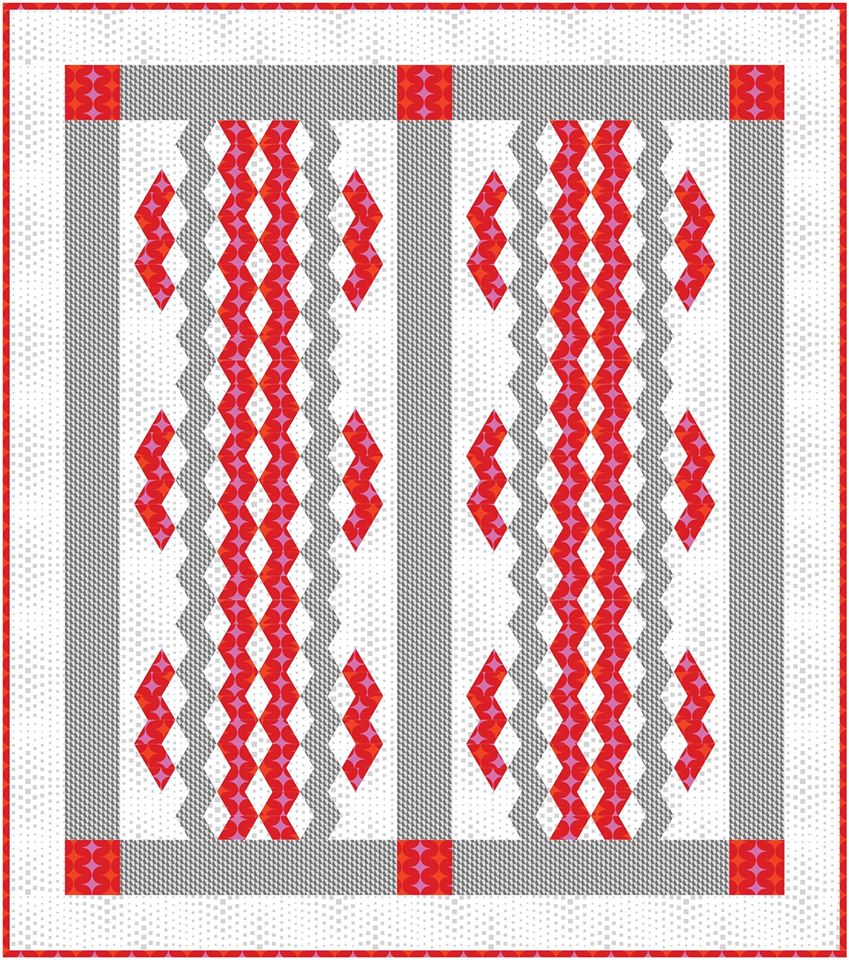
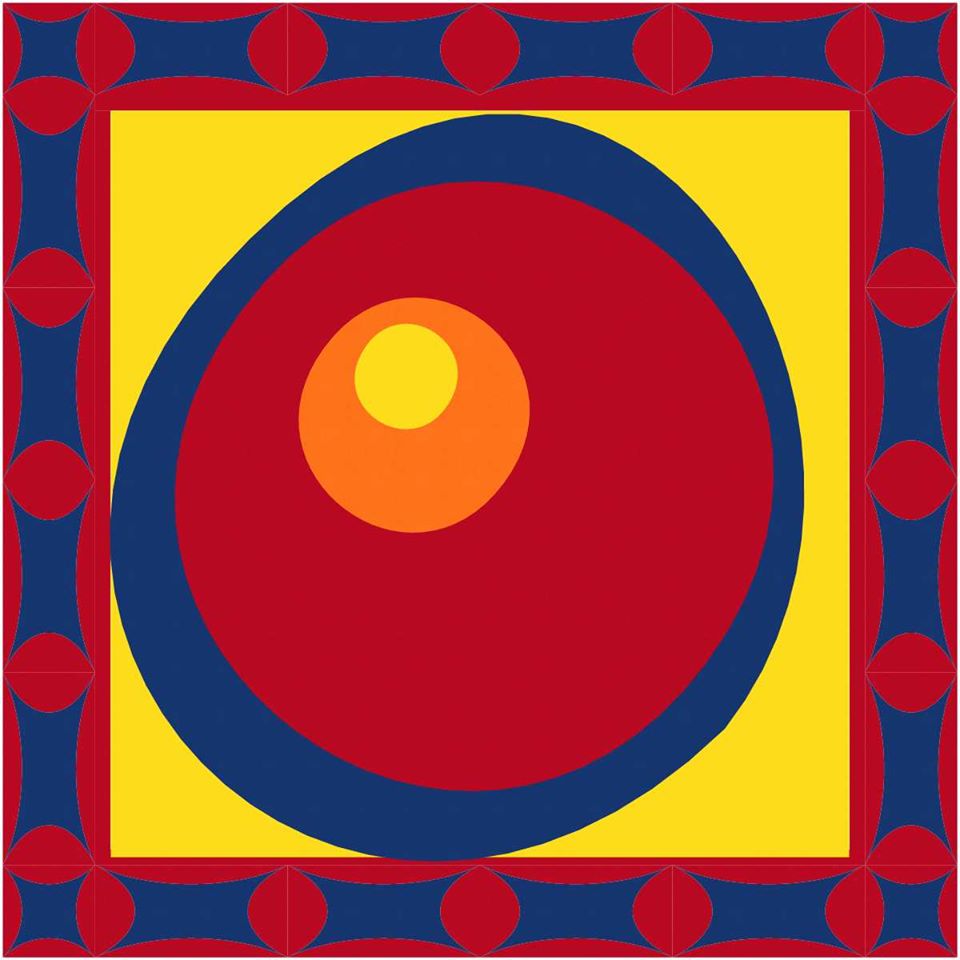
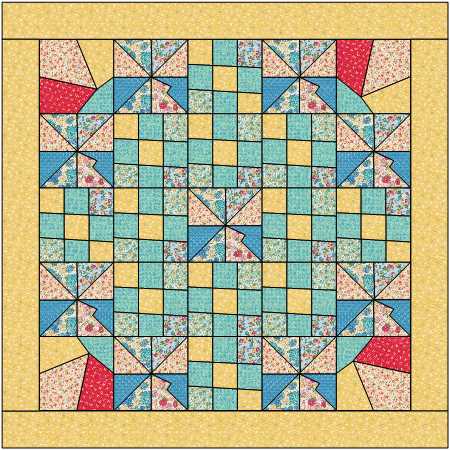
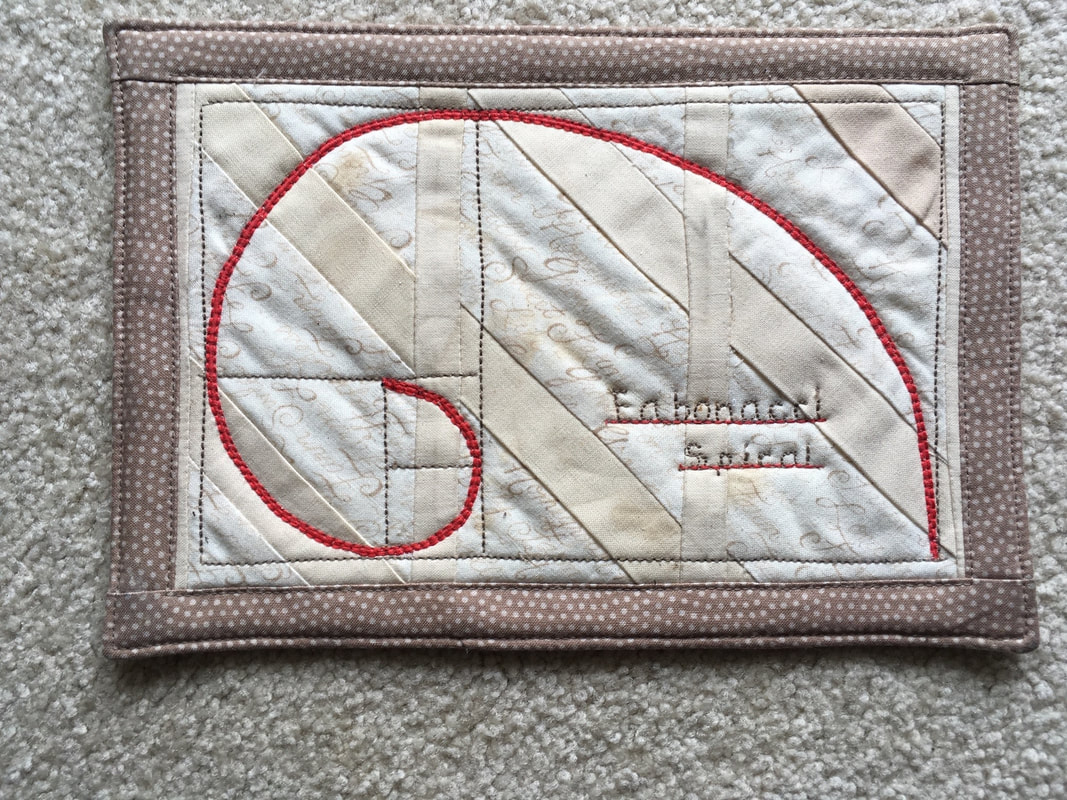
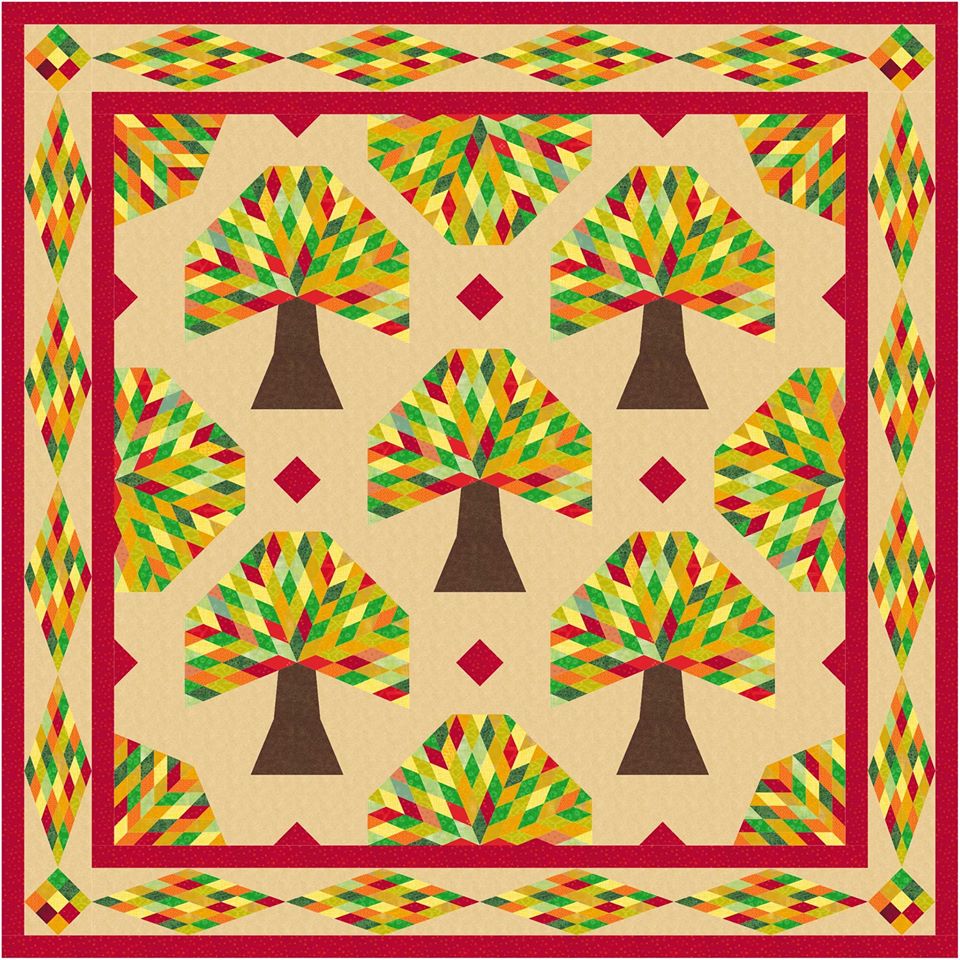
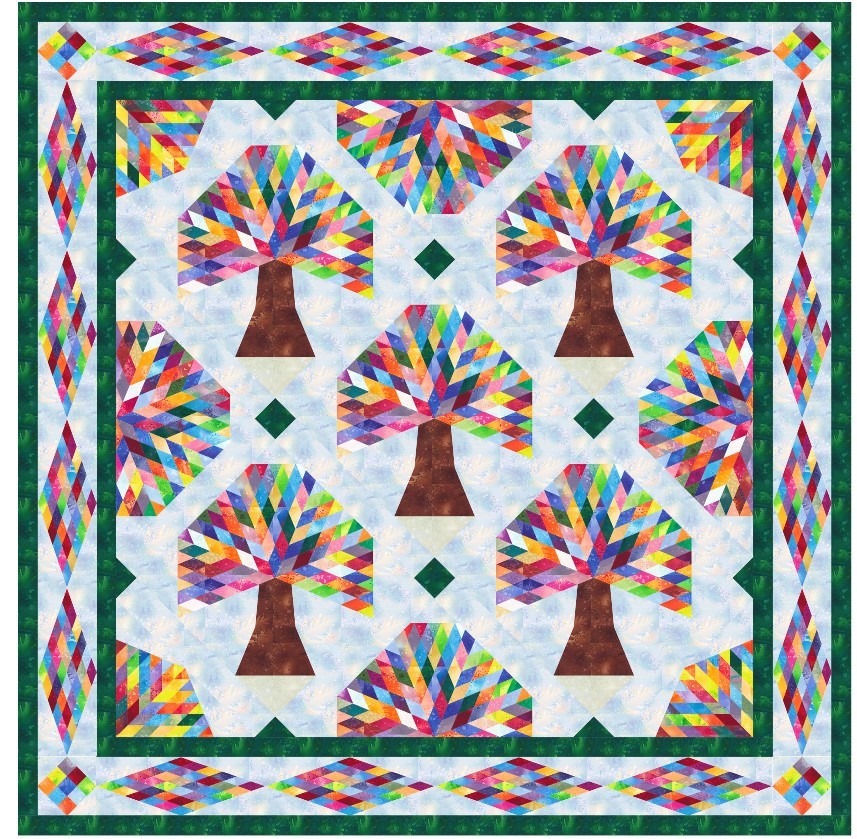
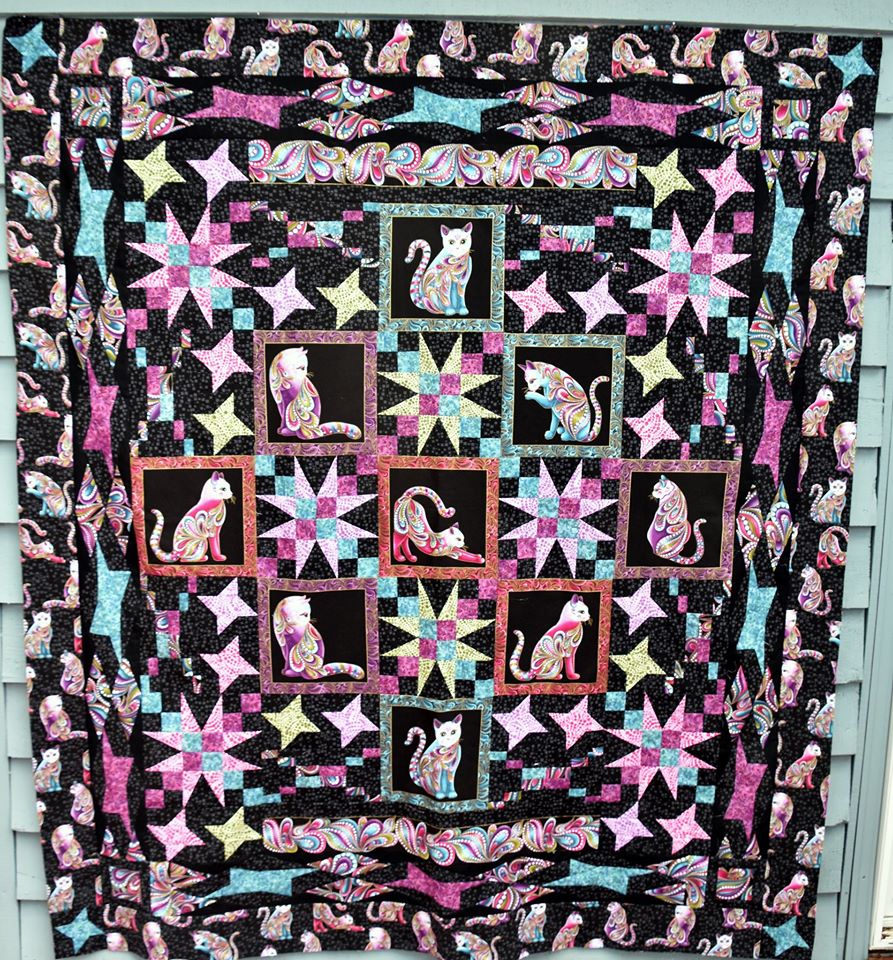
Starburst Quilt
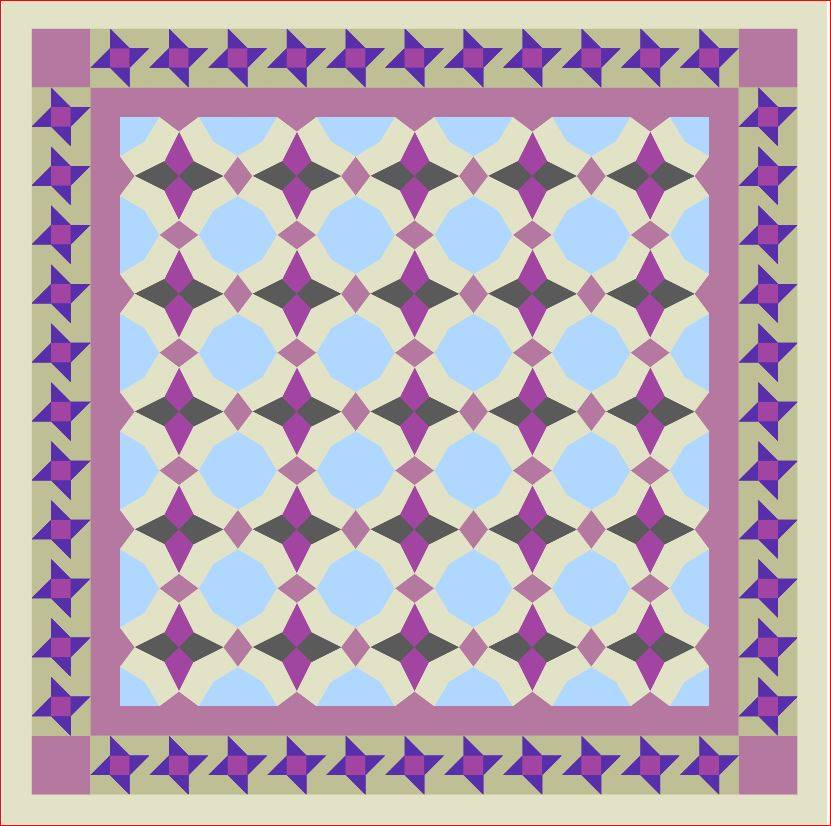
Tech Know Quilters Specialty Rulers and Dies Class
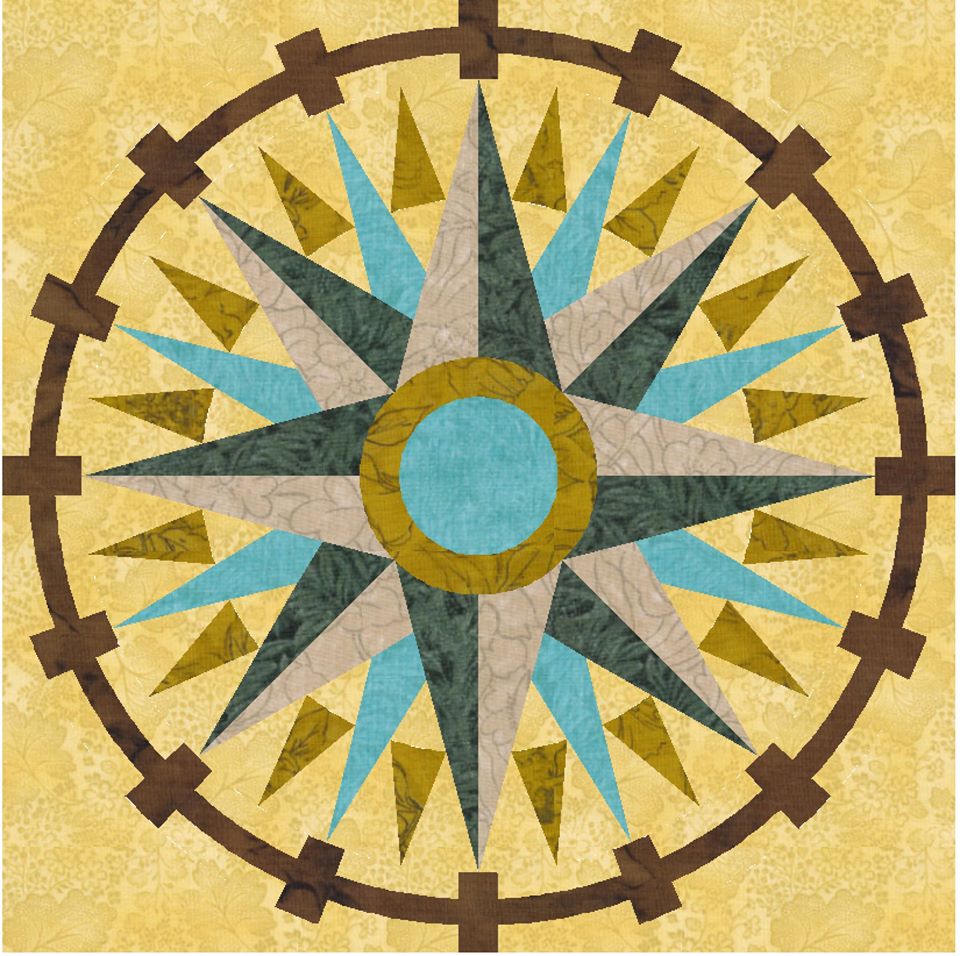
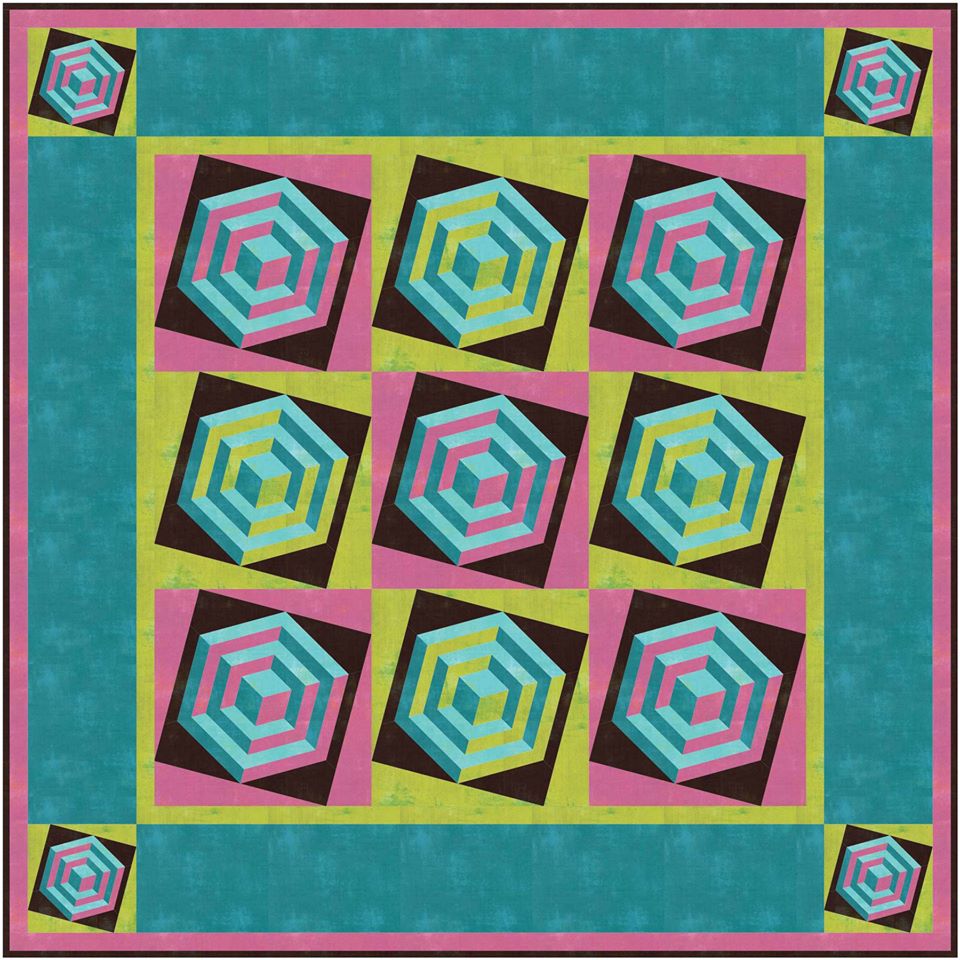
There are a lot of tools on the market that can make cutting and piecing our quilts so much easier. However when it comes to designing we need to develop our skill set to understand the best options for creating blocks and quilts that can utilize these tools. Even if you don’t use the tools discussed in this class, you will learn that the techniques transfer to most quilting rulers and dies. This class has a lot of fun bonuses built into the lessons that you are not going to want to miss. There are sessions on Studio 180 Design tools, Hex N More, Wedge Rulers and Accuquilt Dies along with working with Electronic Cutting Systems like Silhouette, Cricut and Brother Scan N Cut. Here are just some of the projects you will learn to create in the class. 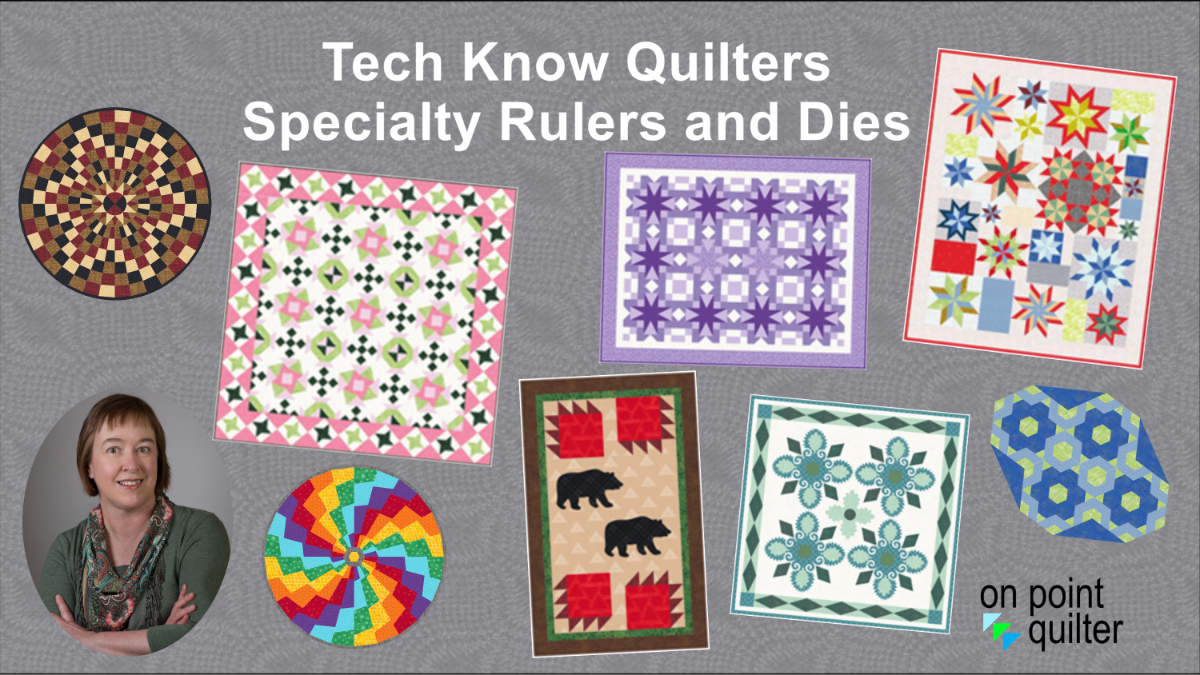
If you are a Tech Know Quilter member, you are welcome to select this as one of your monthly classes (or even add it on to your planned class). Just send us a note if you would like to do either of these options in September. Note that it is a more advanced class.
If you are currently not a member, you can learn more and sign up for the wait list here. Sale on Studio 180 Design Rulers
I have a few Deb Tucker rulers -- 15% off through August 2022 -- while quantities last. Make sure to use the code STUDIO180 when checking out to receive the discount.
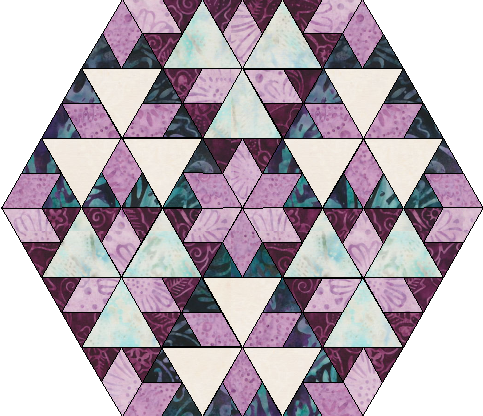
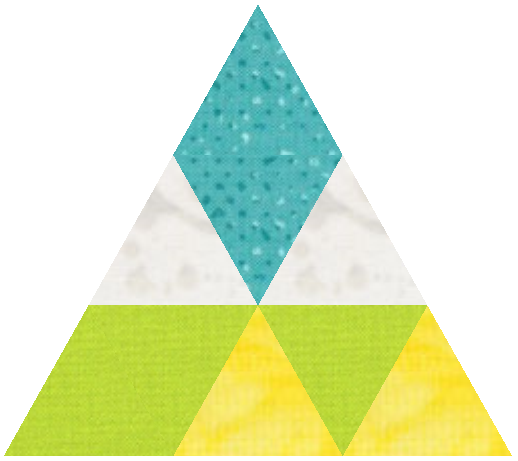
Let me take you through the process of making the quilt. Equilateral Triangle 1
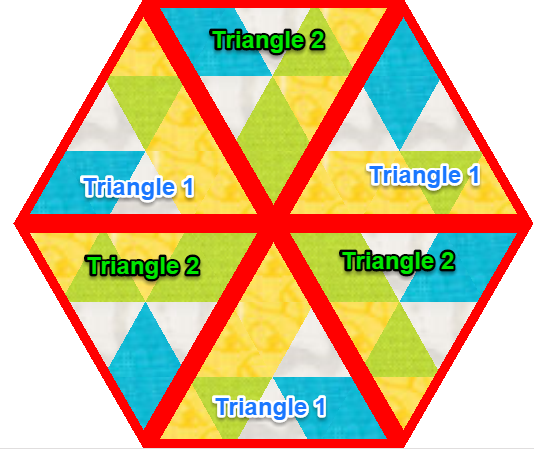
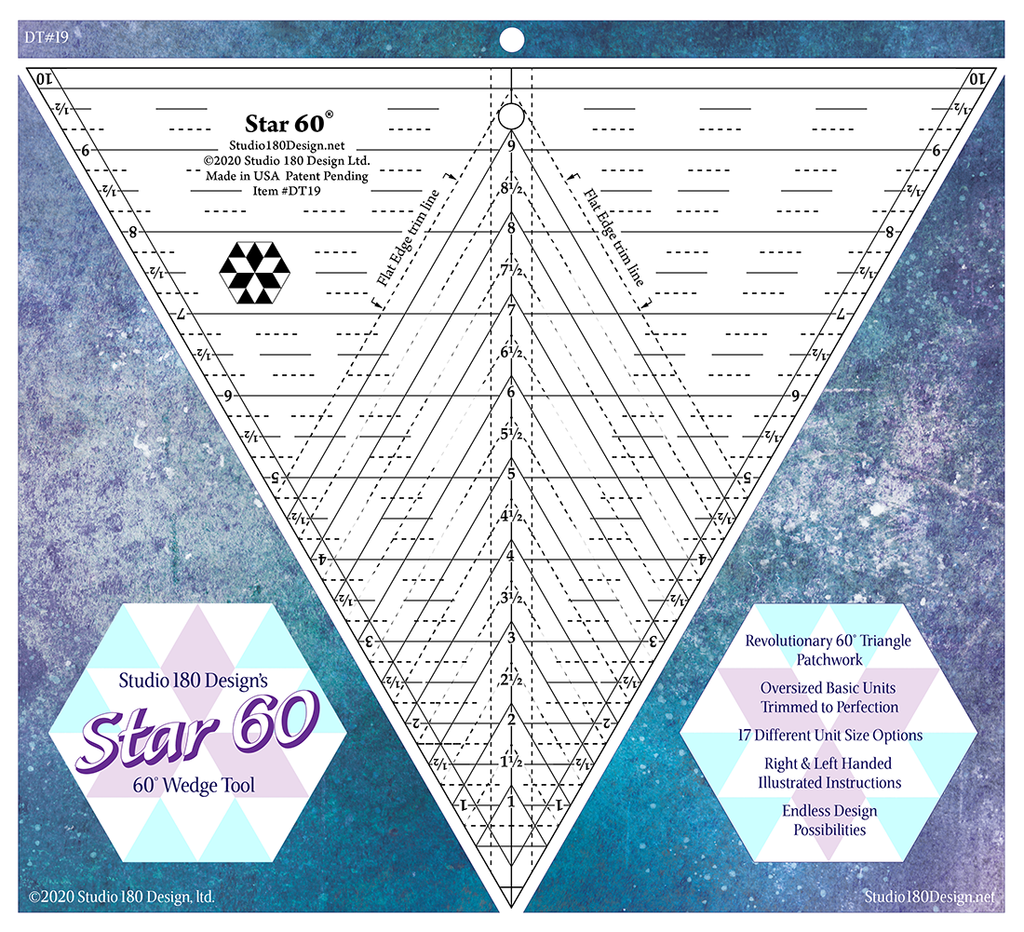
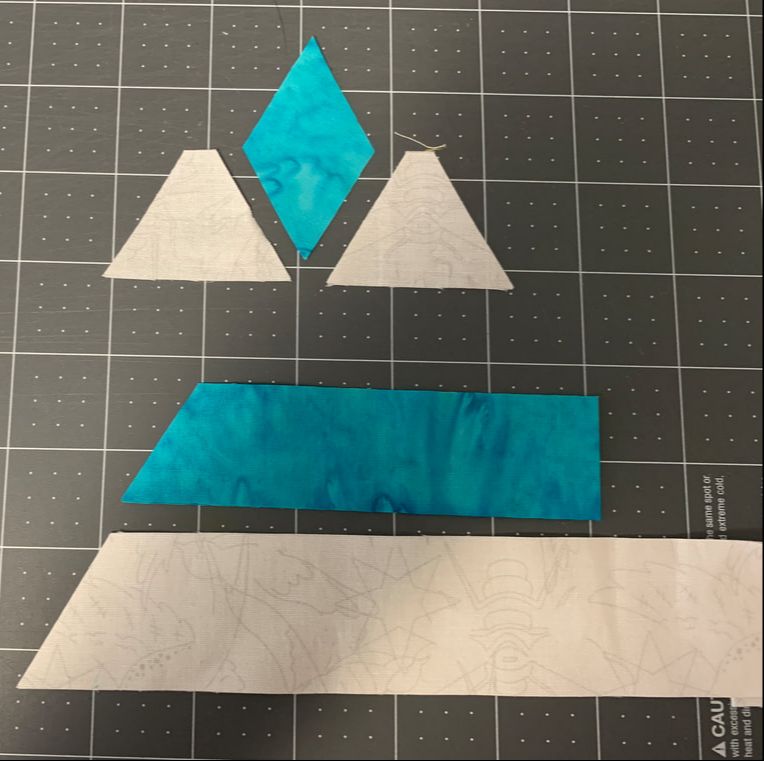 Cut blue diamond from 1-1/4" strips and side triangles from 1-1/2" strips. The cuts were done with the Star 60 Wedge tool from Studio 180 Design. 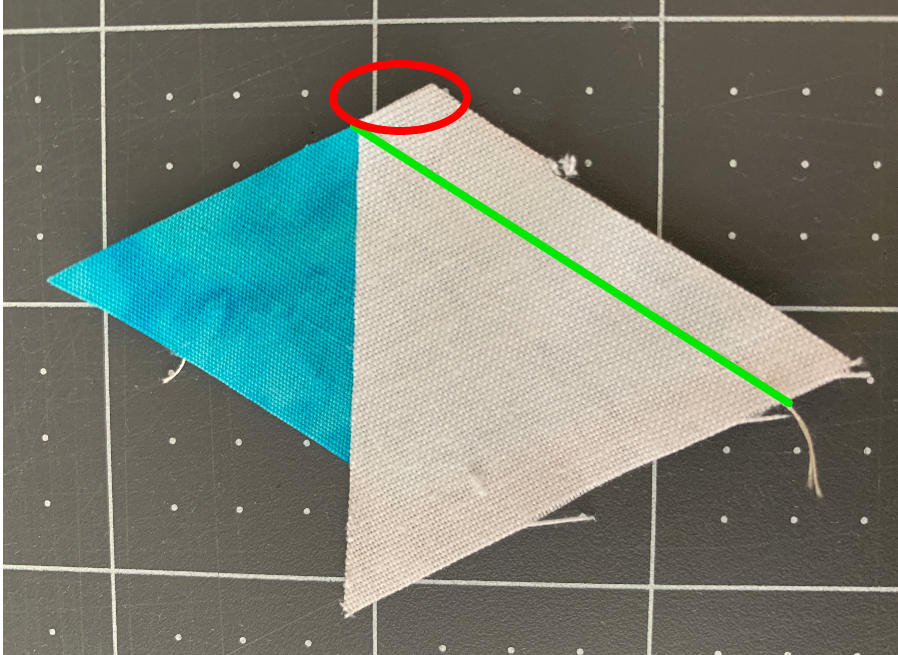 Match the flat corner of the triangle (shown with circle) with the edge of the diamond. Also align the raw edges. Sew 1/4 inch seam. 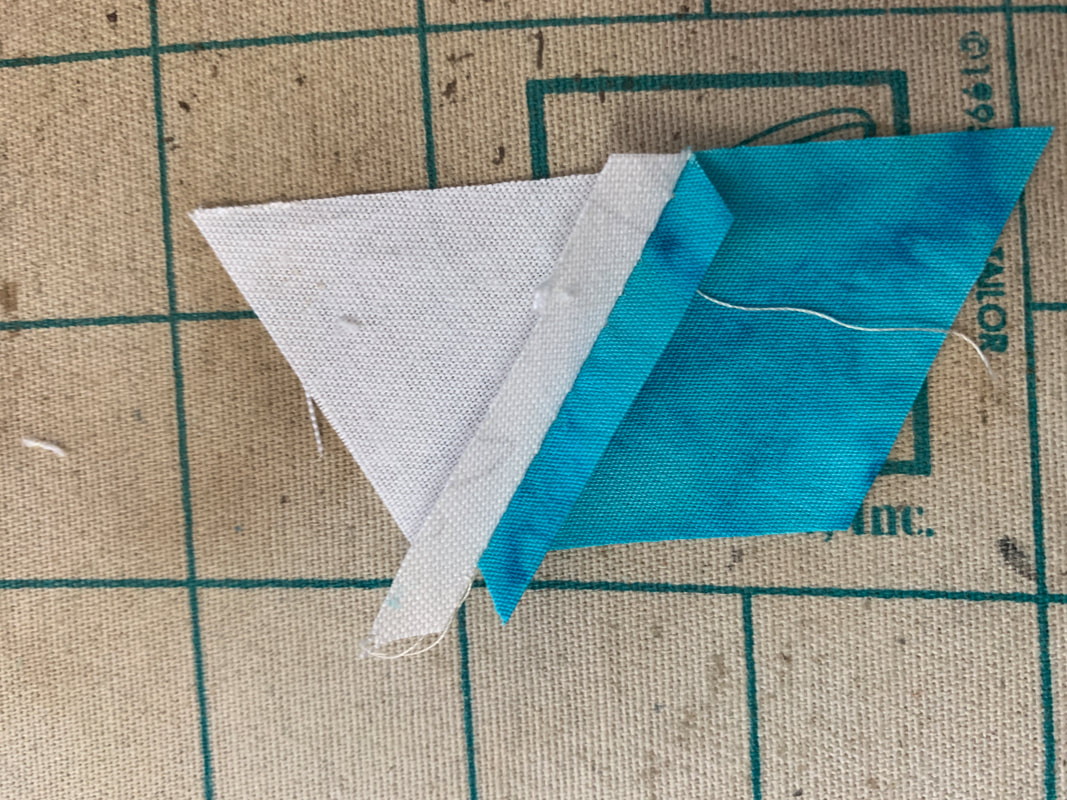 Press all seams open. This will make sure the units lay really flat. 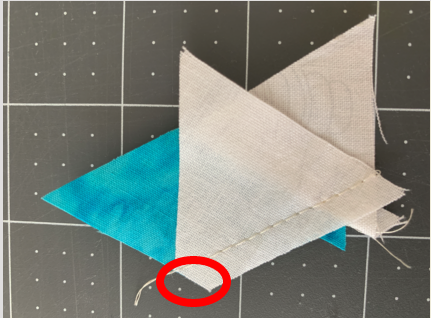 Position another white triangle on the other size of the diamond point. Align the flat corner of the triangle with the edge of the diamond. Sew 1/4 inch seam. 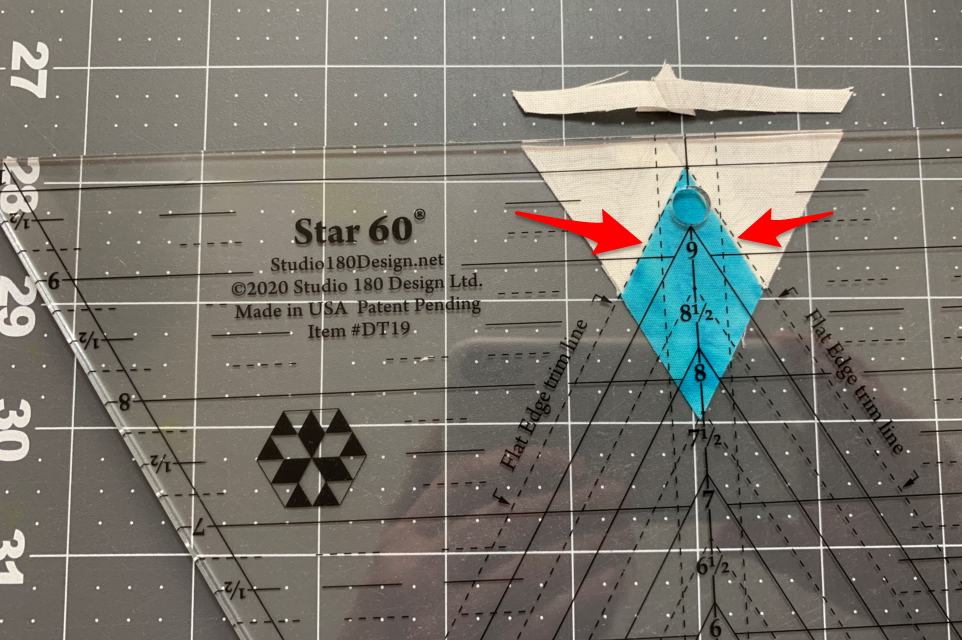 Use the Star 60 tool and align the Flat Edge trim lines with the diamonds. Trim off the top edge (leaving a perfect 1/4 inch seam allowance) . 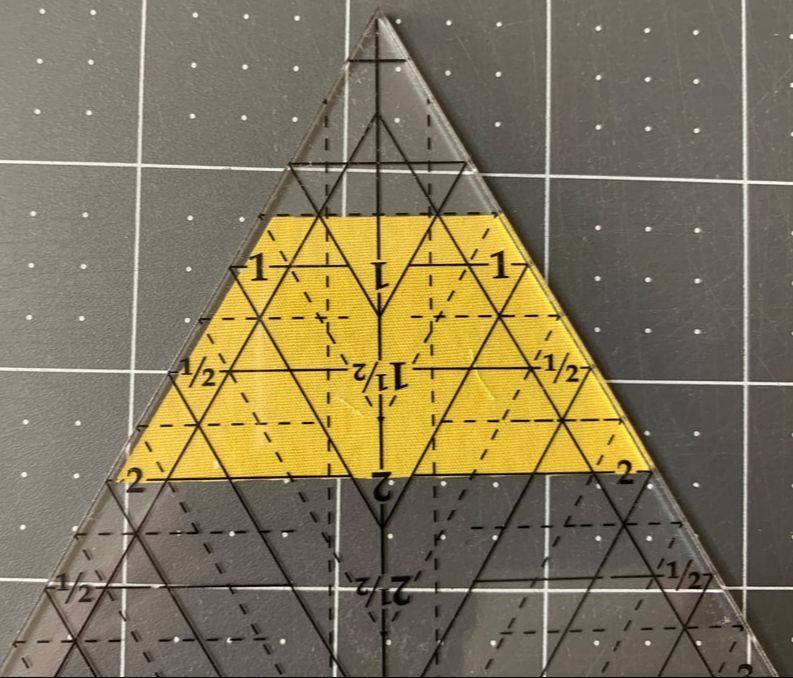 Cut 1-1/4" Yellow strips and Green strips. Align the 2" horizontal line on the Star 60 tool with the bottom of the yellow 1-1/4" strip. Trim the left and right slanted lines. 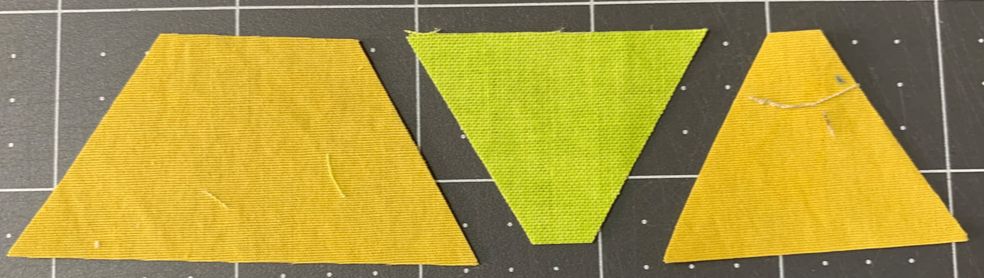 Cut yellow and green triangles from the 1-1/4" strips as well. 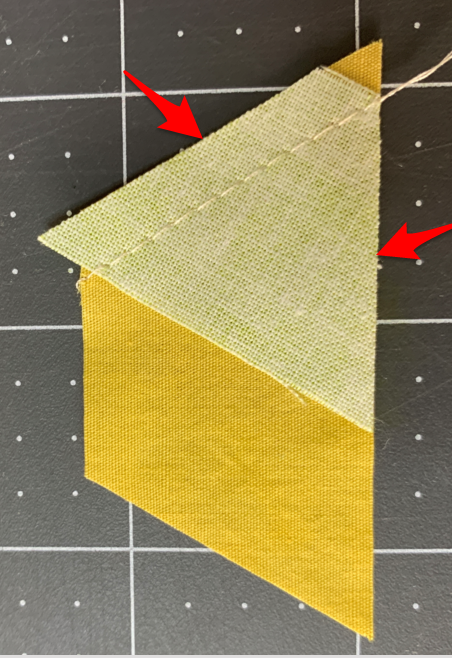 Match the two raw edges of the Green triangle with the right and bottom raw edges of the of the trapezoid. Sew 1/4" seam. 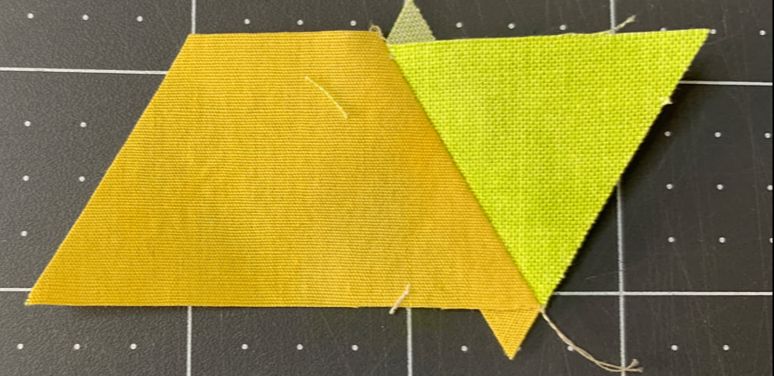 The sewn unit after pressing open. 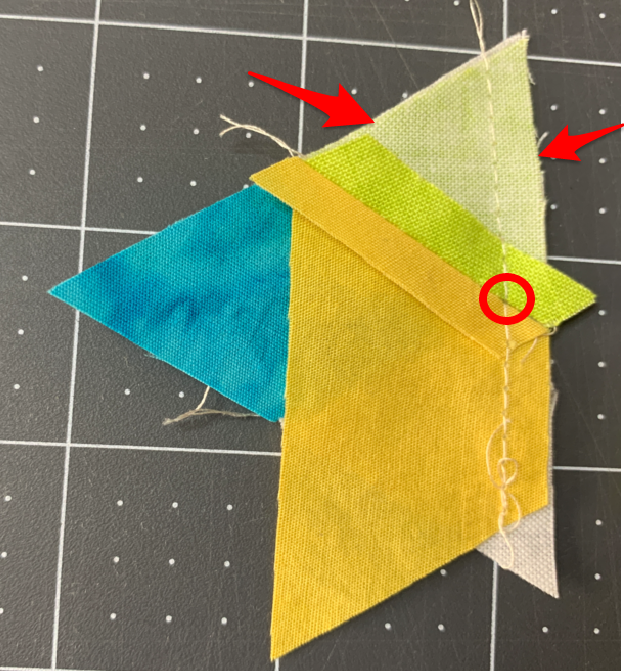 Match the raw edges (noted with arrows) of the new unit with the Star 60 Unit. Also, make sure the seam intersections (noted with red circle) are aligned 1/4 inch from raw edge. Consider using a pin to keep it aligned. Sew 1/4 inch seam. 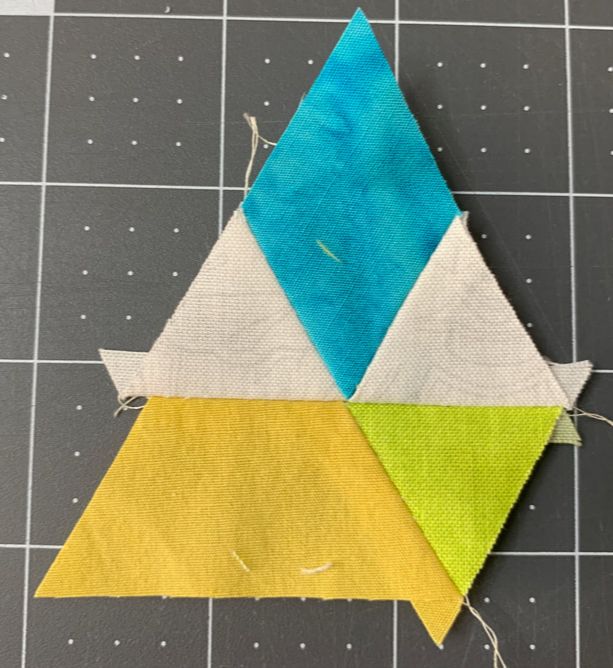 Sewn unit. Ideally all the points will meet perfectly in the center. 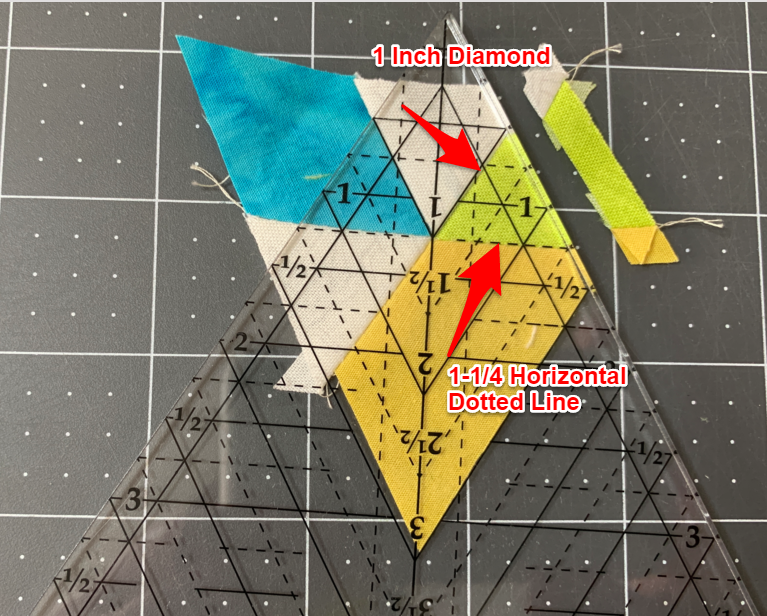 Align the sewn edges of the green triangle with the Star 60 wedge tool. One edge should align with the 1" diamond and the other with the 1-1/4" horizontal dotted line. Trim the right edge. 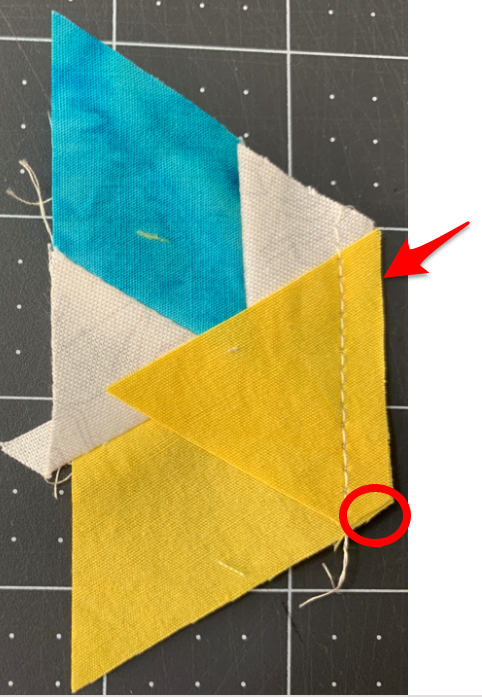 Match the flat edge of the yellow triangle with the bottom of the previous unit. The raw edges should also be aligned. Sew 1/4 inch seam. 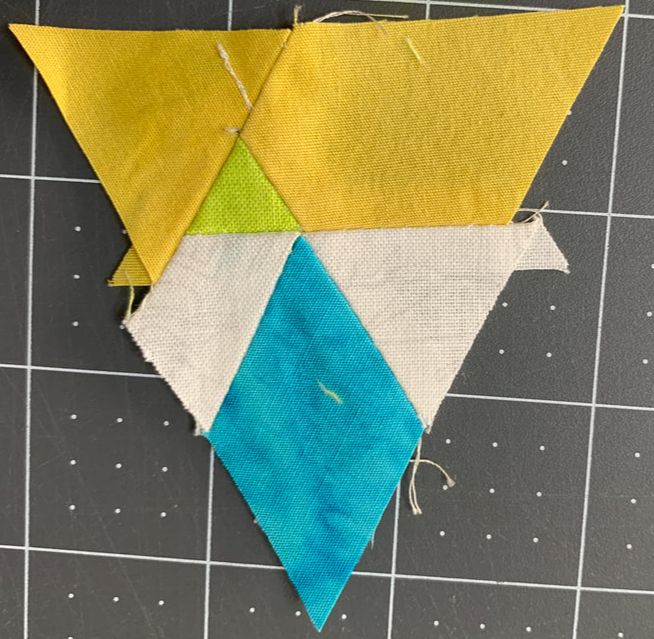 Ready for trim down. 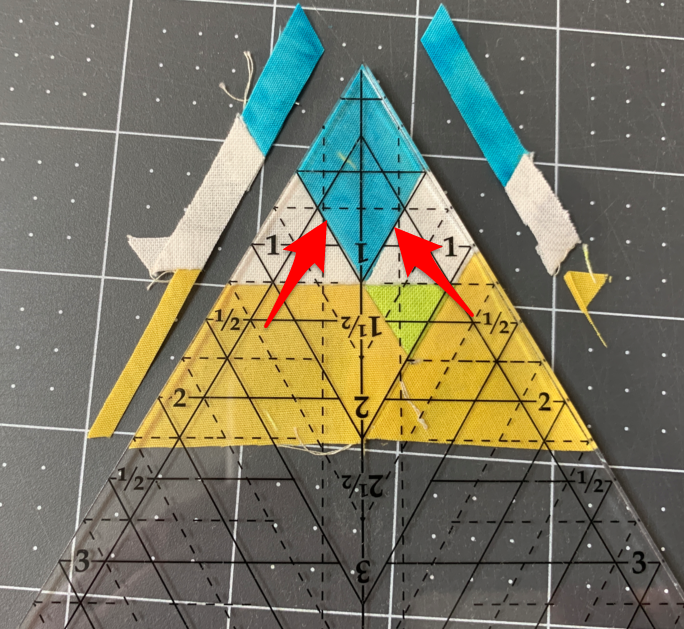 Match the 1 inch diamond guidelines from the Star 60 tool with the blue diamond sew lines. Trim the right and left edges. 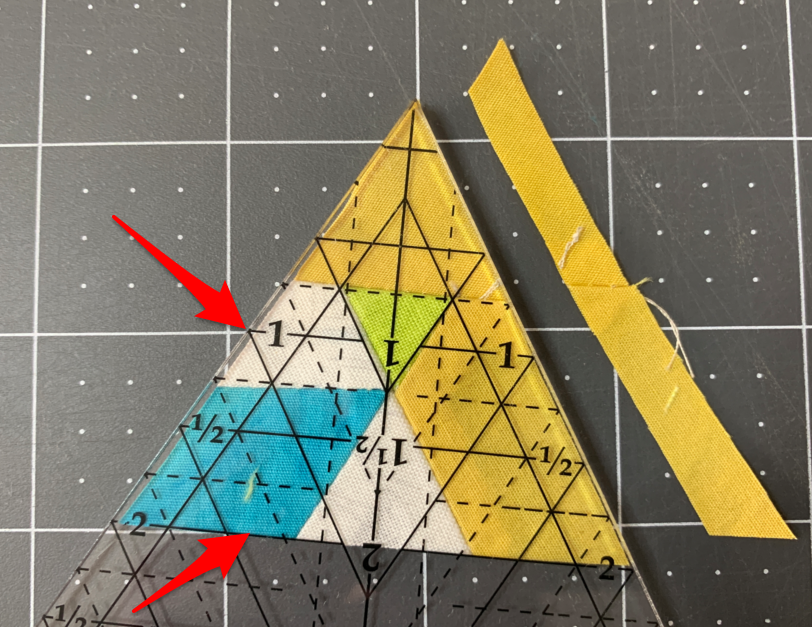 Rotate the unit so the most recently cut edges align with the left edge and 2 inch horizontal line on the Star 60 tool. Trim the right edge. 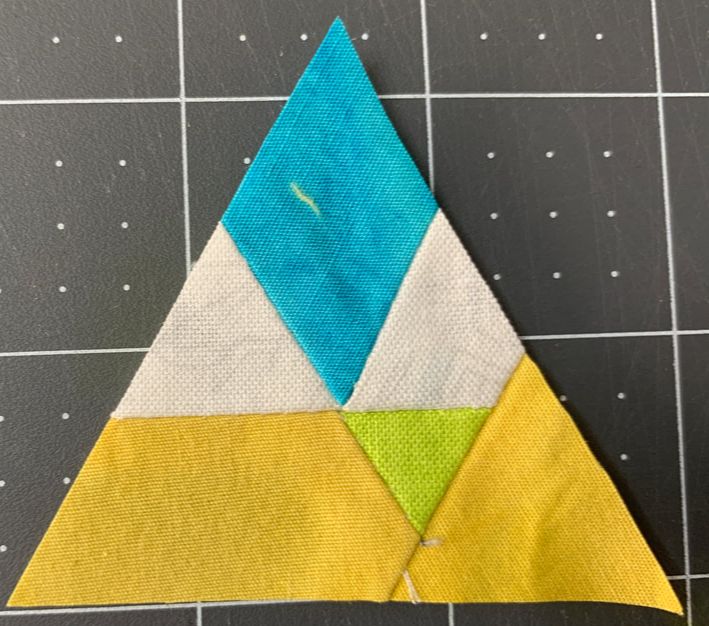 Finished Equilateral Triangle. Make 3 for each hexagon (9 total for 3 hexagon blocks). Equilateral Triangle 2
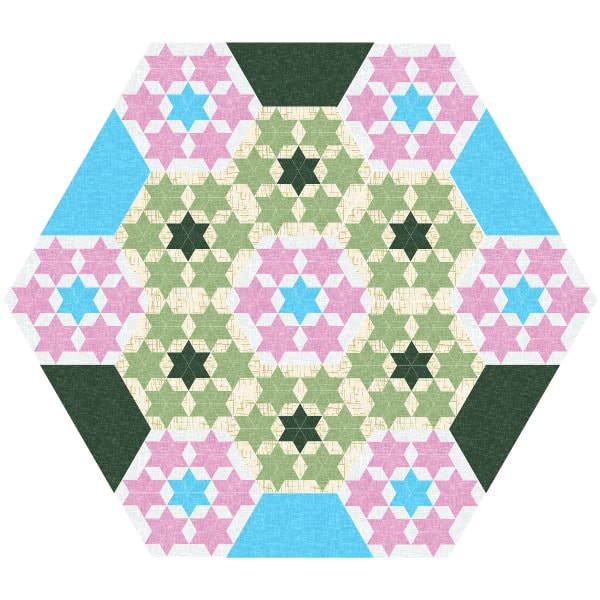
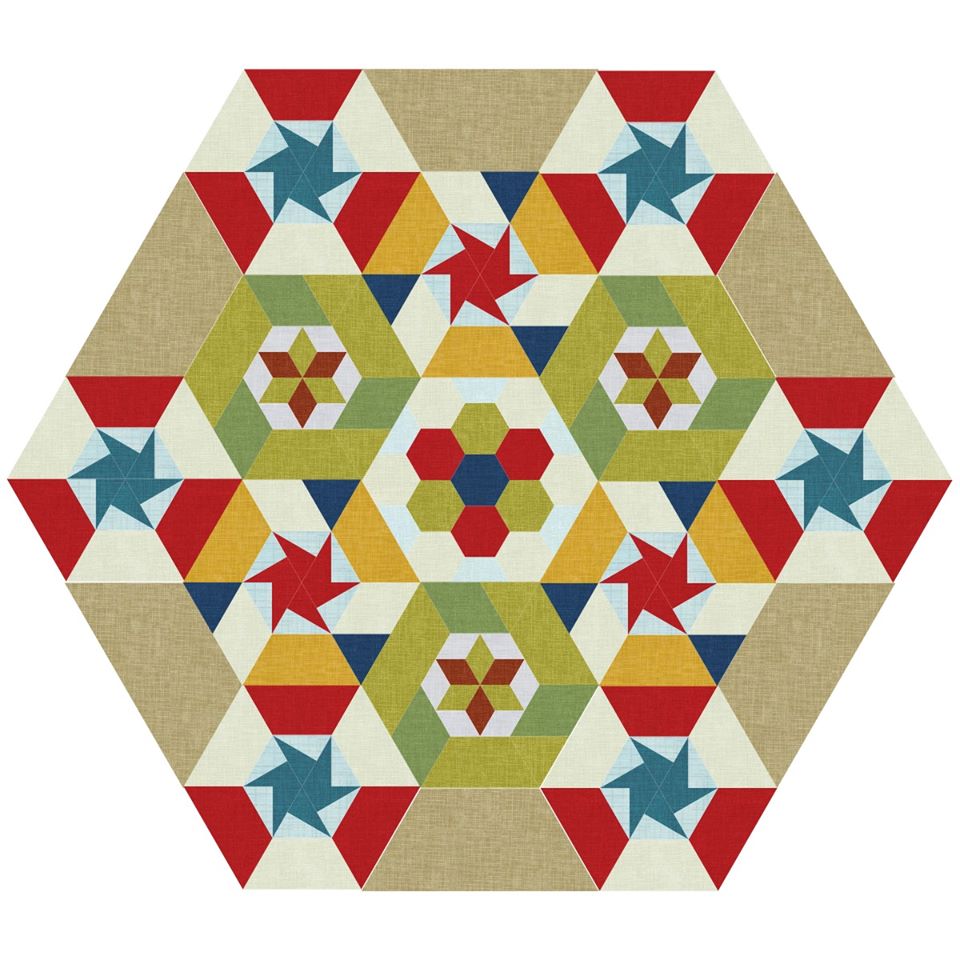
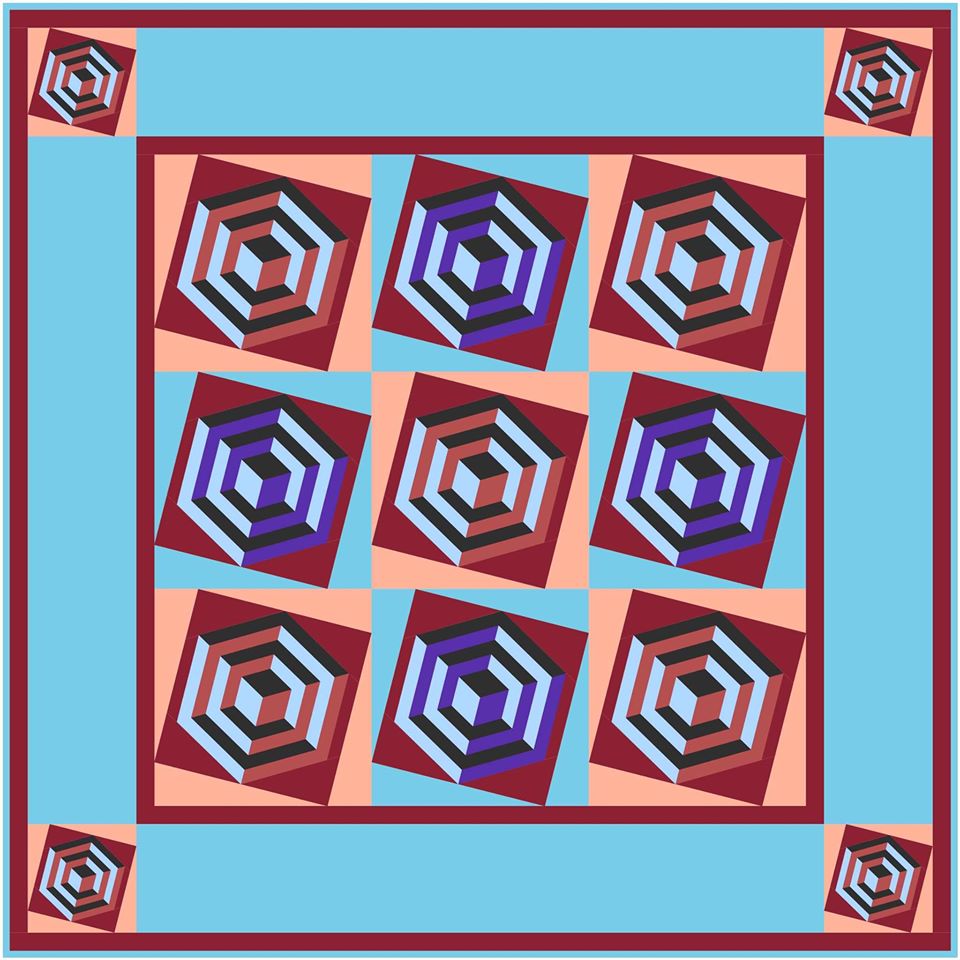
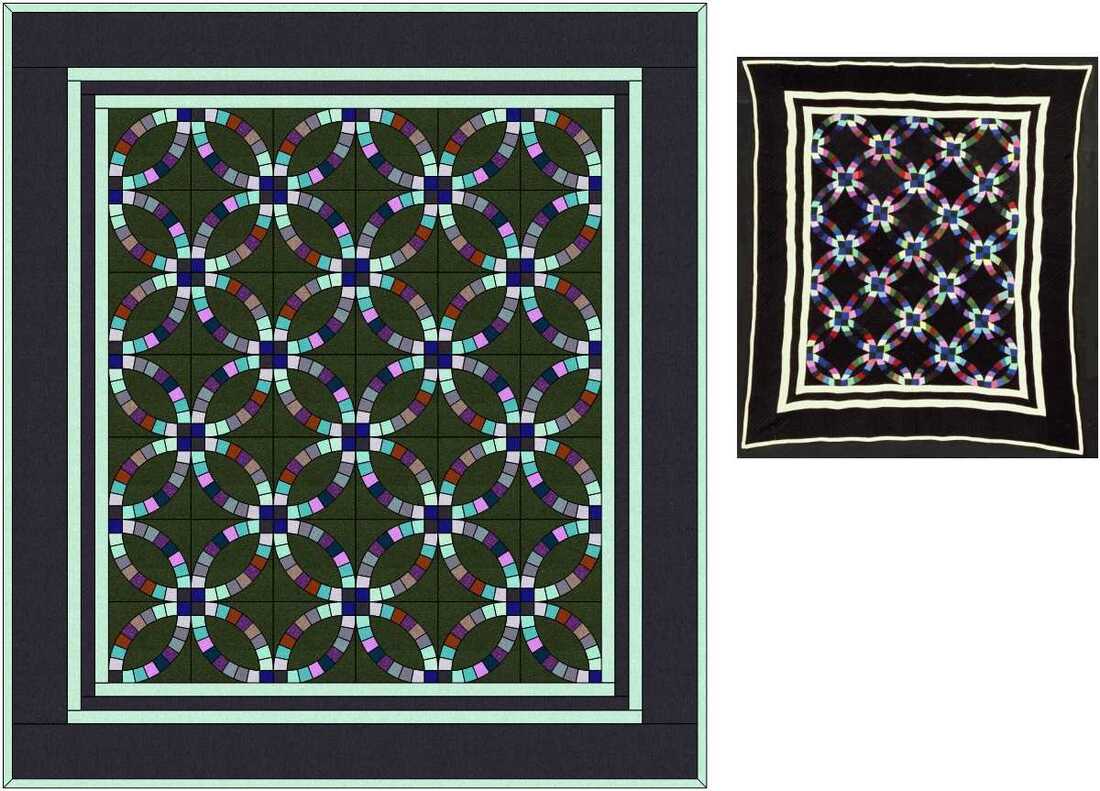
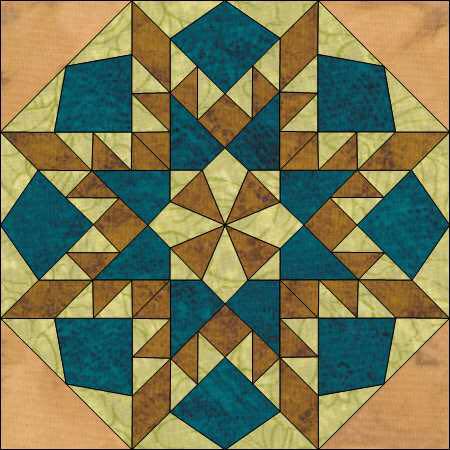
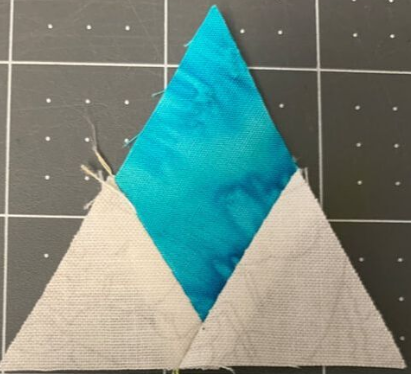 Construct the teal and white Star 60 units as described in Equilateral Triangle 1.  Cut Green diamonds and triangles from 1-1/4" green strip. Cut yellow triangles from 1-1/4" yellow strip. Cuts should be done with the Star 60 tool. 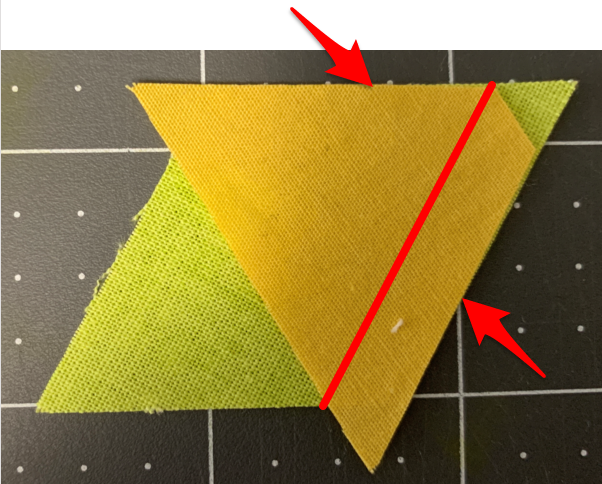 Align raw edges of yellow triangles with green diamond (red arrows). Sew 1/4" seam on right side (red line). 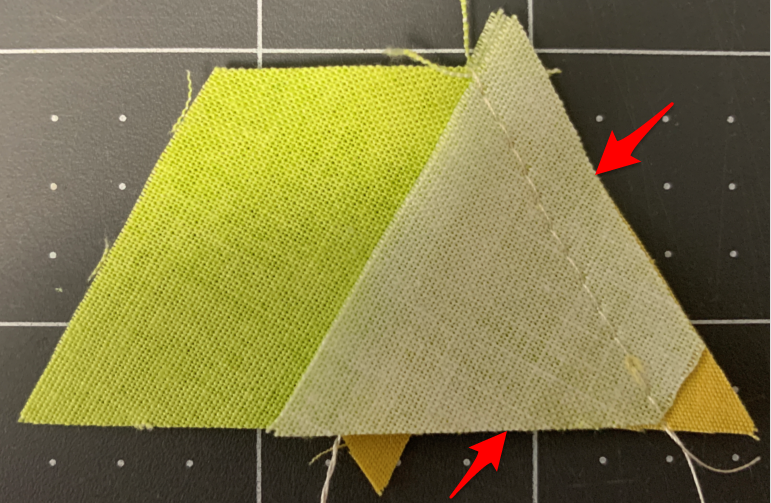 Align raw edges of green triangle with previous unit (red arrows). Sew 1/4" seam on right side.  Position below the Star 60 Unit. 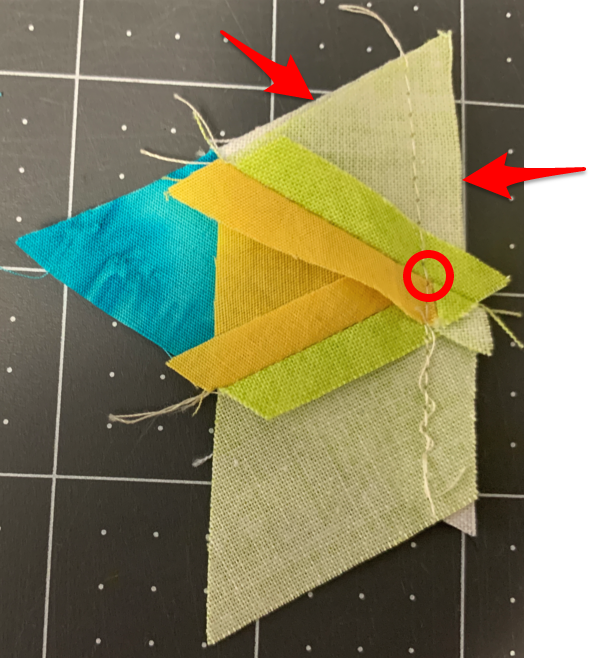 Align raw edges of parallelogram with equilateral triangles (noted by red arrows). make sure the seam triangle intersections line up (the red circle). Sew 1/4" seam. 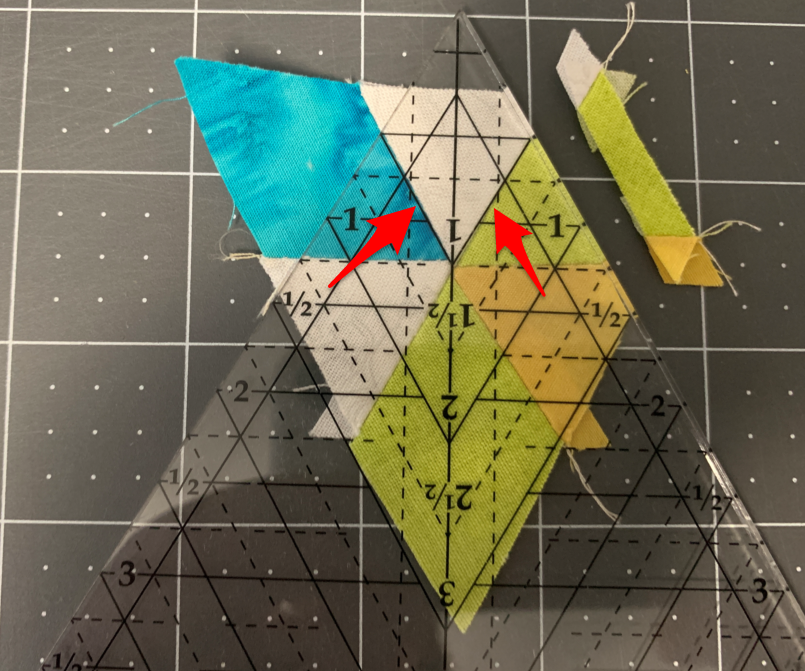 Line up sewn seams on white triangle with the 1" diamond guidelines on the Star 60 tool. Trim right edge. 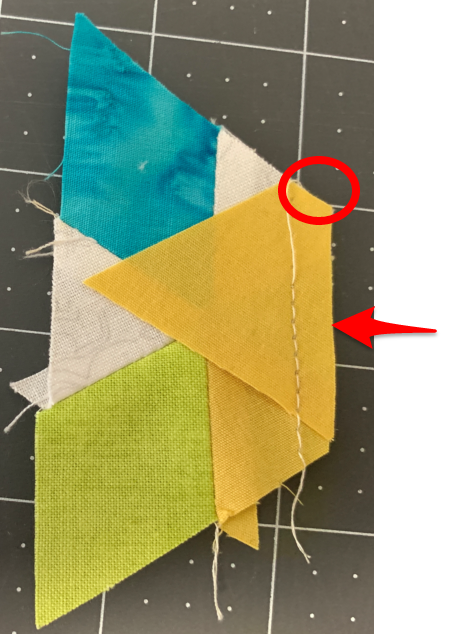 Match the flat edge of the yellow triangle with the previous unit. The raw edge should also be aligned. Sew 1/4" seam. 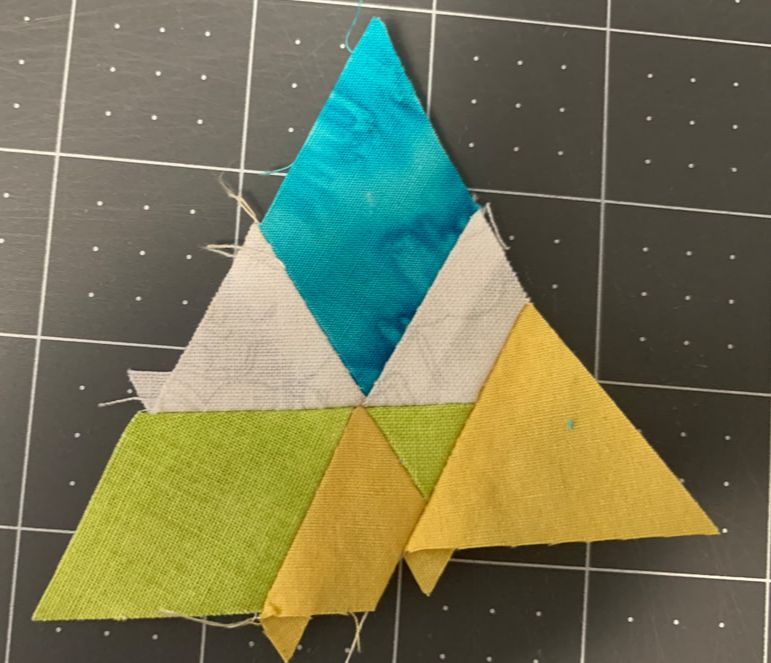 Ready for trim down. 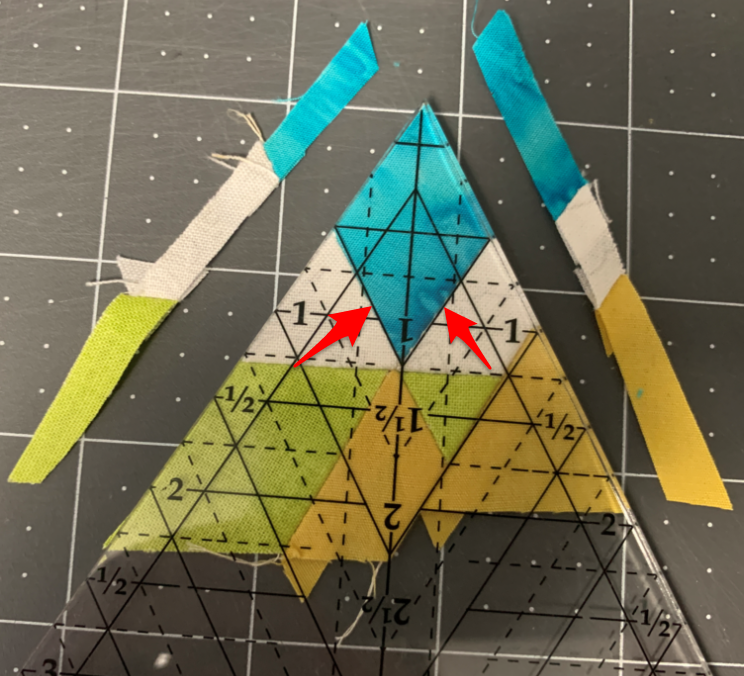 Match the 1 inch diamond guidelines from the Star 60 tool with the blue diamond sew lines. Trim the right and left edges. 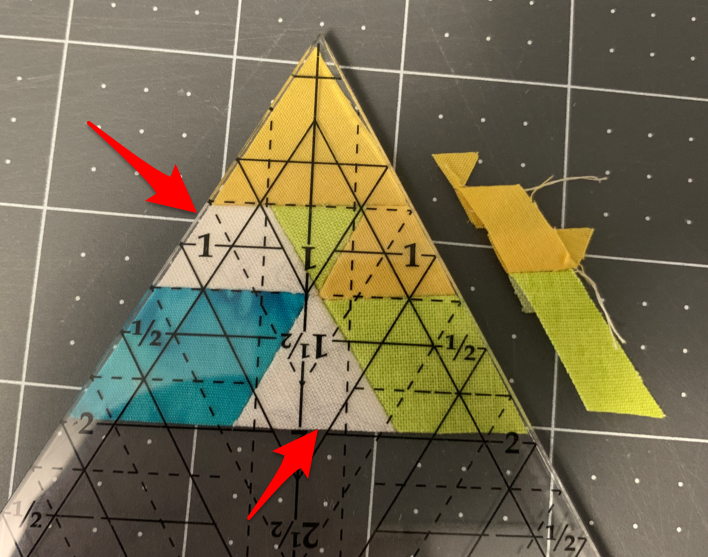 Rotate the unit so the most recently cut edges align with the left edge and 2 inch horizontal line on the Star 60 tool. Trim the right edge. 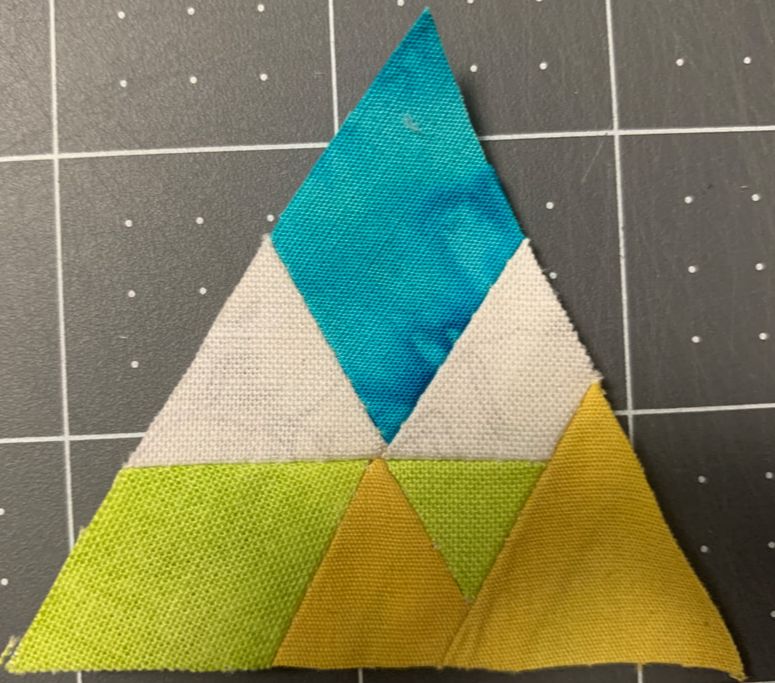 Finished Equilateral Triangle 2. Make 3 for each hexagon (9 total for 3 hexagon blocks). 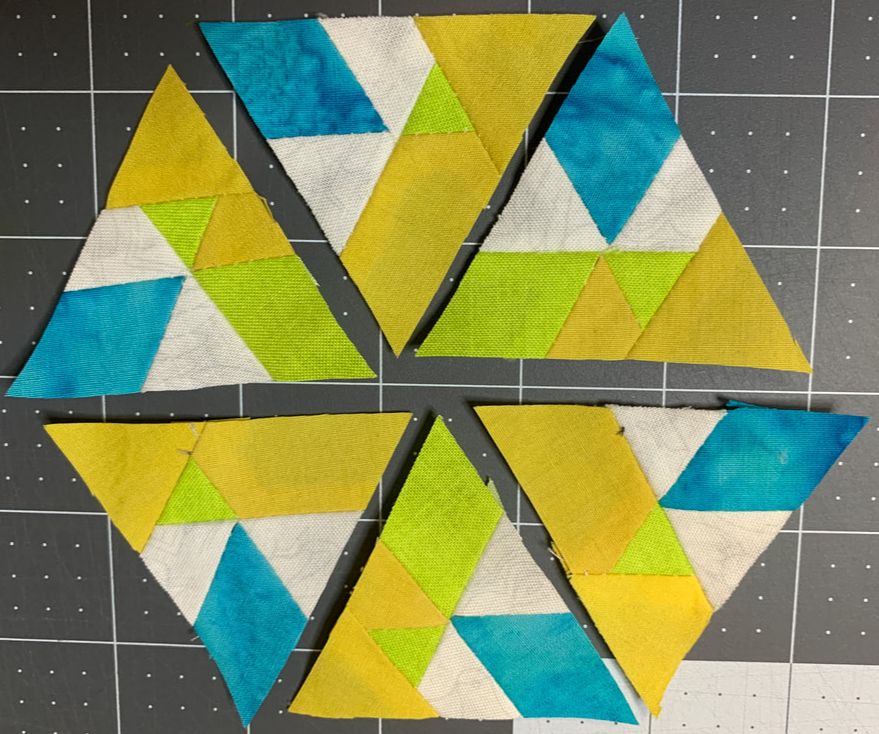 Lay out each hexagon block using 3 of equilateral triangle 1 and 3 of equilateral triangle 2. Make sure the rotation of each unit matches the EQ design. Block Construction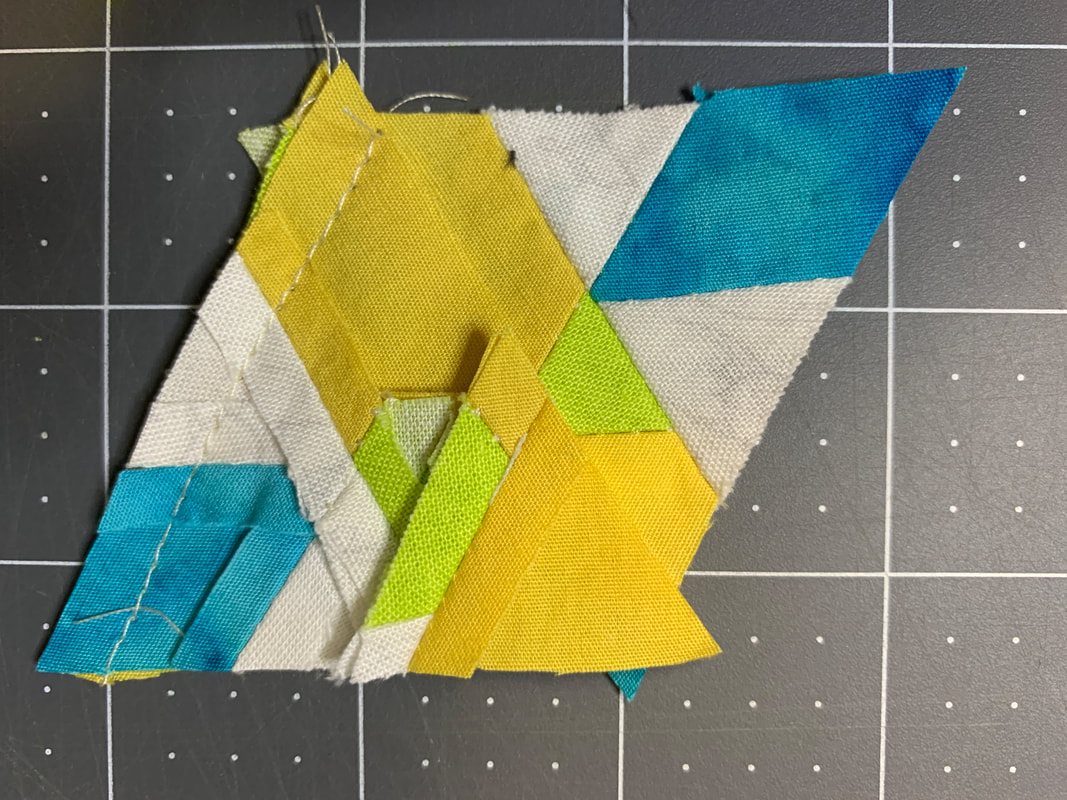 Join 3 equilateral triangles in a row. Create two rows for each hexagon. 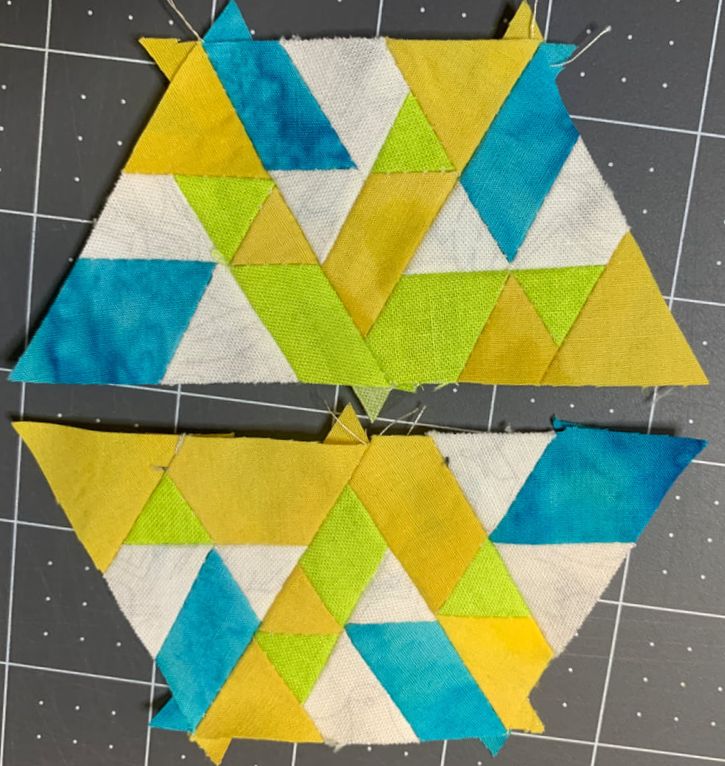 Combine top and bottom rows. 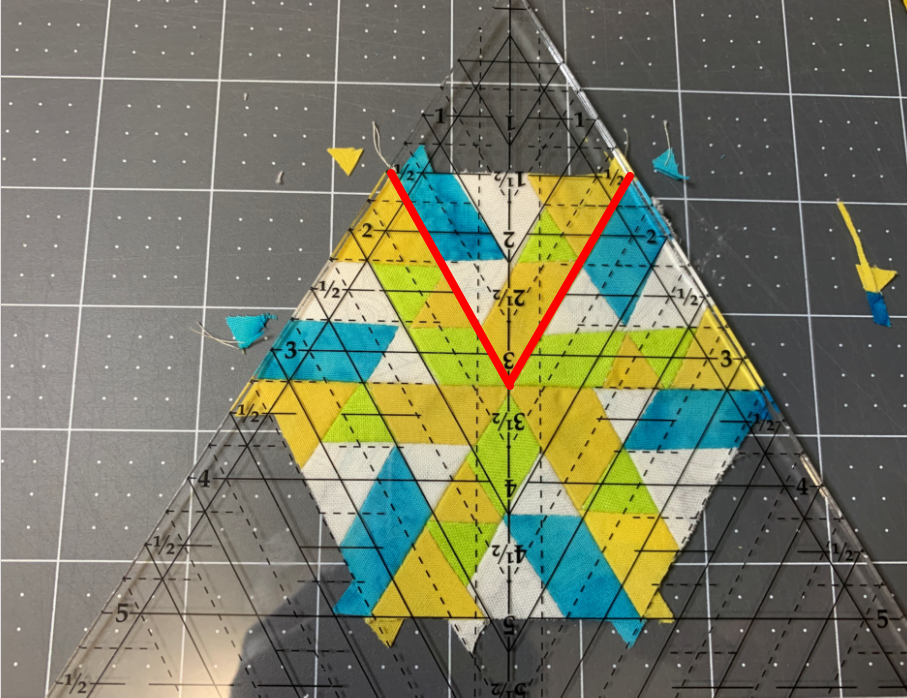 Line up the 3" equilateral triangle lines on the Star 60 wedge tool and trim any extra. There may only be the extra nubs on the bottom to trim. Rotate unit and do the trim down for every triangle section. 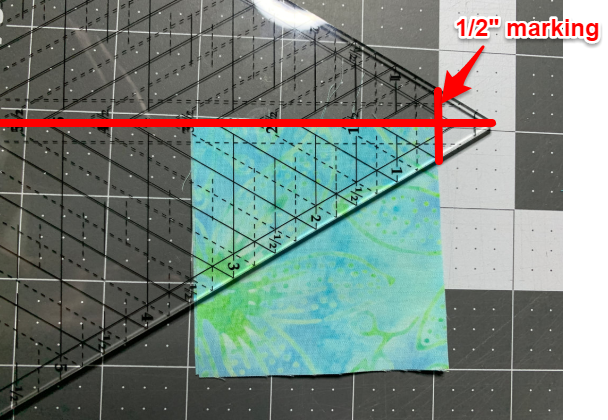 Put two 3 inch squares right side together. Line up the center mark on the Star 60 tool and the marking at 1/2 inch. Trim slanted edge. 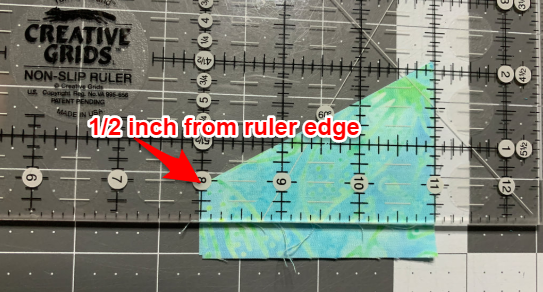 Using a standard ruler, trim second set of setting triangles to 1/2 inch from slanted cut. 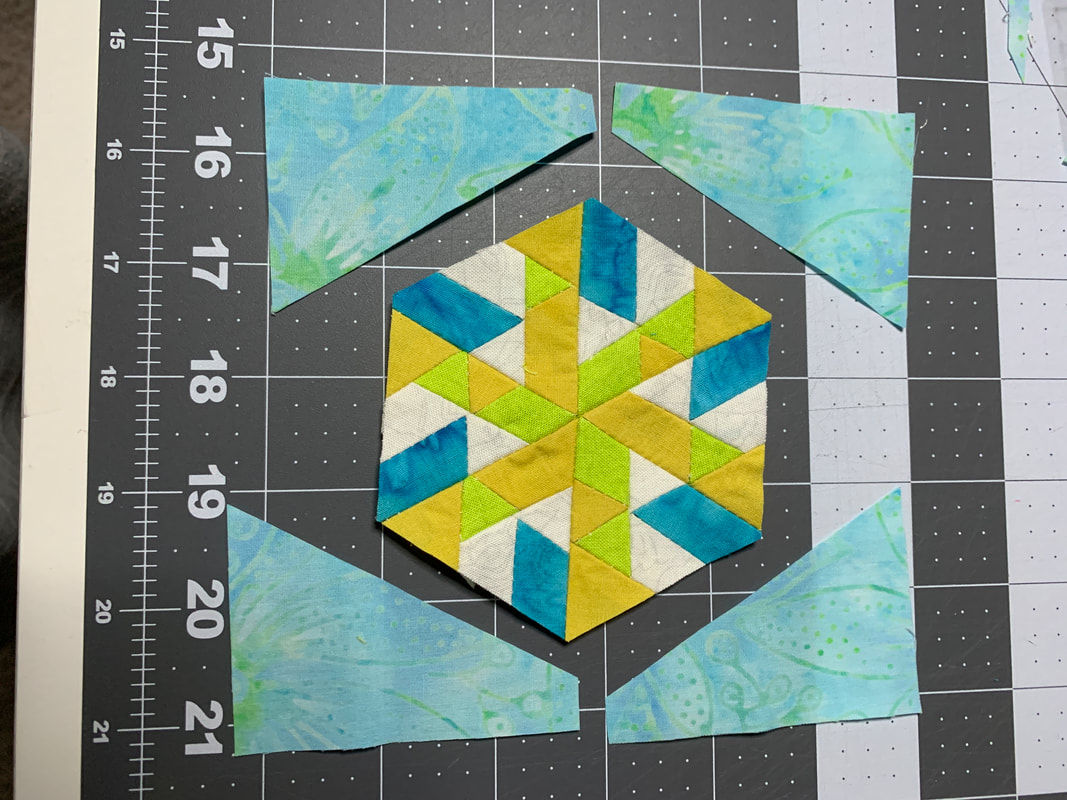 Lay out setting pieces on four sizes of pieced hexagon. 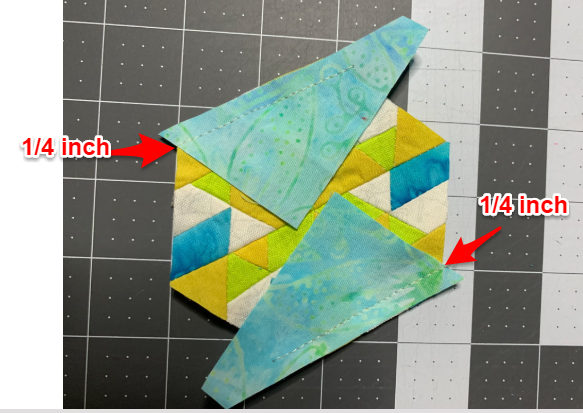 With right sides together lay setting pieces on two corners. Shift the pieces so that the start of the sew lines is 1/4 inch. Sew. Press toward setting corner pieces. 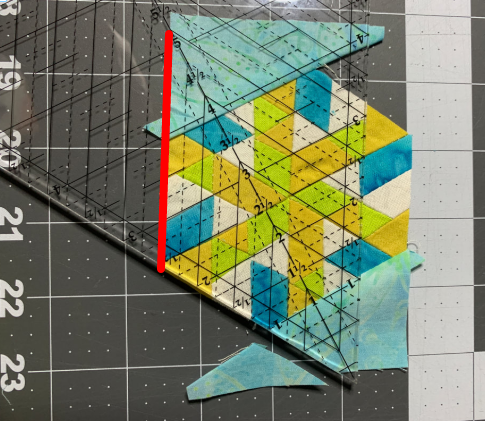 Match up the edge with the 5" diamond line and trim the setting piece on the opposite corner. 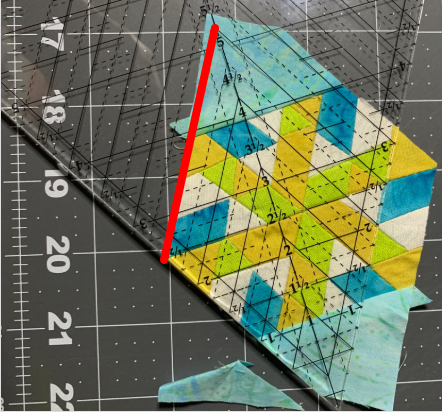 Rotate unit 180 degrees and repeat trim down on the other side. 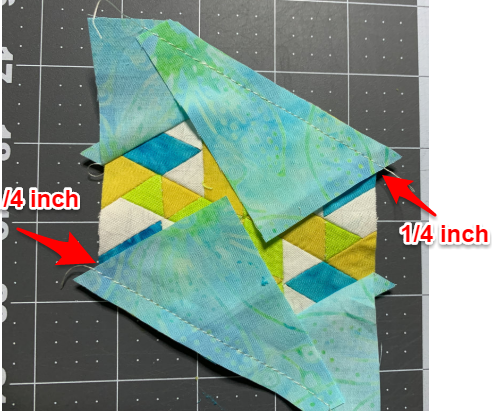 With right sides together lay setting pieces on the other two corners. Shift the pieces so that the start of the sew lines is 1/4 inch. Sew. Press toward setting corner pieces. 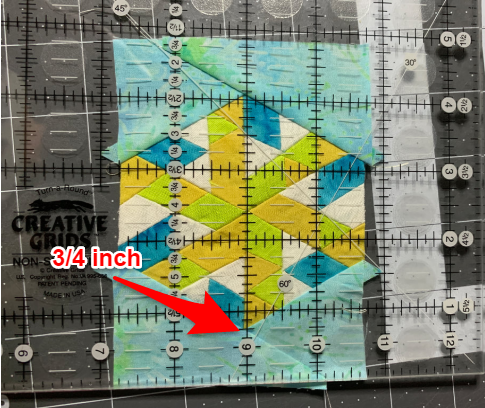 Using a standard ruler trim edges of block so the setting triangles are 3/4 inch from hexagon corner. Trim both sides. 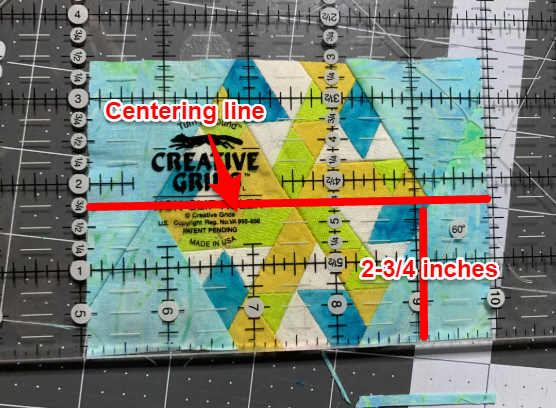 Trim top and bottom so that the center line on the ruler is at 1-3/4". The block should now measure 5" x 3-1/2". Quilt Construction Sew 3 blocks together. Center should measure 9-1/2" x 5". 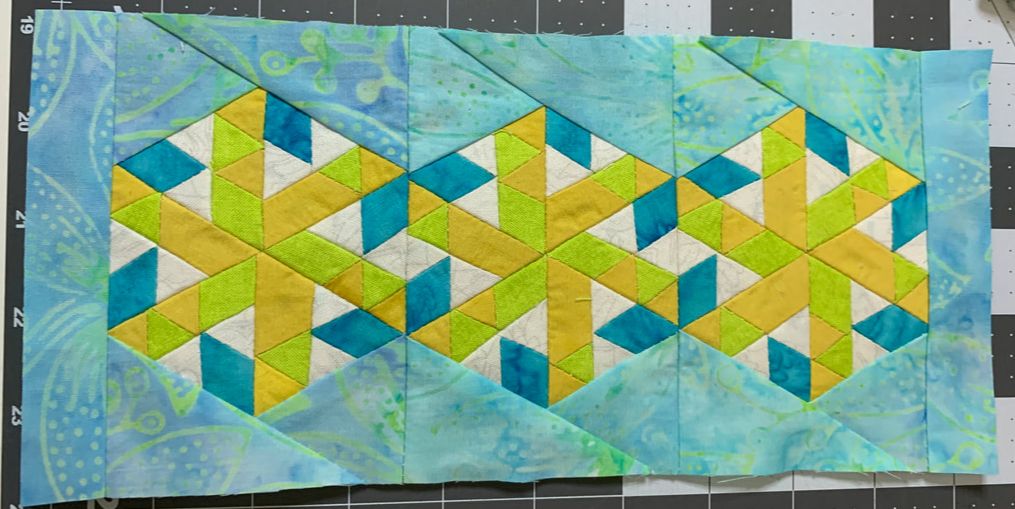 Add 1" x 3-1/2" strips of setting fabric to two sides. Piece should measure 10-1/2" x 5"  Add 1-1/2" x 10-1/2" border pieces to two sides. Add 1-1/2" x 7" border pieces to opposite two sides. Piece should measure 12-1/2" x 7". 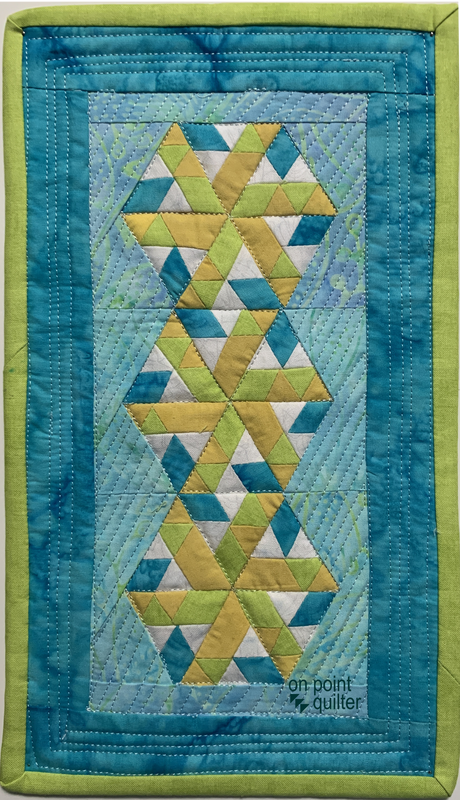 To quilt the Miniature Star 60, I stitched in the ditch around the equilateral triangles. For the setting corners and inner border, I quilted about 1/4 inch apart following the angle of the hexagon blocks. I quilted straight lines for the outer border. Everything was eye-balled (with no pre-marking of the quilting lines) Review of Star 60 Tool by Studio 180 DesignI liked that all of my pieces were easy to cut with the Star 60 tool (equilateral triangles, diamonds and the trapazoid pieces). I was even able to cut the setting triangles. Of course the oversized piecing, trim down technique from Studio 180 Design is always a preferred piecing methodology in any of my quilts. I was pleasantly surprised that these miniature units were no problem. The instructions that came with the tool were good -- but there were a lot of them and it was a little easy to get lost the first time cutting and trimming down each unit. I know that I will use this tool again. The tool should be available at local quilt shops. Here is a link directly to the Studio 180 Design website, if you would like to purchase directly from them.  https://deb-tuckers-studio-180-design.myshopify.com/collections/star-60/products/star-61 Hexagon Quilts Designed in EQHexagons are one of my favorite type of designs in my Tech Know Quilter's classes. Tech Know Quilter's is a paid membership program for quilters who wish to master using Electric Quilt 8. Membership is only open a few times a year, so sign up for the wait list to be informed of the next open enrollment period. Here are a few of the hexagon designs created by Tech Know Quilter members. Many of these were class projects -- with a few originals or variations included. (Note that these are not necessarily Star 60 friendly.)
Design Your Own Star 60 Block
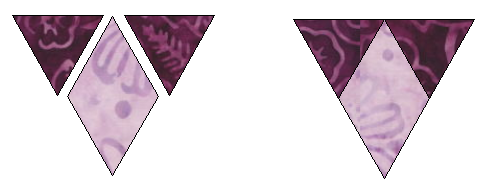
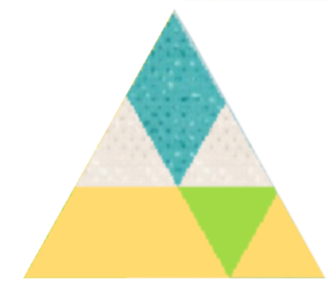
There are two basic shapes, that you can work with (1) an equilateral triangle and (2) a diamond. There are a ton of size options, but you essentially can create larger over-sized units by combining the diamond with two equilateral triangles. The pieced units are then trimmed down to the precise size needed.
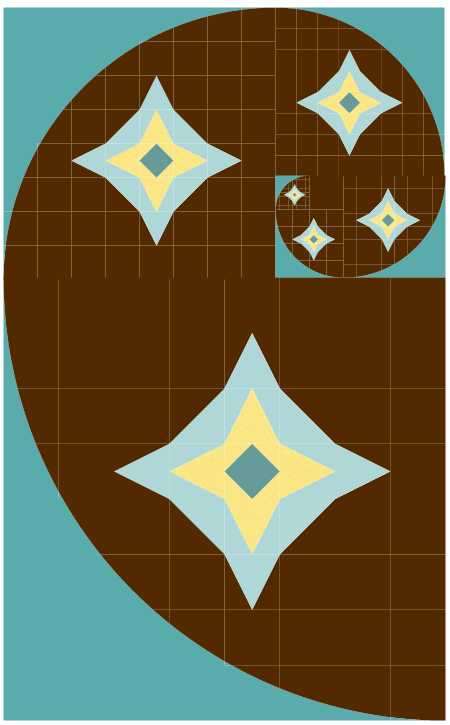
You can combine these units with larger equilateral triangles and diamonds to create even larger equilateral triangles. Here is one design I came up with.
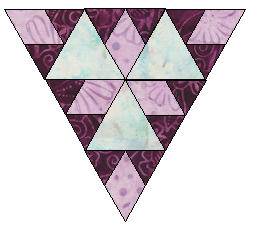
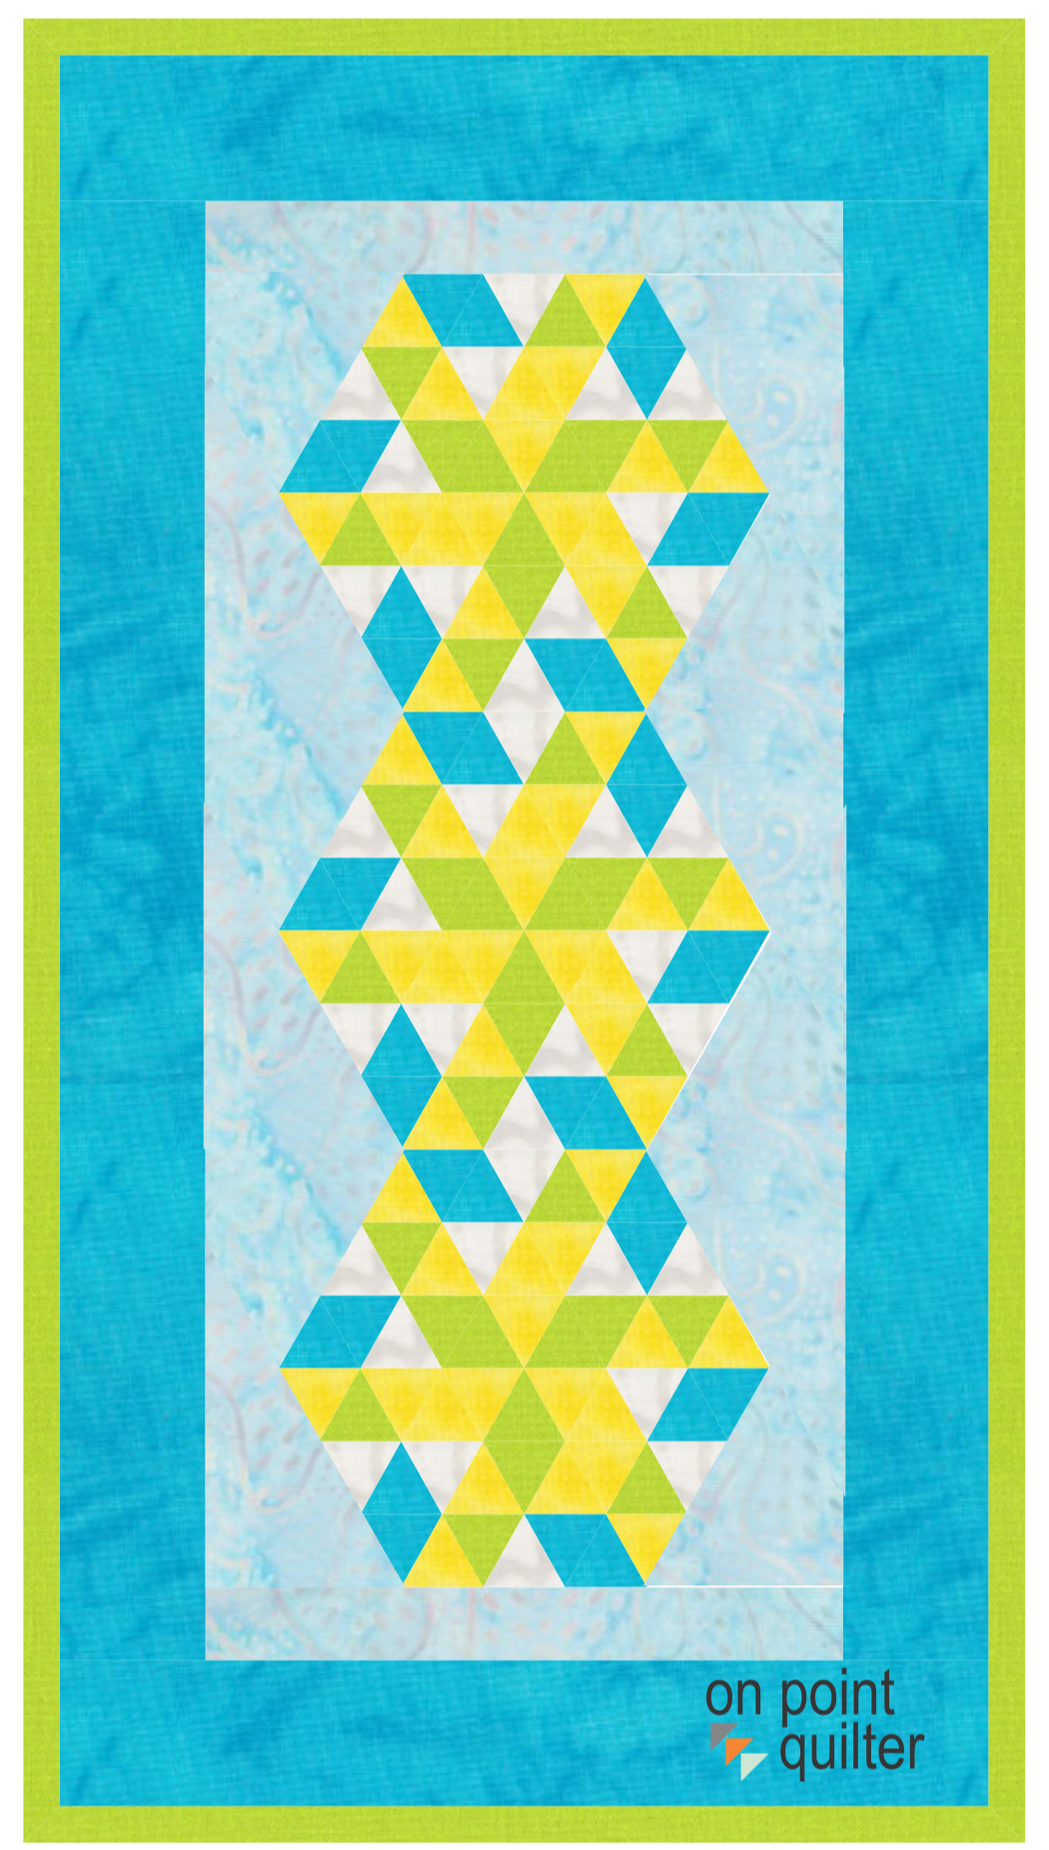
To play even more I combined six equilateral triangle units to create a hexagon block.
It did take a bit of effort to draft the hexagon block -- which was created as an applique motif block in Electric Quilt 8. I began to wonder about how I could more easily audition my designs to see if I liked them before drafting the actual block.
So I came up with a much easier solution using Electric Quilt 8 software. For this solution, I am not worried about "piecing" the block -- only about coloring to see if I could come up with a design that would be Star 60 friendly with fabrics I would like to work with.
In my Electric Quilt tutorial, I will share with you how simple it is to create graph paper with guidelines to create your own equilateral triangle and hexagon block designs. I will also share some fast coloring techniques as well.
Here is the link to the equilateral triangle calculator referenced in the video.
Here is the one patch quilt from the video.
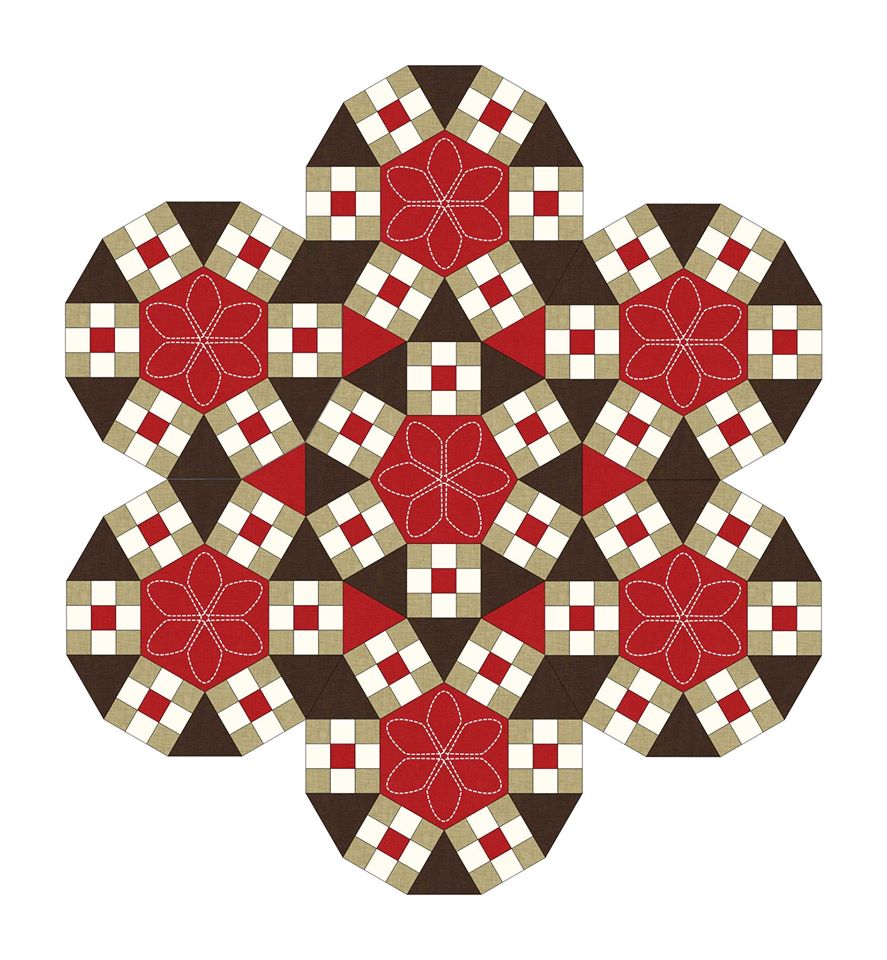
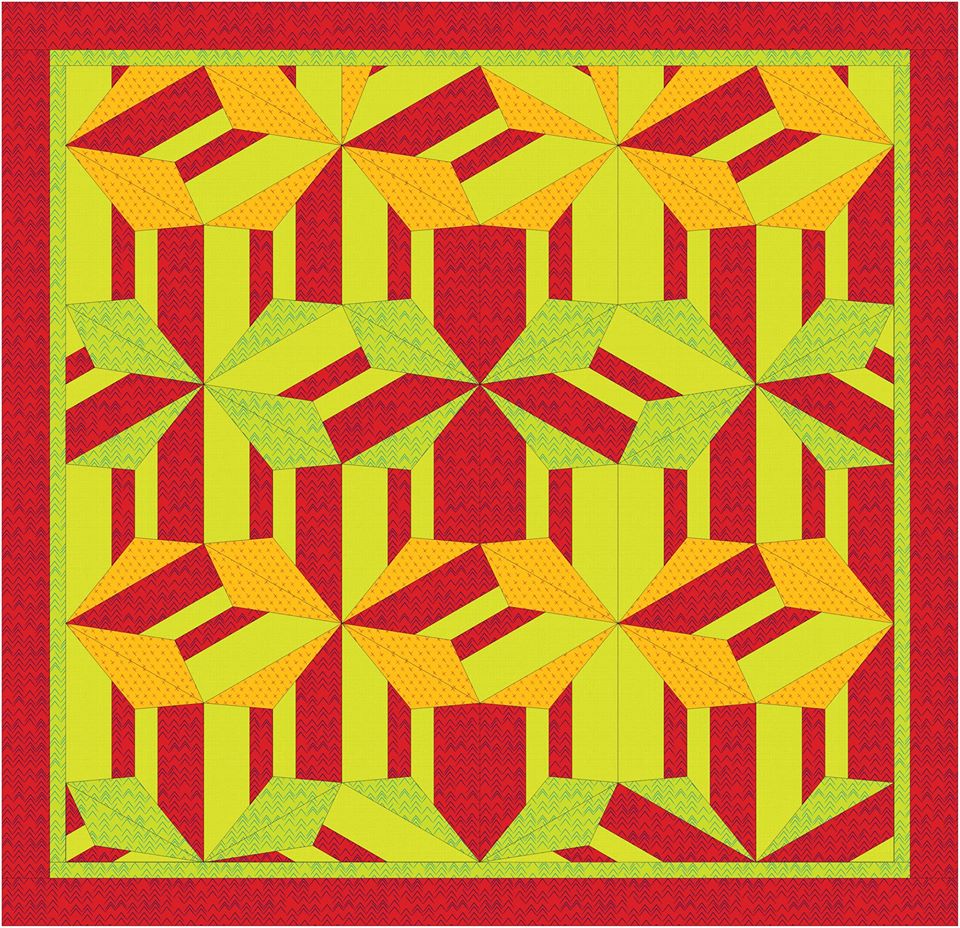
Star 60 Friendly Hexagon block created by Kari Schell using EQ8
My challenge to you. Create your own equilateral triangle unit/hexagon block in a favorite fabric collection. I would love to see what you come up with.
Apply What You Learned Challenge Quilts
Tech Know Quilters is a membership of Electric Quilt 8 owners who are mastering Electric Quilt through online training. At the end of their April class, they were encouraged to apply what they learned during the month of April.
Tech Know Quilters is open to new members only a few times a year. You can sign up for the wait list here and we will notify you of the next open enrollment period..
Kessel Point - Just finished the Design to Production and it has been my favorite! Very organized and methodical approach which speaks to my soul,
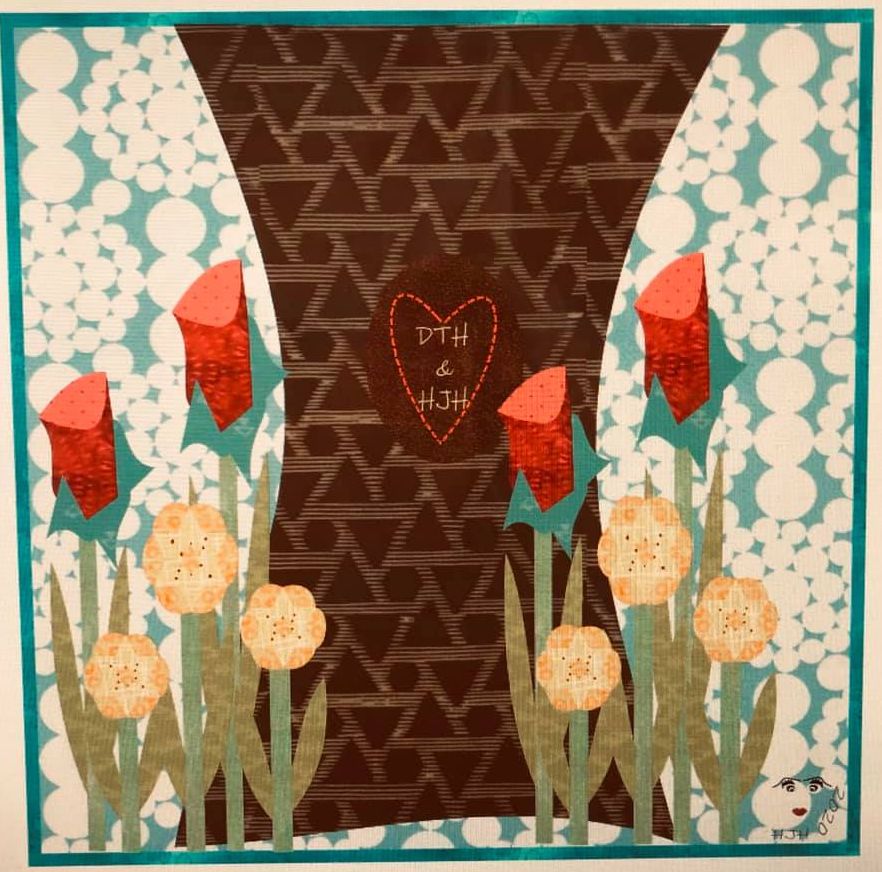
I’ve had this Dream Big panel for awhile and decided it will become a anniversary gift for my in-laws in September. Utilizing Kari’s cheat sheets, I was able to dissect block by block and lay out my plan of attack. Even better – I too have a new Cricut Maker and have attempted the EQ8 >Inkscape>Cricut path. Your tutorial to do so enabled me in easily creating the appliques for my Camping quilt Thanks for your efforts Kari – Your lessons are invaluable!
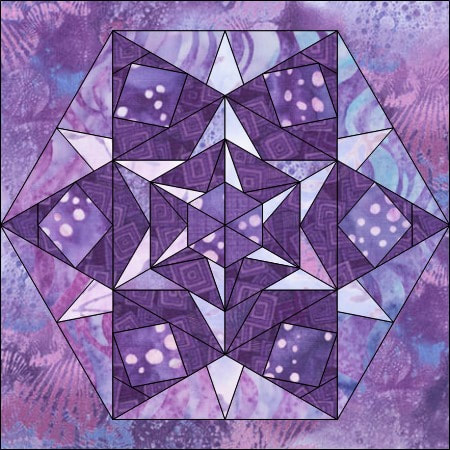
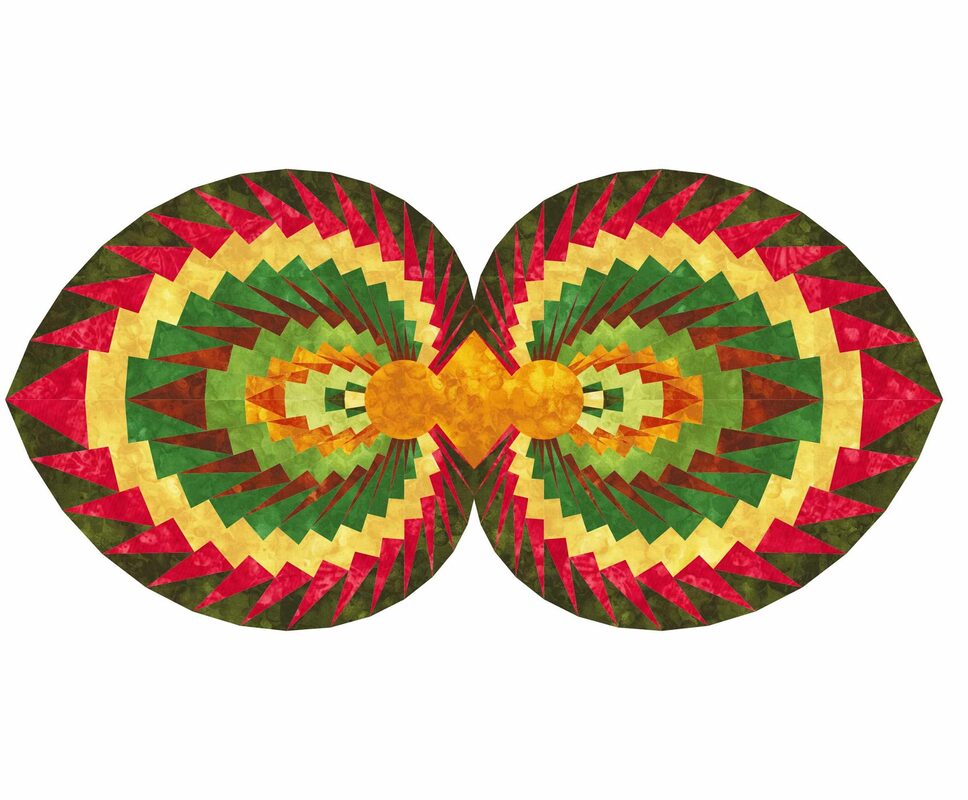
Kristy Goodin Soard I took the Masters Advanced PolyDraw class this month. I was reminded to use multiple rings and spokes settings in a single block. I found the block in my book by Edyta Sitar, but she created it with templates and I wanted to be able to execute with foundation piecing. I used a layout from the library to create one quilt, and designed the second on my own.
Other Projects
Here are some additional projects created by Tech Know Quilter members -- they are a very talented group who are doing amazing things with Electric Quilt 8.
Nancy Messuri
Helen Hicks
TKQ Masters Projects
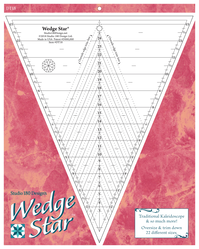 Wedge Star Tool by Deb Tucker's Studio 180 Design Wedge Star Tool by Deb Tucker's Studio 180 Design
On Facebook this week, I saw that Deb Tucker's Studio 180 Design created a new tool -- the Wedge Star. After looking at the tool and the quilts designed using the tool, I fell in love with the simplicity of how the blocks are created combined with a complex look by coloring the blocks.
To take full advantage of the Wedge Star tool, I knew I needed to recreate these blocks in Electric Quilt so I could play with a fabric collection of my choice. In this 7 minute tutorial you will be guided through drafting the two blocks in PolyDraw, importing the Art Gallery Matchmade fabric collection (included in Stash 2019 Download 01), and creating 3 on point quilts in the quilt worktable.
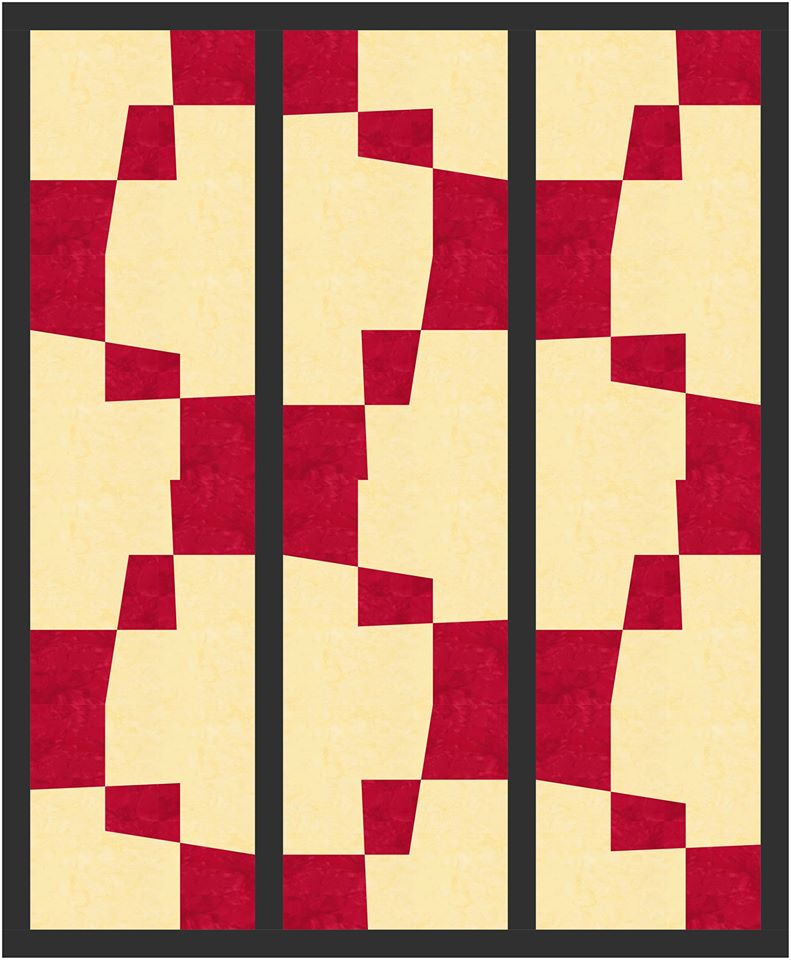
As an alternative to using the tool, you could also print out foundation patterns directly from Electric Quilt. Here are the blocks from the video.
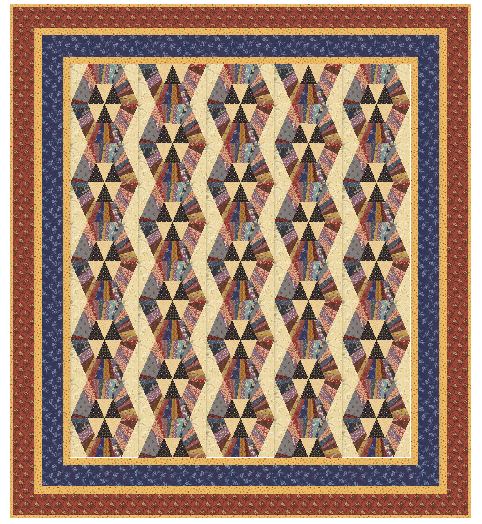
Here are the quilts from the video.
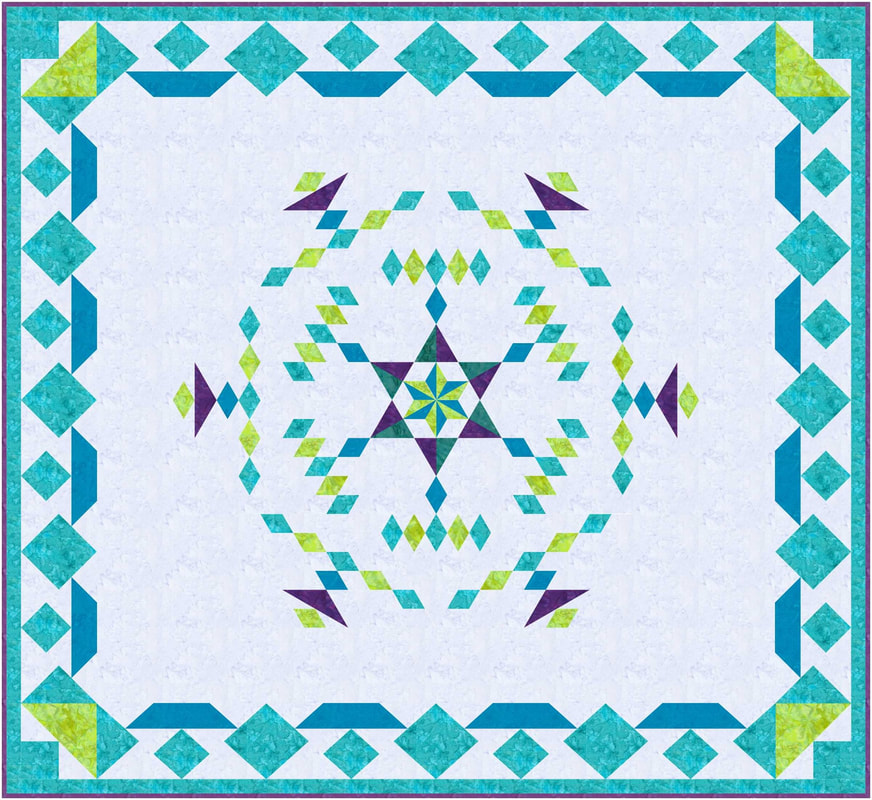
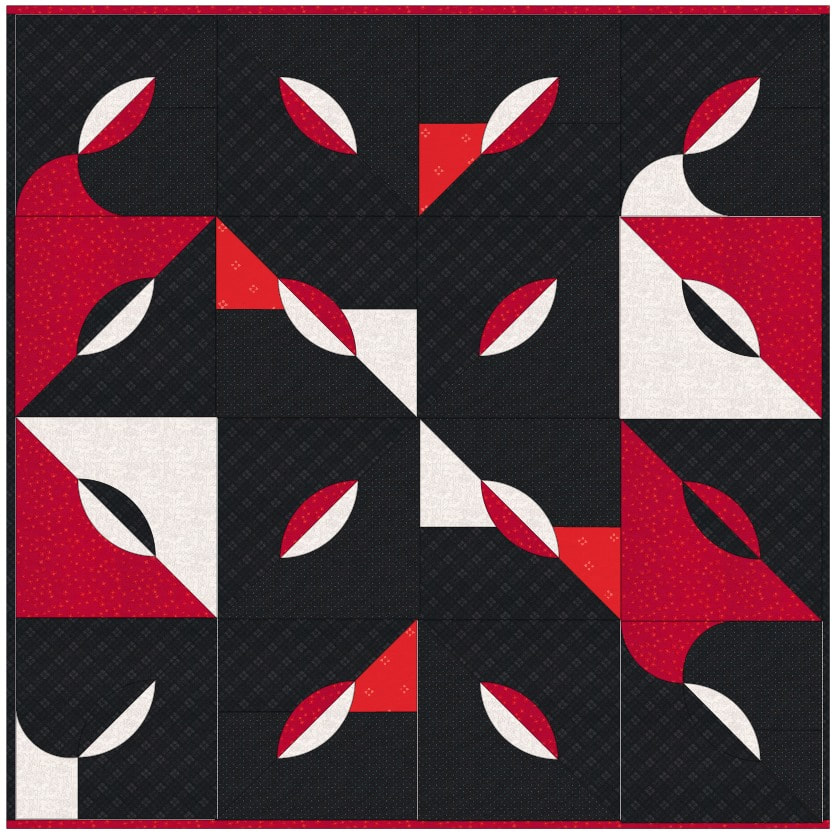
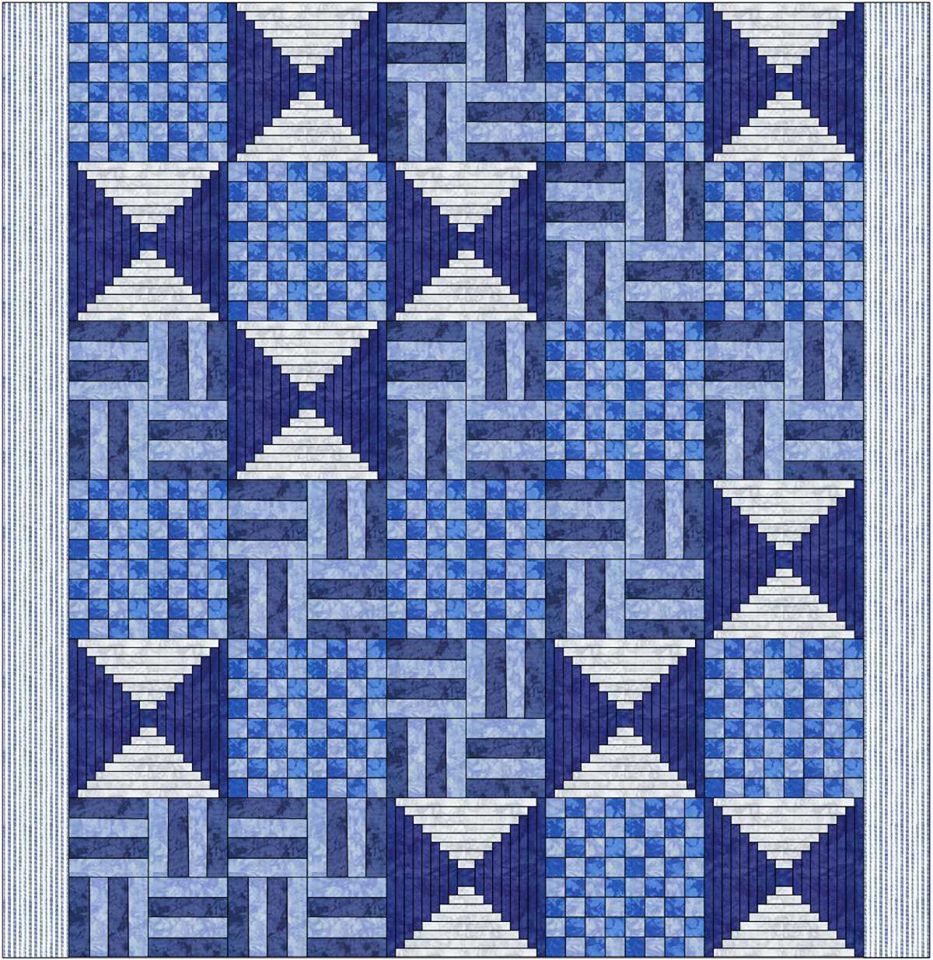
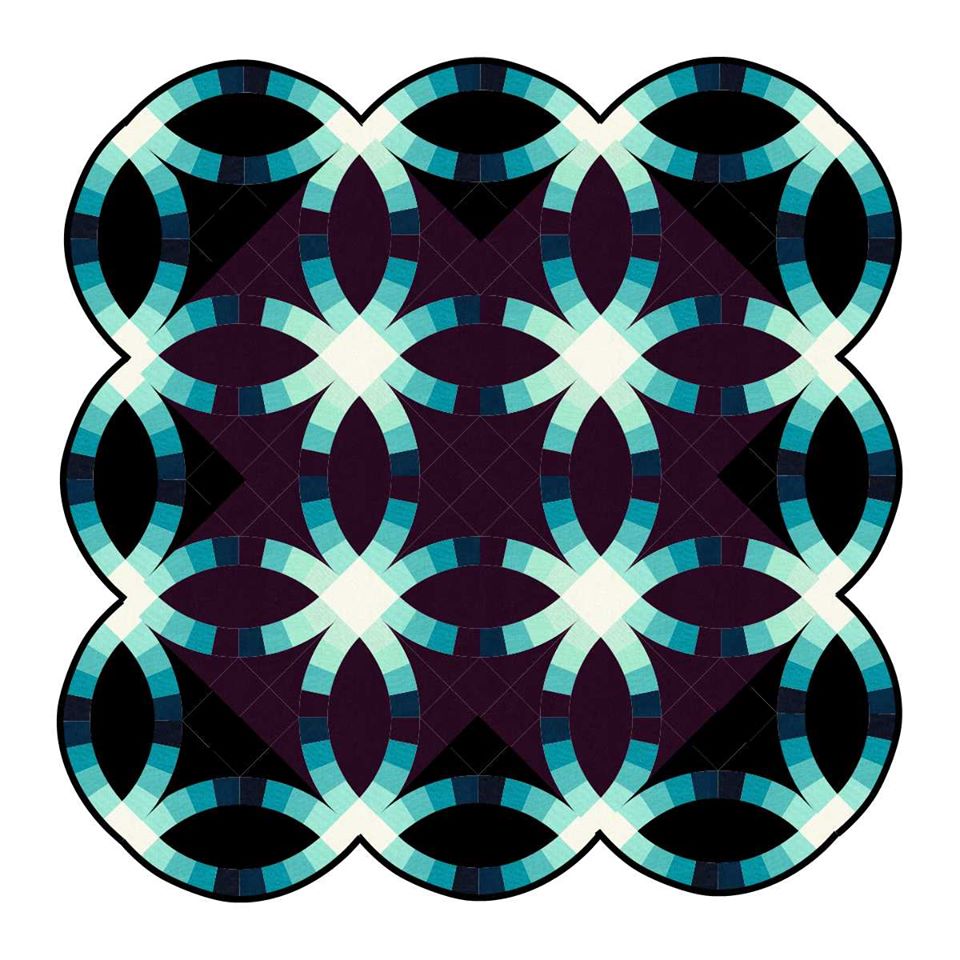
Kaleidoscope Block 2 set in an on point layout - designed by Kari Schell
Kaleidoscope blocks 1 and 2 set in an on point layout - designed by Kari Schell
Kaleidoscope blocks 1 and 2 in an on point layout with additional coloring to emphasize the circular feel of the design. By Kari Schell.
I would love to see your designed Kaleidoscope Wedge quilts. Feel free to post on the Learning EQ Facebook group.
Introduction to Electric Quilt Class at Minnesota Quilt Show
Would you like to join me for an an in person hands-on Electric Quilt class? I will be teaching at the Minnesota Quilt Show in Rochester MN. This is my only scheduled in person class for 2019.
The class, Introduction to Electric Quilt 8 is a full day class on Saturday, June 15, 2018. You can learn more and register here. I look forward to seeing you there. Shoot for the Stars with EQ8
Are you just getting started with Electric Quilt 8 and need some help?
Shoot for the Stars is designed to get you started with Electric Quilt 8 through training delivered straight to your inbox. This series includes 14 short (ie. 5-10 minute) videos delivered over the course of a month allowing you to learn the basics of this complex program in bite size increments. The class is currently on sale for $35 (regular $50). Join now.
Back when I started quilting, I had a book from Mary Ellen Hopkins entitled "It's OK if you Sit on My Quilt Book". In this book she introduced the quilting world to connector corners. I think this may have been one of the techniques that revolutionized modern day quilting. Over the years I have heard a number of names for the technique including "cheater corner" and "folded corner".
The technique refers to a method of adding triangles to a quilt block. It is frequently the suggested method for creating snowball blocks, square within a square units and flying geese units. Although I've used the technique over the years, I found that I would have some fabric slippage or I would stretch the fabric in the pressing process -- resulting in less than perfect results.
A couple of years ago I was introduced to the Perfect Corner Ruler™. It is built off the folded corner concept. However this variation on the technique gets rid of some of the challenges with folded corners.
The Perfect Corner Method™ and Ruler™ were both developed by Ruthanna Grihalva, Forever In Stitches, LLC. 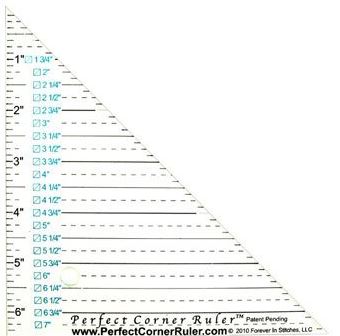
Perfect Corner Tool
Using the Perfect Corner Ruler
I used the Perfect Corner ruler in my Tad, Ted and Theodore Bowtie pattern. The example below is for the "Theodore" unit in this pattern.
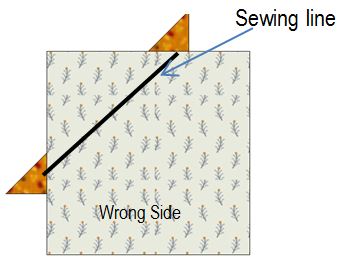
Using the ruler, draw a diagonal line on the wrong side of the base piece of fabric (this is the piece the corner will be added to). The measurement to use for this line is exactly the same as your folded corner measurement. (For the Theodore unit this is 2".) 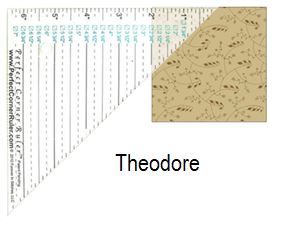
Theodore Perfect Corner Line
Cut corners. The square for these corners will be 3/4" greater than the folded corner square. For Theodore this was 2-3/4" x 2-3/4". Cut the square once on the diagonal for two corner pieces.
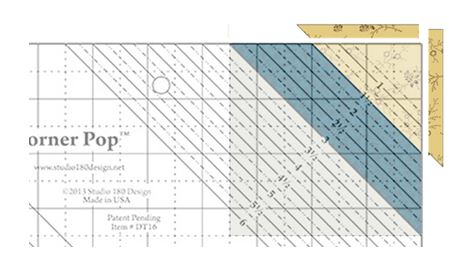
Using the Corner Pop Ruler
Approximately six months ago Deb Tucker came out with her version of a "folded corner" ruler. Corner Pop™ from Studio 180 Design is used for folded corner units. Using this tool you will trim rather than mark, add an oversized replacement triangle and then square everything to a perfect size.
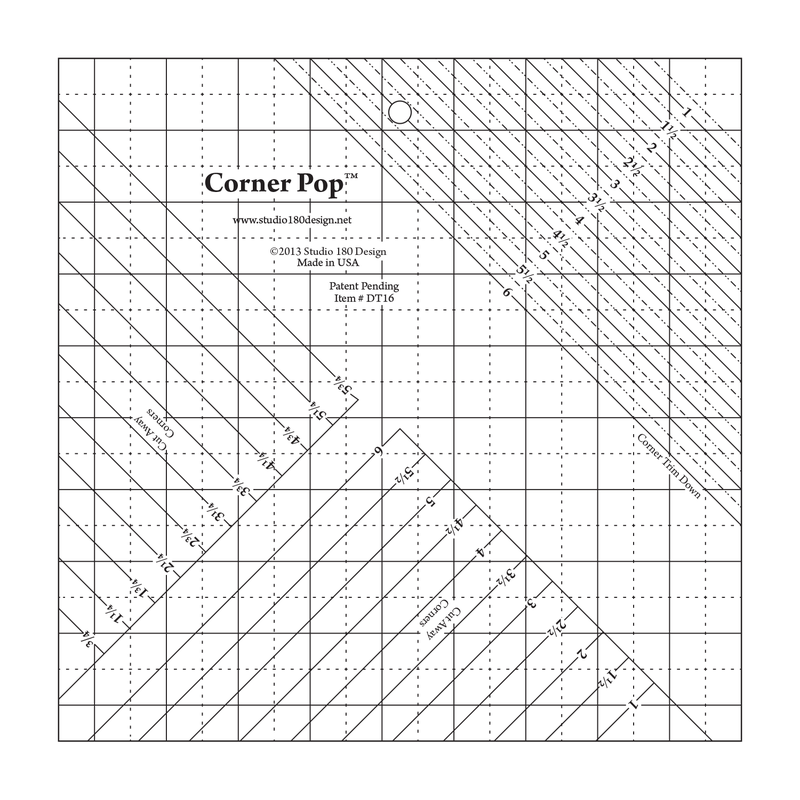
Deb Tucker's Corner Pop Ruler
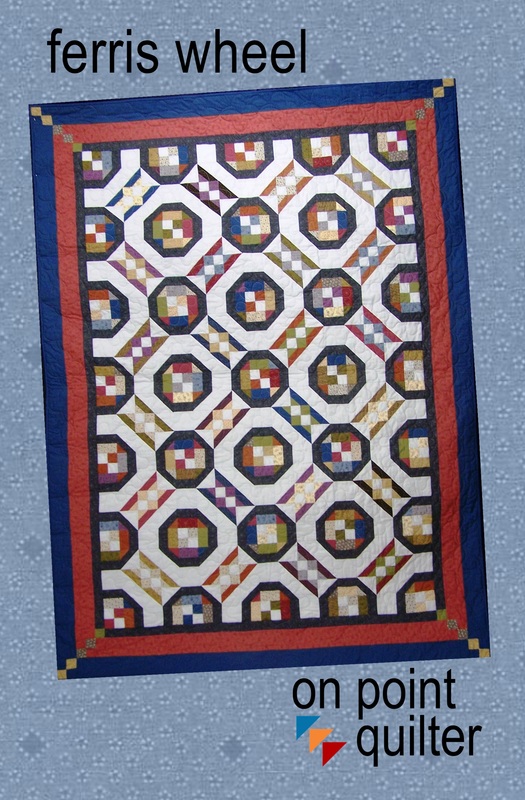
This tool is featured in my latest pattern - Ferris Wheel. This pattern would have traditionally called for a 2 inch folded corner. Here is how I used the Corner Pop tool. 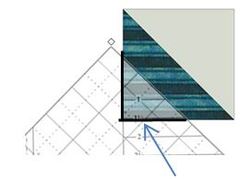
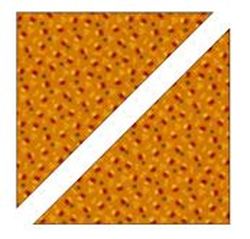
Use the 1 1/2″ Cut Away lines on the Corner Pop™ to cut one corner on a half-square triangle unit.
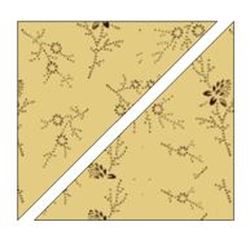
The square for these corners will be 3/4" greater than the folded corner square. (For this unit, the square is 2-3/4" x 2-3/4".) Cut each corner squre once on the diagonal to create two half-square triangles.
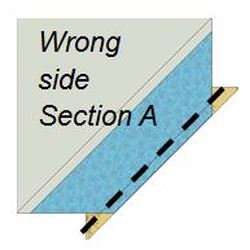
With the half square triangle unit on top, sew (using an accurate 1/4″ seam) the corner triangle to the half square triangle.
Folded Corner Poll
Inquiring minds what to know....what methods you have tried -- and if you have tried multiple methods, which one do you prefer. Poll selections are confidential.
Featured Pattern - Ferris Wheel
When going to the fair as a child, the ferris wheel was my favorite ride. I loved the view at the top and enjoyed colorful lights late at night. This quilt can be made with 8 fabrics or the medium and dark fabrics may be made from scraps. If made from scraps, Charms work for the Dark; and Fat Eighths or Fat Quarters for Medium 1 and 2.
Happy quilting.
Kari Sign up for my newsletter to stay current on what's happening in my studio and learn more quilting tips. As a thank you, I'll send you a FREE pattern for this small maple leaf quilt.
|


Free guide available for newsletter subscribers


Kari SchellElectric Quilt Expert and Educator and Pattern Designer. Categories
All
Archives
July 2024
|


 RSS Feed