
Let me take you through the process of making the quilt. Equilateral Triangle 1
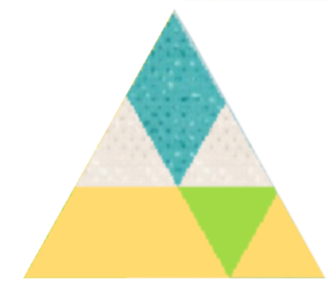
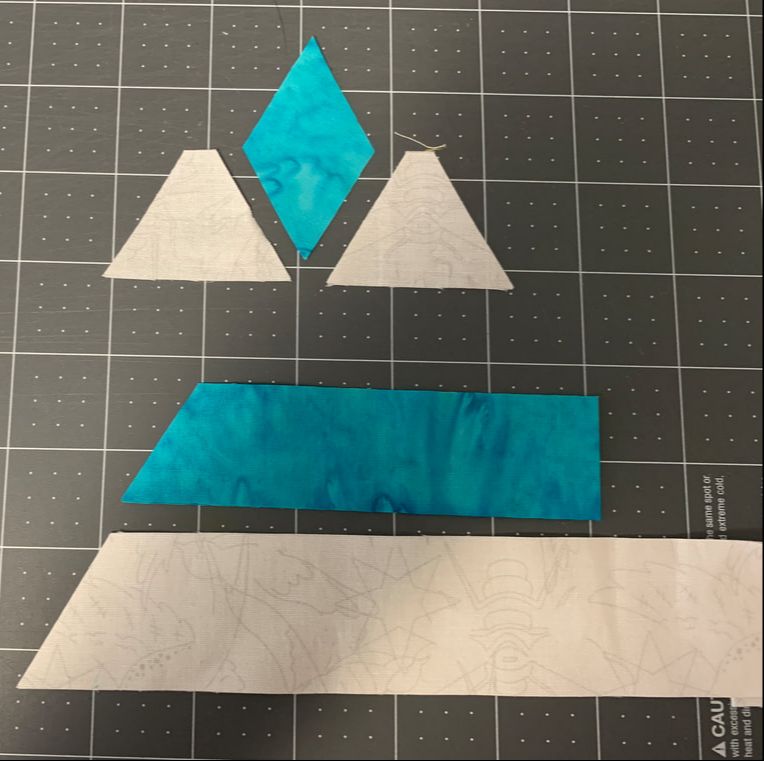 Cut blue diamond from 1-1/4" strips and side triangles from 1-1/2" strips. The cuts were done with the Star 60 Wedge tool from Studio 180 Design. 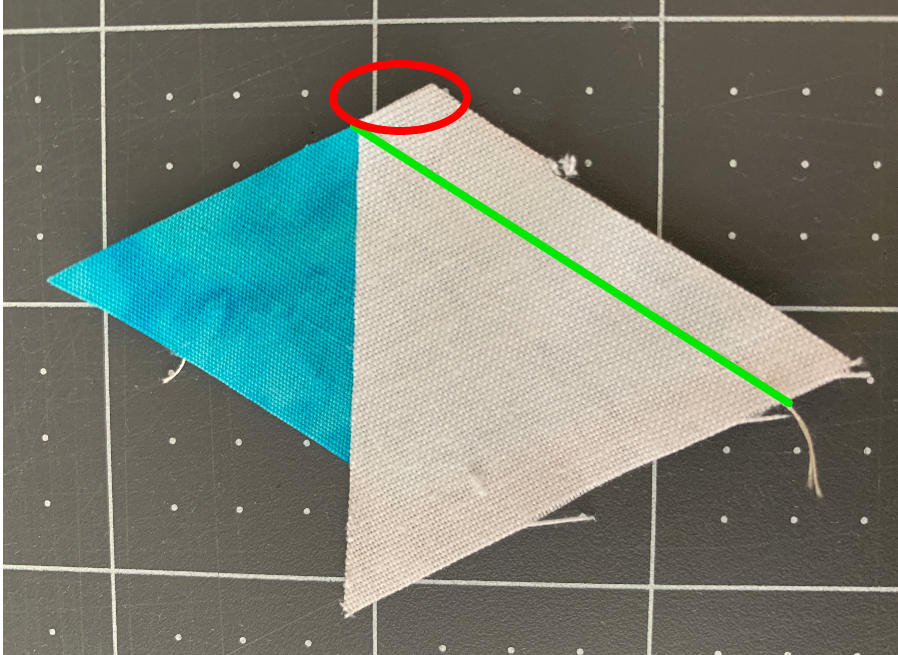 Match the flat corner of the triangle (shown with circle) with the edge of the diamond. Also align the raw edges. Sew 1/4 inch seam. 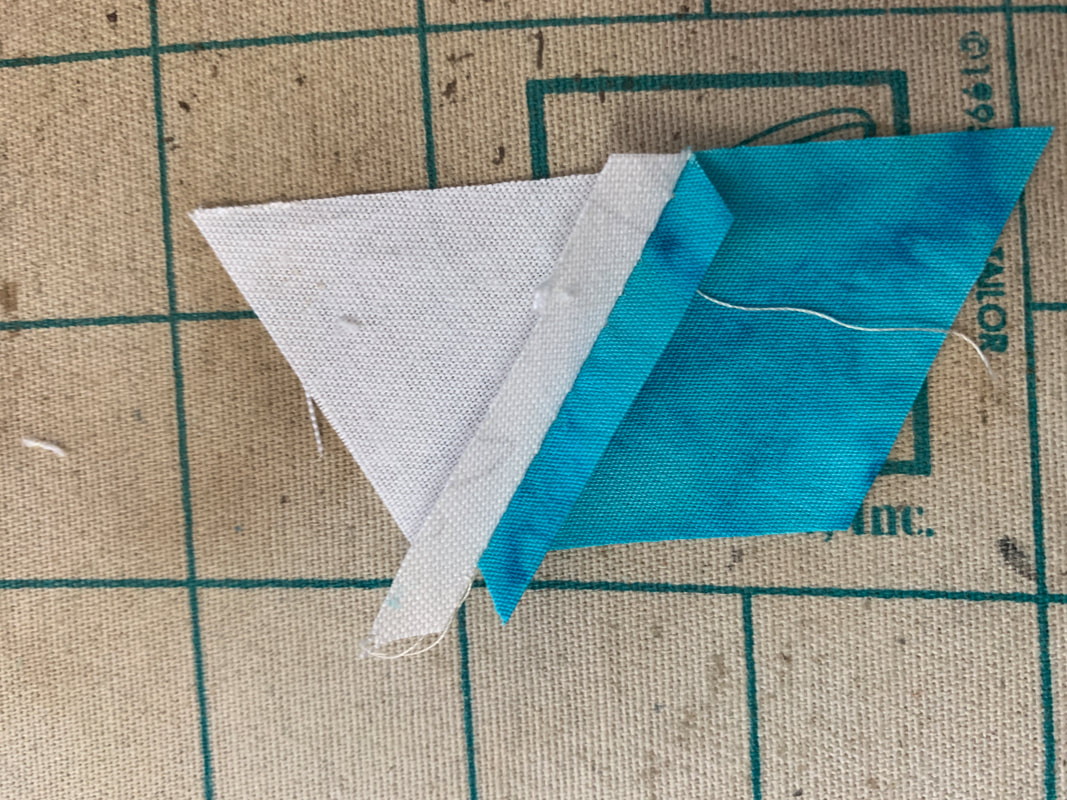 Press all seams open. This will make sure the units lay really flat. 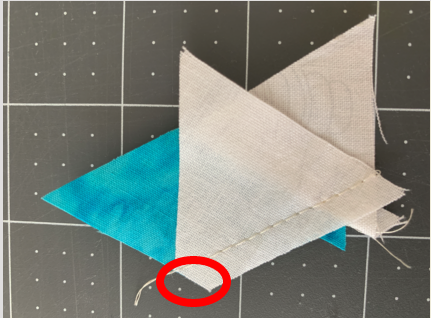 Position another white triangle on the other size of the diamond point. Align the flat corner of the triangle with the edge of the diamond. Sew 1/4 inch seam. 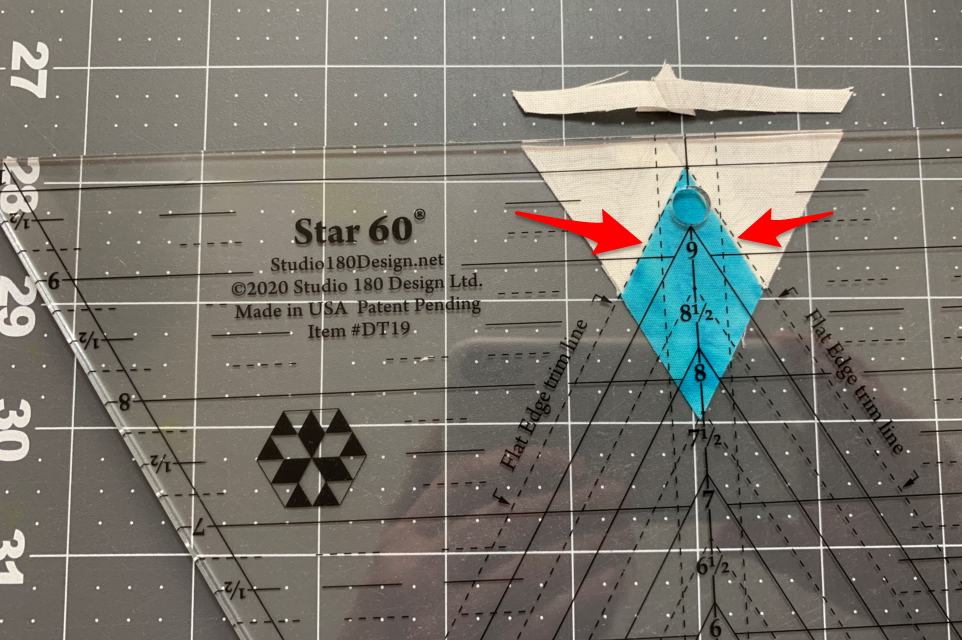 Use the Star 60 tool and align the Flat Edge trim lines with the diamonds. Trim off the top edge (leaving a perfect 1/4 inch seam allowance) . 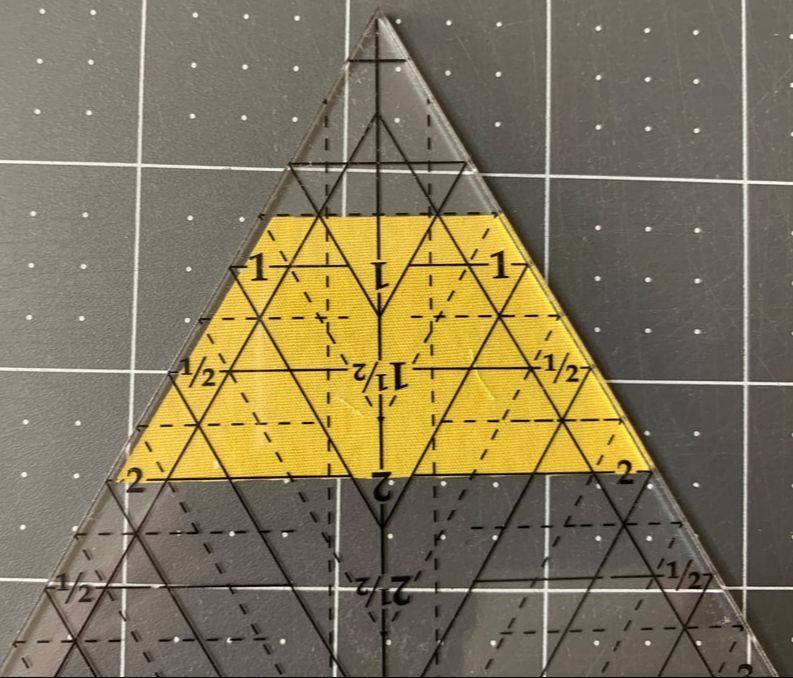 Cut 1-1/4" Yellow strips and Green strips. Align the 2" horizontal line on the Star 60 tool with the bottom of the yellow 1-1/4" strip. Trim the left and right slanted lines. 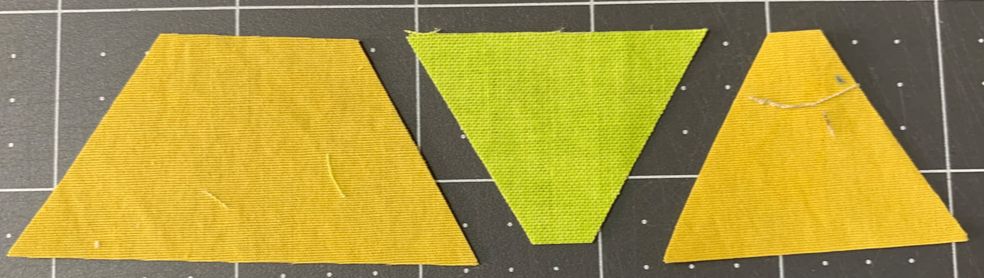 Cut yellow and green triangles from the 1-1/4" strips as well. 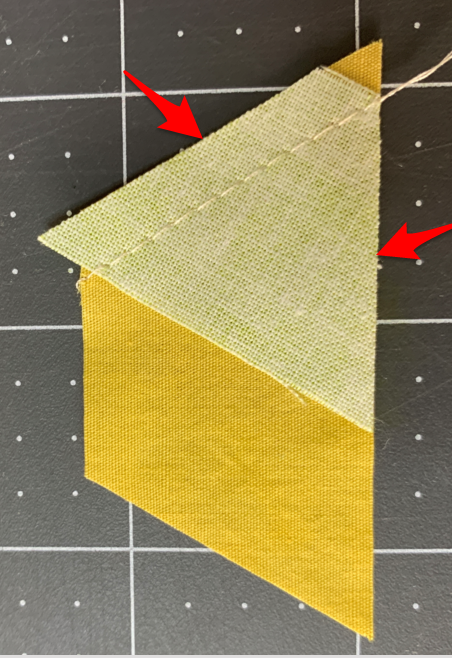 Match the two raw edges of the Green triangle with the right and bottom raw edges of the of the trapezoid. Sew 1/4" seam. 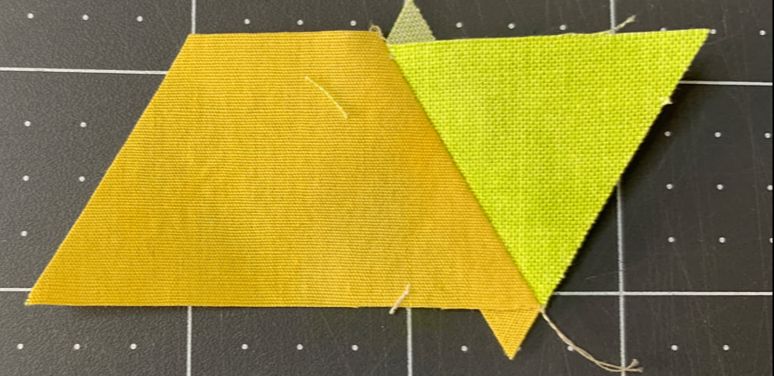 The sewn unit after pressing open. 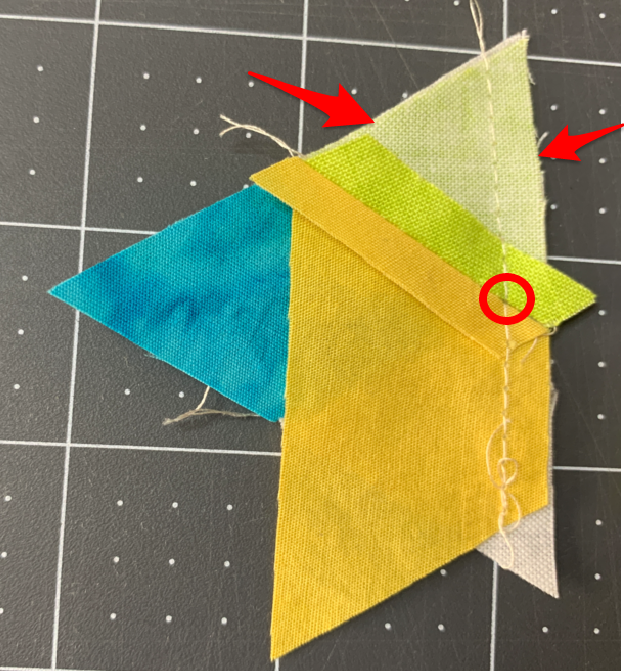 Match the raw edges (noted with arrows) of the new unit with the Star 60 Unit. Also, make sure the seam intersections (noted with red circle) are aligned 1/4 inch from raw edge. Consider using a pin to keep it aligned. Sew 1/4 inch seam. 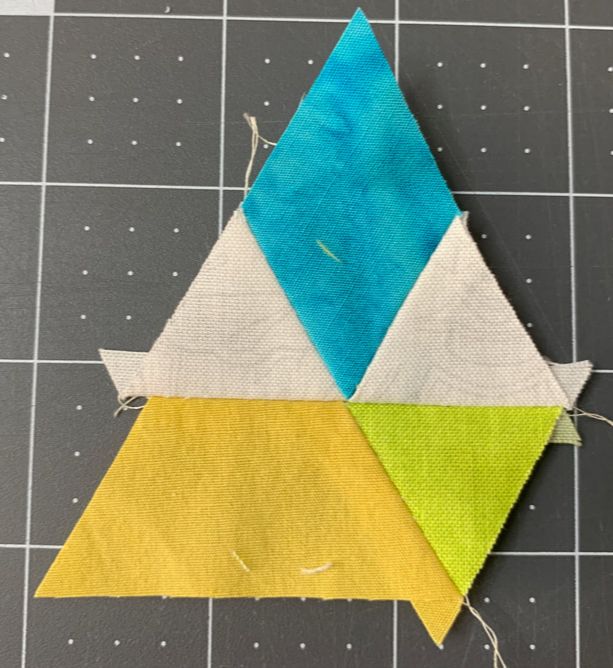 Sewn unit. Ideally all the points will meet perfectly in the center. 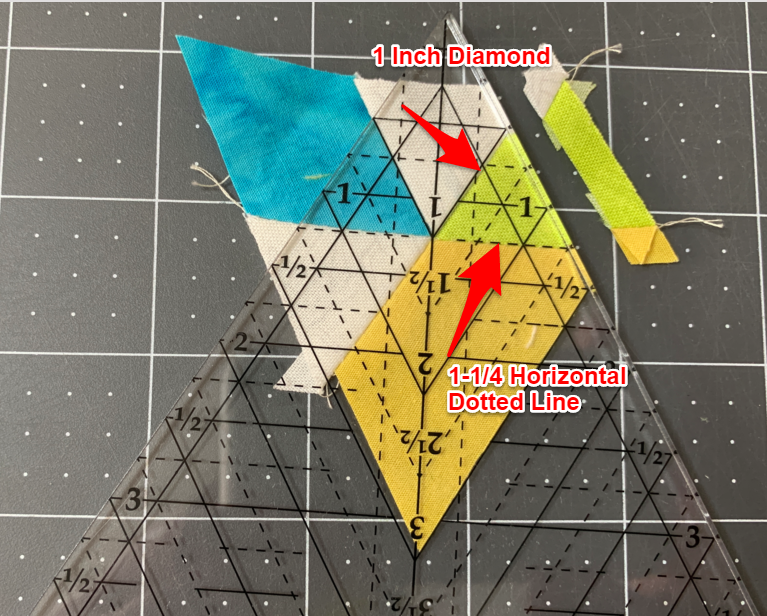 Align the sewn edges of the green triangle with the Star 60 wedge tool. One edge should align with the 1" diamond and the other with the 1-1/4" horizontal dotted line. Trim the right edge. 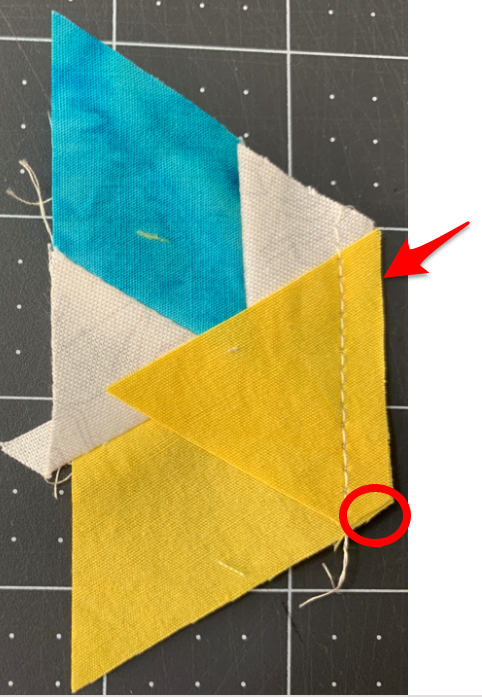 Match the flat edge of the yellow triangle with the bottom of the previous unit. The raw edges should also be aligned. Sew 1/4 inch seam. 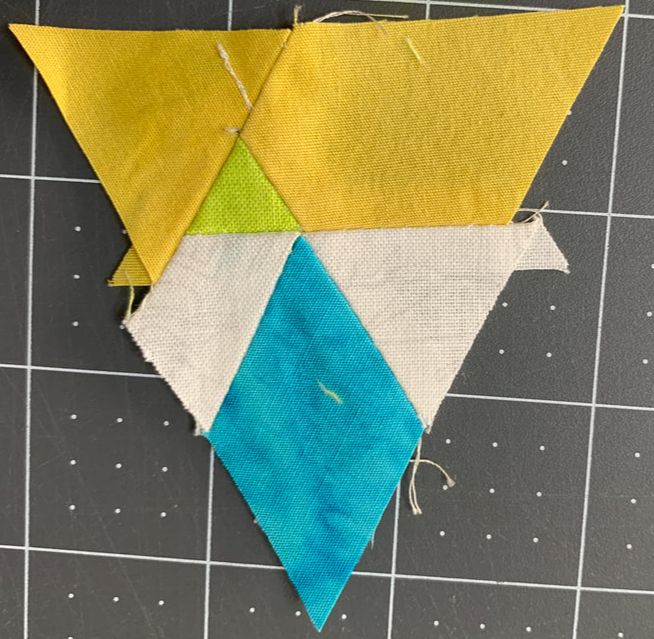 Ready for trim down. 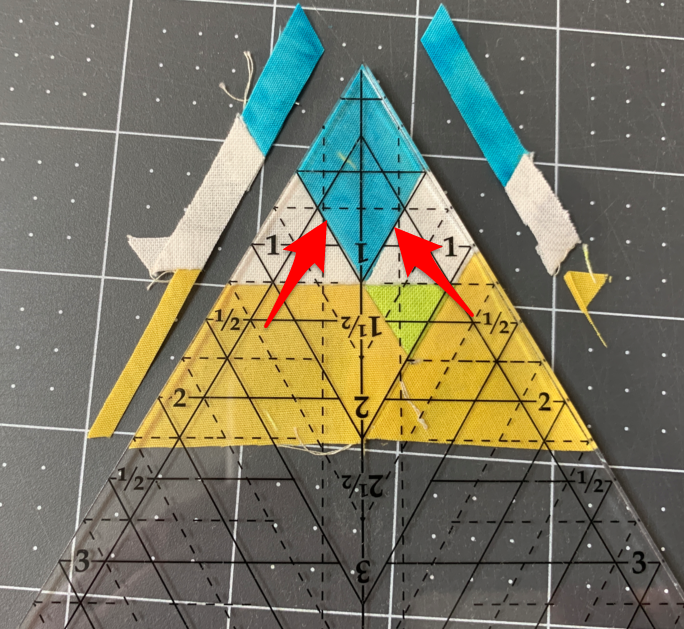 Match the 1 inch diamond guidelines from the Star 60 tool with the blue diamond sew lines. Trim the right and left edges. 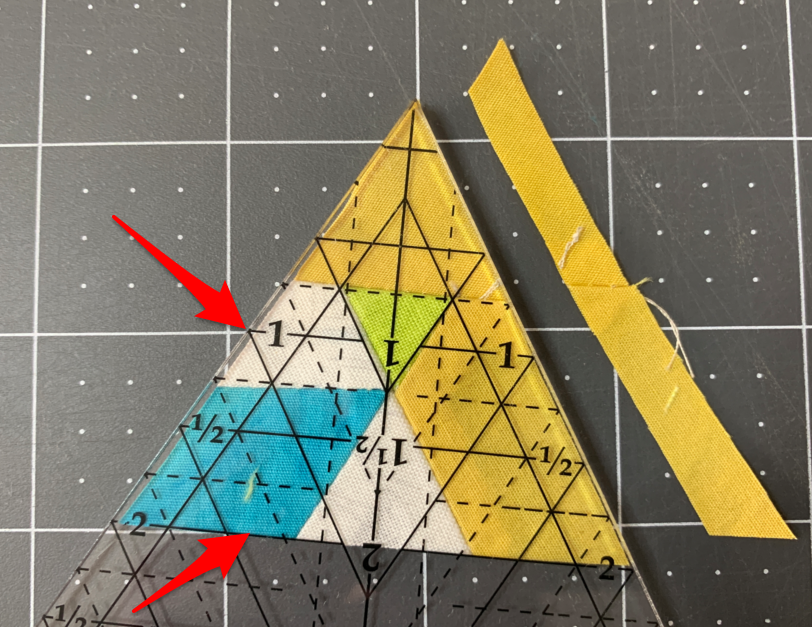 Rotate the unit so the most recently cut edges align with the left edge and 2 inch horizontal line on the Star 60 tool. Trim the right edge. 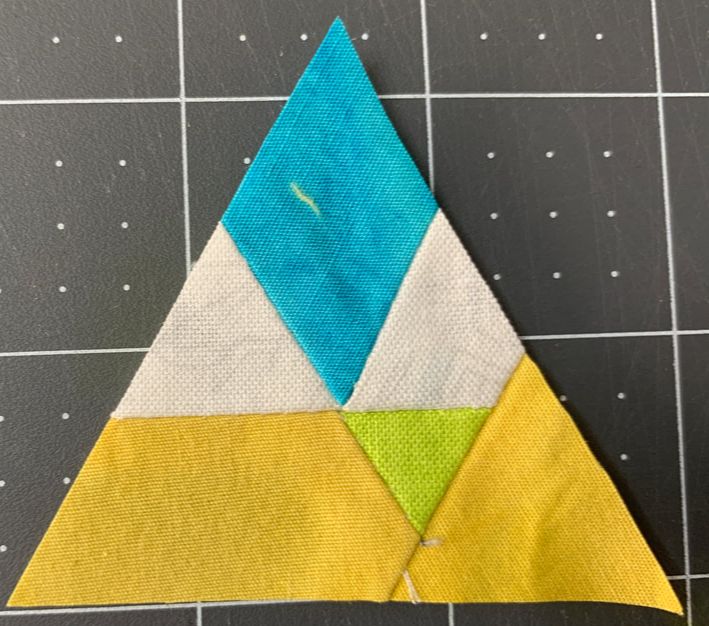 Finished Equilateral Triangle. Make 3 for each hexagon (9 total for 3 hexagon blocks). Equilateral Triangle 2
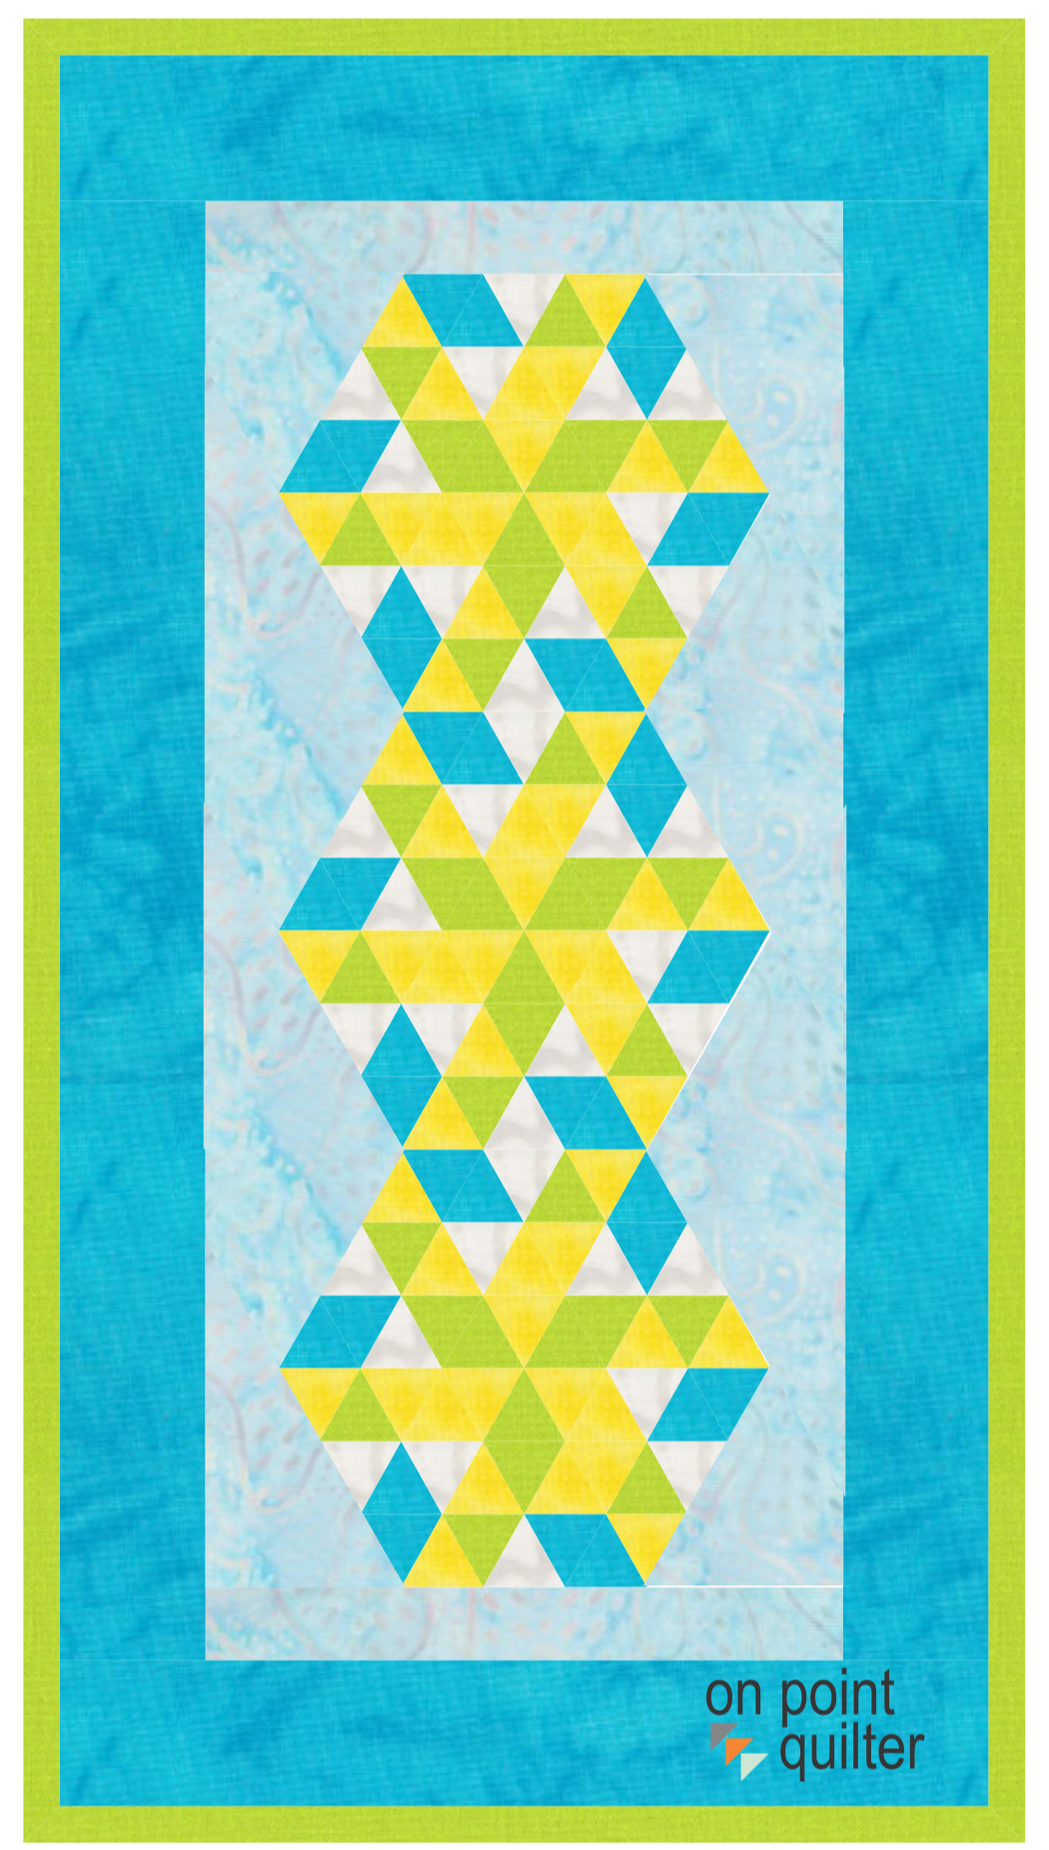
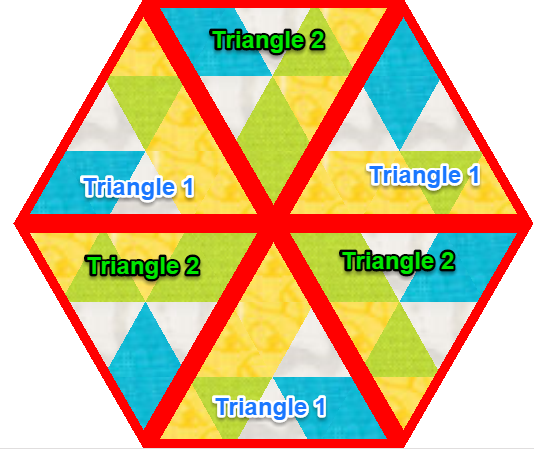
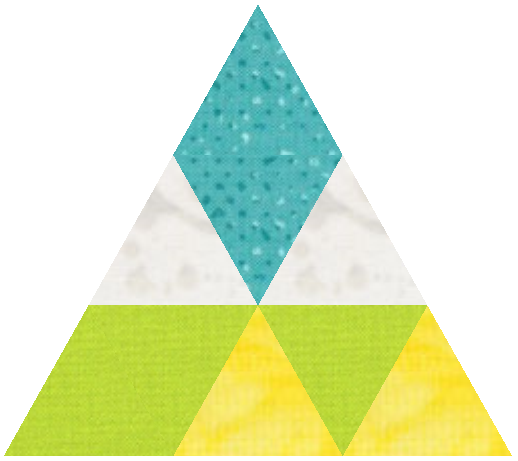
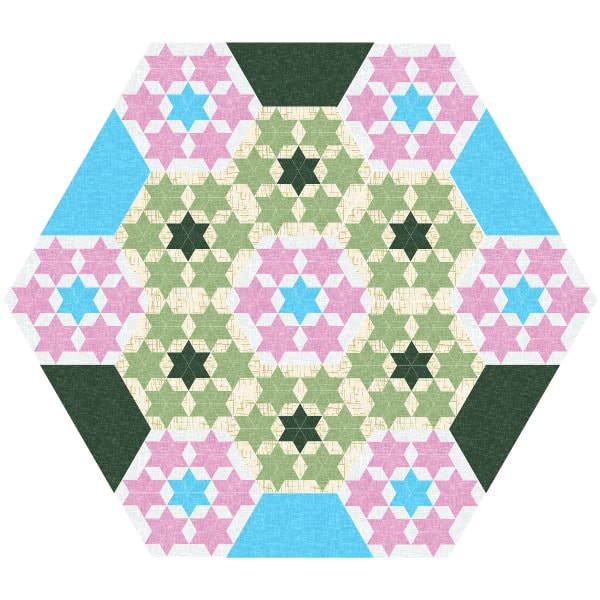
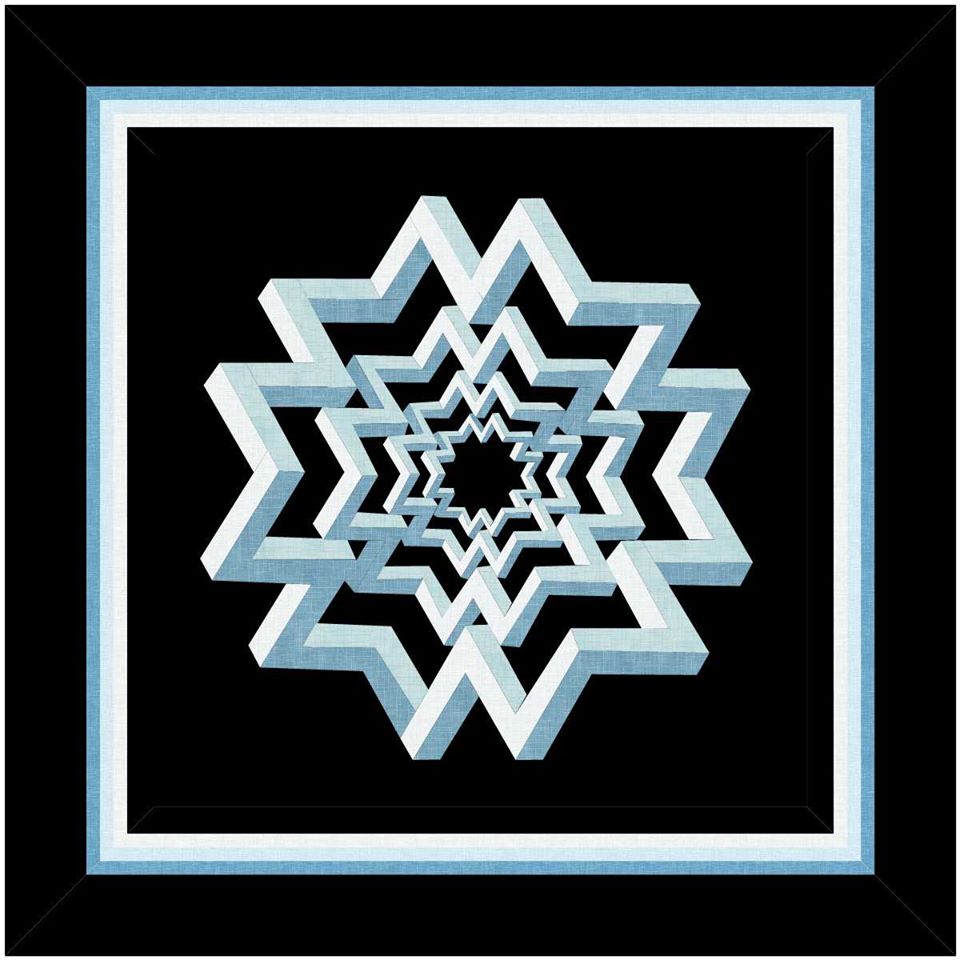
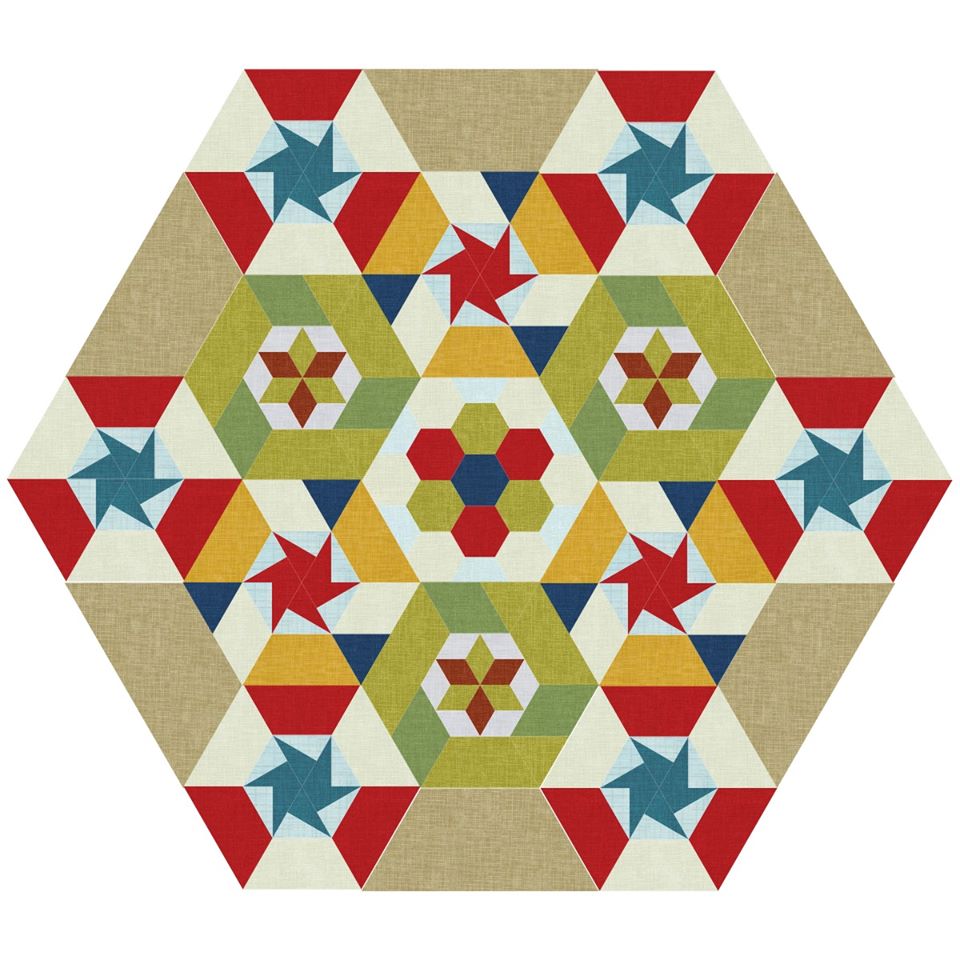
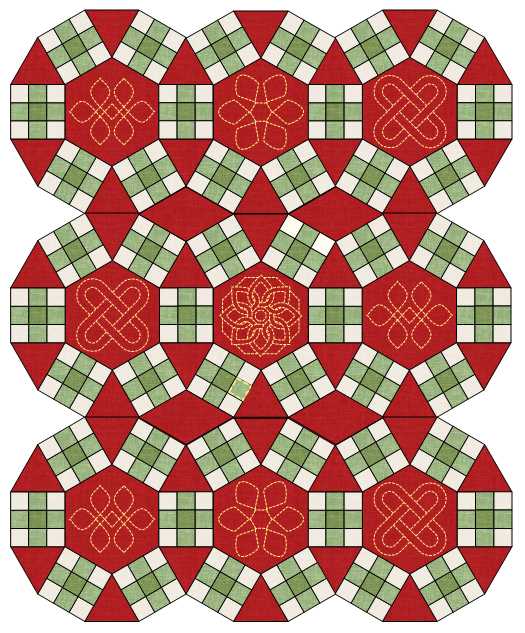
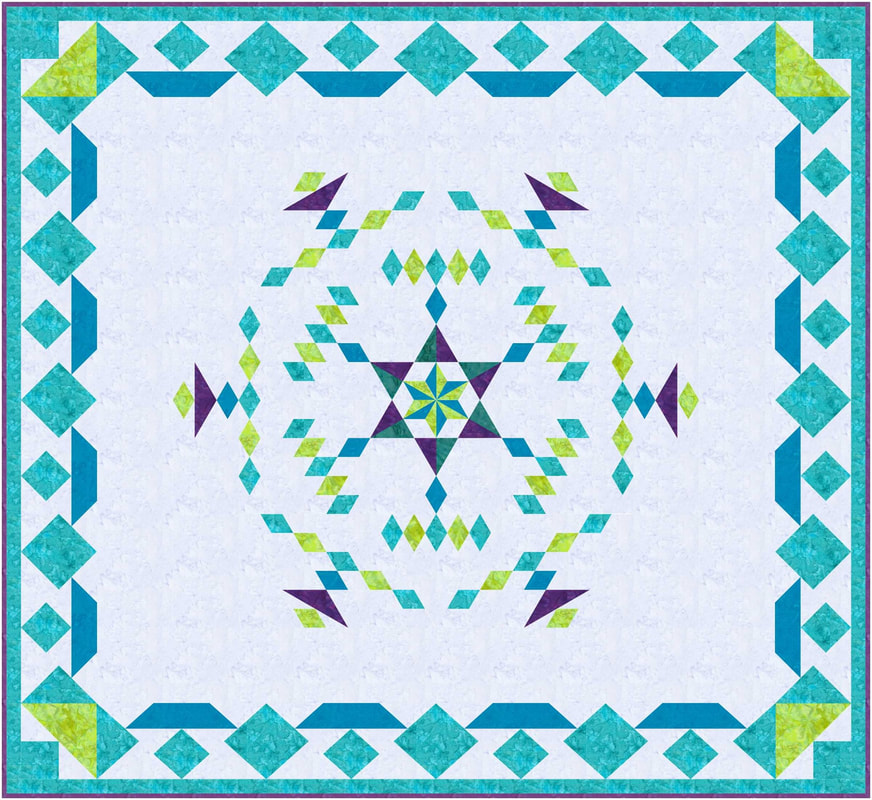
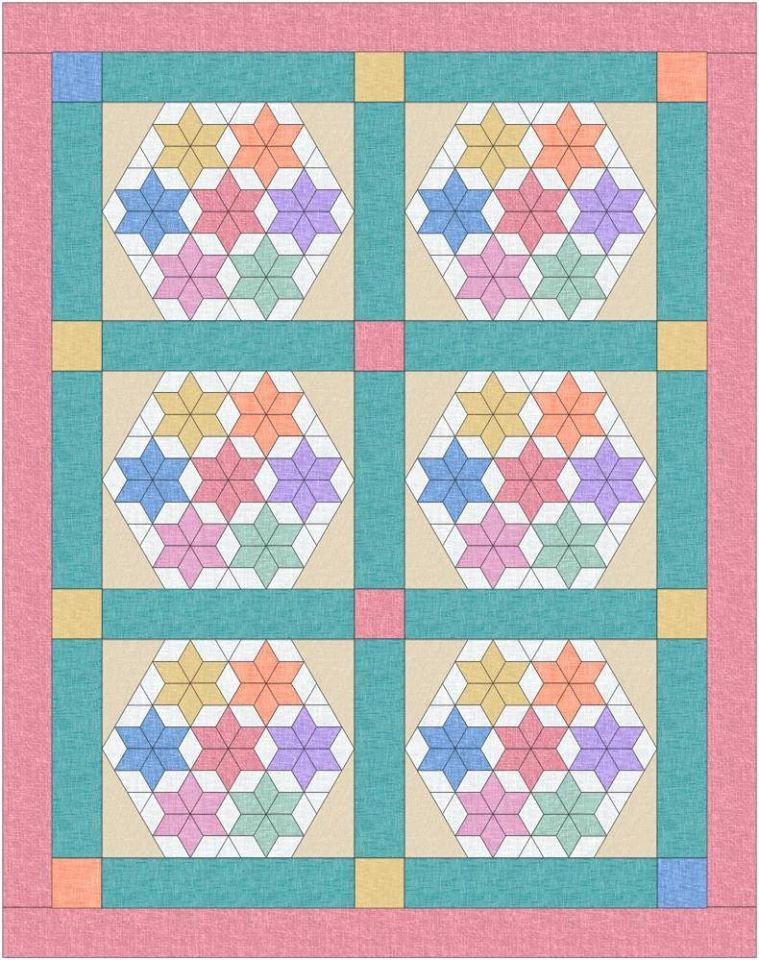
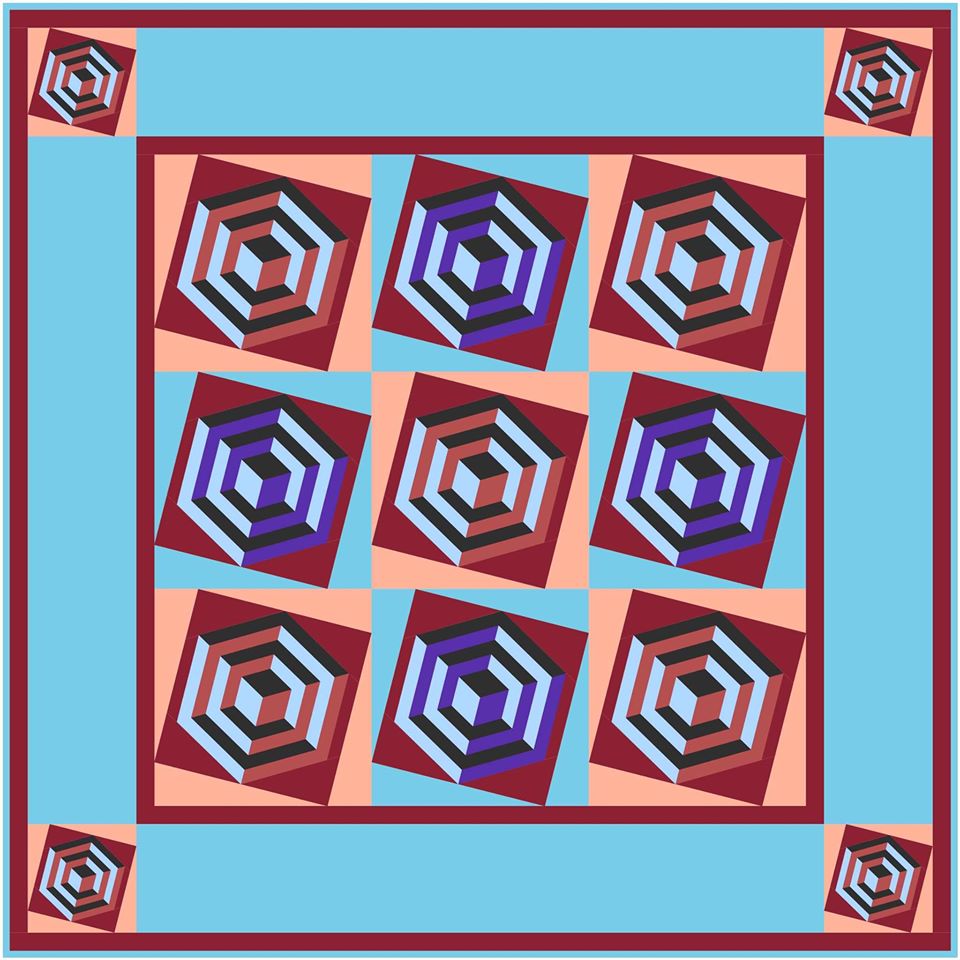
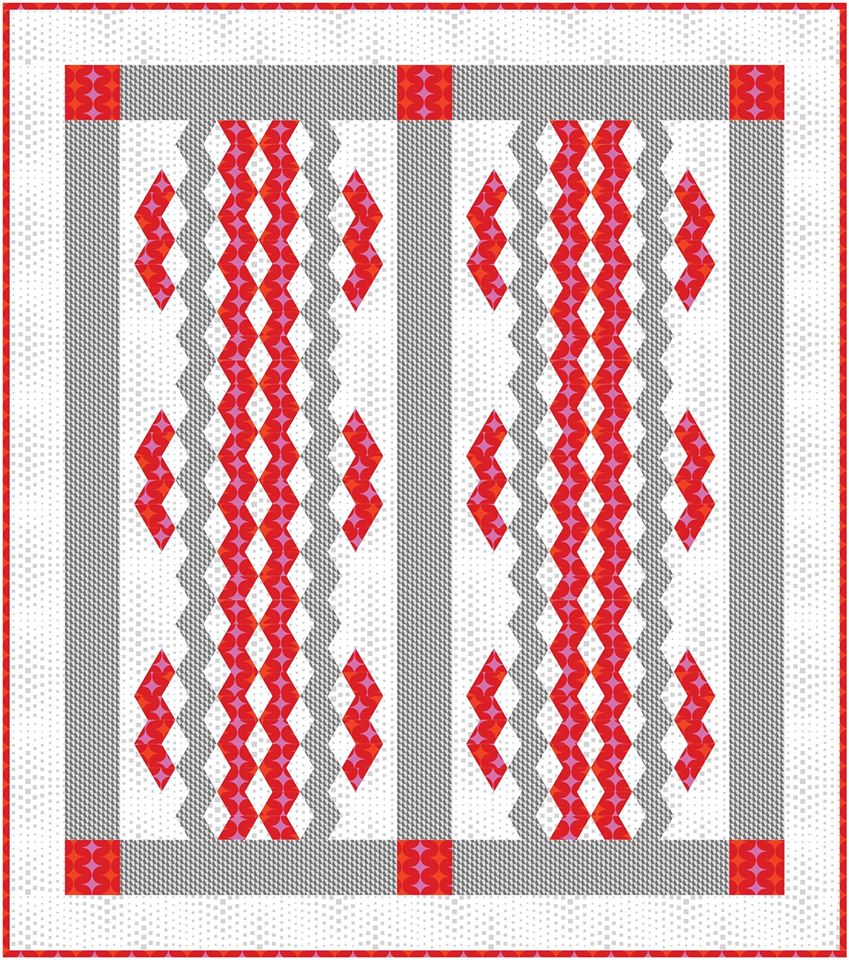
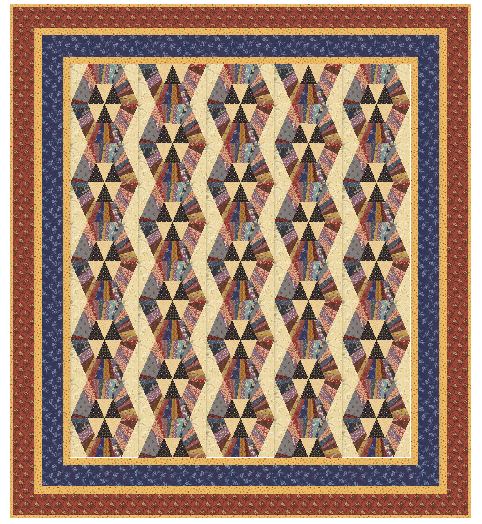
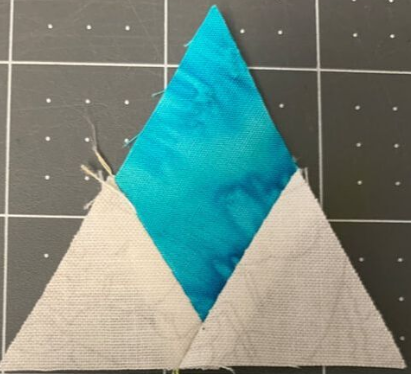 Construct the teal and white Star 60 units as described in Equilateral Triangle 1.  Cut Green diamonds and triangles from 1-1/4" green strip. Cut yellow triangles from 1-1/4" yellow strip. Cuts should be done with the Star 60 tool. 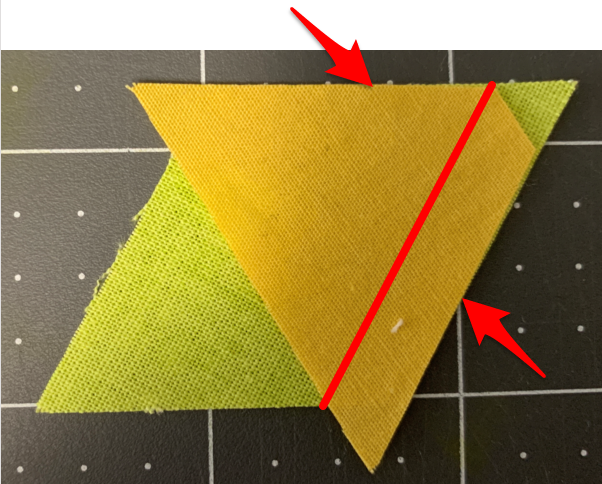 Align raw edges of yellow triangles with green diamond (red arrows). Sew 1/4" seam on right side (red line). 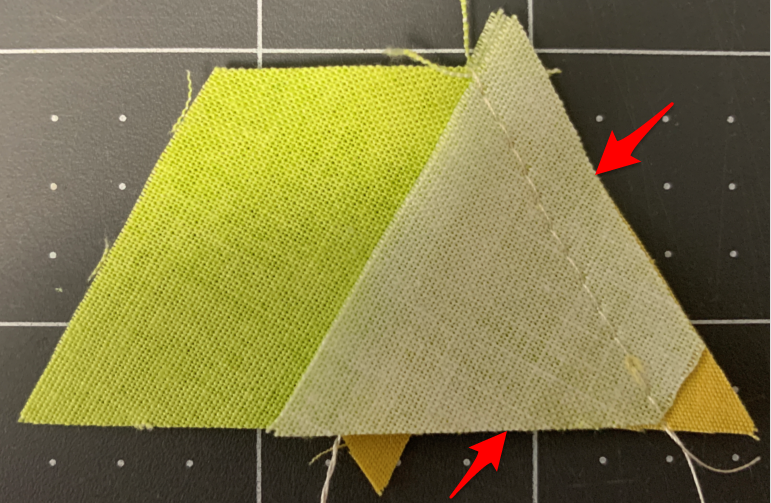 Align raw edges of green triangle with previous unit (red arrows). Sew 1/4" seam on right side.  Position below the Star 60 Unit. 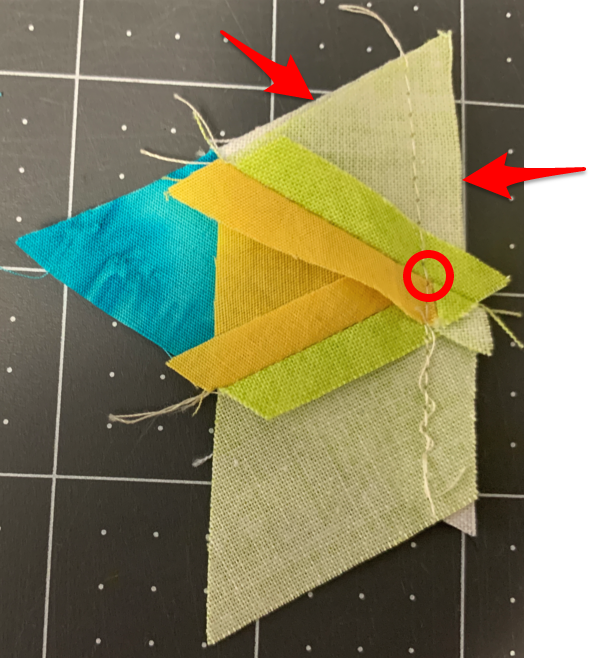 Align raw edges of parallelogram with equilateral triangles (noted by red arrows). make sure the seam triangle intersections line up (the red circle). Sew 1/4" seam. 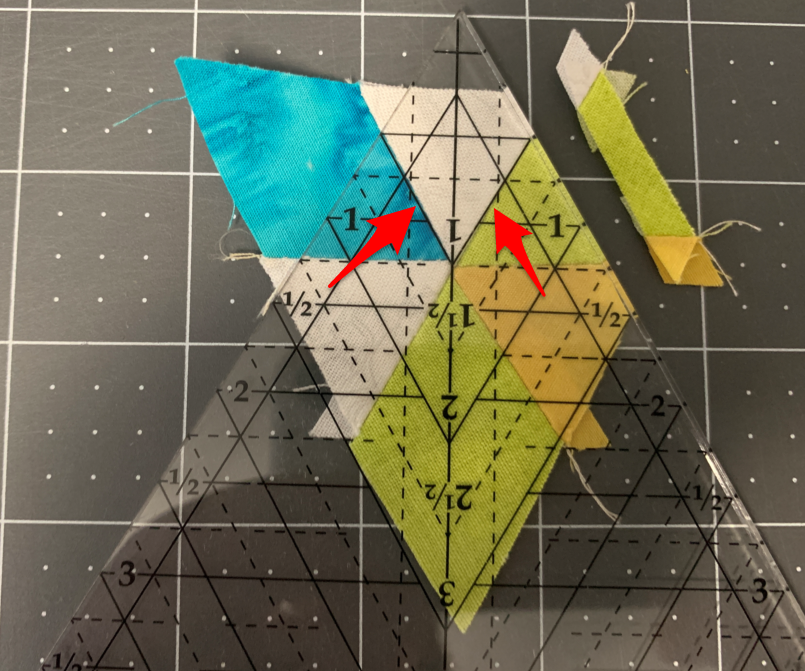 Line up sewn seams on white triangle with the 1" diamond guidelines on the Star 60 tool. Trim right edge. 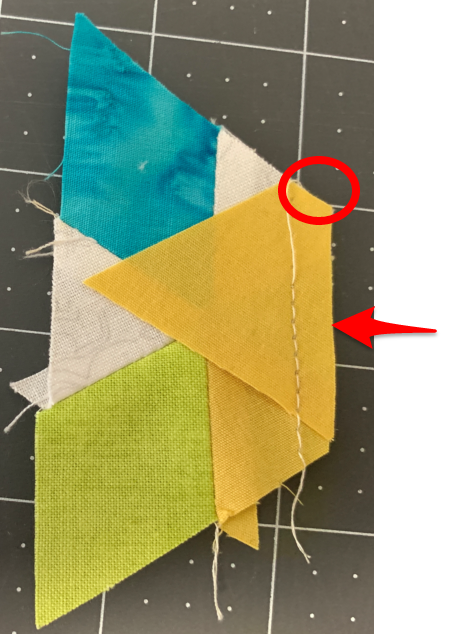 Match the flat edge of the yellow triangle with the previous unit. The raw edge should also be aligned. Sew 1/4" seam. 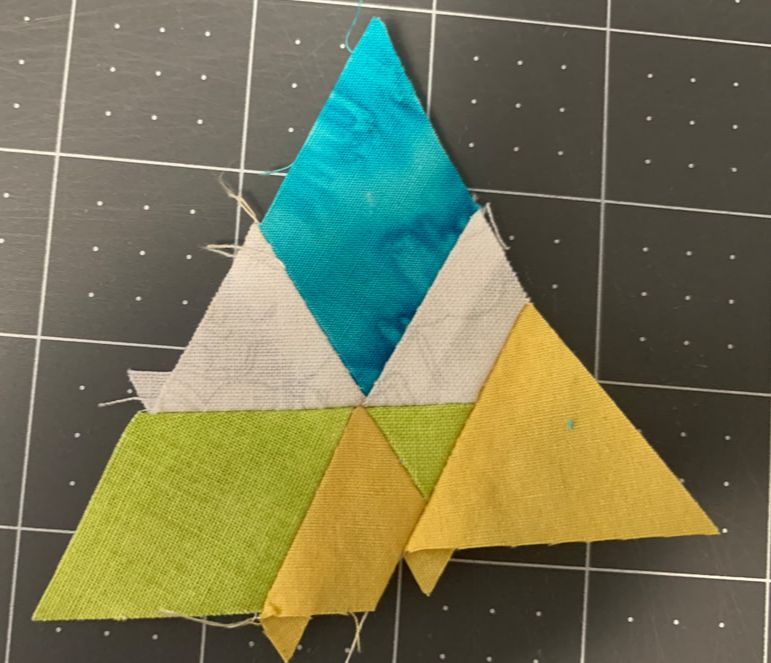 Ready for trim down. 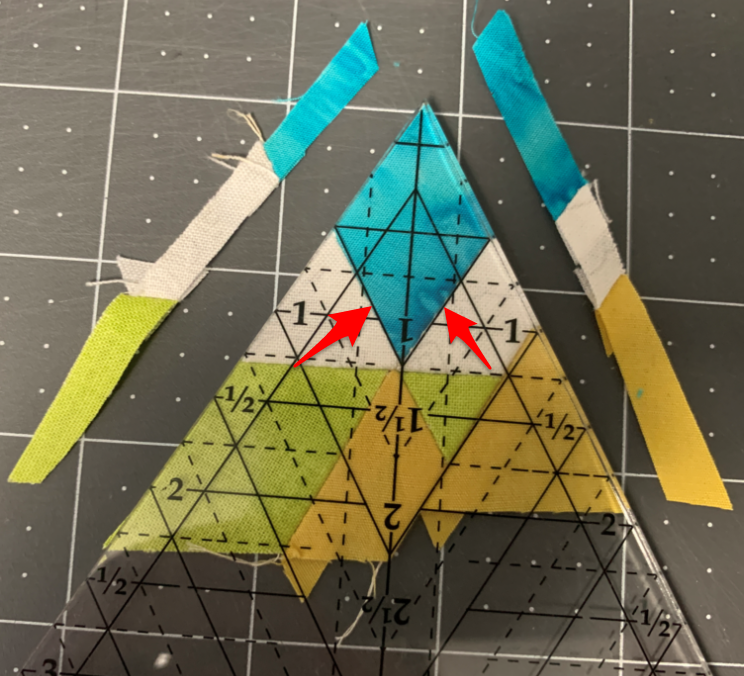 Match the 1 inch diamond guidelines from the Star 60 tool with the blue diamond sew lines. Trim the right and left edges. 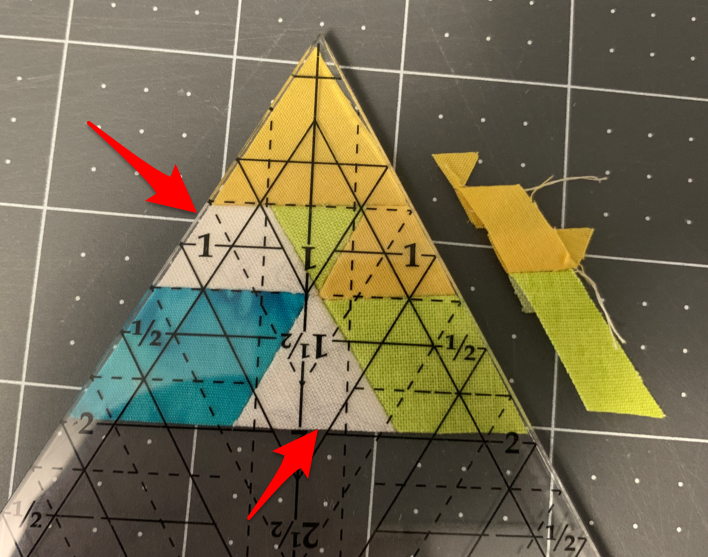 Rotate the unit so the most recently cut edges align with the left edge and 2 inch horizontal line on the Star 60 tool. Trim the right edge. 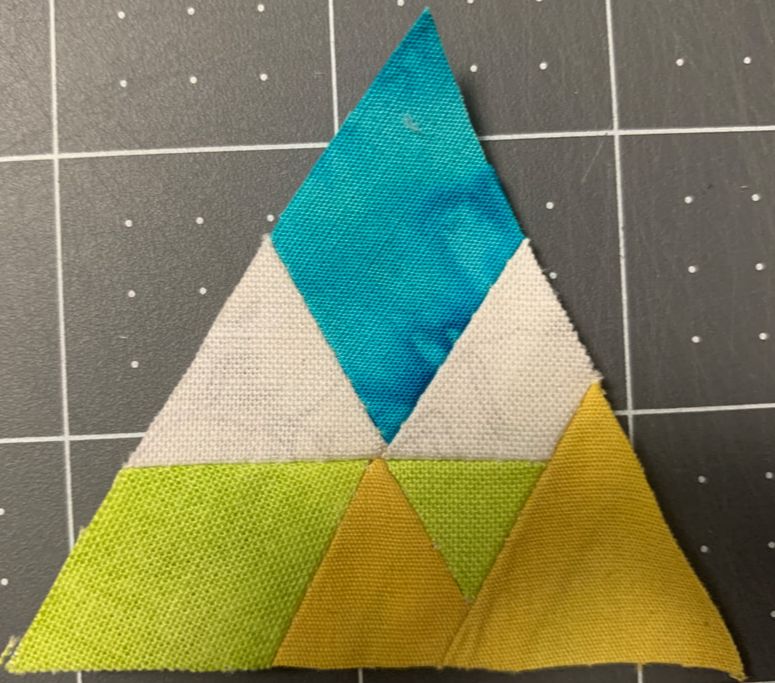 Finished Equilateral Triangle 2. Make 3 for each hexagon (9 total for 3 hexagon blocks). 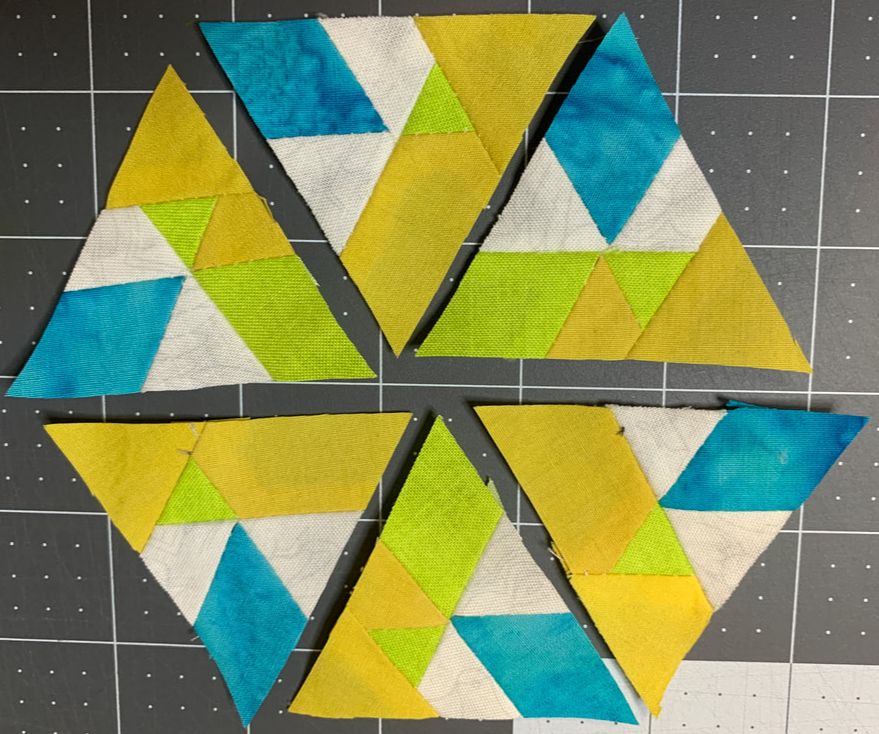 Lay out each hexagon block using 3 of equilateral triangle 1 and 3 of equilateral triangle 2. Make sure the rotation of each unit matches the EQ design. Block Construction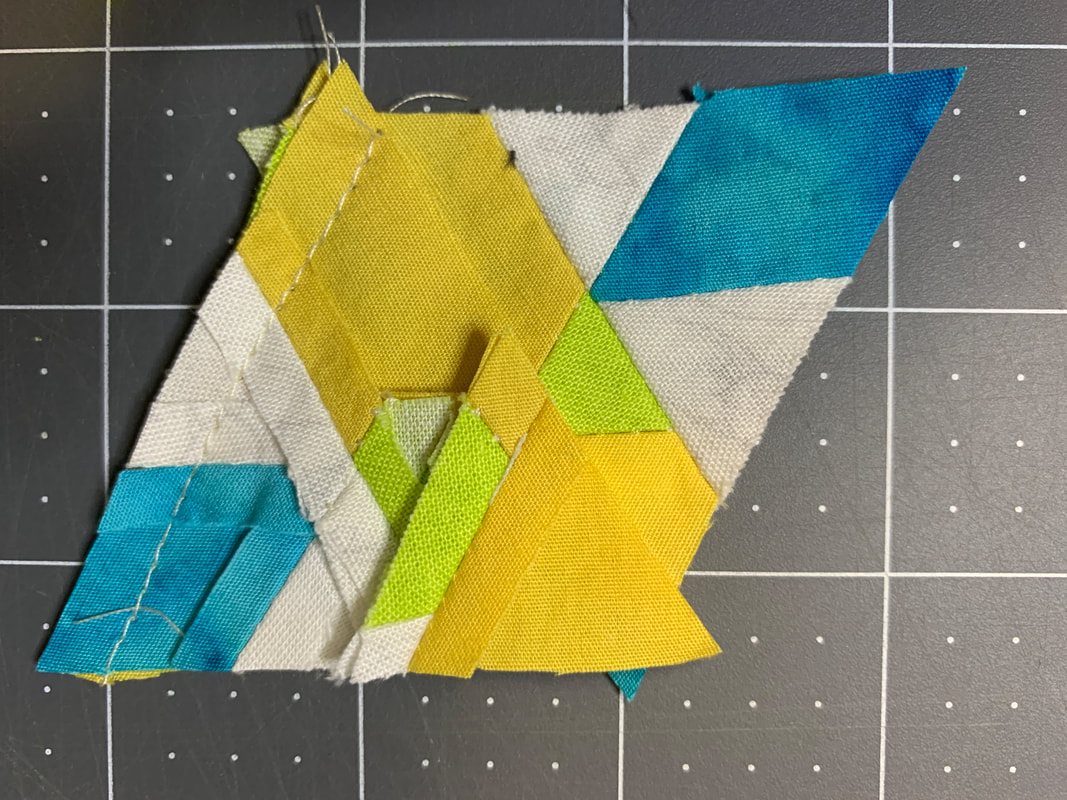 Join 3 equilateral triangles in a row. Create two rows for each hexagon. 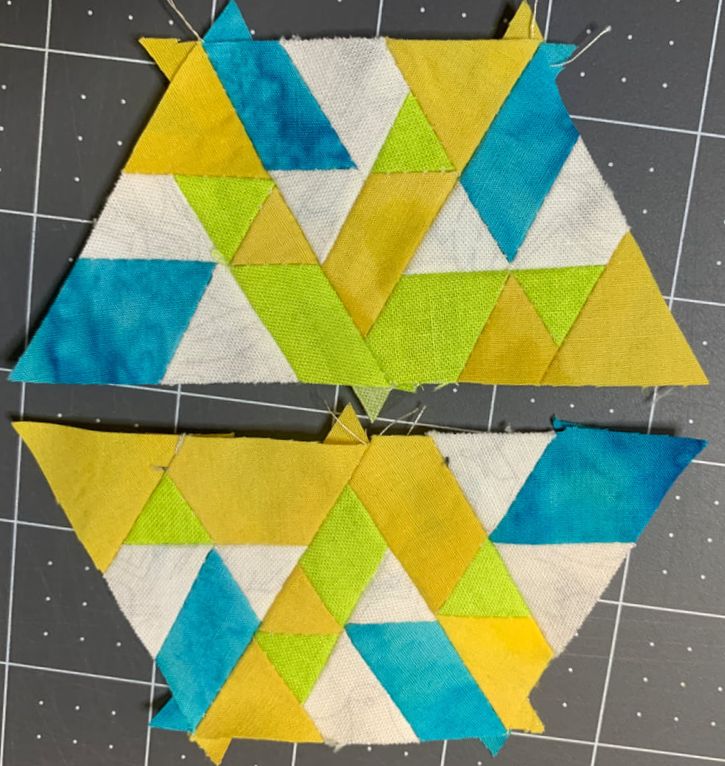 Combine top and bottom rows. 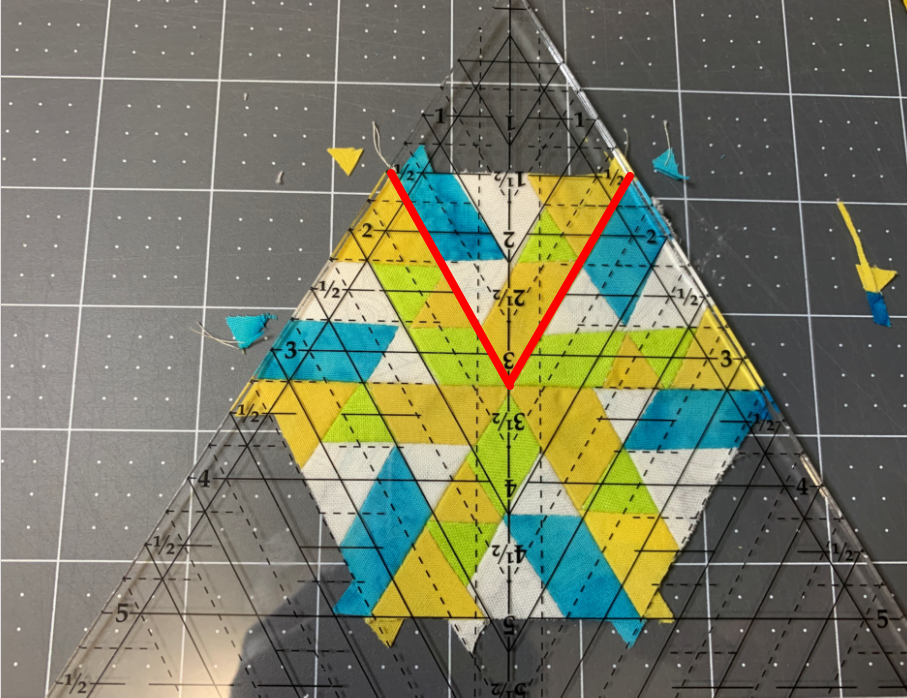 Line up the 3" equilateral triangle lines on the Star 60 wedge tool and trim any extra. There may only be the extra nubs on the bottom to trim. Rotate unit and do the trim down for every triangle section. 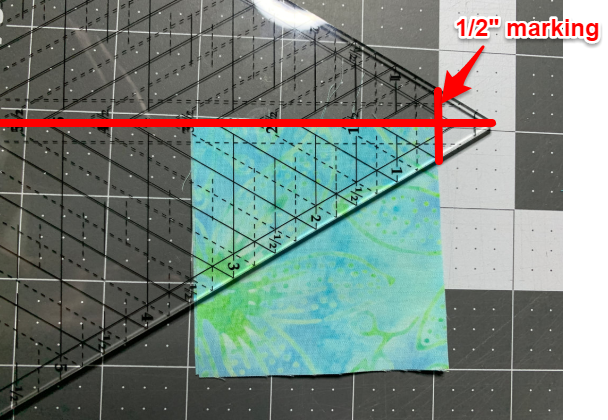 Put two 3 inch squares right side together. Line up the center mark on the Star 60 tool and the marking at 1/2 inch. Trim slanted edge. 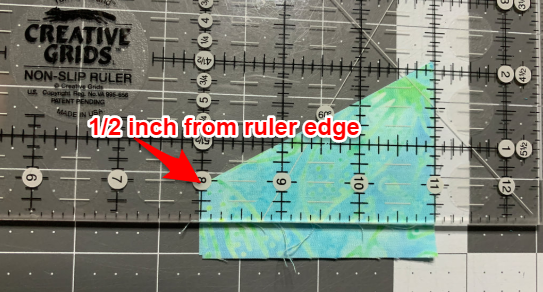 Using a standard ruler, trim second set of setting triangles to 1/2 inch from slanted cut. 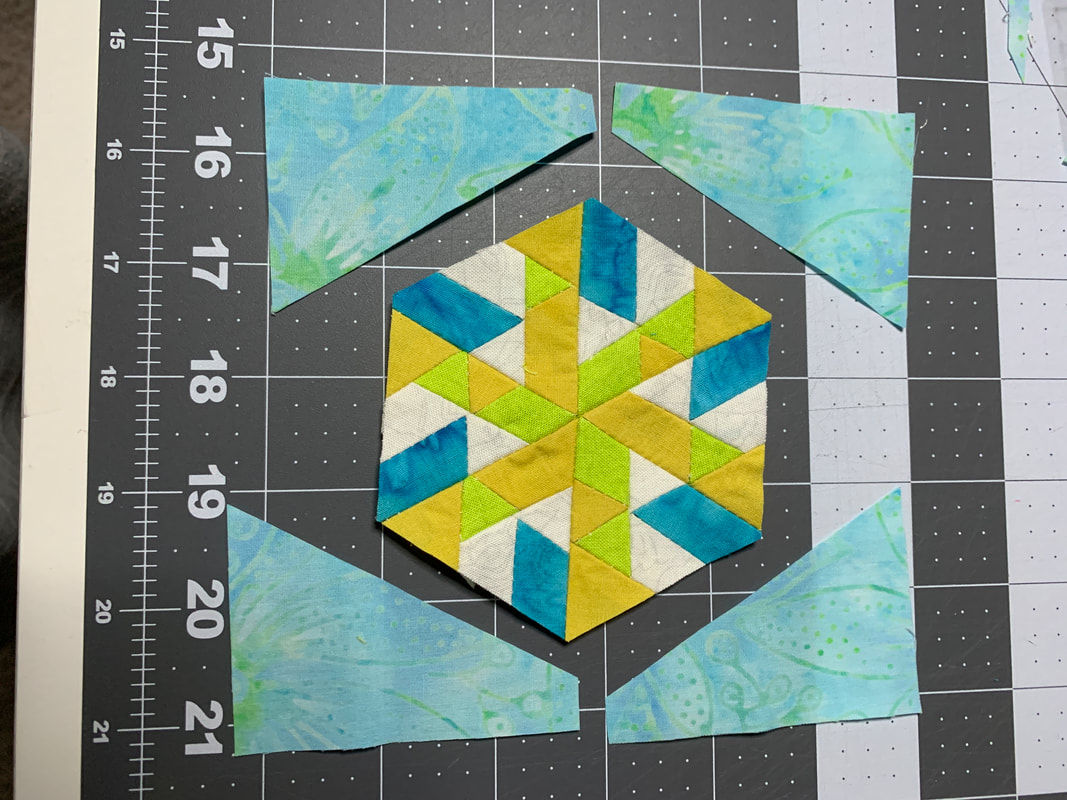 Lay out setting pieces on four sizes of pieced hexagon. 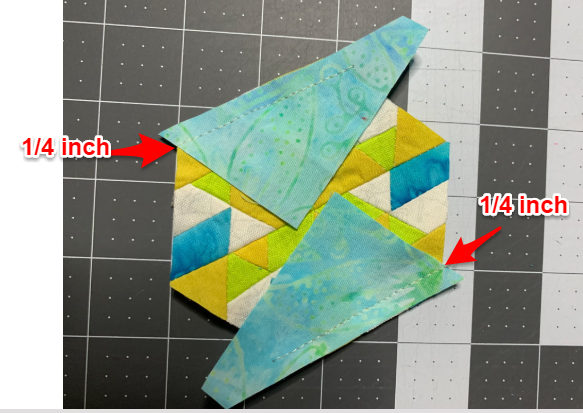 With right sides together lay setting pieces on two corners. Shift the pieces so that the start of the sew lines is 1/4 inch. Sew. Press toward setting corner pieces. 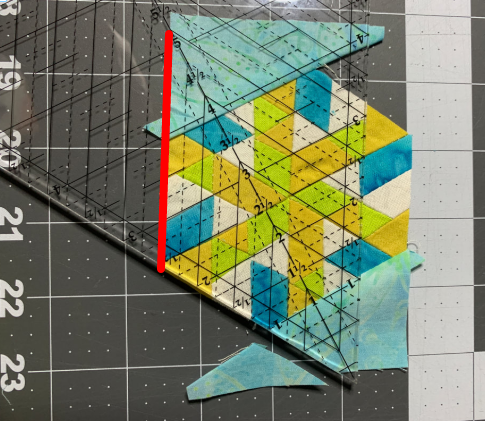 Match up the edge with the 5" diamond line and trim the setting piece on the opposite corner. 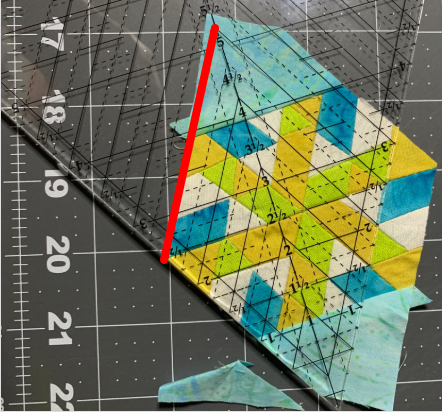 Rotate unit 180 degrees and repeat trim down on the other side. 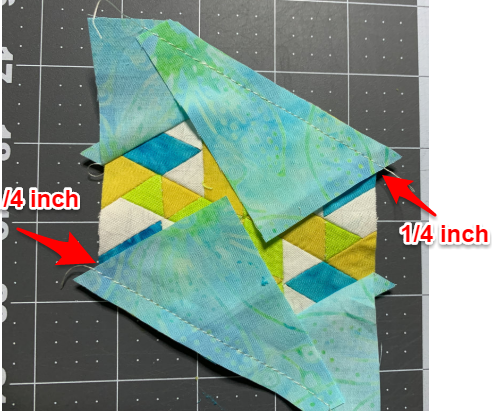 With right sides together lay setting pieces on the other two corners. Shift the pieces so that the start of the sew lines is 1/4 inch. Sew. Press toward setting corner pieces. 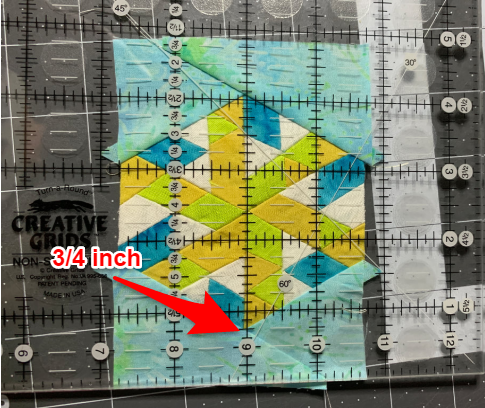 Using a standard ruler trim edges of block so the setting triangles are 3/4 inch from hexagon corner. Trim both sides. 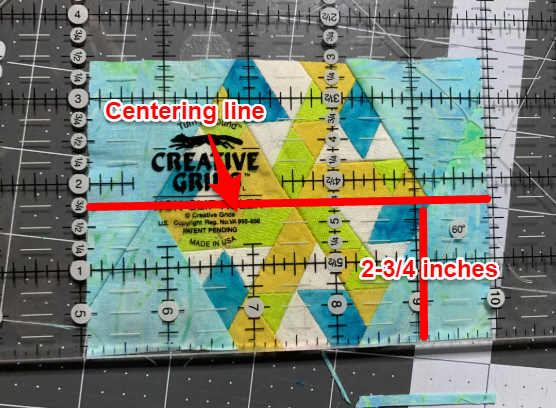 Trim top and bottom so that the center line on the ruler is at 1-3/4". The block should now measure 5" x 3-1/2". Quilt Construction Sew 3 blocks together. Center should measure 9-1/2" x 5". 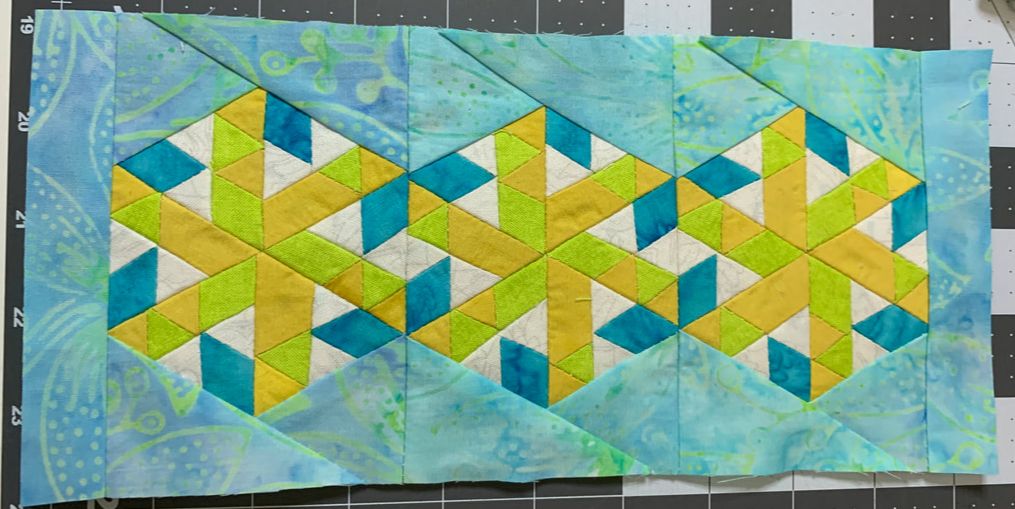 Add 1" x 3-1/2" strips of setting fabric to two sides. Piece should measure 10-1/2" x 5"  Add 1-1/2" x 10-1/2" border pieces to two sides. Add 1-1/2" x 7" border pieces to opposite two sides. Piece should measure 12-1/2" x 7". 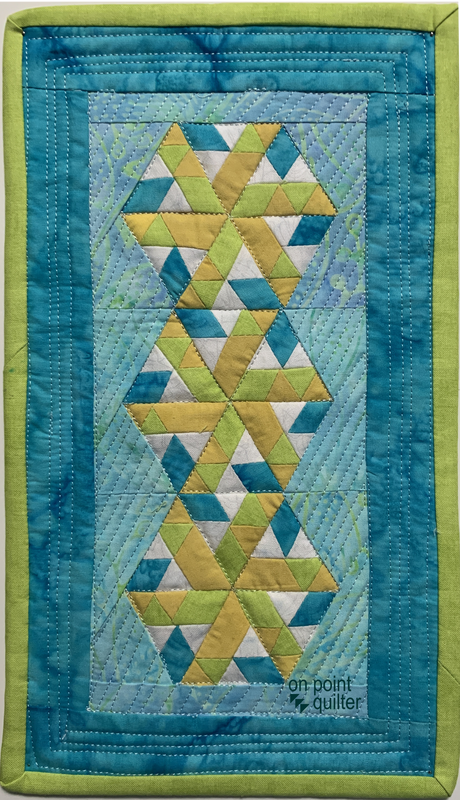 To quilt the Miniature Star 60, I stitched in the ditch around the equilateral triangles. For the setting corners and inner border, I quilted about 1/4 inch apart following the angle of the hexagon blocks. I quilted straight lines for the outer border. Everything was eye-balled (with no pre-marking of the quilting lines) Review of Star 60 Tool by Studio 180 DesignI liked that all of my pieces were easy to cut with the Star 60 tool (equilateral triangles, diamonds and the trapazoid pieces). I was even able to cut the setting triangles. Of course the oversized piecing, trim down technique from Studio 180 Design is always a preferred piecing methodology in any of my quilts. I was pleasantly surprised that these miniature units were no problem. The instructions that came with the tool were good -- but there were a lot of them and it was a little easy to get lost the first time cutting and trimming down each unit. I know that I will use this tool again. The tool should be available at local quilt shops. Here is a link directly to the Studio 180 Design website, if you would like to purchase directly from them. 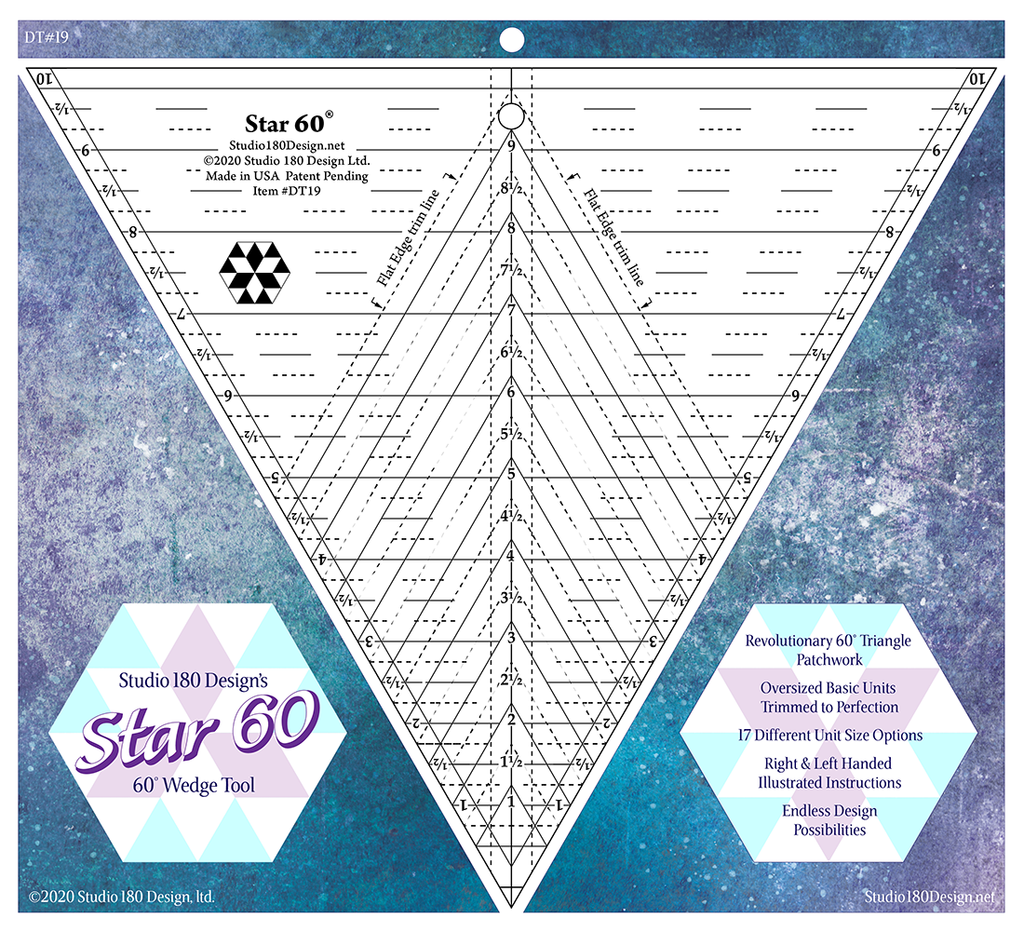 https://deb-tuckers-studio-180-design.myshopify.com/collections/star-60/products/star-61 Hexagon Quilts Designed in EQHexagons are one of my favorite type of designs in my Tech Know Quilter's classes. Tech Know Quilter's is a paid membership program for quilters who wish to master using Electric Quilt 8. Membership is only open a few times a year, so sign up for the wait list to be informed of the next open enrollment period. Here are a few of the hexagon designs created by Tech Know Quilter members. Many of these were class projects -- with a few originals or variations included. (Note that these are not necessarily Star 60 friendly.)
Susan Pelland
8/1/2020 08:29:34 am
Fabulous review of the Star 60 ruler and another fabulous quilt! I am always amazed by your tutorials Kari. You do a fabulous job with your instructions!
Lyrique
8/10/2020 07:42:31 am
What an excellent, well-planned lesson this is! Each and every step is meticulously photographed and described thoroughly. Thank you so much, Kari, for all your planning and effort that go into such a lesson. Comments are closed.
|


Free guide available for newsletter subscribers


Kari SchellElectric Quilt Expert and Educator and Pattern Designer. Categories
All
Archives
July 2024
|


 RSS Feed