
Back when I started quilting, I had a book from Mary Ellen Hopkins entitled "It's OK if you Sit on My Quilt Book". In this book she introduced the quilting world to connector corners. I think this may have been one of the techniques that revolutionized modern day quilting. Over the years I have heard a number of names for the technique including "cheater corner" and "folded corner".
The technique refers to a method of adding triangles to a quilt block. It is frequently the suggested method for creating snowball blocks, square within a square units and flying geese units. Although I've used the technique over the years, I found that I would have some fabric slippage or I would stretch the fabric in the pressing process -- resulting in less than perfect results.
A couple of years ago I was introduced to the Perfect Corner Ruler™. It is built off the folded corner concept. However this variation on the technique gets rid of some of the challenges with folded corners.
The Perfect Corner Method™ and Ruler™ were both developed by Ruthanna Grihalva, Forever In Stitches, LLC. 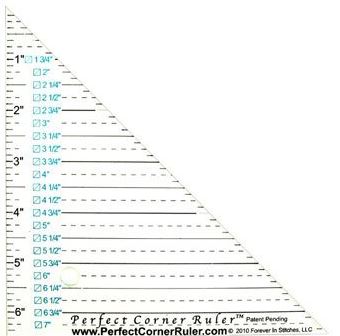
Perfect Corner Tool
Using the Perfect Corner Ruler
I used the Perfect Corner ruler in my Tad, Ted and Theodore Bowtie pattern. The example below is for the "Theodore" unit in this pattern.
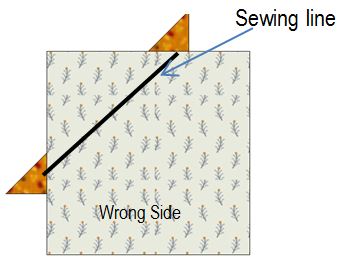
Using the ruler, draw a diagonal line on the wrong side of the base piece of fabric (this is the piece the corner will be added to). The measurement to use for this line is exactly the same as your folded corner measurement. (For the Theodore unit this is 2".) 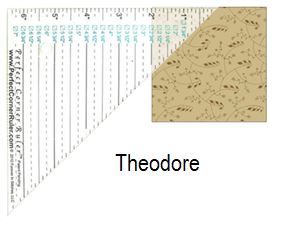
Theodore Perfect Corner Line
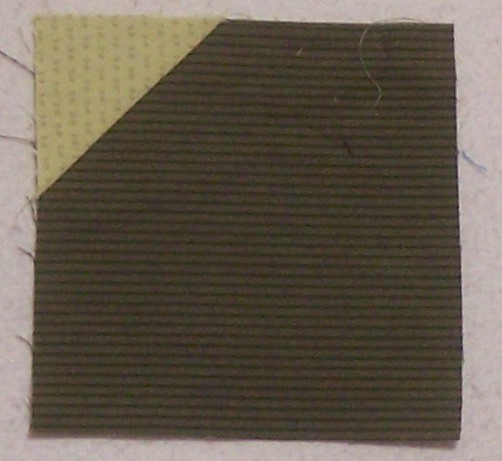
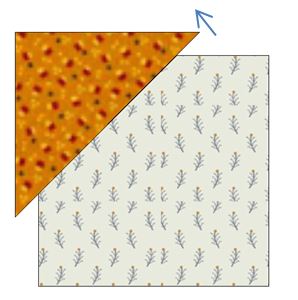
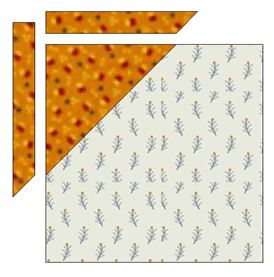
Cut corners. The square for these corners will be 3/4" greater than the folded corner square. For Theodore this was 2-3/4" x 2-3/4". Cut the square once on the diagonal for two corner pieces.
Using the Corner Pop Ruler
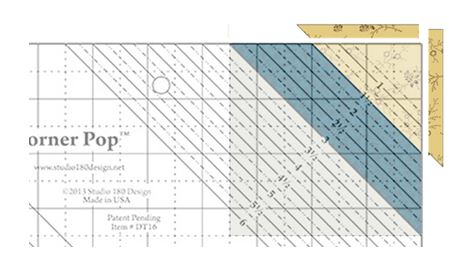
Approximately six months ago Deb Tucker came out with her version of a "folded corner" ruler. Corner Pop™ from Studio 180 Design is used for folded corner units. Using this tool you will trim rather than mark, add an oversized replacement triangle and then square everything to a perfect size.
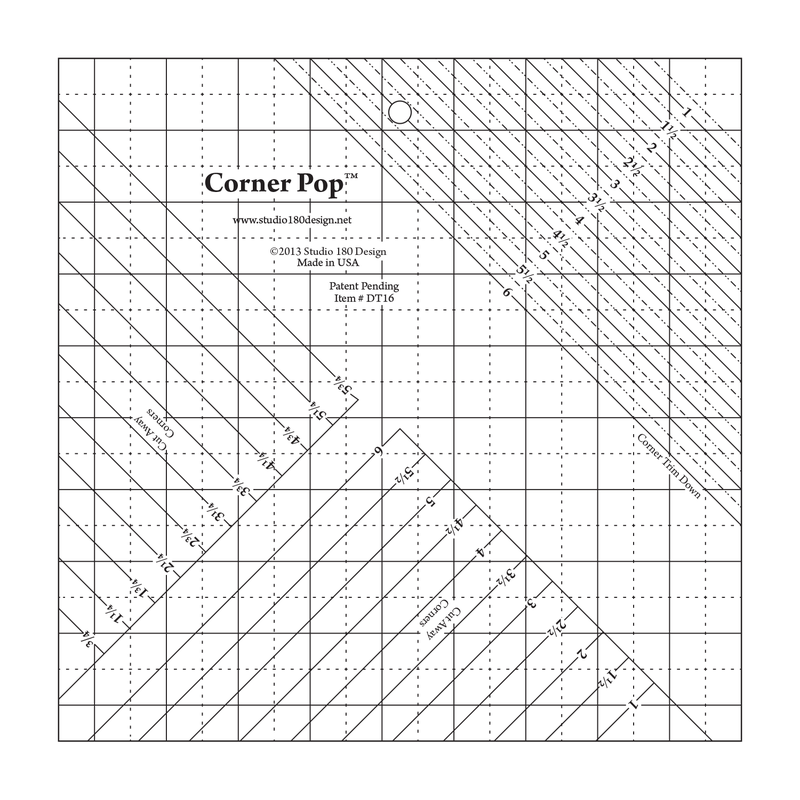
Deb Tucker's Corner Pop Ruler
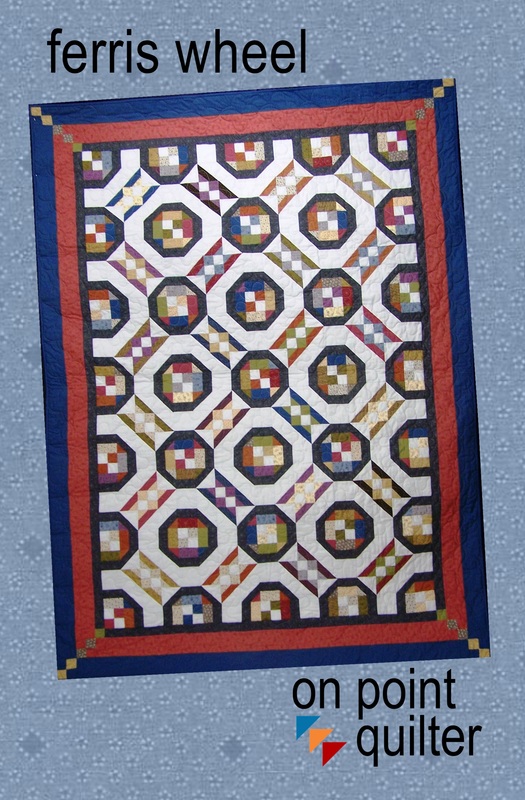
This tool is featured in my latest pattern - Ferris Wheel. This pattern would have traditionally called for a 2 inch folded corner. Here is how I used the Corner Pop tool. 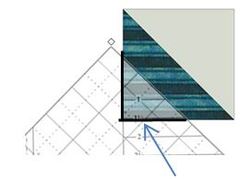
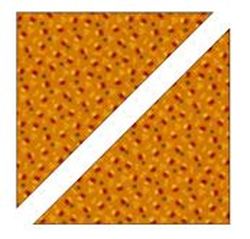
Use the 1 1/2″ Cut Away lines on the Corner Pop™ to cut one corner on a half-square triangle unit.
The square for these corners will be 3/4" greater than the folded corner square. (For this unit, the square is 2-3/4" x 2-3/4".) Cut each corner squre once on the diagonal to create two half-square triangles.
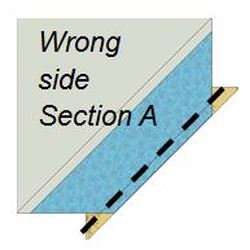
With the half square triangle unit on top, sew (using an accurate 1/4″ seam) the corner triangle to the half square triangle.
Folded Corner Poll
Inquiring minds what to know....what methods you have tried -- and if you have tried multiple methods, which one do you prefer. Poll selections are confidential.
Featured Pattern - Ferris Wheel
When going to the fair as a child, the ferris wheel was my favorite ride. I loved the view at the top and enjoyed colorful lights late at night. This quilt can be made with 8 fabrics or the medium and dark fabrics may be made from scraps. If made from scraps, Charms work for the Dark; and Fat Eighths or Fat Quarters for Medium 1 and 2.
Happy quilting.
Kari Sign up for my newsletter to stay current on what's happening in my studio and learn more quilting tips. As a thank you, I'll send you a FREE pattern for this small maple leaf quilt.
Judy
5/2/2015 02:55:43 am
Can't participate in your surveys as I use a different method. I use Inklingo to print HST's in the required size, then using the trimmed corners to place them accurately on the square, I sew along the printed seam line. No waste with cutting over-large HST's and the corners come out perfectly.
Sharon
5/2/2015 06:33:02 am
I don't like the folded corners method because I hate the wasted fabric, and I never sew those small triangles together to use in something else. Besides that, they don't turn out very accurate for me. My 1/4" seam allowance is more accurate. I prefer sewing a triangle to an already trimmed corner. I like Sharyn Craig's Cutting Corners Ruler, and would like to see you do a post on that ruler.
Connie
5/2/2015 03:52:39 pm
Ihave used all the methods including Sharon's, but my favorite and only method now is the Corner Pop tool from Studio 180 Design! LOVE that tool! Comments are closed.
|


Free guide available for newsletter subscribers


Kari SchellElectric Quilt Expert and Educator and Pattern Designer. Categories
All
Archives
July 2024
|

 RSS Feed