
Back when I started quilting, I had a book from Mary Ellen Hopkins entitled "It's OK if you Sit on My Quilt Book". In this book she introduced the quilting world to connector corners. I think this may have been one of the techniques that revolutionized modern day quilting. Over the years I have heard a number of names for the technique including "cheater corner" and "folded corner".
The technique refers to a method of adding triangles to a quilt block. It is frequently the suggested method for creating snowball blocks, square within a square units and flying geese units. Although I've used the technique over the years, I found that I would have some fabric slippage or I would stretch the fabric in the pressing process -- resulting in less than perfect results.
A couple of years ago I was introduced to the Perfect Corner Ruler™. It is built off the folded corner concept. However this variation on the technique gets rid of some of the challenges with folded corners.
The Perfect Corner Method™ and Ruler™ were both developed by Ruthanna Grihalva, Forever In Stitches, LLC. 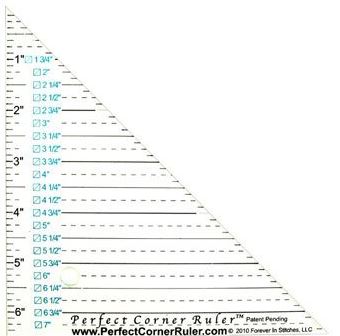
Perfect Corner Tool
Using the Perfect Corner Ruler
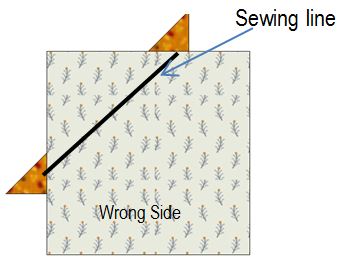
I used the Perfect Corner ruler in my Tad, Ted and Theodore Bowtie pattern. The example below is for the "Theodore" unit in this pattern.
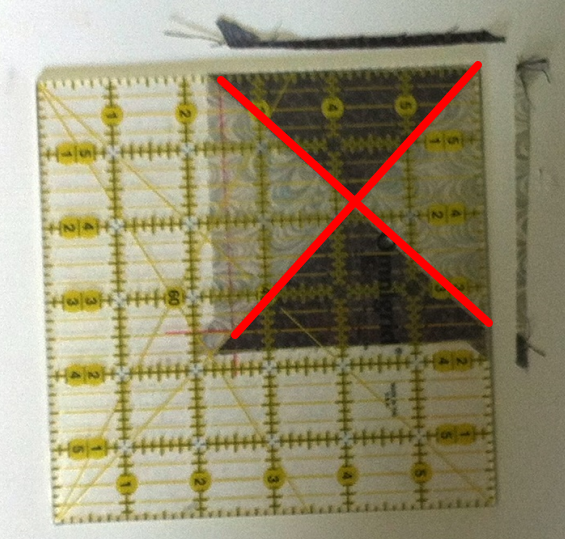
Using the ruler, draw a diagonal line on the wrong side of the base piece of fabric (this is the piece the corner will be added to). The measurement to use for this line is exactly the same as your folded corner measurement. (For the Theodore unit this is 2".) 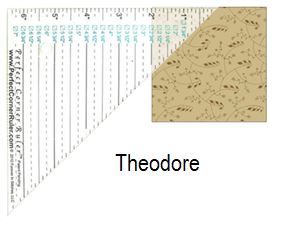
Theodore Perfect Corner Line
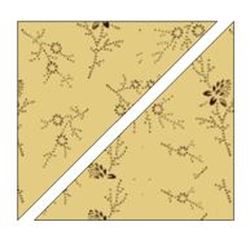
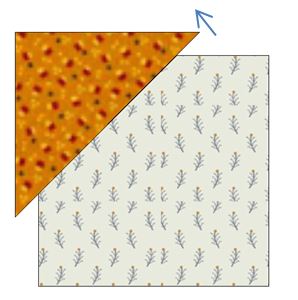
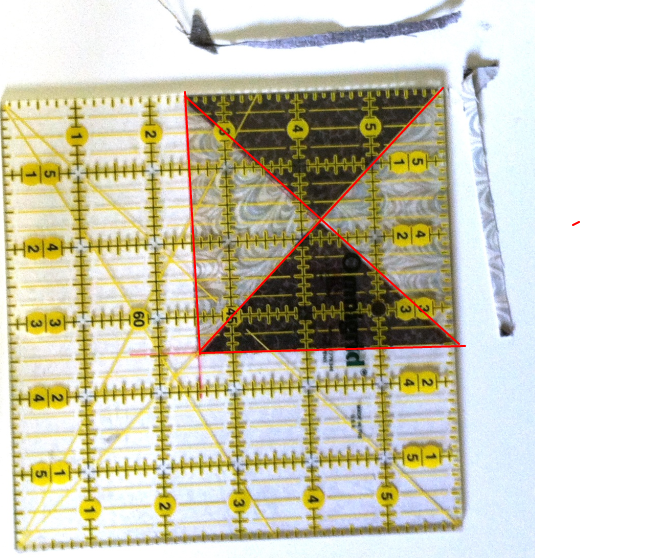
Cut corners. The square for these corners will be 3/4" greater than the folded corner square. For Theodore this was 2-3/4" x 2-3/4". Cut the square once on the diagonal for two corner pieces.
Using the Corner Pop Ruler
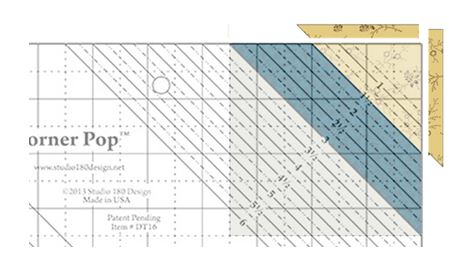
Approximately six months ago Deb Tucker came out with her version of a "folded corner" ruler. Corner Pop™ from Studio 180 Design is used for folded corner units. Using this tool you will trim rather than mark, add an oversized replacement triangle and then square everything to a perfect size.
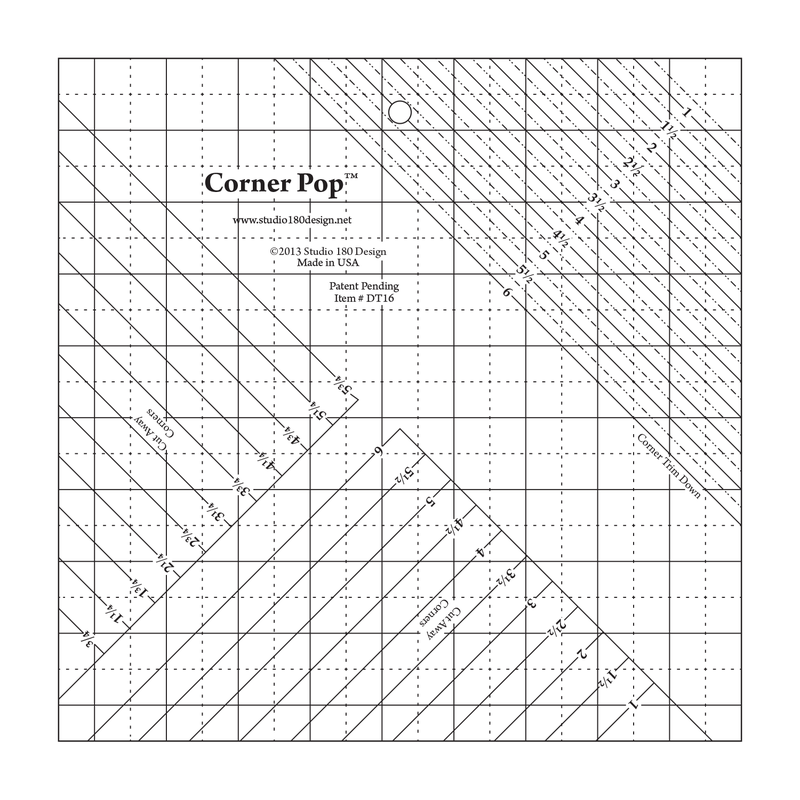
Deb Tucker's Corner Pop Ruler
This tool is featured in my latest pattern - Ferris Wheel. This pattern would have traditionally called for a 2 inch folded corner. Here is how I used the Corner Pop tool. 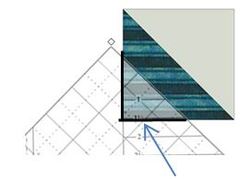
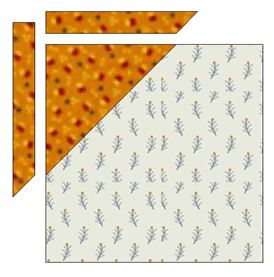
Use the 1 1/2″ Cut Away lines on the Corner Pop™ to cut one corner on a half-square triangle unit.
The square for these corners will be 3/4" greater than the folded corner square. (For this unit, the square is 2-3/4" x 2-3/4".) Cut each corner squre once on the diagonal to create two half-square triangles.
With the half square triangle unit on top, sew (using an accurate 1/4″ seam) the corner triangle to the half square triangle.
Folded Corner Poll
Inquiring minds what to know....what methods you have tried -- and if you have tried multiple methods, which one do you prefer. Poll selections are confidential.
Featured Pattern - Ferris Wheel
When going to the fair as a child, the ferris wheel was my favorite ride. I loved the view at the top and enjoyed colorful lights late at night. This quilt can be made with 8 fabrics or the medium and dark fabrics may be made from scraps. If made from scraps, Charms work for the Dark; and Fat Eighths or Fat Quarters for Medium 1 and 2.
Happy quilting.
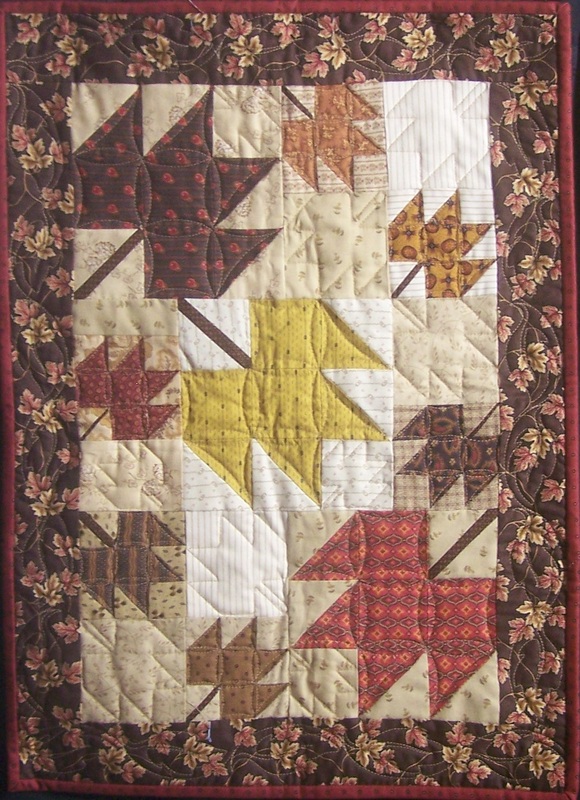
Kari Sign up for my newsletter to stay current on what's happening in my studio and learn more quilting tips. As a thank you, I'll send you a FREE pattern for this small maple leaf quilt.
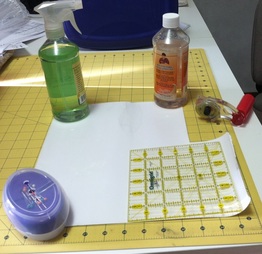
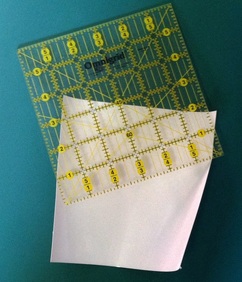
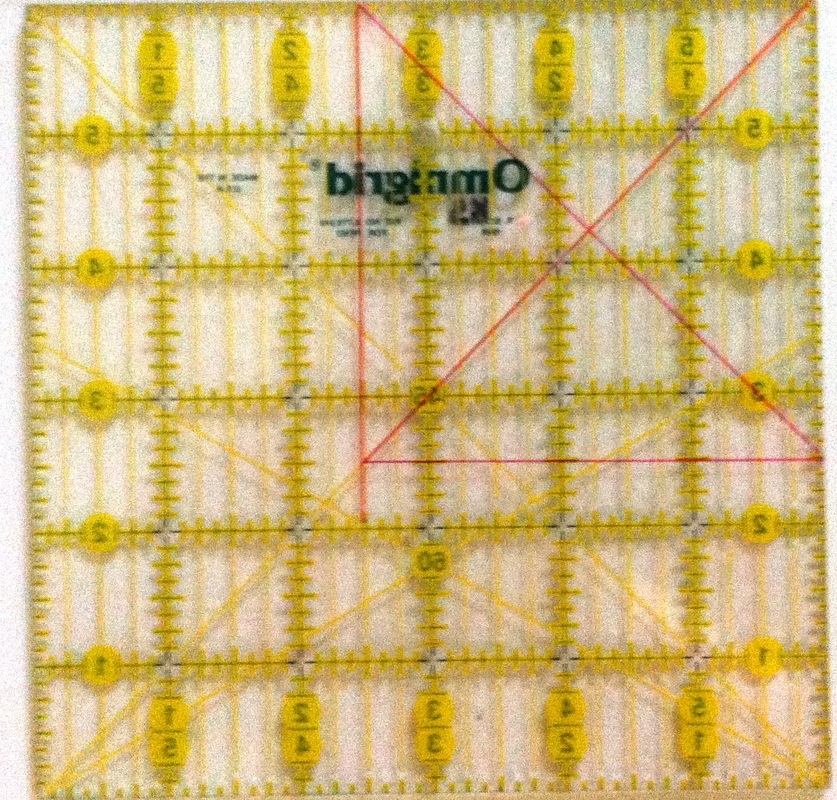
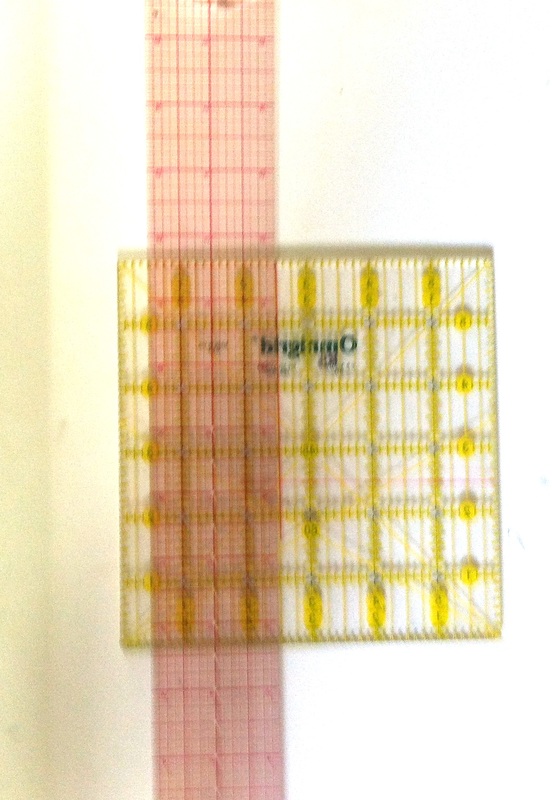
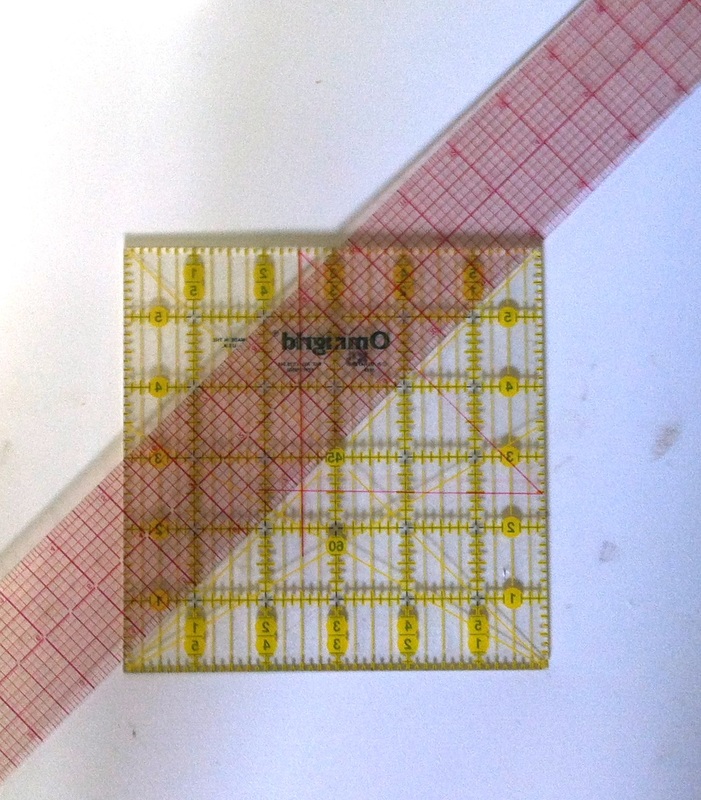
When using a standard ruler, I suggest adding additional lines to aid in fabric placement and cutting. I like to mark these lines with a fine point Sharpie marker. Since a Sharpie make “permanent” marks, I start by lining my ruler with Invisigrip. Invisigrip™ is a clear, non-slip material that is applied to rulers and templates to prevent rulers from slipping when rotary cutting. It is made by Omnigrid®.

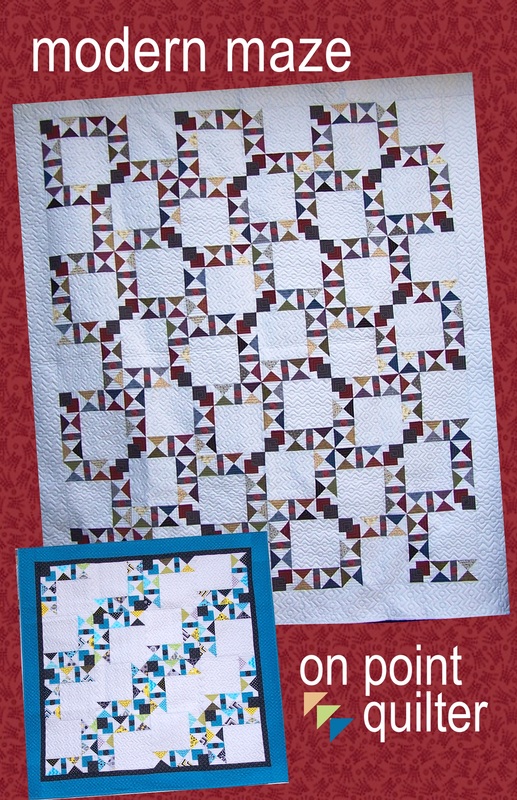
Featured Quilt - Modern Maze
|


|
Create your own maze with these asymmetrical blocks. There are endless rotation possibilities. The quilt may be completed with four fabrics or may be made from scraps (or with charm packs).
Finished sizes:
Recommended (optional) Tools: |
|
Happy quilting.
Kari
Sign up for my newsletter to stay current on what's happening in my studio and learn more quilting tips. As a thank you, I'll send you a FREE pattern for this small maple leaf quilt.
Kari
Sign up for my newsletter to stay current on what's happening in my studio and learn more quilting tips. As a thank you, I'll send you a FREE pattern for this small maple leaf quilt.
|
|
Someone had shared with me a post over a year ago for a “magic binding”. I had successfully used the technique on a charity quilt, posted about it, and then forgot it. A month ago a friend showed me a quilt she did with the technique and reminded me that I had written about it on my blog. Thanks Erin for the reminder.
Since I am currently finishing up a number of baby quilts and a number of Triangle Frenzy table toppers, this was a good opportunity for me to get caught up on my binding. So I thought I would re-share the technique, with a few more photos and suggestions for successfully creating this magic binding.
Since I am currently finishing up a number of baby quilts and a number of Triangle Frenzy table toppers, this was a good opportunity for me to get caught up on my binding. So I thought I would re-share the technique, with a few more photos and suggestions for successfully creating this magic binding.
Step 1 - Calculate number of strips needed.
Measure the perimeter of the quilt. Divide by 40 and round up to the next whole number.
Measure the perimeter of the quilt. Divide by 40 and round up to the next whole number.
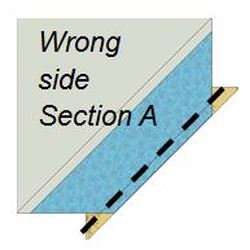
| Step 2 - Cut the strips. Binding fabric strips are cut at 1-1/4”. (Blue fabric in photo.) Flange fabric strips are cut at 1-1/2”. (Red fabric in photo.) For all strips, cut 45 degree angles on the ends. Keep my strips folded wrong sides together when making this cut. | 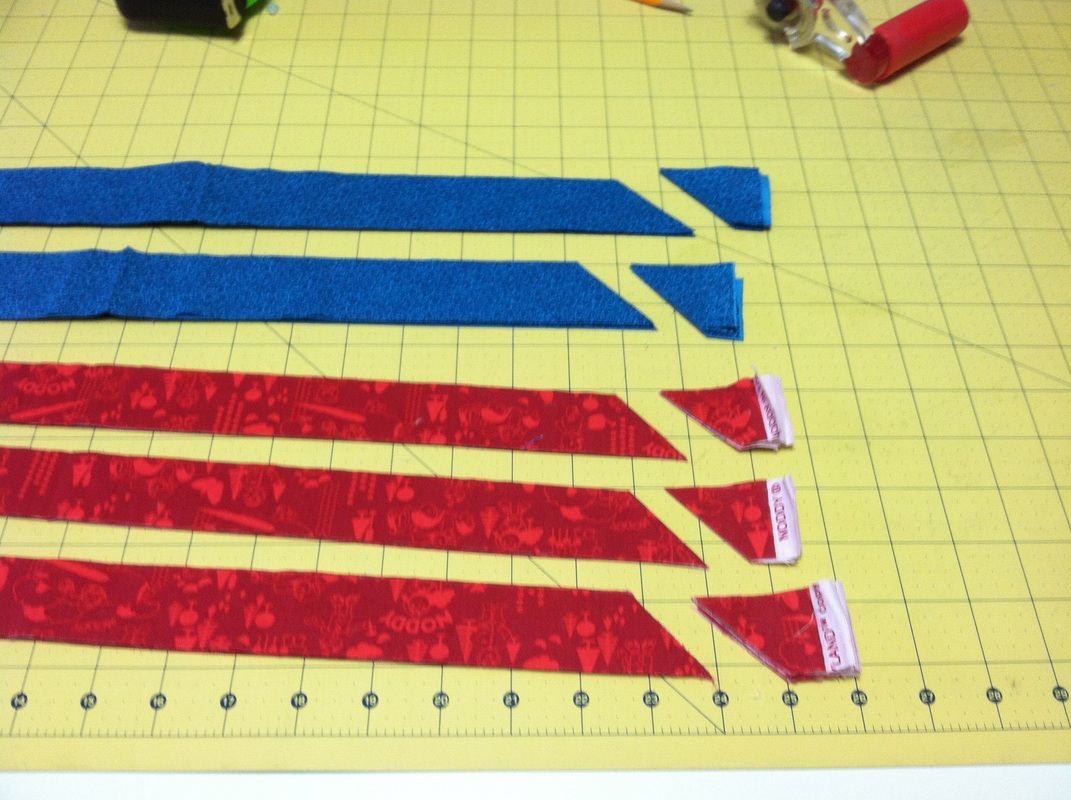 |
Step 3 – Combine binding and flange strips for one long strip of each.
Because I folded the strips before cutting the 45 degree angle, the strips will all interlock. If one side doesn’t work, flip to the other side when piecing.
Because I folded the strips before cutting the 45 degree angle, the strips will all interlock. If one side doesn’t work, flip to the other side when piecing.
| Step 4 - Combine both long strips together. |  |
| Step 5 - Cut a 45 degree angle on combined strips. Step 6 - Press toward BINDING FABRIC. | 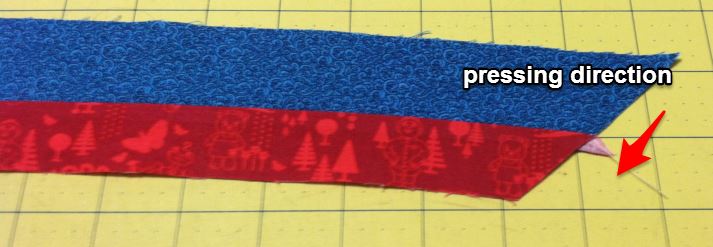 |
| Step 7 - Fold long piece in half wrong sides together and press again. | 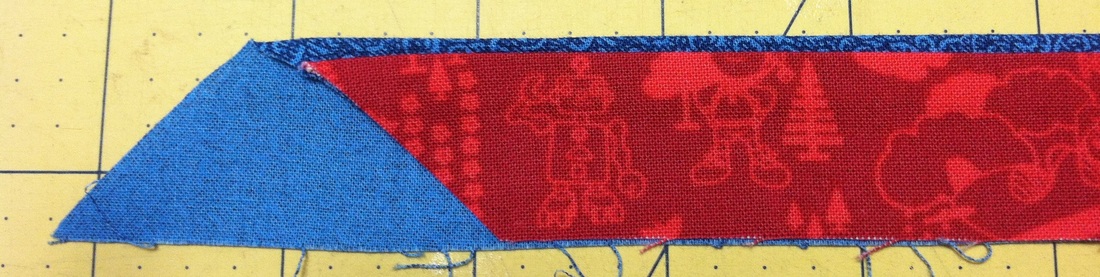 |
| Step 8 - With flange side up, sew the flange on the BACK side of the quilt. | 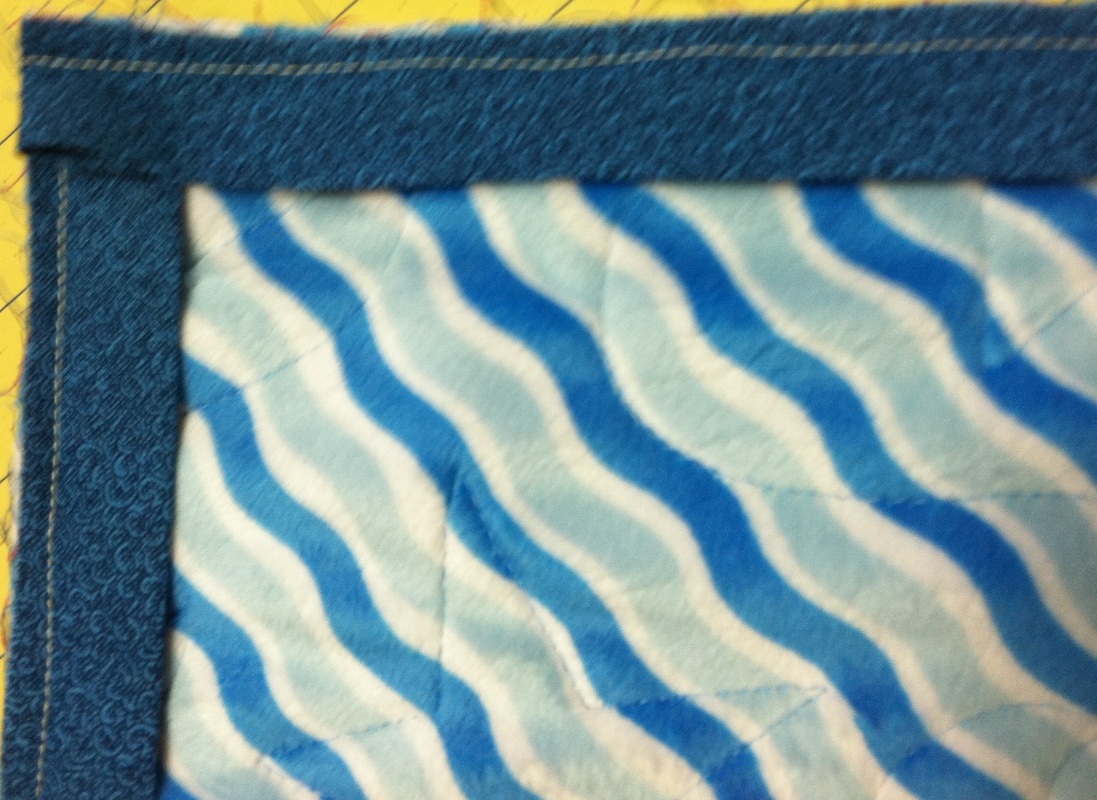 |
| Step 9 – Combine beginning and end of binding. Here is my tip for this step. Leave about a four inch tail before starting to stitch down the binding. Start stitching in the middle of one of the sides. When you are about eight inches from the start, lay the binding flat and mark the point the end matches the start of the binding. Also draw a short mark that shows the “angle direction” of the starting piece. Open the binding and match the 45 degree angle on a ruler with the bottom of the binding. The pencil mark should be at the 3/8 inch mark on the ruler. (Technically this should be ½ inch – but because we are working with bias, I have found more success making it a bit smaller.) Cut the 45 degree angle. Now sew the start and finish pieces together with ¼ inch seam. You should now be able to sew the continuous binding down with no gaps or extra bulk. | 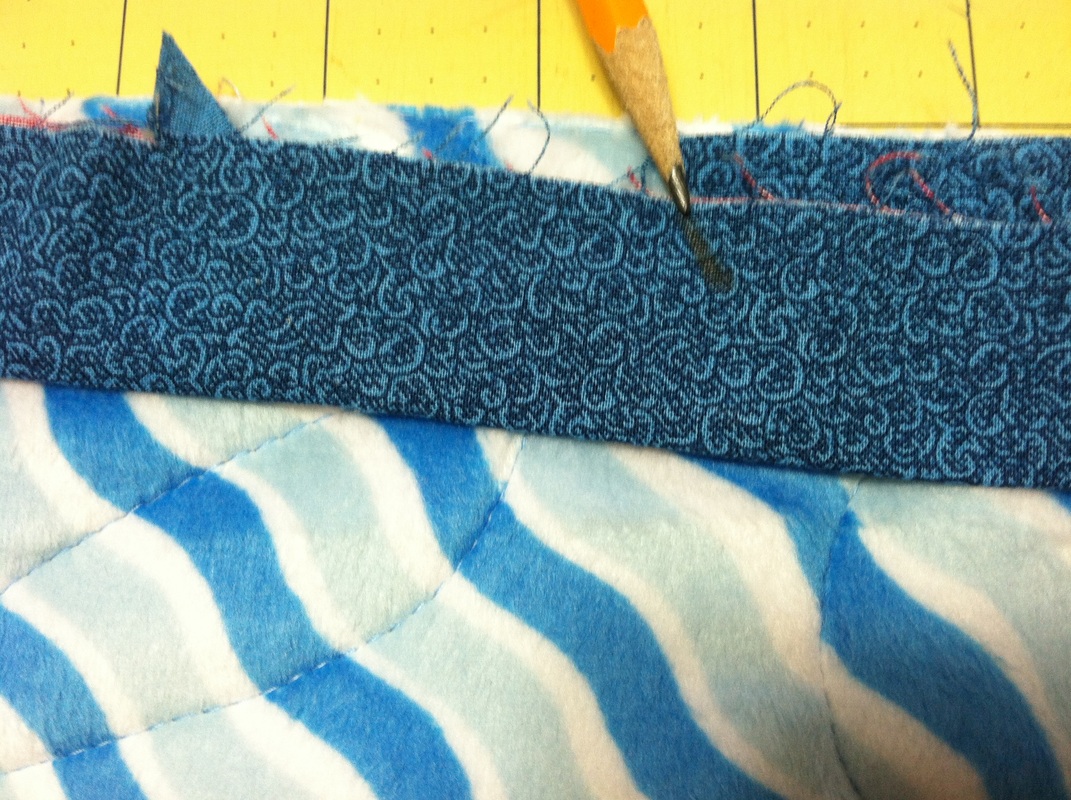 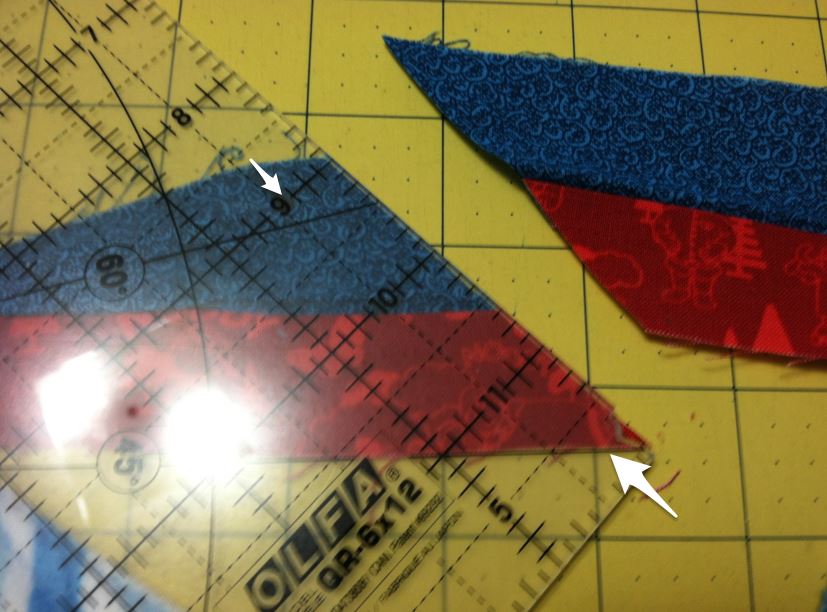 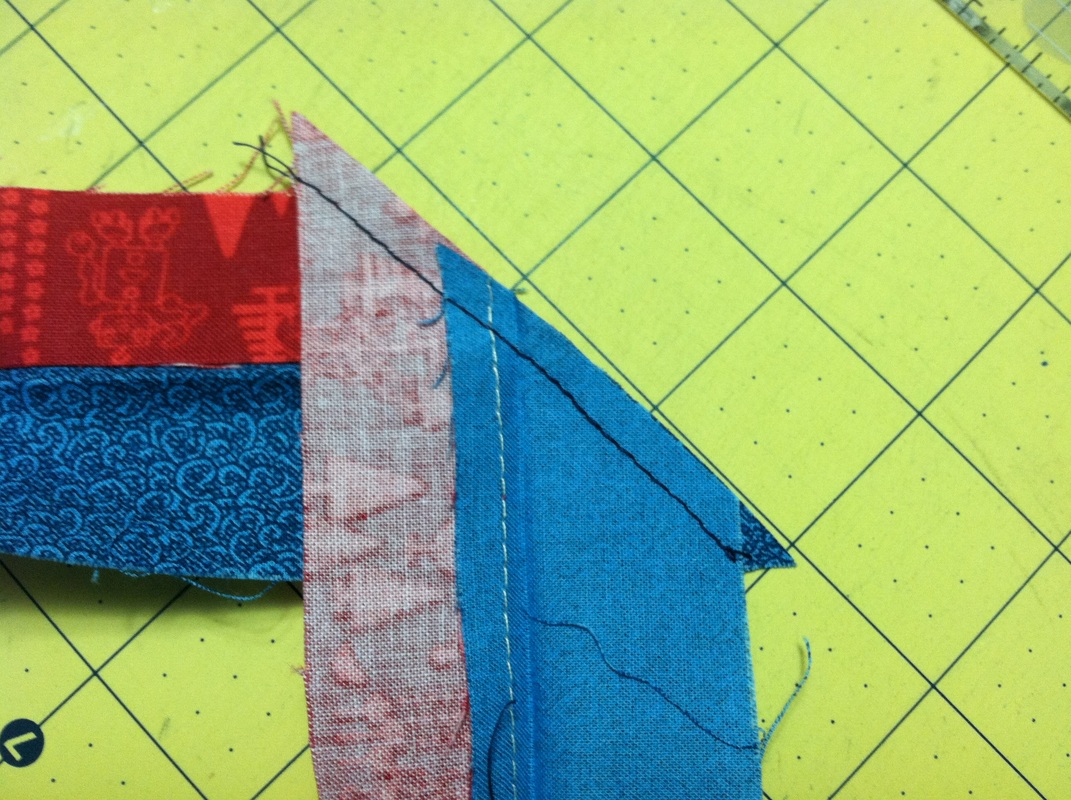 |
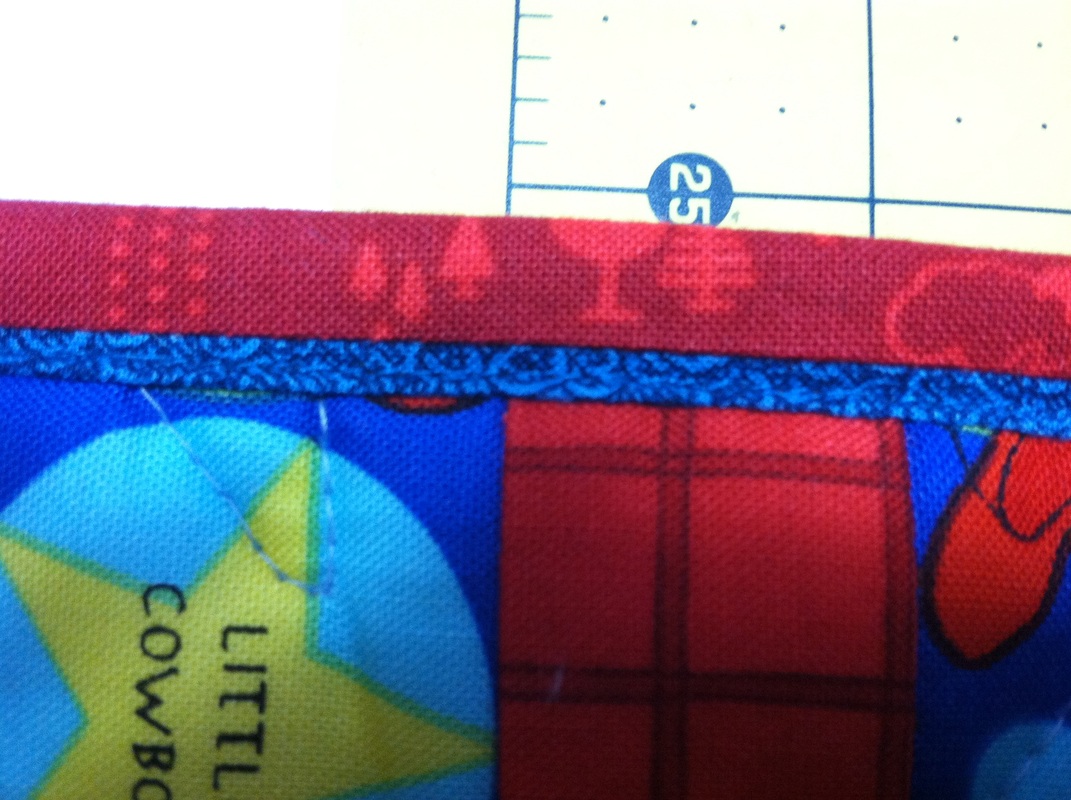
| Step 10 - Press binding toward the quilt front and pin in place. The flange should extend slightly beyond the ¼ inch sewing line. I like to use the red Clover Wonder clips to hold the binding in place until I can sew it down. | 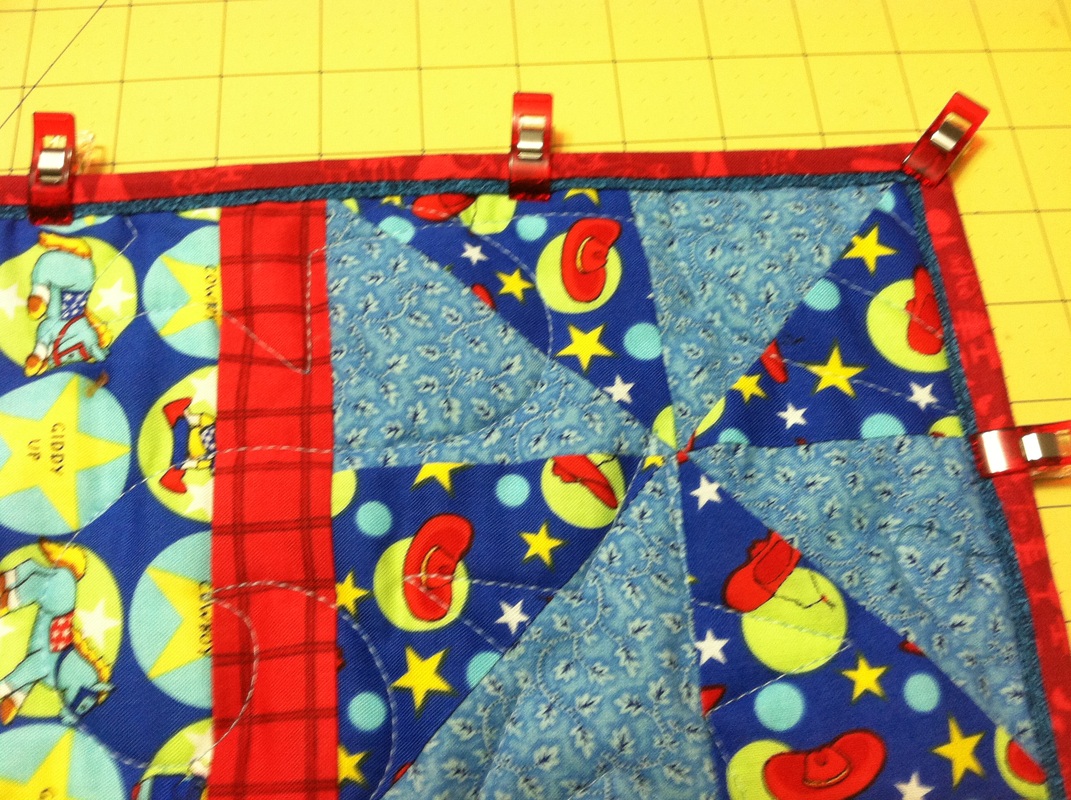 |
Step 11 - Stitch in the ditch on the flange.
Change thread on the machine so the top thread matches the flange cover (dark blue) and the bottom thread matches the backing fabric or the quilting thread used for the back of the quilt (light blue in my example).
Change thread on the machine so the top thread matches the flange cover (dark blue) and the bottom thread matches the backing fabric or the quilting thread used for the back of the quilt (light blue in my example).
 | 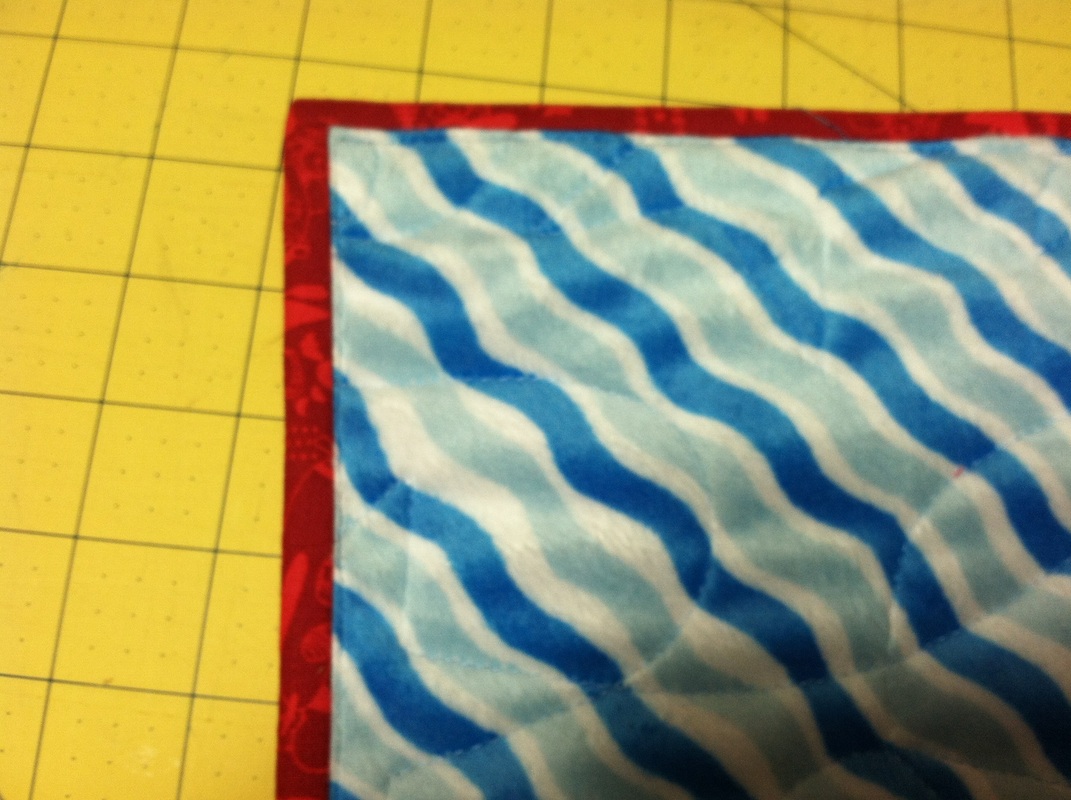 |
Here are a few additional Triangle Frenzy quilts with the Magic Binding. These were made using the Triangle Frenzy patterns by Bunnie Clealand and are a great way to use border fabrics.
 |  |
 |  |
Studio Spotlight Blog Hop
Would you like to see my studio? I will be participating in a blog hop with 10 designers where we will each share a tour of our work pace. There are lots of fun giveaways. A list of the participating designers is included in the link below.
I'm hoping you can join the fun.
Click on this link for all participating designers.
I'm hoping you can join the fun.
Click on this link for all participating designers.

Happy quilting.
Kari
Kari
Sign up for my newsletter to stay current on what's happening in my studio and learn more quilting tips. As a thank you, I'll send you a FREE pattern for this small maple leaf quilt.
 | |
The leaves have been gorgeous this fall. I'm hoping to get out for a nice walk later today to enjoy the beauty.
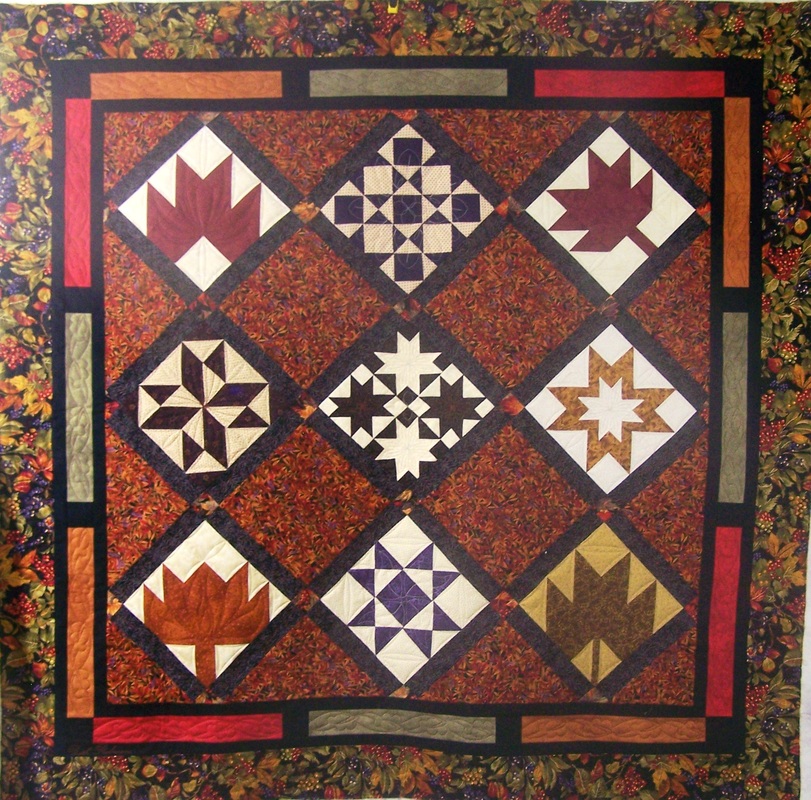
Of course my favorite leaves are those in a quilt. The following sampler quilt top has a wonderful fall theme and was provided by Beth R - who indicated that she wanted "medium custom". For this week's post, I want to walk through how I decided to quilt it. Even if not doing a leaf quilt, this can assist you in analyzing your own quilts.
Of course my favorite leaves are those in a quilt. The following sampler quilt top has a wonderful fall theme and was provided by Beth R - who indicated that she wanted "medium custom". For this week's post, I want to walk through how I decided to quilt it. Even if not doing a leaf quilt, this can assist you in analyzing your own quilts.
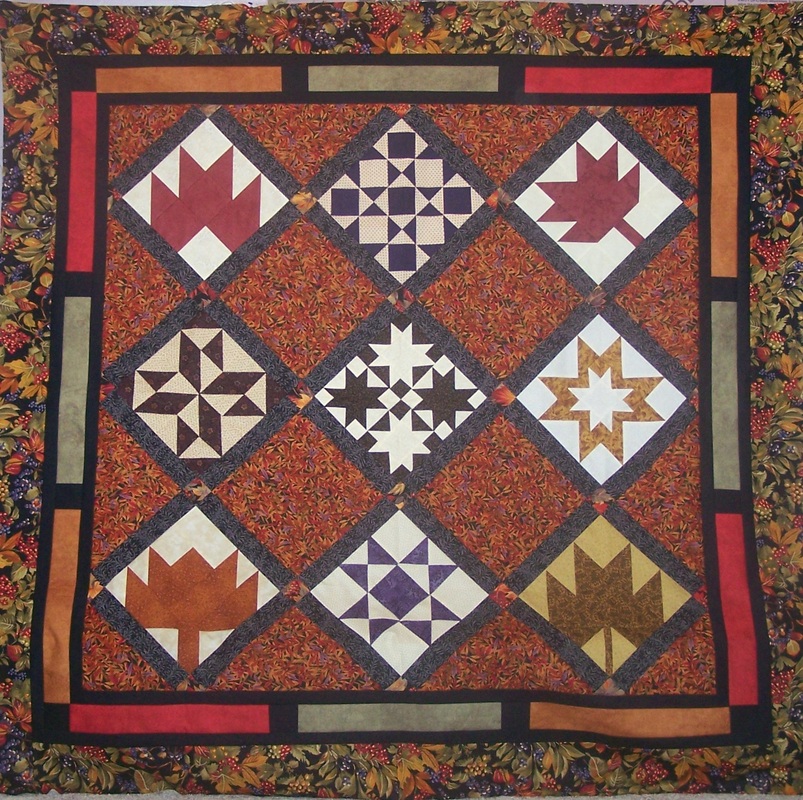
The theme for this quilt definitely needed to be "leaves". There are a number of different spaces that need to be filled and I also needed to address how I wanted to quilt each of the sampler blocks.
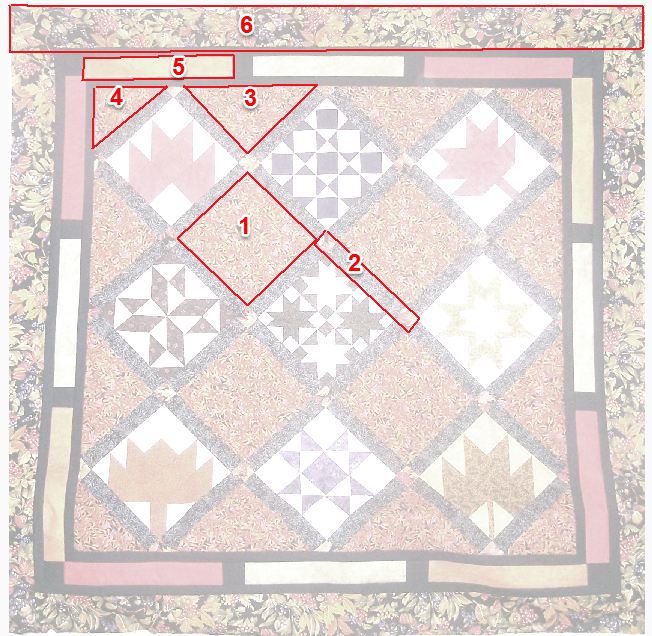
I started by going back to my library of quilting books for inspiration. In looking at "Machine Freehand Patterns" by Nan Moore, I discovered a few pages of freehand leaf designs. The beauty with using my Art and Stitch software is that I only have to draw "one" leaf and then I can modify for designs I can use on my Intelliquilter. If you don't have a computerized system, these designs could also be done freehand.
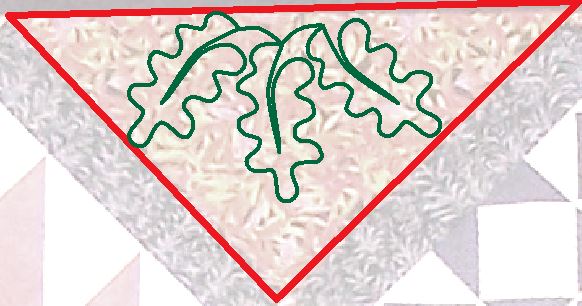
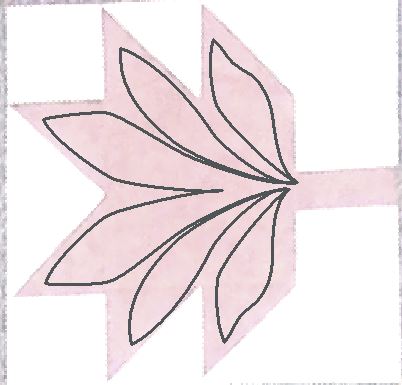
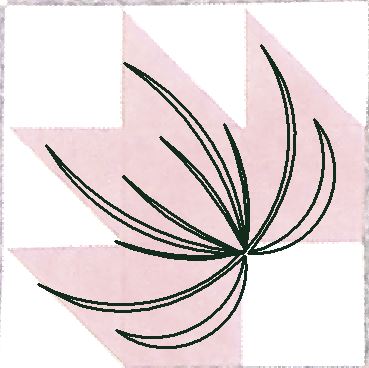
Here is what I came up with for spaces 1, 3 and 4. A wreath (or partial wreath) of oak leaves.

My Initial Oak Leaf
|
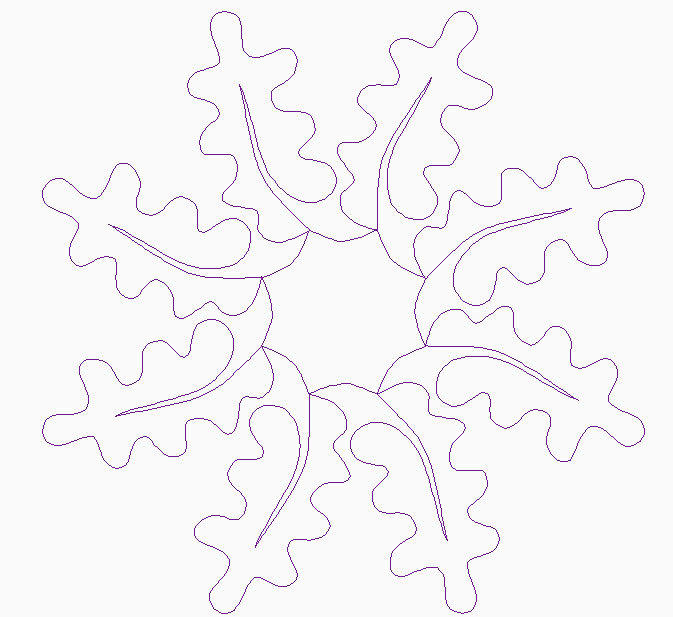
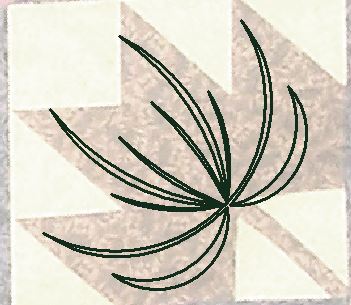
Oak Leaf Wreath Quilting Pattern
|

For a free quilting pattern this week, I decided to give you the oak leaf wreath. Click here for a pdf of the pattern. Click here for the Art and Stitch file.
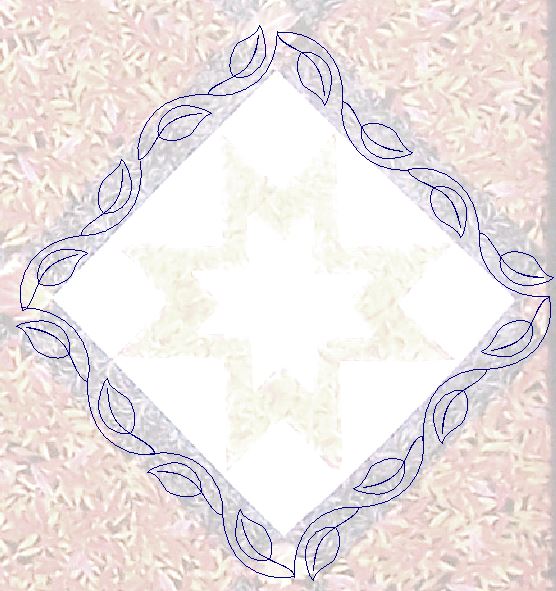
For space five I decided to go with another leaf variation. This one could be used as a point to point design as well. I like that I can stretch this (or shorten this) to fill a space.
For space five I decided to go with another leaf variation. This one could be used as a point to point design as well. I like that I can stretch this (or shorten this) to fill a space.

Leaf quilting for Sashing or Skinny Border
For the sashing I wanted a very simple leaf with vine that could come together in the corner.
Leaf Quilting for Sahsing or Skinny Borders
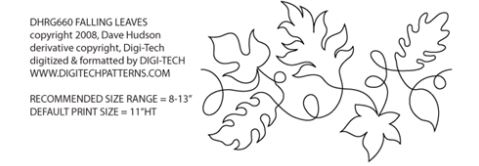
For the border, I will use a design that came with my Intelliquilter, Falling Leaves by Dave Hudson.
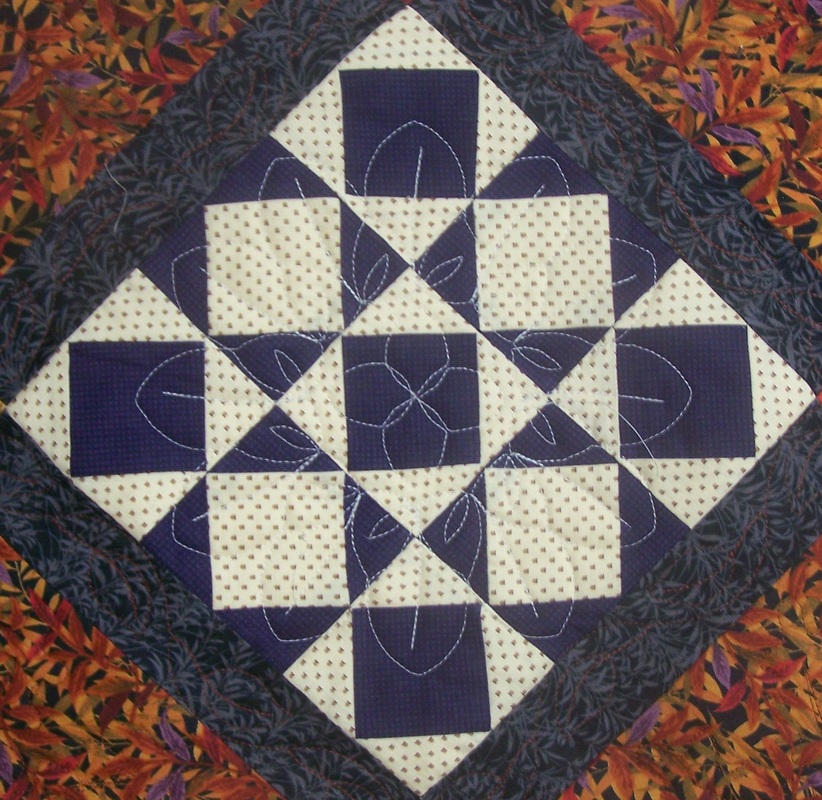
Now for the sampler blocks. There were a number that were based on an eight pointed star, so I came up with a leaf that could be flipped and rotated to fill the space. For the backgrounds, I will use a point to point arc and do that directly on my longarm.

Leaf Block Quilting Option
|
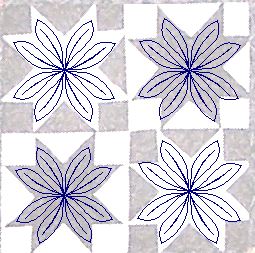
Eight Pointed Star Quilting Option with Leaves
|
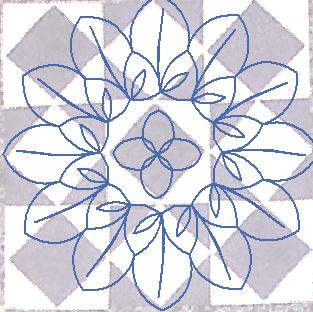
There were a couple of additional blocks that I designed some other quilt patterns around a leaf. The second design was inspired by the "Leaf Flower" in Patterns by Helen on my Intelliquilter.

Will add point to point arcs in the corners to fill the background space.
|
|
For the leaf blocks, I wanted some leaf like texture or veins. The "S Curve" option was inspired from a book by Deloa Jones. All of these blocks will also have "arcs" in the background spaces.

|
|
I hope this provides some inspiration when quilting your next leaf quilt. Here are some photos of the finished quilt. I used a rust thread for much of the quilt -- which of course means the quilting is only visible on the back. But you can see more of the quilting in the close-ups.

Back of Quilt -- lightened to better see the quilting.
|

|


|

|


|
Happy quilting.
Kari
Kari
Sign up for my newsletter to stay current on what's happening in my studio and learn more quilting tips. As a thank you, I'll send you a FREE pattern for this small maple leaf quilt.
|
|
I am back!!!!
Who would have thought that vestibular nueritis could take so long to heal. I particularly appreciated my physical therapists that specialize in balance/dizzyness issues. They not only had me working on basic balance and visual exercises, but gave me a number of items to work on to simulate some of my skating and ice dancing moves. Although I am not yet at 100%, I am functioning and am very thankful for that.
Back to quilting.
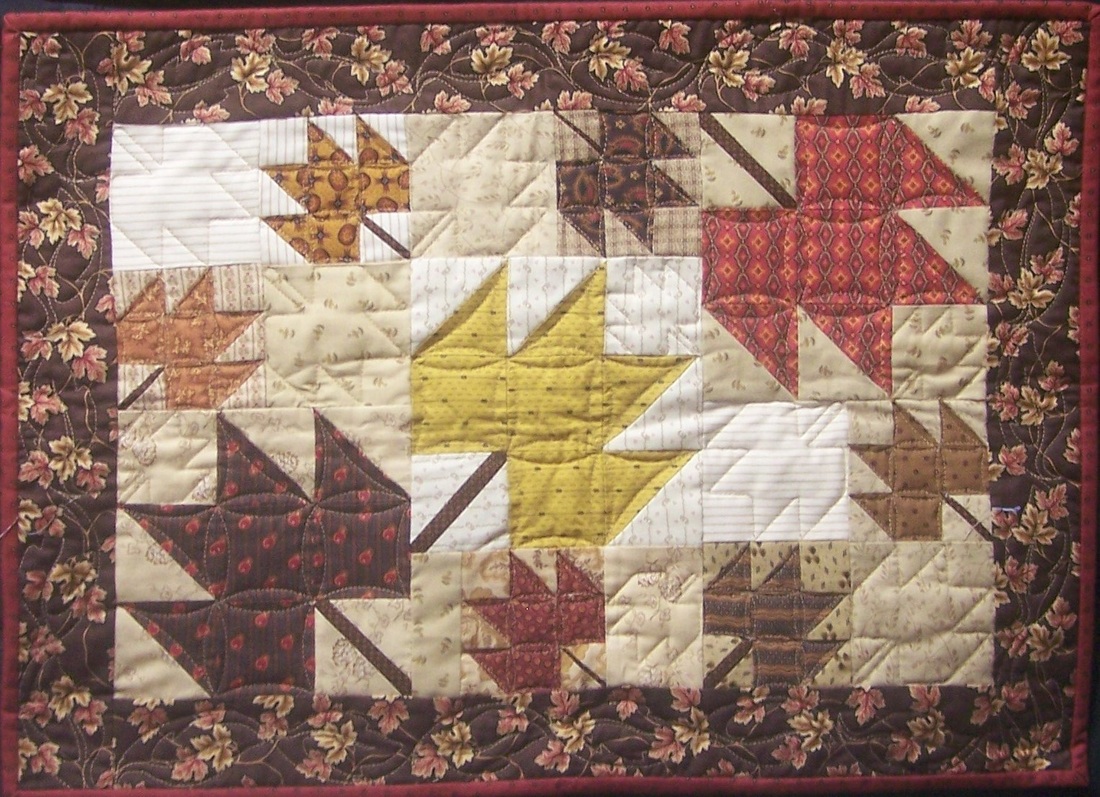
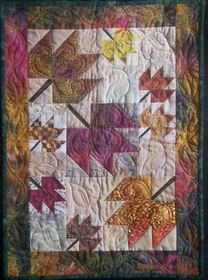
Fall is in the air and I am excited to promote my pattern "Come Said the Wind". The pattern is centered around a poem/old children's song. There are two sizes (both wall hangings). The smallest could also be used as a placemat.
Who would have thought that vestibular nueritis could take so long to heal. I particularly appreciated my physical therapists that specialize in balance/dizzyness issues. They not only had me working on basic balance and visual exercises, but gave me a number of items to work on to simulate some of my skating and ice dancing moves. Although I am not yet at 100%, I am functioning and am very thankful for that.
Back to quilting.
Fall is in the air and I am excited to promote my pattern "Come Said the Wind". The pattern is centered around a poem/old children's song. There are two sizes (both wall hangings). The smallest could also be used as a placemat.
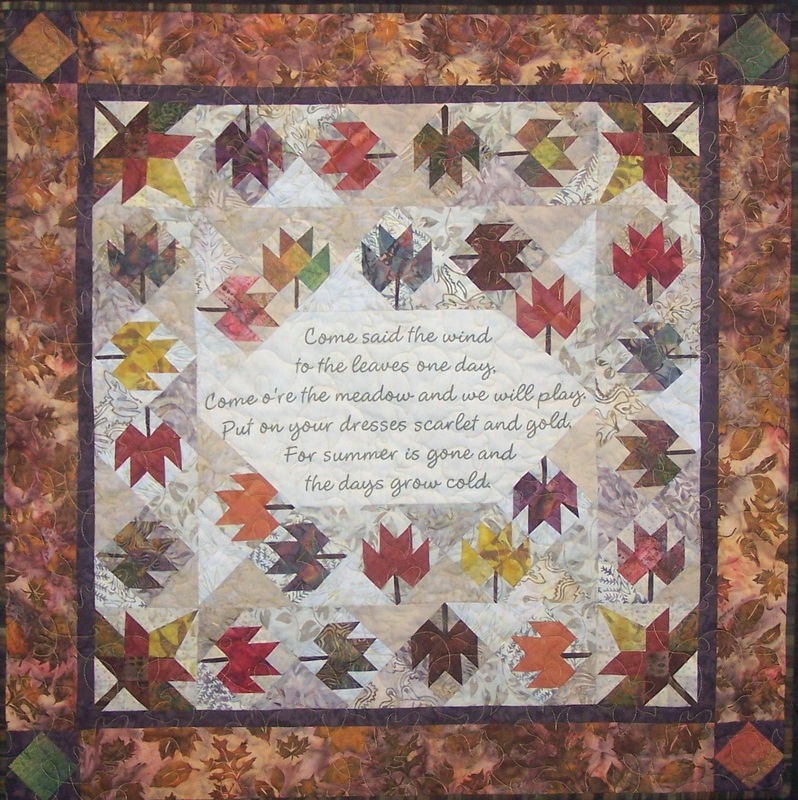
Come Said the Wind 33 x 33
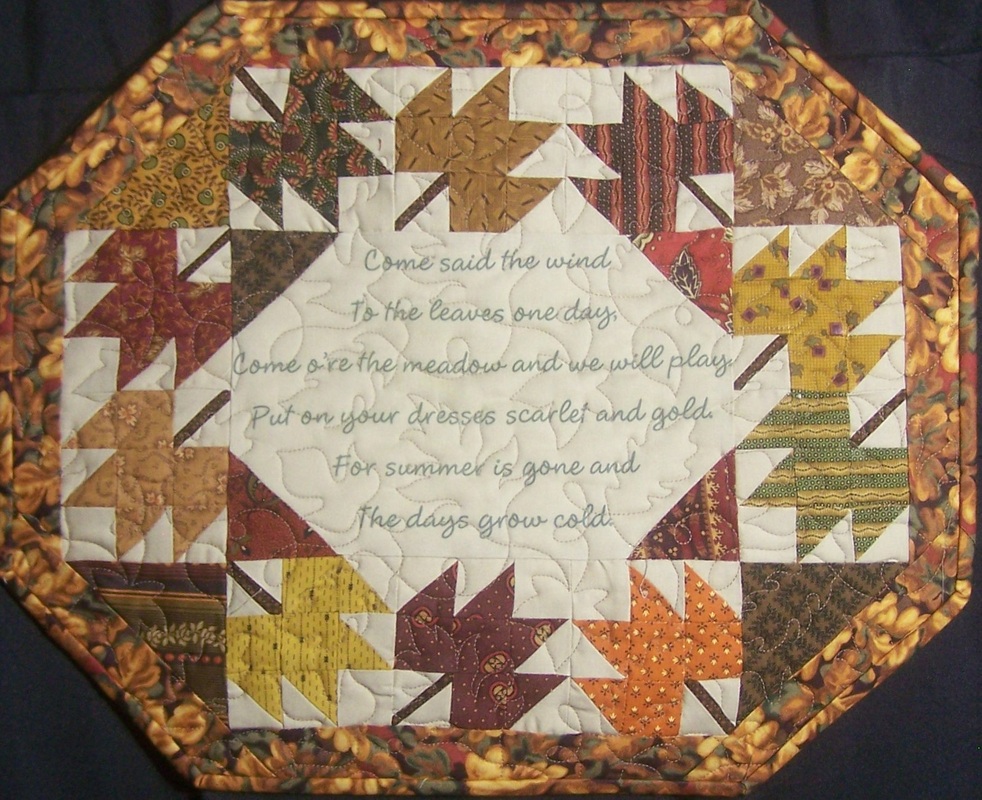
Come Said the Wind 15 x 12
Do you prefer batiks or civil war for fall quilts? I couldn't decide so I needed to do one of each.
The blocks in the quilt are "small" --- but really cute. The maple leaf finishes to 3 inch and the Sycamore leaf to 4-1/4 inch. However, don't be intimidated by the size. There are lots of tips to ensure successful piecing of the project.
I provide instructions for using a number of specialty rulers/tools. These tools are optional. Instructions are also included for the traditional rulers.
Optional Specialty Rulers:
A number of people asked me how I created the center panel (with the poem). Instructions are in the pattern -- but I also wanted to provide a video.
I also have a free handout explaining the technique.
These free pdf files of the verse are also available for Come Said the Wind pattern.
These free pdf files of the verse are also available for Come Said the Wind pattern.
- Large wallhanging. Set paper size to 12" x 18". Run a test copy before printing on fabric and measure to make sure poem will fit in finished cut piece of 17-1/2" x 9". This will only work on a large carriage printer.
- Small wallhanging. Run a test copy before printing on fabric. Outside lines should be 6-1/2" x 9-1/2". Print on letter paper.
| The full pattern can be purchased through the Shopping Section of my website. Because I am excited to be back blogging again, I thought I would offer a sale on the pattern. It will be $7 (regularly $10) for the next week. | 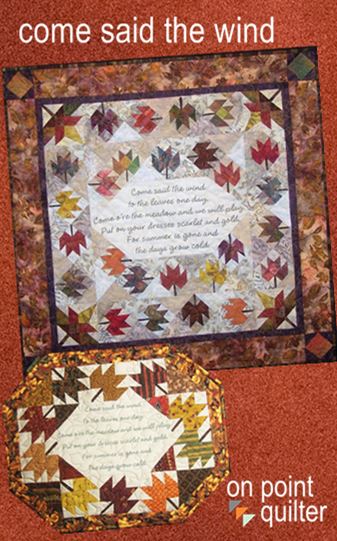
Come Said the Wind pattern
|
Happy quilting.
Kari
Kari
Sign up for my newsletter to stay current on what's happening in my studio and learn more quilting tips. As a thank you, I'll send you a FREE pattern for this small maple leaf quilt.
| |


Free guide available for newsletter subscribers


Kari Schell
Electric Quilt Expert and Educator and Pattern Designer.
Categories
All
Art And Stitch
Cricut Maker
Dear Jane
Electric Quilt 7
Electric Quilt 8
Goose Goose Duck Challenge
Inkscape
Patterns
Silhouette Cameo
Stampin Up
Tips And Techniques
Tools And Rulers
Archives
July 2024
June 2024
May 2024
April 2024
March 2024
February 2024
January 2024
December 2023
November 2023
October 2023
September 2023
August 2023
July 2023
June 2023
May 2023
April 2023
March 2023
February 2023
January 2023
December 2022
November 2022
October 2022
September 2022
August 2022
July 2022
June 2022
May 2022
April 2022
March 2022
February 2022
January 2022
December 2021
November 2021
October 2021
September 2021
August 2021
July 2021
June 2021
May 2021
April 2021
March 2021
February 2021
January 2021
December 2020
November 2020
October 2020
September 2020
August 2020
July 2020
June 2020
May 2020
April 2020
March 2020
February 2020
January 2020
December 2019
November 2019
October 2019
September 2019
August 2019
July 2019
June 2019
May 2019
April 2019
March 2019
February 2019
January 2019
December 2018
November 2018
October 2018
September 2018
August 2018
July 2018
June 2018
May 2018
April 2018
March 2018
February 2018
January 2018
December 2017
November 2017
October 2017
September 2017
August 2017
July 2017
June 2017
May 2017
April 2017
March 2017
February 2017
January 2017
December 2016
November 2016
October 2016
September 2016
July 2016
June 2016
May 2016
April 2016
March 2016
February 2016
January 2016
December 2015
November 2015
October 2015
September 2015
August 2015
July 2015
June 2015
May 2015
April 2015
March 2015
February 2015
January 2015
December 2014
November 2014
October 2014
September 2014
July 2014
June 2014
May 2014
April 2014
March 2014
February 2014
January 2014
December 2013
November 2013
October 2013
September 2013
August 2013
 RSS Feed