
Background: I owned a Silhouette Cameo (first edition) and had pretty mixed results with cutting fabric. I had some nice cuts but wouldn't have achieved that without some great advice from my blog readers. Check out my paper snowflake project last year -- which was done on the Silhouette Cameo.)
Given my fairly frustrating learning curve on the Cameo, I will admit to being a bit gun-shy. However, I have a retreat coming up next week, and realized that if I actually wanted to make my snowman project, I needed to cut it out -- NOW! I experienced a couple of glitches with Cricut Design Space including designs not showing up in the import and modifications to design in Inkscape not carrying over to Cricut Design Space. But once my design was loaded, the cutting process was a dream. Not one bad cut in my first time cutting fabric with the Cricut Maker.
Here was the block I created for the TKQ Calendar Quilts class. I want to piece the block at the size 20 x 15.
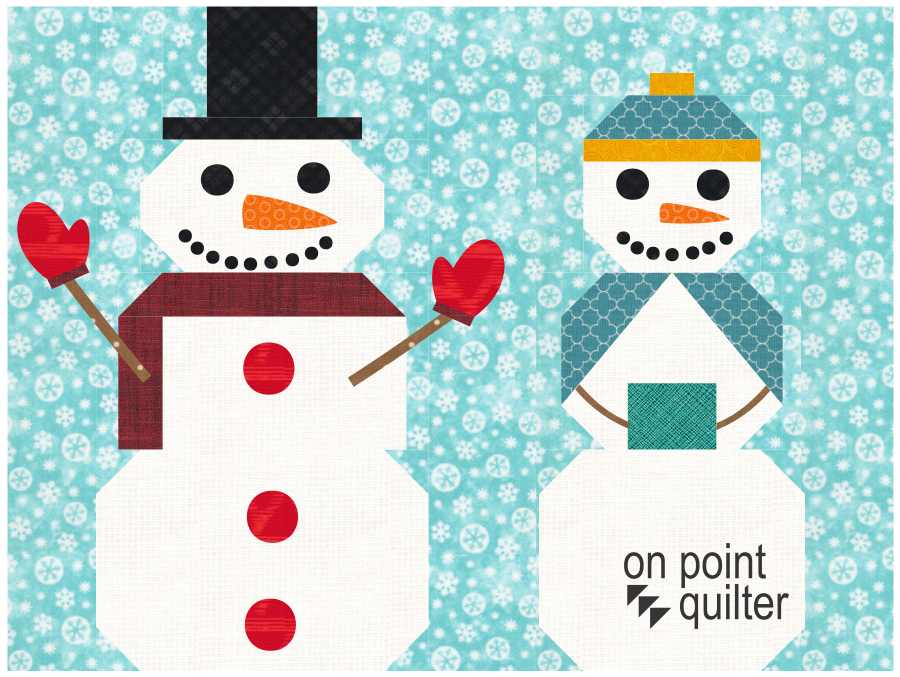
Snowman Block designed by Kari in EQ (for a Tech Know Quilter class)
Here is the video describing my process. Not sure if I figured out the most efficient way to do everything -- but I figured I needed to start with the basics.
In the video, I explain that I printed my block to a pdf writer. In the video I used Cute PDF Writer. However the actual pdf writer is not important. Feel free to use what you have available to use on your computer.
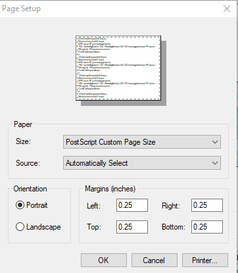
Look to see if you have a setting for your pdf writer called Post Script Custom Page Size. I just discovered this setting a few months ago -- but essentially it lets you pick a page size (even one that is larger than any of your installed printers). This is particularly useful for larger sized blocks.
If you don't have this option, just pick the largest paper size you have installed on your computer. You make have some tiling which will require multiple Inkscape files.
The intermediate software I used to convert my design from the pdf format to an svg format is Inkscape. Inkscape is a professional vector graphics editor for Windows, Mac OS X and Linux. It's free and open source.
Inkscape can seem overwhelming to use when you open it for the first time. However you only need to use a couple of tools within Inkscape -- so this really is a piece of cake. You can download Inkscape here. Inkscape will allow you to create an SVG file which may be used in any electronic cutting system (Cricut Design Space, Silhouette Studio, or Brother Canvas Workspace). So what is an SVG file? An SVG file is a graphics file that uses a two-dimensional vector graphic format. Unlike raster formats such as JPG, GIF, and PNG, an SVG image remains crisp and clear at any resolution or size. 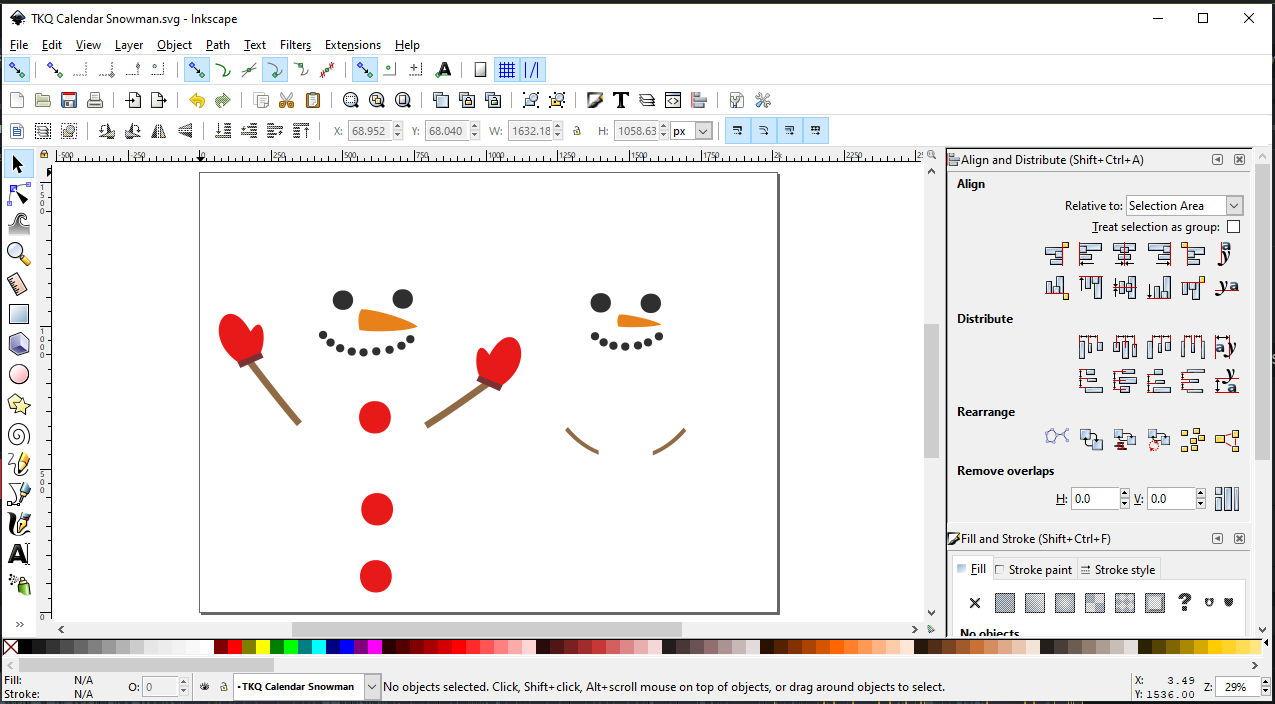
In Inkscape, ungroup your image and select and delete any patches that you don't want to cut with your cutting system. Then save as an SVG. (Update: Make note of the size of the svg objects.)
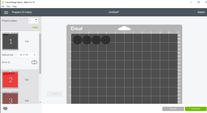
In Cricut Design Space, select Upload Image and navigate to the SVG file. Select Save. Select the Image and select Insert Images. (Update: Resize the grouped images to match the size noted in Inkscape.) Make any modifications. I chose to remove the circles for the mouth as I think it will be easier to use a decorative stitch on my sewing machine rather than appliquing 1/4 inch circles on my block.
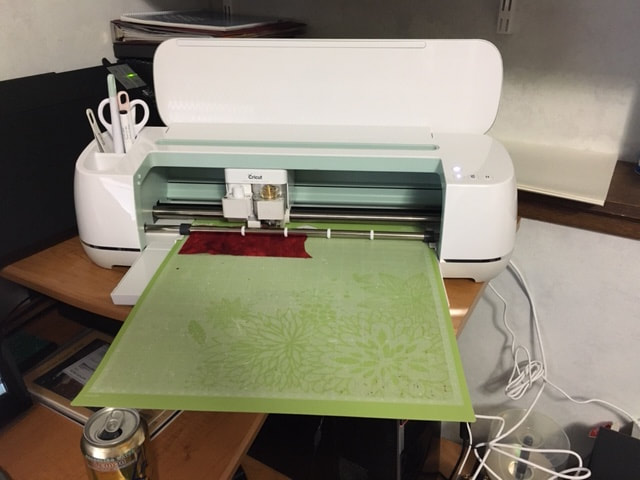
I chose to back my fabric with Soft Fuse Premium. I love the soft hand of this fusible -- it actually feels like there is none. I ironed the fusible to the fabric (3 seconds with a dry iron), removed the paper and placed it fusible size down on the Cricut mat. I used the green mat -- but after I was all done found that they actually recommend the pink mat.
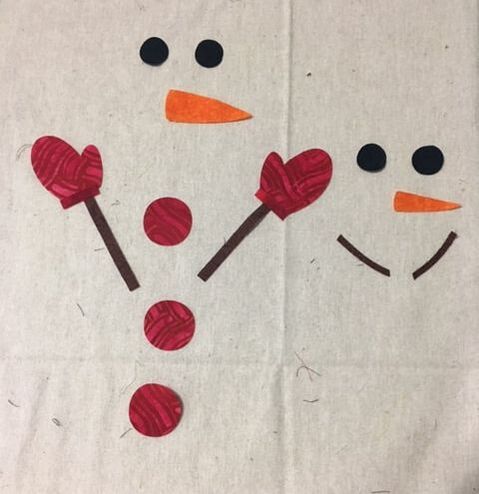
Cutting with the rotary cutter blade was an absolute dream. I had absolutely no problems with shifting material and there were no snags in the cut (both issues that I had with my old Silhouette Cameo). (Note -- I had the first version of the Silhouette Cameo and based on conversations with others who have upgraded, I think the later versions are less troublesome.)
Karen King
1/4/2020 08:09:07 am
Kari THANKS for sharing this is fantastic information!
Carole Fox
1/4/2020 08:22:27 am
What fusible paper did you use?
Kari Schell
1/4/2020 09:03:48 am
Carole Fox -- I used Soft Fuse Premium from SoftFusePremium.com It has a super soft hand.
Maureen A Feron Pinwill
1/4/2020 09:15:17 am
Thank you so much for sharing this. I am in the mind of giving my first Cricut to the grandchildren and buying myself a Cricut maker and you may have just convinced me to, along with purchasing the new embroidery digitizing program I am eyeing and the new computer. Oh boy this will be an expensive year for my dear heart ;)
Fox
1/4/2020 09:28:34 am
Hi again Kari. Just wanted to say that there was an easy way to do the job. I wanted to make sure so I took the time to reproduce your block(I am one of your subscribers so I know how to do it !). You edit your block, delete the pieced parts, save to sketchbook, do your quilt with that block et voilà. Appliqué direct on inkscape. On the Cameo I would just import the pdf file direct into the Silhouette program.
Kari Schell
1/4/2020 12:11:55 pm
Thanks for the added tip on using the PDF with Silhouette Design Studio. I personally haven't had as much luck loading the pdf directly to Silhoutte Design Studio -- I froze the program loading my snowman block. But had no problem with the Inkscape transfer. I do think Silhouette Design Studio is much more robust software than either Brother or Cricut. But I personally found it harder to use. Maybe because I didn't use it often enough I kept having to relearn.
Dianne E Lovell
1/4/2020 09:54:40 am
Thank you so much Kari! I also bought myself a Cricut Maker for Christmas and am using Inkscape. I was starting to look for turorials on both to learn how to use it - you have helped greatly!
Kathleen McCormick
1/4/2020 10:14:18 am
This is awesome! So much more helpful than the Brother Scan N Cut. Now to see whether I can sell and upgrade to what is a much better machine (and you can pick up pieces locally which I can't with the Brother).
Kari
1/4/2020 12:15:03 pm
Kathleen -- I've also heard very good things about Brother Scan N Cut from those in Tech Know Quilters. I do think being able to make a quick trip to JoAnn Fabrics or Michaels is a nice option.
Chris K.
1/4/2020 05:40:55 pm
I'm wondering why you didn't just print the applique pattern to PDF instead of the whole quilt. Then you wouldn't have to delete the parts you don't want. Also, I'm wondering why you add an inch to the paper size.
Kari Schell
1/4/2020 06:09:00 pm
Chris -- as you noted I could have copied the applique components to a new block and colored it with solid colors and then printed that to a pdf. I figured the time would be about the same for the two methods. So no significant reason why I did one versus the other. I added an inch to the paper size as printers always factor in page margins. EQ will not allow you to set a margin size of 0. If I had select the exact size of the block, there would have been a small amount of tiling between pages.
LINDA PAREDEZ
1/5/2020 10:47:42 am
I find that my images come into Design Space from Inkscape a bit bigger than the EQ and Inkscape objects. As I want to use my Maker to cut images for machine embroidery files, the size needs to be exact to the EQ image. I realize I can regroup the objects in Inkscape, note the total image size and adjust it accordingly in Design Space. But if you have a more exact way of bringing the images into Design Space at the correct size, I would very much appreciate your insight!
Kari
1/5/2020 05:56:14 pm
I did not realize that. Thanks for the information. I am checking to see if there is an Inkscape setting to change this -- but baring that, I would select everything in Inkscape and note the exact size. (change it to inches). Then before you ungroup in Design Space, change the size to this number.
Colette K
1/5/2020 11:01:54 am
Thank you, Kari! I appreciate all that you’ve shared. I’ve been using Maker for a while and agree with you, the rotary blade cuts very well!
Kari
1/5/2020 06:00:09 pm
Colette K. Thanks for the information. I had some pieces under that in size -- but I was wondering if there was a size that was just too small. For those smaller pieces, I would imagine just switching to the bonded fabric blade. I wonder if there is a way to mix the blades for the same piece. I am also wondering if Cricut will warn you when you need to select the other blade. That might be asking too much.
Colette K
1/5/2020 07:59:00 pm
Just a thought, perhaps color the smaller pieces so they cut on a separate mat and use the Edit Tools function to switch to the bonded fabric blade for that mat.
Debbie W
1/11/2020 05:44:50 pm
Just got my Cricut Maker this week. I have been looking at Inkspace and didn't know where to start. This was the perfect project to learn how it works, and so glad to have EQ8 to work with. I have so many ideas now for future projects. Thanks so much for posting. Comments are closed.
|


Free guide available for newsletter subscribers


Kari SchellElectric Quilt Expert and Educator and Pattern Designer. Categories
All
Archives
July 2024
|


 RSS Feed