|
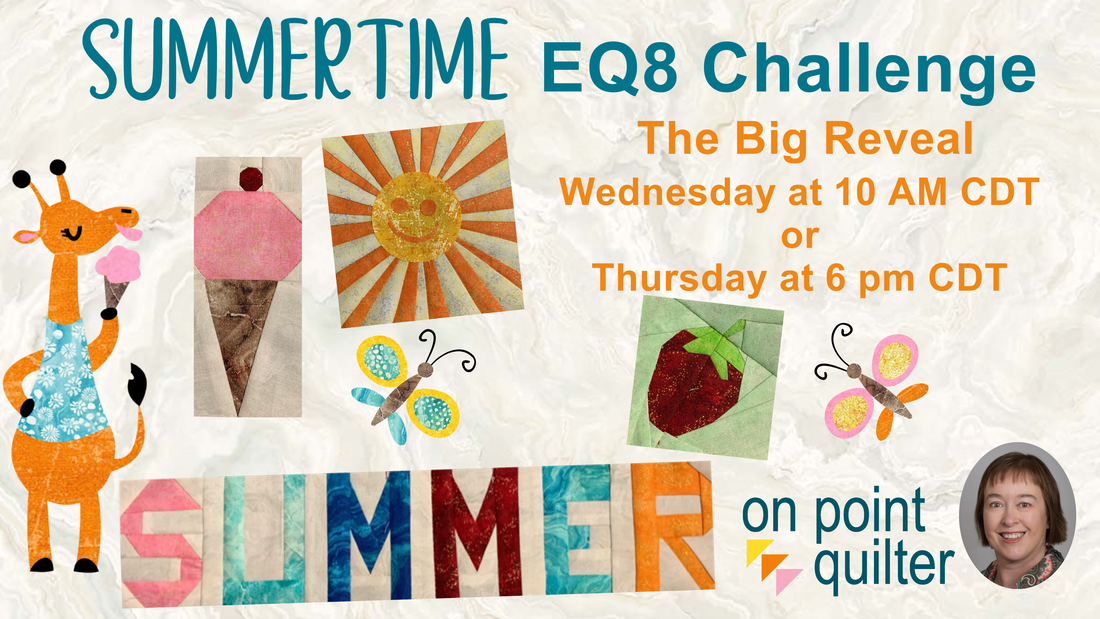
With over 1,200 participants in the Summertime EQ8 Challenge, everyone has had a busy week -- including me. I am so impressed with the blocks that are being drafted as the knowledge and confidence that has been gained while going through each of the free tutorials.
You are still welcome to sign up for the free challenge. Videos will be available through the end of the month.
Summertime Quilt Reveal
Choose between Wednesday morning or Thursday evening where we will be finishing up the Summertime challenge with a live Zoom meeting.
For those enrolled in the challenge, the videos will be available through the end of the month. (During the zoom meeting, I will be sharing a way to have unlimited access to these videos.) Even if you were unable to join the challenge, you are still welcome to participate in the reveal where I share my layout along with my pieced quilt using these cute little blocks. I will also be talking about Tech Know Quilters and announcing a flash sale. New Tips and Techniques for Paper Piecing
Electric Quilt is fantastic in that is provides us with easy to print foundation patterns. However there has been some confusion on how to paper piece and how to cut those fabric pieces slightly oversized for the foundations.
Since I have been sharing a lot of newly designed paper pieced patterns in the free Summertime EQ8 challenge, I thought I should also share my thoughts on actually making these blocks. Paper Piecing Instructions
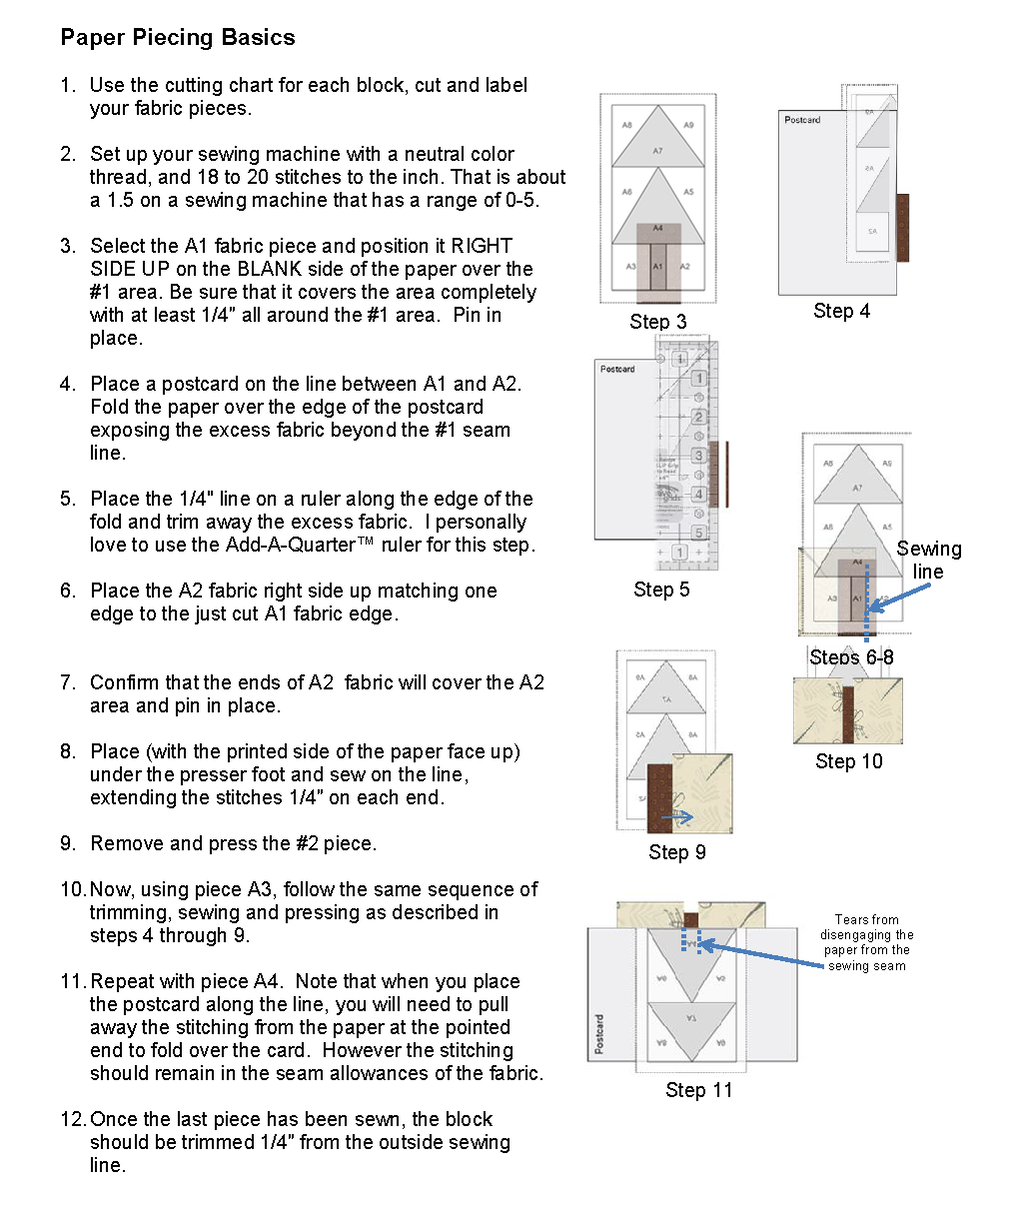
If you are new to foundation/paper piecing, here is my suggested piecing process. This is excerpted from my Northwoods Loon pattern.
For those that prefer a video, her is a short one covering the same steps noted above (just using a different block).
Oversized Piecing Calculations - Manual Approach
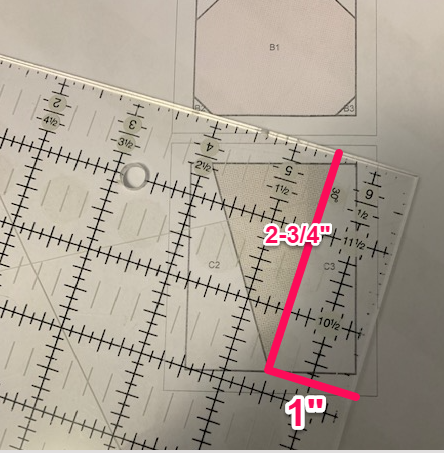
When I write paper piecing instructions (for either myself or a pattern that I am publishing) I like to create a pre-cutting chart. In those instructions, I provide the measurements for rectangles that are slightly oversized and can be added to a previous patch (or patches). If you would like to try my approach, here are some specifics:
For each patch in the block:
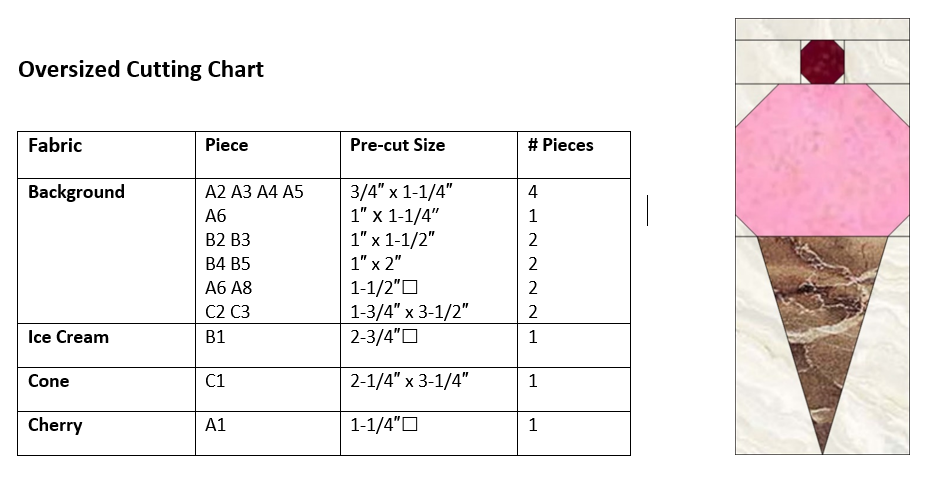
Adding 3/4" to both the width and height gives me an oversized piece measuring 1-3/4" x 3-1/2". I always test my patterns and if I am having any problems I will add a bit more to the pre-cut size.
Here is my cutting chart for the ice cream cone block. The block has a finished size of 2" x 5". And was the first block in the Summertime EQ8 Challenge. Creating SVG Oversized Cutting Charts
This week I decided to play with two different approaches to creating svg cutting charts for a foundation pattern. I couldn't decide between starting with a block diagram or templates in EQ.
Both approaches use an extra piece of software called Inkscape.
What is Inkscape?
The extra piece of software I used for creating the SVGs is Inkscape. Inkscape is a professional vector graphics editor for Windows, Mac OS X and Linux. It's free and open source. Inkscape can seem overwhelming to use when you open it for the first time. However you only need to use a couple of tools within Inkscape -- so this really is a piece of cake. You can download Inkscape here. I am currently using version 1.1 (which is the version demonstrated in the video). Inkscape will allow you to create an SVG file which may be used in any electronic cutting system (Cricut Design Space, Silhouette Studio, or Brother Canvas Workspace). So what is an SVG file? An SVG file is a graphics file that uses a two-dimensional vector graphic format. Unlike raster formats such as JPG, GIF, and PNG, an SVG image remains crisp and clear at any resolution or size.
SVG Oversized Piecing Approach 1 : Adding Seam Allowances with Inkscape
SVG Oversized Piecing Approach 2: Create the Oversized Seam Allowances using Templates in EQ 8 and use Inkscape to Convert to SVG
Creating SVG Files with Oversized Piecing Video
Here is the video where I demonstrate both approach 1 and approach 2.
Here is the link for the Cute PDF Writer for Windows referred to in the video.
Here is the link for the RWTS PDF Writer for MAC referred to in the video.
Working the Your Cutting System
Each of the major cutting systems has a slightly different approach. Chances are that if you have a cutting system, you have worked through the process of importing a picture or an svg. My primary suggestion is to always double check the measurements of your imported images and adjust them before dong anything else in your cutting system. I have discovered that each of the cutting systems has a different "conversion" from an SVG file. And Cricut (the brand I use), seems to "update" their system at least once a week with the updates changing the conversion percentage. Learn from my mistakes. I have thrown away way too much fabric for forgetting to check and adjust the size before cutting. Comments are closed.
|
Kari SchellElectric Quilt Expert and Educator and Pattern Designer. Categories
All
Archives
July 2024
|




 RSS Feed