
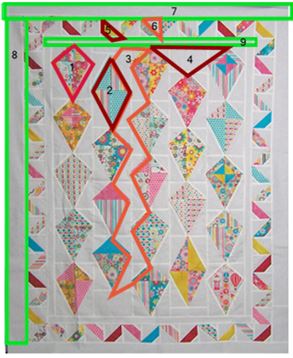
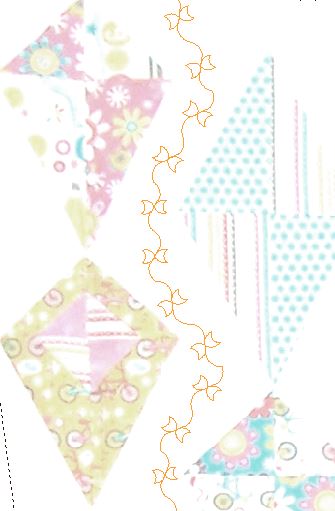
 Let's Go Fly a Kite, marked with potential quilt spaces for custom quilting. I have a fair number of "interesting" spaces to fill on my kite quilt. So I thought I would play a bit with Kite Tails. My Art and Stitch video tutorial this week is about drafting a Kite Tail motif and then playing with it as a "motif fill" and on a curvy line as a motif stitch. This is super simple with a lot of "play" opportunities. 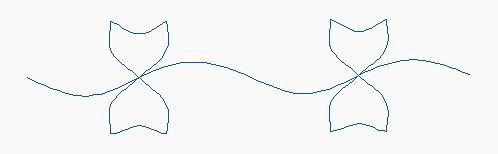 Kite Motif from Art and Stitch Video Tutorial Here are the designs from the video.
Here were a few additional designs for the quilt
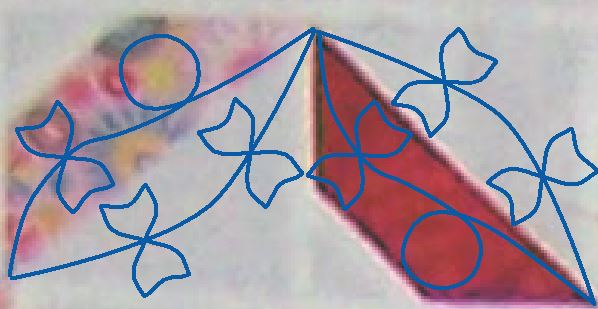 The above two designs can be laid on the quilt as a point to point design. Within Art and Stitch, you can replicate it using the Power Copy EE.  Kite Border Using Art and Stitch Software
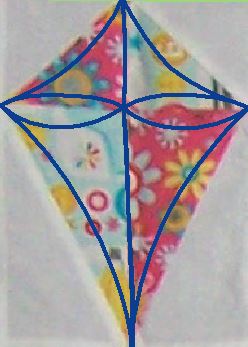
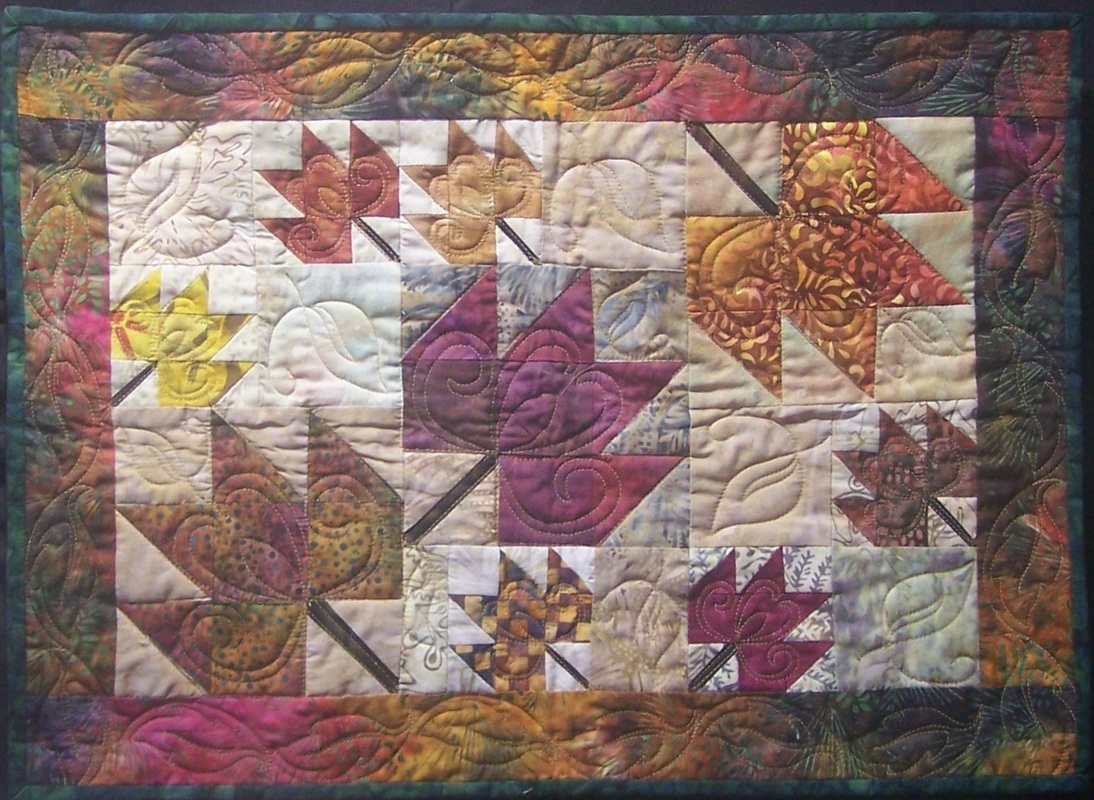
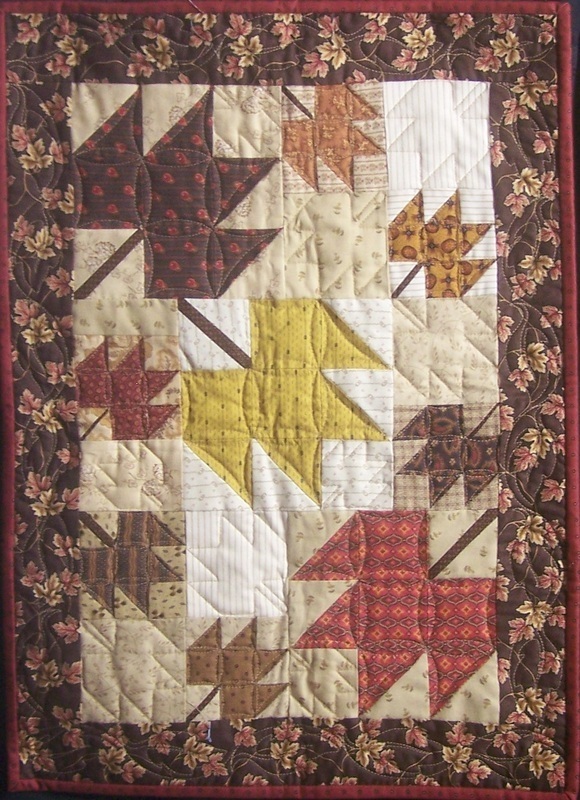
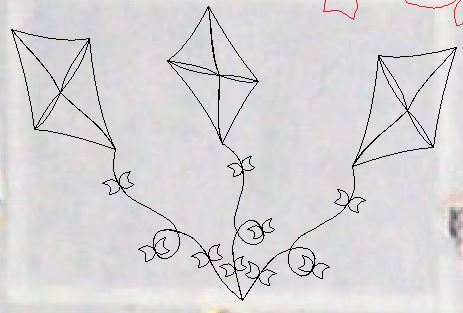 Three kites combined. This would work in a triangle block. I didn't get my top quilted -- so that will have to wait for a later blog. As you can see, I still have a few decisions to make on how I want to quilt it. Featured Quilting Pattern Are you interested in the Edge to Edge Kite design? This one is available for digital download in all the major quilting formats. There even is a pdf that can be used by those without digital systems. The pattern is on sale for half price for another week. Click here to purchase. 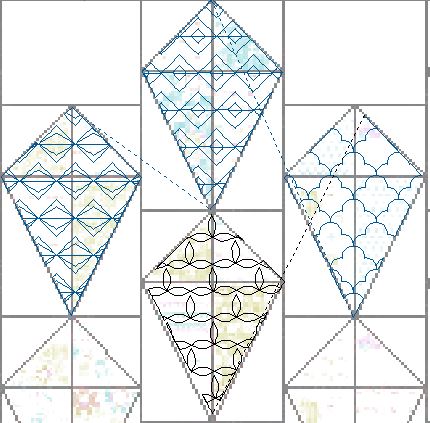 Other motif fills for the kites. Should I use a different one for each kite? 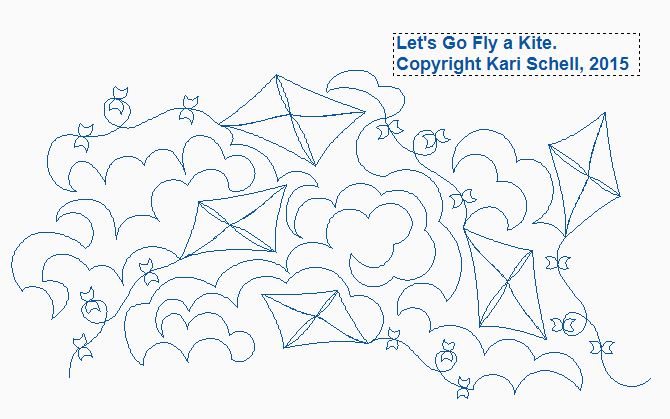 Note: Instructions for piecing the Kite quilt will be available until August 15th. Please make sure to print off anything you need by that time. Happy quilting. Kari Sign up for my newsletter to stay current on what's happening in my studio and learn more quilting tips. As a thank you, I'll send you a FREE pattern for this small maple leaf quilt.
This week I will cover creation of an edge to edge pattern for the Let's Go Fly a Kite quilt. I thought I would cover this in two videos. Both show how I use Art and Stitch to create my design. Video 1 will cover creating the Kite plus tail. Video 2 will cover use of a template to create an interlocking design and placement of the kites and connecting everything up with a cloud filler design. The beauty of this pattern is that once you understand the process, it would be a great pattern to freehand on your domestic on non-computerized longarm machine.  If sewing this freehand, stitch the string and tail first. Then add the top.  In the second video I created an interlocking template and placed the kites. I also added clouds to fill in the empty space and connect everything up.  Here is my final edge to edge design. Here is a photo of it super-imposed on my Let's Go Fly a Kite quilt. This one took a bit of time to draft and I realize that not all of you will want to draft your own rendition. Therefore, I decided to offer the pattern on my website in all the major quilting system formats. Since this is a new offering from me, I want to celebrate and will provide a 50% discount off the pattern for the next two weeks. The digitized pattern will regularly retail for $15. So it is on sale for $7.50. Click here to purchase and download. 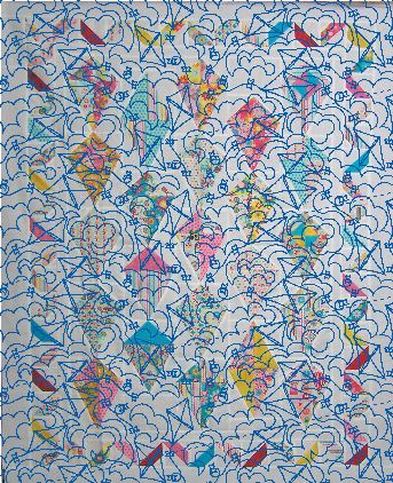 For those are still working on piecing the quilt, a reminder that onstructions for piecing the Kite quilt will be available until August 15th. Please make sure to print off anything you need by that time. Happy quilting. Kari Sign up for my newsletter to stay current on what's happening in my studio and learn more quilting tips. As a thank you, I'll send you a FREE pattern for this small maple leaf quilt.
In an attempt to compress the background around appliqué or quilted motifs, quilters are continually looking for other creative choices besides good old tried-and-true stippling or loops and circles. I have numerous books in my library dedicated to background fills. My favorites include:
8427 172nd Ave. NE Forest Lake, MN 55025 Then there are the online tutorials. Both of these talented women work on a domestic machine and are inspirational:
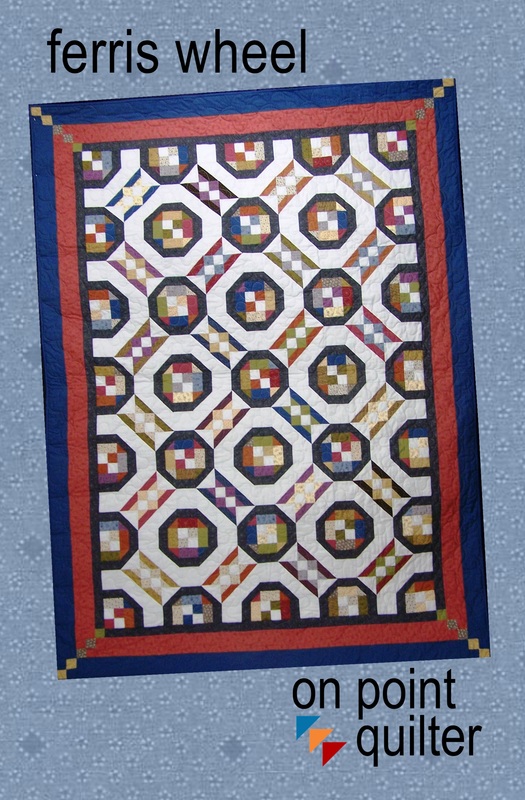
Over the years I have found the trick to executing many of these fills is practicing on a whiteboard or even just a pad of paper and a good pen. Keep drawing the fill until you feel comfortable with it. Sometimes it may take many sheets of paper to reach that "comfort level". Occasional, I never got there -- my brain just couldn't recreate the shape. My advice based on painful experience ... DO NOT START QUILTING UNTIL YOU HAVE REACHED THAT COMFORT LEVEL. Background Fills with a Computerized MachineI love my APQS Millennium with Intelliquilter. The computer helps a lot with execution of precise designs. It works particularly well for pantographs, borders, block designs and motifs. However it can be a challenge when it comes to fillers around applique or embroidery. However it can be done! This week I decided to design my own creative fill using Art and Stitch. This particular fill was for a Halloween themed quilt made by Pat C. I used Art and Stitch software to draw the fill. I want to do a special shout out and thank you to Carol Best for her advice on how to apply a Creative Fill with two separate applique shapes in a block. Her steps are included in my video. Almost Finished Halloween QuiltCheck out the finished project (minus a few embellishments to be added by Pat. I used the "Man in the Moon" filler around the Hat and Spider. For other fillers, I did some freehand work. This was my first freehand work since the broken wrist -- and I must admit that I was feeling very grateful that I have the computer to assist with most of my quilting. 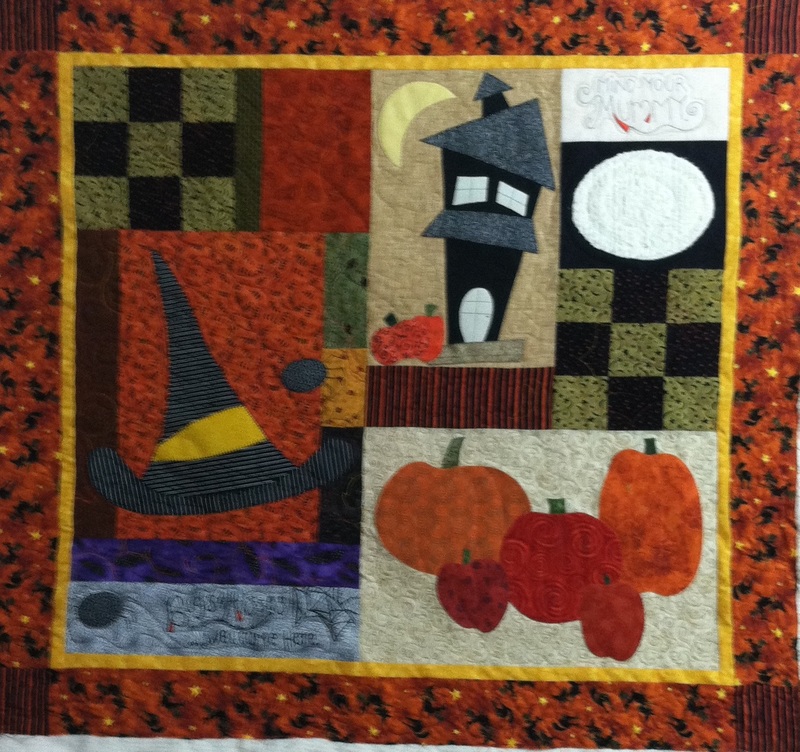 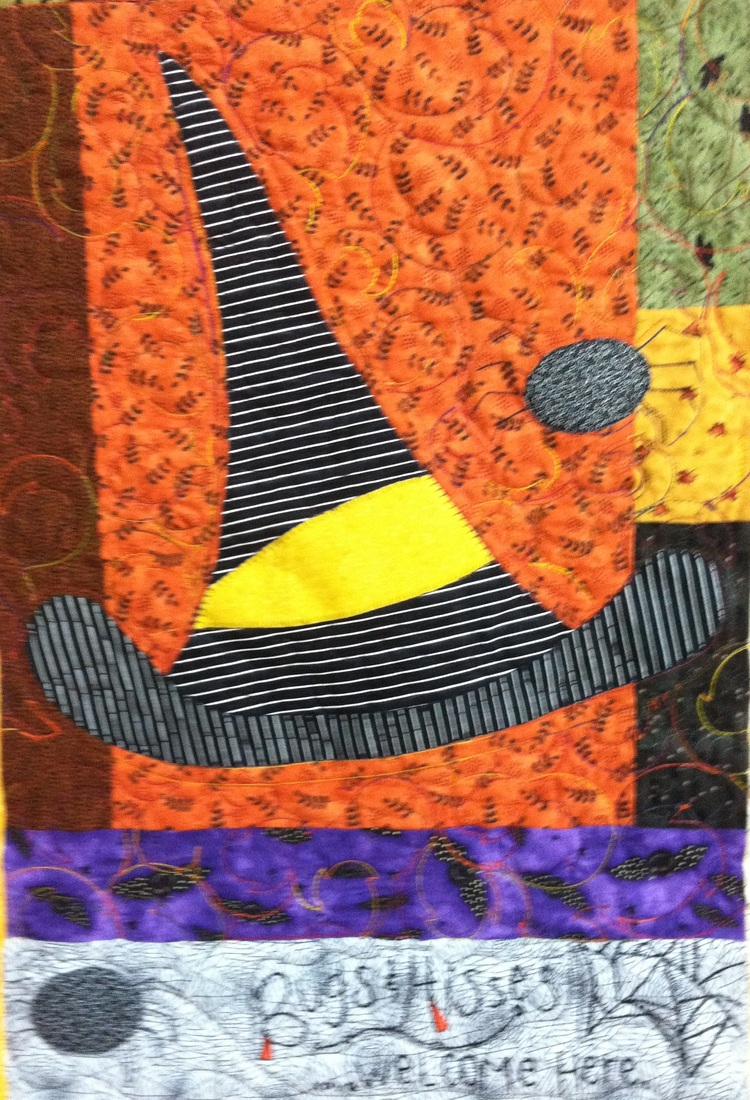 Man in the Moon Creative Fill 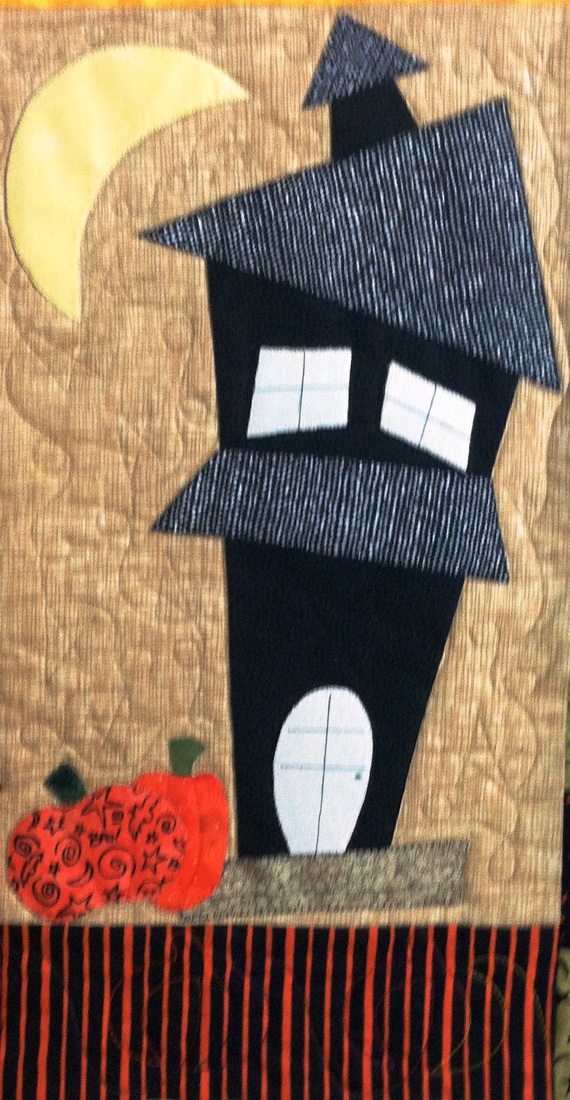 Stars and Circles Background Fill - Freehand 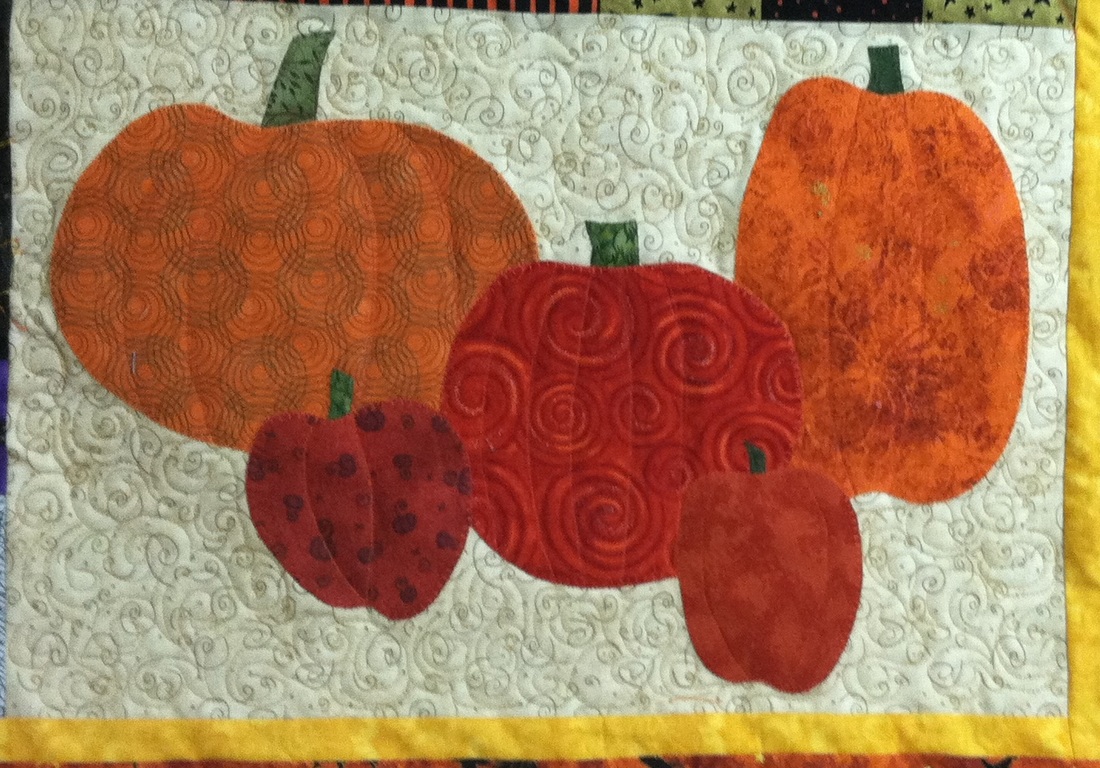 Swirls Background Fill - Freehand. No computerized system -- the Man in the Moon design can also be done freehand.Check out this 50 second video that shows how to stitch out a freehand filler of the design. There is no audio on this one. Try the design on paper and let me know how it goes. True confession -- after finalizing the video above and finishing the stitch out of the design from the video, I wished I had taken a little more time to actually connect up the motifs. The following video also provides you a suggestion on drafting and placement of a continuous line creative Man in the Moon fill. 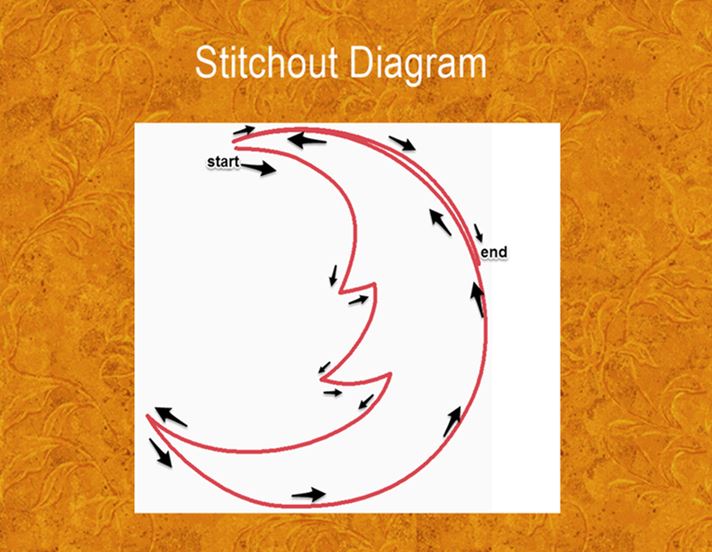 Man in the Moon Stitch Out by Kari Schell Featured Pattern - Ferris WheelI happened on a carnival last weekend. As usual, my eyes were drawn to the Ferris wheel and I was tempted (just a little) to try it out. Perhaps you will think of this pattern the next time the carnival is in your town.
Happy quilting. Kari Sign up for my newsletter to stay current on what's happening in my studio and learn more quilting tips. As a thank you, I'll send you a FREE pattern for this small maple leaf quilt.
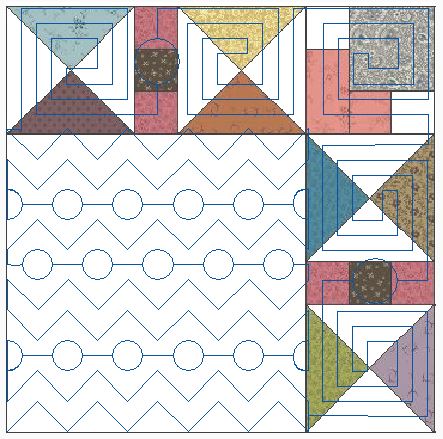
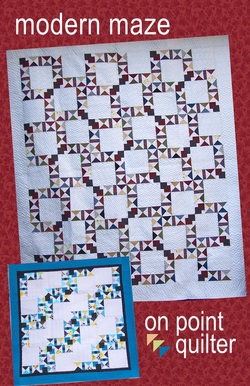
Two weeks ago I introduced my first "modern" quilt. Modern Maze has significantly more negative space then most of my quilts which called for a specialized quilting design. I would like to share how I came up with a modern quilting design for this quilt. I hope this will assist you with your next modern quilt. Approach Like all my quilts, I like to start by identifying the spaces within the quilt that can be used for custom quilting. The five unique spaces I identified are noted below. 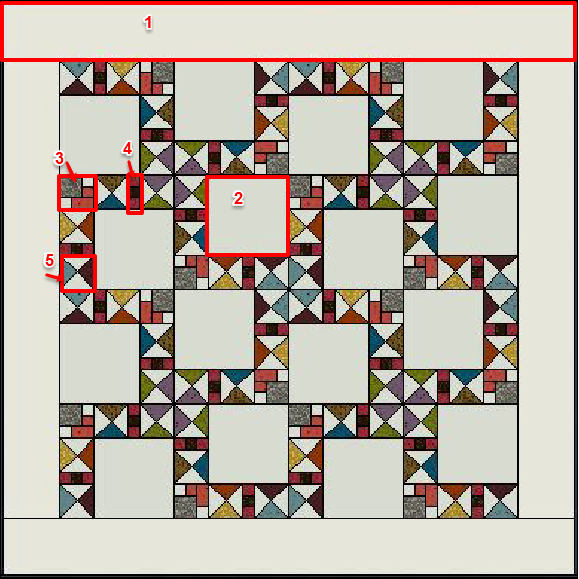 I went to some of my favorite quilting design sites and did a Google Search to get some ideas for quilting a modern quilt. What I quickly learned is that many of these designs used lots of straight lines and circles. I began playing with some options in Art and Stitch, the quilting program I use for drafting my quilting designs. Because this is a fairly involved design, I have split the video into two parts. The first part covers the Greek Key sashing and Part 2 the creation of a design for the large negative space. A variation of this design was used for the border as well. 4.25 Note - I just realized that the video has an extra clip inserted in the second video. My apologies for the confusion. I had some issues producing this video as the handles in the "shape" mode weren't working correctly for me as there was a huge delay between moving them and them moving on the screen. I'm still figuring out why I was having so many problems; it could be my new desktop computer, Windows 8, the video software I use, a graphics card, my monitor or even compatability with A&S with Windows 8. I played with the program compatability feature of Windows 8 after completing the video and am hoping I solved the issue. Time will tell. I am offering the quilting design as a free printed pattern (to assist those wanting to quilt this on their domestic machines as well). Here is the finished block (drafted and stitched out).
Quilting Through the Seasons - Maple Grove Quilt Show Today
Featured Quilt - Modern Maze Hot off the presses, the pattern for Modern Maze is now available for purchase. For those that collect charm packs, this quilt is charm friendly!
Happy quilting. Kari Sign up for my newsletter to stay current on what's happening in my studio and learn more quilting tips. As a thank you, I'll send you a FREE pattern for this small maple leaf quilt.
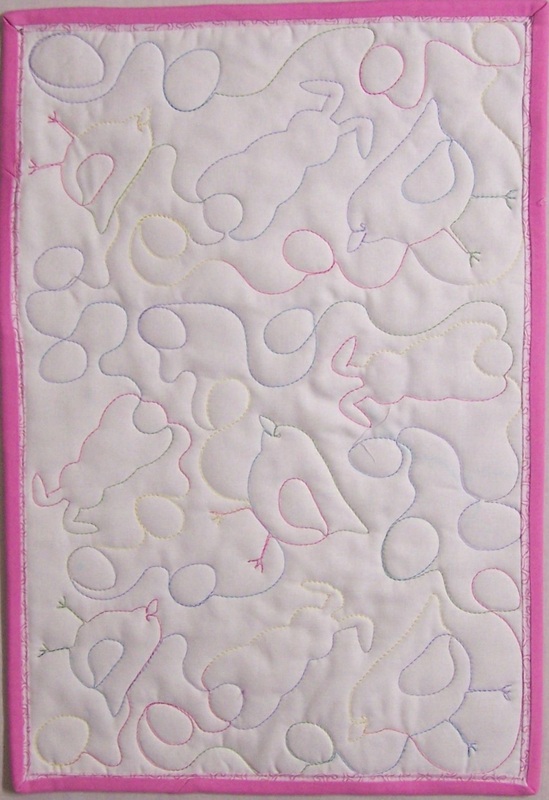
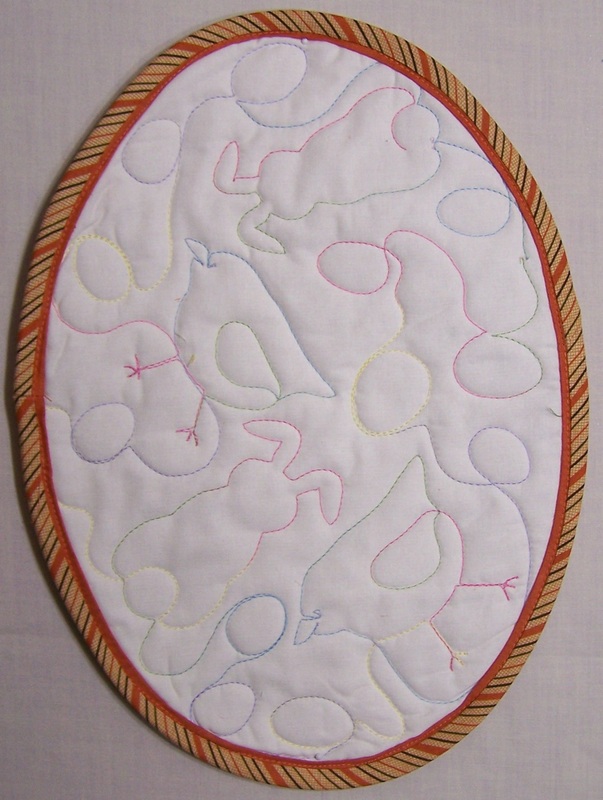
Last week, "It's a Quilt Thing" offered a free digital pattern for a quilted placement. "Welcome Easter" has chicks and bunnies which can be colored with Crayola Crayons. The coloring can be made permanent by heat setting the crayons with a warm iron. Or, if you would like to use them again next year, you can just wash them. I immediately needed to put some muslin on my machine and stitch out a number of those placemats. Then I had a little room left on the muslin and decided I needed a couple of oval placemats as well. I needed to do some modification of the design to make it work for the ovals. I found this worked best in Art and Stitch.
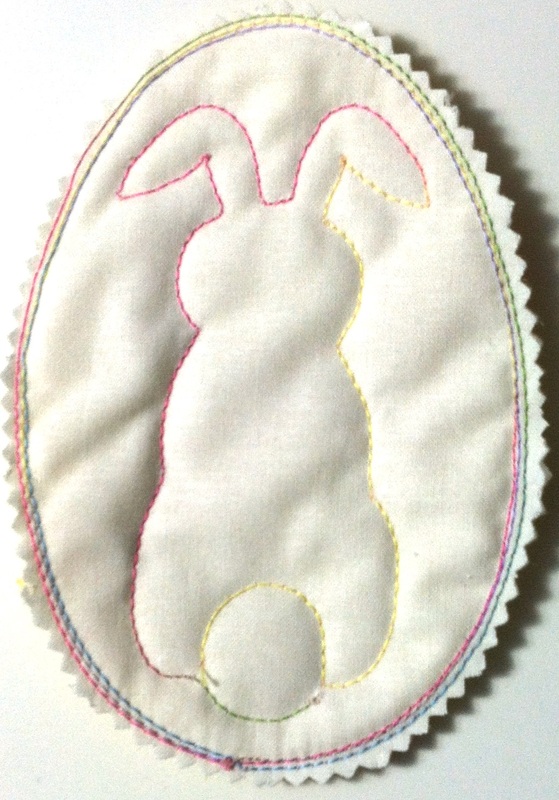
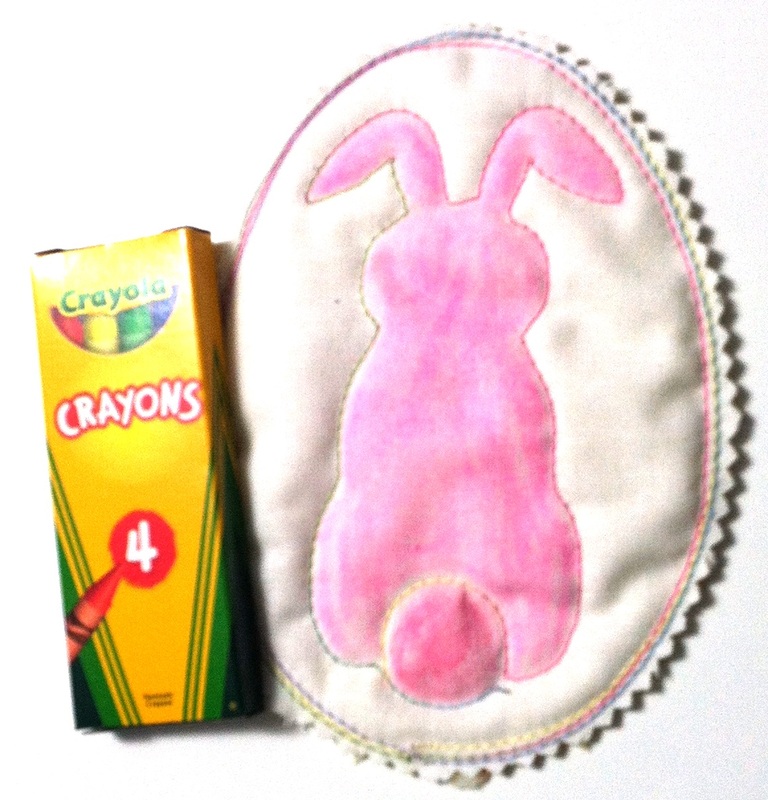
Then I thought -- what if I just placed the bunny in an egg shape for a small "mug rug"? Back to Art and Stitch.
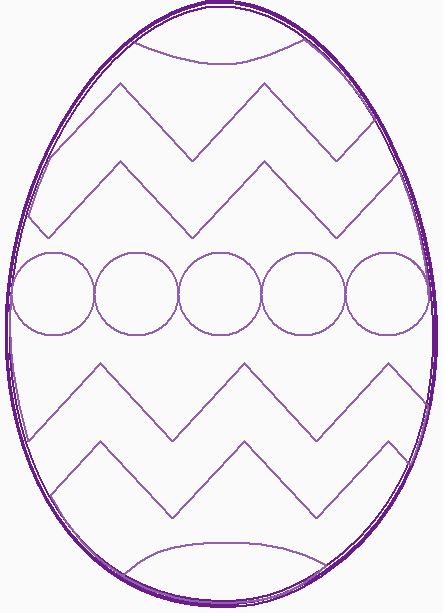
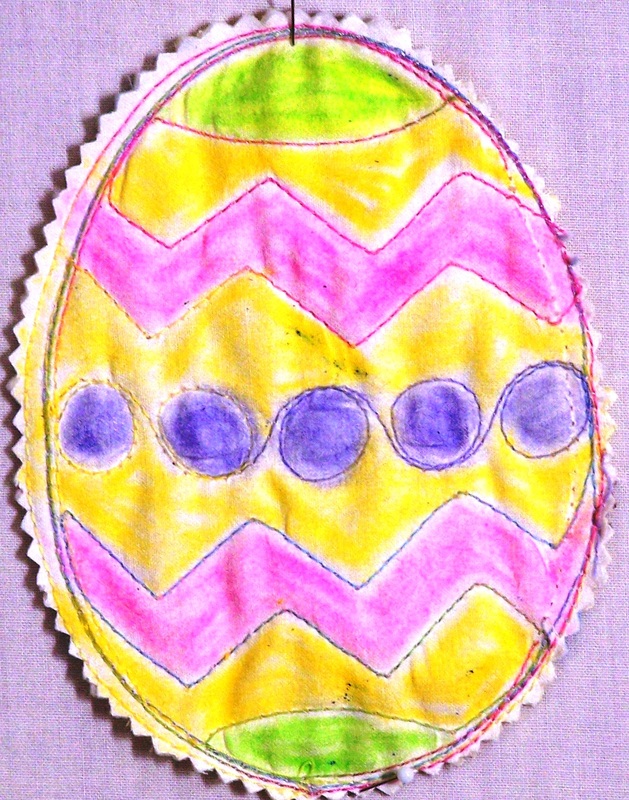
Creating my own Easter Egg DesignsAs this was stitching out I began thinking about all the other possible ways to decorate my egg. Also -- did I want a stitch design or did I want to create applique shapes? Should I do this in Art and Stitch or in Electric Quilt? I decided to start with some basic zigzags and circles and played in both Electric Quilt and Art and Stitch.
This week I will share the video showing how I created the Art and Stitch egg (including how I made the stitching continuous). This was why I chose to put my circles in a row. Next week I will share how I created the Electric Quilt design. If you watch both videos, you will better understand the differences in the drawing tools. I share a few new tools in this video including the tracing wizard and transform. Easter Egg Contest
As I was working on my Easter egg, I thought this would be a fun idea for another exchange. This one will be open to users of Electric Quilt, EQ Stitch, Art and Stitch, and Art and Stitch Plus. Anyone who submits a design is a winner (but you must submit a design to win). Those who submit a design will have access to a members only page on my website. From this page they can download files from all the exchange participants. However, you must have the source software to be able to use the file. If you do not submit a design, you will not be able to receive the files. Once you have completed the design, label it with your name. Send me the file at [email protected]. For those using the embroidery programs, please also send me a screenshot of your finished design as I don't own the embroidery software modules. Due date is Saturday, March 28th. Here are the files with the basic egg shape.
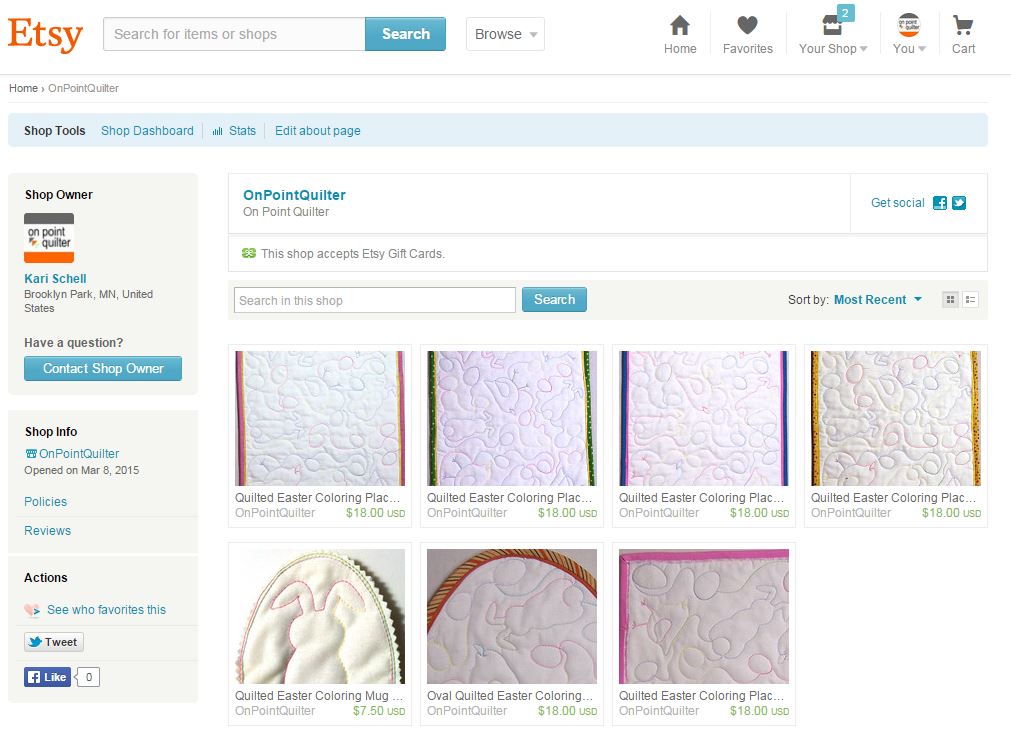
How the member only pages work: When I receive your submission, I will set you up as a member using your current e-mail address. You will receive an email asking you to set a personal password for the site. I will link your email address with the private page. You will need to log in on my site to be able to access the private page. Membership is only required for the private pages. The login button will change to "My Account". You will then be able to choose the page to access. I will post pictures of the submitted designs on an upcoming blog post with your name (but will not provide access to the files). Etsy Shop Now Open
Happy quilting. Kari Sign up for my newsletter to stay current on what's happening in my studio and learn more quilting tips. As a thank you, I'll send you a FREE pattern for this small maple leaf quilt.
|


Free guide available for newsletter subscribers


Kari SchellElectric Quilt Expert and Educator and Pattern Designer. Categories
All
Archives
July 2024
|


 RSS Feed