
|
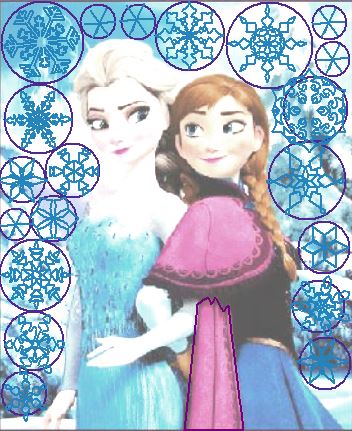
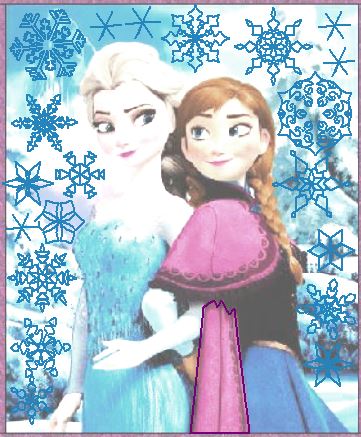
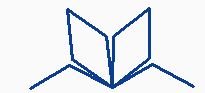
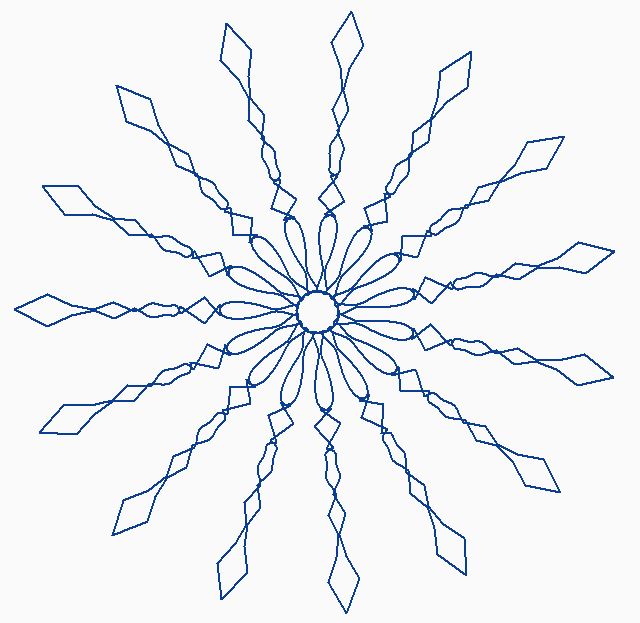
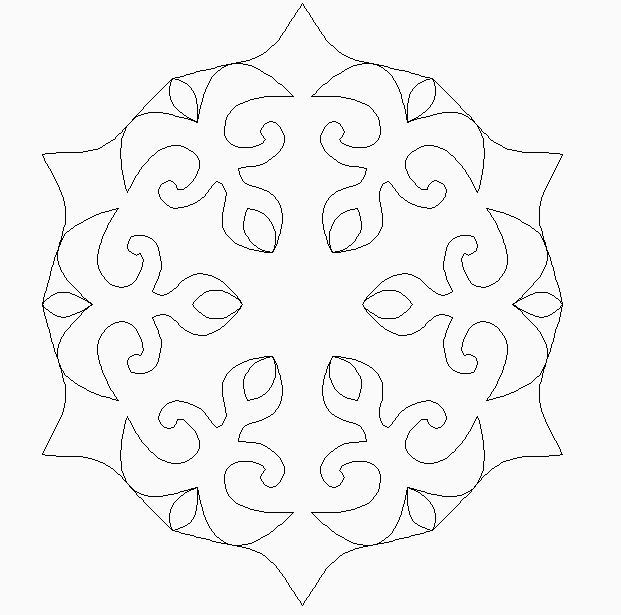
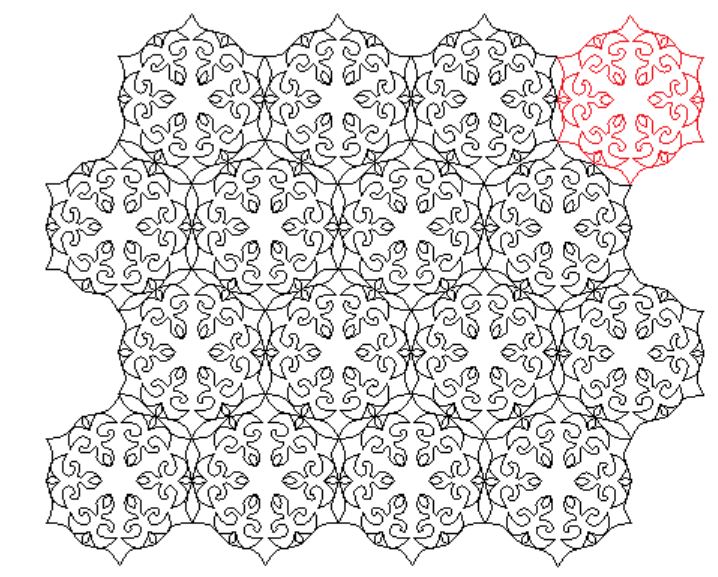
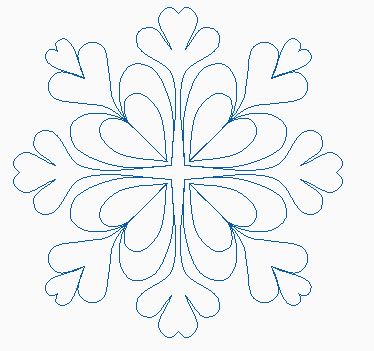
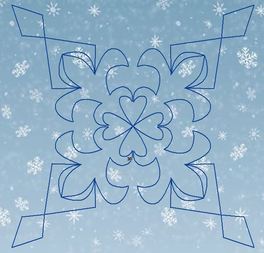
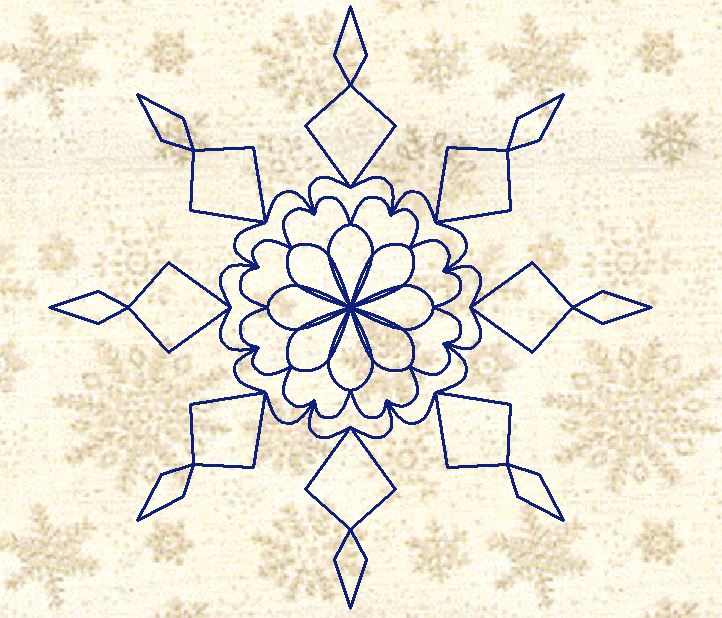
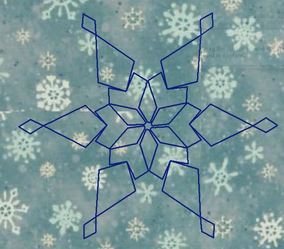
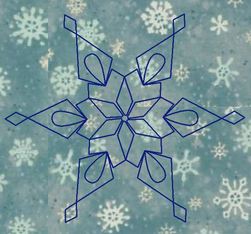
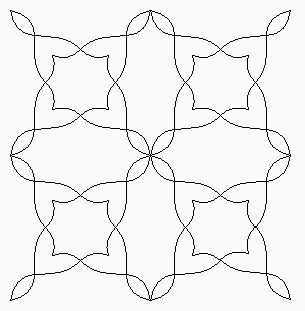
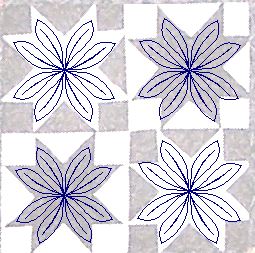
This week I will focus on "How Will I Quilt That ... Elsa and Anna Quilt". I decided I would create two options. One will be able to be used as a pantograph overall quilting pattern. This one could easily be freehanded on domestic machine. The second will be custom. I wanted to use some of those fabulous snowflakes from the exchange. Elsa and Anna Overall Snowflake MeanderI started by drafting a simple snowflake using diamonds.  Here are the snowflakes connected with Meander Anything. Snowflake Exchange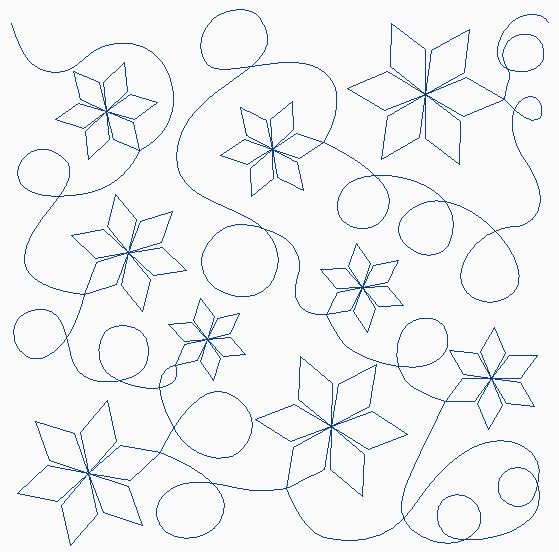 See how I did this using Art and Stitch software. (In reviewing the video this morning, Correction: In the video I mentioned using Snap to Grid to connect the snowflake ends when using Meander Anything. I should have said "Snap to Anchors". 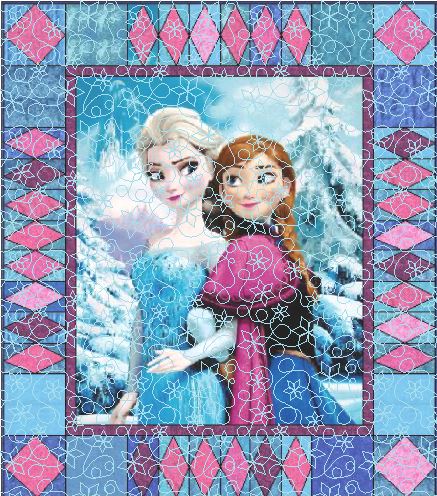 For a free copy of a pdf of the quilting design, click here. For a free copy of the Art and Stitch file, click here. Elsa and Anna Custom OptionFor the "custom" option, I decided I wanted to outline both Elsa and Anna. They are "huge". So their clothing would be a nice place to try a creative fill. I also wanted to put snowflakes in the un-pieced blocks and then over the background spaces in the panels. An then I thought I would like to use point to point designs in the pieced borders. Let's get started.
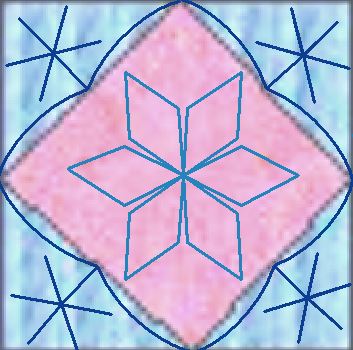
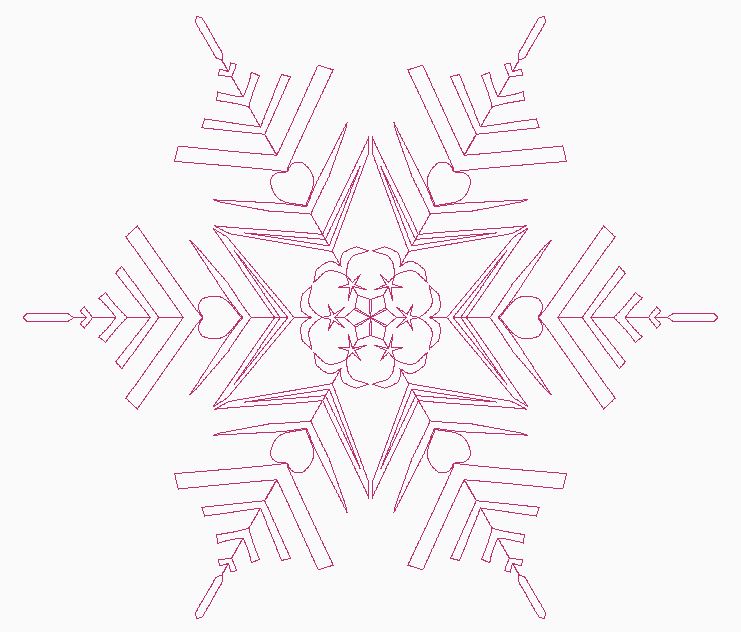
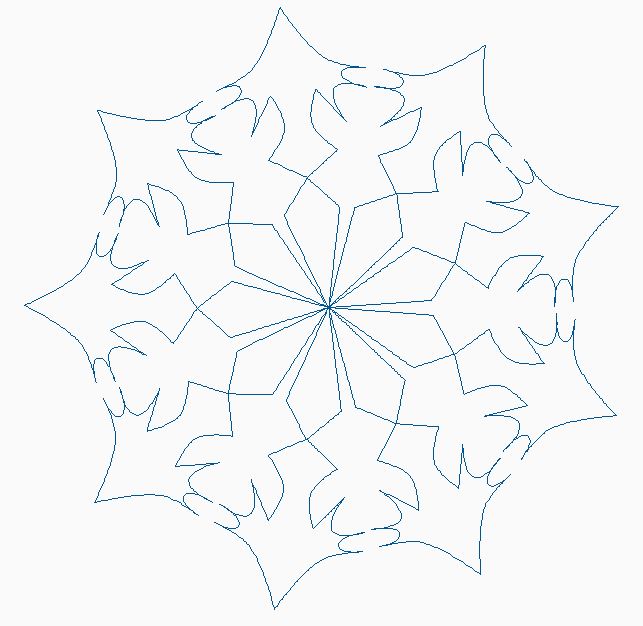
Once I figured out how many snowflakes I needed, I started to fill them in with snowflakes from the Art and Stitch exchange. I needed a few more simpler snowflakes, so I also added a few more created with the Magic Circle tool. After I filled in all the snowflakes, I could get ride of the circles as I won't actually quilt them.
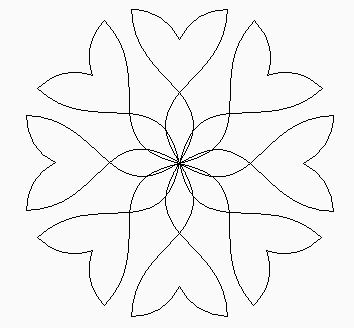
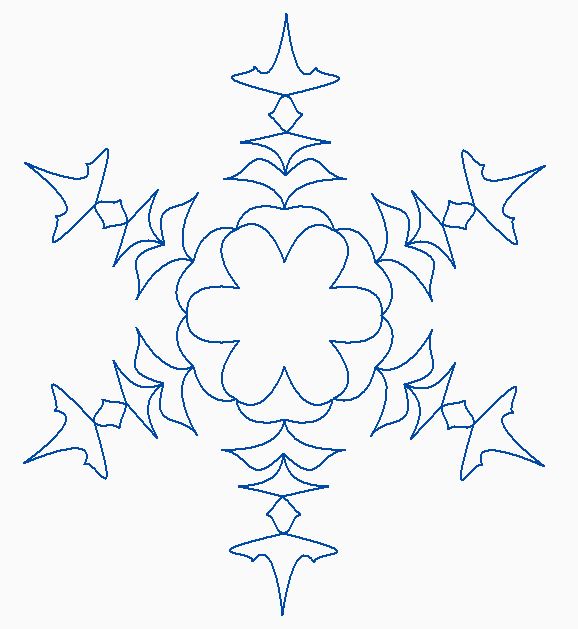
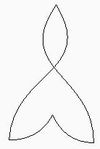
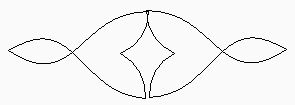
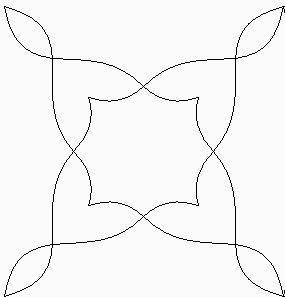
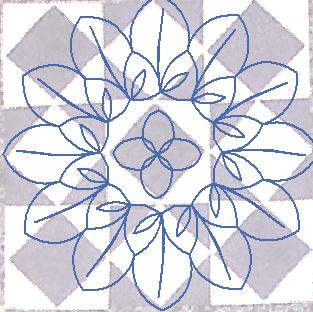
For the diamonds, I decided on some Point to Point Designs. I thought a variation on the snowflake block in the overall option would work for that and then I added a simple six pointed snowflake (now that I know snowflakes have six sides).
Here is what they will look like in the diamond section of the quilt. 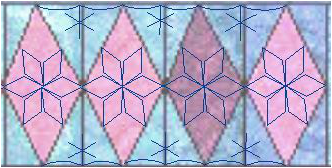
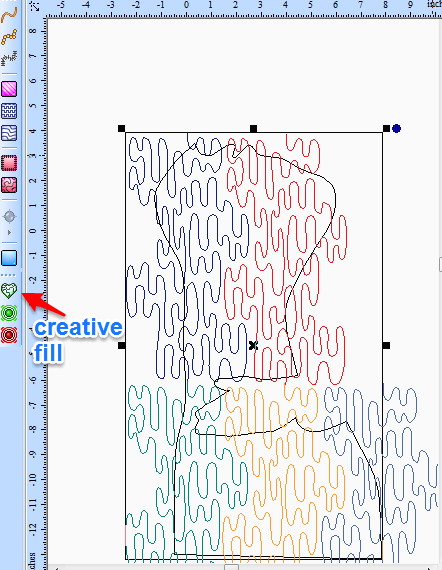
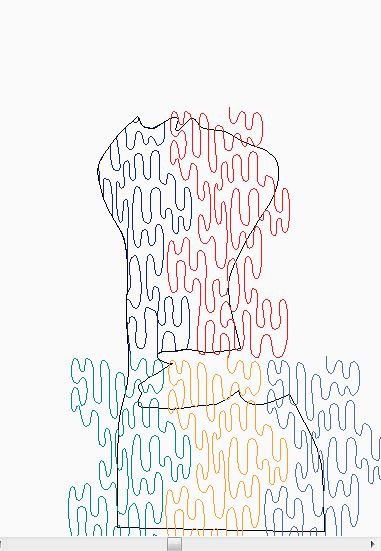
I drew outlines of the clothing using the Curve tool. When I want a sharp point, I use the Control key while adding a node. 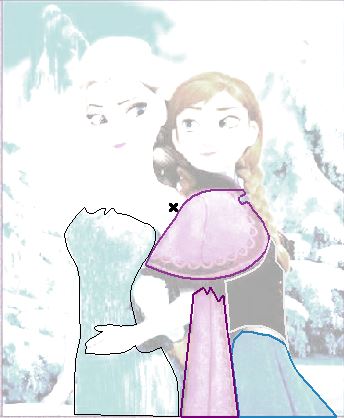 For Elsa's dress, I used a creative fill using River Run Meander by David Hudson. I rotated the design and didn't connect the segments to make it easier to quilt out on my machine. Each color is a separate segment in the second photo.
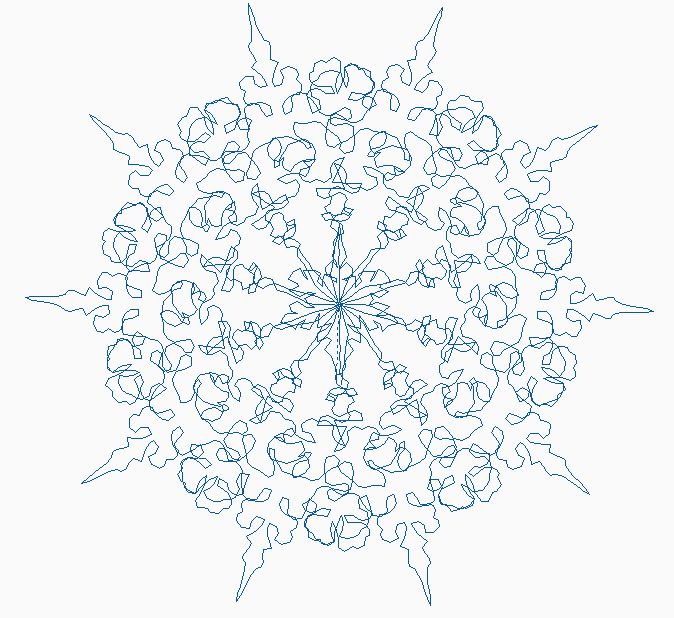
Move other segments above the dress shape and repeat the creative fill process. You should select only one "fill" and the dress shape at a time before applying the creative fill button. Apply a running stitch and double check your stitch out. 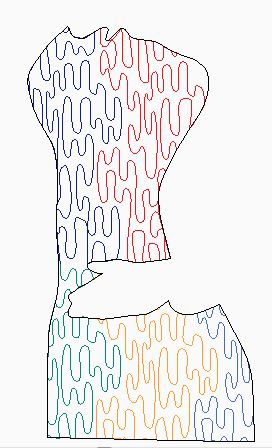 I will try some different creative fills for the other clothing. I was hoping to get my top quilted before this post -- but didn't make it. Hopefully I will have a final quilt to share with you next week. Snowflake ExchangeThere were 44 submissions (plus the 4 projects I shared with you a few weeks ago). Awesome work!!! Here are the designs. Those who submitted should have received a link to the private page and can obtain the actual Art and Stitch files. If you missed the link, please send me an e-mail. Whee! There was a lot to share this week. I hope you enjoyed the quilting ideas and the Elsa and Anna quilt series. Happy quilting. Kari Sign up for my newsletter to stay current on what's happening in my studio and learn more quilting tips. As a thank you, I'll send you a FREE pattern for this small maple leaf quilt.
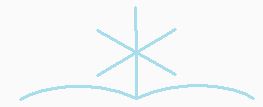
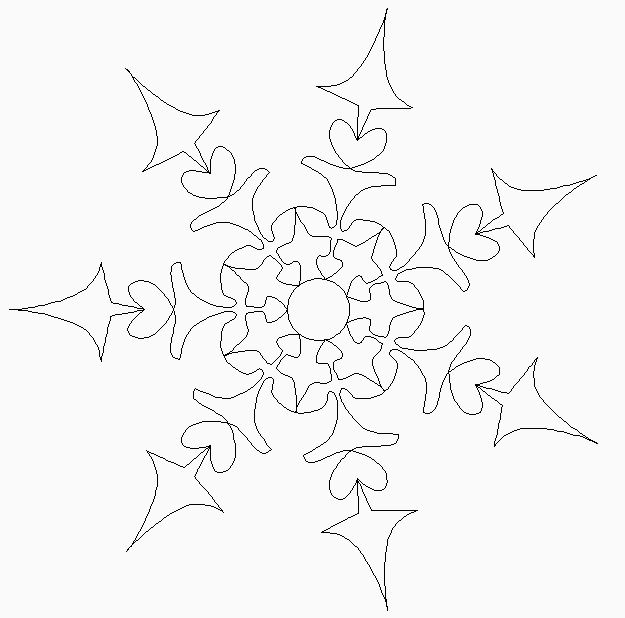
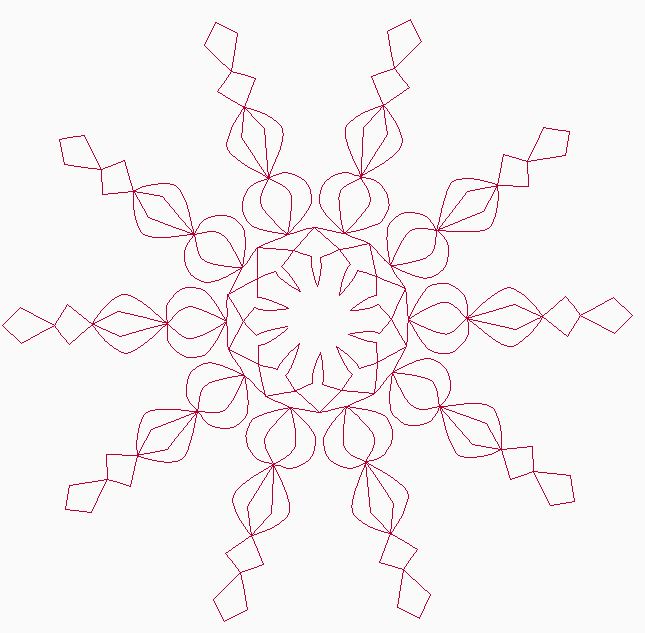
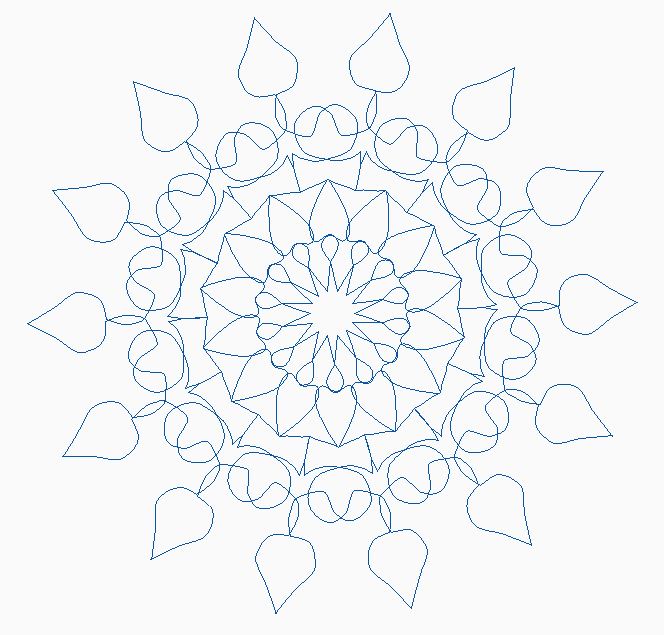
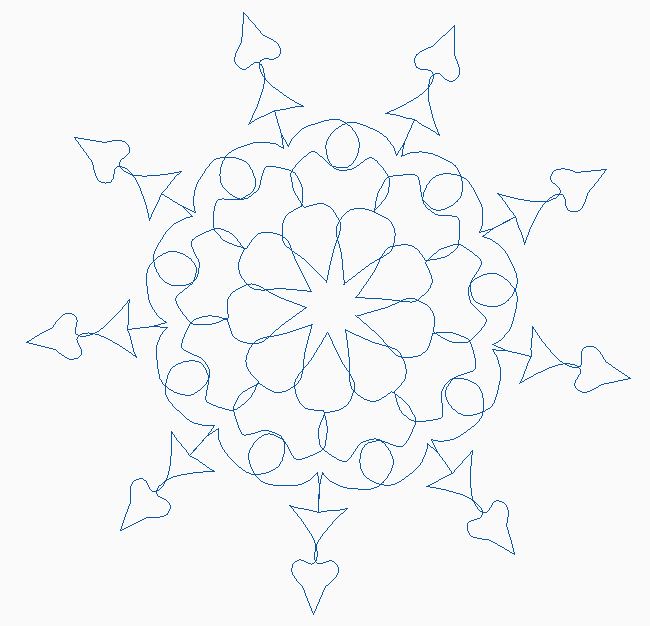
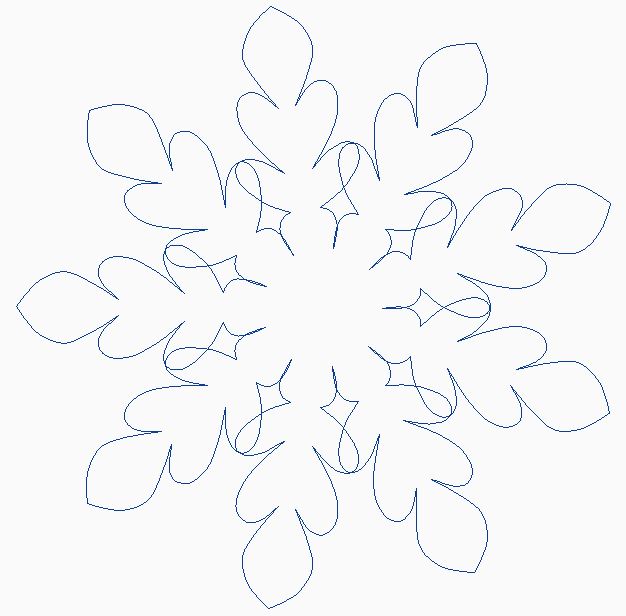
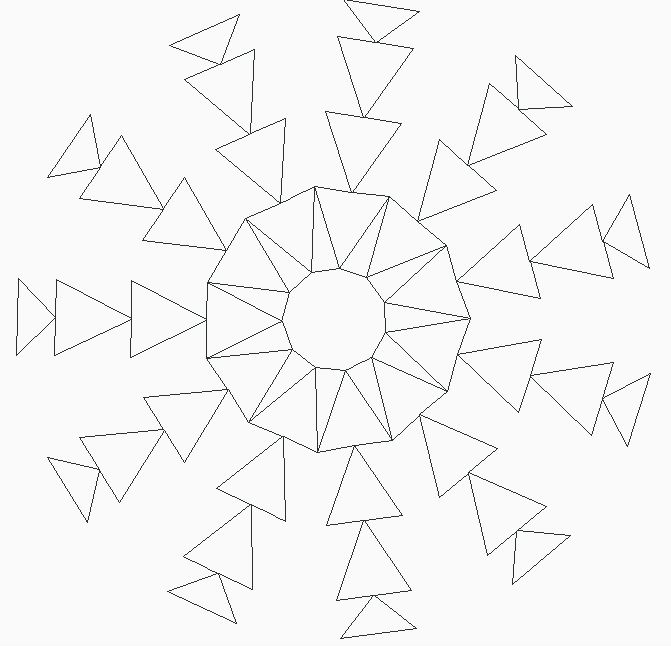
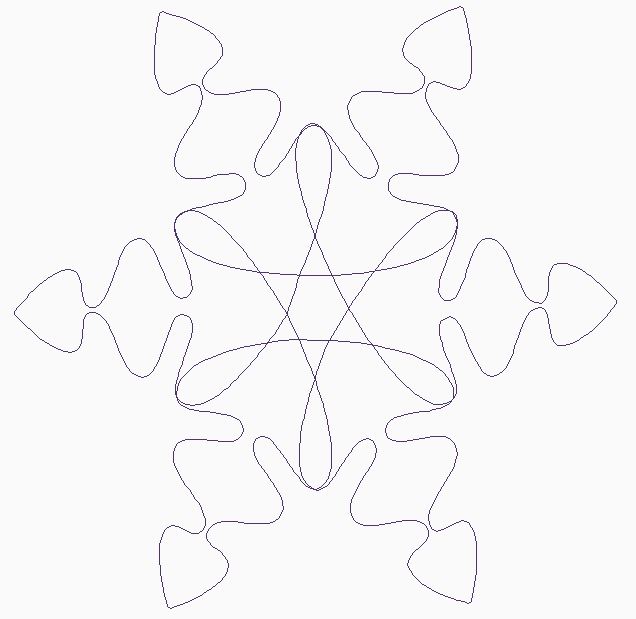
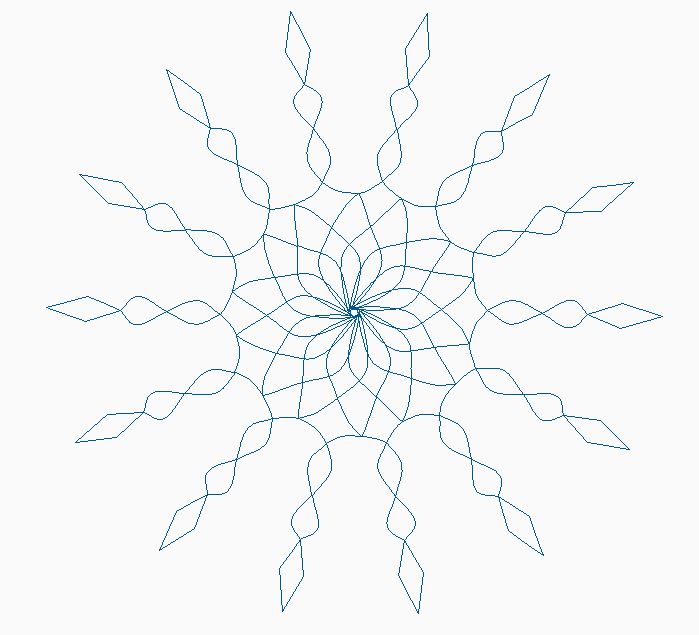
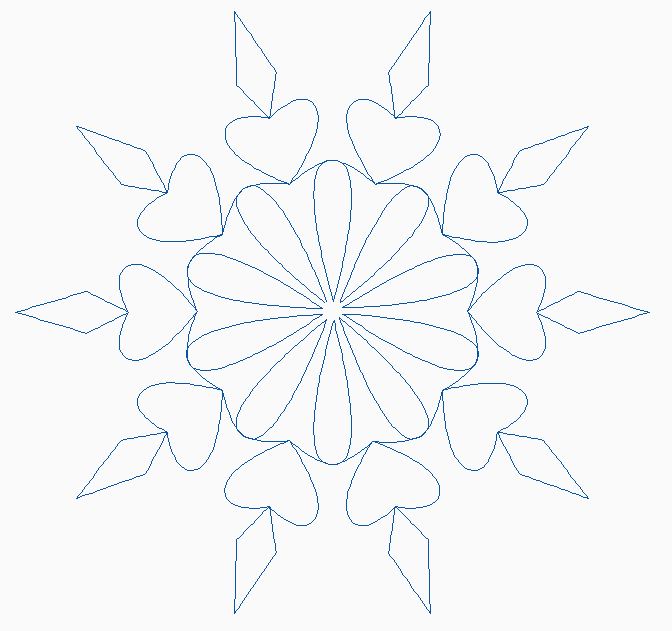
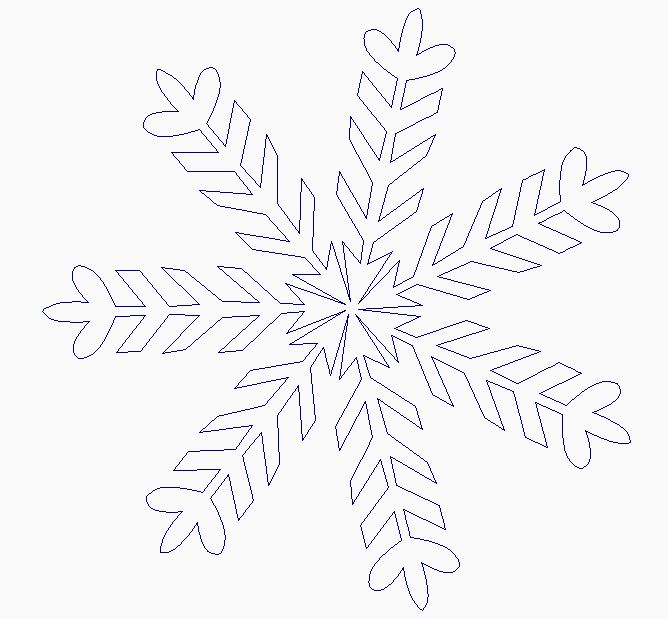
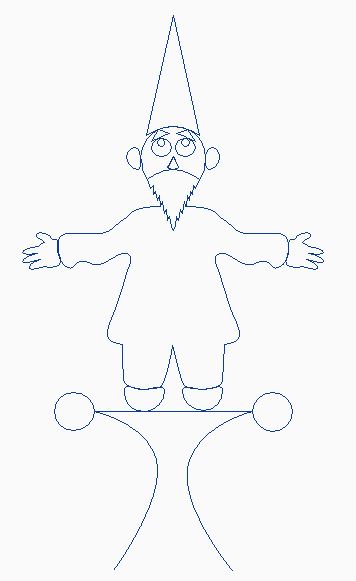
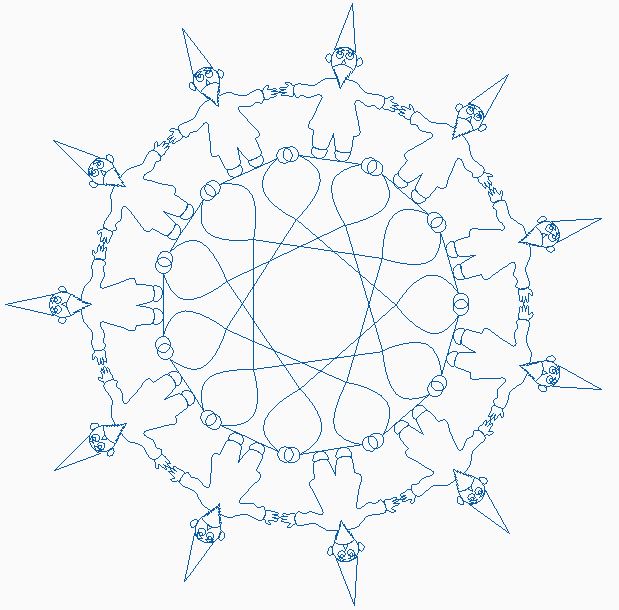
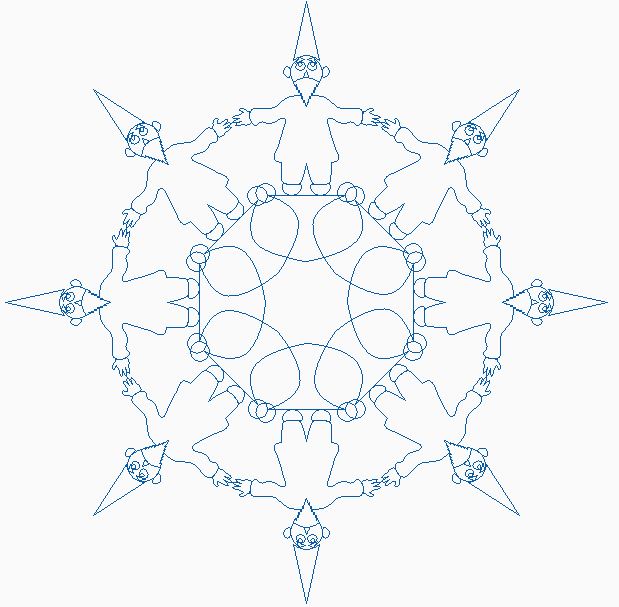
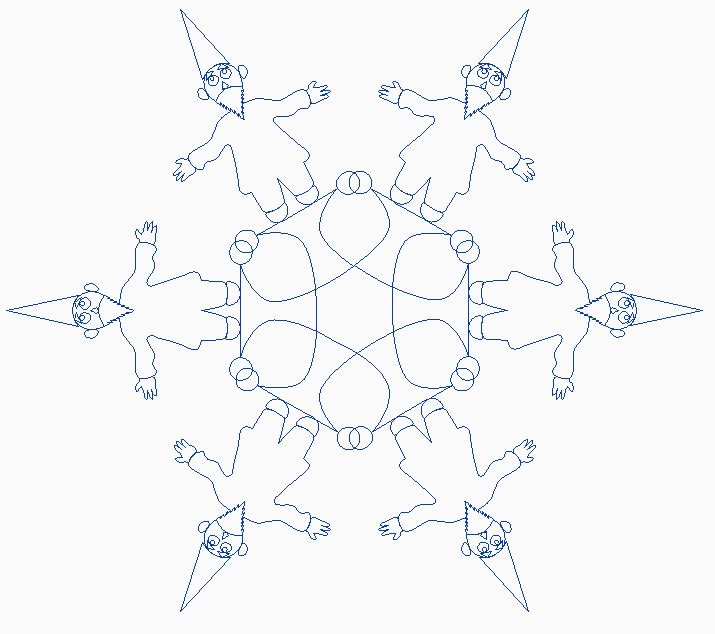
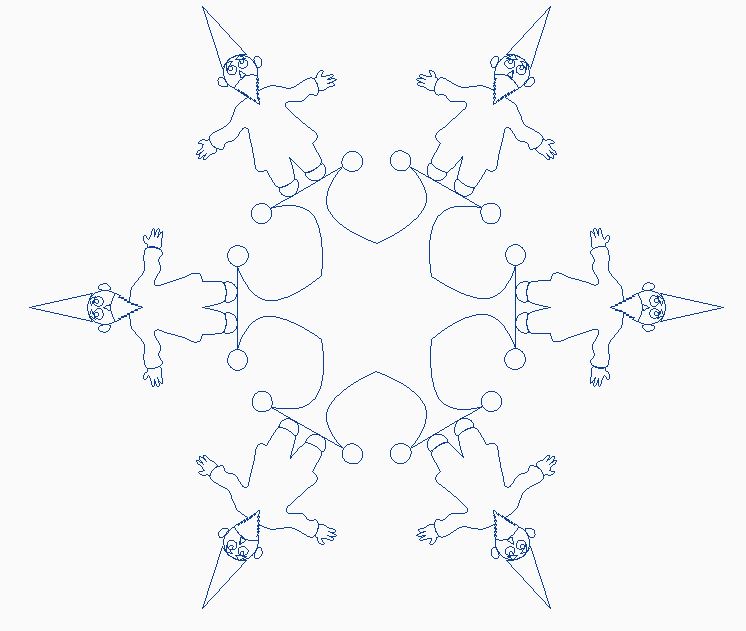
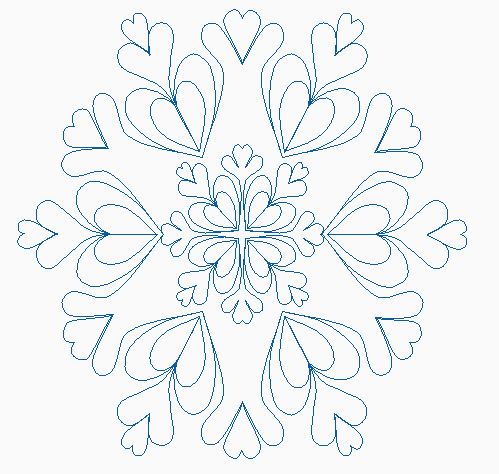
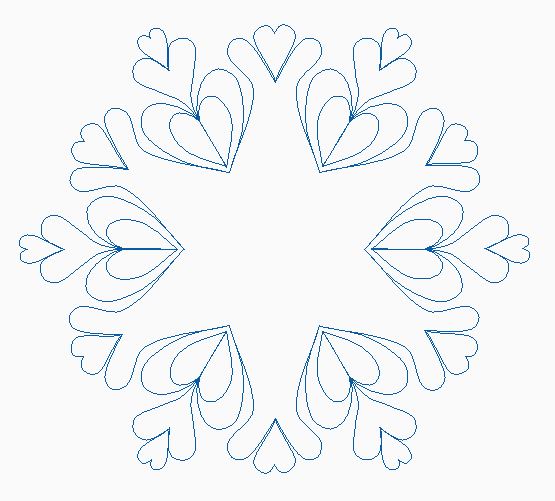
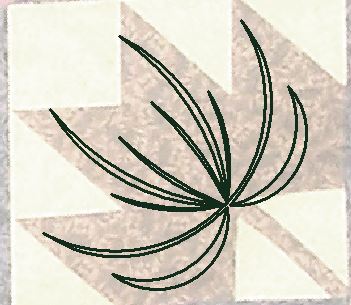
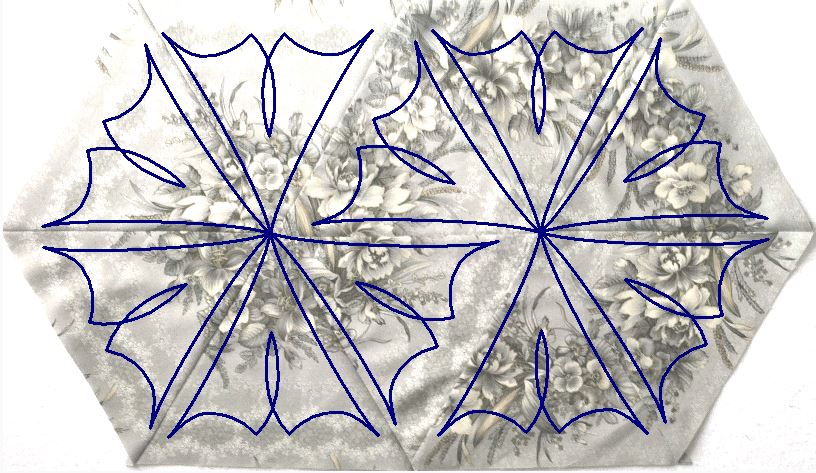
As I look out on my backyard today I see snow. I am a northern gal and love snow this time a year (as long as I don't have to drive in it). During my appointment with the hand doctor earlier this week, I was told no cross-country skiing this year. This was disappointing, but not a total surprise given the broken wrist that happened the beginning of January. Since I can't enjoy the snow outdoors, I decided to focus on making snowflakes that could be quilted. I've been playing in Art and Stitch, my digital quilting software, and have come up with a method to make lots of snowflakes. These snowflakes are based on the paper snowflake method we all probably tried in grade school. The following video demonstrates how I made one of these snowflakes. Here are a few of my completed snowflakes. If you click on the photo, you can get a FREE pdf of the design for use on your quilts. 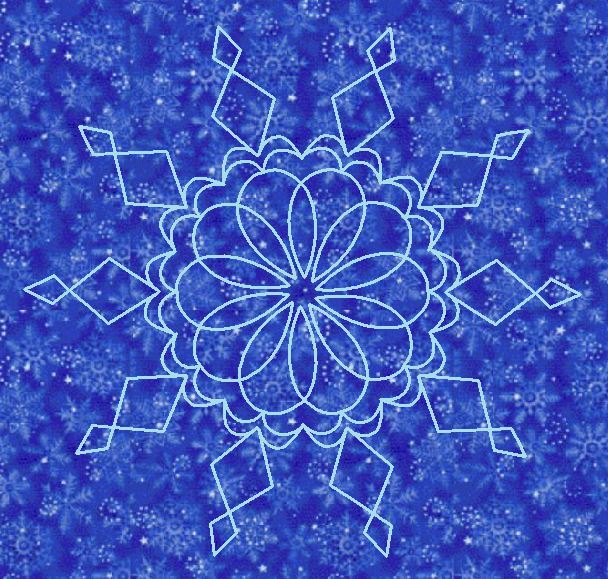 Snowflake 1 by Kari Schell
Art and Stitch Snowflake ExchangeI thought it would be fun to offer an exchange for those that use the Art and Stitch software. To participate in this exchange, you will need to draft a snowflake in Art and Stitch. You can make it as simple or as complex as you like. Please don't infringe on anyone's copyrighted designs. For ideas search Google Snowflake Images, or Paper Snowflakes, or check out a Snowflake font. Once you have completed the design, label it with your name and save the file in the ANS format. Send me the file at onpointquilter@comcast.net. I will create a members only page on my website and set you up with access to this page. All Art and Stitch files received will be posted to the page. As a member of this private page, you will be able to download any of the submitted ANS files. Only those who have contributed a snowflake will be allowed access to the page. I received a question on the members only feature. When I receive your submission, I will set you up as a member using your current e-mail address. You will receive an email asking you to set a personal password for the site. I will link your email address with the private page. You will need to log in on my site to be able to access the private page. Membership is only required for the private pages.  The login button will change to "My Account". You will then be able to choose the page to access.  I will post pictures of the submitted designs on an upcoming blog post with your name (but will not provide access to the files). Due date is February 7. I'm looking forward with great anticipation to seeing all your snowflakes. Feel free to post questions in the comment section. I will do my best to respond. And the Winner is......I had 74 comments to my studio tour on last weeks blog hop. I was overwhelmed and deeply grateful with your responses. The winners are Sylvia K. and Tabitha K with random numbers (60 and 47). They will be receiving two On Point Quilter patterns of their choice. Happy quilting. Kari Sign up for my newsletter to stay current on what's happening in my studio and learn more quilting tips. As a thank you, I'll send you a FREE pattern for this small maple leaf quilt.
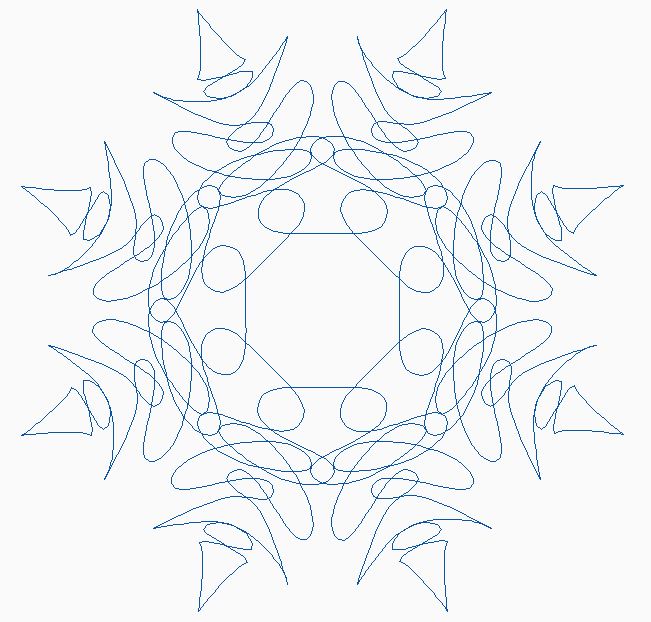
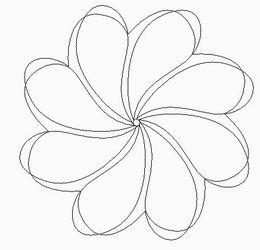
A number of years ago (pre-Intelliquilter) I purchased Volumes 1-5 of the Quiltmaker Design CDs from Electric Quilt. I haven't looked that closely at them in the last few years. Loe Van der Heijden's comment on the Yahoo Art and Stitch group regarding EMS files made me think that these may be very usable designs for those of us with a digital longarm system. First -- I checked out the copyright information. Digitizing is allowed for use in a computerized quilting system. Just no resale/mass production. Yeah!!!  Now a video tutorial on how i digitized one of these patterns using Art and Stitch. The design in this video is from Volume 3. After going through this I got hooked on a number of the designs and found it fun to play with new variations of them in Art and Stitch. Even without Art and Stitch, you can create these designs for use on your domestic sewing machine. Here is what I did with Fantasia (from Volume 4)
 Fantasia Magic Circle Design (you could do this with any number of repeats) Here is Heart Song from Volume 4 with my Magic Circle variation in Art and Stitch.
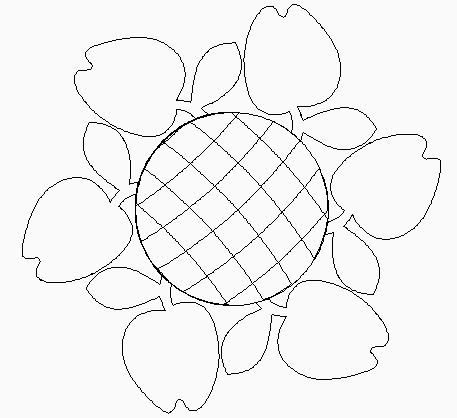
Here is what I did with the Apple Charm Tack from Volume 2. I created a magic circle and then added curved cross-hatching in the center.
If you are interested in the Quiltmaker CDs, they can be purchased on the Electric Quilt website. They retail for $24.95 each and each CD has hundreds of designs. (After this week's tutorial I decided I really needed the remaining three volumes and placed my order. I'm looking forward to the added designs.) Happy quilting. Kari Sign up for my newsletter to stay current on what's happening in my studio and learn more quilting tips. As a thank you, I'll send you a FREE pattern for this small maple leaf quilt.
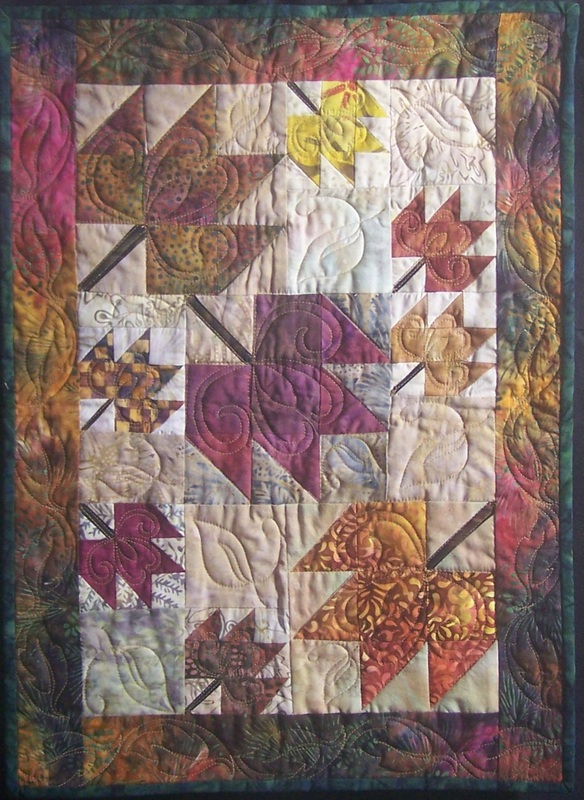
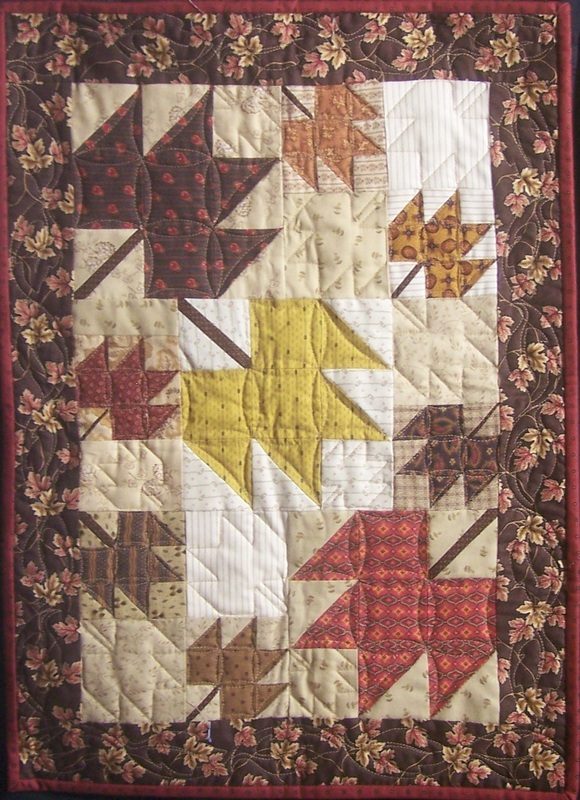
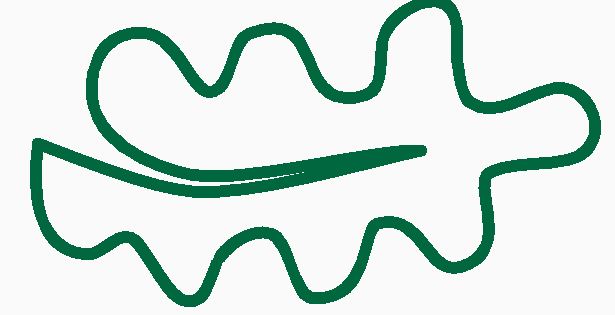
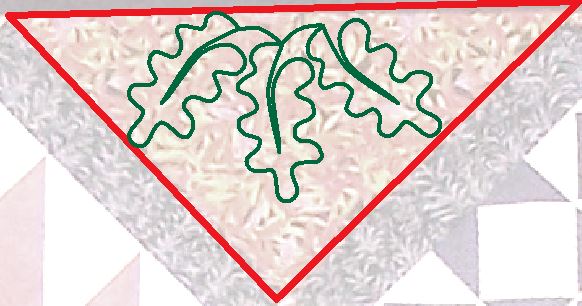
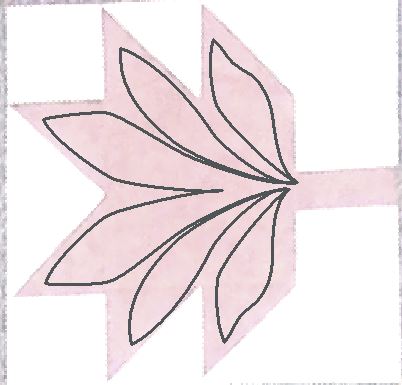
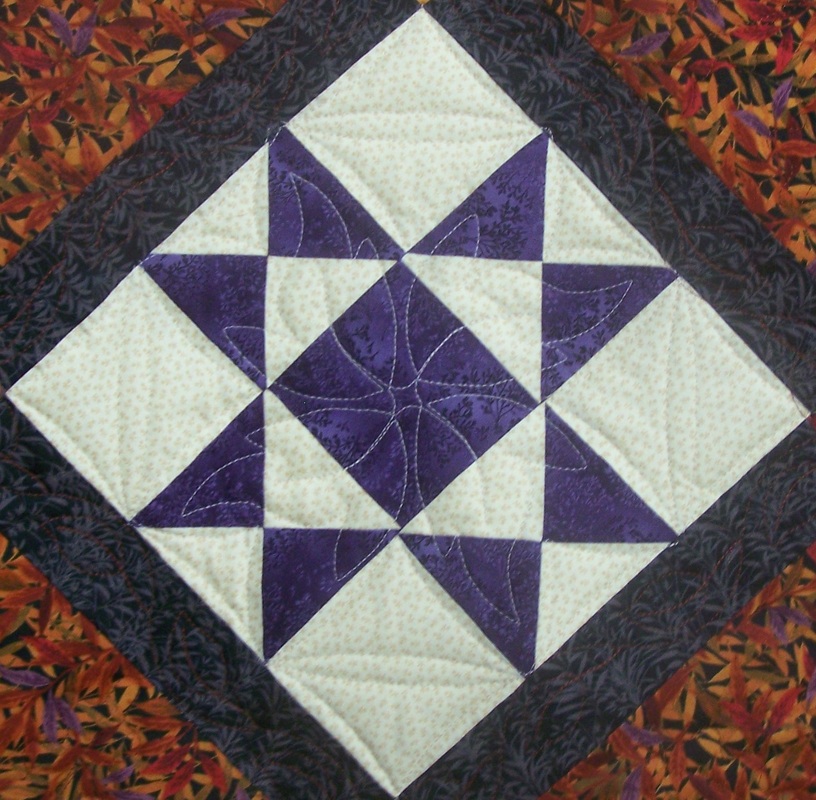
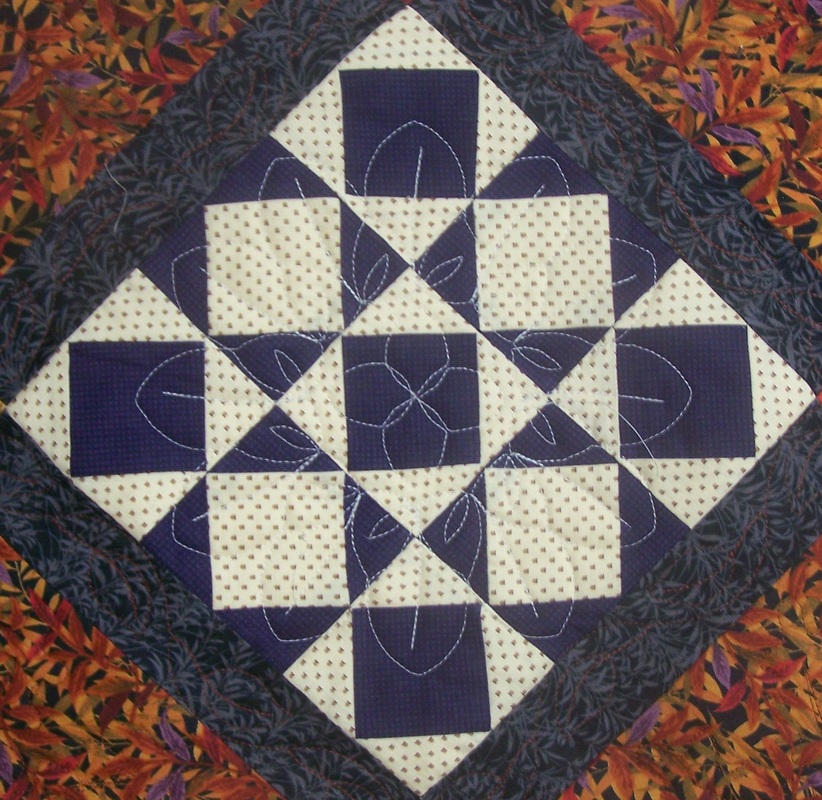
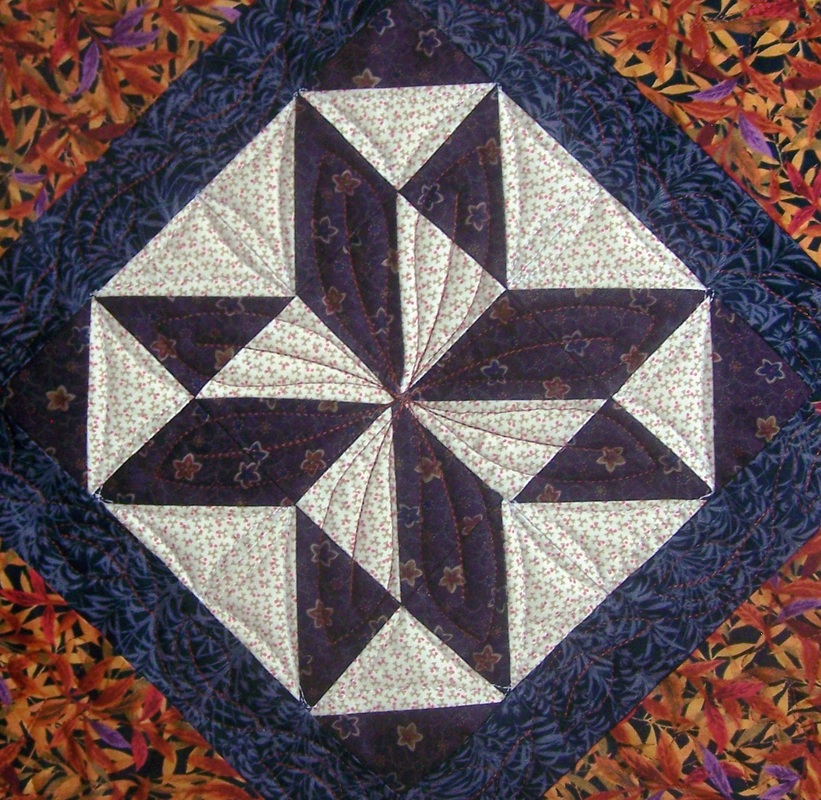
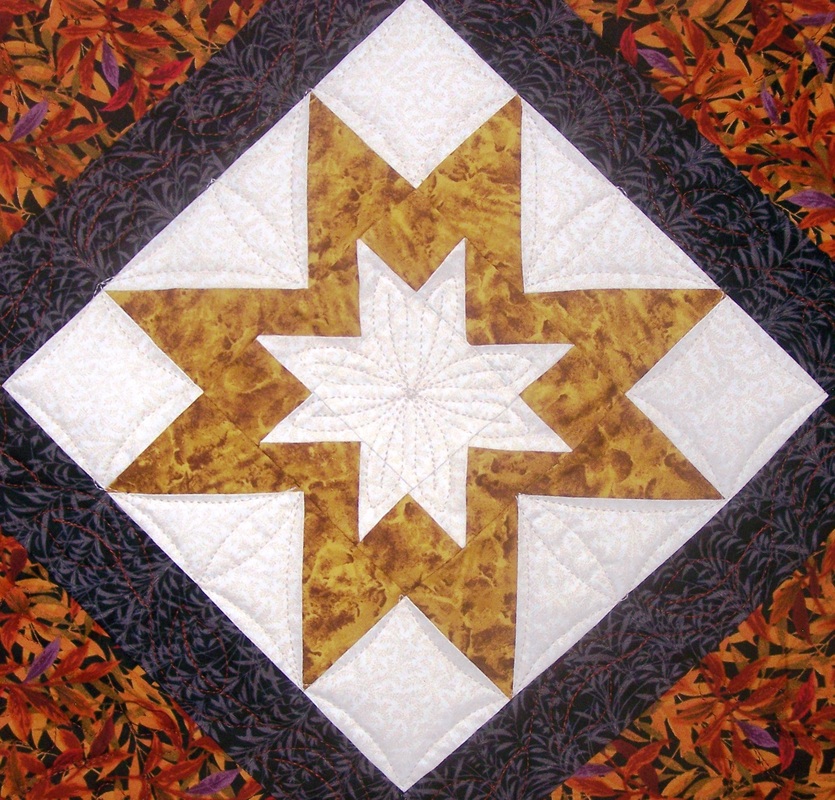
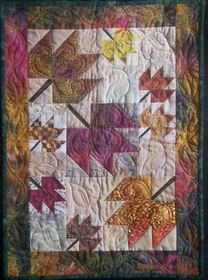
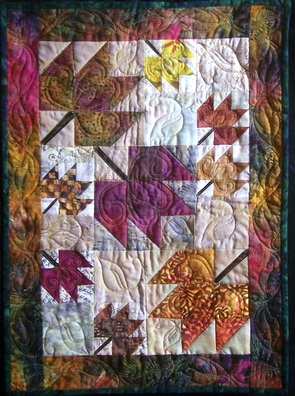
The leaves have been gorgeous this fall. I'm hoping to get out for a nice walk later today to enjoy the beauty. Of course my favorite leaves are those in a quilt. The following sampler quilt top has a wonderful fall theme and was provided by Beth R - who indicated that she wanted "medium custom". For this week's post, I want to walk through how I decided to quilt it. Even if not doing a leaf quilt, this can assist you in analyzing your own quilts.  The theme for this quilt definitely needed to be "leaves". There are a number of different spaces that need to be filled and I also needed to address how I wanted to quilt each of the sampler blocks. 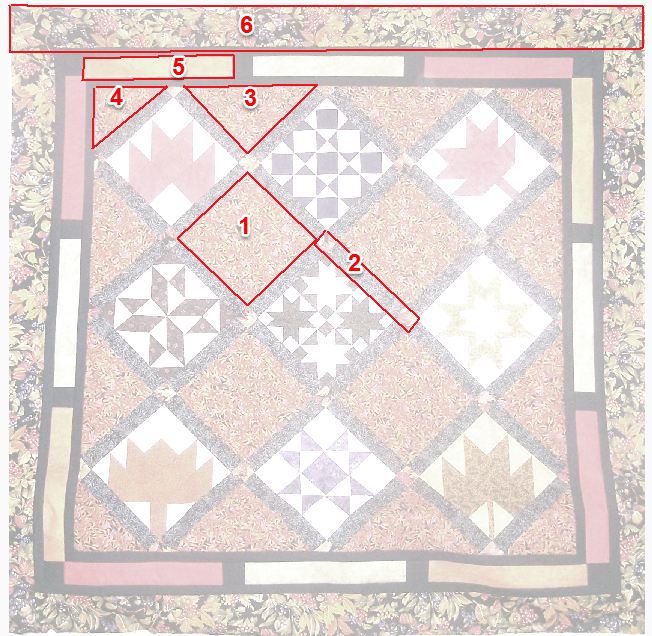 I started by going back to my library of quilting books for inspiration. In looking at "Machine Freehand Patterns" by Nan Moore, I discovered a few pages of freehand leaf designs. The beauty with using my Art and Stitch software is that I only have to draw "one" leaf and then I can modify for designs I can use on my Intelliquilter. If you don't have a computerized system, these designs could also be done freehand. Here is what I came up with for spaces 1, 3 and 4. A wreath (or partial wreath) of oak leaves.
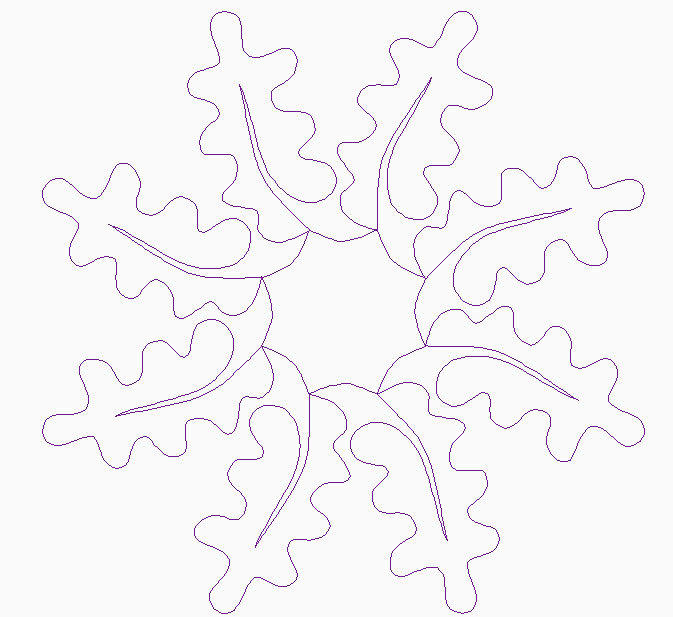
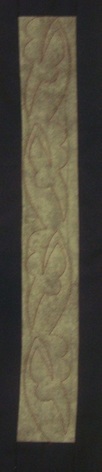
For a free quilting pattern this week, I decided to give you the oak leaf wreath. Click here for a pdf of the pattern. Click here for the Art and Stitch file. For space five I decided to go with another leaf variation. This one could be used as a point to point design as well. I like that I can stretch this (or shorten this) to fill a space.  Leaf quilting for Sashing or Skinny Border For the sashing I wanted a very simple leaf with vine that could come together in the corner. 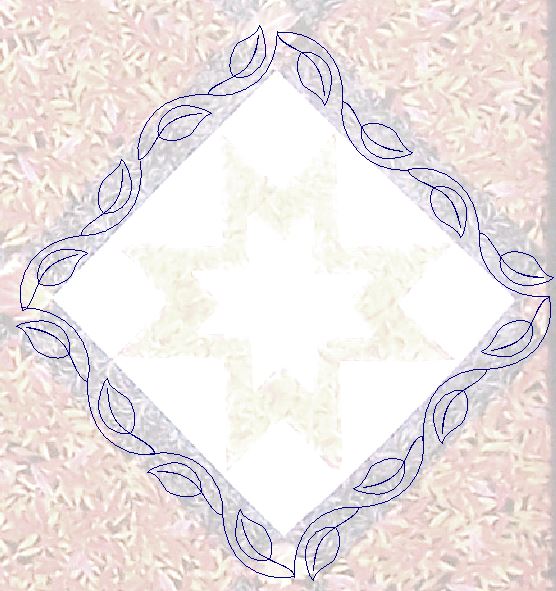 Leaf Quilting for Sahsing or Skinny Borders For the border, I will use a design that came with my Intelliquilter, Falling Leaves by Dave Hudson. 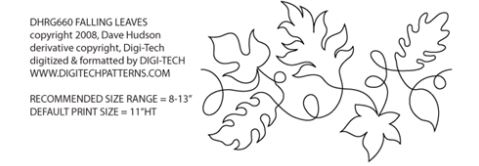 Now for the sampler blocks. There were a number that were based on an eight pointed star, so I came up with a leaf that could be flipped and rotated to fill the space. For the backgrounds, I will use a point to point arc and do that directly on my longarm.
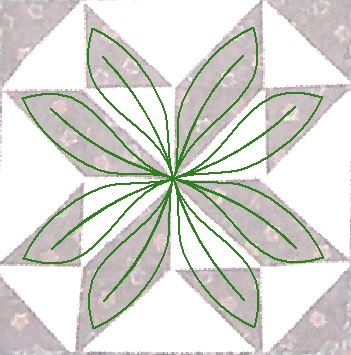
There were a couple of additional blocks that I designed some other quilt patterns around a leaf. The second design was inspired by the "Leaf Flower" in Patterns by Helen on my Intelliquilter.
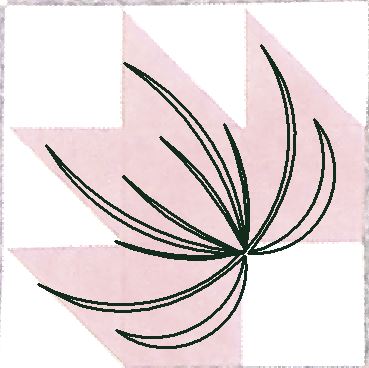
For the leaf blocks, I wanted some leaf like texture or veins. The "S Curve" option was inspired from a book by Deloa Jones. All of these blocks will also have "arcs" in the background spaces.
I hope this provides some inspiration when quilting your next leaf quilt. Here are some photos of the finished quilt. I used a rust thread for much of the quilt -- which of course means the quilting is only visible on the back. But you can see more of the quilting in the close-ups. 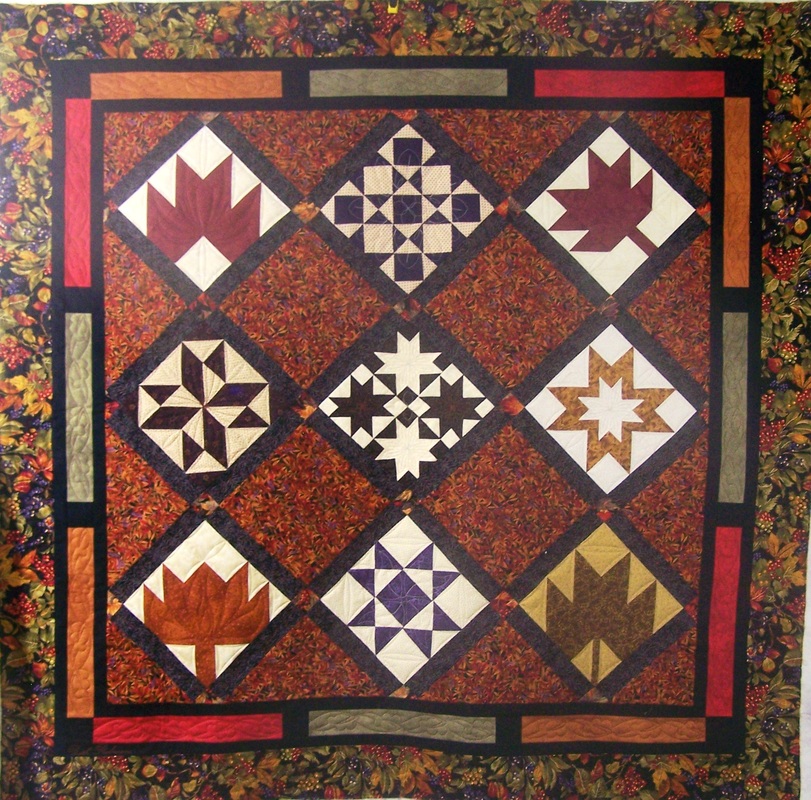
Happy quilting. Kari Sign up for my newsletter to stay current on what's happening in my studio and learn more quilting tips. As a thank you, I'll send you a FREE pattern for this small maple leaf quilt.
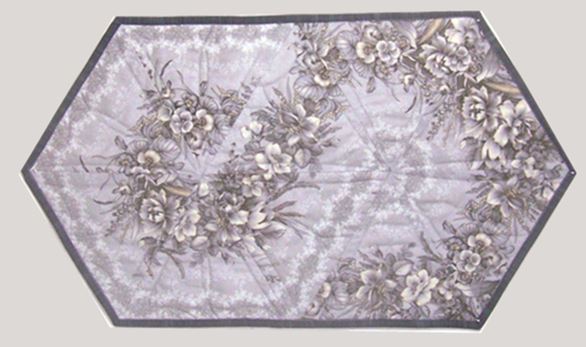
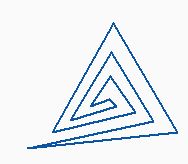
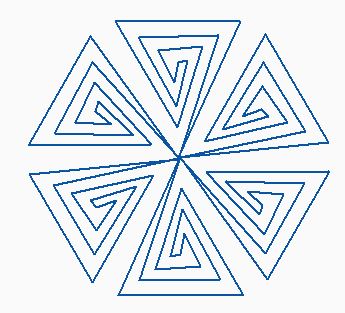
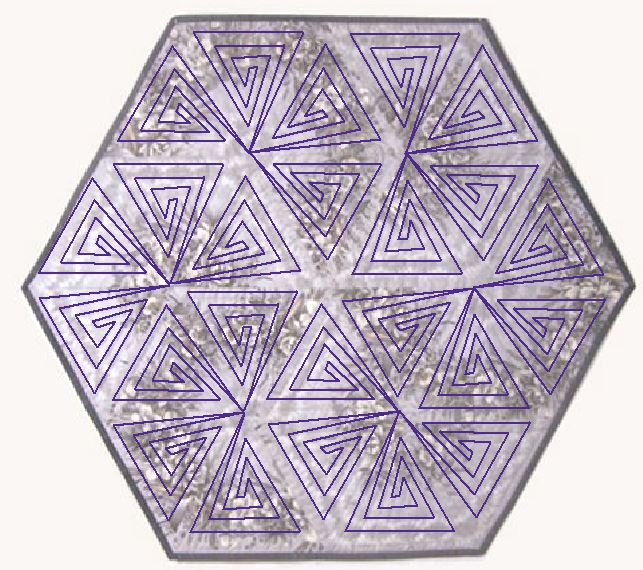
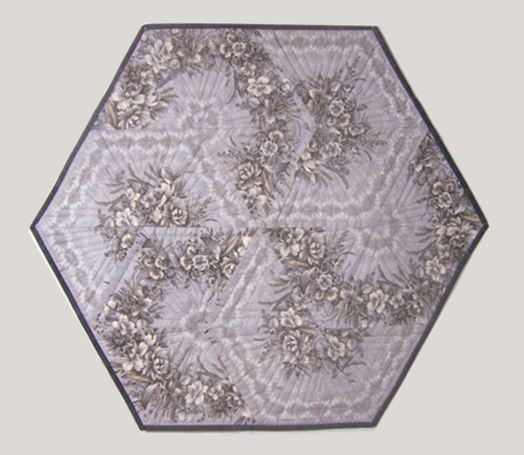
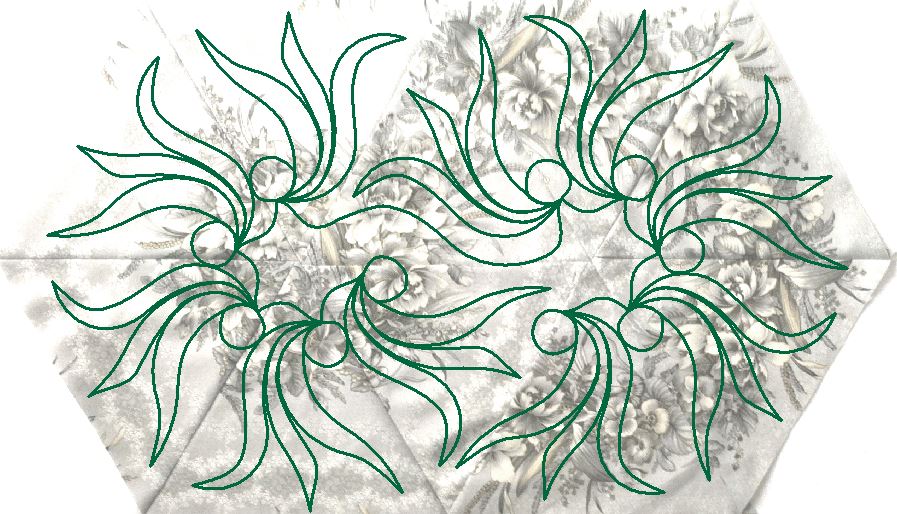
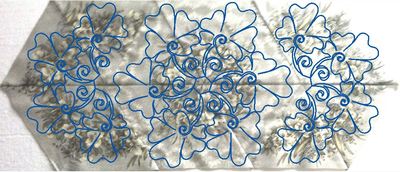
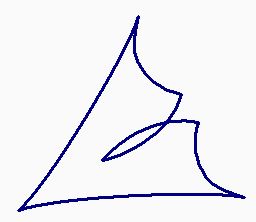
Last spring I had the opportunity to get to know Bunnie Cleland. Bunnie is a new quilt designer and had just released a series of patterns which utilize the 60 degree equilateral triangle. Her patterns (which at the time had just been picked up by Checker Distributions) are now on their best seller list. They may also be purchased here. I've been keeping my eye out for appropriate fabric and found the following Jo Morton border print which I thought I would try. 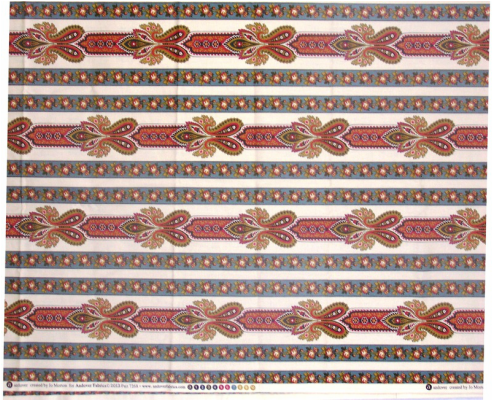 After spending some time analyzing the fabric, I couldn't decide if the fabric would actually work. And then of course the decision would be where to actually cut the strips. So I made another trip to the quilt store. This time electing a safer border fabric (i.e. one with blurrier lines). I purchased two yards of the fabric, not sure exactly how much I would need. (My apologies for the blurry photo. The was taken with my iphone at a quilt retreat right before I cut up the fabric.) 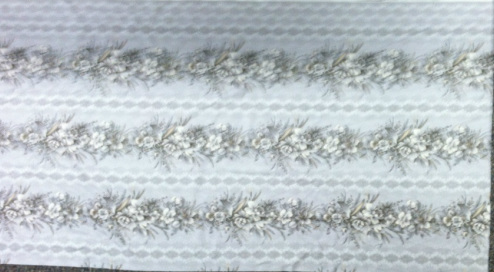 Gentle Flowers by Quilt Gate I was pleased to find that two yards went a very long way! From that I made the five quilts including the "Hexagon Table Topper", two of the "Triangle Frenzy Runner" and two of the "Triangle Frenzy Swirl". Quilting Triangle Frenzy Quilts For the Hexagon Table Topper, I decided to quilt this with a simple triangle design. Using Art and Stitch I started by drafting a basic triangle design that would fit in one of the 60 degree triangle pieces. I then created a wreath using Magic Circle. From that I deleted two of the triangles.
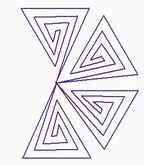
For the Triangle Frenzy Swirls, I first used another simple design rotated with Magic Circle.
 Finished Triangle Frenzy Swirls by Kari Schell For the second swirls, I used a pattern from Sue Heinz "Drawn to Mastery" book. Her book is focused on free-handing the deigns, but I have found they are fun to work with in Art and Stitch. I just drafted one of the design elements and then had fun playing with it.
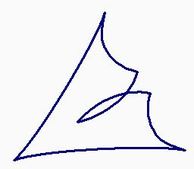
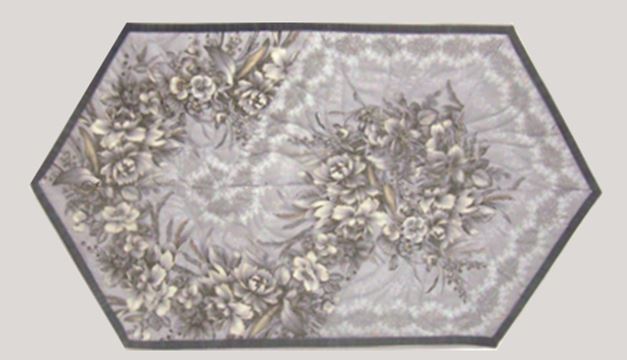 Finished Triangle Frenzy Swirls by Kari Schell For the Triangle Frenzy Runner, I used another design by Sue Heniz. 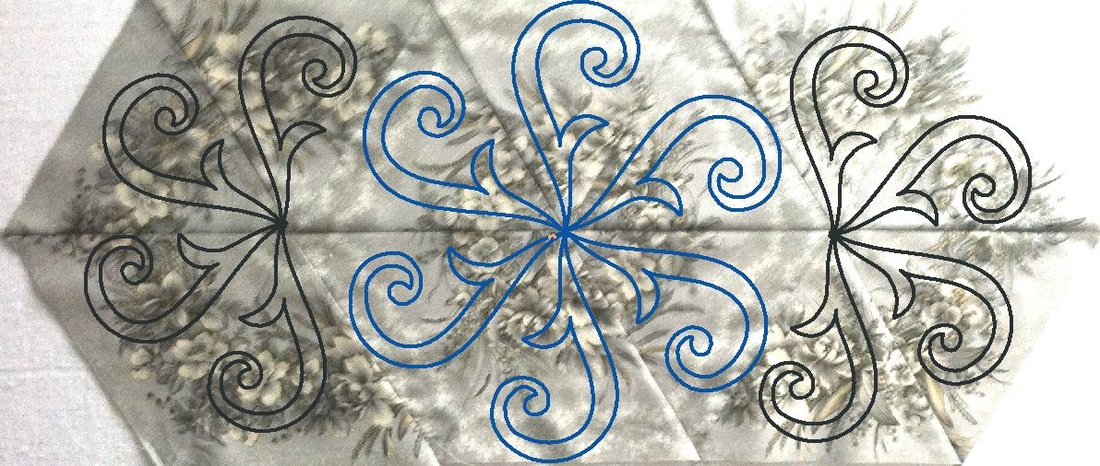 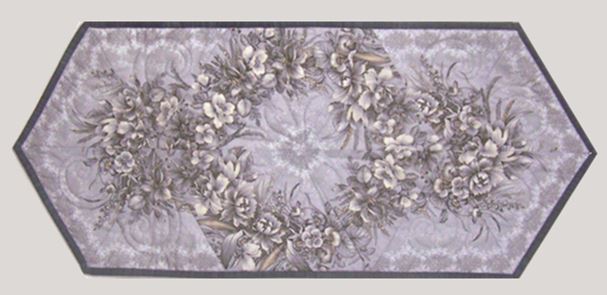 Finished Triangle Frenzy Runner by Kari Schell For the other runner I used a floral design that I had developed.
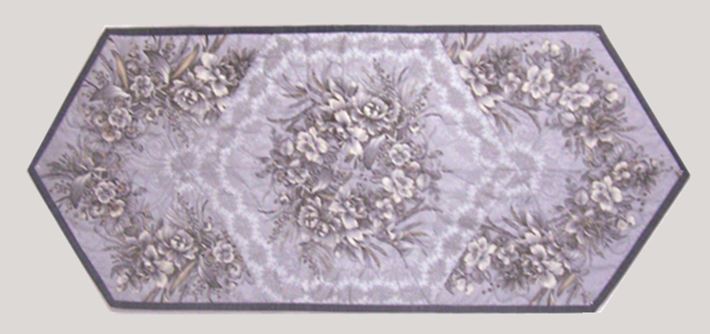 Finished Triangle Frenzy Runner by Kari Schell Would you like to try using my quilting designs? I've included pdfs of the three motifs I developed. Click on the photo for the link to the pdf.
For those that use Art and Stitch, I am also offering a FREE Art and Stitch file for the floral design. Stay tuned. Next week I will share how I solved my dilemma with the Jo Morton border. Happy quilting. Kari Sign up for my newsletter to stay current on what's happening in my studio and learn more quilting tips. As a thank you, I'll send you a FREE pattern for this small maple leaf quilt.
|


Free guide available for newsletter subscribers


Kari SchellElectric Quilt Expert and Educator and Pattern Designer. Categories
All
Archives
April 2024
|


 RSS Feed