
|
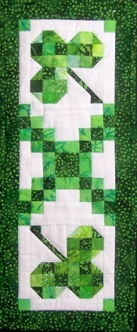
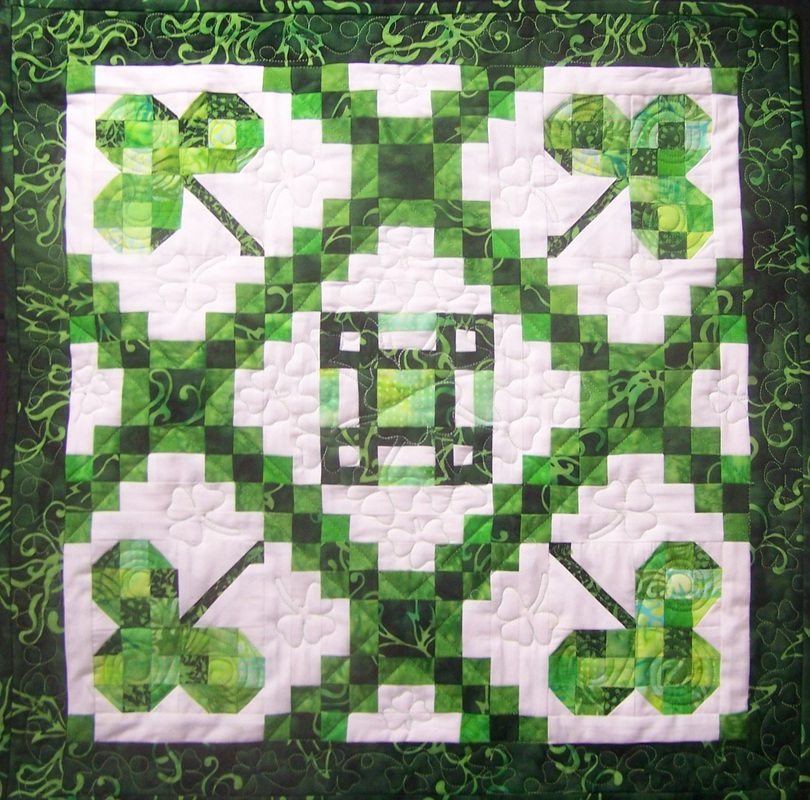
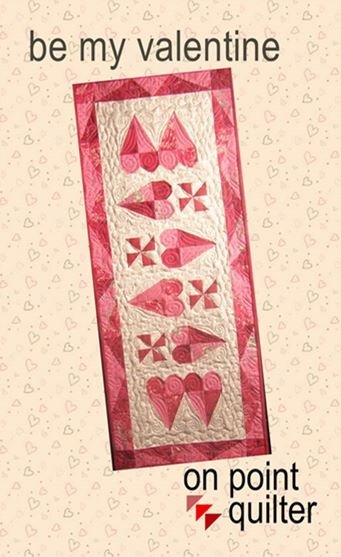
Feathers are the mainstay of just about every longarm quilter and feathered wreathes really dress up a quilt. Learn how to create your own feathered wreath using Art and Stitch, a digitizing software for quilters and embroiderers. Blog Pop Just a quick reminder that their is a Blog Pop going on. Lots of fun ideas on embellishing your pop-up and lots of great prizes. To catch up, check out the complete list of designers here. My Blog Pop contribution will be posted next Tuesday. I look forward to having you join me. Online ClassesIntroduction to EQ7 - starts February 23rd This online class will cover basic navigation of the software, creating a new project, using the libraries, using Quick Quilts for fast projects, adding borders, coloring tools/fabrics, creating quilt labels and printing quilts, blocks, fabric yardage estimates, rotary cutting and foundation patterns. By the end of class you will be comfortable working with the program and be able to explore additional features on your own. Users of all levels are welcome, with special emphasis on beginners. Dates: February 23, March 1,8 and 15 10 - 11:30 am (Central time) (four sessions) Class size will be limited to 10 participants. This class will be exactly like taking at "in person" class at a show or shop. We will use screen sharing technology -- so you will be able to see my screen and if you have specific questions, I will also be able to view yours as well. Register here. Easy Draw Online Class - Starts February 23rd Have you ever found the “perfect” block online. But then realized you wanted to piece it a different way. Maybe you want rotary cutting instructions or a foundation pattern. Or maybe you want a different size to incorporate into a different quilt. With Electric Quilt you can redraft these blocks. This class will focus on how to “read a block” and then come up with the most efficient way to draft it with Electric Quilt. The 22 blocks in this class are those that can be done in a “grid” format – basically just like drawing with a pencil and graph paper. Within Electric Quilt these blocks are drafted within Easy Draw. Level: Advanced Beginner. Dates: February 23, March 1, and 8 6:30 - 7:30 pm (Central time) (three sessions) Class size will be limited to 10 participants. This class will be exactly like taking at "in person" class at a show or shop. We will use screen sharing technology -- so you will be able to see my screen and if you have specific questions, I will also be able to view yours as well. Register here. Featured Patterns - Valentines Day and St. Patricks Day BundleFor this weeks feature, I though I would bundle the quilt patterns for two small quilts together. And then I decided to put the bundle on sale. Get both Be My Valentine and Smiling Irish Eyes patterns for $12. Purchase combined bundle here.
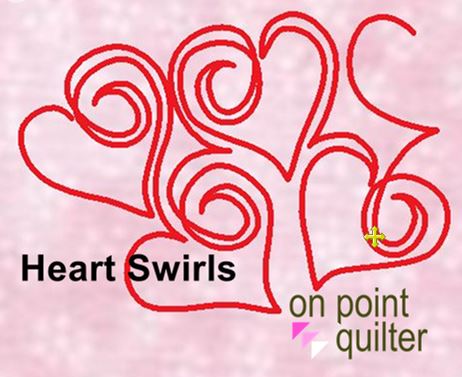
Since I have been thinking about heart quilts, I knew I needed to design a pantograph that could be used with these designs. So this weeks video tutorial will be on using Art and Stitch to design your own interlocking pantograph. You will hear my thought process as I clean up the pantograph design and see my edits. (I did speed up some of the editing to cut about 10 minutes from the video.) Here are a couple of options for using the design. 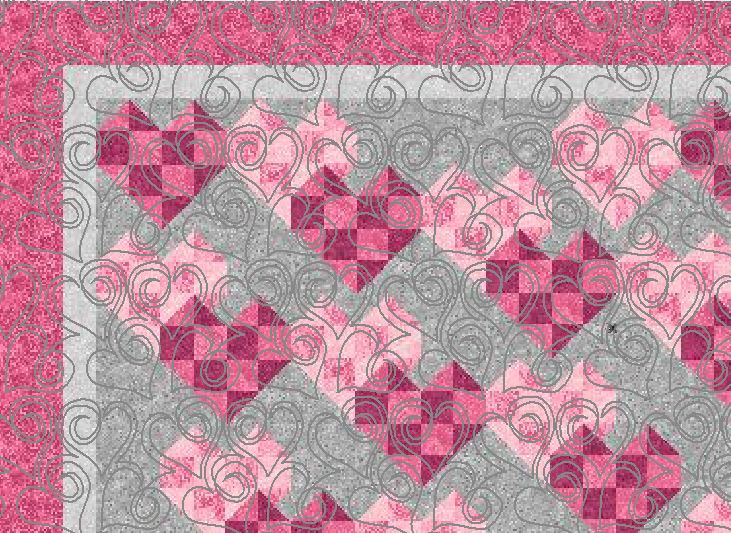 With Love with Heart Swirls Quilting (designs by Kari Schell)  Be My Valentine with Heart Swirls Quilting by Kari Schell Did you enjoy drafting your own heart swirl design? If you would prefer to purchase mine, I have a great introductory sales price. Be My Valentine Plus Heart Swirl Quilting Bundle - on sale for $13 Bundled product is on sale for $13 - a savings of $10. (Digital downloads only.) Purchase here. 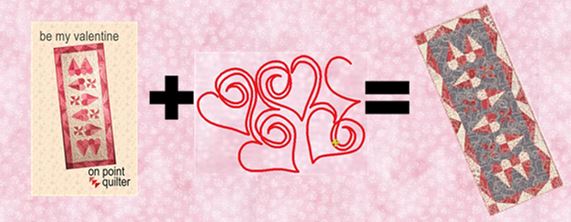 Be My Valentine Bundle Featured Pattern: Be My Valentine
Featured Quilting Design: Heart Swirls
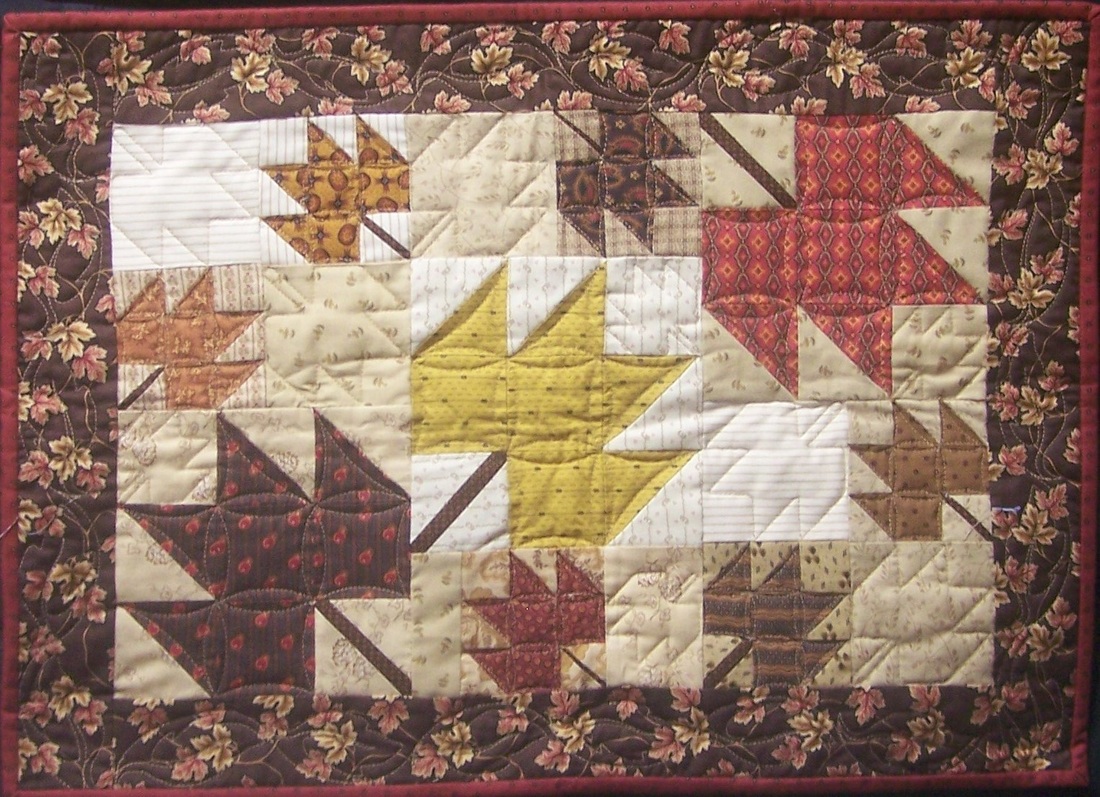
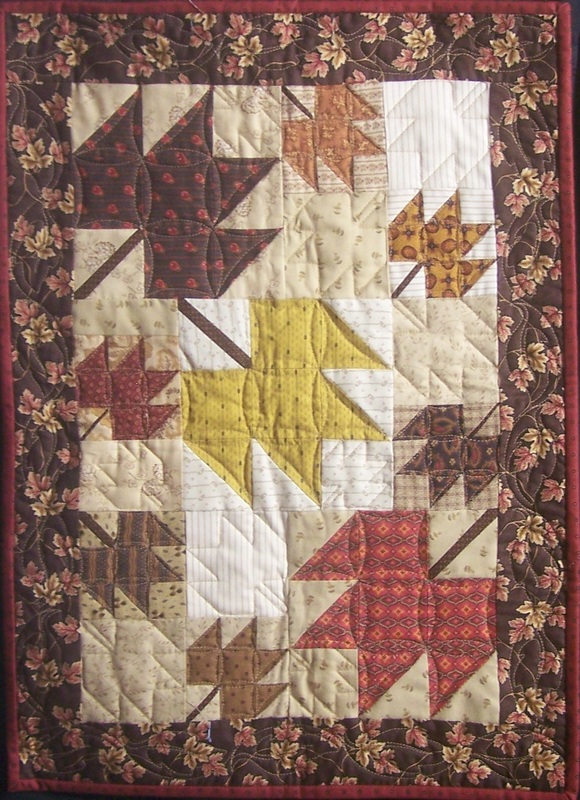
Happy quilting. Kari Sign up for my newsletter to stay current on what's happening in my studio and learn more quilting tips. As a thank you, I'll send you a FREE pattern for this small maple leaf quilt.  11/7/2015 Personal Note: I have a full blog post this week. But I wanted to give a heads up to all my readers. I am scheduled to have a heart valve replaced next Thursday and will be out of commission for a few weeks. Hopefully I will be back and blogging again by early December. (And for those who asked; yes -- there will continue be free Electric Quilt and Art and Stitch videos in future blogs. I love sharing my knowledge with all of you.) During my absence, you will still be able to purchase items from my store. Downloadable items can still be accessed immediately; however any products that require shipping will be sent the week of November 23rd. Any e-mails and other questions will also be answered on my return. Ellipses and Circles on a LineThis week I have been busy catching up on quilting customer quilts. Since the focus of the week has been quilting, I thought my post would center on one of the quilting designs I created for a customer. My customer used Kaffee Fassett material and wanted a design with irregular circles on a line. She didn't want it to look "perfect" -- in other words she was interested in a more random look. Now this is great news for those with manually driven longarm machines and those working on their domestic machines. However this presents a bit of a challenge for those of us with computerized machines that don't want to resort to freehand (Warning: Freehand quilting will atrophy without regular use). 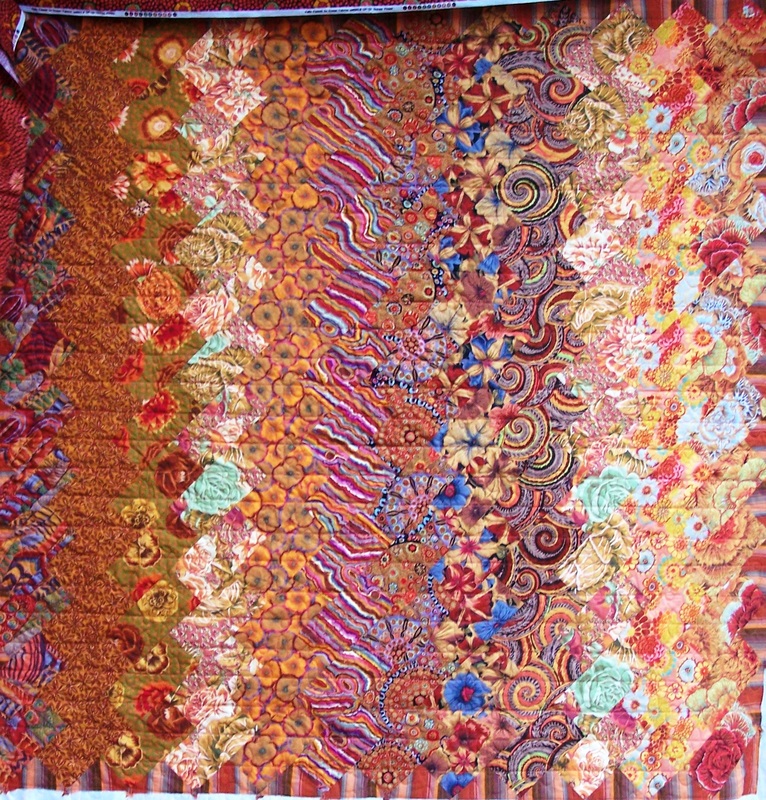 Quilt by Susan J. To address that issue, I decided to design two different lines (think of this as panto row one and panto row two). See how I created the pantograph using Art and Stitch in this weeks video tutorial. (Note that the design may also be done freehand!) 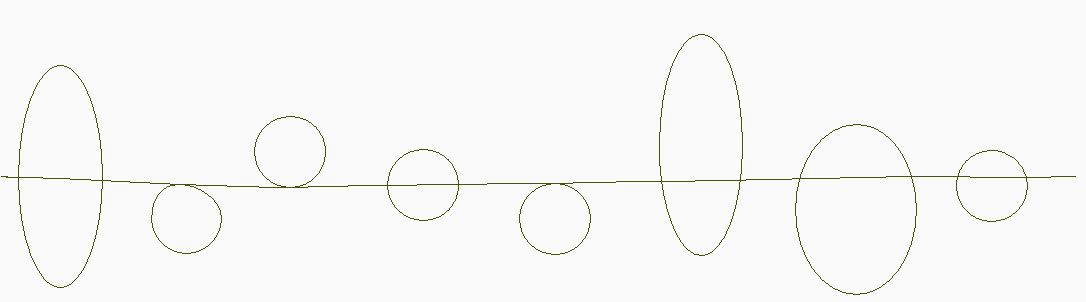 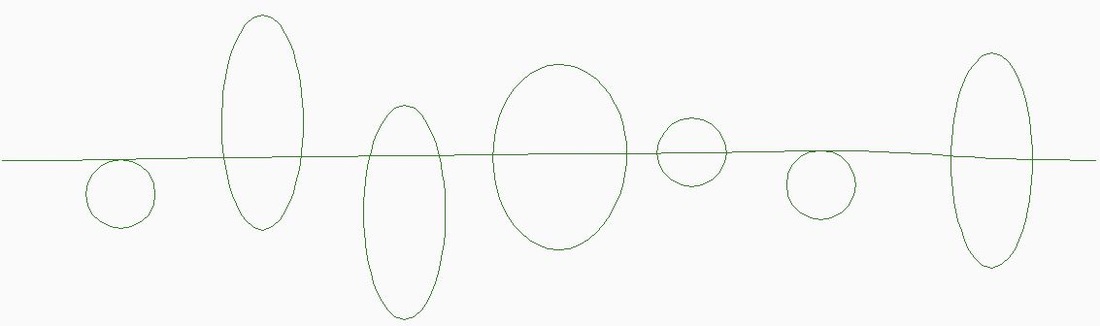 Now for the real magic. Intelliquilter had a new release about a month ago. One of the new features is "progressive offset". Essentially this results in each row being shifted as opposed to every other row being alternated. Much better for my "random" goal for this quilt. 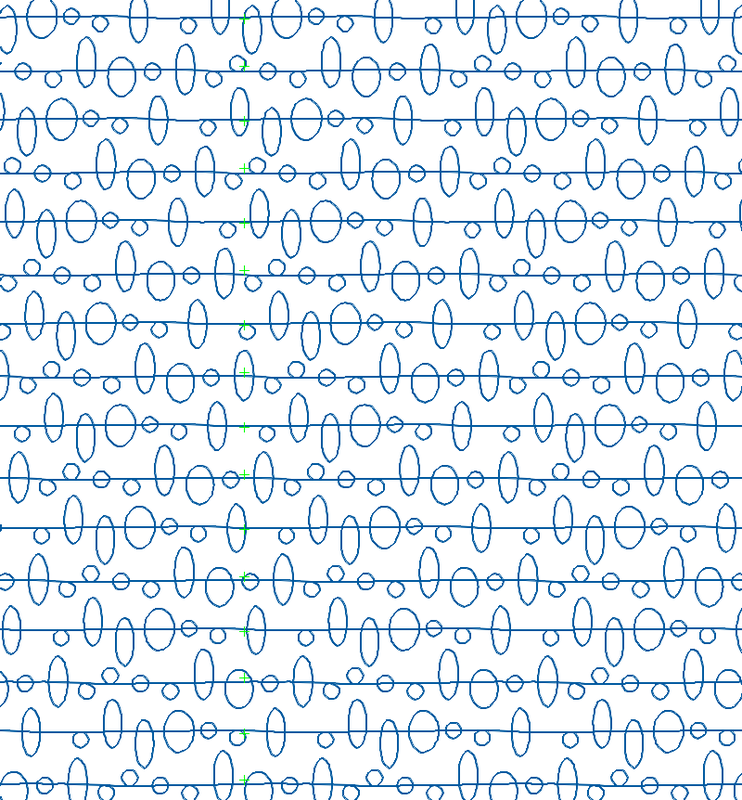 For those who have Intelliquilter, you may also be interested in my settings. 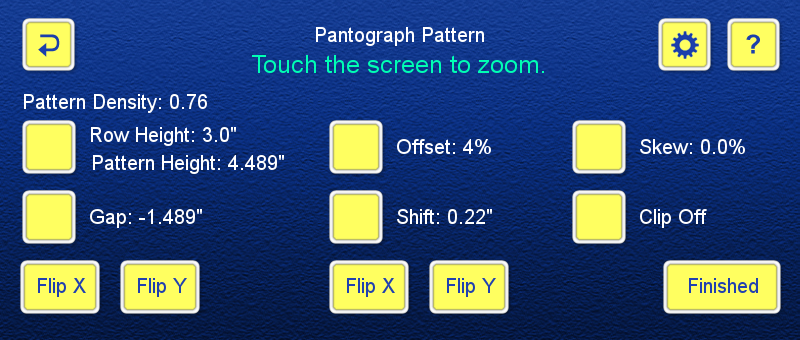 Love Your EQ (or Art and Stitch) Private Coaching Program
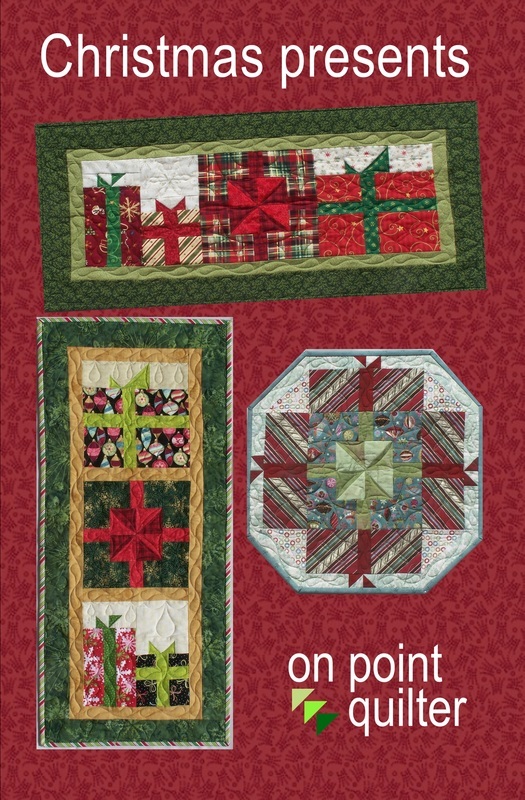
Featured Product - Christmas PresentsWe had a beautiful week in Minnesota. But cold weather is on its way and that means it is time to start preparing for Christmas. Do you want a quick and easy project for either your house or a great Christmas gift? Check out the possibilities with my Christmas Presents pattern. 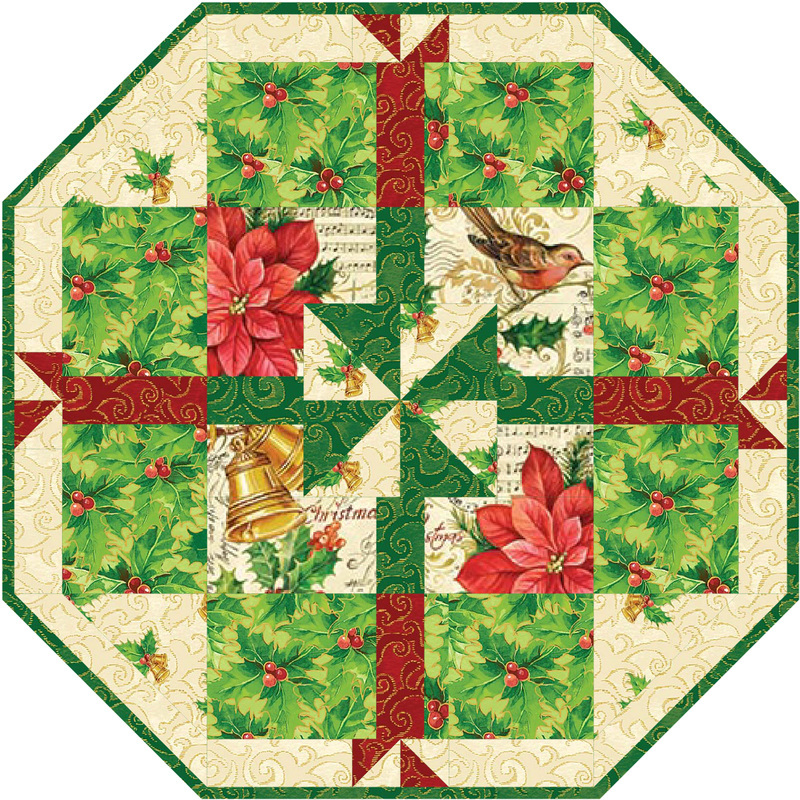 Christmas Presents Table Topper using A Christmas Story from Northcott fabrics 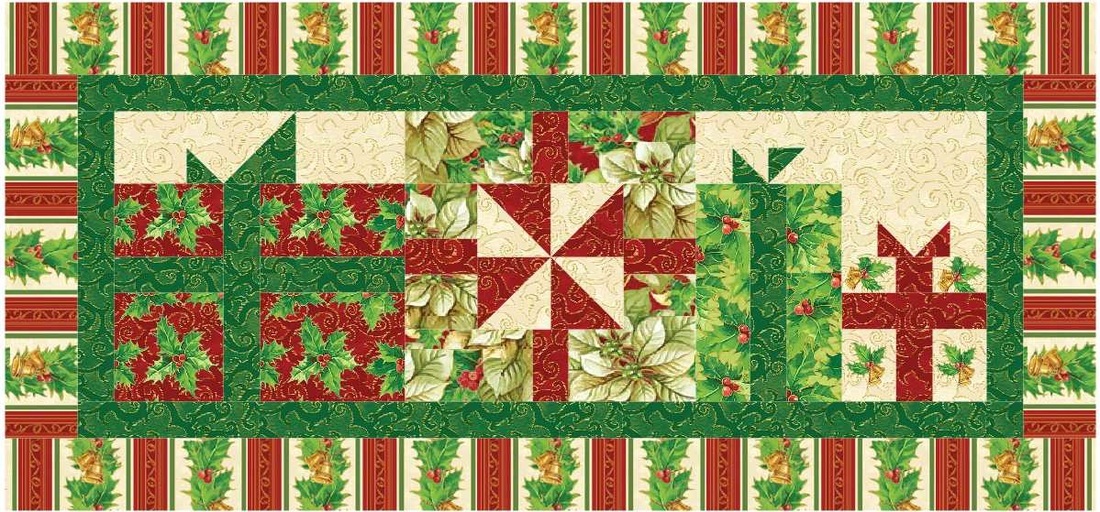 Christmas Presents with Let it Glow fabric by Moda 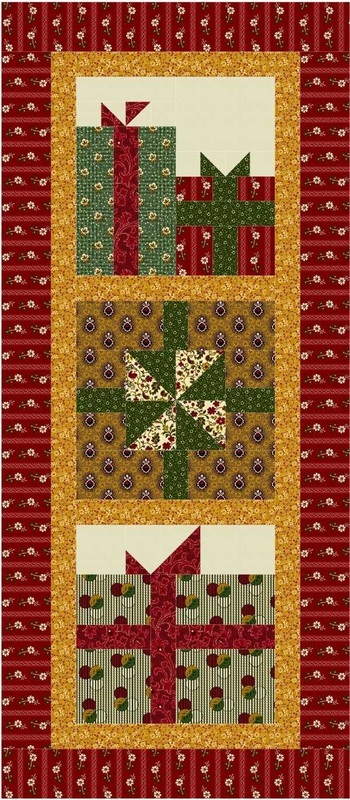 Christmas Presents with Molly Bs Simply Christmas by Marcus Brothers 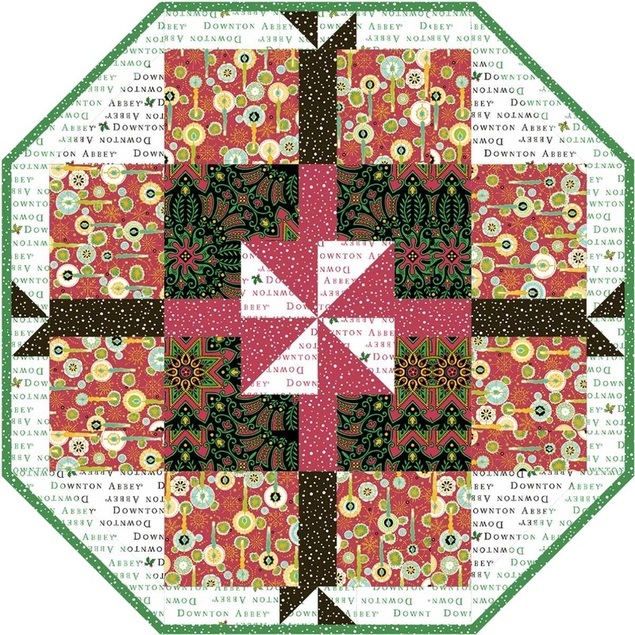 Christmas Presents with Downton Abby Christmas by Andover Happy quilting. Kari Sign up for my newsletter to stay current on what's happening in my studio and learn more quilting tips. As a thank you, I'll send you a FREE pattern for this small maple leaf quilt.
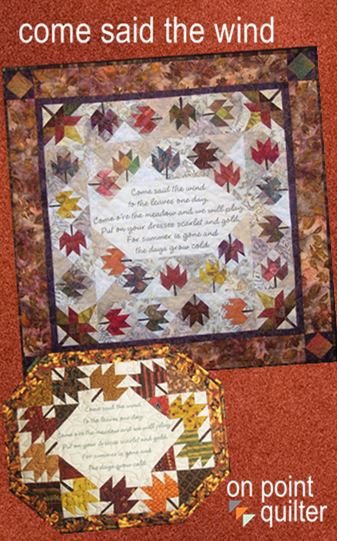
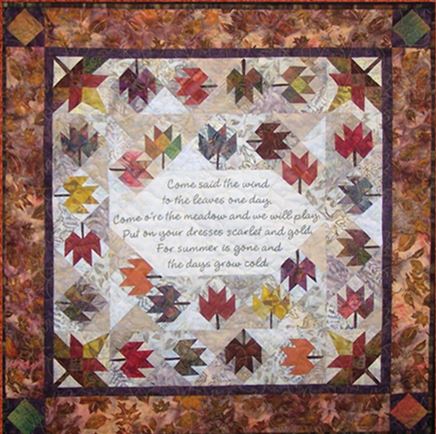 Come Said the Wind by Kari Schell I received a note on someone asking me for other suggestions for transferring my Come Said the Wind poem to fabric. In the pattern I provide three suggestions:
I've been thinking the last month about putting on the poem during the quilting process. I finally found a little time to play in Art and Stitch and on my longarm and am really pleased with this option. This weeks video tutorial will be about creating a "handwritten" design for your quilt in Art and Stitch. There were a number of tips I came up with in the process that I would love to share with you. 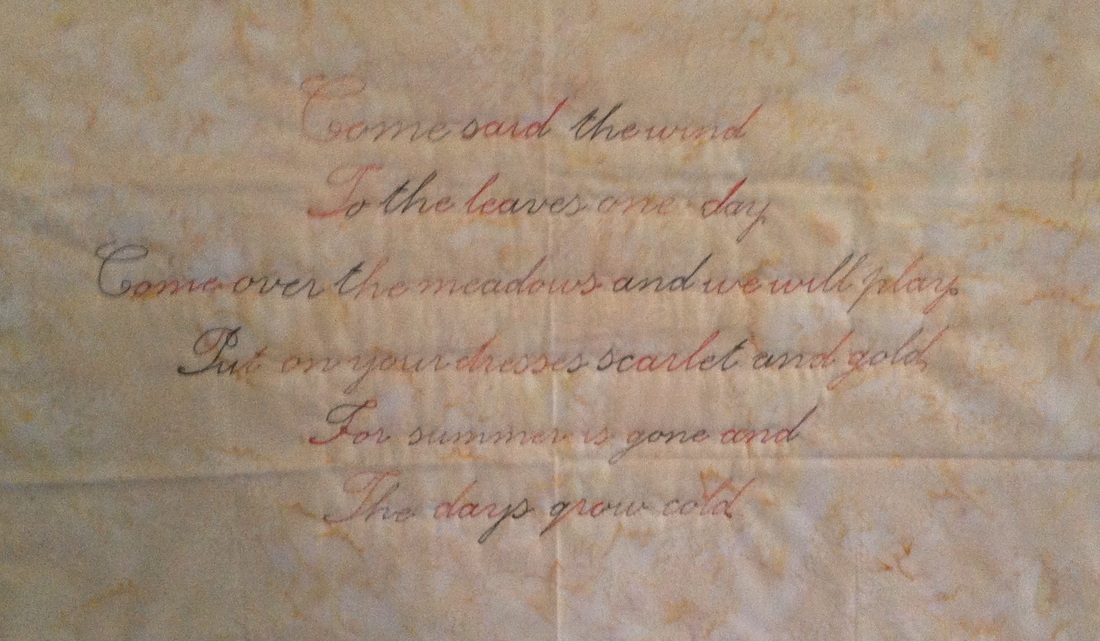 I was pleased with the final stitch out -- but not so much the photograph. It probably wasn't the best idea to use a batik background. I am also thinking that this could work for adding names to baby quilts. Where would you like to add "word art" to your quilt? Love your Electric Quilt Private Coaching ProgramI know that you may be ready to make the commitment to expand your knowledge and use of Electric Quilt. I have openings in my schedule starting in January and will be taking on a limited number of private coaching clients to work with in expanding your Electric Quilt technical skills. The program will be formally released next week at Fall Quilt Market -- but I wanted to give my loyal blog readers and newsletter subscribers first shot at obtaining one of these limited number of spaces, including some Early Bird discounts if you sign up by October 31st. Read more about the program here. (PS -- This could be tailored to Art and Stitch as well.) Featured Product: Come Said the Wind
Happy quilting. Kari
True confessions. A number of years ago I purchased a Bernina that had an embroidery unit. Having never done machine embroidery before, I was very challenged in using the embroidery features on the machine. After a couple of trips to the repair shop, I decided machine embroidery was not for me and eventually sold the machine. Now that I have Art and Stitch, I really wanted to give machine embroidery another try. This time I decided to go simpler. I purchased a used Brother PE 500 machine (which only does embroidery). I watched a number of You Tube videos on the machine. I also spent some time at a retreat last weekend, talking to a machine embroidery expert in the group (who was working on embroidery designs on her machine). I was ready to try again. I thought I would start with recreating a small quilt block using embroidery. I am a big Dear Jane fan and thought that one of the Jane Stickle blocks would be a good start. I selected the first block to get started. 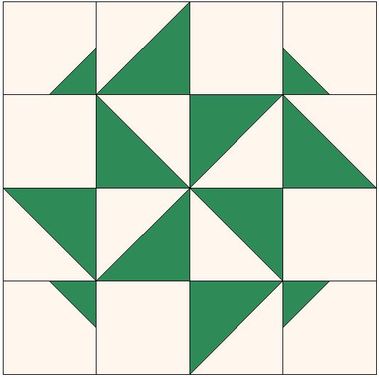 Jane A. Stickle Block (redrafted by Kari Schell) Here is the Art and Stitch video tutorial on how I created the embroidery design. Note that I do not have the "Embroidery module". This was all done with the Art and Stitch Base version! Here is my finished design stitched out on my Brother PE500. 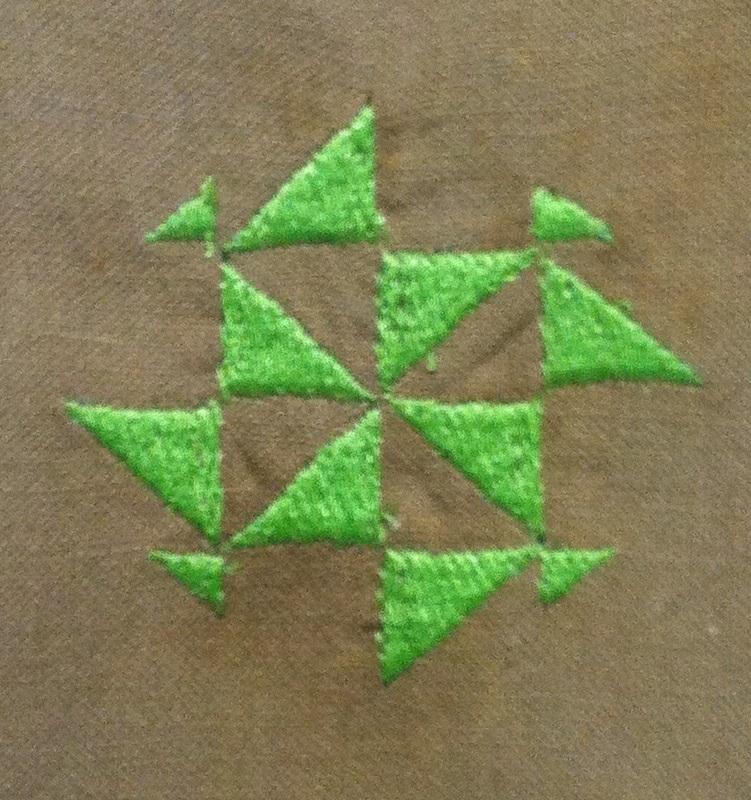 Jane A. Stickle Embroidered Block 2" x 2", created by Kari Schell The entire process was a lot less painful than I thought. I think I may try a few other blocks. Featured Product - Come Said the Wind Are you starting to think about an autumn quilt for your wall this fall. Now is the time to get started with Come Said the Wind. The pattern includes two sizes and the verse can be printed directly on fabric, traced or hand embroidered. You choose. 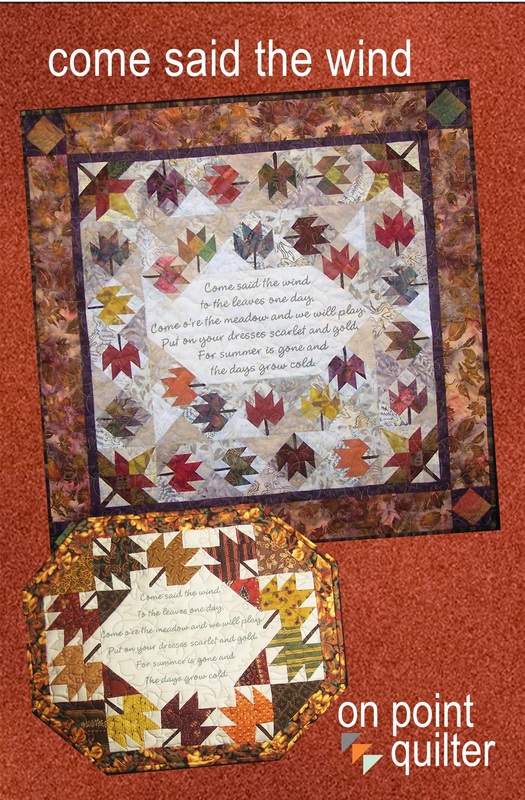 Purchase here. Happy quilting. Kari Sign up for my newsletter to stay current on what's happening in my studio and learn more quilting tips. As a thank you, I'll send you a FREE pattern for this small maple leaf quilt.
|


Free guide available for newsletter subscribers


Kari SchellElectric Quilt Expert and Educator and Pattern Designer. Categories
All
Archives
July 2024
|

 RSS Feed