ON POINT QUILTER
  • Blog
  • About
  • EQ8 Training
    • Tech Know Quilters Electric Quilt 8 Membership Training
    • EQ8 Made Easy
    • Electric Quilt 8 Sneak Peek
  • Store
  • Contact
Picture

Tech Know Quilter Members Showcase Their Work

4/1/2023

 
Wow.  It has been an amazing week.  It was so fun seeing so many of you at the my free EQ webinars on Sunday and Monday.  I hope you enjoyed creating your own Easter Egg Hunt quilt. 

​I even had fun finishing my quilt with the foundation friendly eggs.  The applique shapes all cut with my Cricut Maker which made even the applique super simple on this one.  

After the webinars, I moved into open enrollment with a flash sale for Tech Know Quilters.  I am super excited to be able to welcome a great group of new members to Tech Know Quilters.  They are all ready to start their first class next Monday.


Picture
Easter Bunny Hunt Quilt - Designed and created by Kari Schell
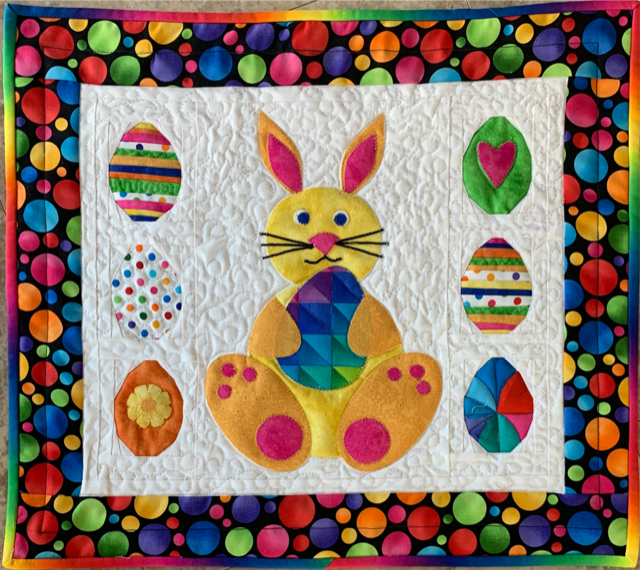
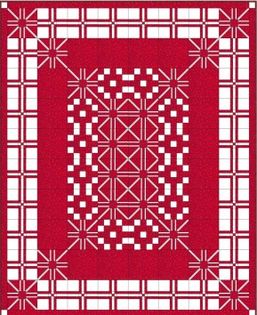
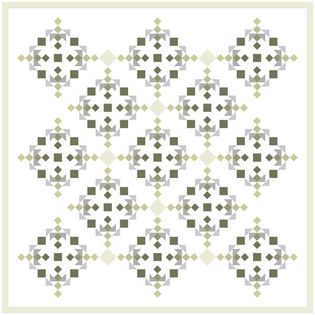
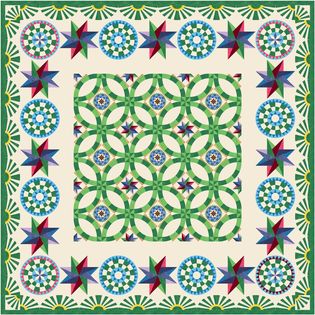
I don't have a video today -- but wanted to share some pretty amazing designs by those currently in Tech Know Quilters.  At the end of each month, I ask them to share a project to showcase what they learned during the month.  Their projects both inspire me and make me proud to be a part of teaching them about Electric Quilt.
Learn More About Tech Know Quilters and Sign Up for the Wait List
Picture
Marcia Jensen I am a new student in learning all the ins and outs of EQ8 – four of us from my neighborhood have all purchased the program, and are meeting every other Saturday to work our way through the “EQ8 Lessons for Beginners” workbook; and each of us is taking one (or more) of your classes right now! So, February has been a very EQ8 kind of month for us! Our local quilt guild will celebrate its 40th anniversary this summer, and we have been challenged to make a red and white quilt (ONLY red and white) to commemorate the occasion. So, I used this challenge opportunity to create a quilt in EasyDraw, and plan to make it! The design is very simple, but like the look of the pattern it makes! Hope it works out to look as good in real life!
Picture
Lee Wiencki Working with Precuts. Every colour except the white and binding can be made with one fat quarter. I spent more time designing with basic blocks, half square triangles and square within a square, to get a bigger block.
Picture
Curryanne Hostetler Here is my challenge with two new blocks
Picture
Curryanne Hostetler also did one using all the blocks in the lesson
Picture
Rhonda Goss Circles by design-Masters classes
Picture
Merle Rawson Circles by Design. This is my homage to Ukraine, blue and yellow are their National colours and the sunflower is their National flower. I have called the quilt "Sunflowers For Ukraine"
Picture
Jane Perri This was created using the bargello course. The original tube was from a coloring book page that I have been waiting to learn how to draw. It took me over 8 hours to figure out how to do it. Eventually, it came together. I am looking forward to the 3D course.
Picture
Mary Groesbeck I've always loved circles. Masters Quilters by Design was just a month full of joyful days. Here's my Master's Challenge (from a Pineapple Pack). I had enough fabric allotted to make a pieced border and to include binding. Difficult challenge, but I like the result.
Picture
Brigitte Lee End of the word. Or can we make it better?
Picture
Julie Pedersen This was my favorite quilt from the Circles by Design Masters Class.
Picture
Edith Craig My class this month was Master's Circles. I designed this first quilt as part of the Master's Challenge which required us to use 10 fabrics, but only a 12" x 44" piece of each color plus a border. It was difficult to judge how far that small amount of fabric would go and the EQ8 yardage guide was a good tool for this.
Picture
Edith Craig For the end of the month challenge, I started with the same quilt, but without the fabric restrictions. This enabled me to enlarge the quilt and add additional borders. I drafted additional border blocks inspired by the original quilt and kept the basic coloring the same. It was fun to see where this would take me. This quilt was the result that I liked best.
Picture
Fran Heisey This quilt was inspired by a print I saw on the internet. I wondered if I could achieve the Swiss cheese effect. The top two blocks are essentially rectangular applique rings with more than one hole.
Picture
Fan Heisey I couldn't resist posting a second colorway. The original print looked very 3D. I didn't add shadow lines in EQ; it would have been really fiddly. However, if I make this quilt, I would like each layer to actually have depth.
Picture
Linda Carlson
Picture
Zdenka Nemethová My favourite from Master´s Circles
Picture
Candy Huddleston Lesson 3 - Special Effects 19 Layout: Used a Modified Star Friendship block with chain.
Picture
Candy Huddleston Lesson 3 - Square-in-a-square Layout: Used a 9-patch Friendship Star in the center square
Picture
Candy Huddleston Lesson 3 - Special Effects 18 Layout: Used Serendipity to create the 9-patch Friendship Star
Picture
Candy Huddleston Lesson 3 - Star 35 Layout: Used Single Star blocks & 9-patch Friendship Star in center
Picture
Candy Huddleston Lessons 8 & 9: Square-in-a-square Layout: Used Pickle Dish from Lesson 8 & Wheel Design from Lesson 9 in center Medallion
Picture
Helen Warwick I am using the lesson info that I learned in Panel quilts. A friend that volunteers for the fire dept. mentioned that she was going to make a quilt for the fire dept auction. She wondered if I had any ideas on how to go about doing that. Lucky her, I had just taken your panel quilt classes and said if see sent me a picture of the panel I would try to come up with some ideas. The panel is of Smokey the Bear. I have made two layouts and will probably do one more and then see what she thinks. This is really fun.
Picture
Helen Warwick Option 2

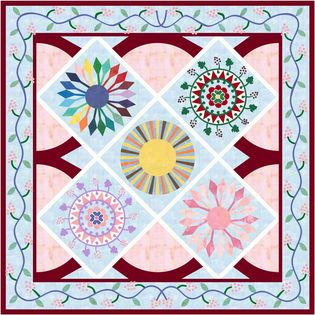
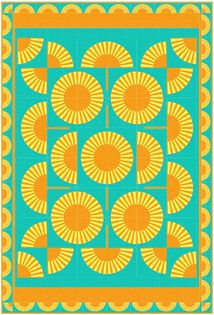
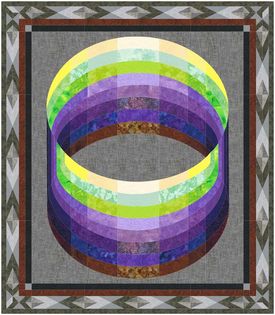
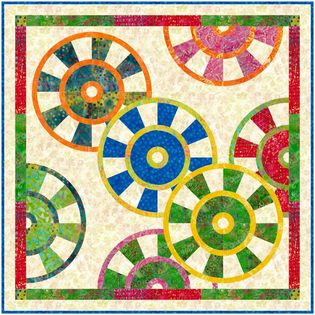
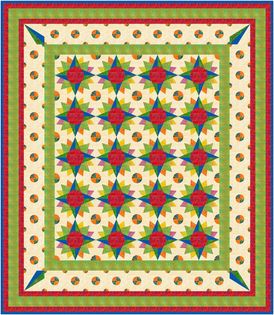
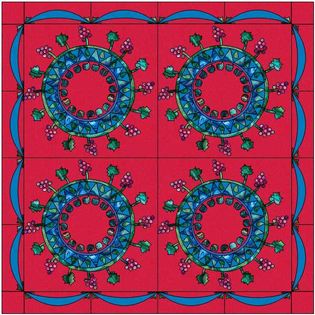
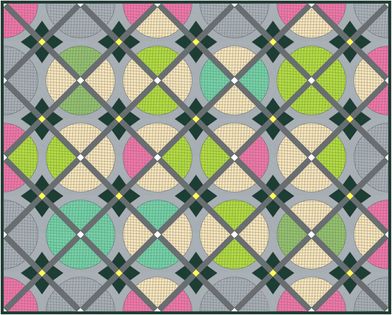
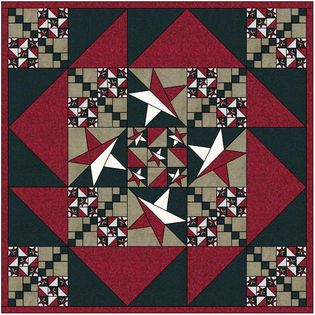
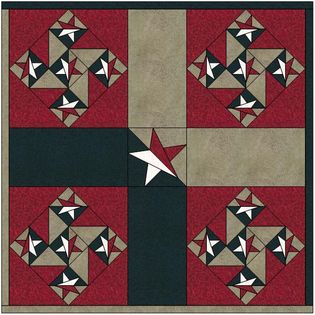
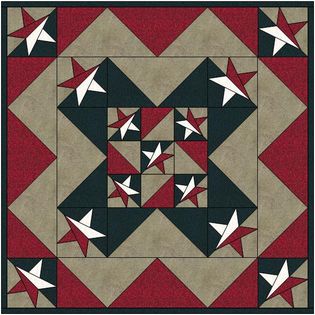
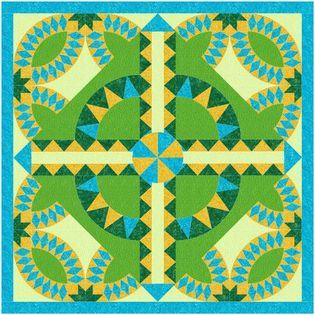
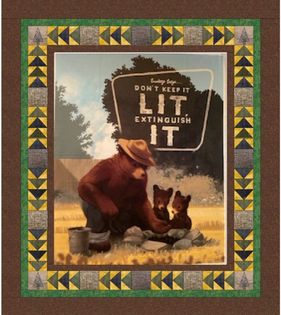
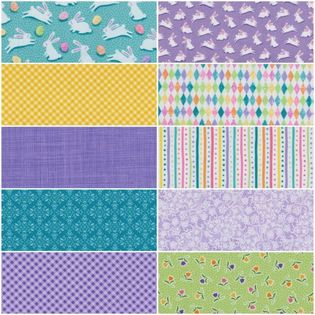
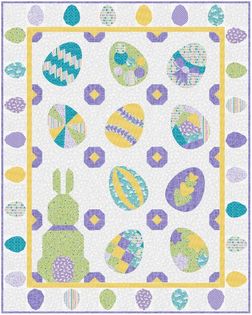
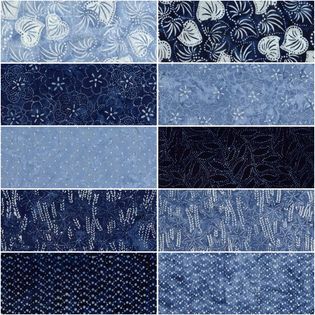
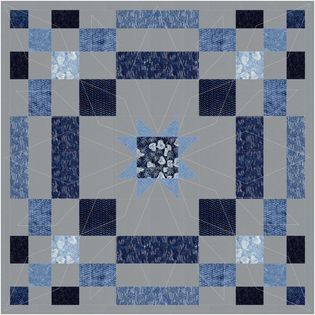
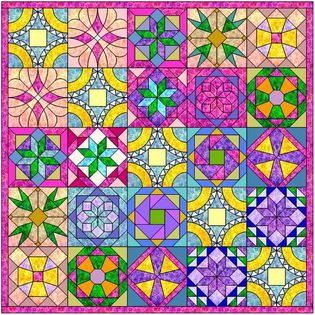
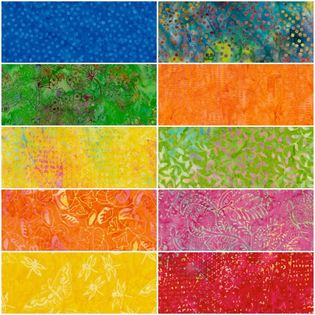
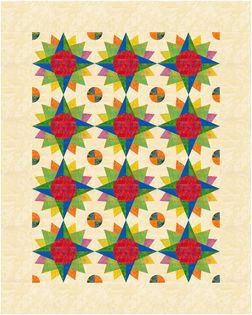
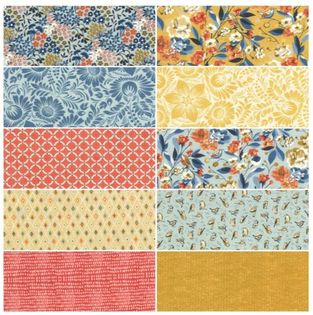
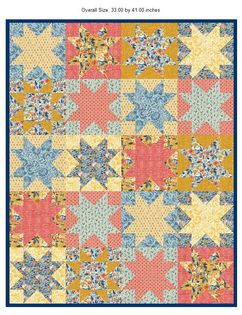
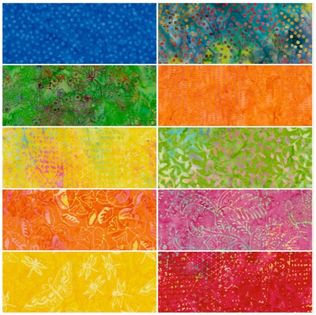
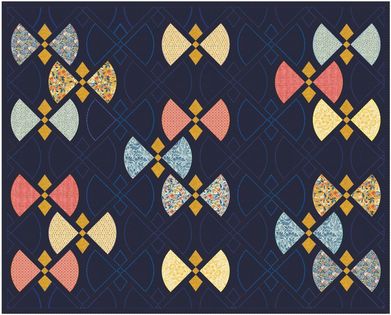
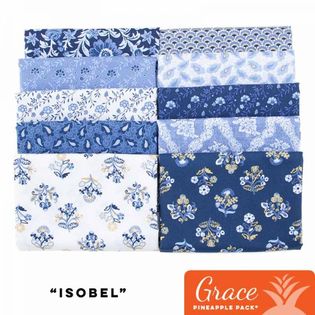
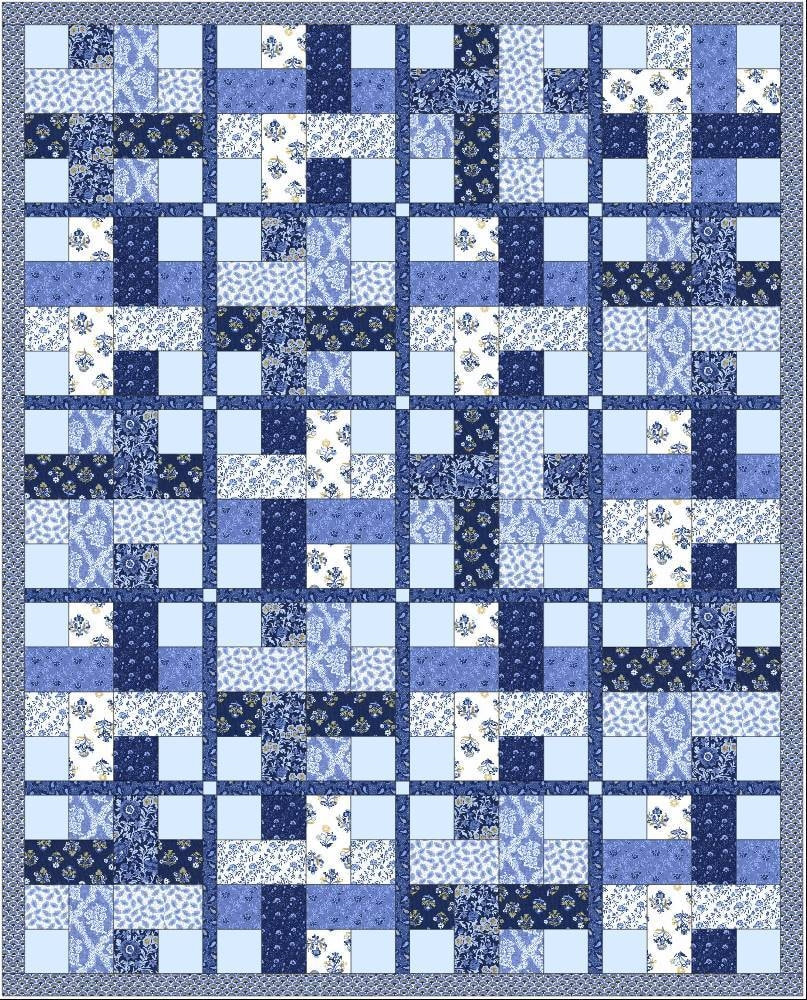
Tech Know Quilters Pineapple Pack Masters Challenge

Mary Groesbeck introduced me to Pineapple Fabrics in North Carolina and suggested this challenge idea.  Pineapple Fabrics sells pre-cut sets of coordinating fabric.  They have different fabric options for each type of pre-cut and even have free patterns that are available if you purchase the fabric kit.   

After perusing the options, I decided to challenge TKQ Masters member to design a quilt using the  Grace Pineapple Pack. Each Grace Pineapple Pack includes 10 different 12" x 43" strips.  


The goal was to design a quilt that uses just the fabric collection -- plus one additional background fabric.  And to use only 12 inches of each of the fabrics (other than the added background).  Many posted their fabric yardage charts to prove their compliance with the rules.
Picture
Brigitte Lee started her design with the quilt with the bunny and eggs (far right).  To meet the rules of the challenge, she redid her quilt and submitted the design on the left.
Picture
Picture
Picture
Julie Pedersen  
​Here is my quilt. I used gray for the background fabrics and added quilting to it using a paler gray thread.
Picture
Rhonda Goss

​I chose Florish as a color palette.
Picture
Picture
Edith Craig
I love Pineapple Fabrics. I have selected Fiesta Batiks for this challenge.  I used the batik collection plus a background and chose this block to stay with the circle theme. I modified the block so the pieces were small enough and varied enough to only use a quarter of a yard of fabric, leaving a little left over from the 12 inch Pineapple strips.
Picture
Picture
Katherine Martin
Basic Grey Nutmeg fabric collection.  The binding could be pieced from scraps left over or from stash or allowed background fabric!
Picture
Picture
Mary Groesbeck
I did it...and using our Masters class for an idea. The fabric requirements show the yellow fabric to be 3/8 yd, but I know it can be done within 1/4 because you know how EQ takes into account a rectangle for everything. I had to piece the border, but did have enough for the binding. This was a hard one to figure out...I had to change the layout a few times. I think this may have to be the practice for my bigger one with only 3 fabrics.
Picture
Curryanne Hostetler 
I picked a grace pineapple with only 8 fabrics so I grabbed 2 from another one.
Picture
Picture
Fran Heisey
Here's my quilt. I used the block from the Quilt Index quilt. The fabric is Basic Grey's Nutmeg. I had to hand calculate the yardage for the butterfly bodies from the block. EQ overcalculated, by nearly double, probably because the patches are on point.
Picture
Picture
Anne Hurlburt
Here's my baby-sized quilt. I used a simple block (don't know the name, a quilting client recently made it) with 4 fabrics plus a small amount of background. I did two colorings, each with 4 fabrics of the 10. Then I did a horizontal layout and figured out how many blocks I could make and stay within 1/4 yard (I perhaps could have gotten more, but wanted to make sure I was within 1/3.) Then I added a narrow sashing-- as wide as would fit in the yardage, and a border, using the last 2 of the 10 fabrics.
Picture

Want to Know More About TKQ Masters?

Tech Know Quilters members are eligible for the Masters program after completing 12 months of Tech Know Quilter classes.  Masters members receive fewer lessons each month, with more time to devote to their own projects and challenges.

Drop me a note if you have completed over 12 months of Tech Know Quilters and are interested in learning more about the Masters program.
​
You can learn more about the regular Tech Know Quilters membership program and sign up for the wait list for the next open enrollment period here.

Picture
Happy quilting.

​Kari

Join the On Point Quilter weekly newsletter and receive regular tips and inspiration on using Electric Quilt 8 along with the  Free 12 Top
Tips for EQ8 video guide.
Picture

Comments are closed.
    Picture
    Picture
    Picture
    Free guide available for newsletter subscribers
    Picture
    Picture
    Picture

    Kari Schell

    Electric Quilt Expert and Educator and Pattern Designer.

    Categories

    All
    Art And Stitch
    Cricut Maker
    Dear Jane
    Electric Quilt 7
    Electric Quilt 8
    Goose Goose Duck Challenge
    Inkscape
    Patterns
    Silhouette Cameo
    Stampin Up
    Tips And Techniques
    Tools And Rulers

    Archives

    April 2025
    March 2025
    February 2025
    January 2025
    December 2024
    November 2024
    October 2024
    September 2024
    August 2024
    July 2024
    June 2024
    May 2024
    April 2024
    March 2024
    February 2024
    January 2024
    December 2023
    November 2023
    October 2023
    September 2023
    August 2023
    July 2023
    June 2023
    May 2023
    April 2023
    March 2023
    February 2023
    January 2023
    December 2022
    November 2022
    October 2022
    September 2022
    August 2022
    July 2022
    June 2022
    May 2022
    April 2022
    March 2022
    February 2022
    January 2022
    December 2021
    November 2021
    October 2021
    September 2021
    August 2021
    July 2021
    June 2021
    May 2021
    April 2021
    March 2021
    February 2021
    January 2021
    December 2020
    November 2020
    October 2020
    September 2020
    August 2020
    July 2020
    June 2020
    May 2020
    April 2020
    March 2020
    February 2020
    January 2020
    December 2019
    November 2019
    October 2019
    September 2019
    August 2019
    July 2019
    June 2019
    May 2019
    April 2019
    March 2019
    February 2019
    January 2019
    December 2018
    November 2018
    October 2018
    September 2018
    August 2018
    July 2018
    June 2018
    May 2018
    April 2018
    March 2018
    February 2018
    January 2018
    December 2017
    November 2017
    October 2017
    September 2017
    August 2017
    July 2017
    June 2017
    May 2017
    April 2017
    March 2017
    February 2017
    January 2017
    December 2016
    November 2016
    October 2016
    September 2016
    July 2016
    June 2016
    May 2016
    April 2016
    March 2016
    February 2016
    January 2016
    December 2015
    November 2015
    October 2015
    September 2015
    August 2015
    July 2015
    June 2015
    May 2015
    April 2015
    March 2015
    February 2015
    January 2015
    December 2014
    November 2014
    October 2014
    September 2014
    July 2014
    June 2014
    May 2014
    April 2014
    March 2014
    February 2014
    January 2014
    December 2013
    November 2013
    October 2013
    September 2013
    August 2013

    RSS Feed

Contact:
On Point Quilter
e-mail:  [email protected]
phone:  763-566-6536

GET MY NEWSLETTER FOR REGULAR EQ AWESOMENESS!

* indicates required
  • Blog
  • About
  • EQ8 Training
    • Tech Know Quilters Electric Quilt 8 Membership Training
    • EQ8 Made Easy
    • Electric Quilt 8 Sneak Peek
  • Store
  • Contact