
|
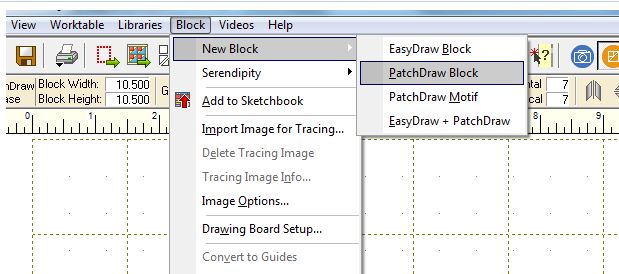
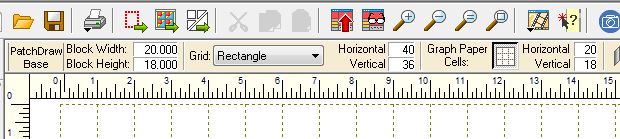
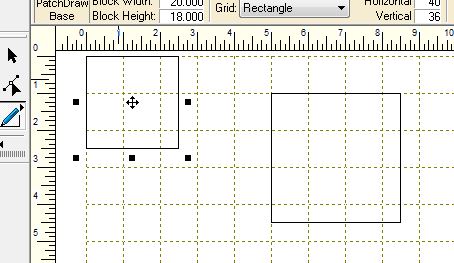
Sometimes I want to know "How many blocks can I make from a fat quarter of fabric?" There are a lot of ways to figure this out with math -- but let me provide an easy way to do with Electric Quilt that requires no (or at least minimal) math -- I promise!! Let's assume I want to do a quilt with a traditional Bear's Paw block. Step 1 - Find the Bear's Paw block in your Block library. Or you can draft one with a 7 x 7 grid using Easy Draw. 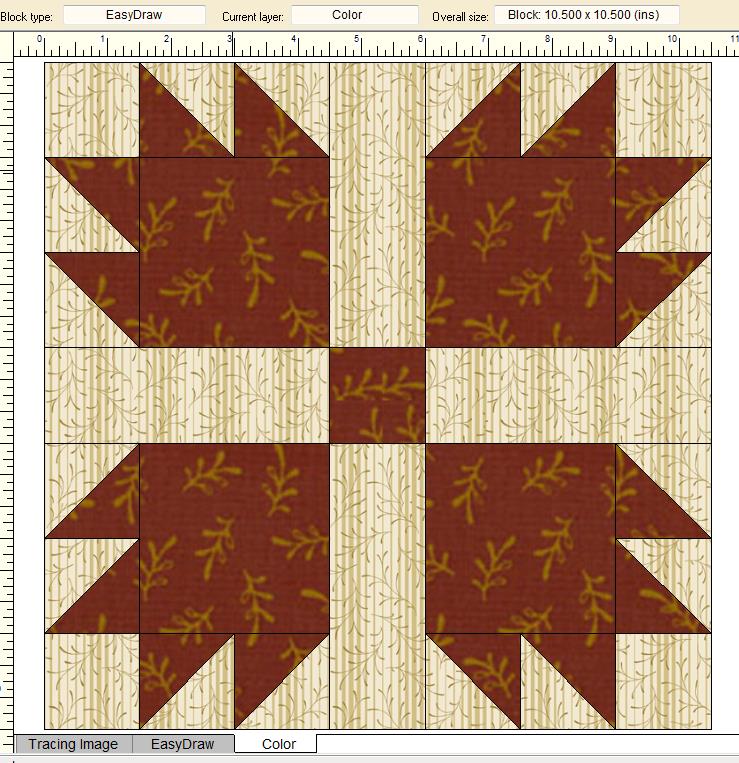 Step #2 - Print out a rotary cutting block for your block at the size you wish the block to be in your quilt. Let's assume this one will be 10-1/2" x 10-1/2". 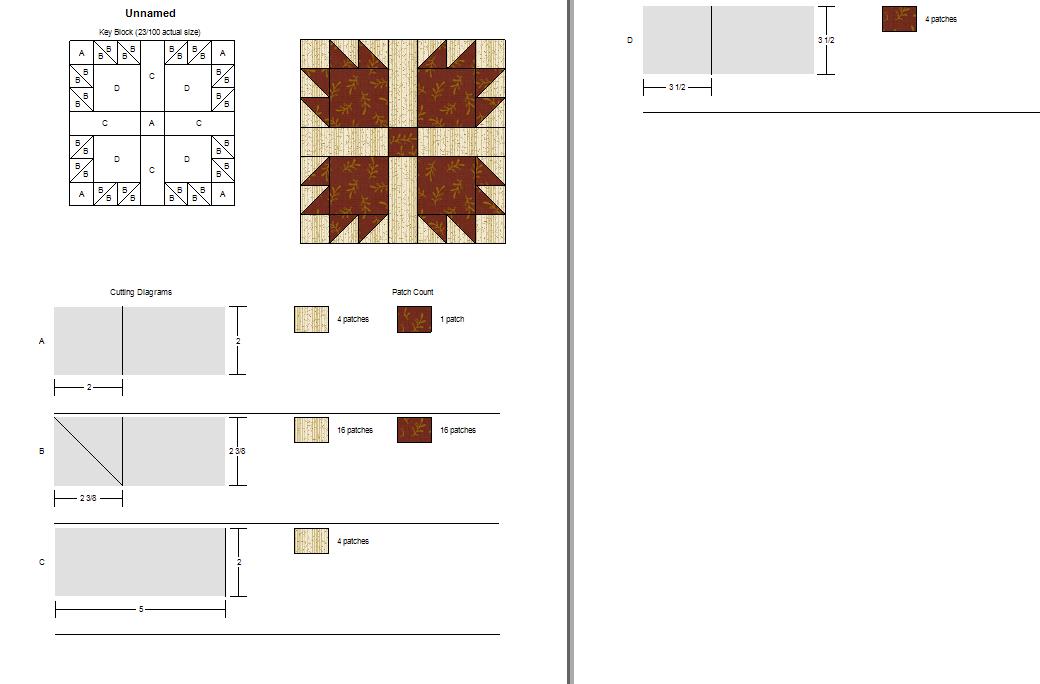 Step #3 - Create a new Patchdraw Block in EQ. The setup should be as follows:
  Step #4 - Refer to your cutting chart and draft one of each of the dark patches. For those patches with fractions, round up to the next 1/2" mark. (Or if you wish to have oversized pieces for your half square triangles, now is the time to make those adjustments.) So I will draft the following patches using the Polydraw tool:
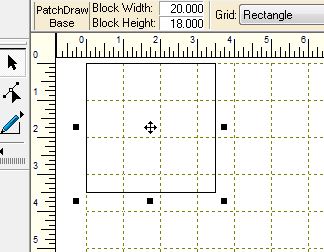
I find it easiest to draft in the upper left corner as I can see my ruler lines to easily know how far I need to go to create the patch. Remember that in Polydraw you must draw the whole patch. After selecting the Polydraw tool left click on the 0,0 point on the page. Go to the 3-1/2,0 mark and left click again. Then to the 3-1/2, 3-1/2 and left click. And finally back to 0,0. Now left click twice to close the block. Once you have completed the first patch, move it out of the way and create the next two patches.
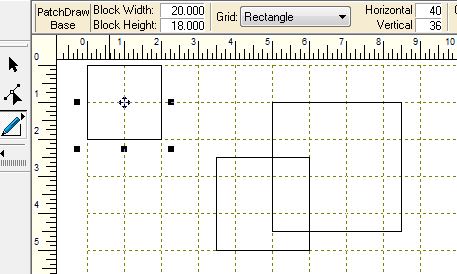
Step #5 - Now make enough copies of the patches for one block by using the clone button (see my red circle around the cone button. I made 4 3-1/2" squares, 8 2-1/2" squares (there are 2 patches for each square per the cutting chart, so I only needed 8 squares for the 16 triangle patches), and 1 2" square. 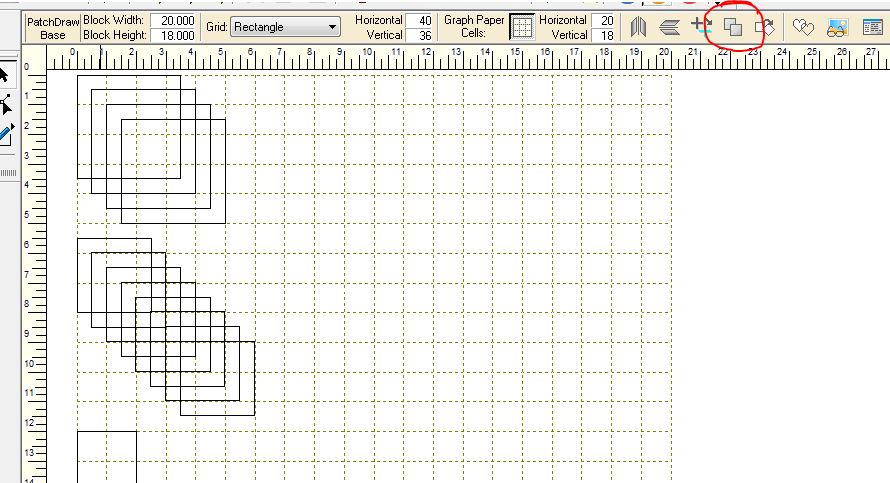 Step # 6 - Place the patches in rows to get the best use of the fabric. Also try to consider how best to do the layout for rotary cutting efficiencies (i.e. all the 3-1/2" patches in one row). As you can see I can squeeze all the pieces in a 6" x 20" piece of fabric. 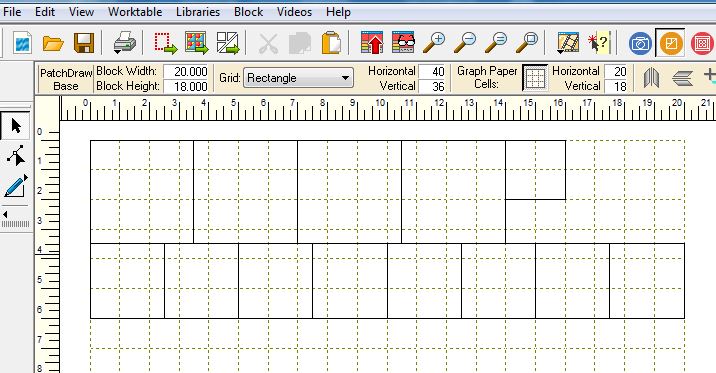 Step # 7 Left click with your mouse and drag a box around all of your patches. Then copy, paste (you now have a complete set for a second block). Fit those pieces below your first section. Do a third paste and fit those below your second section. You can see that everything fits into the 18 x 20 inch block. So you can make three Bear's Paw block with one fat quarter. 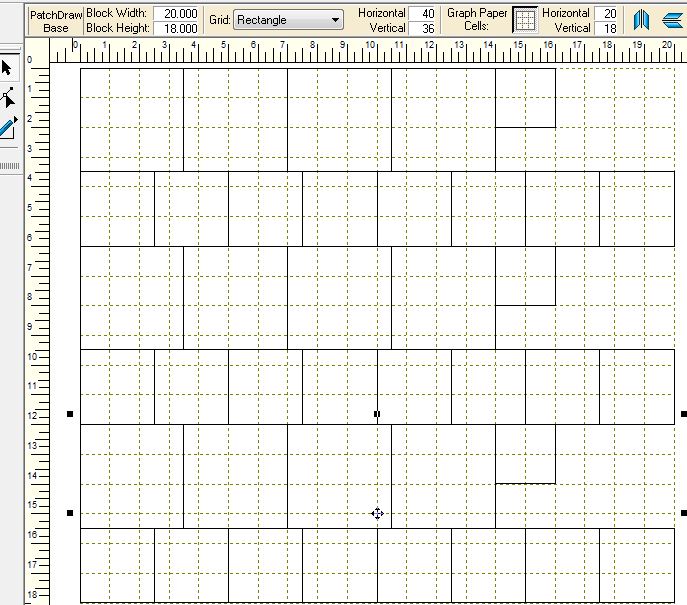 Step #8 Color your block. Make each size a different color. Add to sketchbook. At this point I would also print out and make add reference marks with sizes for each of the color coded squares. You now have a very efficient cutting chart for the dark fat quarters. 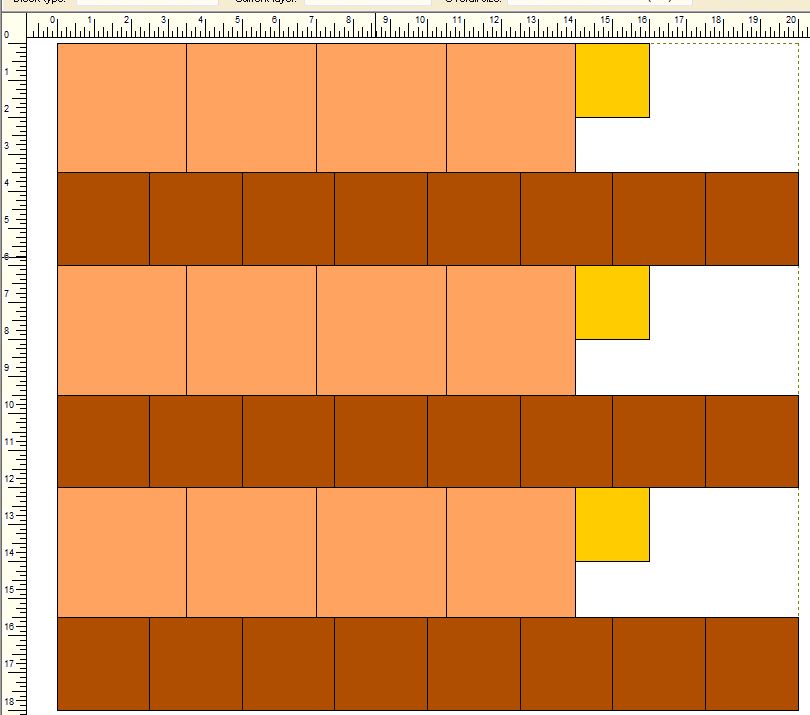 Step #9 - I would also suggest going to the project sketchbook and including notes on the size of the block in case you need to refer back to your work. 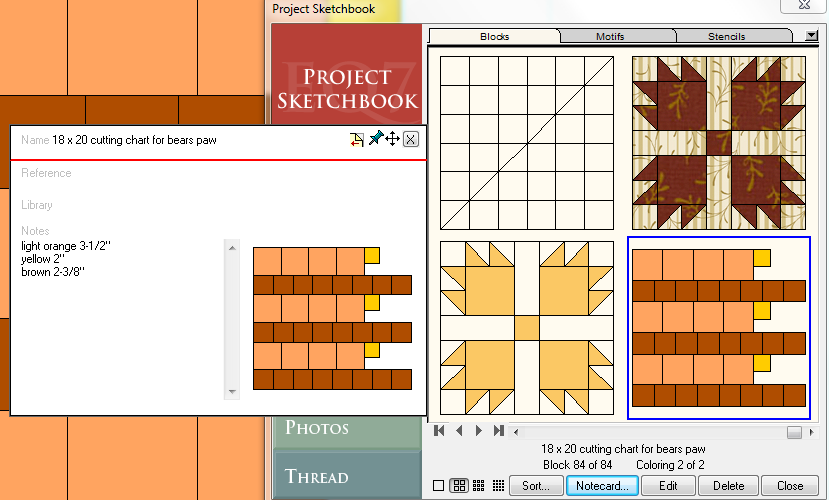 Now let's do the same for the background pieces. I won't go through all the steps, but will show you the final layout. First one block, then three blocks. I needed to move a few of the 2" patches (see those circled in blue) to make best use of my fat quarter. Also note that you can rotate the pieces as well to optimize your layout. In this case it was most efficient to do the 2" x 5" pieces with the long side horizontally. 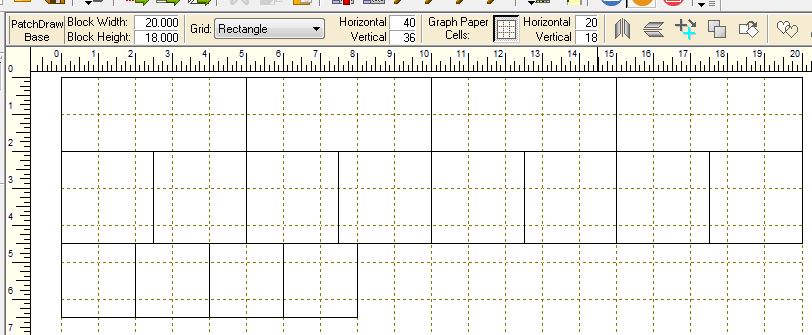 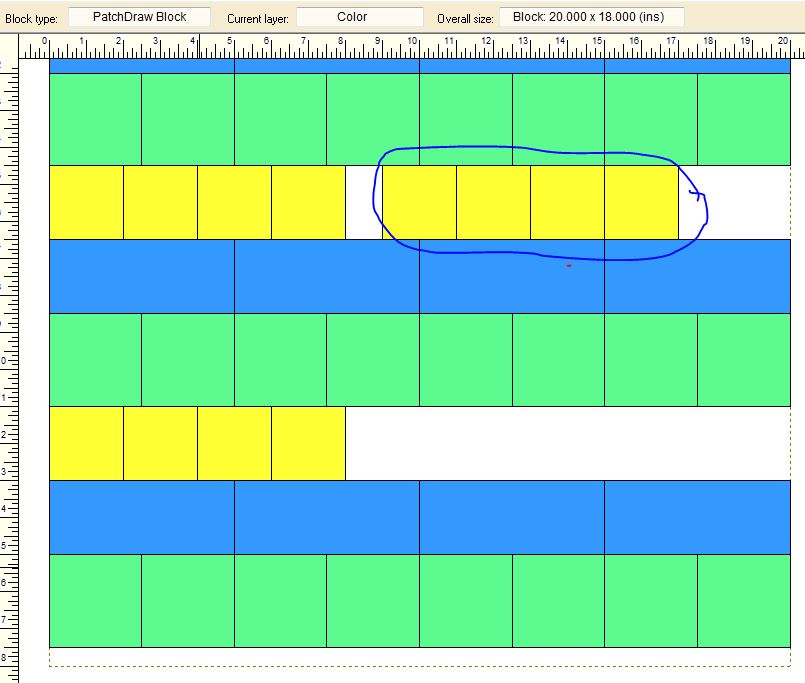 I learned that I could cut backgrounds for three blocks out of one fat quarter. I hope you find this useful. Please let me know if you have any questions. Happy Quilting. Kari Sign up for my newsletter to stay current on what's happening in my studio and learn more quilting tips. As a thank you, I'll send you a FREE pattern for this small maple leaf quilt.
Comments are closed.
|


Free guide available for newsletter subscribers


Kari SchellElectric Quilt Expert and Educator and Pattern Designer. Categories
All
Archives
July 2024
|
 RSS Feed