ON POINT QUILTER
  • Blog
  • About
  • EQ8 Training
    • Tech Know Quilters Electric Quilt 8 Membership Training
    • EQ8 Made Easy
    • Electric Quilt 8 Sneak Peek
  • Store
  • Contact
Picture

Heartfelt Grace New Block and EQ8 Tutorial

1/27/2024

 
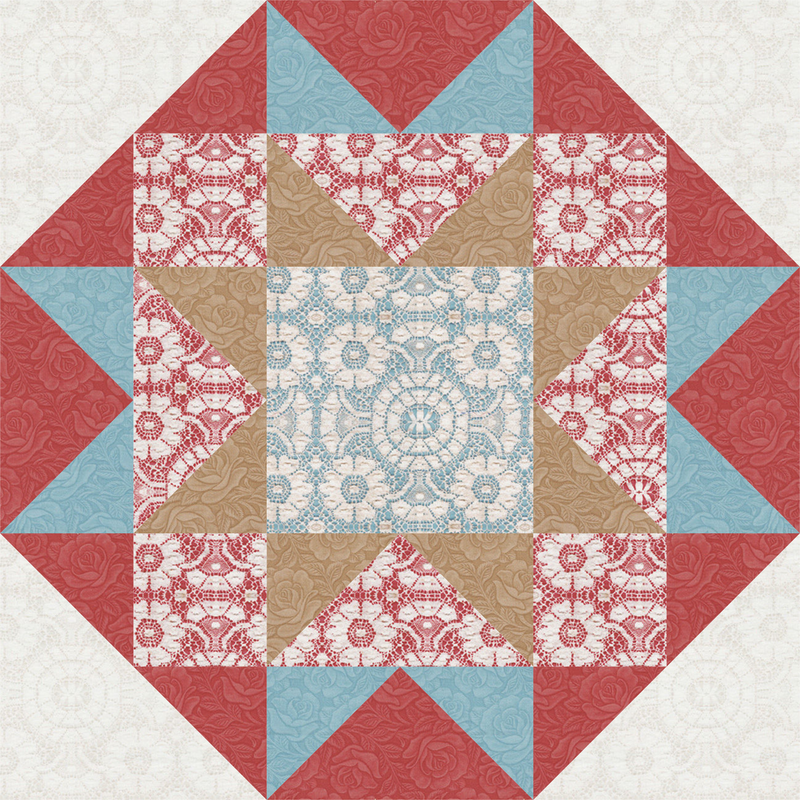
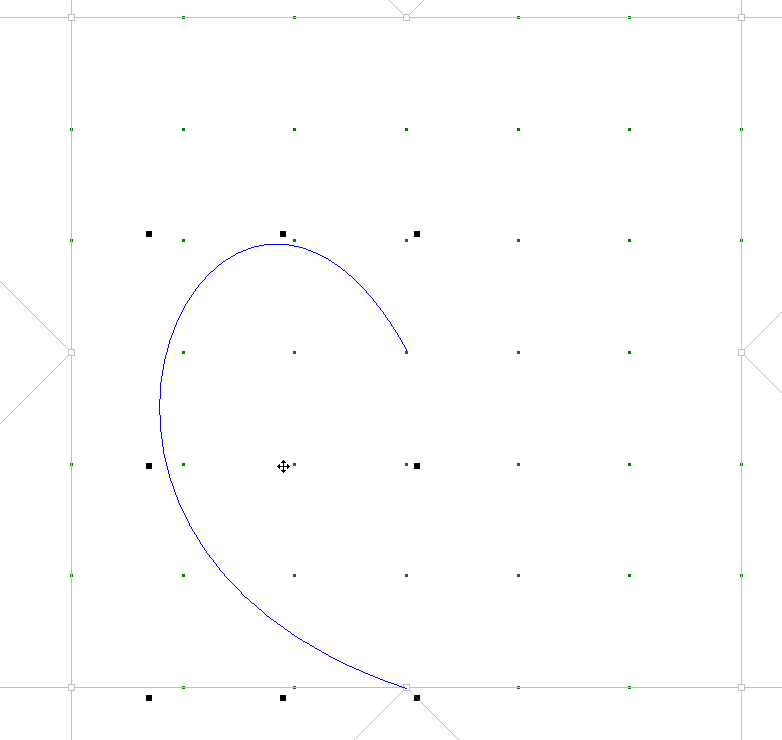
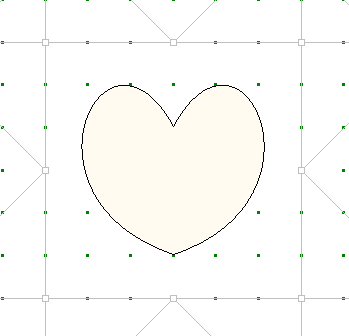
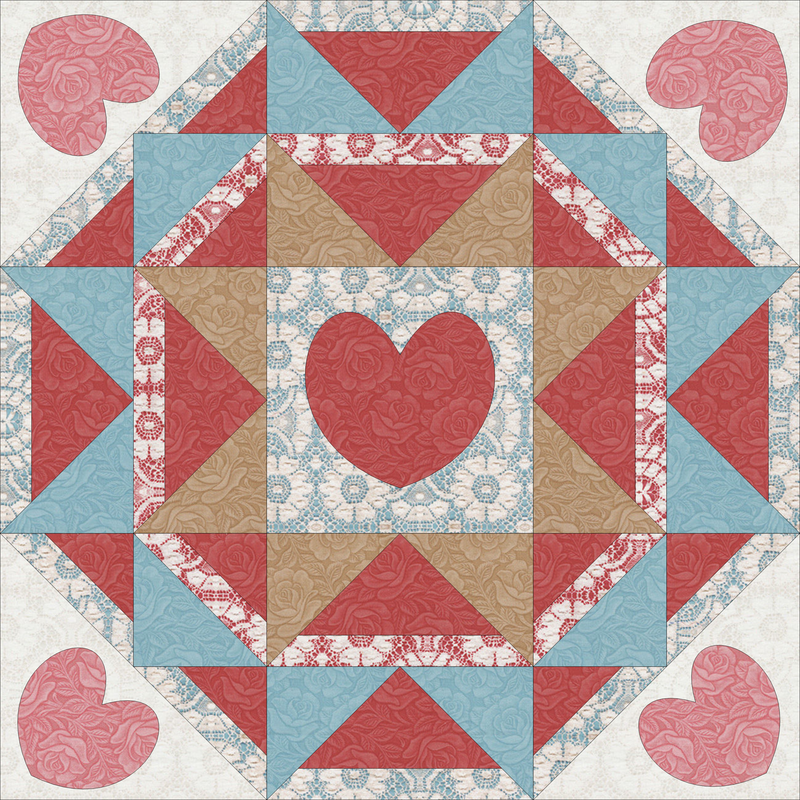
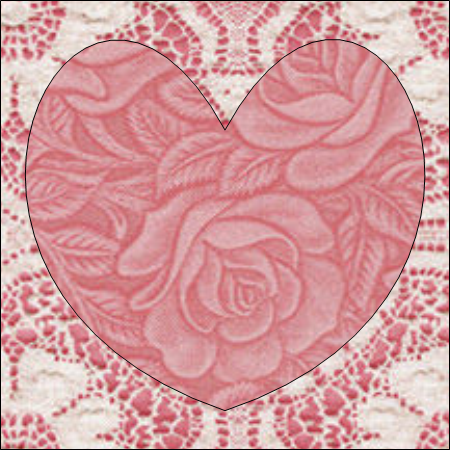
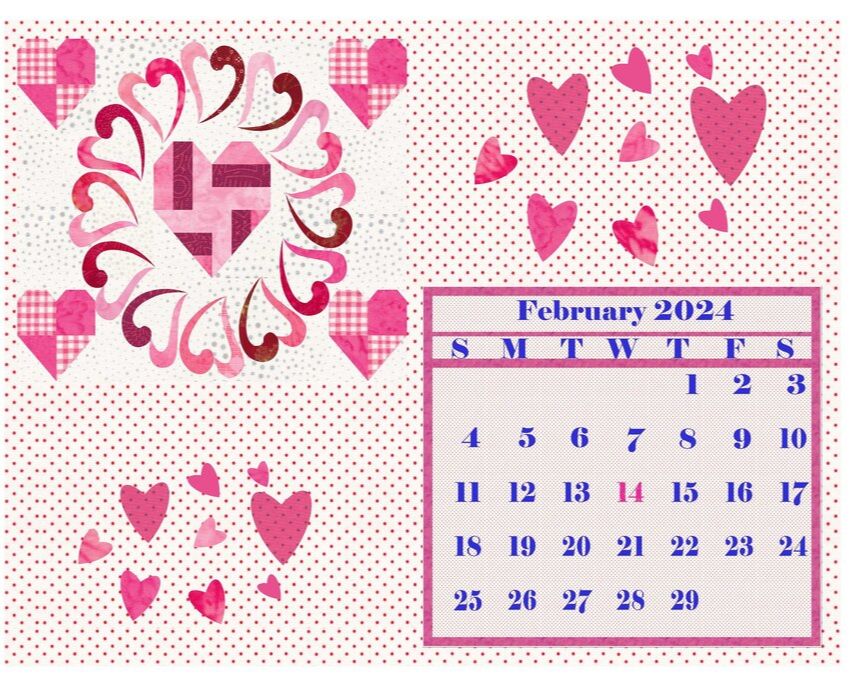
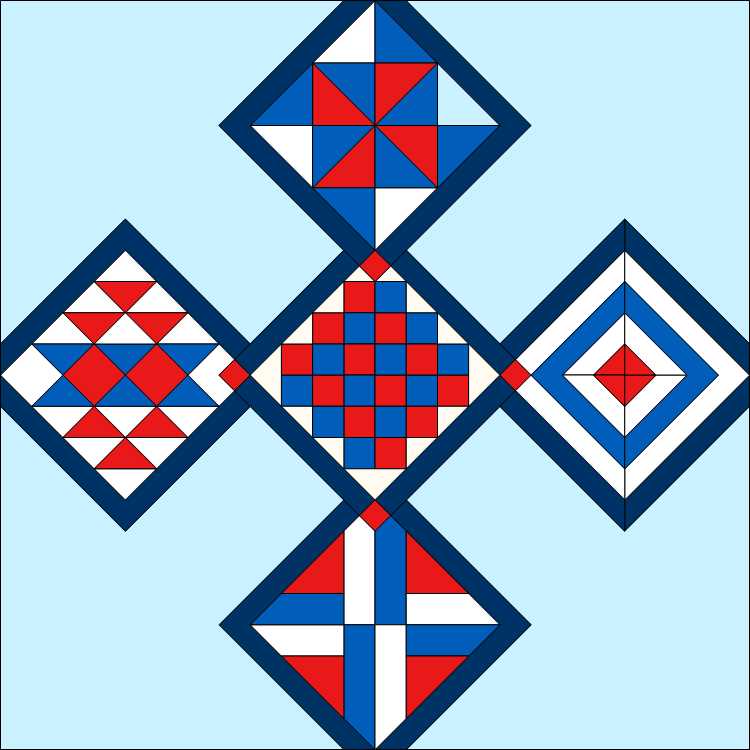
The block for this weeks tutorial is primarily pieced and drafted in EasyDraw.  But includes some optional heart applique motifs.  I used the fabric collection Leather and Lace and Amazing Grace to color the block and quilt.   

​I combined the hearts with the fabric collection for the name of my new block - Heartfelt Grace.

Scroll down to see some fantastic EQ8 designs in the latest Tech Know Quilter showcase.

Heartfelt Grace Electric Quilt 8 Tutorial

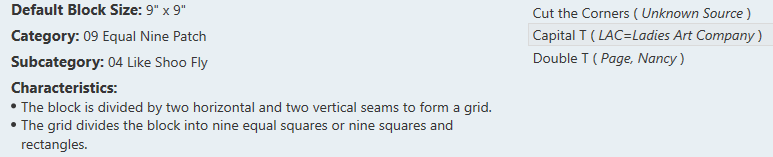
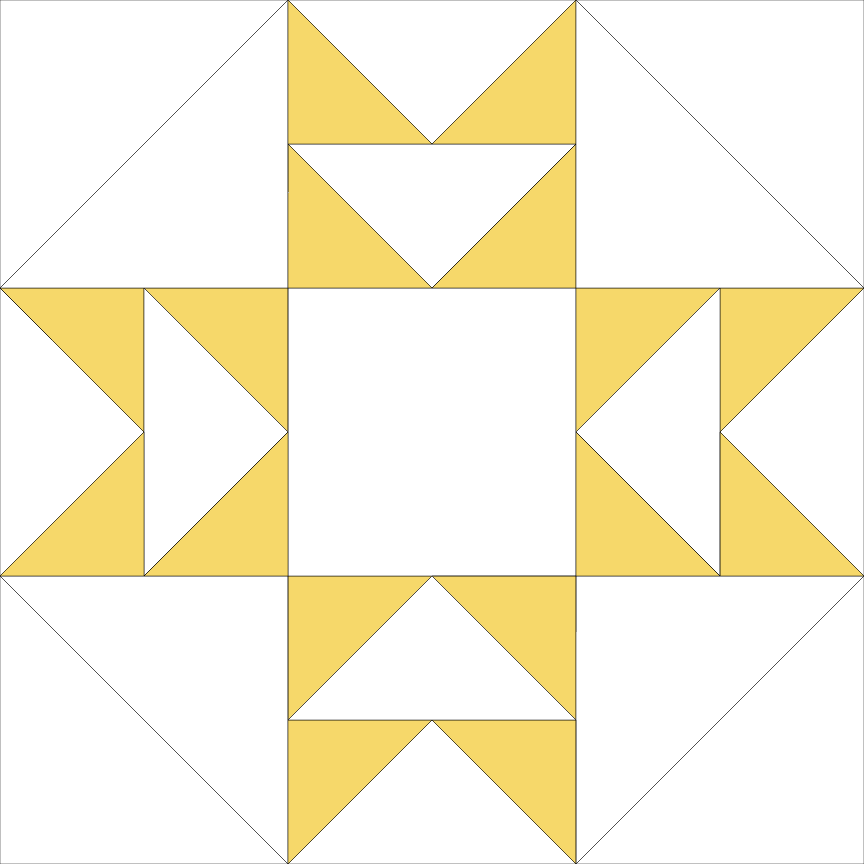
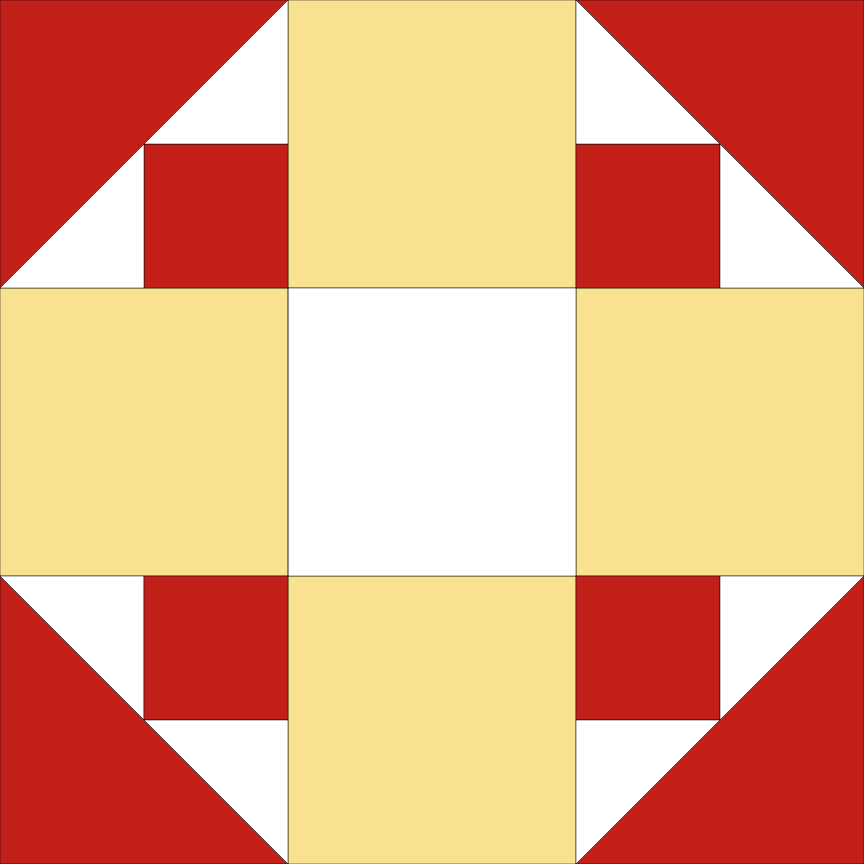
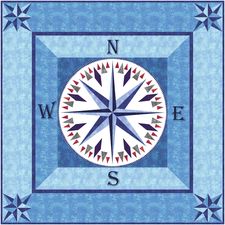
The inspiration for this block came from two different blocks in Block Base+. 

Block Base Plus is based Barbara Brackman's  Encyclopedia of Pieced Quilt Patterns.  This book is the perfect resource for identifying 4000+ historic blocks plus the names and publishing information.  The blocks are EQ friendly and can be used in Electric Quilt 8. 

Check out my review of Block Base + here.  

Inspirational Block #1

Block 1662b can be located in Category 09-Equal Nine Patch under the sub-category 04 - Like Shoo Fly.

I liked the idea of the double flying geese units incorporated in a nine patch block.

The block goes by a number of names including:
  • Cut the Corners
  • Capital T
  • Double T
Picture
Block 1662b from Block Base +
Picture
Inspirational Block #2

​
For the corners, I was inspired by the corners in block 1659.

The block was found in the same category/subcategory as the previous block.

​The block goes by the name "Album".
Picture
Block 1959 from Block Base +
Picture
Original combo block idea.

But wait.

​There's more!
Picture
Original combo block idea in EQ8

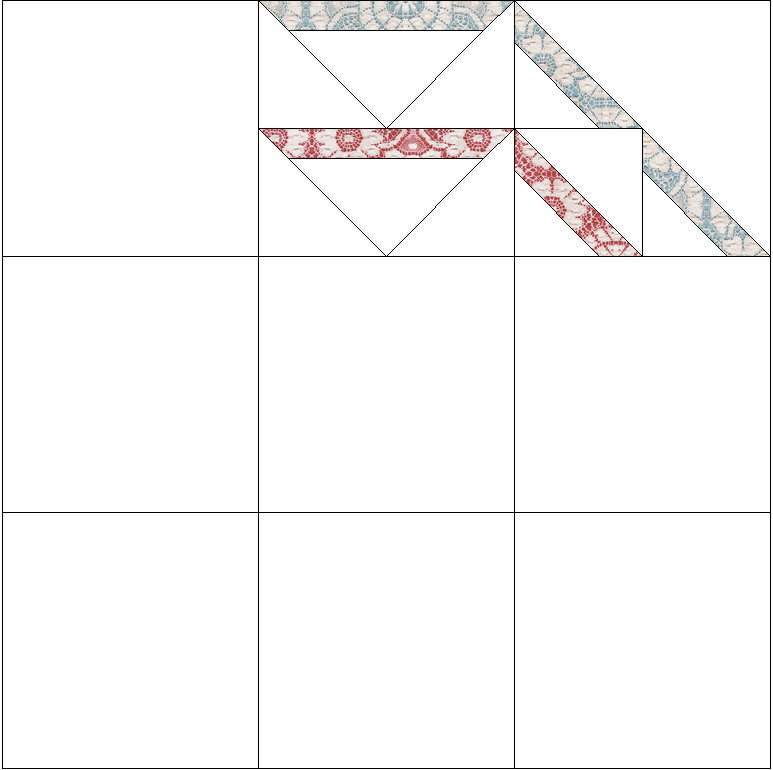
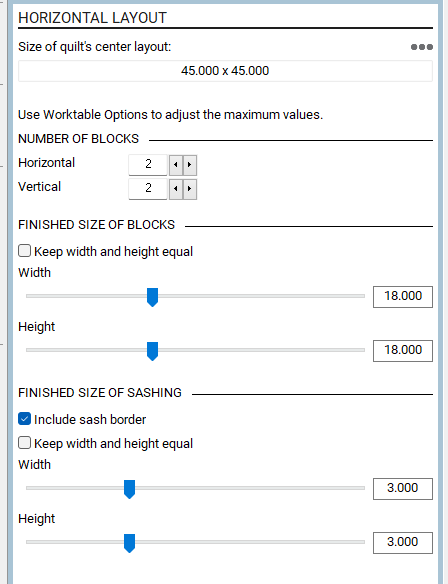
Adding Bands Around the Octagon Shape

Picture
Octagon Banding Idea in EQ
In my tutorial, I decided to I wanted to add a band around the octagon incorporating the center of the outer flying geese unit and the corner triangles.

I then repeated that concept for the second flying geese unit and added a couple of diagonal lines to the square in the corner to extend the band.

The trickiest part in the design was getting the band the same width in the corners as in the flying geese unit.  While you can set snap points to work for a horizontal band strip or a diagonal band strip  -- those same snap settings won't work for the other rotation of the band.

So I share my favorite ninja trick for ensuring the band is exactly the same width for both the geese (horizontal band) and triangles (diagonal band).

Once I finalized two of the squares in the nine patch block, I cloned and rotated to finished the pieced portion of the block.
Picture
Heartfelt Grace Pieced Block
For the applique, all you need to draw is one Bezier curve. 

Use the handles to adjust the curve for the left side of your heart. 

Modify it the make it as skinny of wide as you want. 

​It is your heart -- so you decide.
Picture
Bezier Curve for 1/2 Heart
Clone and flip your modified Bezier curve.  That insures the left and right segments of your heart are exactly the same shape.

With the edit tool, combine the top and bottom nodes of the left and right Bezier curves.
Picture
Applique Motif Heart in Heartfelt Grace block
Clone, rotate (45 degrees) and resize for the heart motif in one of the corners.

​After putting the motif in one corner, clone, rotate (90 degrees) and place in the other corners.
Picture
Heartfelt Grace Block with Applique Hearts
For a variation of the block, erase everything other than the single heart motif in the center.

Resize the block to 3 x 3 to see how those cornerstone units will look with fabric from the Leather and Lace and Amazing Grace fabric collection.
Picture
Cornerstone Block

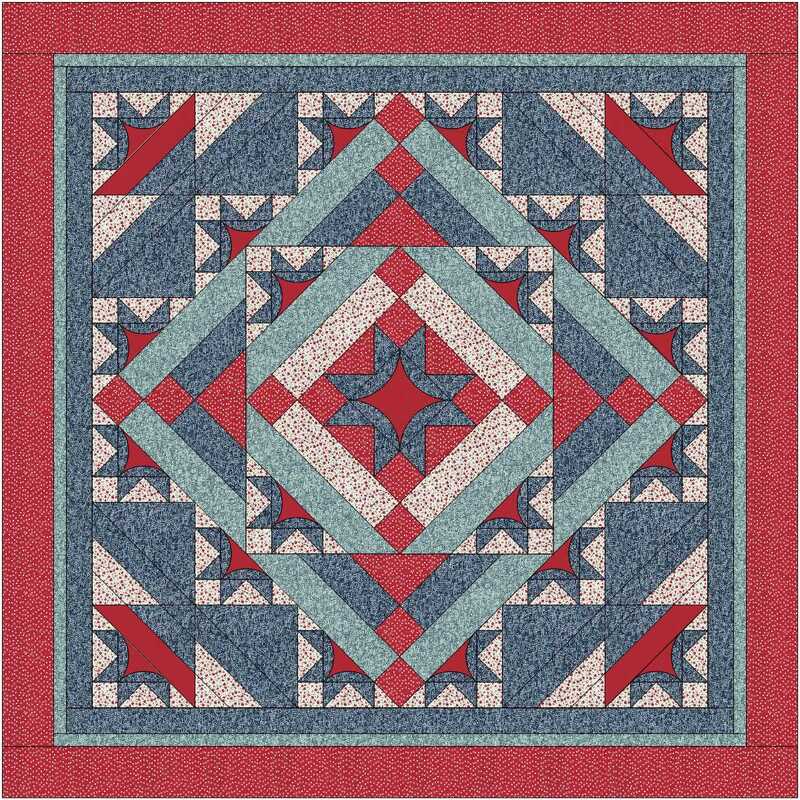
Heartfelt Grace Quilt Design

In the quilt worktable, create a New Quilt>Horizontal.

Set the Layout at 2 blocks horizontal by 2 blocks vertical.

Set the size of blocks at 18 x 18.

Include sashing, set at 3 x 3.

​Click on the box to include sashed border.

On the border tab, the only border I included was a 1/2 inch mitered border -- for the binding.
Picture
Layout Tab for Heartfelt Grace Quilt
See how to create your own Heartfelt Block and Quilt in the complete video tutorial.
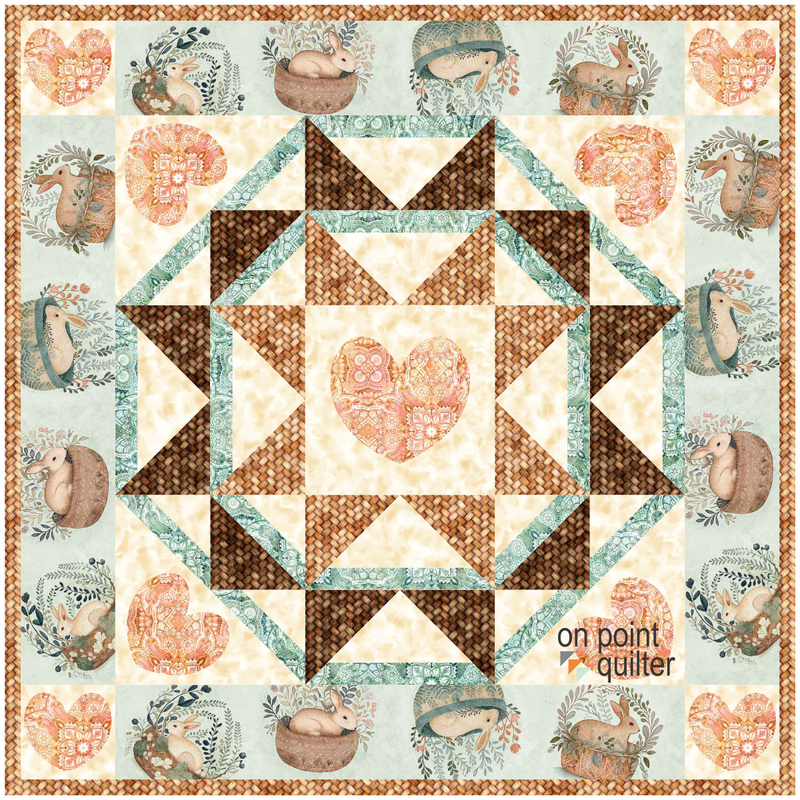
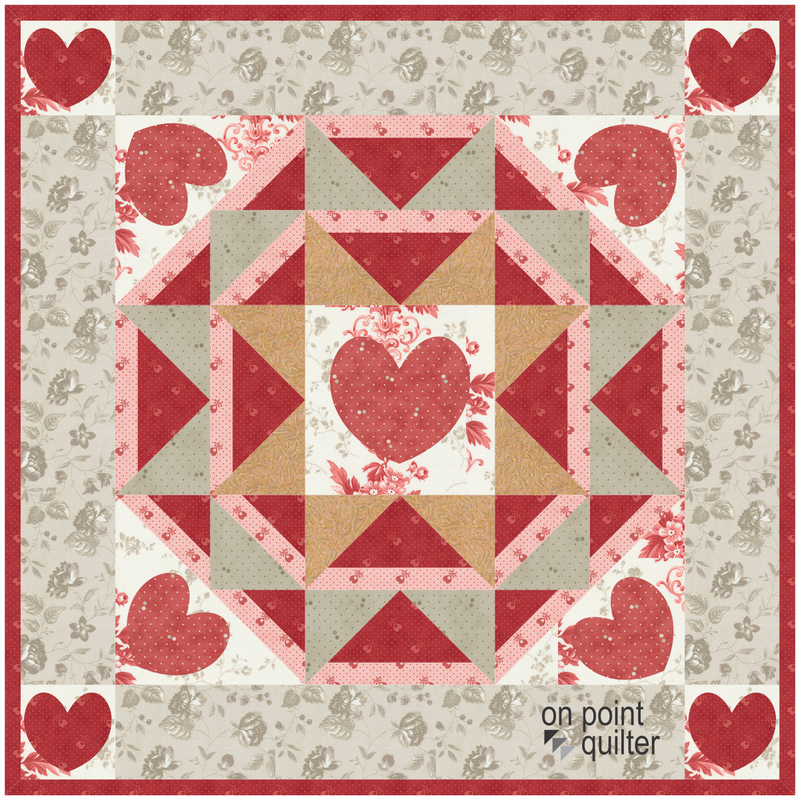
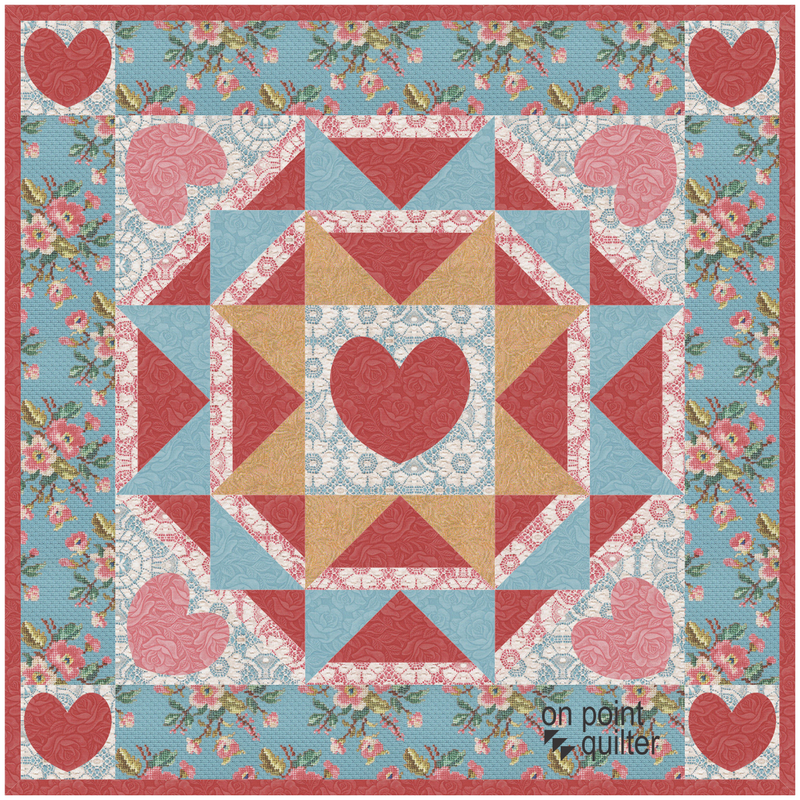
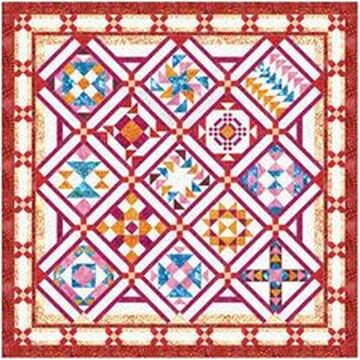
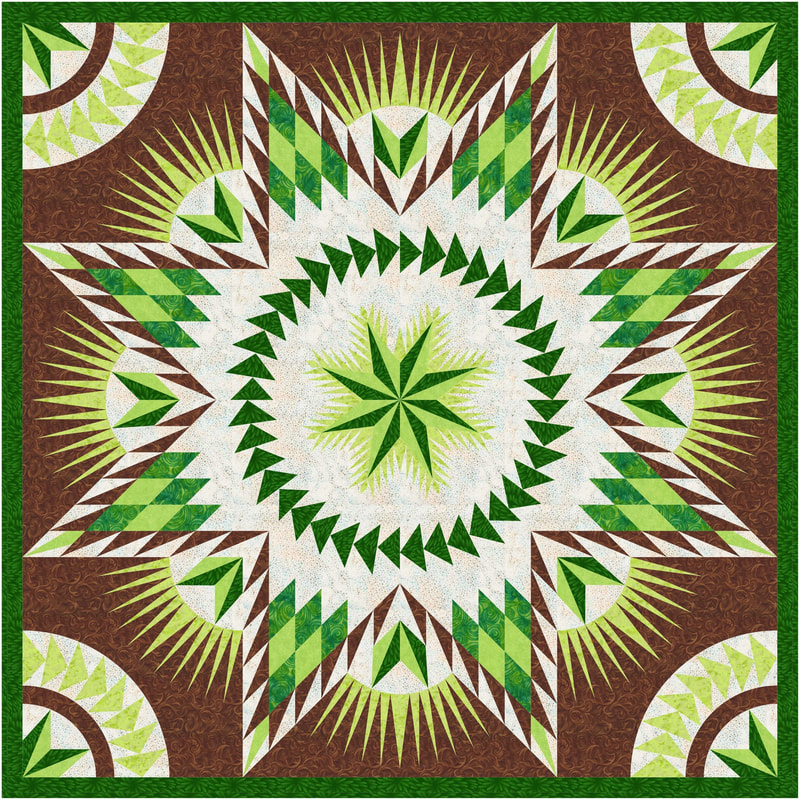
Here are the quilts from the video.
Picture
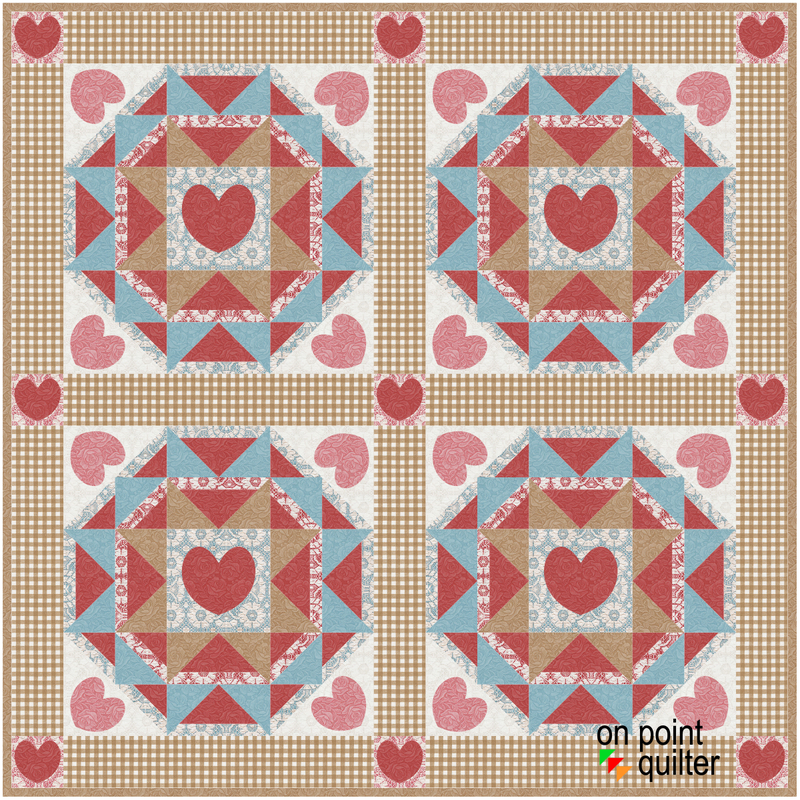
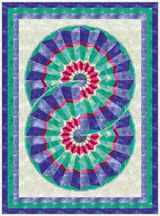
Heartfelt Grace Quilt 46" x 46"
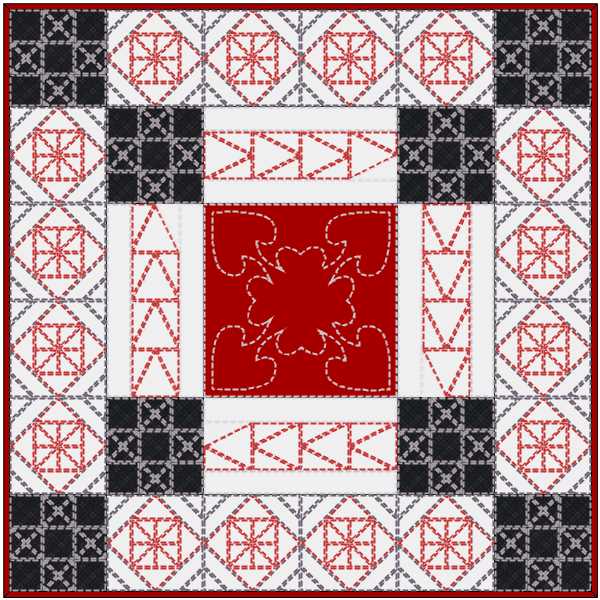
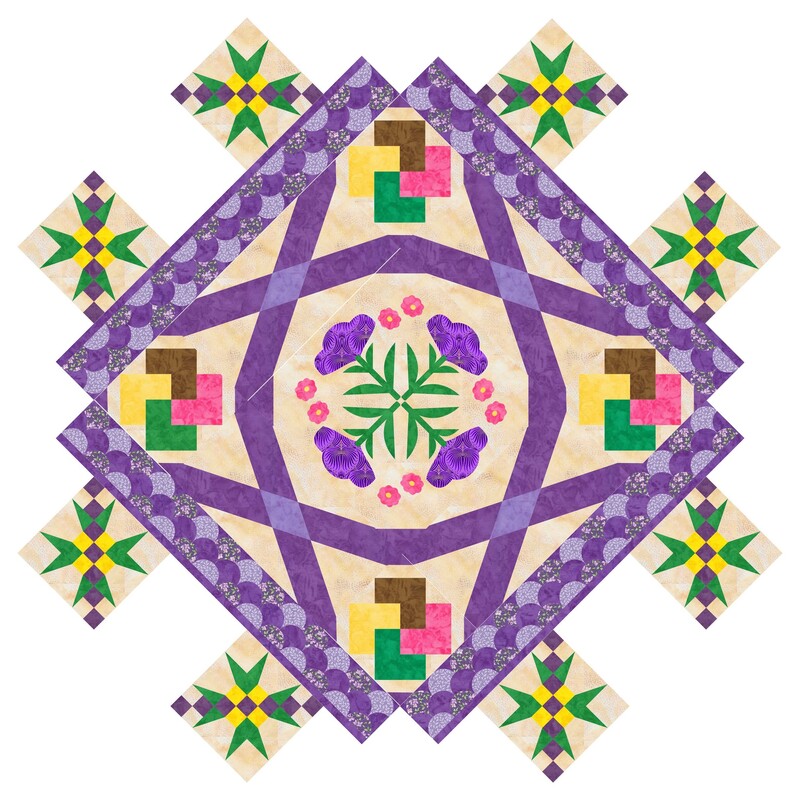
I also did a variation of the quilt -- with just one block.  Valentines Day is just around the corner.  So this might be an easier option to be complete in time.  
Picture
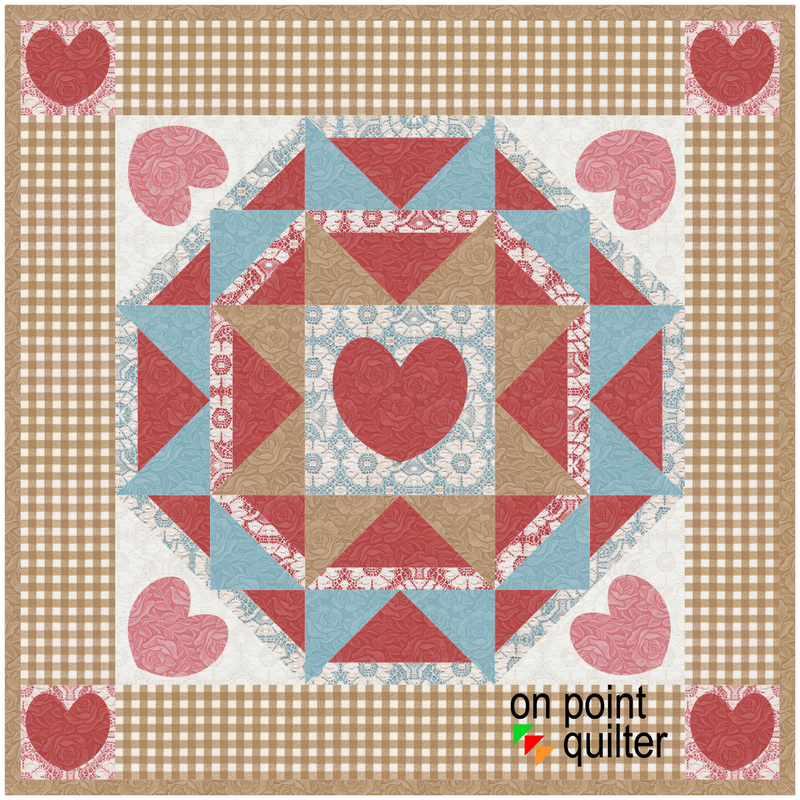
Heartfelt Grace Quilt 25 x 25
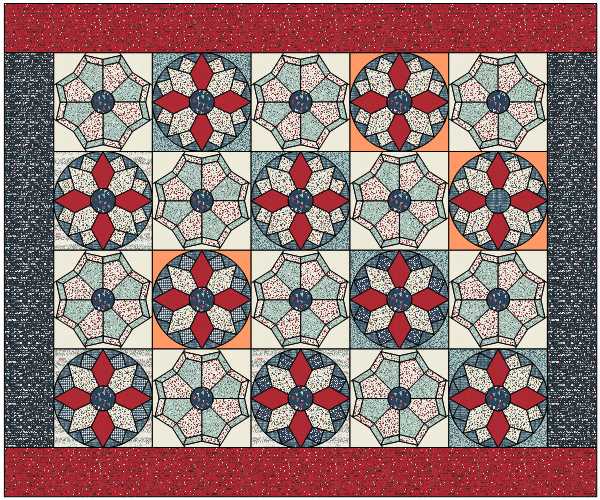
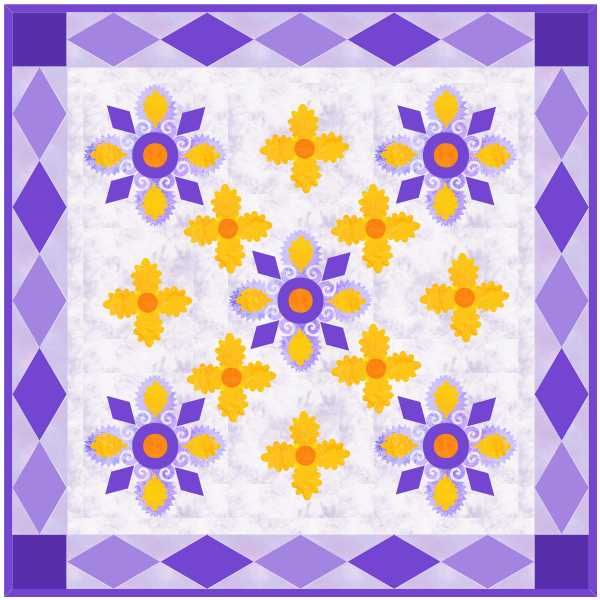
It isn't included in the video, but I played with a couple of different fabric collections as well.
Picture
Heartfelt Grace using Cottom Tails designed by Morris Creative Group for QT Fabrics
Picture
Heartfelt Grace using Ridgewood designed by Minick & Simpson for Moda
Picture
Heartfelt Grace using Leather Lace and Amazing Grace designed by Cathe Holden for Moda
I look forward to seeing what you decide to do with this design -- or maybe you will be inspired to create your own "banded" block.  Share your creation in the Learning EQ Facebook Group.
Heartfet Grace Learning EQ Facebook Post

Tech Know Quilters Showcase

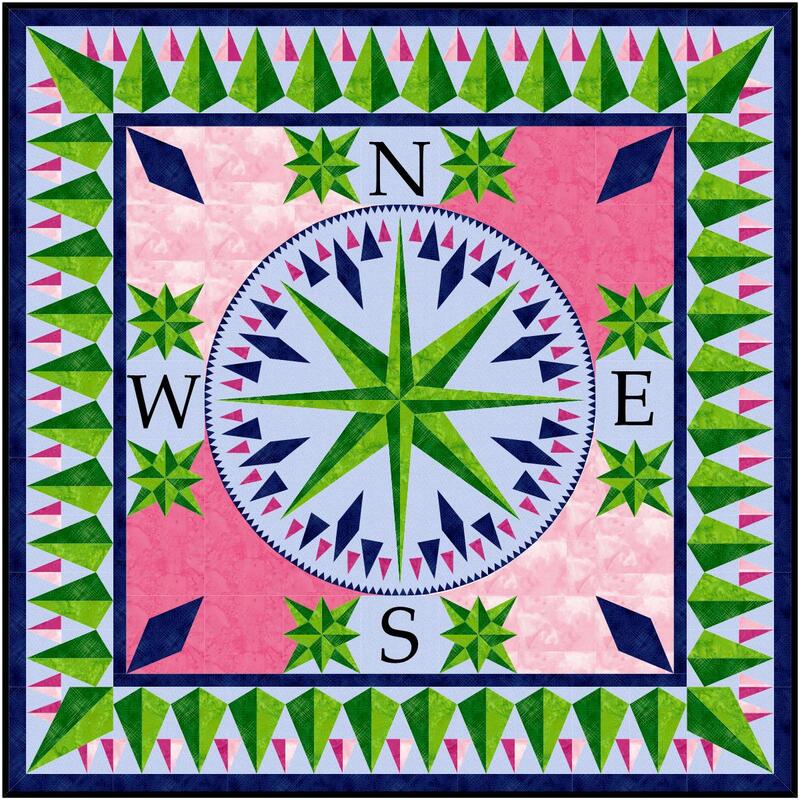
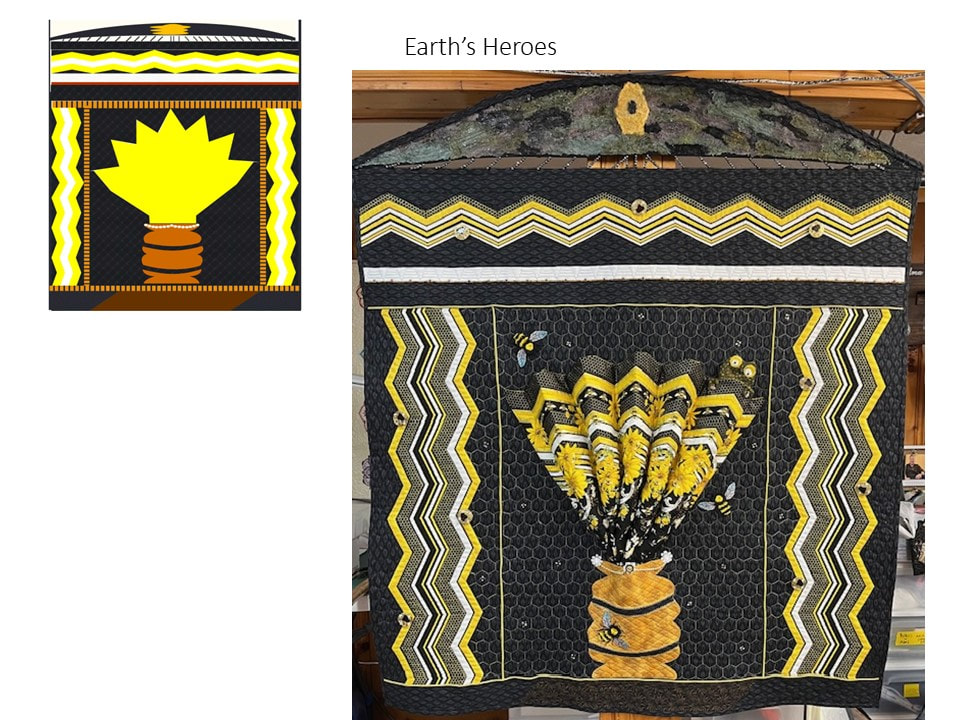
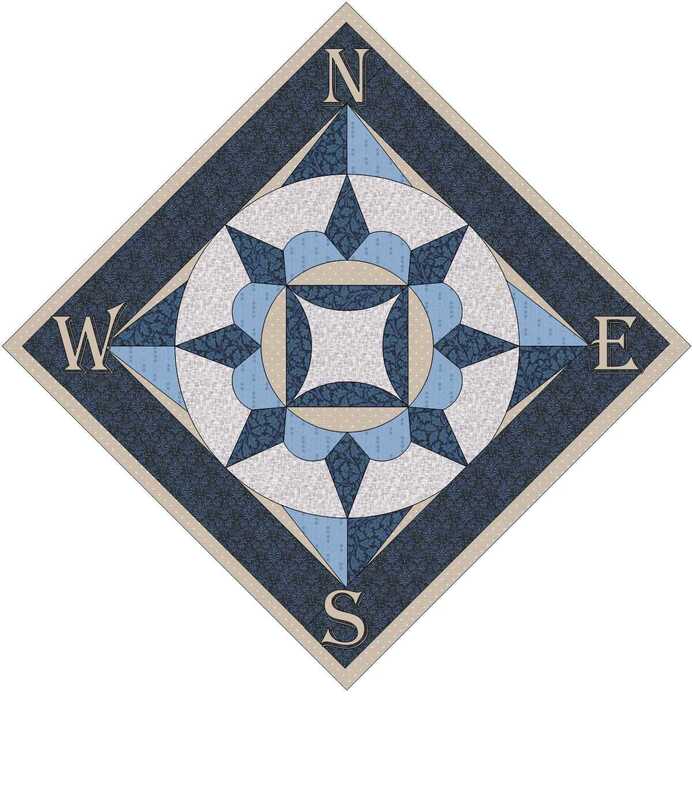
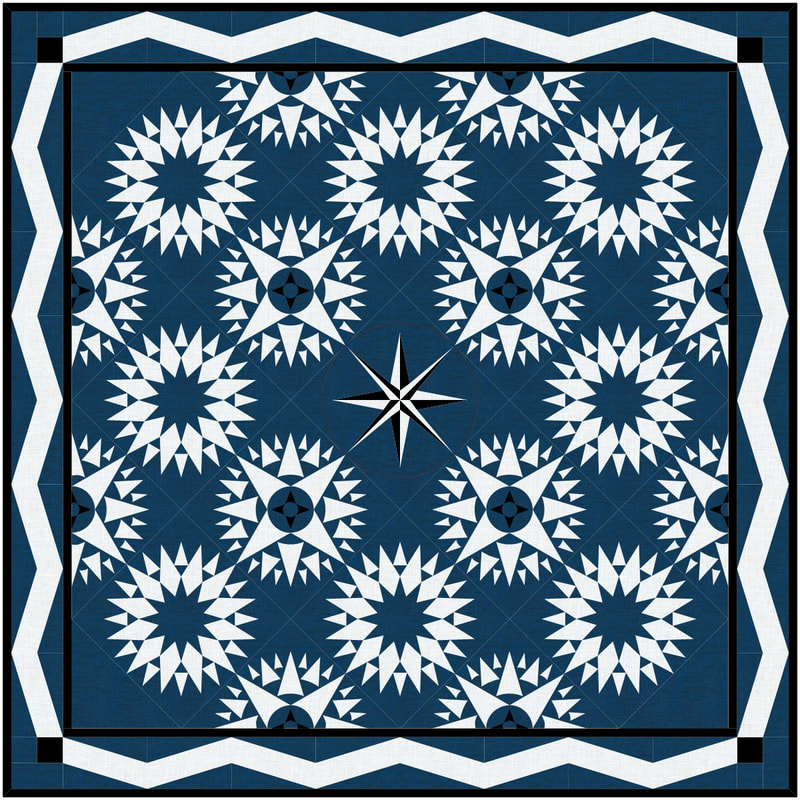
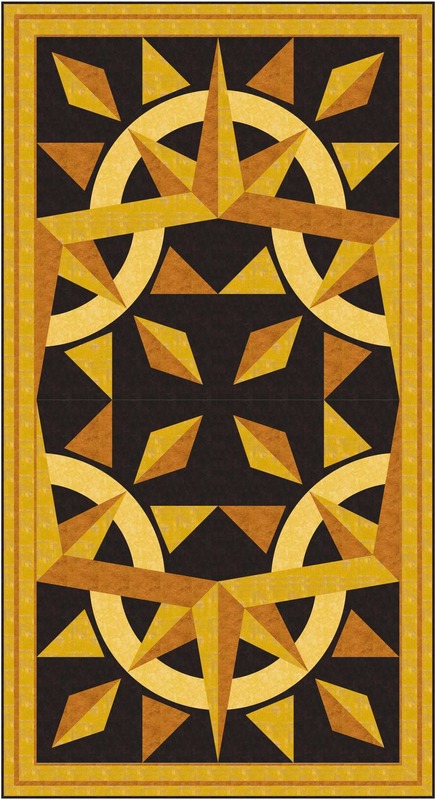
Each month I encourage Tech Know Quilter members to share favorite projects from their class for the month and applications of the concepts for their own quilts.  Here are their submitted designs for the December Month-End Challenge.

​I am so grateful to be able to assist an amazing group of quilters and designers in their Electric Quilt journey.
Picture
Mary Groesbeck designed some of the quilts for the Masters class in December (including this design). She noted that "I learned that PolyDraw and EasyDraw can be better friends that I thought, and I really, really like gold compasses on black."
Picture
Joy Hegglund In the Masters Compass Quilts class, Kari had us draw an tree and put a compass star on top. I decided to draw a quilt inspired by a picture from Pinterest and after her blog post on wreaths added a Santa Claus wreath to the top
Picture
Joyce Drenth All the lessons this month were wonderful. I especially liked the 3D effect of the last quilt.
Picture
Stella Shaffer Crutcher I am learning so much through these lessons! The pace is perfect and the instruction is excellent. I posted this quilt in the EQ Fabric of the Month Challenge with the following comment: "I try to create and upload a quilt into each monthly challenge just for the practice. I recently joined the Tech Know classes with Kari Schell, so I practiced some of the skills from this month's Medallion class to make this quilt. I have already learned so much and I'm just finishing my third month/class in her program. The quilt based on a saw tooth block that I edited to create the medallion and then I carried parts of the medallion into the finishing blocks.
Picture
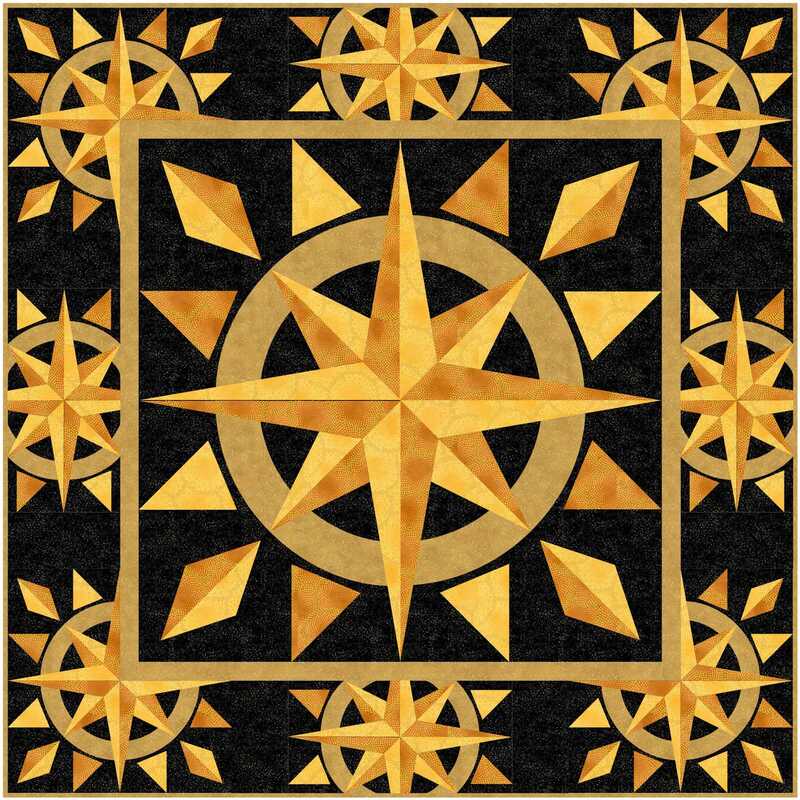
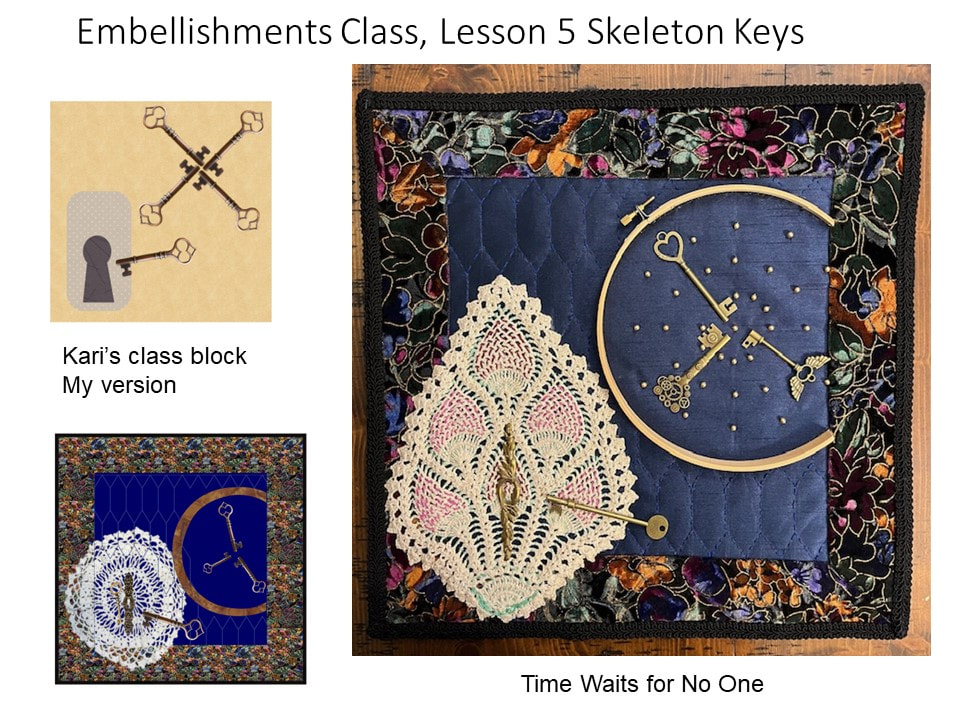
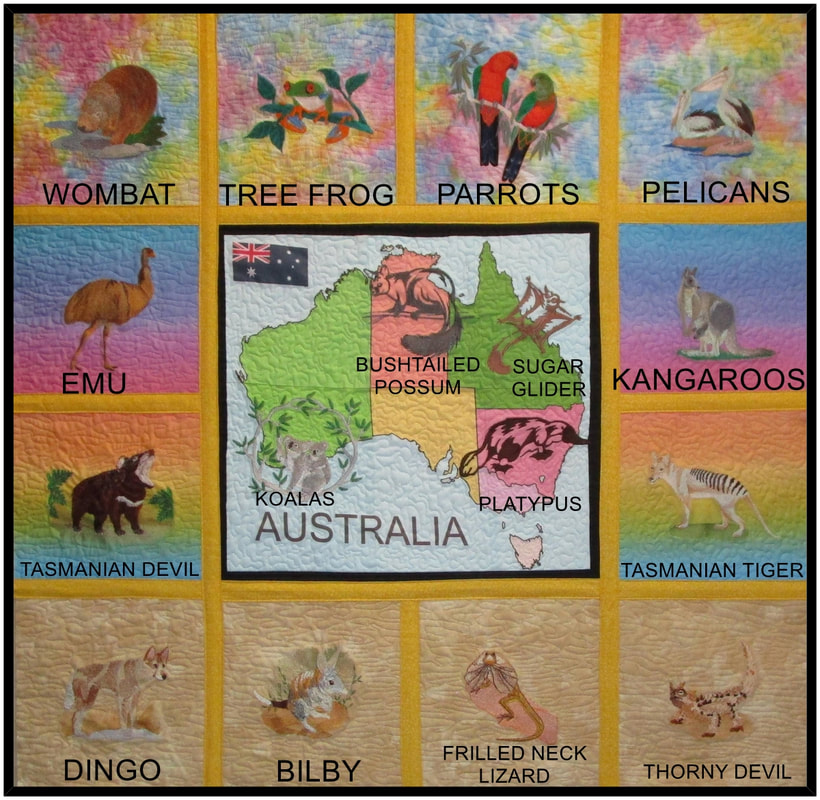
Fran Heisey I learned so much this month. It was hard to pick a favorite. I especially enjoyed learning how to make the stained glass effect.
Picture
Margo Reppert I think this was my favorite quilt for the month. I like how it appears to interlock.
Picture
Candy Huddleston MY version of the Directional Compass Quilt for December MASTERS class. I didn't like the tiny Hexagons around the outside edge (actually, couldn't ever get it quite right), so I changed to triangles & had much better results. Also, I used one of the Miscellaneous Auto Borders and created the diamond blocks for the corners. I'm VERY happy with the result for my first MASTERS challenge.
Picture
Jane Perri This is from the Embellishments class, lesson 5. I finished it today and the course rapped up yesterday; this may be my fasted quilt from start to finish yet. I just had to make this quilt. The doily was made by my grandmother circa 1940-50. I embellished it with colored embroidery and gold metallic threads. The embroidery hoop is one I have used for years. Two of the keys appear to be real ones, two are replicas as is the keyhole. Gold beads indicate the hour locations on the clock. The border fabric is velvet brocade with gold metallic threads. The binding is covered with intricate trim. The blue background is a Duponi silk knockoff. I designed and cut the stencil (thanks for the quilting design course!), then hand quilted. Thanks for the inspiration, Kari!
Picture
Jane Perri Because of the embellishments course, I tried to incorporate lots of different embellishments into this quilt. The small pic is my EQ design. The background was completely finished including sleeve and label before attaching other parts. The top is made from hand dyed cheesecloth and attached with string beads. The zig-zag borders have buttons and are defined with yellow/gold zippers. The quilting designs of bee hives, honeycombs and diamonds, I designed and cut the stencils. The white border has the beehive quilting with amber beads of honey flowing out. The center has 3 embroidered and fringed bees that are also 3D. A stuffed frog that can be removed is peaking out of the flowers. His legs are attached with earrings. Scattered around are small, beaded bees. The flower is made from one quilted and folded piece of fabric that is stuffed to keep it extended 2" beyond background. The vase has bands stitched with gold metallic thread. The top trim has white strung beads, held down with lace flowers and a center button that matches the larger border buttons. The full size 46 wide by 52 tall. It was great fun making this quilt!
Picture
Rhonda Goss Dresden and compass
Picture
Denise Mohler Wow I challenged myself to finish TKQ and I was short just a few lessons--- however, I learned so much this month!!!! Starting with Advanced Easy Draw--- Lesson 8
Picture
Denise Mohler Specialty Rulers and Dies Lesson 12
Picture
Denise Mohler Quilting Designs Lesson 1
Picture
Denise Mohler Sampler Quilts Lesson 13
Picture
Denise Mohler Calendar Quilts Lesson 4
Picture
Denise Mohler From Design to Production Lesson 1
Picture
Denise Mohler Star Quilts Lesson 5
Picture
Dotty Smalley Although I am in the TKQ Masters class, I designed this quilt just because I like animals and Australian animals fascinate me. I actually made it and it will be displayed at our club quilt show in January (12th and 13th). Thank you Kari for such wonderful lessons. The embroideries are from Embroidery Library.
Picture
Sandy Dingman Wells Playing with Mixed Medallions and created a 24" x 24" block.
Picture
Sandy Dingman Wells Have made Mariner Compass Blocks in the past via paper piecing. Enjoyed creating the "Compass" block in EQ8. Thanks Kari for the great webinar and instructions.
Picture
Patricia Hansen I enjoyed the Compass Quilt month and designed this one to make as a gift for our handyman.
Picture
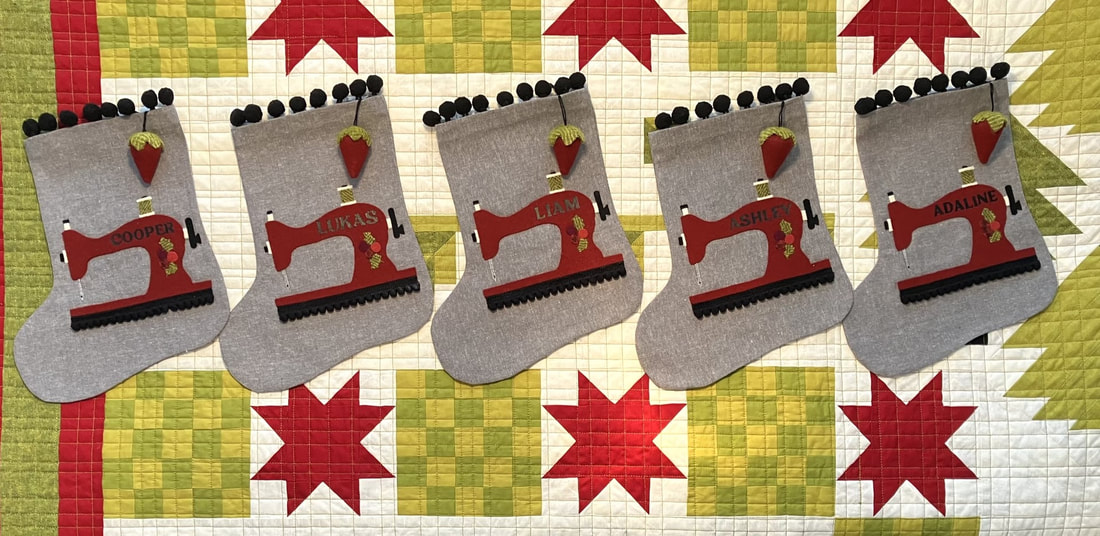
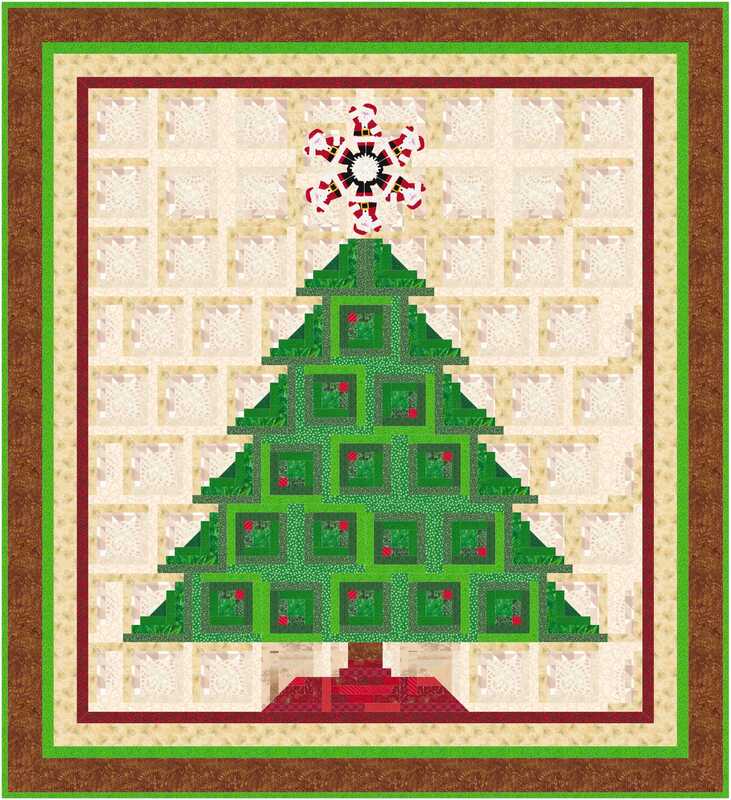
Kristy Goodin Soard Now that Christmas is past, I can share a photo of the stockings I designed in EQ8 for my grandchildren. I have taken every class Kari has offered, and accumulated so much knowledge. This design took tidbits from numerous classes over the years.
Picture
Julie Pedersen For the Masters Compass class, I designed this as an alternate for one of the lessons.
A special shout out to Denise Mohler -- who went through six Tech Know Quilter classes (each with 12 or 13 lessons in them) during the last month.

That is a lot of lessons.  She had been collecting lessons for a while and is now finding the time to work through them all.
Tech Know Quilters is a membership program focused on mastery of Electric Quilt 8.  We have members at all stages of their Electric Quilt journey. 

Click here to learn more.
Picture
Happy quilting.

​Kari

Join the On Point Quilter weekly newsletter and receive regular tips and inspiration on using Electric Quilt 8 along with the  Free 12 Top
Tips for EQ8 video guide.
Picture

Comments are closed.
    Picture
    Picture
    Picture
    Free guide available for newsletter subscribers
    Picture
    Picture
    Picture

    Kari Schell

    Electric Quilt Expert and Educator and Pattern Designer.

    Categories

    All
    Art And Stitch
    Cricut Maker
    Dear Jane
    Electric Quilt 7
    Electric Quilt 8
    Goose Goose Duck Challenge
    Inkscape
    Patterns
    Silhouette Cameo
    Stampin Up
    Tips And Techniques
    Tools And Rulers

    Archives

    April 2025
    March 2025
    February 2025
    January 2025
    December 2024
    November 2024
    October 2024
    September 2024
    August 2024
    July 2024
    June 2024
    May 2024
    April 2024
    March 2024
    February 2024
    January 2024
    December 2023
    November 2023
    October 2023
    September 2023
    August 2023
    July 2023
    June 2023
    May 2023
    April 2023
    March 2023
    February 2023
    January 2023
    December 2022
    November 2022
    October 2022
    September 2022
    August 2022
    July 2022
    June 2022
    May 2022
    April 2022
    March 2022
    February 2022
    January 2022
    December 2021
    November 2021
    October 2021
    September 2021
    August 2021
    July 2021
    June 2021
    May 2021
    April 2021
    March 2021
    February 2021
    January 2021
    December 2020
    November 2020
    October 2020
    September 2020
    August 2020
    July 2020
    June 2020
    May 2020
    April 2020
    March 2020
    February 2020
    January 2020
    December 2019
    November 2019
    October 2019
    September 2019
    August 2019
    July 2019
    June 2019
    May 2019
    April 2019
    March 2019
    February 2019
    January 2019
    December 2018
    November 2018
    October 2018
    September 2018
    August 2018
    July 2018
    June 2018
    May 2018
    April 2018
    March 2018
    February 2018
    January 2018
    December 2017
    November 2017
    October 2017
    September 2017
    August 2017
    July 2017
    June 2017
    May 2017
    April 2017
    March 2017
    February 2017
    January 2017
    December 2016
    November 2016
    October 2016
    September 2016
    July 2016
    June 2016
    May 2016
    April 2016
    March 2016
    February 2016
    January 2016
    December 2015
    November 2015
    October 2015
    September 2015
    August 2015
    July 2015
    June 2015
    May 2015
    April 2015
    March 2015
    February 2015
    January 2015
    December 2014
    November 2014
    October 2014
    September 2014
    July 2014
    June 2014
    May 2014
    April 2014
    March 2014
    February 2014
    January 2014
    December 2013
    November 2013
    October 2013
    September 2013
    August 2013

    RSS Feed

Contact:
On Point Quilter
e-mail:  [email protected]
phone:  763-566-6536

GET MY NEWSLETTER FOR REGULAR EQ AWESOMENESS!

* indicates required
  • Blog
  • About
  • EQ8 Training
    • Tech Know Quilters Electric Quilt 8 Membership Training
    • EQ8 Made Easy
    • Electric Quilt 8 Sneak Peek
  • Store
  • Contact