
|
Nothing says spring more than a bright bouquet of daffodils. To celebrate, we will be designing a daffodil quilt. This was one that I was thinking about making into a formal pattern when originally designed in 2014. Time has slipped away and I am not sure if that will happen. But I will share how to create your own Daffodil Days quilt using Electric Quilt 8 and some basic construction instructions.
Spoiler alert -- They key was setting up the correct layout and then creating a series of setting blocks using Serendipity with Merge blocks.
Here is my finished quilt -- pieced and quilted back in 2014.
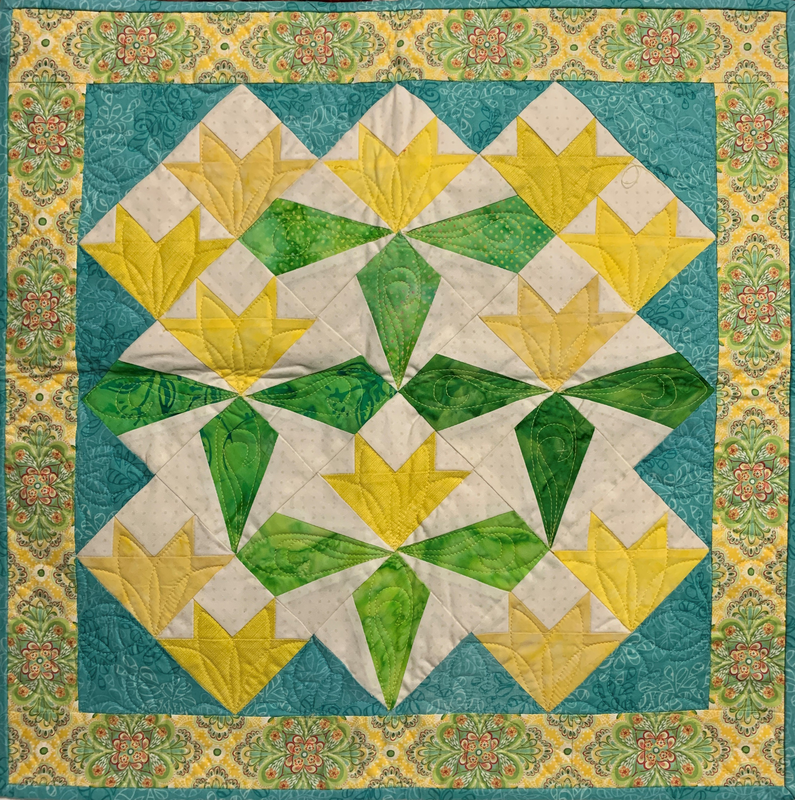
Kari's Daffodil Days Quilt
Piecing Daffodil Days
I often prefer to modify cutting information produced by Electric Quilt to incorporate my favorite construction techniques. So don't be surprised if the information below doesn't exactly match what you print from EQ8.
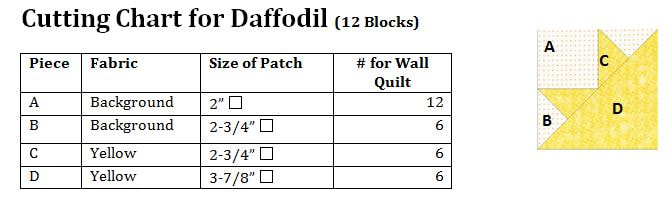
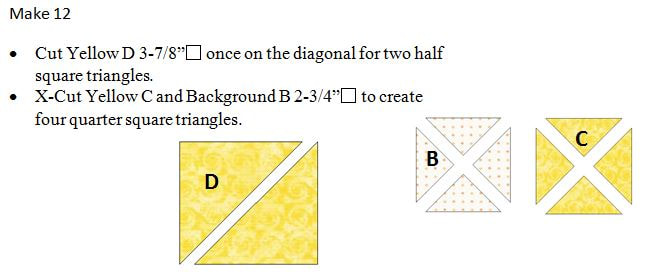
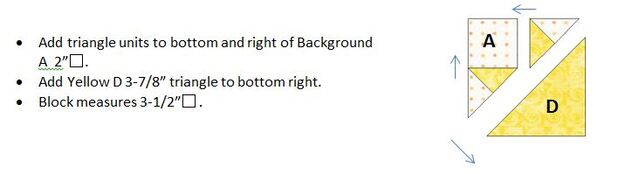
Daffodil Block Construction - Make 12 Blocks

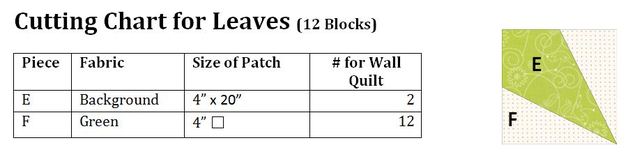
Leaf Block Construction - Make 12 Blocks
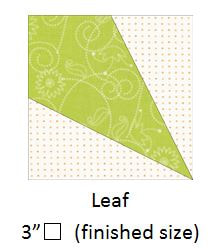
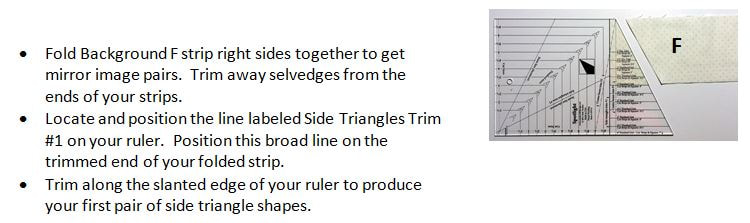
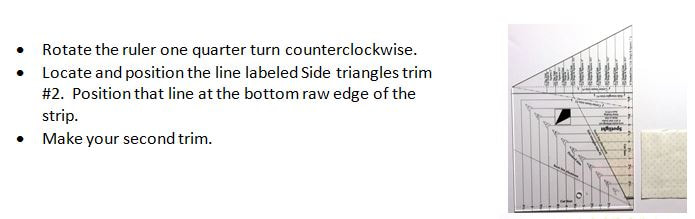
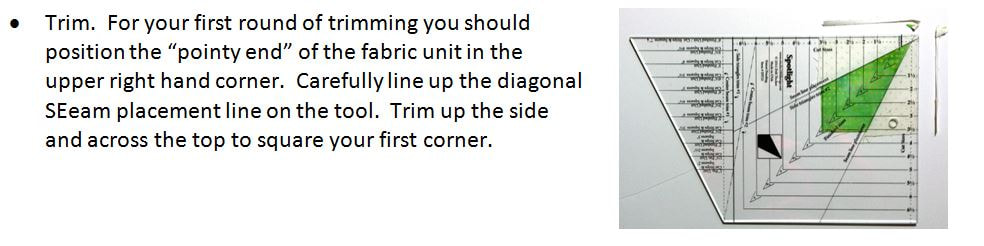
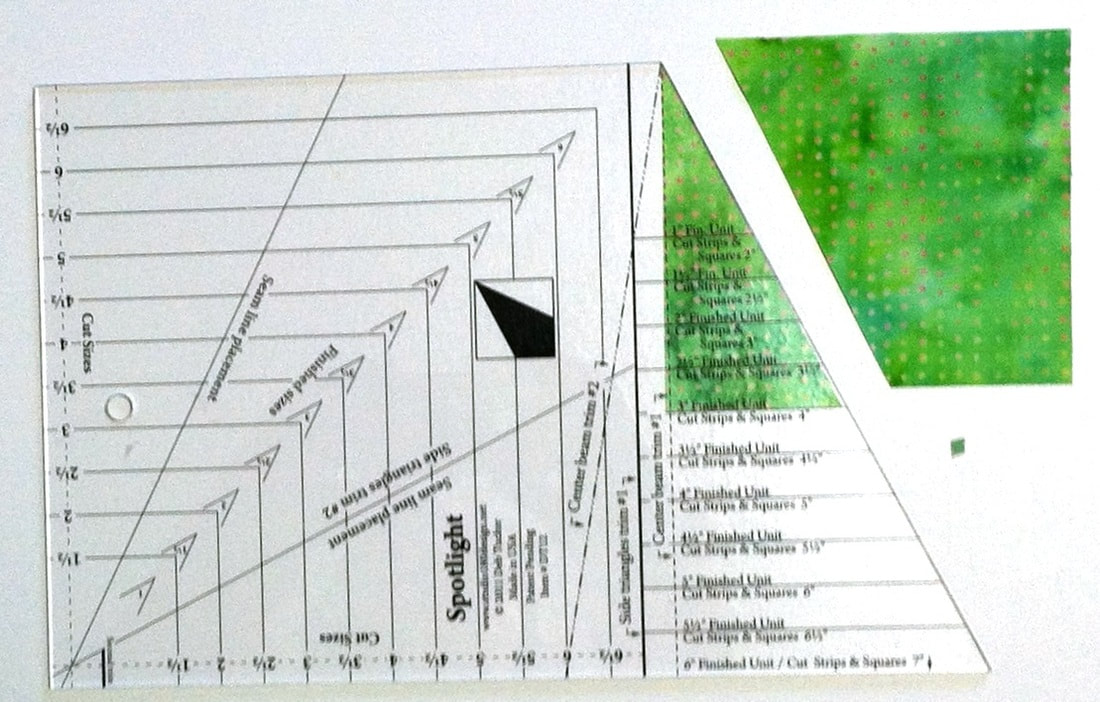
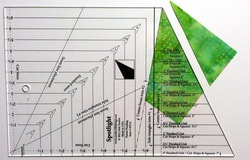
For the Leaf Block, I used a tool from Deb Tucker's Studio 180 Design. I love using these rulers as they provide for pieces that are slightly over-cut and then cut down once they are pieced. This gets rid of many challenges with block construction. For this block I am using the Corner Beam™ tool.
I've taken photos of the cutting and construction of this block as I think it really helps see how the ruler is used.
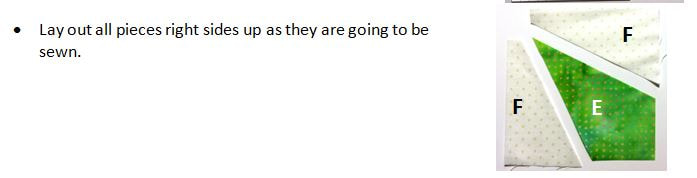
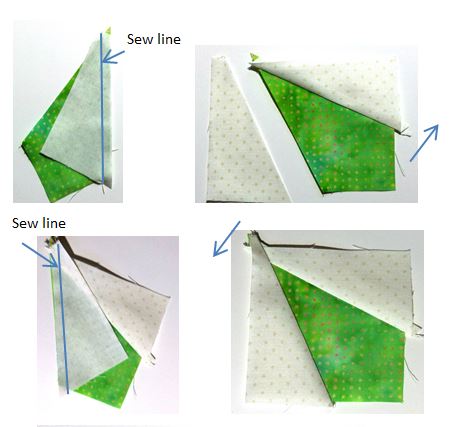
Layer pieces right sides together and raw edges even. Shift Background E down a little over ¼ inch so the point of the green piece is visible. Sew one side, press and then sew the other side.
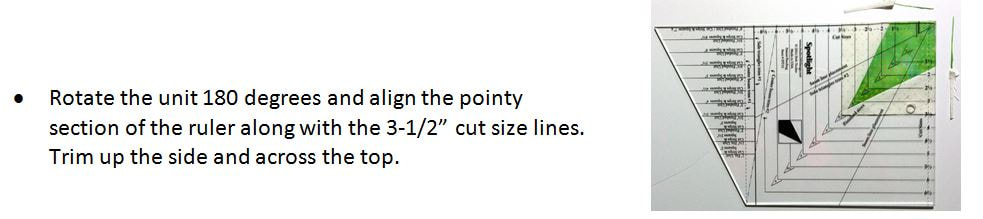
Trim Down Instructions
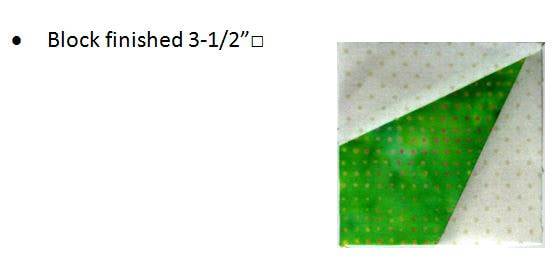
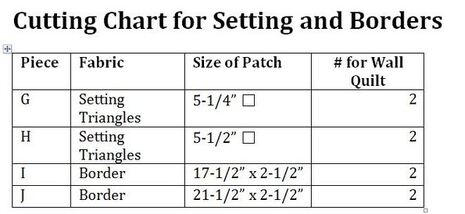
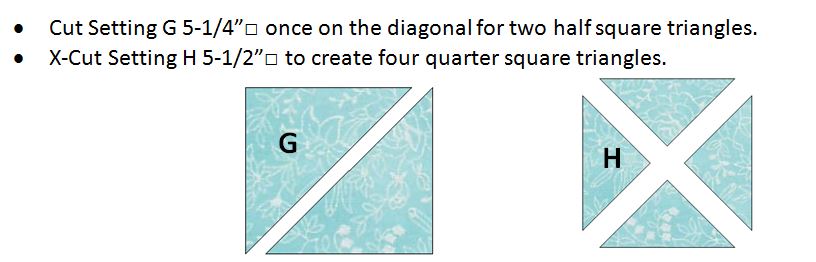
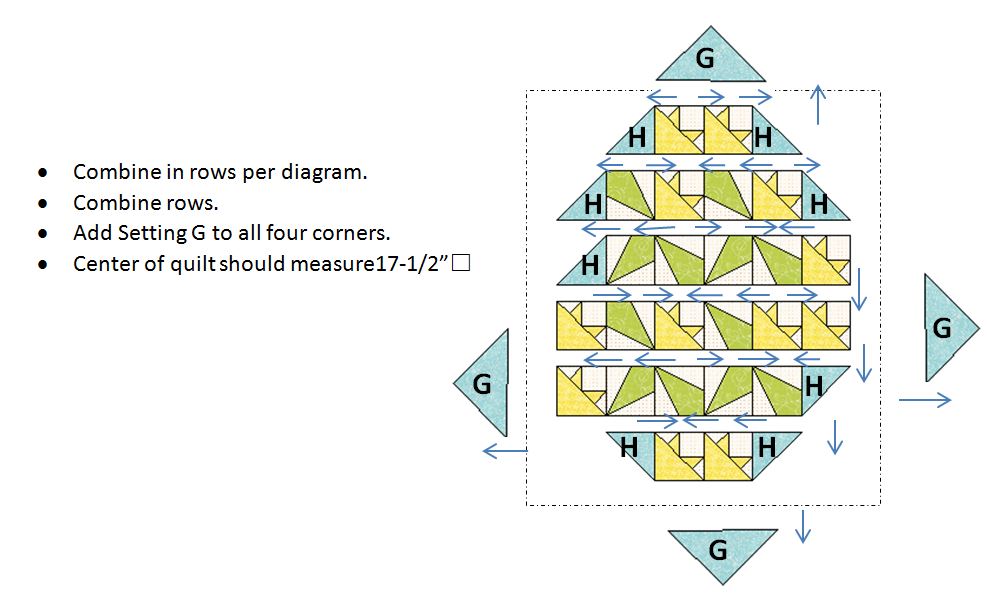
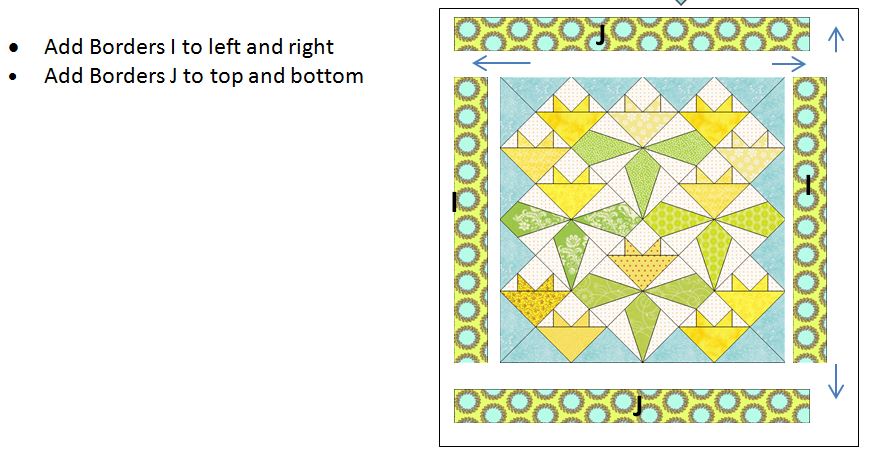
Finishing Instructions
Comments are closed.
|


Free guide available for newsletter subscribers


Kari SchellElectric Quilt Expert and Educator and Pattern Designer. Categories
All
Archives
July 2024
|


 RSS Feed