
|
Even though I love designing my own quilts, I also enjoy makes quilts by other designers. I am a member of Heritage Club at Four Season Quilt Shop in Maple Grove, MN. At each meeting we receive either a pattern from Jo Morton's "Jo's Little Women Club" or Pam Buda's "Prairie Women's Sewing Circle". During the Christmas break, I thought I would make up one of the patterns from the last year. The one I chose was Contrary Wife by Pam Buda. It gave me an opportunity to do some applique and I really liked her setting. For today's post, I thought I would walk you through my process including
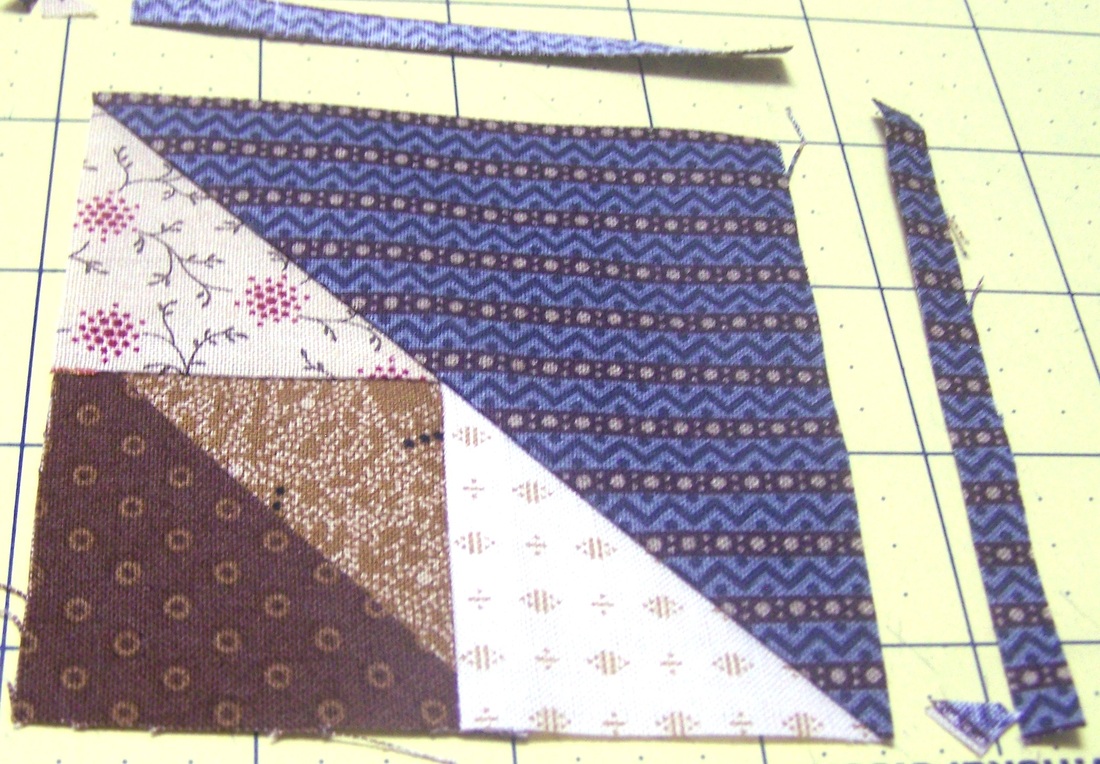
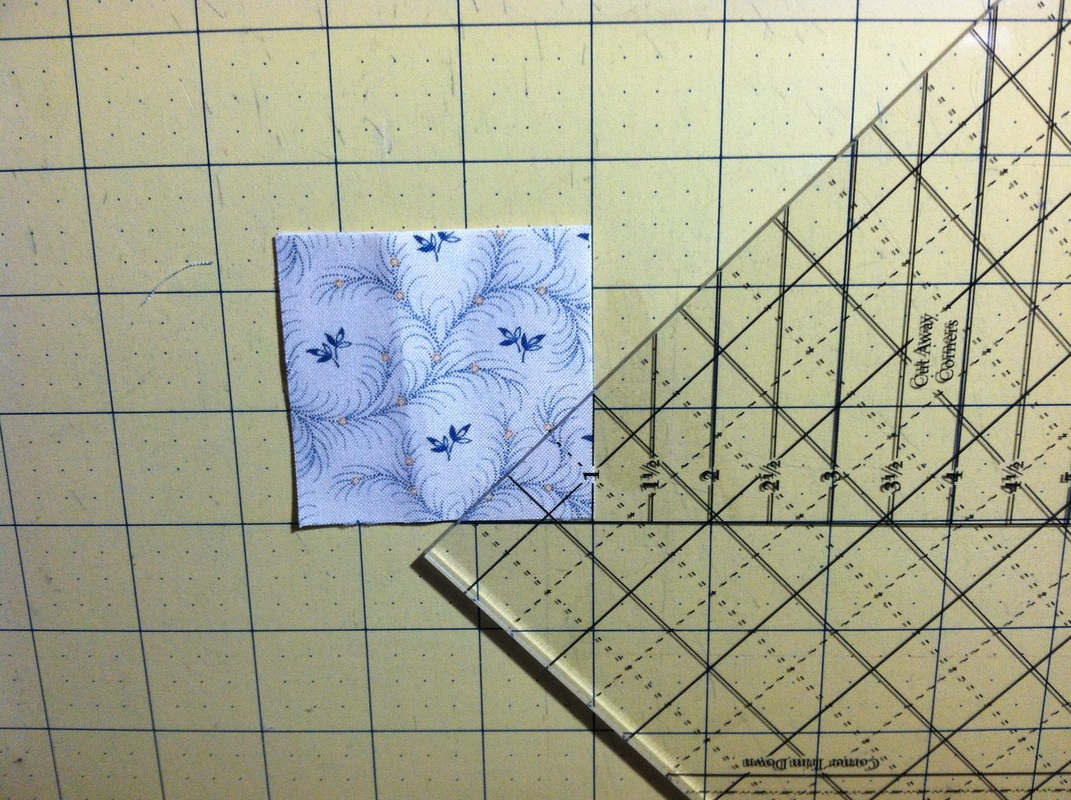
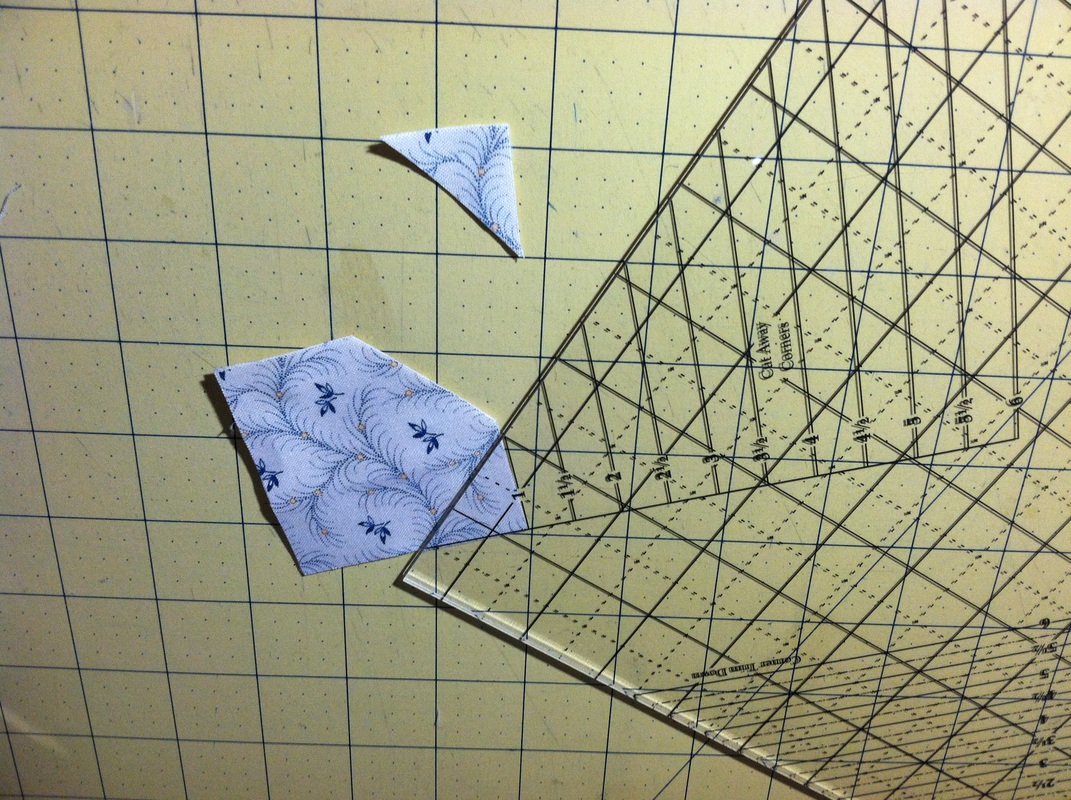
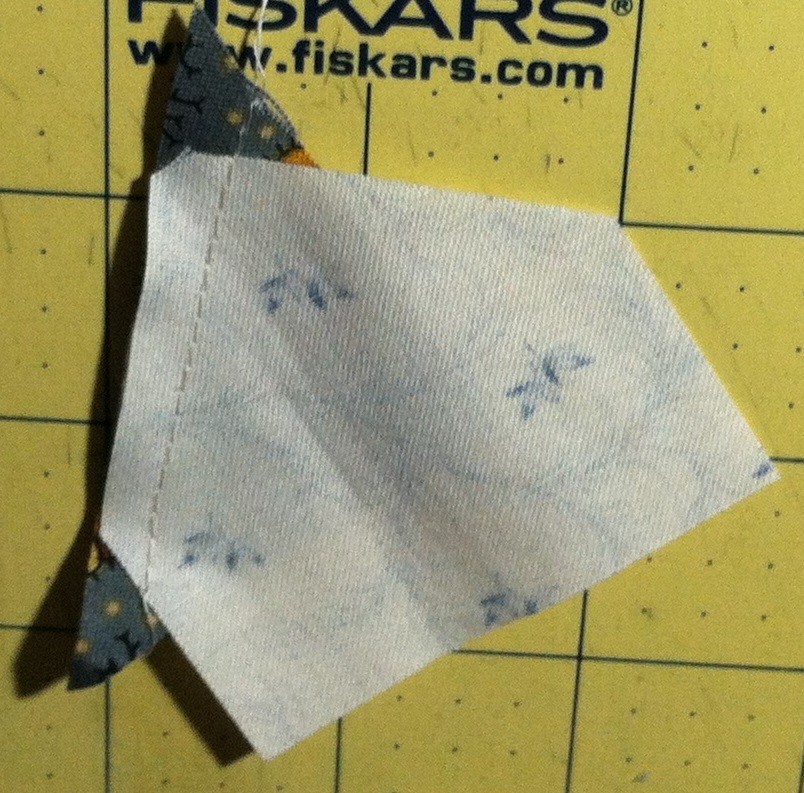
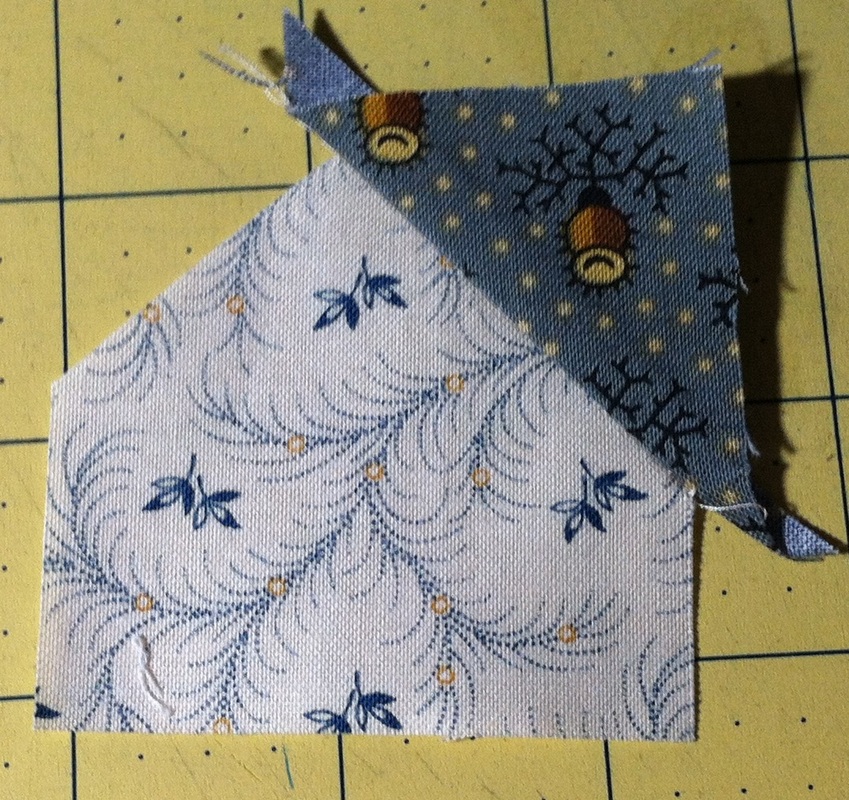
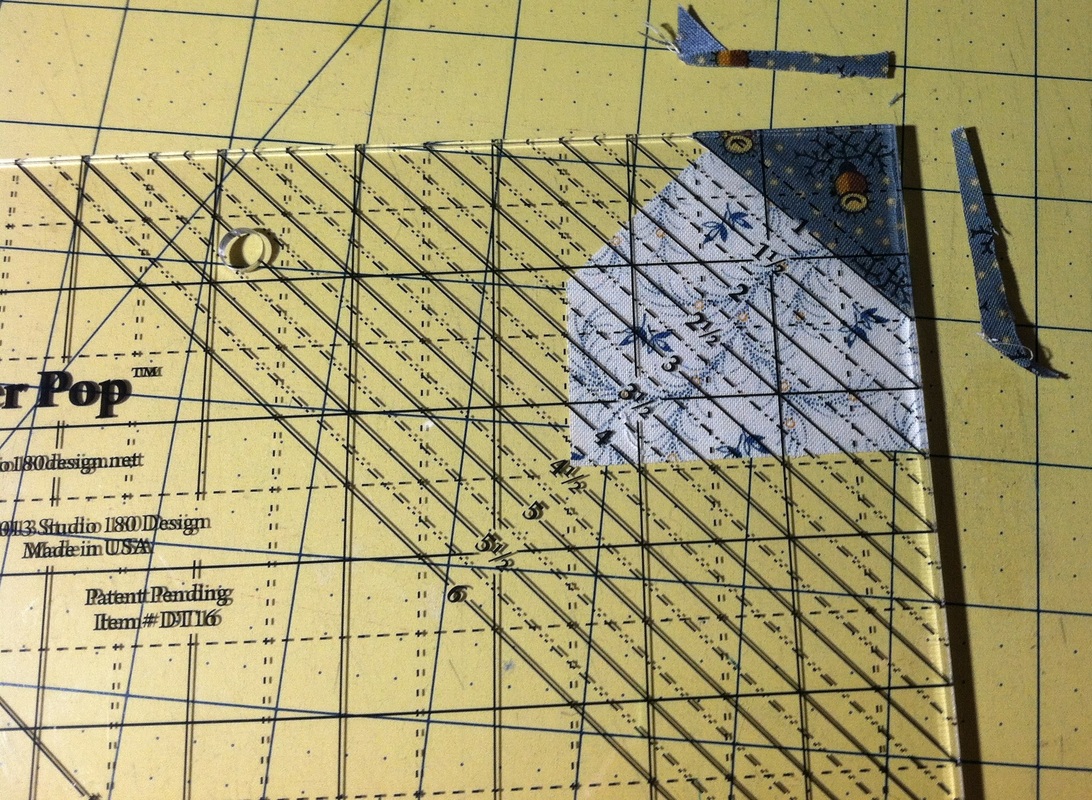
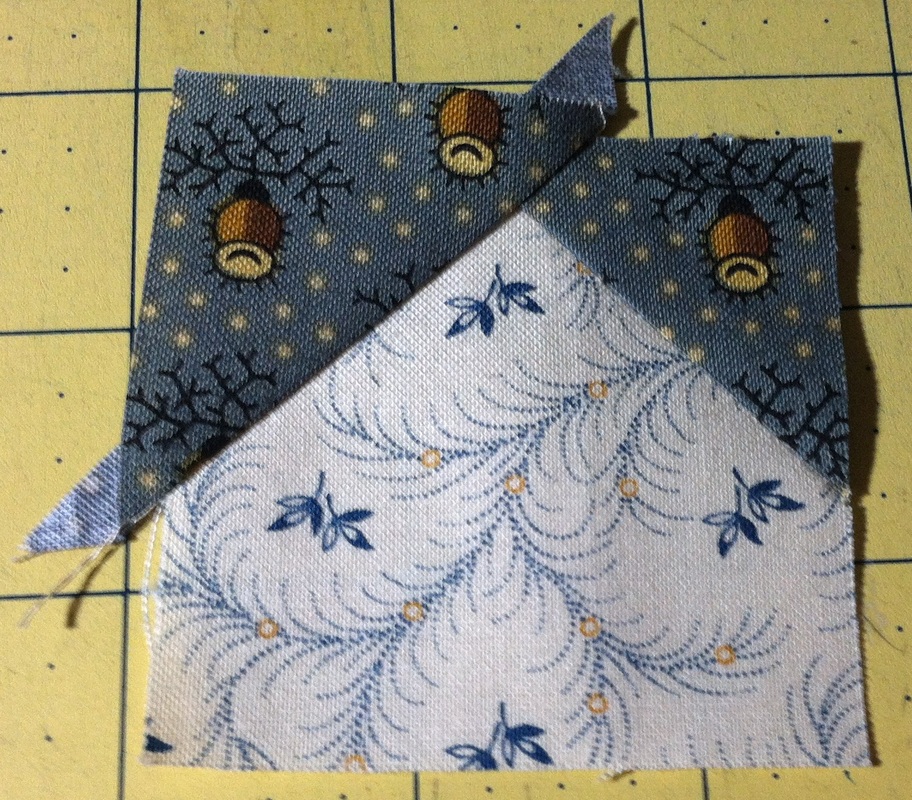
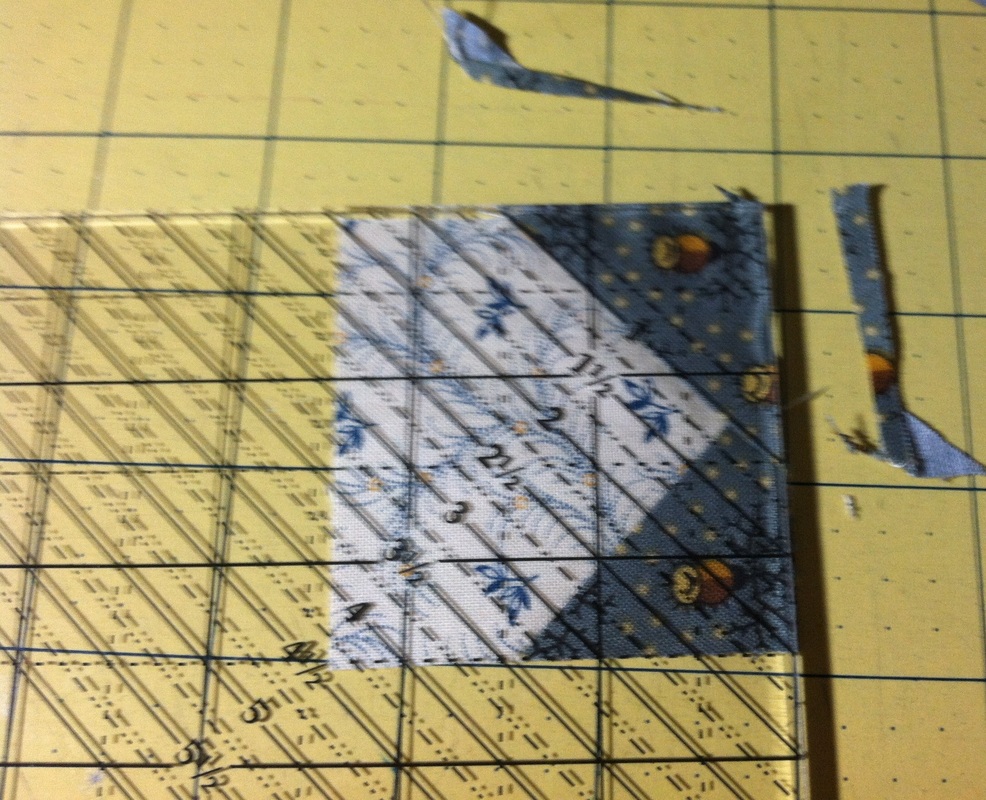
Tracing Applique Block in Art and StitchMy favorite applique technique is using freezer paper templates ironed to the back of fabric. The fabric is cut 1/4" around the templates and the seams are folded over and glued to the freezer paper template. I then use invisible thread and a blind hem stitch on my machine to attach the pieces to the background (you must be able to adjust both the stitch length and the stitch width for this to work well). I learned this technique in a class from Harriet Hargrave many years ago. I've taken numerous classes and tried many other applique methods over the years, but this one works the best for me. Which method of applique do you prefer? However, I digress. What I wanted to do, is cut out my freezer paper templates with the Silhouette Cameo. In order to create the pieces for cutting, I used Art and Stitch to draft the units and the block and then transferred to design to Silhouette Cameo. The follow video provides a demo of how I did this. Corner Pop Ruler DemonstrationFor the sashing, I thought I would try out the Corner Pop ruler by Deb Tucker's Studio 180 Design. The pattern called for folded corners and this ruler provides another way to better execute those corners. Let me share the steps with one of the units in the Contrary Wife quilt. 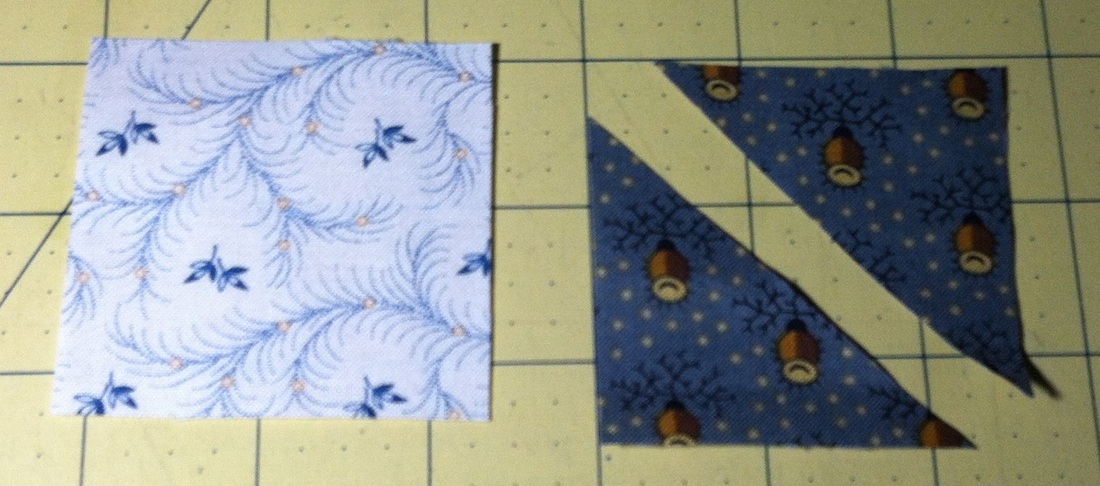 Cut background 2-1/2" x 2-1/2". Cut triangles (replacement for folded corners 2-1/4" x 2-1/4". Cut once on diagonal for two triangle units. (The measurements are included in the instructions for the Corner Pop ruler.)
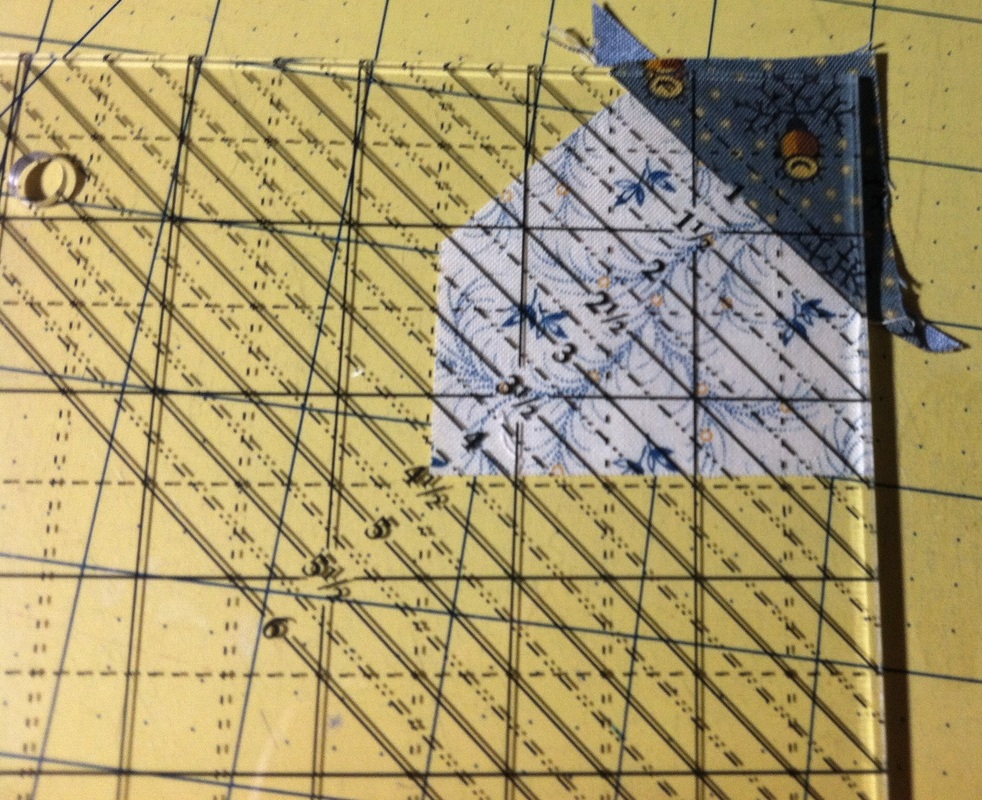 Matching up the 1" line on the corner trim down section of the ruler, trim the outside edges of the triangle.
 Finished unit is 2-1/2" x 2-1/2". How Did I Quilt This?I took a photo of my quilt top and brought it into Art and Stitch as a backdrop. 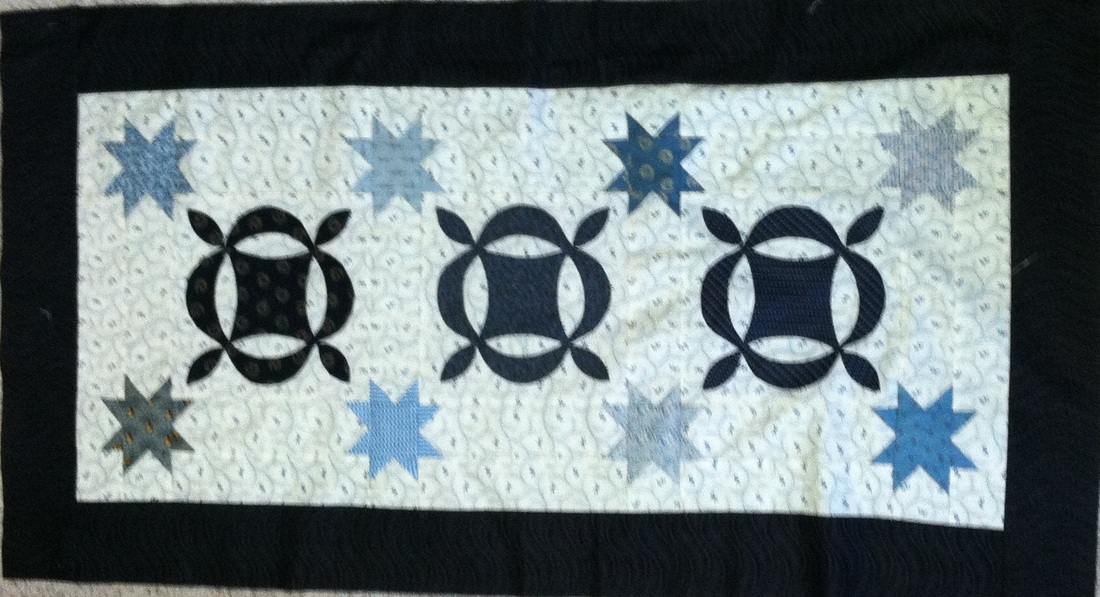 I found a sashing design that I had previously designed that worked really well (bowties). I aslo had a paisley point to point design that I could work around the star blocks. Then I just needed something for the center of the star blocks and and contrary wife applique. I just used the leaf from the applique and made a magic square. 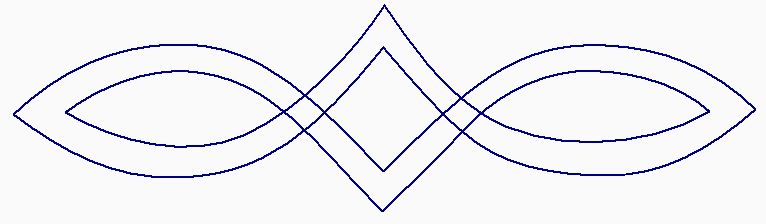 Bowtie design for sashing and borders.
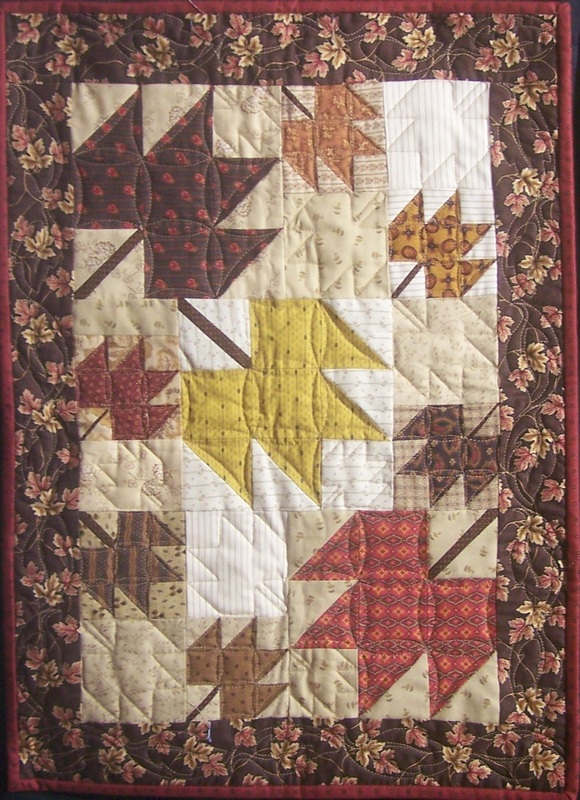
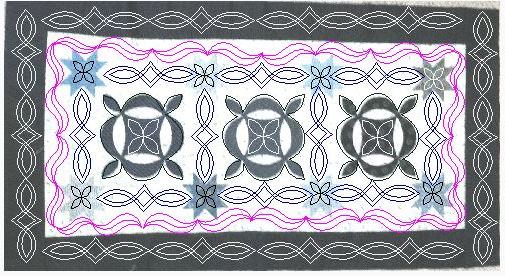 Contrary Wife Quilting Layout Here is the final quilt with a close-up of the quilting. 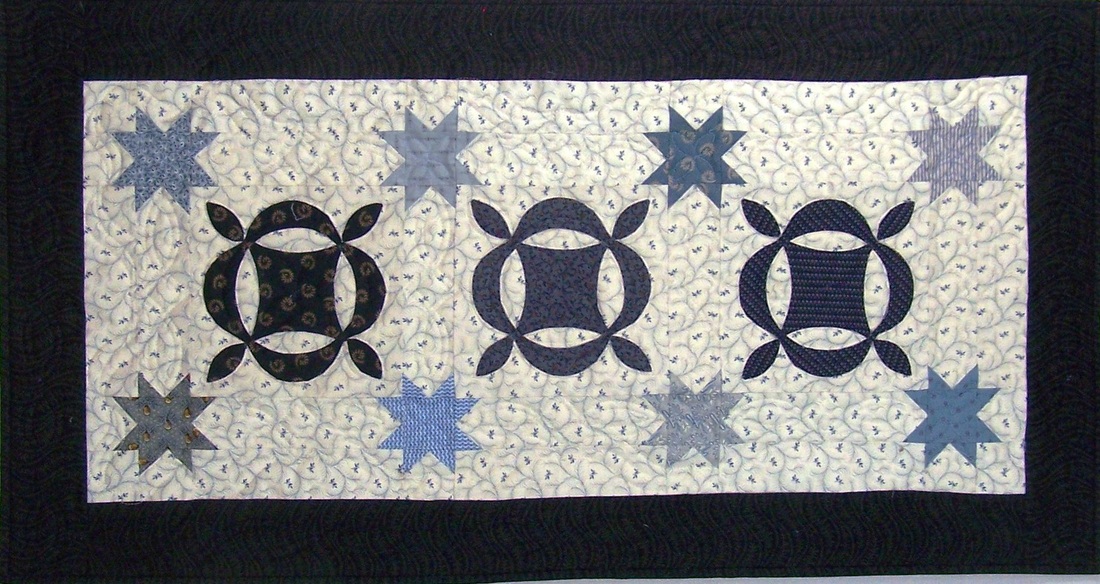 Contrary Wife Finished Quilt by Kari Schell 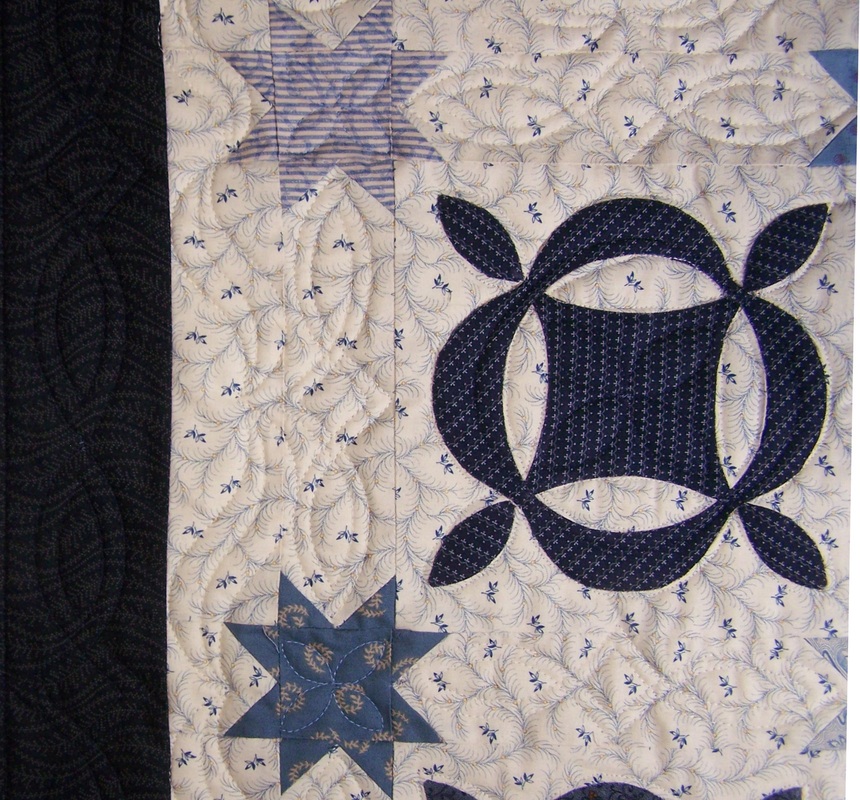 The quilt will be on display as part of the Heritage Club show at Four Season Quilts during the month of January. If you are in the area, please check it out. Happy quilting. Kari Sign up for my newsletter to stay current on what's happening in my studio and learn more quilting tips. As a thank you, I'll send you a FREE pattern for this small maple leaf quilt.
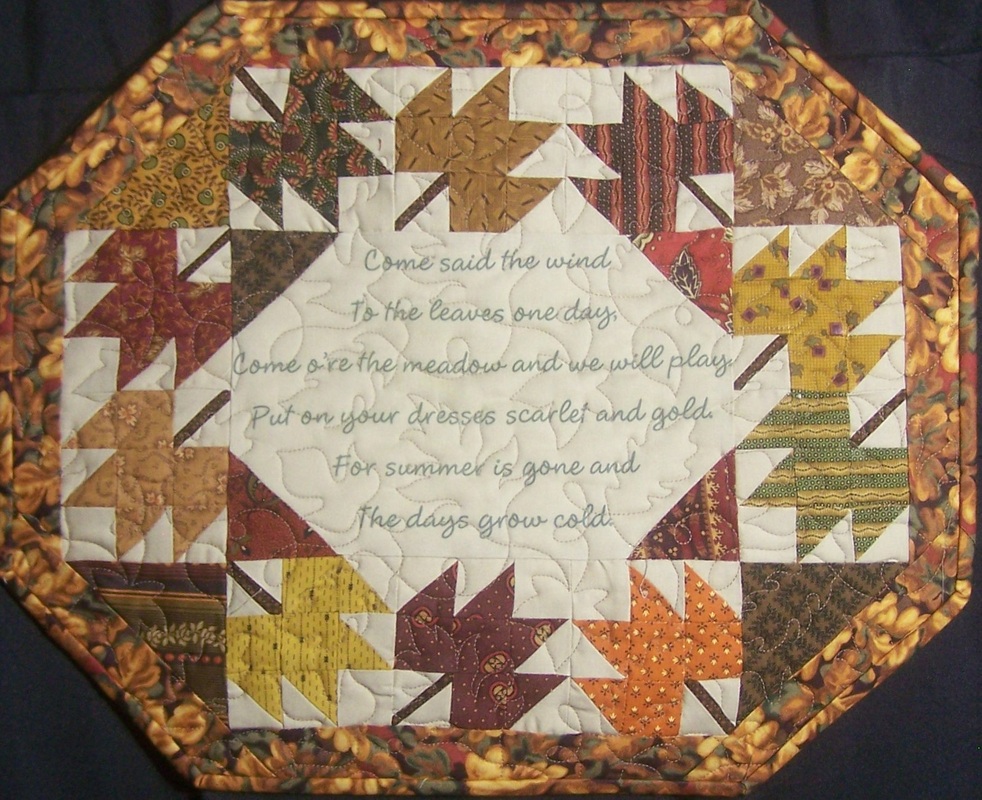
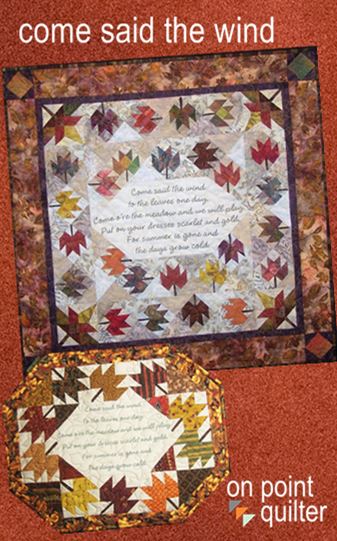
I am back!!!! Who would have thought that vestibular nueritis could take so long to heal. I particularly appreciated my physical therapists that specialize in balance/dizzyness issues. They not only had me working on basic balance and visual exercises, but gave me a number of items to work on to simulate some of my skating and ice dancing moves. Although I am not yet at 100%, I am functioning and am very thankful for that. Back to quilting. Fall is in the air and I am excited to promote my pattern "Come Said the Wind". The pattern is centered around a poem/old children's song. There are two sizes (both wall hangings). The smallest could also be used as a placemat. 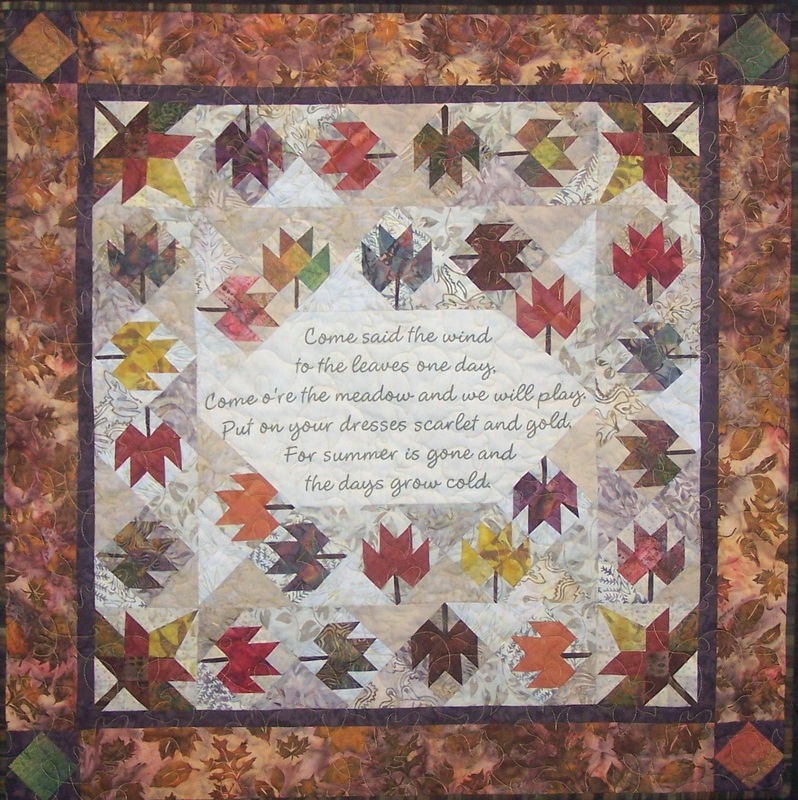
Come Said the Wind 33 x 33
Come Said the Wind 15 x 12
Do you prefer batiks or civil war for fall quilts? I couldn't decide so I needed to do one of each. The blocks in the quilt are "small" --- but really cute. The maple leaf finishes to 3 inch and the Sycamore leaf to 4-1/4 inch. However, don't be intimidated by the size. There are lots of tips to ensure successful piecing of the project. I provide instructions for using a number of specialty rulers/tools. These tools are optional. Instructions are also included for the traditional rulers. Optional Specialty Rulers: A number of people asked me how I created the center panel (with the poem). Instructions are in the pattern -- but I also wanted to provide a video. I also have a free handout explaining the technique. These free pdf files of the verse are also available for Come Said the Wind pattern.
Happy quilting. Kari Sign up for my newsletter to stay current on what's happening in my studio and learn more quilting tips. As a thank you, I'll send you a FREE pattern for this small maple leaf quilt.
A few weeks ago I released my latest pattern -- Sun Rays. 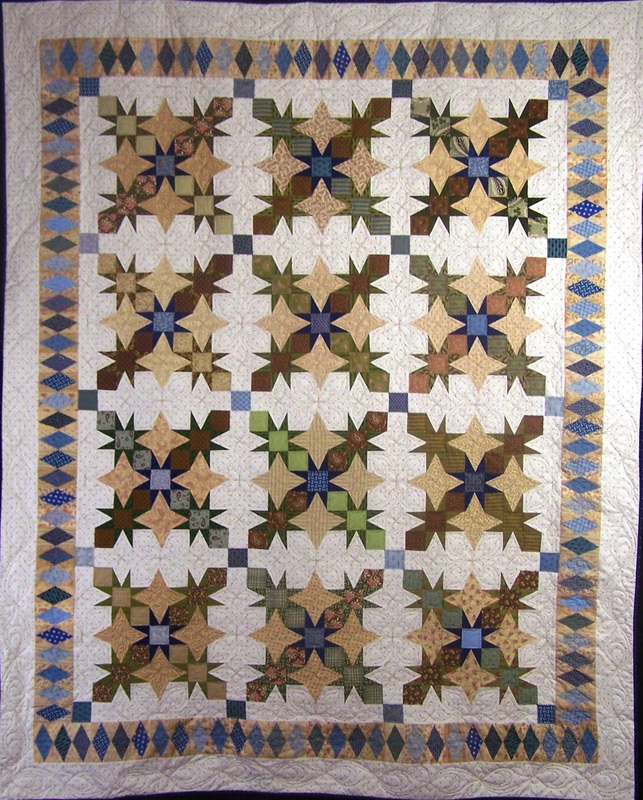
The pattern looks a lot more complicated to piece than it actually is. I like to use tools that involve over-sized piecing and this block makes use of two of the rulers from Deb Tucker's Studio 180 Design -- the V Block Trimmer™ and the Diamond Rects™ tool. For this weeks post, I wanted to focus on the Diamond Rects™ units. They look really tricky, but are really a breeze to complete with the suggested ruler. 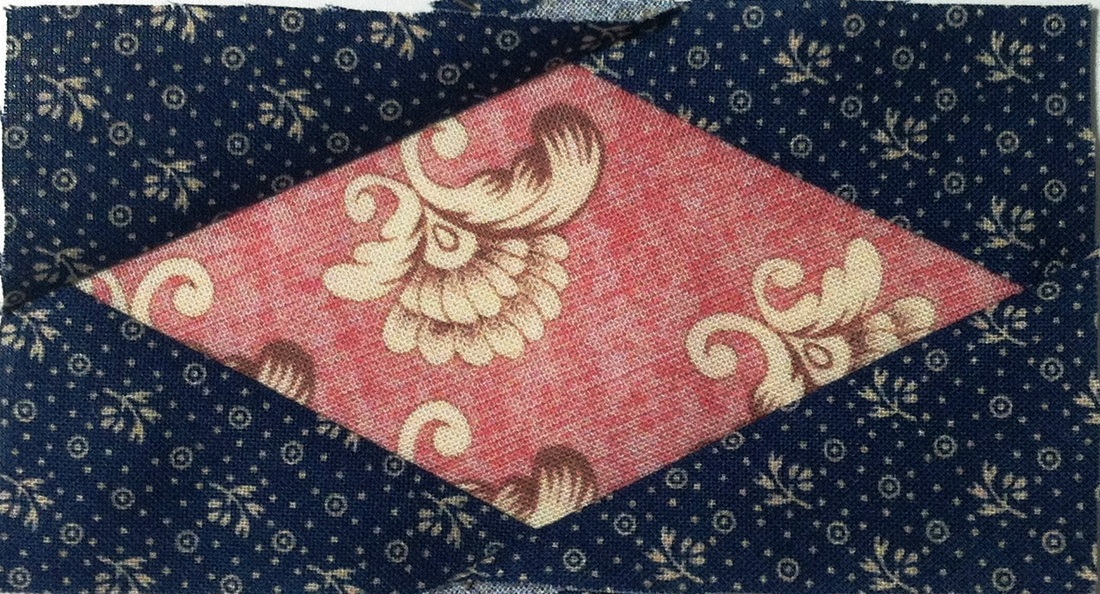
The diamonds, the corners and the final trim downs are all done with one ruler. 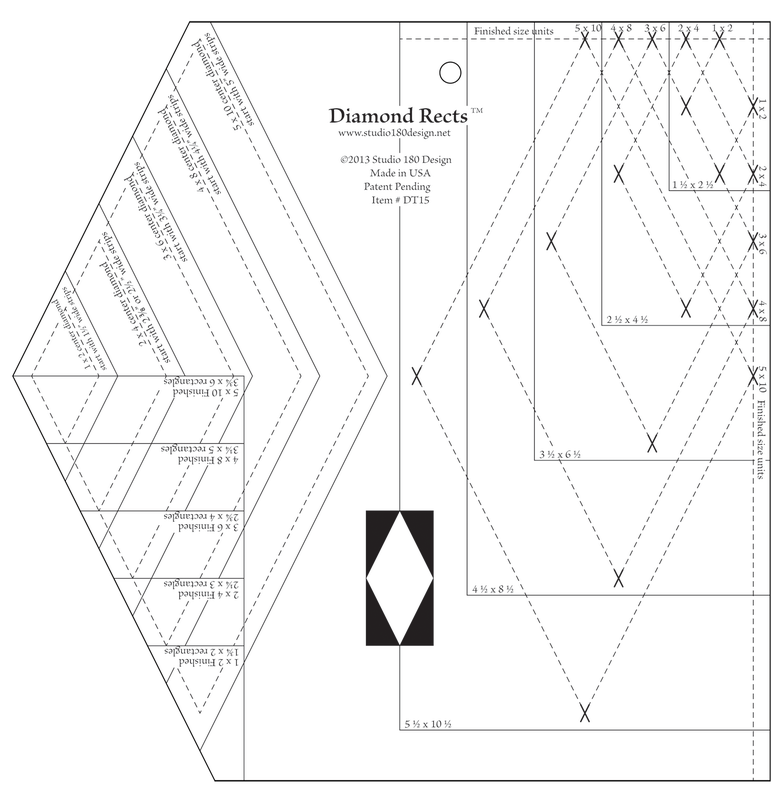
I have been waiting for Deb Tucker to come out with a video -- but this week I thought -- "Why not try one of my own?" This is my first attempt at videoing myself. There were a number of stops and starts as I went to the sewing machine. But overall, I was pleased with the attempt. Take a look. If you are interested in the pattern for this quilt, it is now available in my store. There are four size options: Wall Hanging (34” x 34”); Lap (66” x 82”); Full (82” x 98”); Queen (98” x 98”) 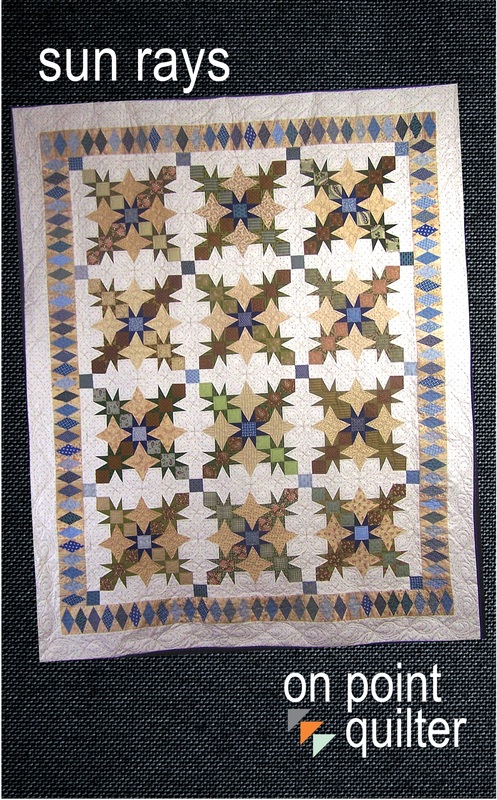
I'm currently working on the wall hanging sized quilt using a new line of Marcus Brother's fabrics - "Softly Spoken" by Harriet Hargrave. The unit in the video is a sneak peak. I am a huge fan of Harriet. Her first book taught me how to machine quilt my first queen sized quilt and I've taken a number of classes from her over the years. It is exciting to see her branch into fabric design. Happy quilting. Kari Sign up for my newsletter to stay current on what's happening in my studio and learn more quilting tips. As a thank you, I'll send you a FREE pattern for this small maple leaf quilt.
I'm back to working on Bonnie Hunter's Celtic Solstice mystery. In addition to the units, I took time to play in EQ. I came up with some design potentials for the finished project -- one of which I will share at the bottom of this post. I find playing with the possibilities reenergizes me to keep going on the project. It is a bit like putting together a jigsaw puzzle. You have all the pieces (maybe), but don't quite know where they all go. The block this week was a variation on a shaded four patch. I chose to use my Tucker Trimmer 1 for this unit. I started by finding 100 neutrals that we at least 2 x 3 (but not more than 2-1/2 x 3-1/2). No need to resize them at this point. 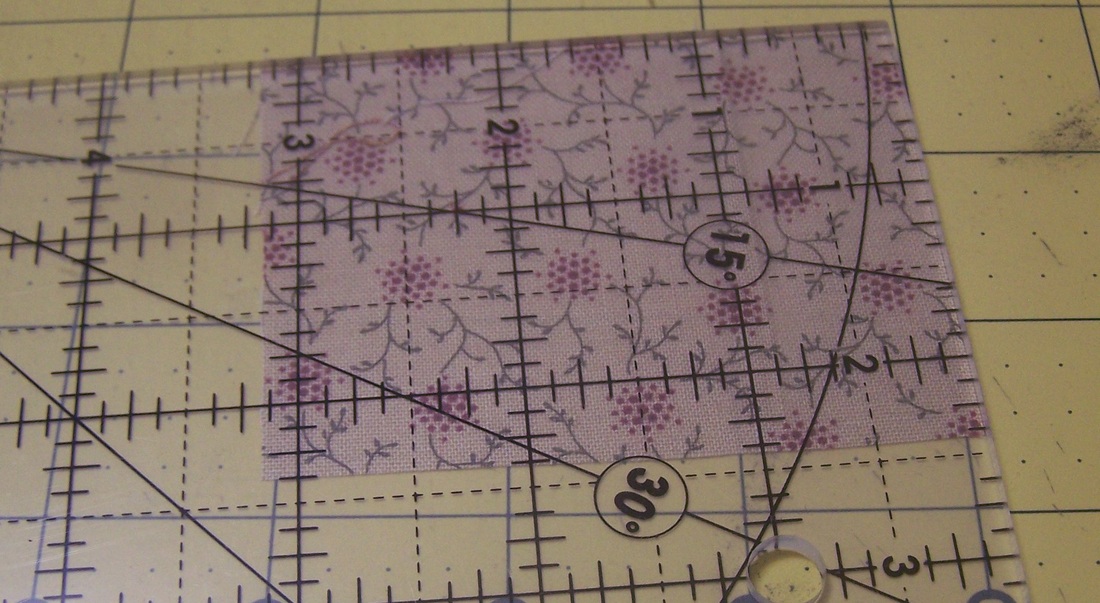
I sewed each one to the right of a 2" half square triangle from Part 3 - lining up the bottoms of the pieces. 
I took two of the units and placed them right sides together. There should be about 1/2 inches between the corners of the gold half square triangles. 
After sewing the pieces together, finger press the midpoint between the half square triangles and clip down to seam allowance. 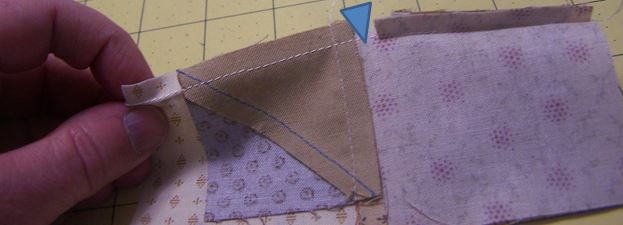
Press toward neutral. The clip will make this very easy to do. 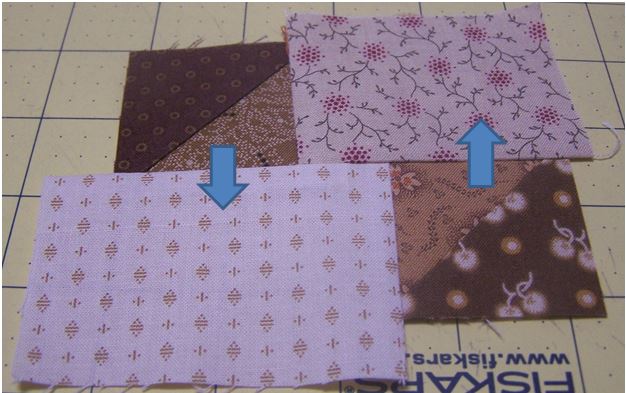
Center on a 4 x 5 inch blue piece. Draw 45 degree angle (this is parallel to the blue seams on the half square triangles). The line needs to go through the seam intersections of the half square triangles. 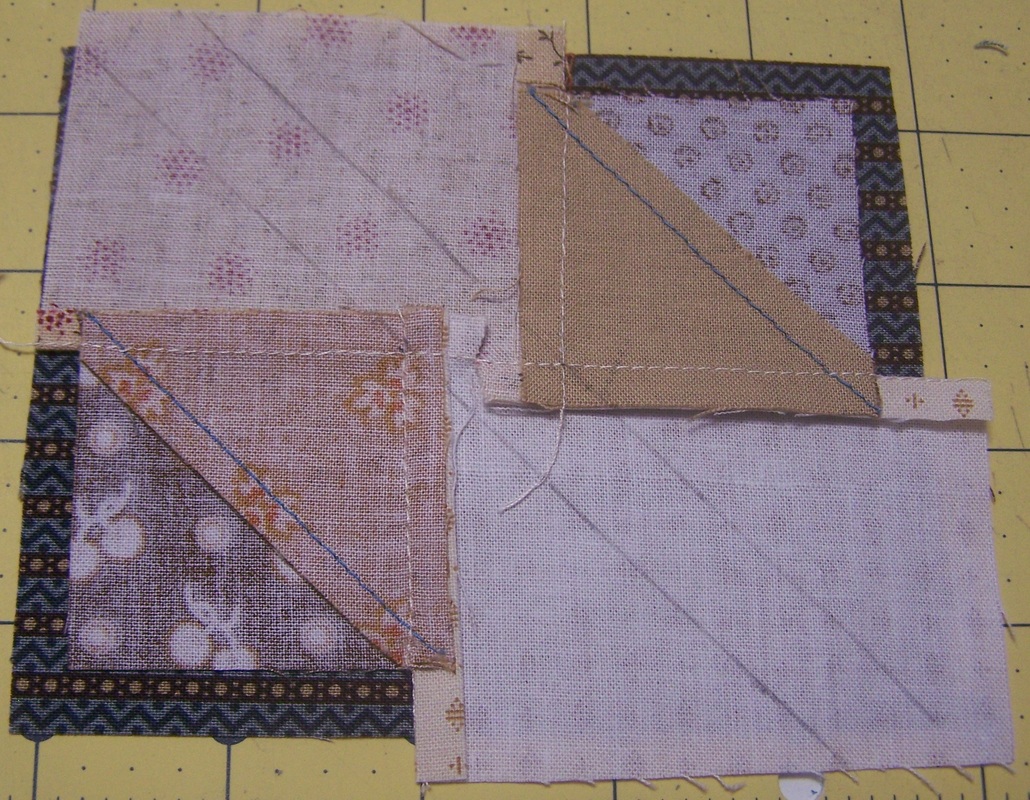
Sew on drawn lines and cut 1/4" beyond the lines. 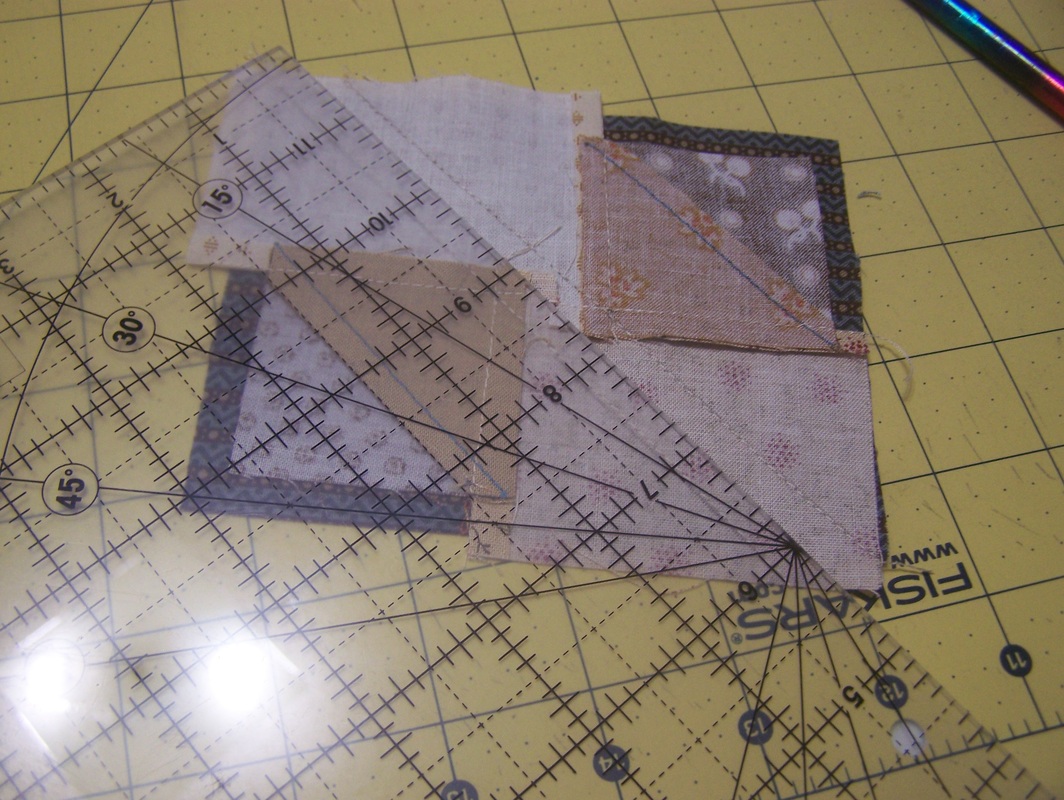
Press toward the blue triangles. 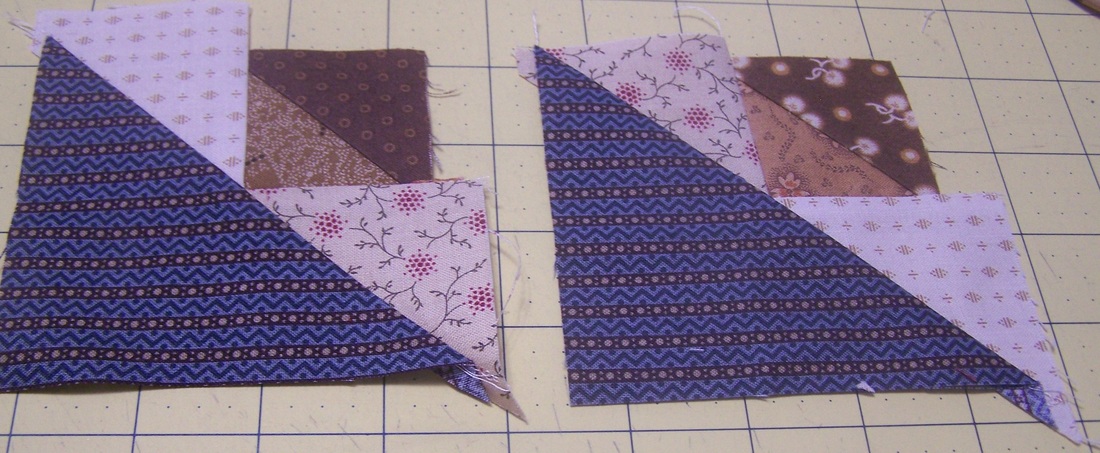
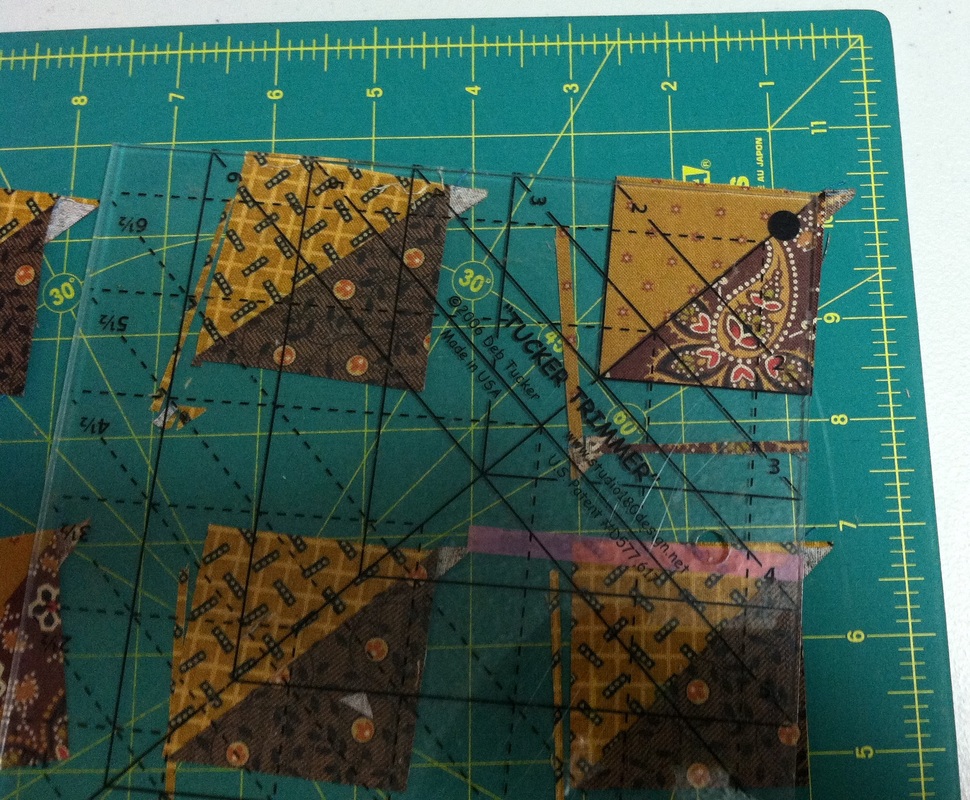
Use your Tucker Trimmer to trim the units to 3-1/2" x 3-1/2". Use the diagonal lines on the ruler to help with placement. 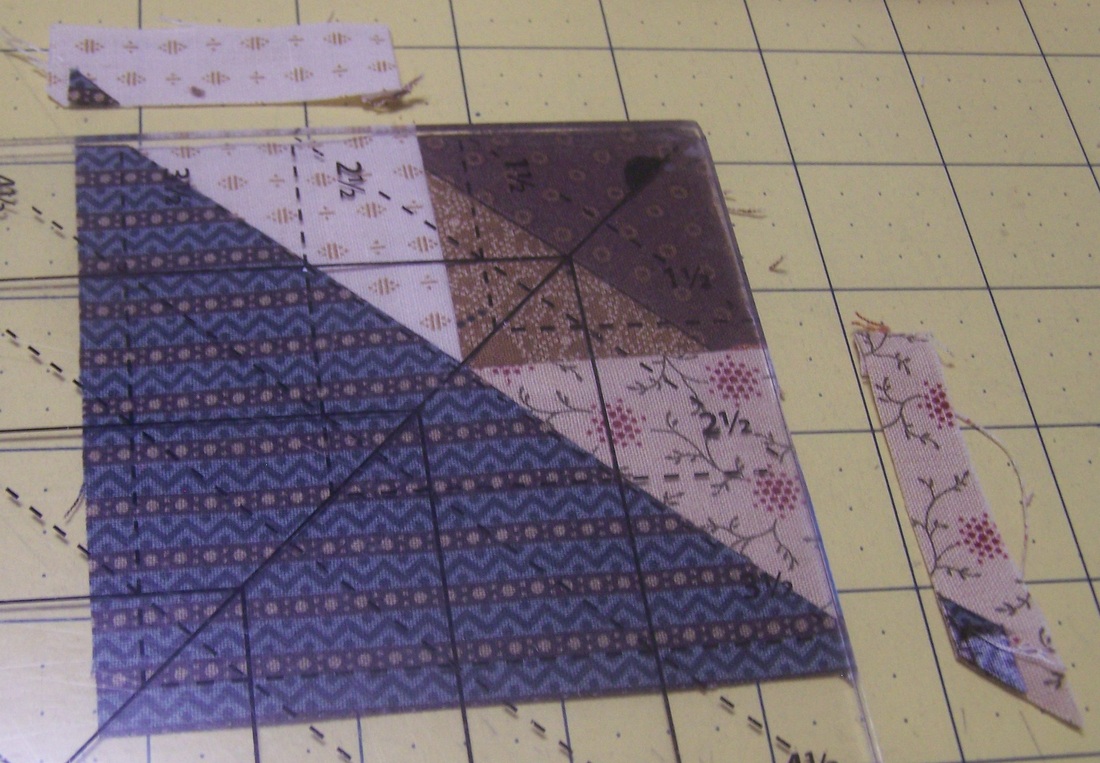
My finished unit. 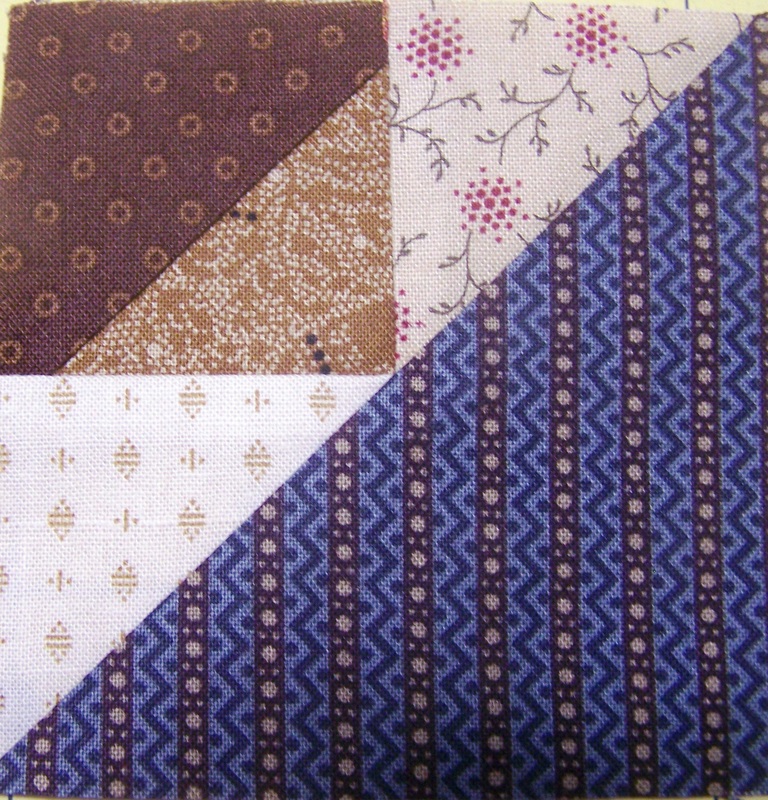
Now for my playing with the various Celtic Solstice units in EQ. 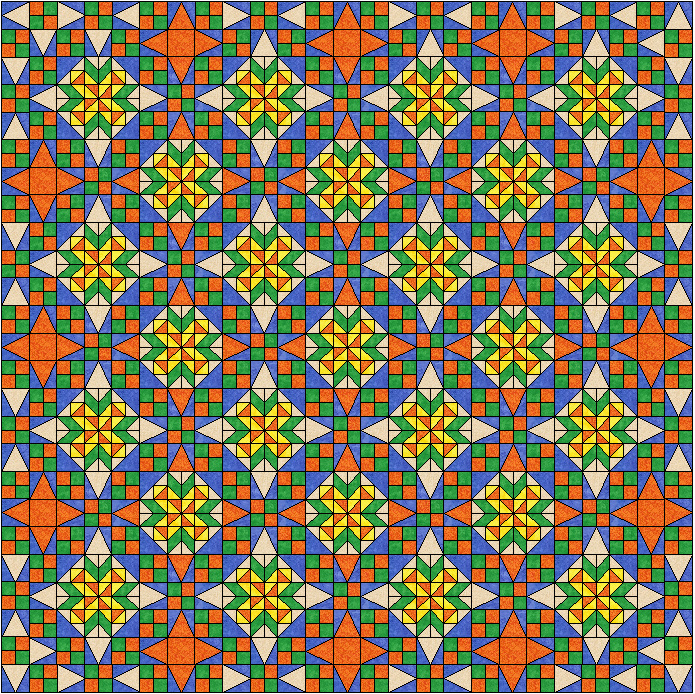
I'm pretty sure this isn't correct as the # of units don't add up -- but definitely a fun option.
Happy quilting. Kari Schell On Point Quilter This has been a busy week. I finally found some time to work on part 3 tonight. I thought I would share how I am doing the pinwheels. 
Pinwheel Block 3-1/2" x 3-1/2"
I knew that I wanted to start with oversized half square triangles that I could trim down to 2-1/2". So I started with 100 2-1/2" squares of brown (Bonnie's orange) and 100 2-1/2" squares of yellow/orange (Bonnie's yellow). Someone in an earlier post mentioned the Angler. I remembered that I had one -- but hadn't used it in years. When I had used it in the past I found I had a little too much variation in my piecing. However since I was making oversized units, I decided it was worth trying again. 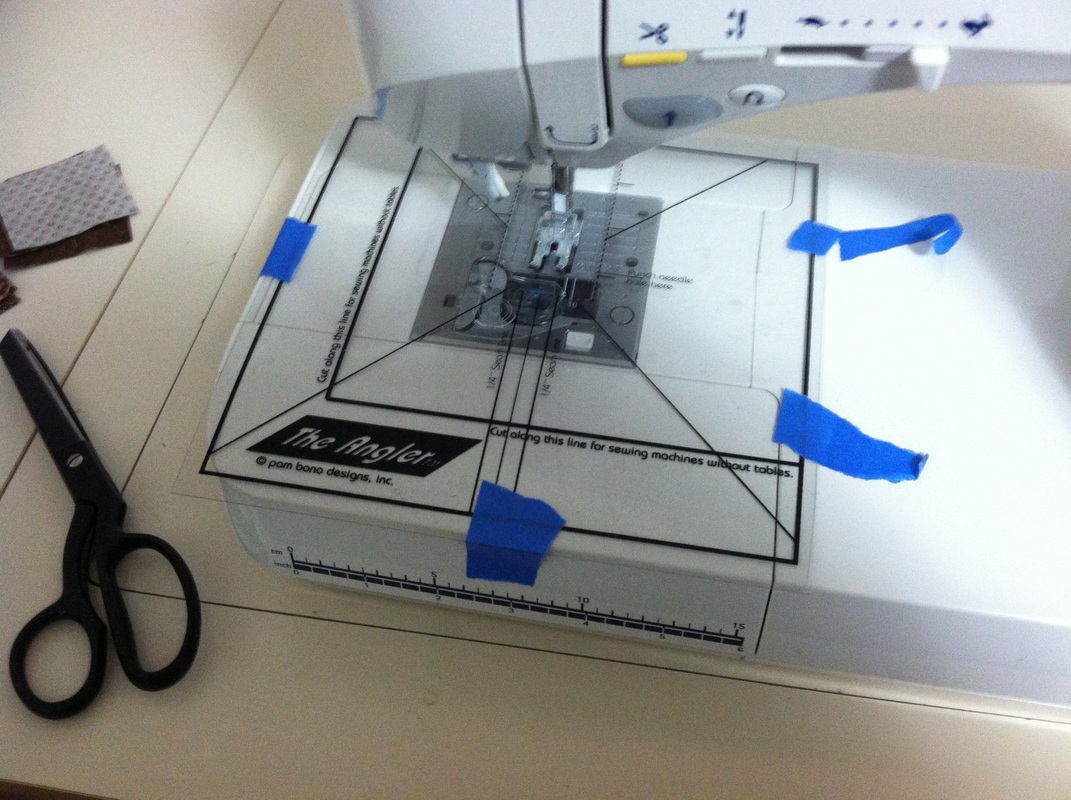
Angler taped to machine. Line up the center line with the needle on your machine.
The corner of your half square triangle units stays lined up with the line on the right. 
Arrow points to line up of corner with the line on the right.
I sew 10 or 20 units at a time. Once I've sewed one side, I don't clip threads. I just feed the entire set through again -- still lining up the corner with the line on the right. 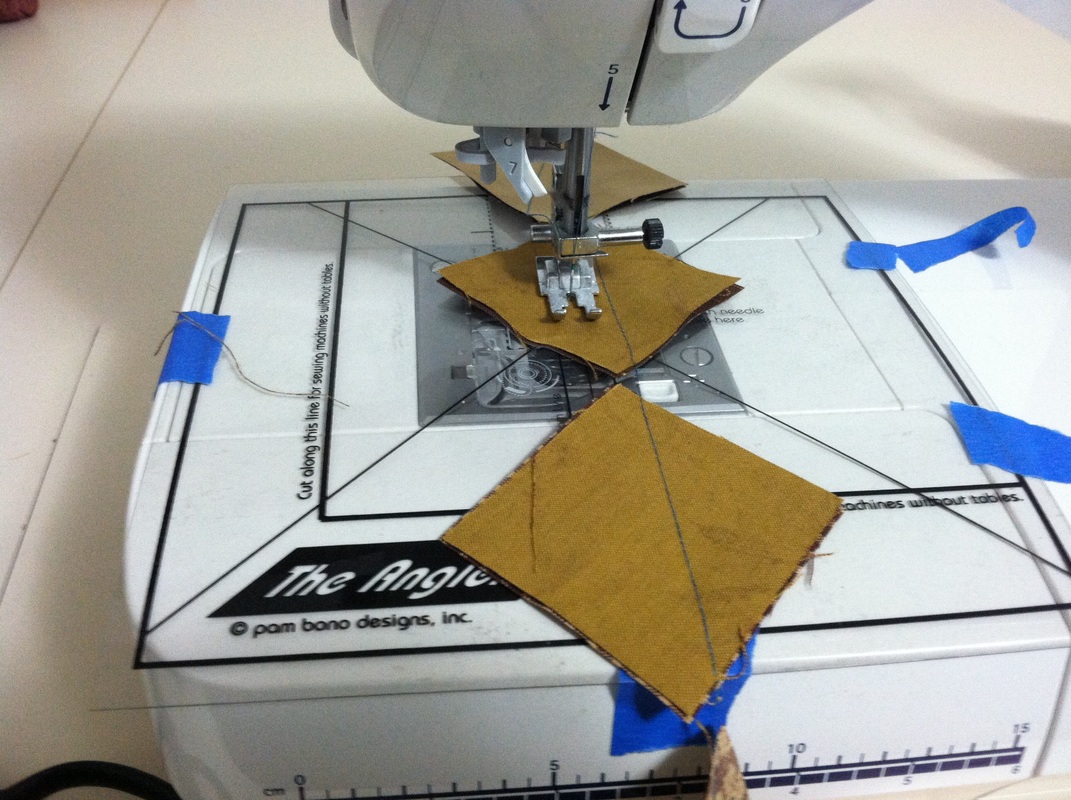
I then cut the units on the diagonal and press toward the brown. I then put nine units on a rotating mat. (I actually have removed the "rotating disk on this mat".) 
Using the Tucker Trimmer from Studio 180 Designs, I trim the top and right edges. 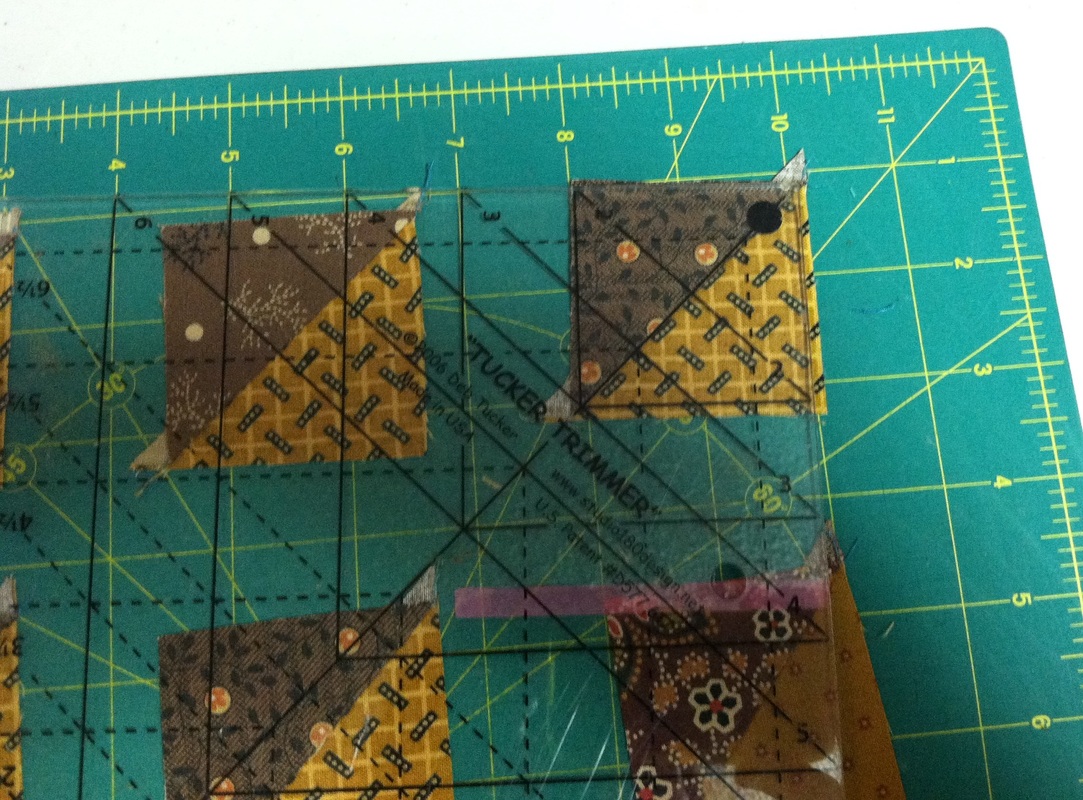
Once I've trimmed all nine units, I rotate the board 180 degrees and trim the other sides so the final unit measures 2" x 2". 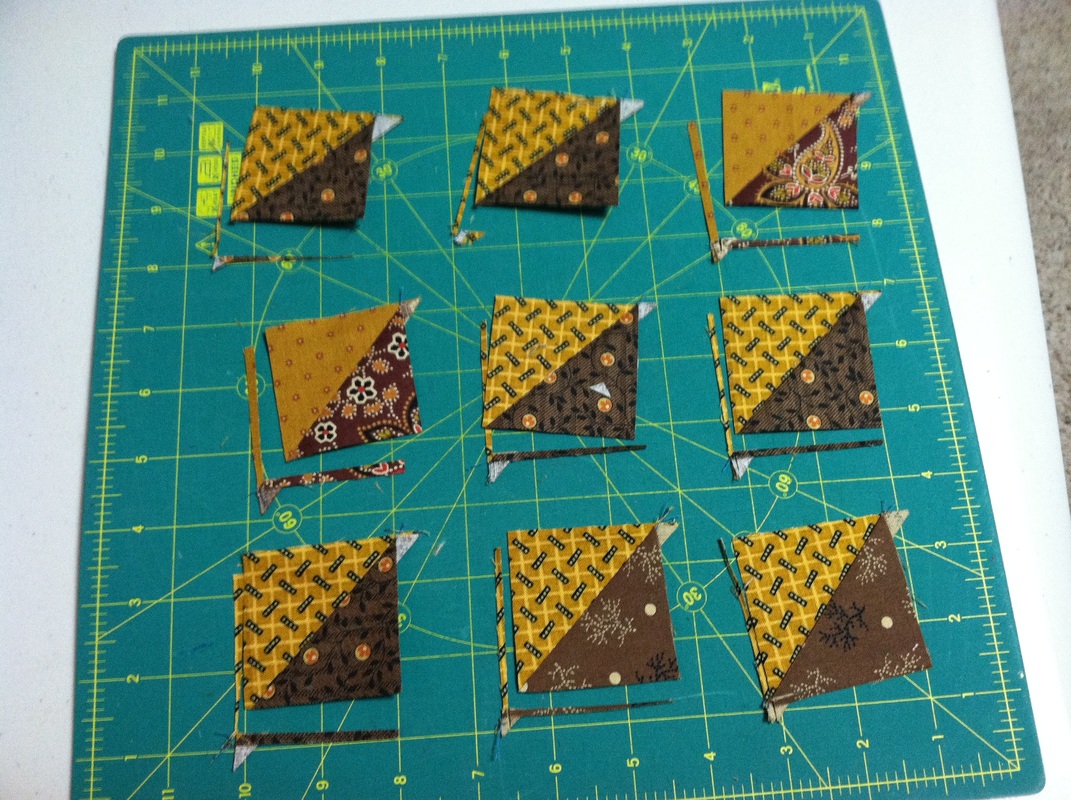
I press the pinwheels with a split seam. 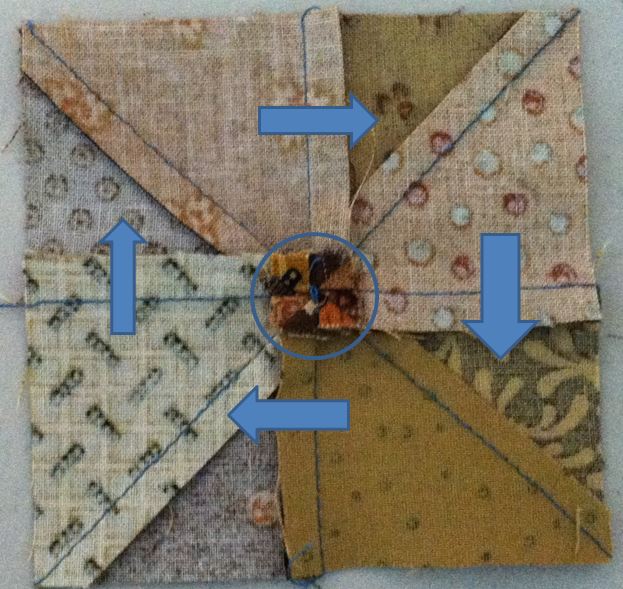
Arrows show pressing direction for split seam. Notice the four patch that is formed in the center.
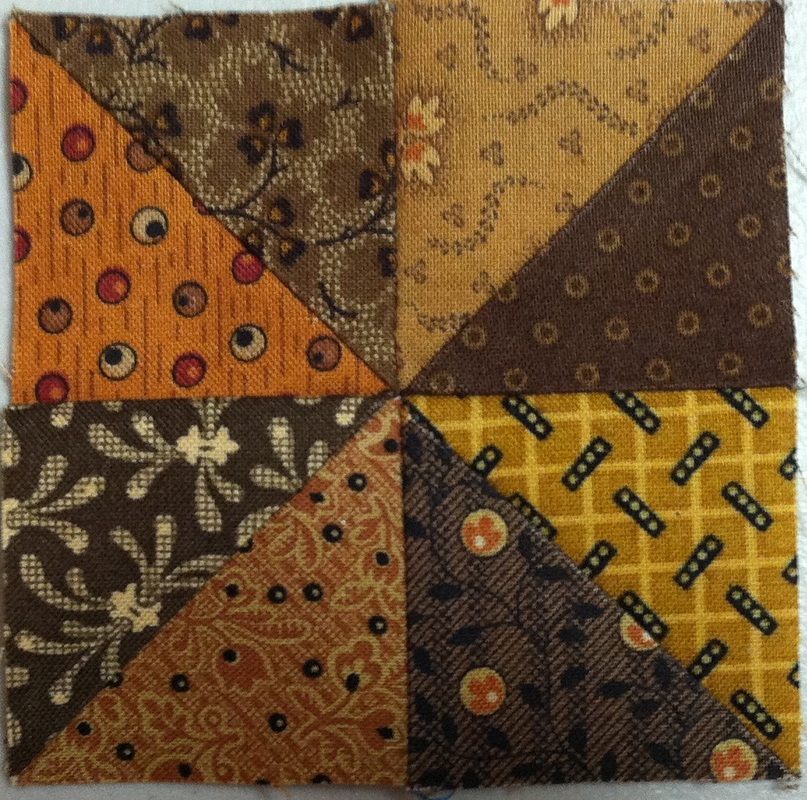
Finished pinwheel
I'm not sure how many blocks I will get done this week. I have a lot of family arriving on Friday and still haven't purchased my tree or started baking. I really admire those of you that are keeping up.
Happy Quilting. Kari Schell On Point Quilter |


Free guide available for newsletter subscribers


Kari SchellElectric Quilt Expert and Educator and Pattern Designer. Categories
All
Archives
July 2024
|


 RSS Feed