
|
Swimming Paper Pieced Block by Kari Schell Swimming has been a sport at every Summer Olympics. It is one of my favorite to watch. I especially enjoy the synchronized swimming event. Today's block was inspired by the Snails Trail quilt block. I incorporate two of these blocks in the bottom half of the quilt to give the illusion of stroking. Click here to purchase the block pattern for paper piecing along with the circle for applique. (Note that the free download period has ended.) Pattern includes over-sized cutting instructions and piecing diagram. Please make sure to verify that you are printing actual size (no scaling). In your options you may need to uncheck "print to page". Click here to purchase other block patterns. As a reminder, each day during the Olympics I will provide a free block for the quilt. The instructions for each block will be downloadable for 24 hours. Check in each day to get all the patterns at no charge. If you miss a pattern, you may purchase it in my store. Here is what the layout looks like with the five blocks provided to date. There will be 22 different blocks in the quilt (with a few blocks used more than once). I still haven't decided on the sashing color. I am waiting for more of my blocks to be completed and potentially a trip to the quilt store. 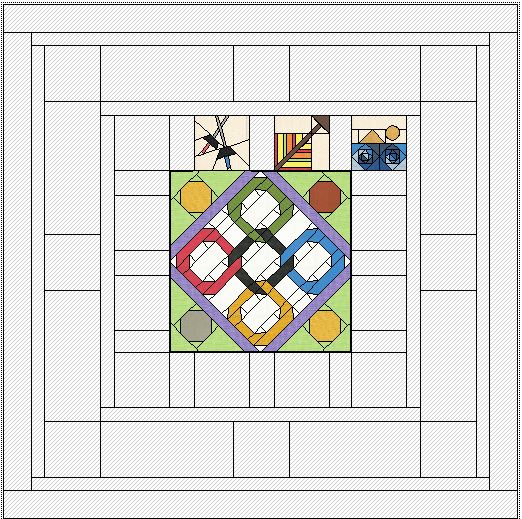 Summer Games Layout with Blocks Provided to Date Drafting Swimming Block Using Electric Quilt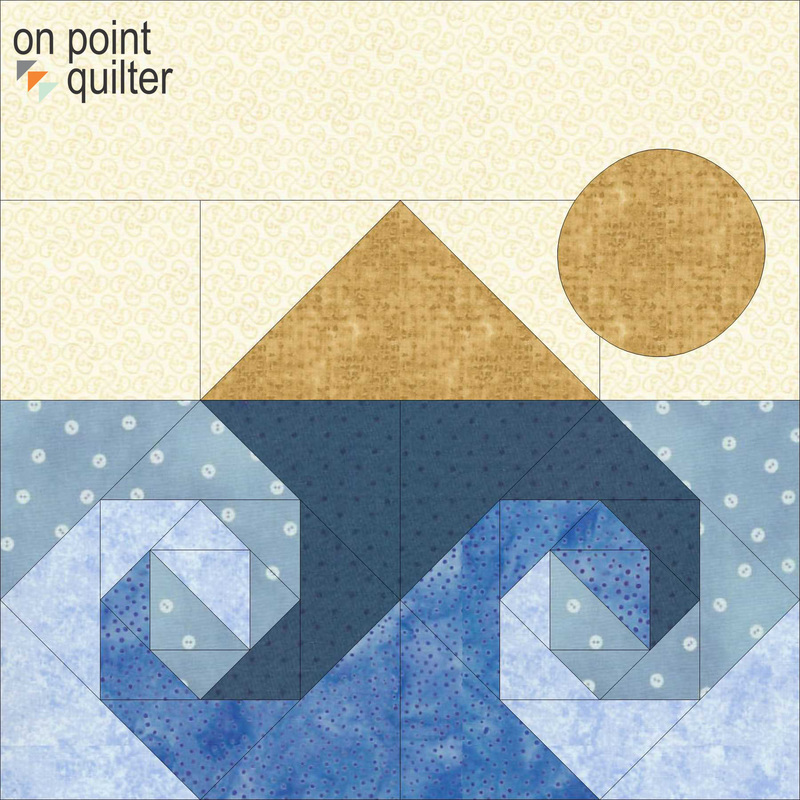 Swimming EQ Block by Kari Schell Block>New Block>Easy Draw Plus Patch Draw Import Image for Tracing in the Tracing Image tab. Easy Draw Tab Settings Block Width and Height: 8 x 8 Snaps: 48 x 48 Snapping Options: Snap to Grid Draw Lines that are may be snapped to grid points (see image below). 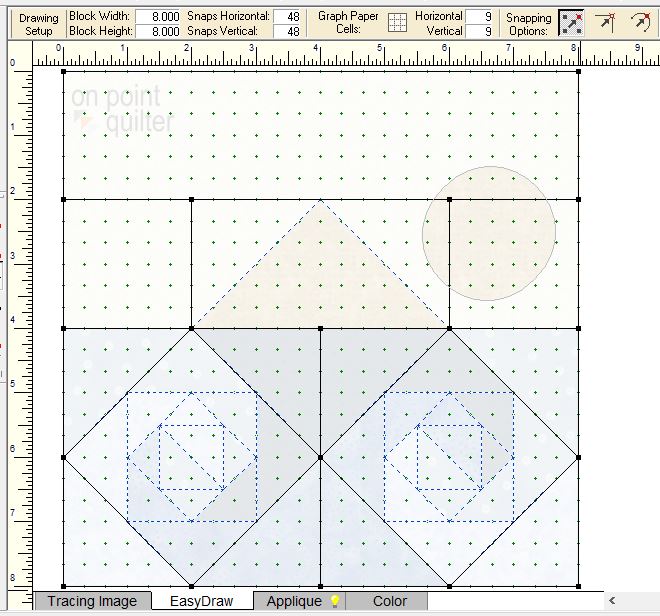 Electric Quilt Sectioning and first lines on Snails Trail blocks. Change Snapping Options: Snap to Nodes only. Select line segments and click on the red dot with the Shape tool. Select Half for to add nodes at the mid-point of each line that needs to be divided. Use the Line tool to draw the lines (connecting the nodes). Continue subdividing and connecting the nodes to complete the block. 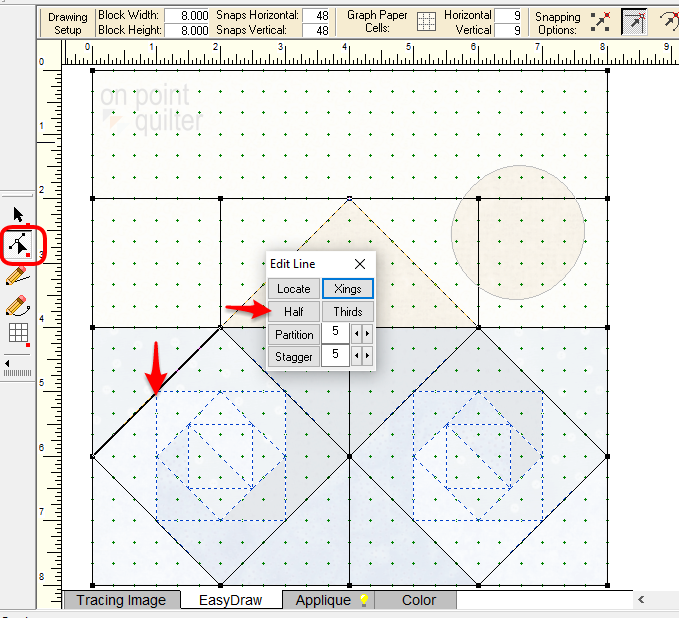 Subdividing lines in Electric Quilt Select the Applique tab. Select the Oval tool and draw the circle for the head. Color. Add to Sketchbook. Save. 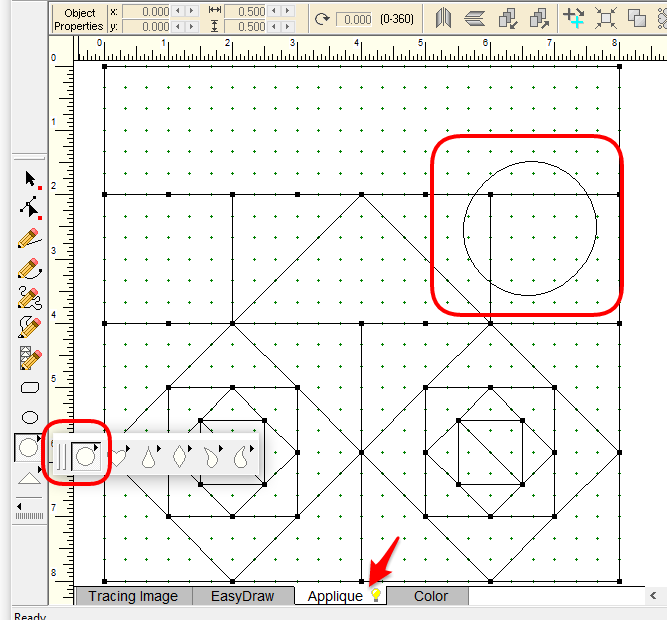 Adding an Applique Head in Electric Quilt
Lilia
8/8/2016 10:32:53 am
That was very helpful Kari - it's nice to put the blocks in as I go.
Jane
8/8/2016 11:16:31 am
It has been fun drafting these blocks in EQ.
Kari
8/8/2016 11:28:40 am
I am not planning to add facial features -- but you certainly could do that on your own block. Would you do it by hand or by machine?
Vicki Gentzell
8/8/2016 04:42:31 pm
I cannot access Block 4
Lilia
8/8/2016 04:56:04 pm
Vicki - today's block is block 5. You have to pick up the block on the day it is presented or you have to purchase it. It's only free for the one day.
Jill Voyles
8/8/2016 07:16:03 pm
You lost me on block 5 when you say Select line segments and click on the red dot with the Shapes tool. --> Select Half for to add nodes at the mid-point of each line that needs to be divided <-- I clicked on Block | Edit, where I found the Edit Line tool that you show popped up on your diagram. I selected Half, but I couldn't get the line to line up on the 4th part of the square. I tried a second time and it kept trying to split the the line in half where your vertical red line is pointing. I couldn't figure out how to continue from there.
Kari
8/8/2016 07:42:42 pm
Jill -- You are almost there. Once you get the node from splitting the line in half, select the line tool and draw a line from one node to another. Because snap to node is selected, you will be able to connect the midpoint of each line.
Jill Voyles
8/9/2016 07:23:33 pm
Yay! Got it. Thanks :) Comments are closed.
|


Free guide available for newsletter subscribers


Kari SchellElectric Quilt Expert and Educator and Pattern Designer. Categories
All
Archives
April 2024
|
 RSS Feed