
|
The last week has been a cold one. And for those of us in the Midwest, it is another week before the planned warm-up. The weather definitely had me looking for my best mittens.
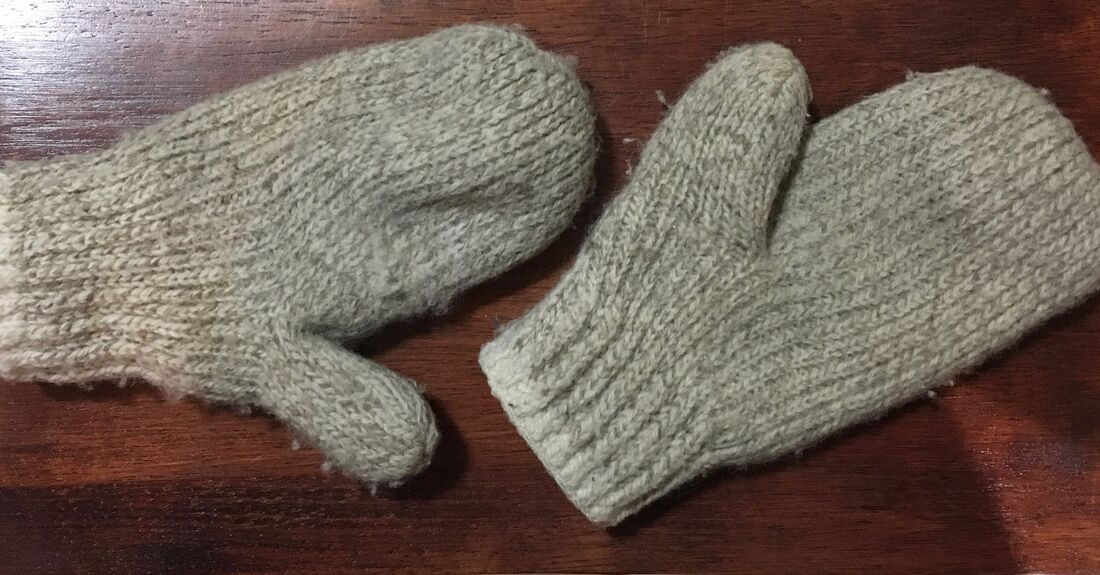
These are made of wool and have kept my hands warm even when cross-country skiing in sub-zero temperature.
Gloves may be considered more "adult" -- but mittens are definitely warmer. Mittens are warmer than gloves (made with the same materials) because, unlike with gloves, your fingers can share warmth. Mittens also have less total surface area for body heat to escape.
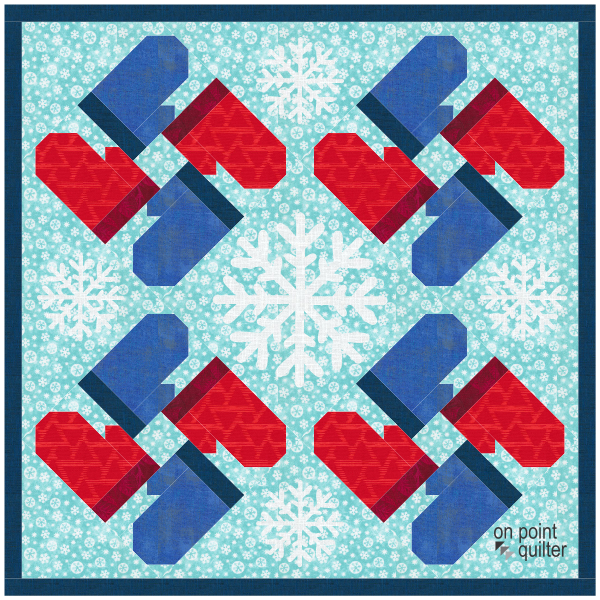
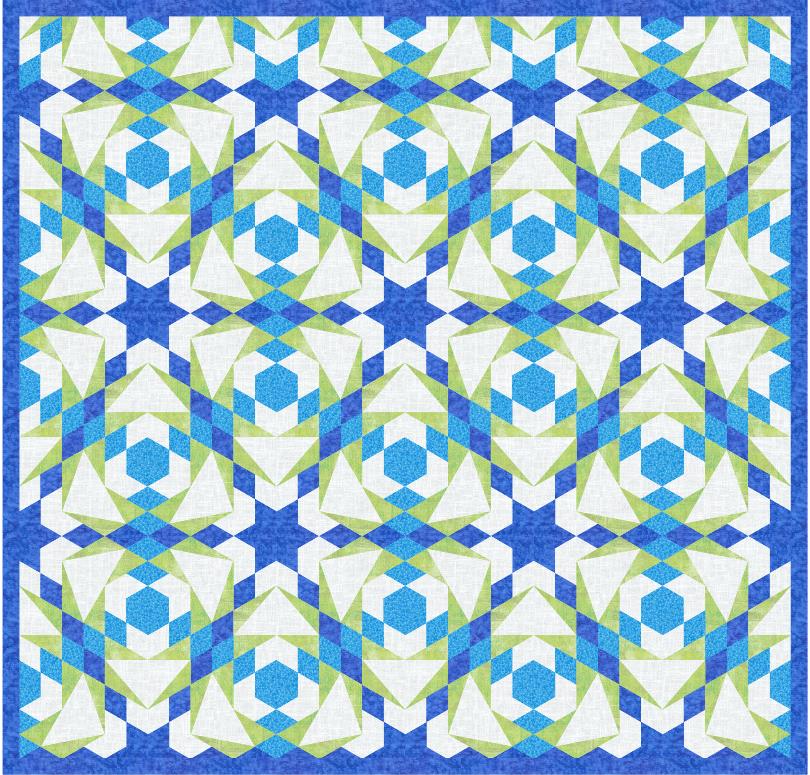
I didn't include this in the video, but I came up with a couple of ideas to use the mitten block. Can you guess the layout that was used for each of these quilts. Both of these quilts use the snowflake motif from last weeks blog post.
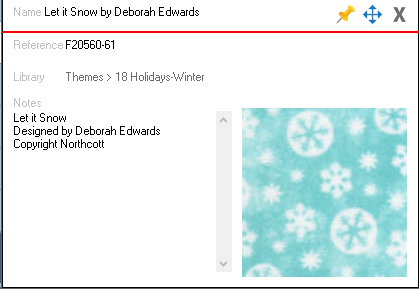
If you missed the post with the snowflake motif, you can learn more here (and make your own mug rug).
I look forward to seeing what you do with the Mitten block(s). Share your designs on the Learning EQ Facebook group.
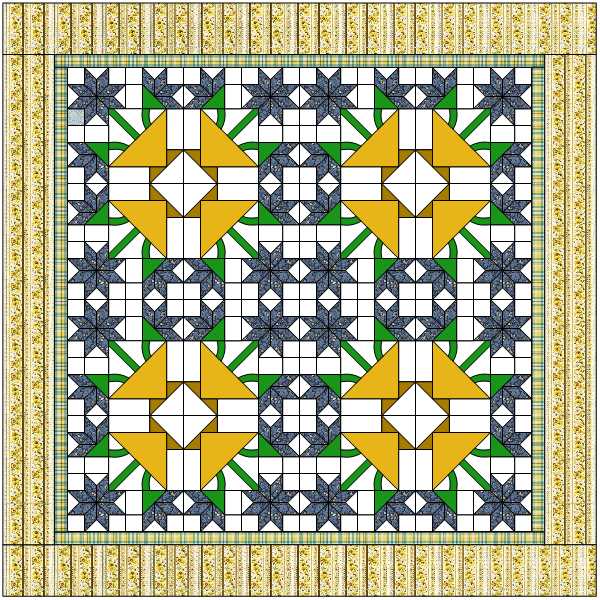
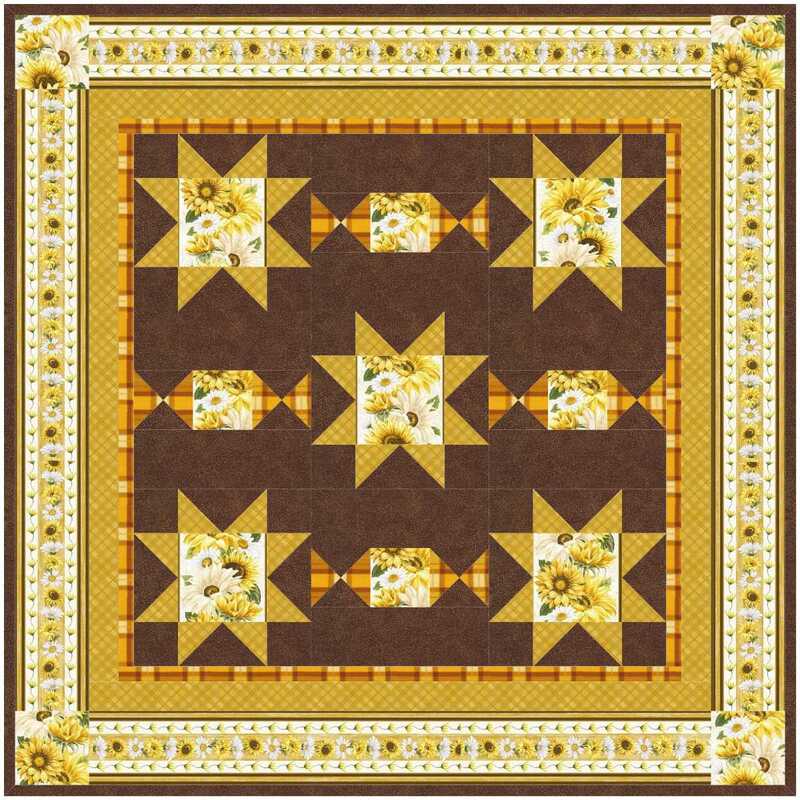
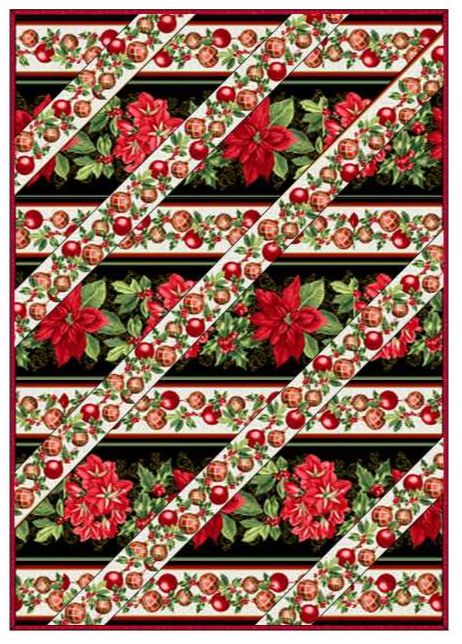
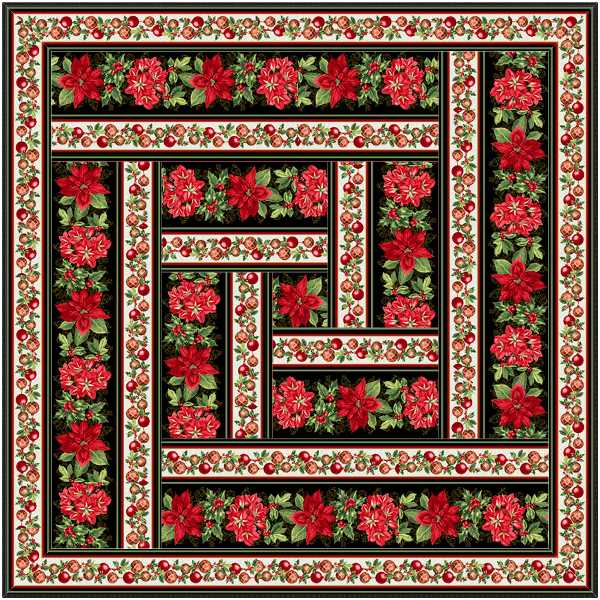
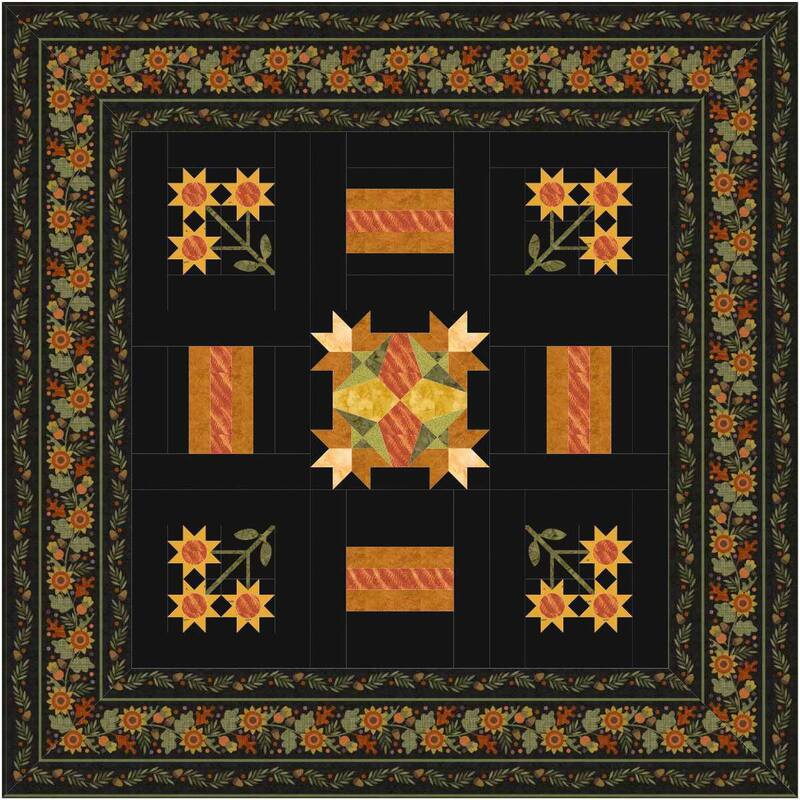
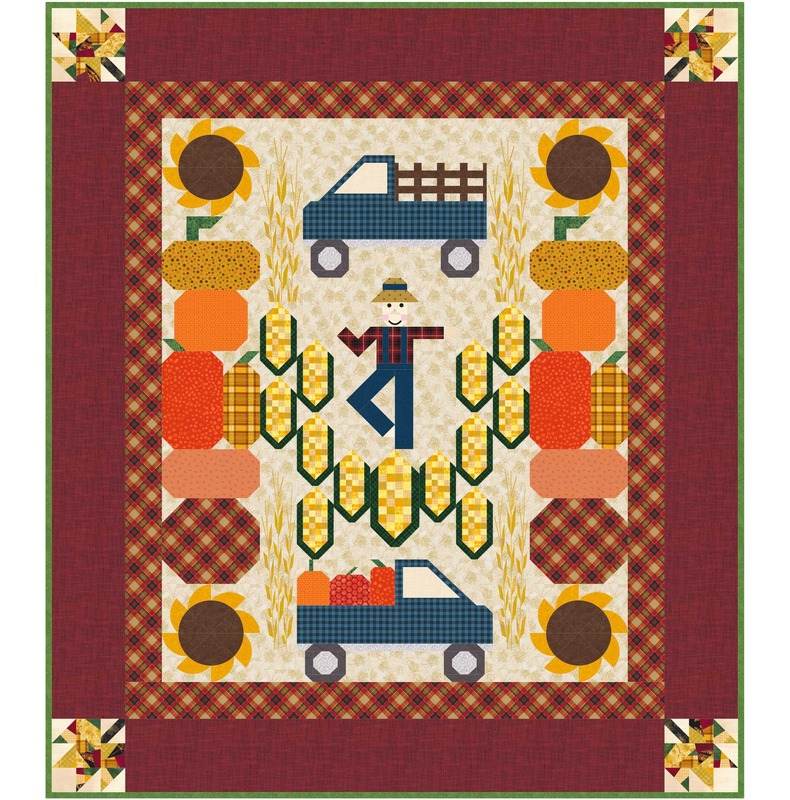
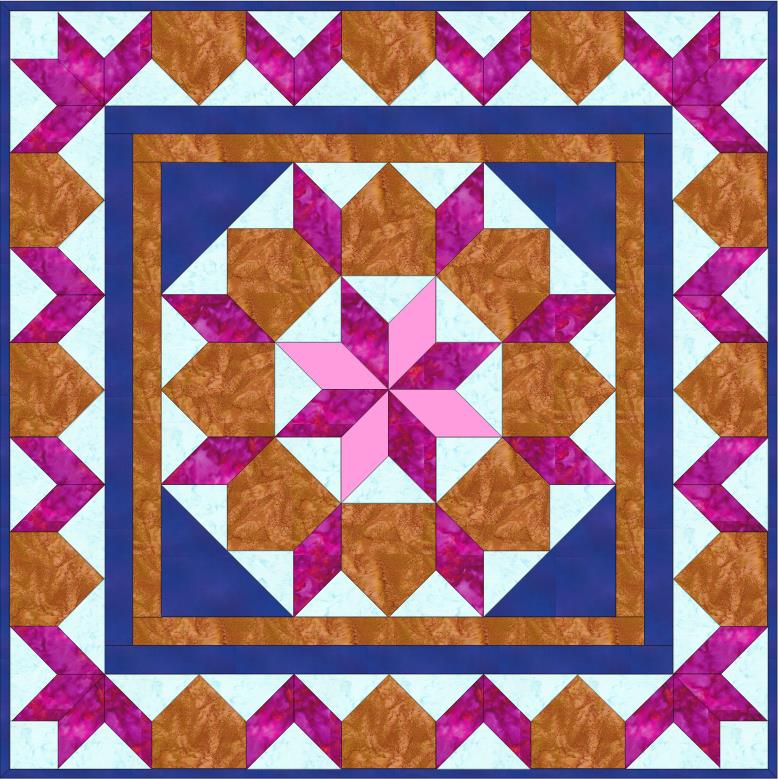
TKQ Masters Border Challenge Show
In November I challenged members to design a quilt around a border fabric. How many of us have that perfect fabric -- and then are afraid to cut it up. The solution is to cut it up virtually first!
I found three different border fabrics for them to design around. However, none were cropped and sized correctly. So they first had to start with fixing that issue. And then incorporate the border fabric in a block or quilt.
Here are their quilts.
Want to Know More about TKQ Masters?
Tech Know Quilters members are eligible for the Masters program after completing 12 months of Tech Know Quilter classes. Masters members receive fewer lessons each month, with more time to devote to their own projects and challenges.
Drop me a note if you have completed over 12 months of Tech Know Quilters and are interested in learning more about the Masters program. You can learn more about the regular Tech Know Quilters membership program and sign up for the wait list for the next open enrollment period here.
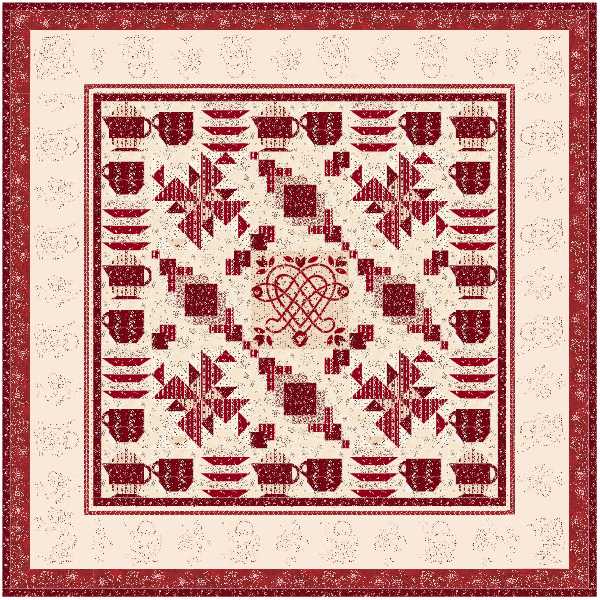
In much of the country, it is going to be much colder than normal with lots of weather warnings. Not a lot of snow in MN this year -- but we will get the sub-zero temperatures. And that is without wind-chill factored it. On days like that, I love to stay inside with a good quilt to work on and some nice warm liquid to ward off the chill that seems to penetrate even the inside of the house.
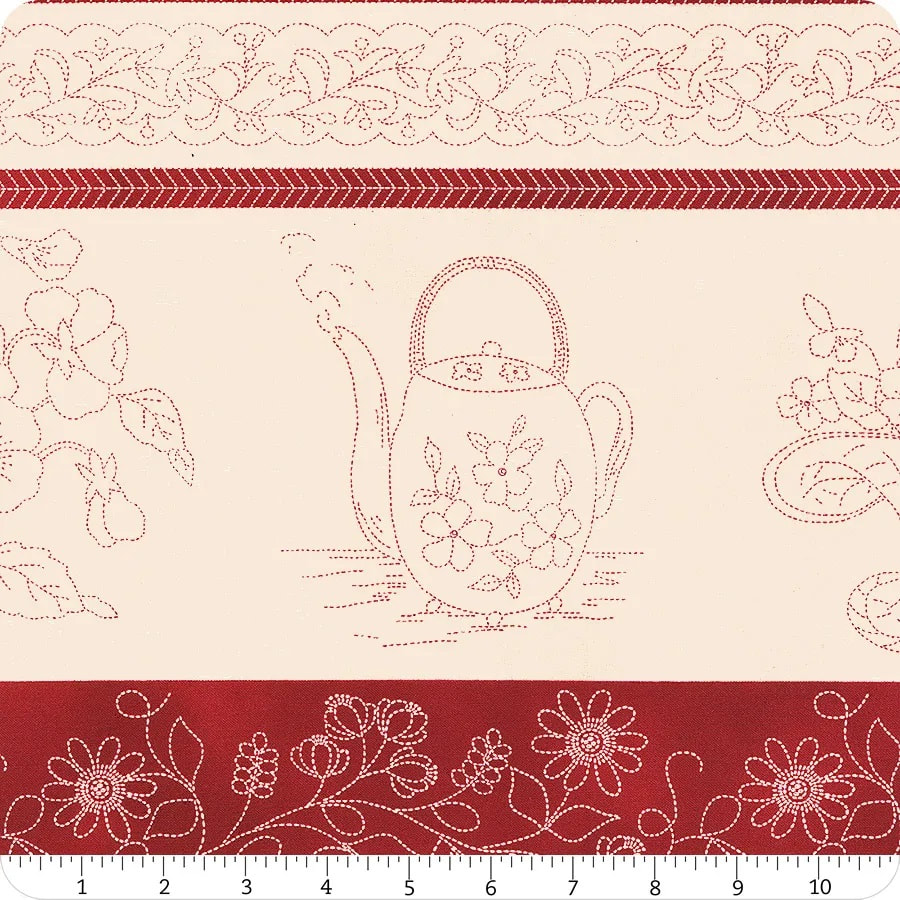
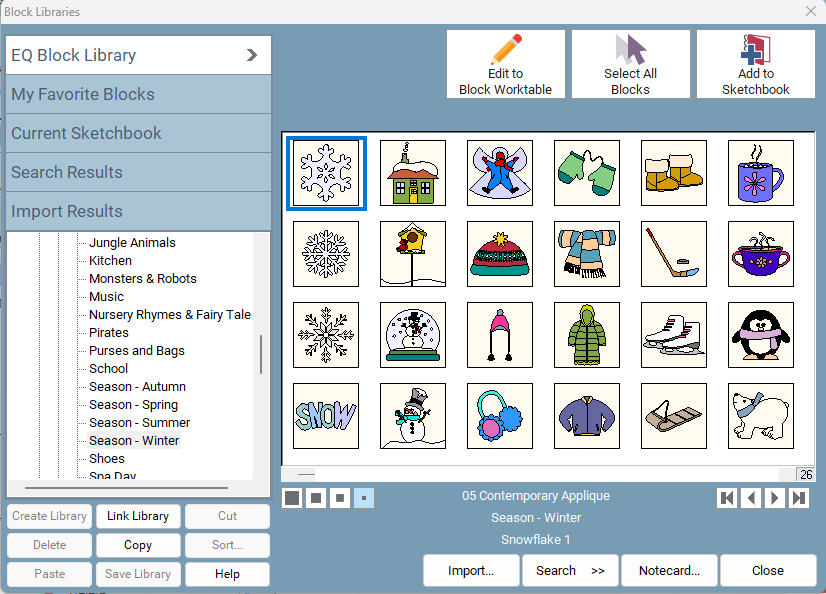
I thought it was the perfect opportunity for a new mug rug to use with a favorite cup of tea. Snowflake Mug Rugs
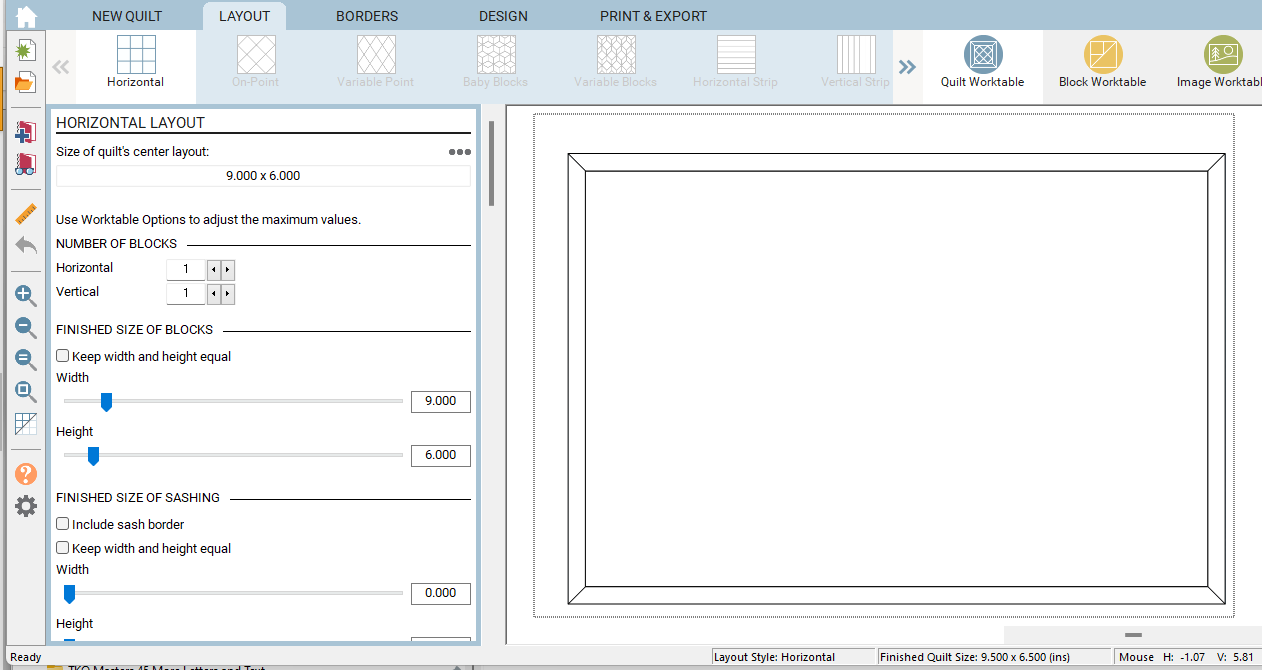
The mug rugs I make are typically 9" x 6". This is a nice size to do a bit of experimenting with a new design or a new concept.
I have been presenting some snowflake ideas to my Masters group this month. In the Masters class we incorporated text in our snowflakes. I promise -- the EQ design presented in this blog post is much simpler than the design concept I shared with them.
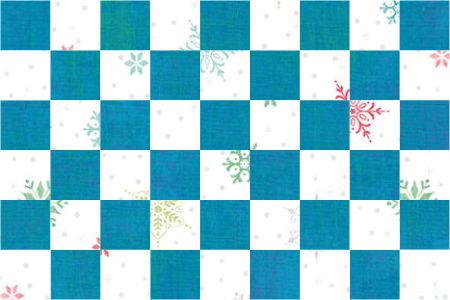
On the Design tab, place the checkerboard block on Layer 1 and three snowflake blocks on Layer 2.
Resize and rotate the snowflakes. A little bit of coloring and you are done. 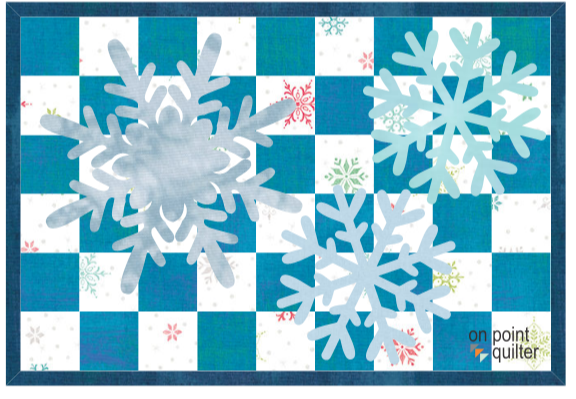
Triple Snowflake Mug Rug
For an alternate design, delete the pieced block and replace with a single fabric.
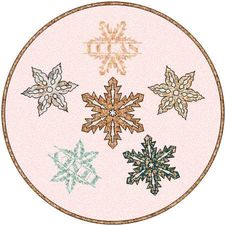
On Layer 2 include two of the snowflakes with the circle center. Use the text tool to add a monogram to each snowflake. I used the font Mr. Rabbit that I obtained from Creative Fabrica a number of years ago. Pick a bold font from the fonts on your computer. If you need some new fonts, check out the free fonts currently available at Creative Fabrica. 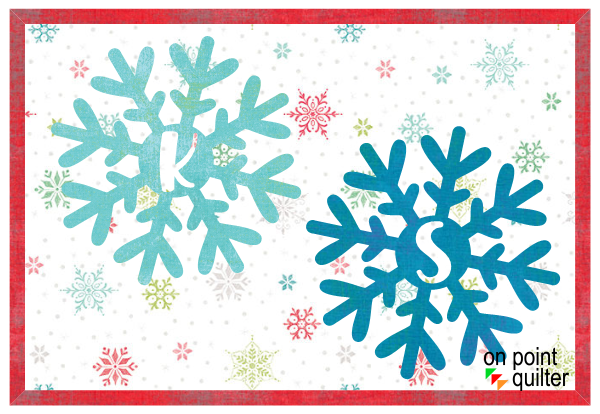
Monogram Mug Rug created by Kari Schell using EQ8.
Learn how to draft these two Snowflake Mug Rug quilts in this weeks free video tutorial.
I would love to see your mug rugs. Feel free to post in the Learning EQ Facebook post. I have set up a post for sharing.
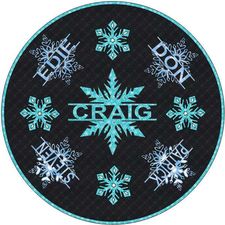
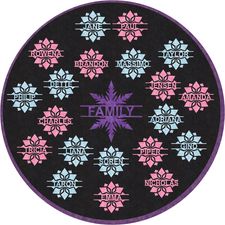
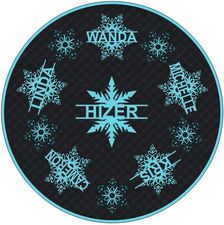
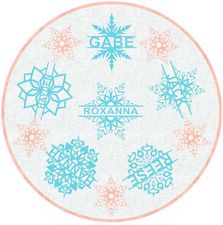
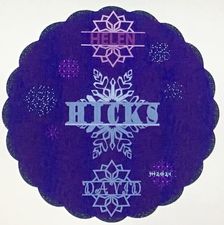
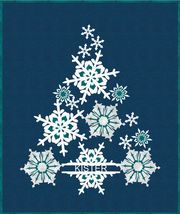
I also decided to play with one of my blocks from the TKQ Masters class on Letters and Text. (No instruction provided in this blog post).
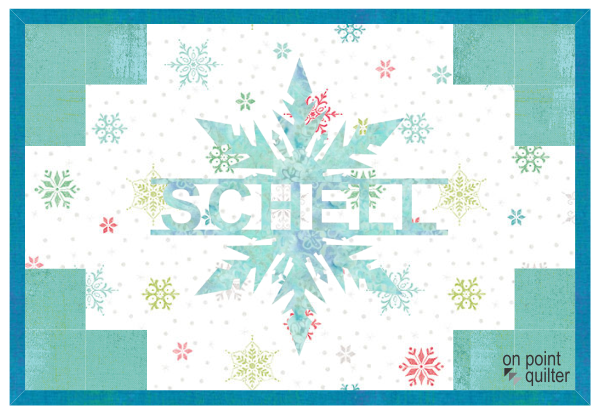
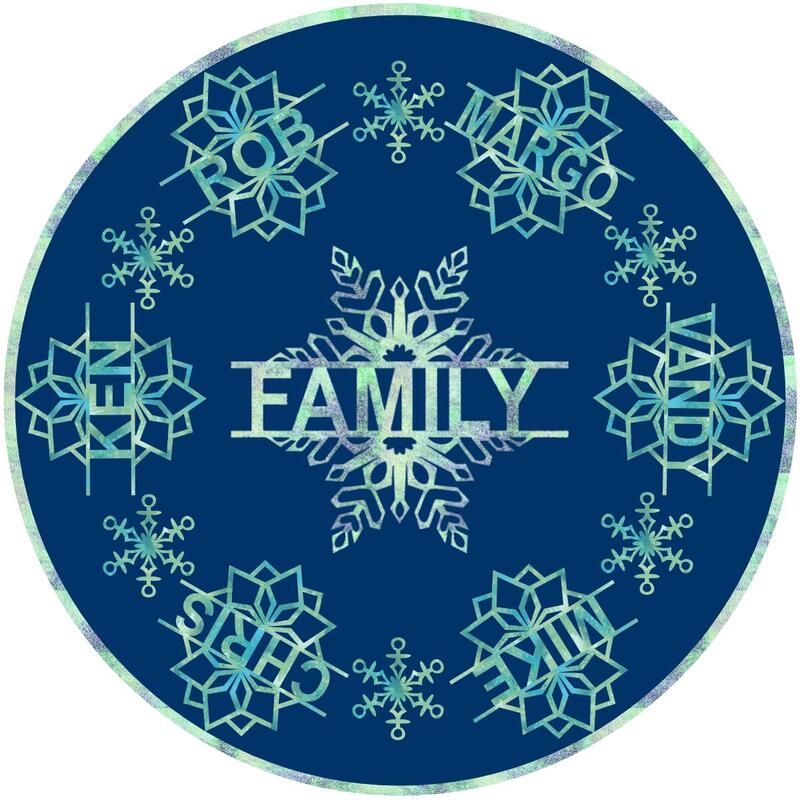
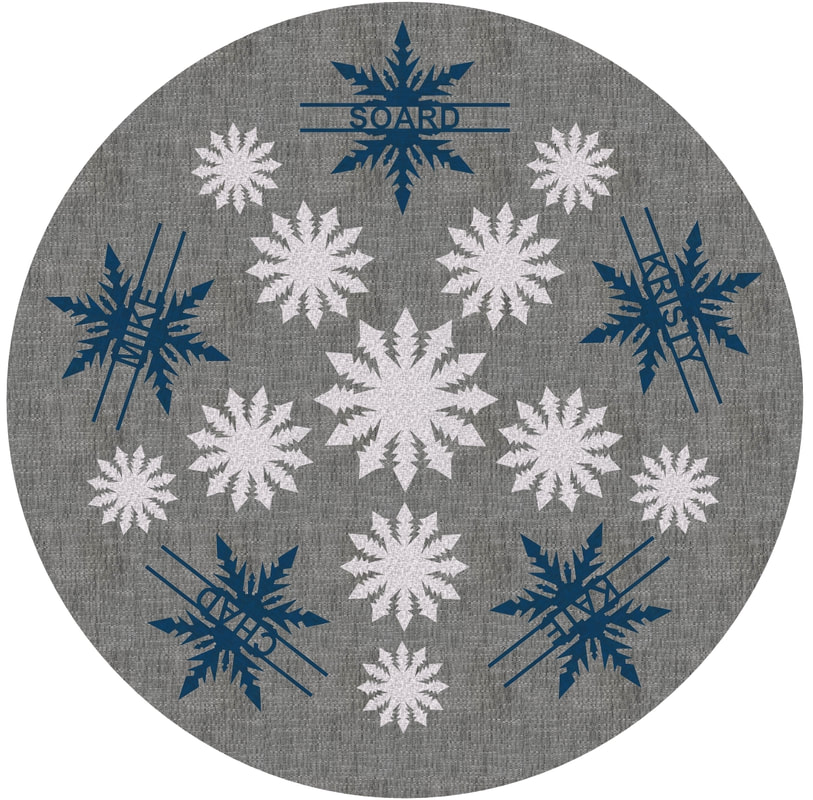
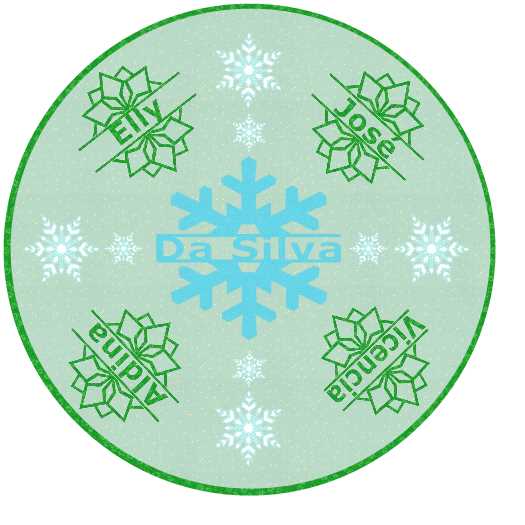
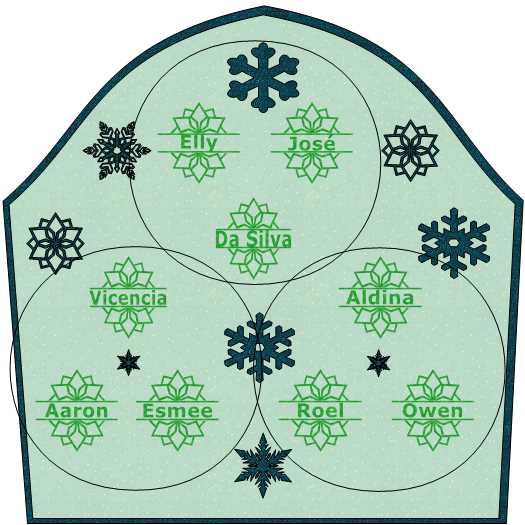
Name Snowflake Designed for TKQ Masters Letters and Text Class
TKQ Masters Snowflake Name Designs
This week, Tech Know Quilter Masters members were working on snowflakes that incorporated names (or other text). Check out some of their amazing designs as they created (for the most part) circular quilts.
If you have completed twelve or more months of Tech Know Quilters, you are eligible to join Tech Know Quilters Masters. If this interests you, send me a note and I will provide you more information on the program.
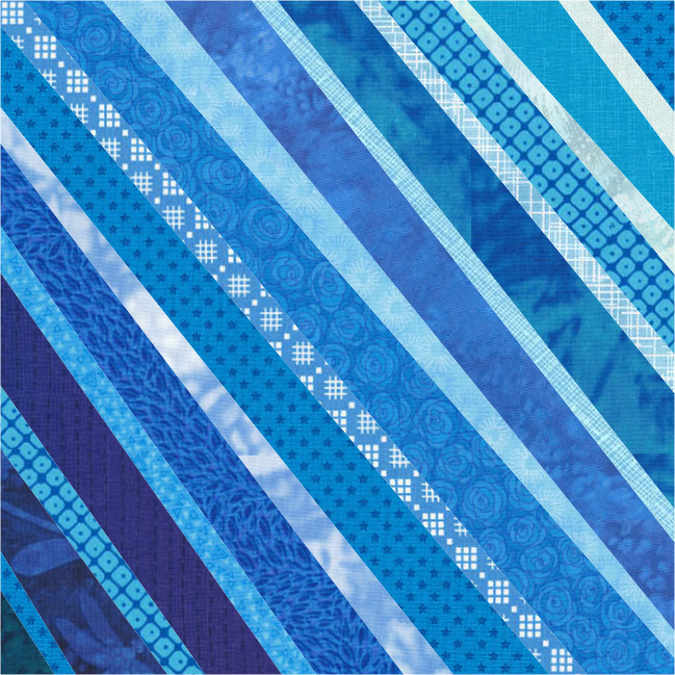
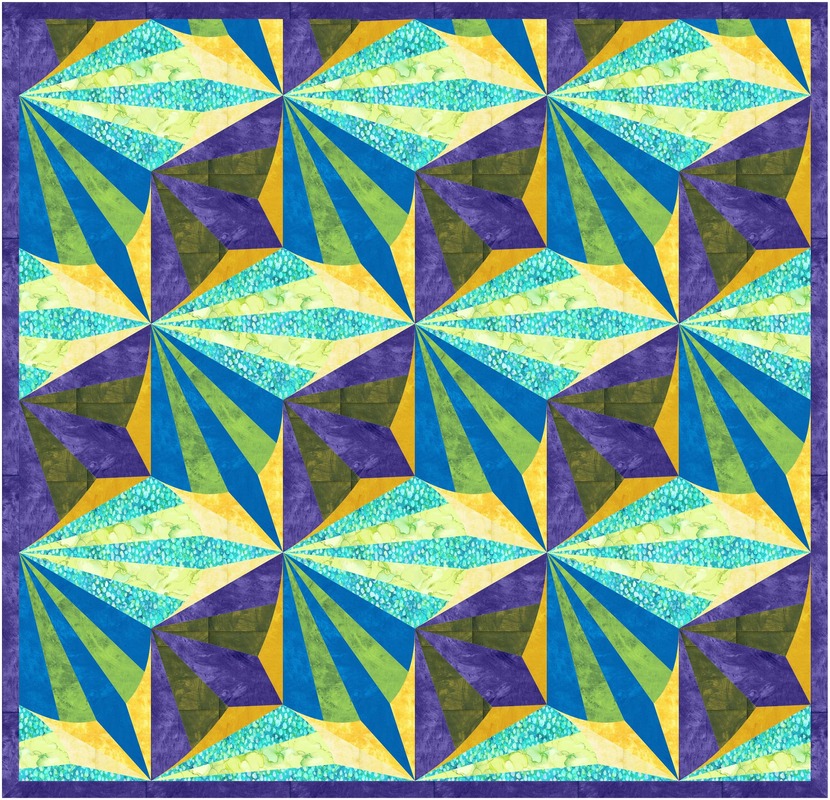
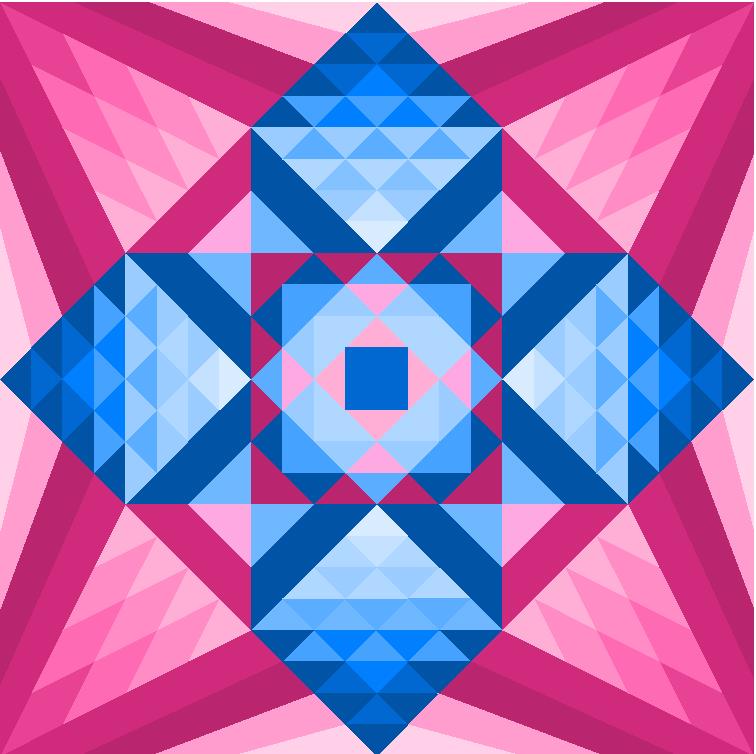
Electric Quilt has a lot of features in the Image Worktable. Many that aren't regularly used by quilters. Until today!
My tutorial will share a few of those tools to create works of art. And they will all start with a block using EasyDraw with a series of slanted lines.
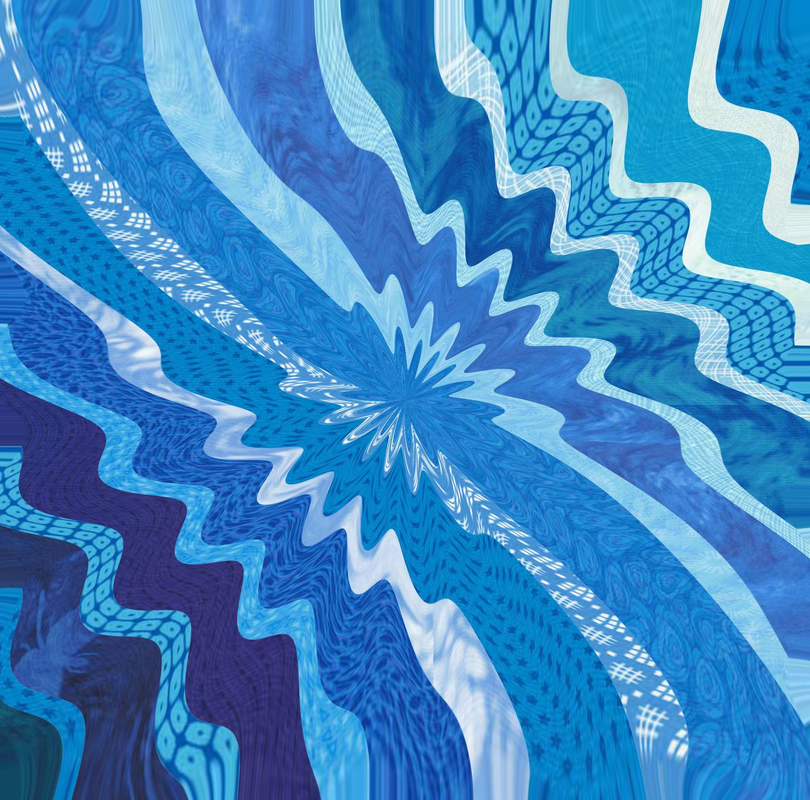
The real magic happens on the image worktable. The image worktable isn't just for cropping and resizing fabric images.
Start by cropping the small white borders EQ puts around all its photos from quilts.
Create the Quilt
Select the quilt worktable, and set up a quilt. You can decide the size and number of blocks. I decided on a Layout of 2 horizontal and 1 vertical. To give the impression of signed artwork, I decided to add a title along with my name to the quilt. In the video I will walk you through the steps to complete this. The typeface for text can be any font that is installed on your computer. I chose the Armelya script which I had download from Creative Fabrica a few years ago. Here is the quilt from the video. I decided to call it Storm Warning. For some reason I kept seeing the wind and snow resulting in blizzard weather conditions. 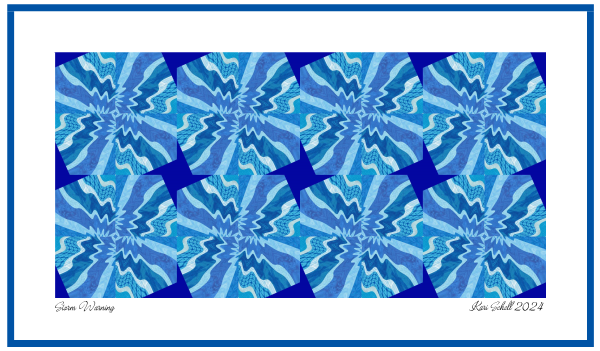
Storm Warning Created by Kari Schell Using EQ8
Here is the quilt I did with the block created with colors (rathe than fabrics). Which do you prefer?
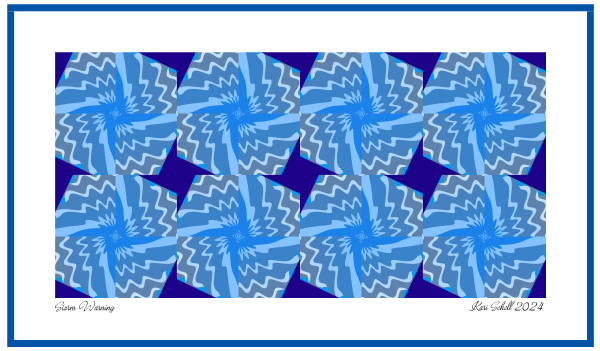 Storm Warning with Colors (rather than fabrics) using EQ8 Storm Warning with Colors (rather than fabrics) using EQ8
See exactly how to create this design using EQ8 in the video tutorial.
I am looking forward to seeing what you do with this concept.
Try using a different block. Or try exploring some of the other options on the quilt worktable. Keep playing until you find something you like and create your own "artwork".
Construction Thoughts
Note that Image designs cannot be pieced or appliqued -- unless you choose to redraft them as blocks. My thought was to print the designs on fabric. Consider changing the block size to 8" and print on EQ Printables. You would only need two blocks for your quilt. Or crop the image to 1/4 of the block. Resize to 4-1/2" x 4-1/2" and print eight of them.
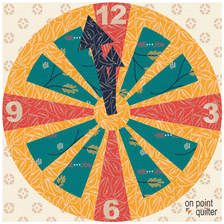
Watching the Clock - A New Years Eve Quilty Tutorial
If you are a clock watcher on New Year's eve, here is your chance to create your own clock using Electric Quilt 8.
This tutorial will share how to use PolyDraw and add some simple Applique shapes. PolyDraw has some unique features that often makes is the best option for working with blocks based on a circular grid.
I would love to see pictures of your New Year Clock quilt -- or do you have a different New Year design. Feel free to share on the Learning EQ Facebook group. I've set up a dedicated post.
Tech Know Quilter Month-End Show
Prepare to be amazed by the incredible creativity on display in our latest showcase featuring student projects from the Tech Know Quilter community.
A recurring sentiment we've encountered is the delightful surprise expressed by many: "I didn't know you could do that with Electric Quilt 8!" Breaking free from any limitations, our talented members have harnessed the full potential of this versatile software,
Tech Know Quilters is a membership program focused on mastery of Electric Quilt 8. We have members at all stages of their Electric Quilt journey.
Now is the time to join and lock in on 2023 pricing. Enrollment is only only 3-4 times a year. Click here to learn more and enroll.
One week before Christmas and counting. I am gifting one quilt this year -- and I still need to tack down the binding. And still a little bit of shopping. But actually in better shape than I normally am at this time of the year.
Scroll down to see the free EQ8 tutorial on a new way to use flying geese units. Make sure you have signed up for the free webinar -- it is right after Christmas. I am looking forward to
Whether you are new to Electric Quilt 8, or a seasoned user, this webinar is for you. Expand Your Creativity with the EQ8 "What If" Game
|


|
|
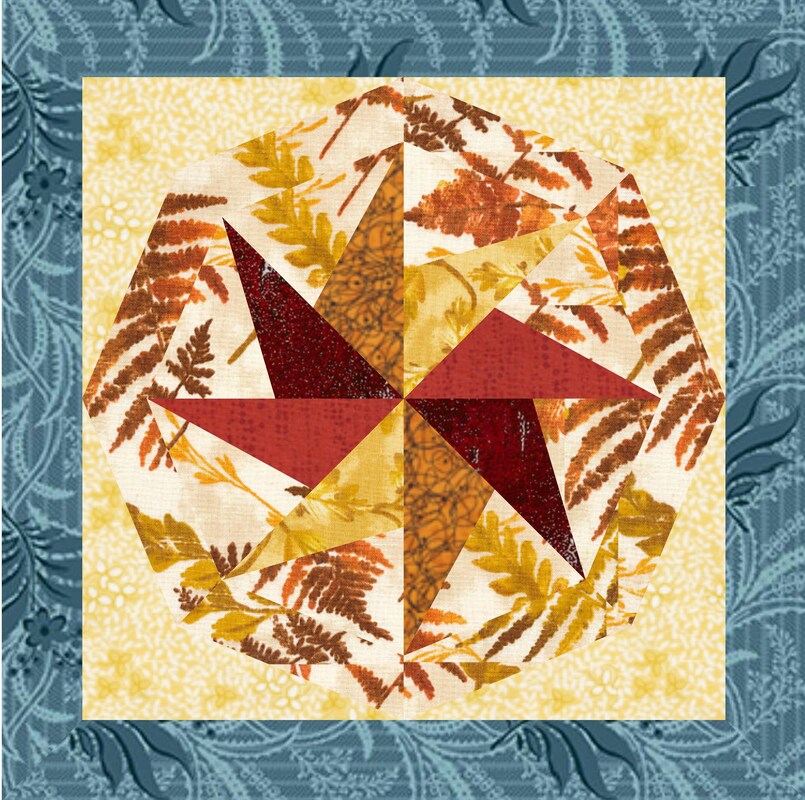
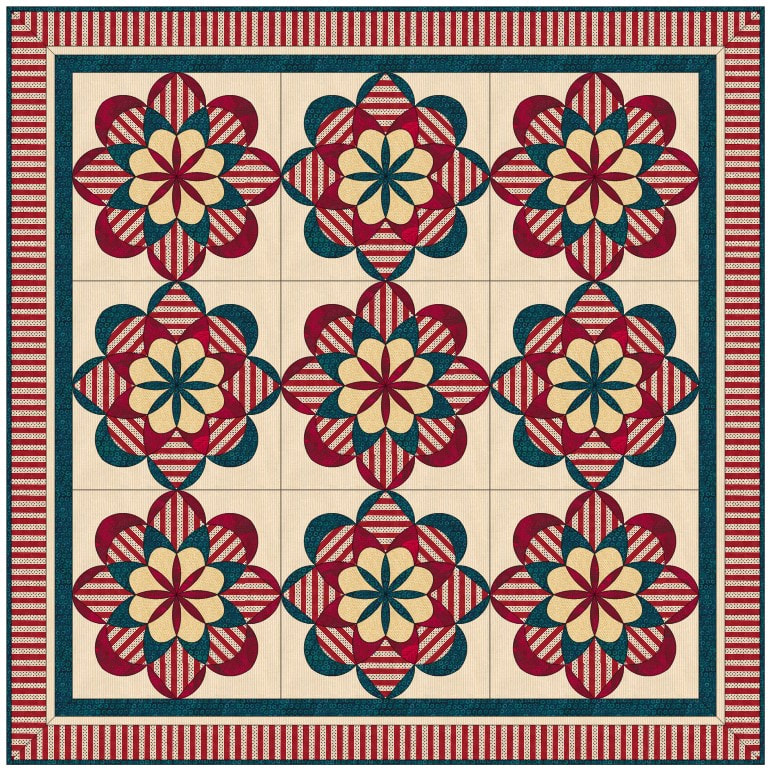
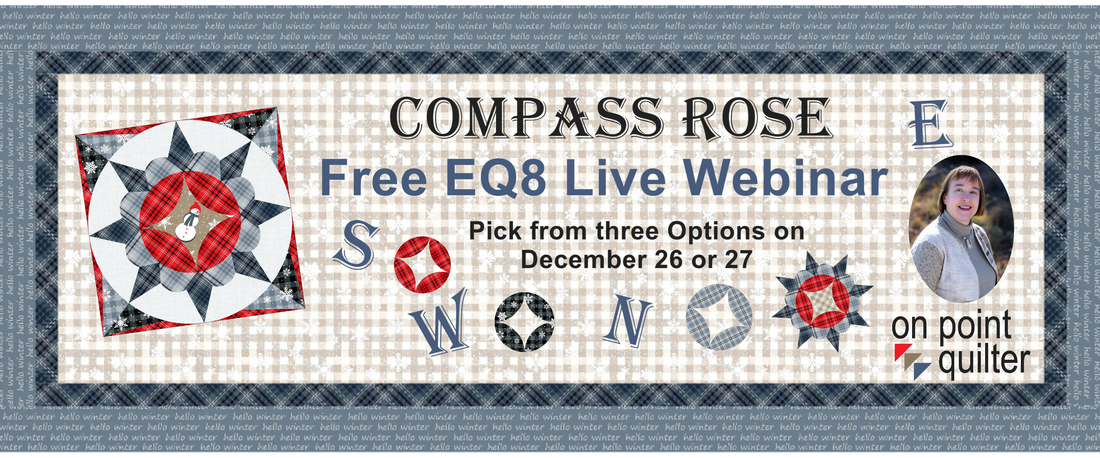
Learn to draft multiple variations of a Compass Rose block using Electric Quilt 8's powerful EasyDraw toolset.
|
|
|
Discover the art of creating a coordinating applique motif, adding a touch of sophistication to your design.
|
|
|
Play the "what if" game and design five unique layouts, alternating between two different fabric collections, because choices matter.
|
|
|
Master the use of Custom Set for a unique on-point setting option that sets your quilt apart.
|
|
|
Learn the art of incorporating text into your quilt for that extra touch of personalization.
|
Why wait? Join me today and receive a BONUS!
All participants will be gifted a comprehensive guidebook, serving as your go-to reference during and after the video. Packed with detailed step-by-step instructions and illustrations, this guidebook ensures you can confidently draft the blocks and bring your dream quilt to life.
I'm excited to witness your future Compass Rose quilt, whether it blooms in Electric Quilt 8 or becomes a tangible masterpiece. Don't miss out – join me now and let's turn your creative visions into quilting magic!
Free Webinar Registration Information
Select the time that suits you best below and register for this exciting webinar. You won't be disappointed!
Make sure to be part of this transformative experience. I look forward to seeing you there.
Can't make it live? Don't worry, a replay will be available for 48 hours for all registrants.
Select the time that suits you best below and register for this exciting webinar. You won't be disappointed!
Make sure to be part of this transformative experience. I look forward to seeing you there.
Can't make it live? Don't worry, a replay will be available for 48 hours for all registrants.
|
Date and Time
|
Registration Link
|
Your Local Time
|
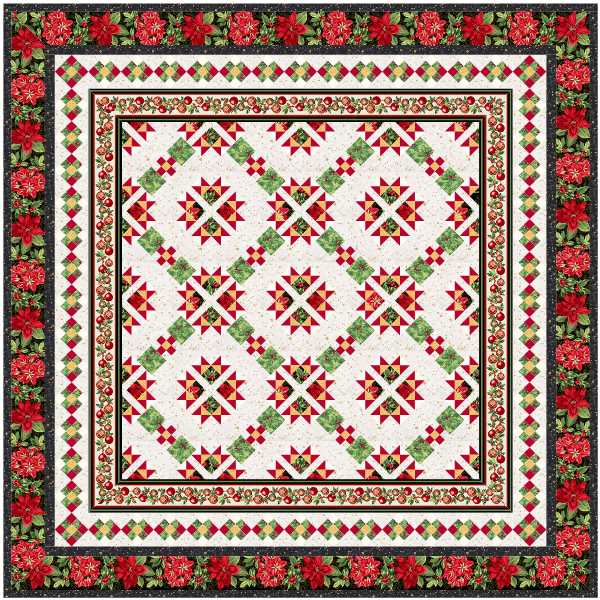
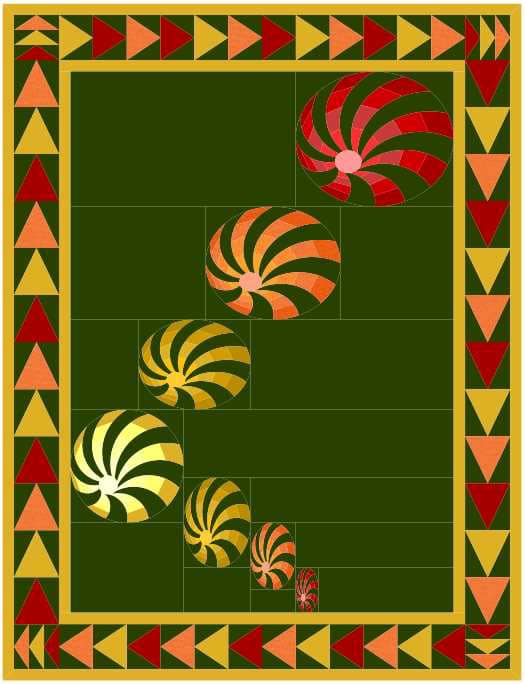
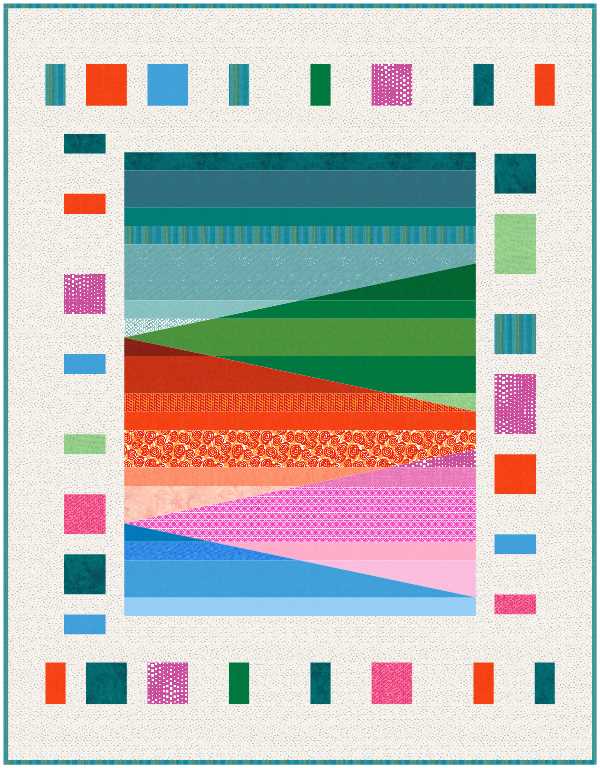
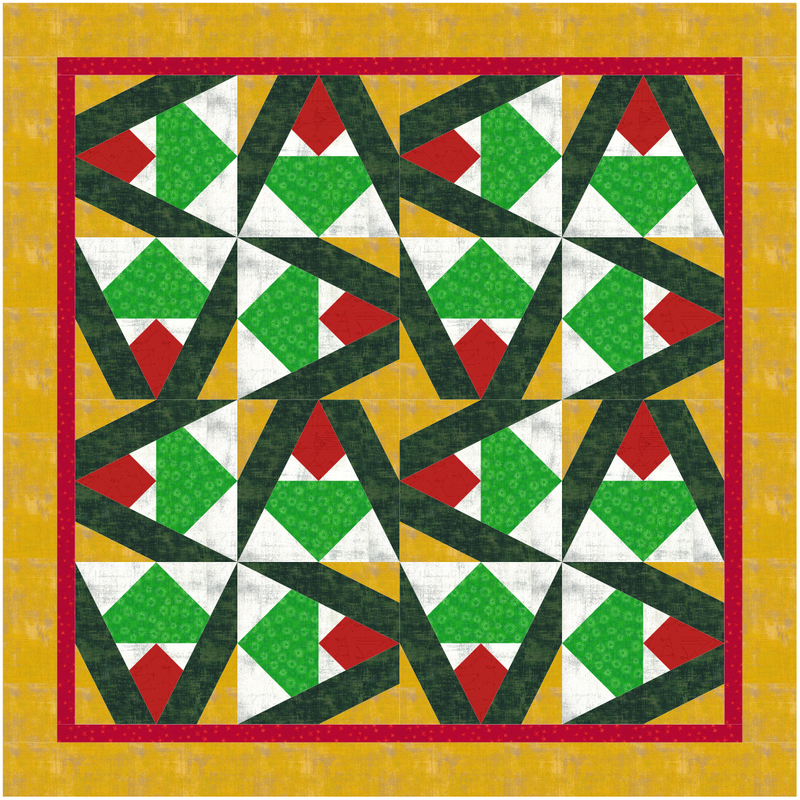
Corner Pop Christmas Quilt Design
Do you have any extra flying geese units layout around? This project is perfect for using those extra units. Or you may find you are ready to create some new ones for a totally new and different quilt.
Here you can see the before photo of my flying geese block -- and the after photo after applying corners with a ratio of 2:1.
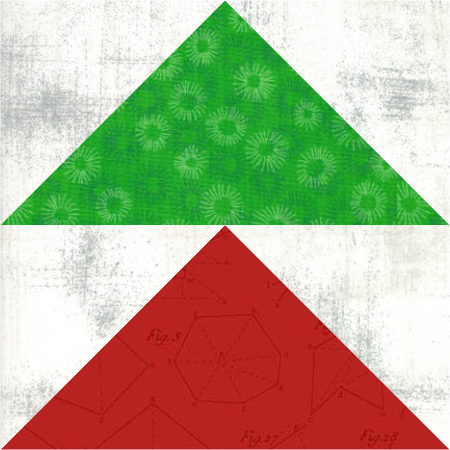
Stacked Flying Geese Units
|
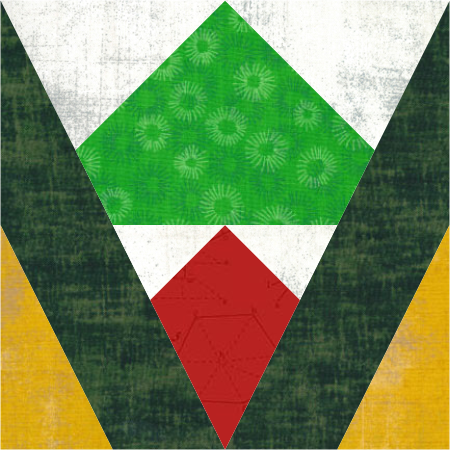
Flying Geese with Corner Pop 2
|
|
Those of you that regularly read my blog posts, know that I like drawing blocks that are "folded corner" friendly. These are units that can be added by placing a square piece of fabric on a block (or segment of a block and sewing from diagonal to diagonal to add a piece with a 45 degree corner). Think of this as one of the methods to add those while corners to the flying geese units above.
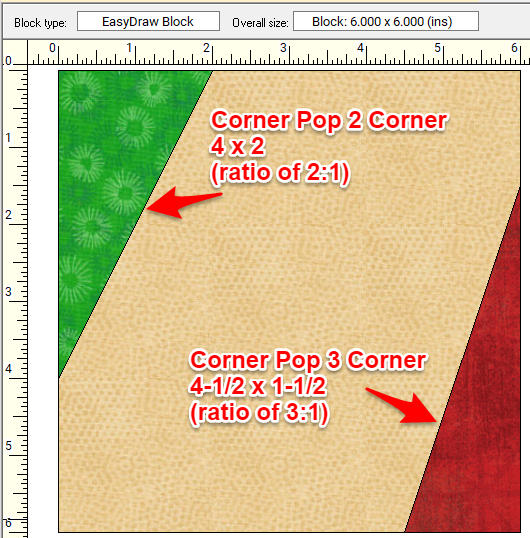
Deb Tucker's Studio 180 Design has a tool called Corner Pop that more efficiently adds these types of folded corners. But she also has tools that expand on the concept. |
|
|
Corner Pop 2 will allow you to add popped corners with a 2:1 ratio. What that means is that Corner Pop 2 will make pops that are twice as tall as they are wide
Corner Pop 3 will allow you to add popped corners with a 3:1 ratio. Both of these units will give you a nice spiky effect.
|
|
These corners don't need to be restricted to simple squares and rectangles. In the video, I explain the process of adding them to a pieced block.
In addition to designing the Corner Pop 2 friendly block, learn how to use Shrink and Fit for a new block and Serendipity to play with block rotation in the Quilt Worktable.
In addition to designing the Corner Pop 2 friendly block, learn how to use Shrink and Fit for a new block and Serendipity to play with block rotation in the Quilt Worktable.
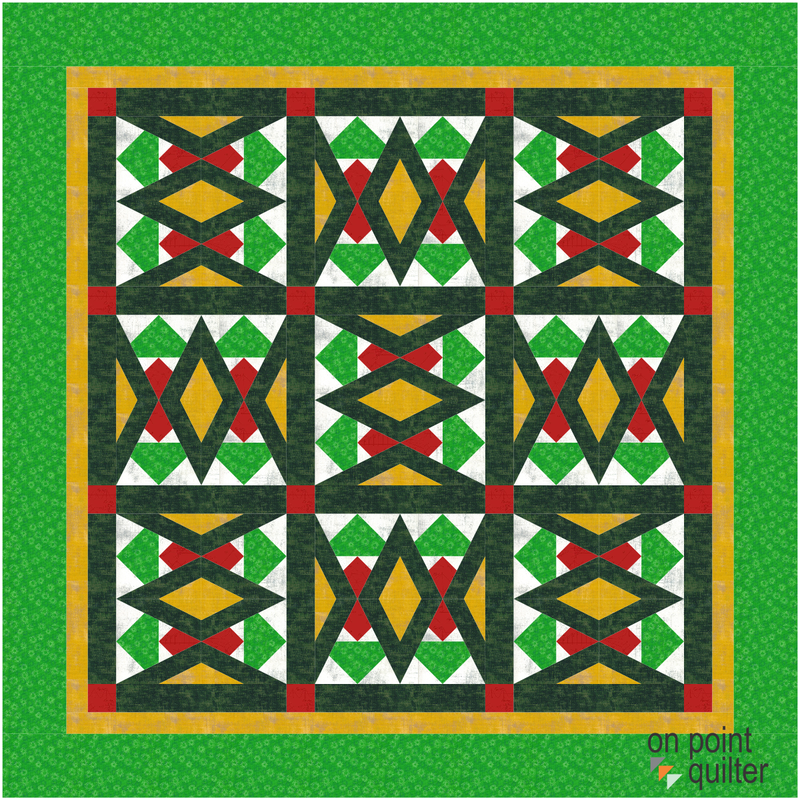
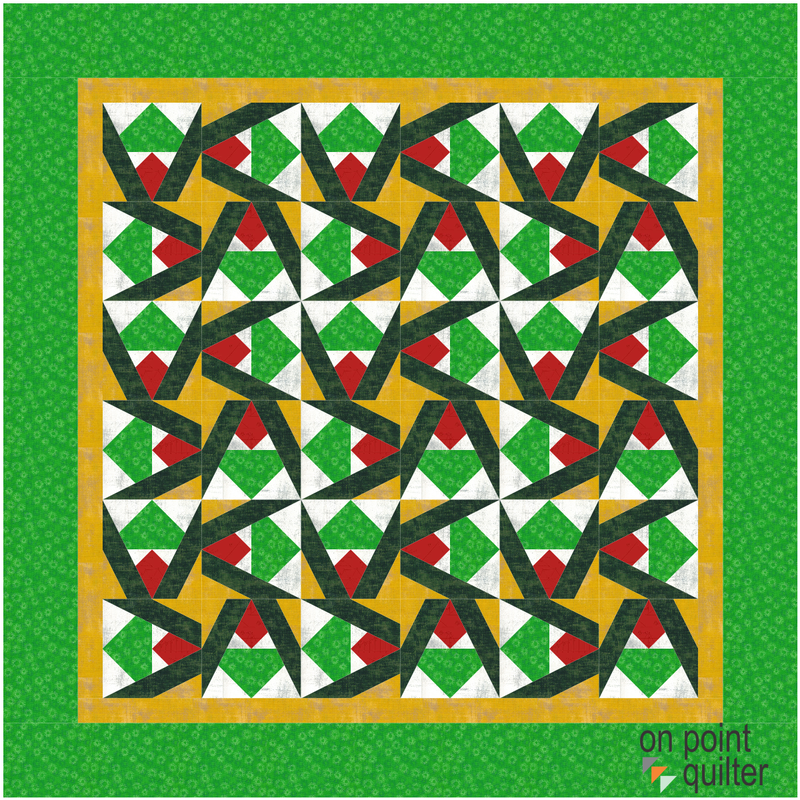
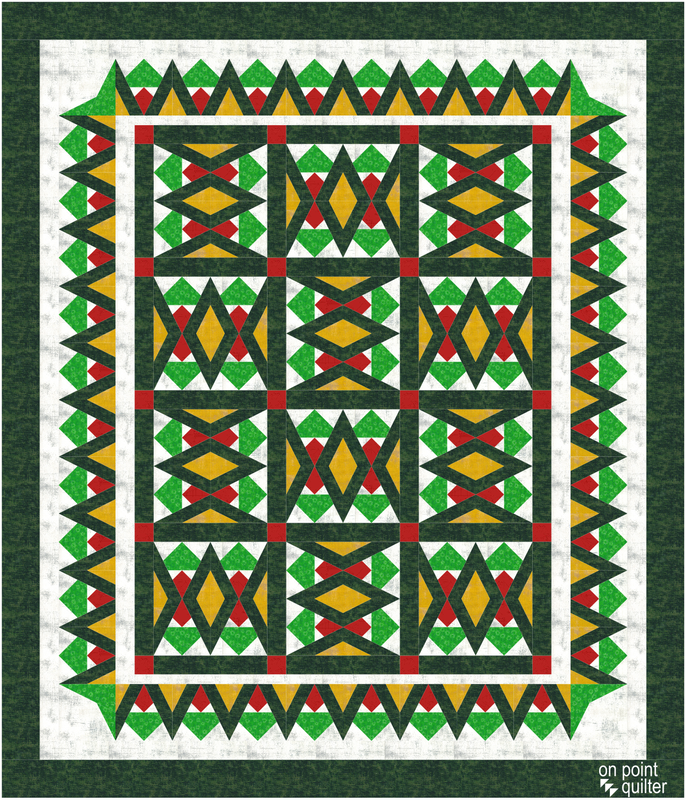
Here are some quilt ideas using the block from the video.
If you are not into using the specialty rulers, these designs would also be very conducive to foundation paper piecing.
If you are not into using the specialty rulers, these designs would also be very conducive to foundation paper piecing.
|
|
|
|
In the last option, you can see how you can carry the block design into the border as well. Make sure to use Tile Square border for blocks that are square. Otherwise, they may not be Corner Pop 2 friendly.
There are so many ways to expand on this concept. For fun start with a different simple block for the center. I look forward to seeing what you do with the idea.
Share your ideas in the Learning EQ8 Facebook group. I've set up a post for you pictures and ideas.
Share your ideas in the Learning EQ8 Facebook group. I've set up a post for you pictures and ideas.

|
Happy quilting.
Kari Join the On Point Quilter weekly newsletter and receive regular tips and inspiration on using Electric Quilt 8 along with the Free 12 Top Tips for EQ8 video guide. 
|


Free guide available for newsletter subscribers


Kari Schell
Electric Quilt Expert and Educator and Pattern Designer.
Categories
All
Art And Stitch
Cricut Maker
Dear Jane
Electric Quilt 7
Electric Quilt 8
Goose Goose Duck Challenge
Inkscape
Longarm Quilting
Patterns
Silhouette Cameo
Stampin Up
Summer Games
Tips And Techniques
Tools And Rulers
Archives
April 2024
March 2024
February 2024
January 2024
December 2023
November 2023
October 2023
September 2023
August 2023
July 2023
June 2023
May 2023
April 2023
March 2023
February 2023
January 2023
December 2022
November 2022
October 2022
September 2022
August 2022
July 2022
June 2022
May 2022
April 2022
March 2022
February 2022
January 2022
December 2021
November 2021
October 2021
September 2021
August 2021
July 2021
June 2021
May 2021
April 2021
March 2021
February 2021
January 2021
December 2020
November 2020
October 2020
September 2020
August 2020
July 2020
June 2020
May 2020
April 2020
March 2020
February 2020
January 2020
December 2019
November 2019
October 2019
September 2019
August 2019
July 2019
June 2019
May 2019
April 2019
March 2019
February 2019
January 2019
December 2018
November 2018
October 2018
September 2018
August 2018
July 2018
June 2018
May 2018
April 2018
March 2018
February 2018
January 2018
December 2017
November 2017
October 2017
September 2017
August 2017
July 2017
June 2017
May 2017
April 2017
March 2017
February 2017
January 2017
December 2016
November 2016
October 2016
September 2016
August 2016
July 2016
June 2016
May 2016
April 2016
March 2016
February 2016
January 2016
December 2015
November 2015
October 2015
September 2015
August 2015
July 2015
June 2015
May 2015
April 2015
March 2015
February 2015
January 2015
December 2014
November 2014
October 2014
September 2014
July 2014
June 2014
May 2014
April 2014
March 2014
February 2014
January 2014
December 2013
November 2013
October 2013
September 2013
August 2013
 RSS Feed