
|
Thanksgiving is over. So it is now time to decorate for Christmas. For me that means pulling out my Christmas quilts along with a few winter quilts.
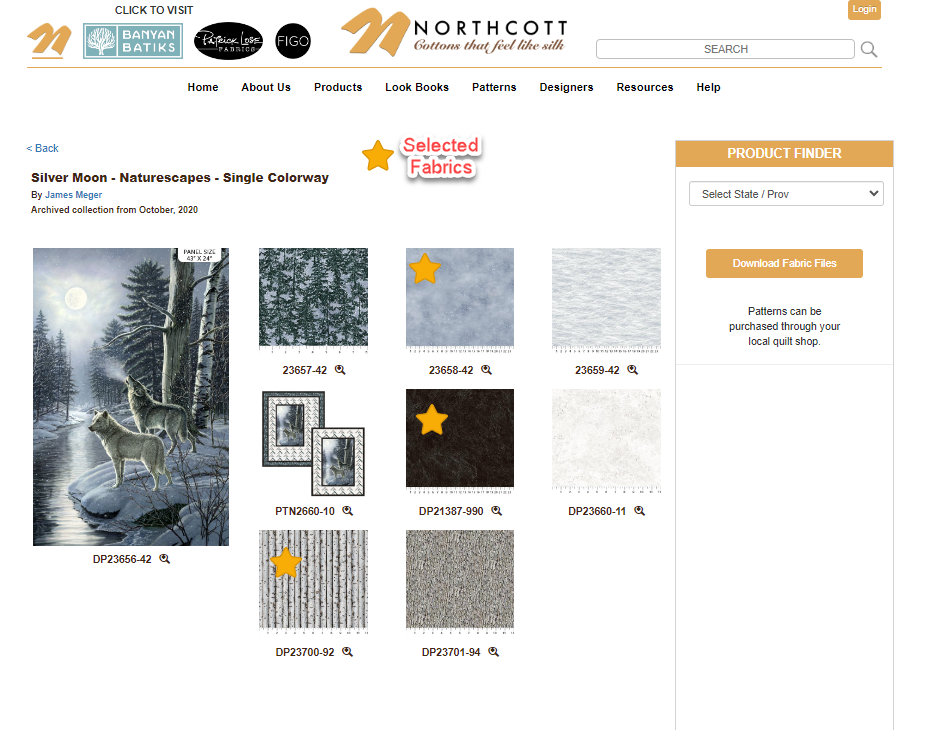
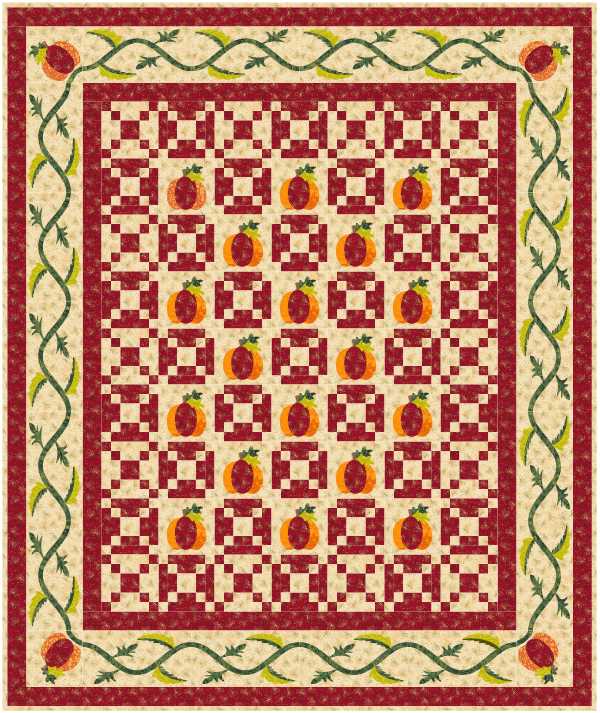
For gift giving, I particularly enjoy creating table runners and smaller wall quilts. I find recipients appreciate items that focused on a particular season and it is less important to "match" their "current colors" or "decorating style". It is a great opportunity to experiment with a new fabric collection or even a new "style" of quilt. The project today will be a fabulous gift option -- in either traditional or non-traditional Christmas fabrics? I look forward to seeing what you do with the design. Deck the Hall Table Runner using EQ8New Fabrics
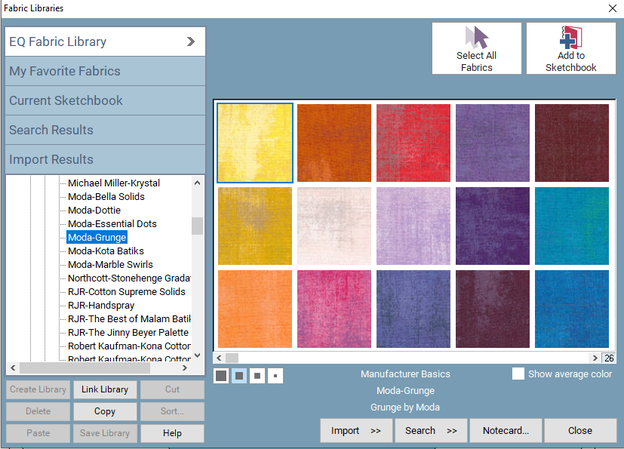
Note that the video does not include information on downloading and importing the fabric into your EQ project. Feel free to use the default fabrics for the project or a collection from the EQ8 Fabric Library.
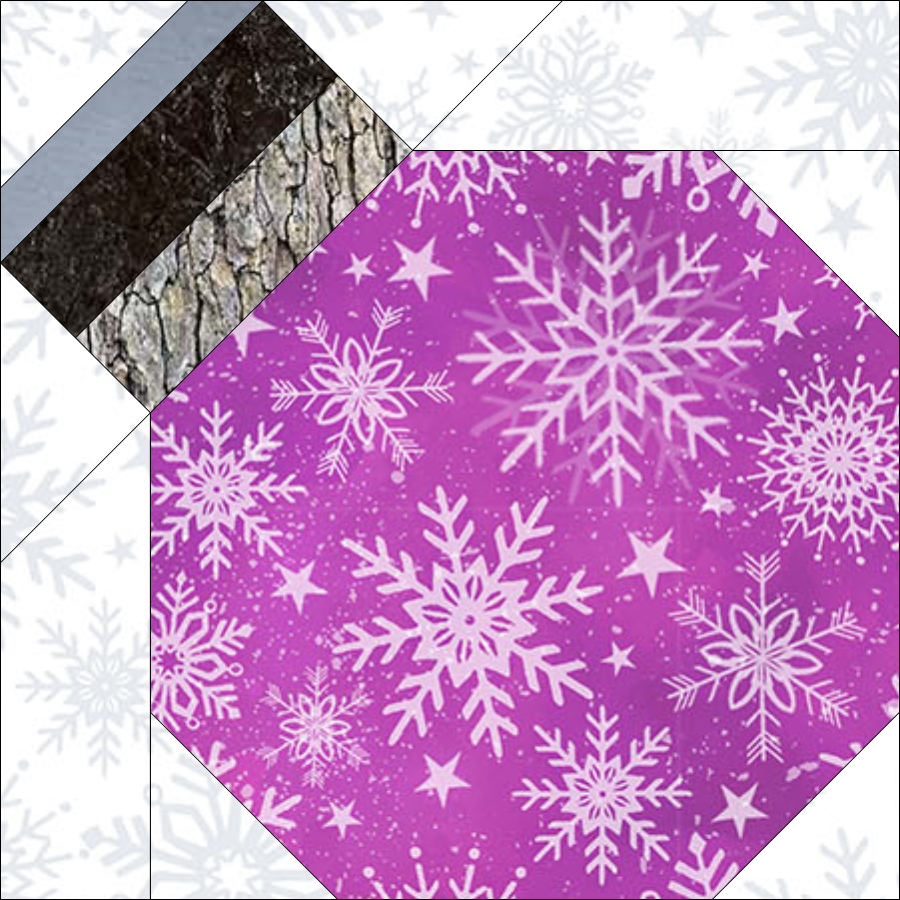
Draw the Ornament Block
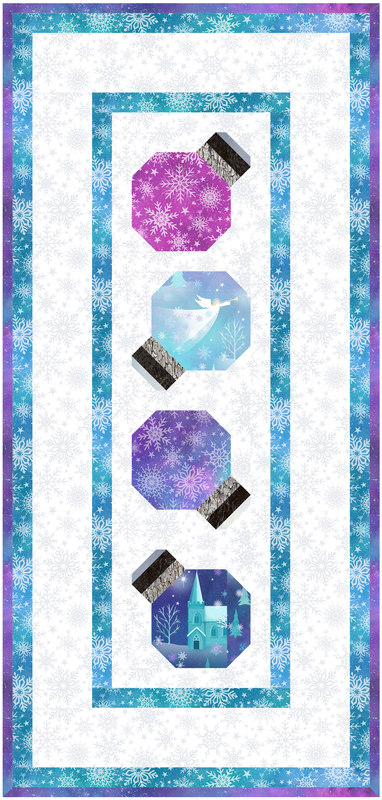
Create the Quilt Layout
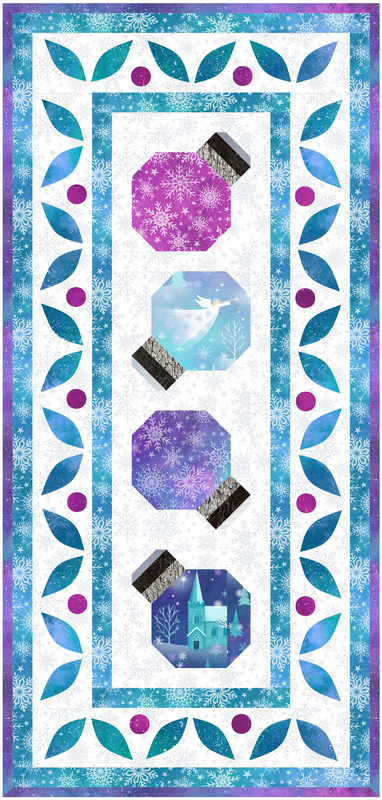
Applique Border Blocks
Create a new block with the style EasyDraw Plus Applique.
The block should be sized at 31" x 3" -- the finished size of the left and right borders. Set the snaps at 12 by 6 to provide guidelines to place both the leaves and the circles. Under Shapes, you can find both the leaf and the circle. Drag them on the block worktable with the Ctrl or Command key. One you've drawn one of each, you can clone, flip and reposition for the remaining patches. In the video I include some tips for getting everything centered in the block. 
Left and Right EasyDraw & Applique Border Block
The second block, can be created, using the first six leaves and two circles from the first applique block.
Make sure to note the size of your patches (under selected segment properties) before changing the size of the block to match the finished size the top and bottom borders. The top and bottom applique block will measure 16" x 3". 
Top and Bottom EasyDraw & Applique Border Block
Finish the Quilt
Check out the full video tutorial.
As I look at my finished quilt, I am already thinking about possible modifications including:
What changes would you make to personalize the project? Feel free to share your design in the Learning EQ Facebook group. Deck the Halls Construction Tips
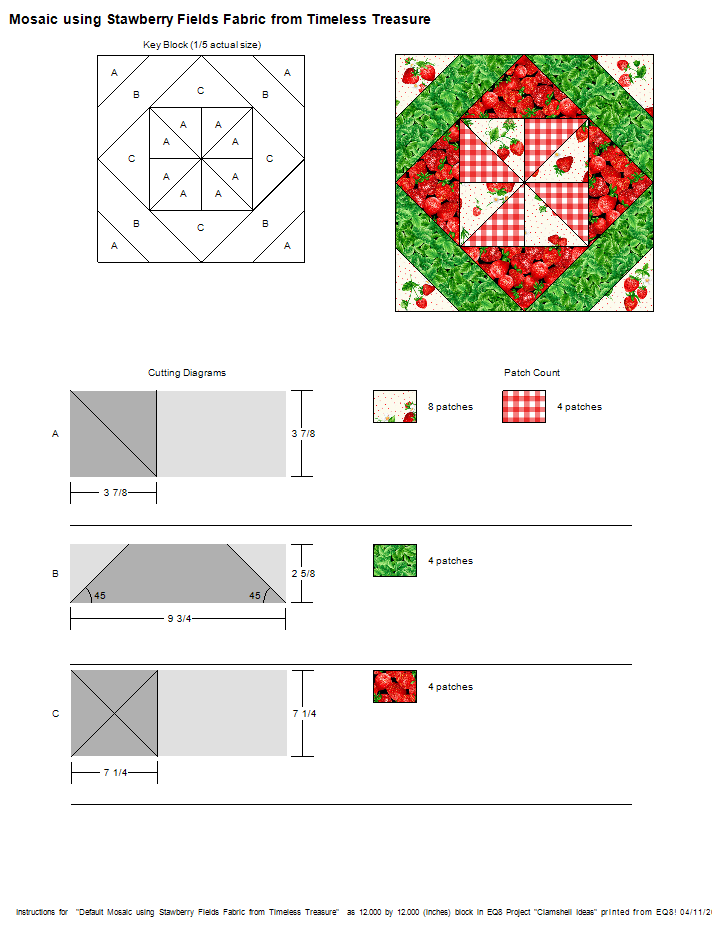
I suggest using either foundation pattern or rotary cutting for the ornament block.
You will notice that piece E is missing from the rotary cutting instructions. That is because there are 8 sides to the piece -- which EQ considers not to be rotary cutting friendly. I would cut a 5-1/2" x 5-1/2" piece. Then add 1-3/4" x 1-3/4" folded corners to all three sides. Alternatively you could use the template for Piece E to trace and cut the fabric. 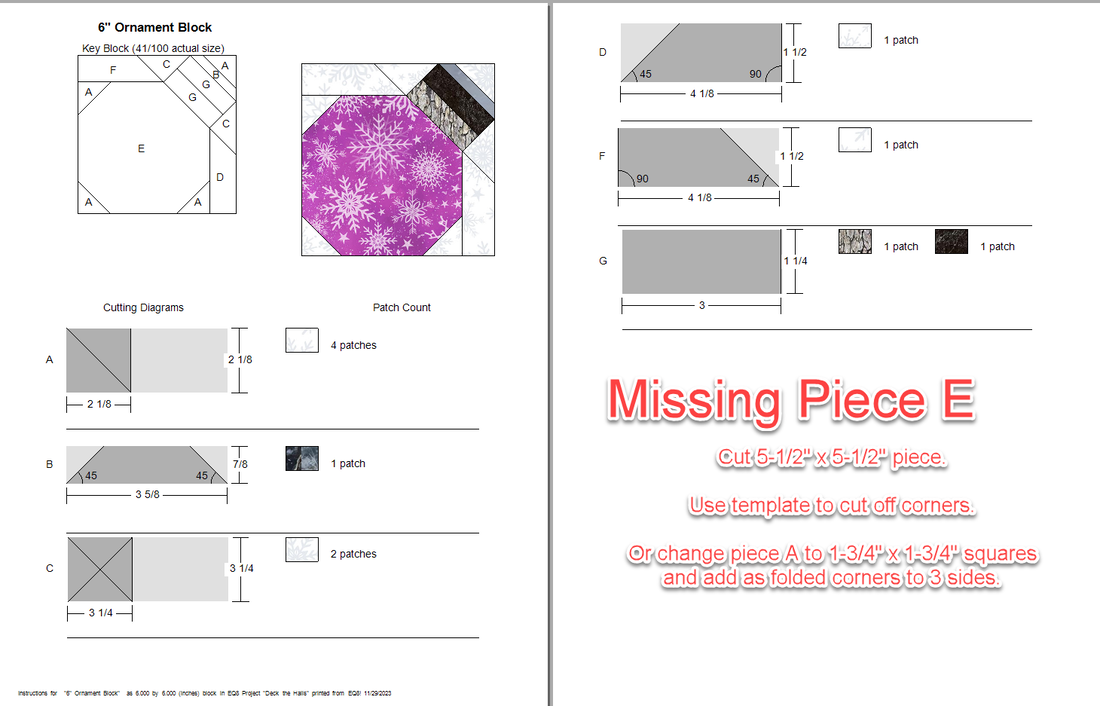
Ornament Block Rotary Cutting with Suggested Modifications
For the applique blocks, I suggest using templates. The templates could also be used with an electronic cutting system, if that is your preferred method to cut applique shapes. You can include or exclude seam allowances on your templates.
Tech Know Quilters Showcase
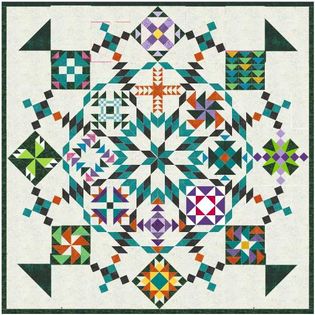
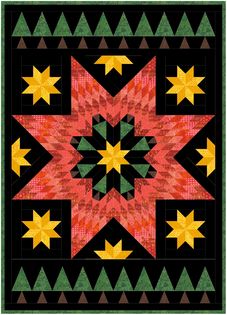
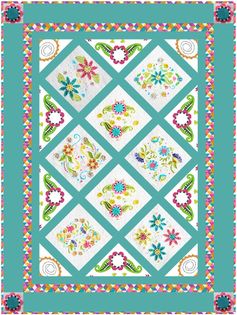
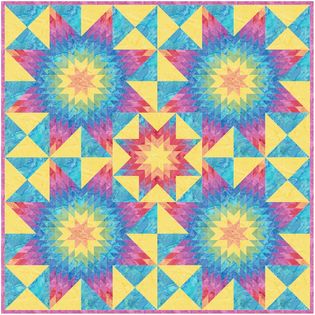
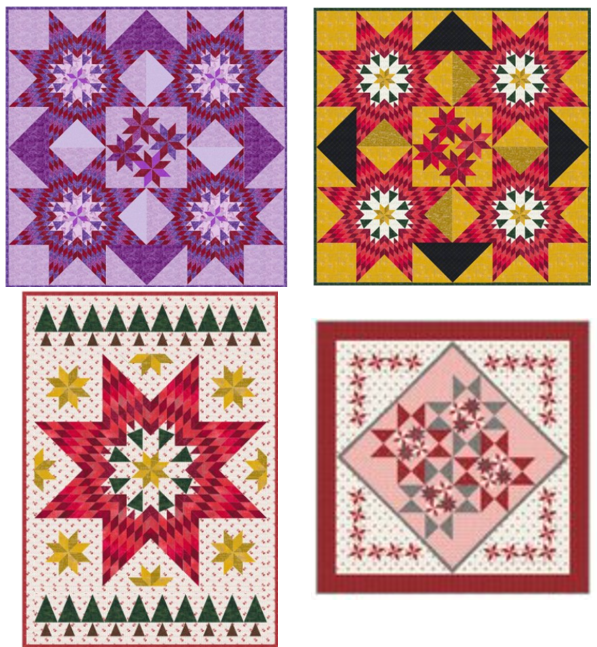
One thing I hear over and over again is -- I didn't know you could do "that" using Electric Quilt 8. One thing that holds us back from truly using Electric Quilt 8 is just not understanding that this versatile software can help you create any type of quilt. In this showcase, be inspired by the quilts created by Tech Know Quilter members using Electric Quilt 8.
Tech Know Quilters is a membership program focused on mastery of Electric Quilt 8. We have members at all stages of their Electric Quilt journey.
If you would like to join this amazing group of quilters, you can sign up for the wait list here.
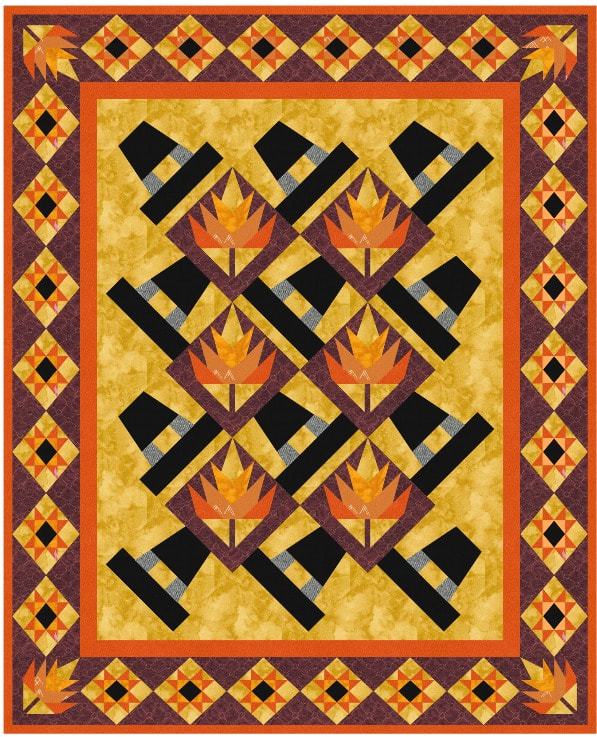
Were you a Black Friday shopper this year?
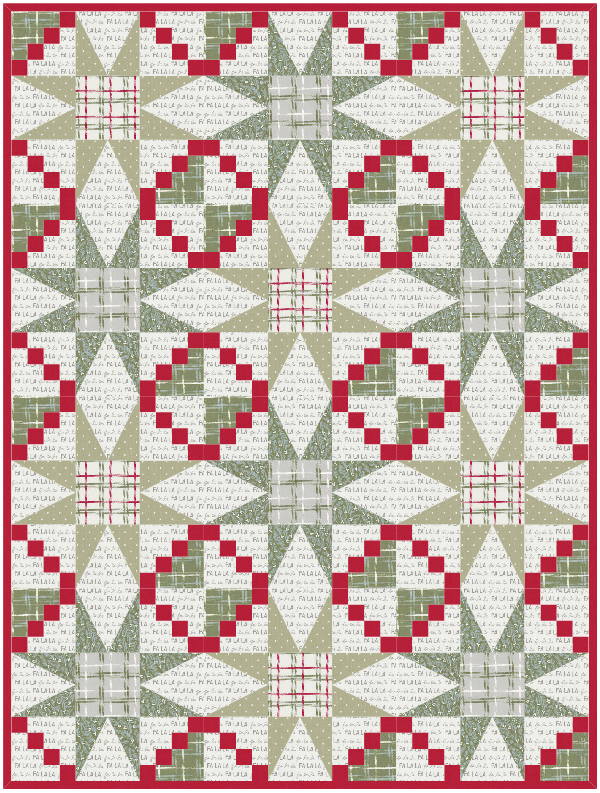
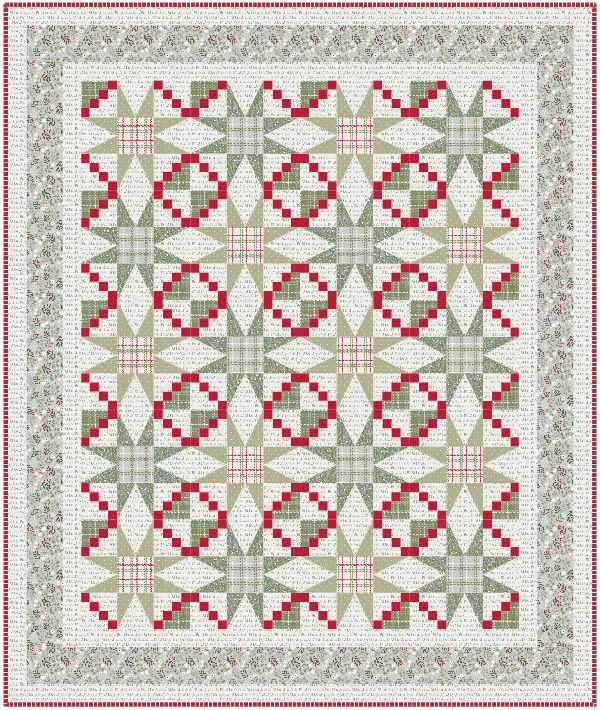
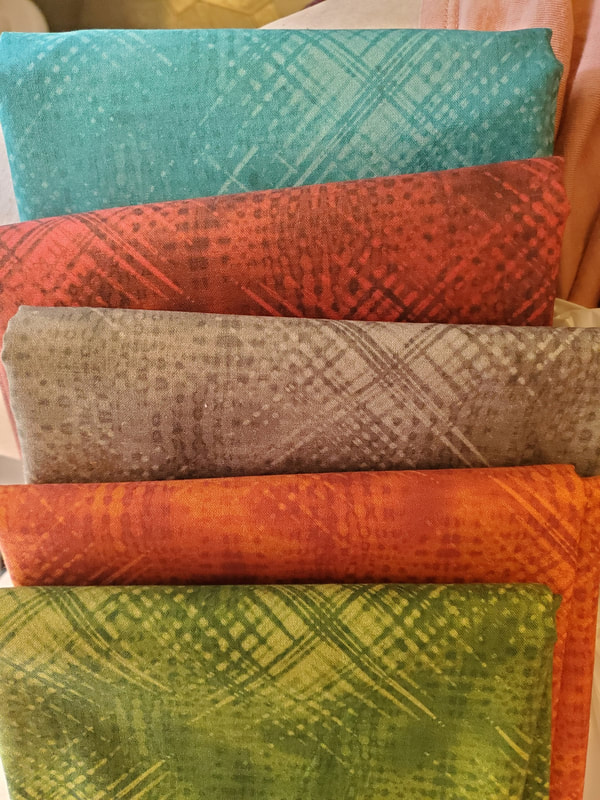
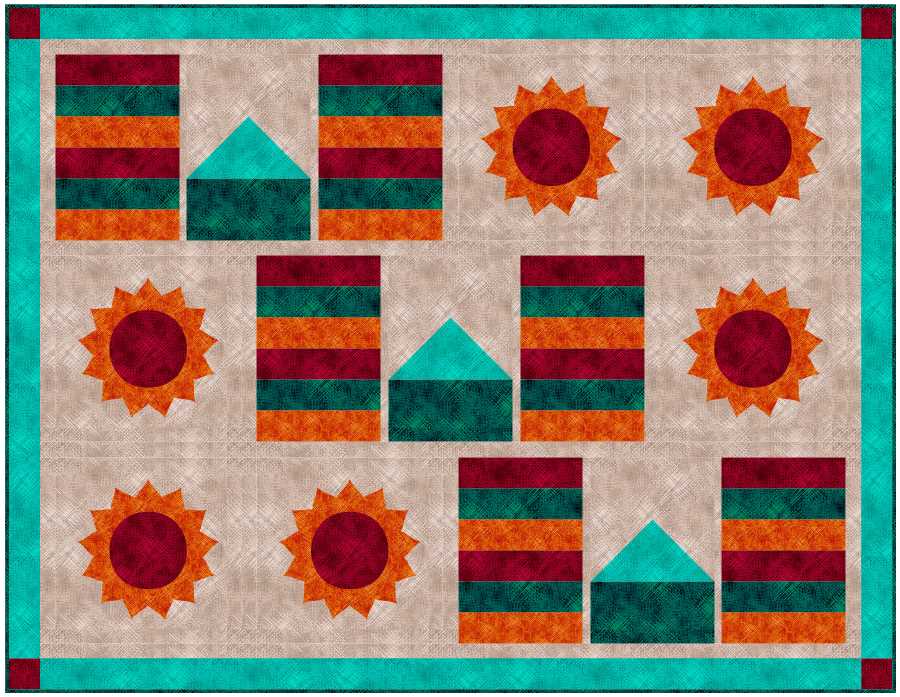
This has been an enjoyable weekend with family in Kansas City. I've been trying to get some Christmas shopping done -- which of course meant braving a few stores on Black Friday. I am finding that if you wait until mid-afternoon the shopping experience is much less stressful. However I have been thinking about some more crazy Black Friday experiences Back in my early-adult years, I remember getting up before the crack of dawn to stand in long lines for particularly enticing Black Friday offers. The one I remember best is the time I started with a trip to JoAnn Fabrics at 6 am. The store was a zoo. Uncle John came with me and graciously stood in the fabric cutting line for me while I scoured the store for some great buys. We were done by 7 am and hurried to Herberger's where they were handing out free cookbooks to the first few hundred customers. It is still one of my favorite cookbooks in my kitchen. The cookbooks also had coupons and I managed to score a $100 coupon with which I enjoyed a nice shopping spree. Did you participate in any Black Friday activities this year? If so, let me know your favorite find in the comments. My new EQ8 tutorial is an idea that will allow you to decompress after a busy shopping day. This new quilt design is focused on keeping things simple. Day After Black Friday Frenzy EQ8 Tutorial
With the busyness of the holiday season now upon us, I am all about easy.
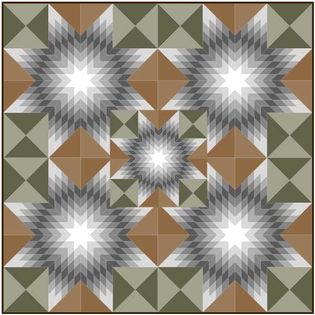
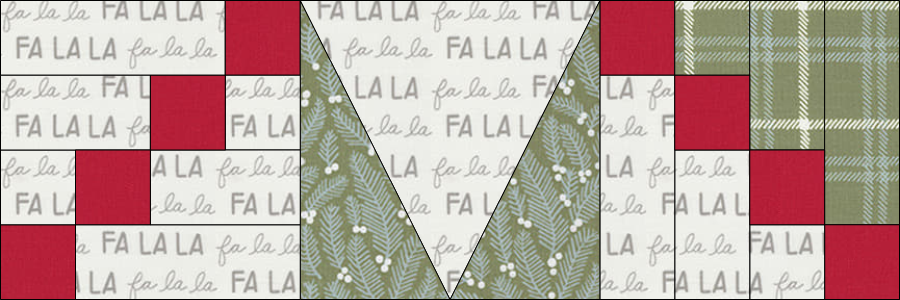
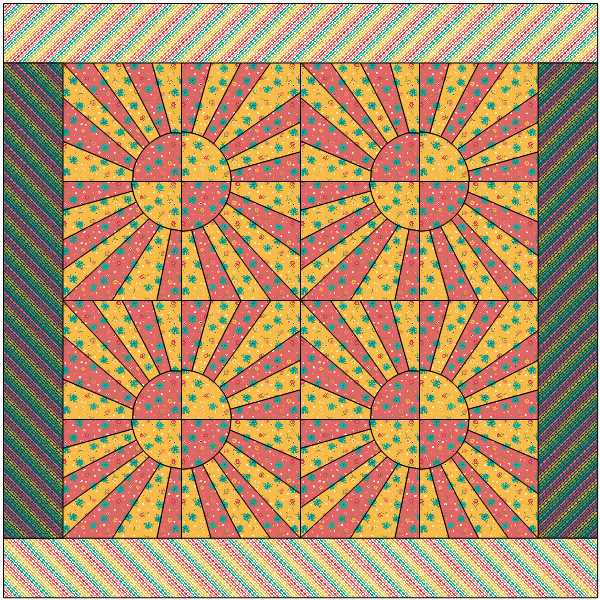
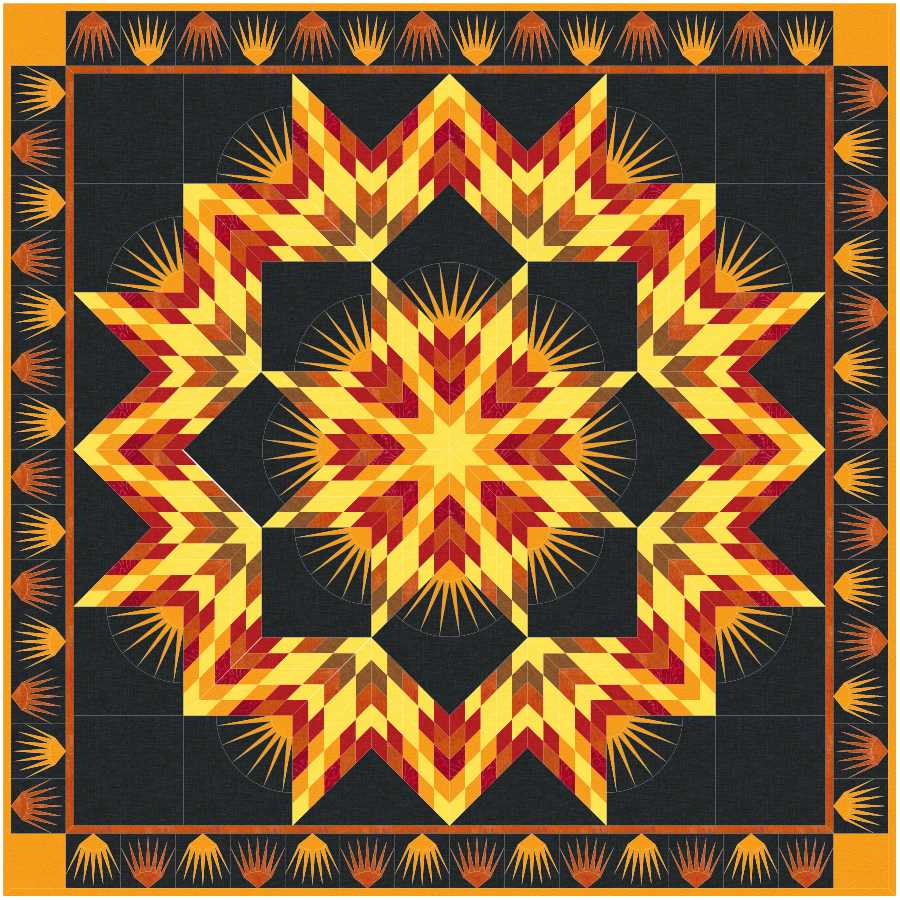
See how to play the "what if" game as you start with a simple 8 pointed star drawn with EQ8, Design your own corners and then play with a variety of options on the quilt worktable. Adding pieced borders is an opportunity to to create coordinating blocks using my 3 in 1 concept -- with no additional drawing required.
I look forward to seeing what you do with the Day After Black Friday Frenzy blocks. Feel free to share in the Learning EQ Facebook post.
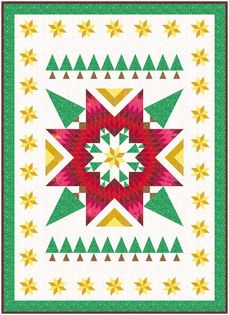
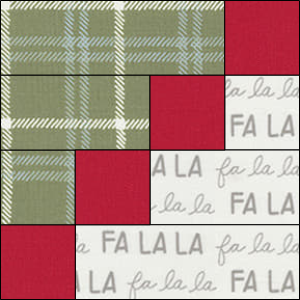
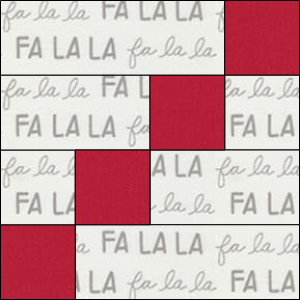
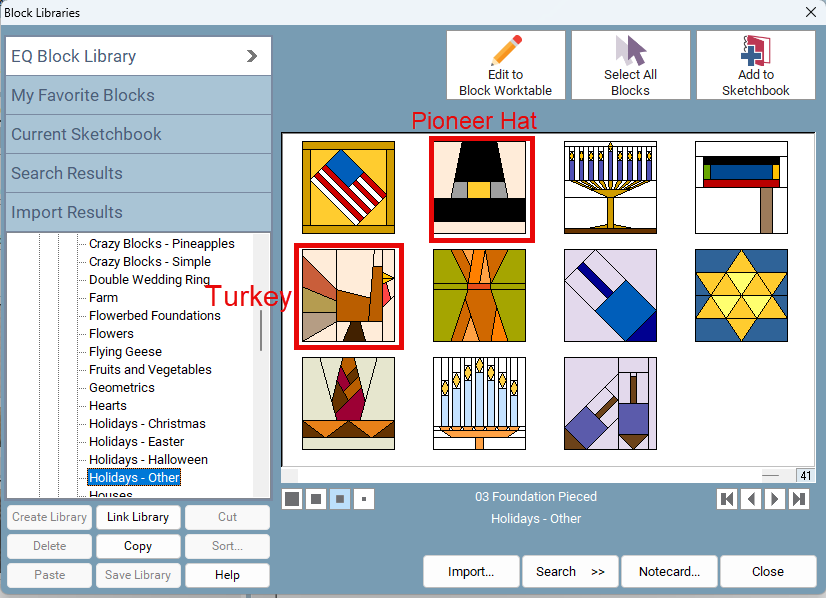
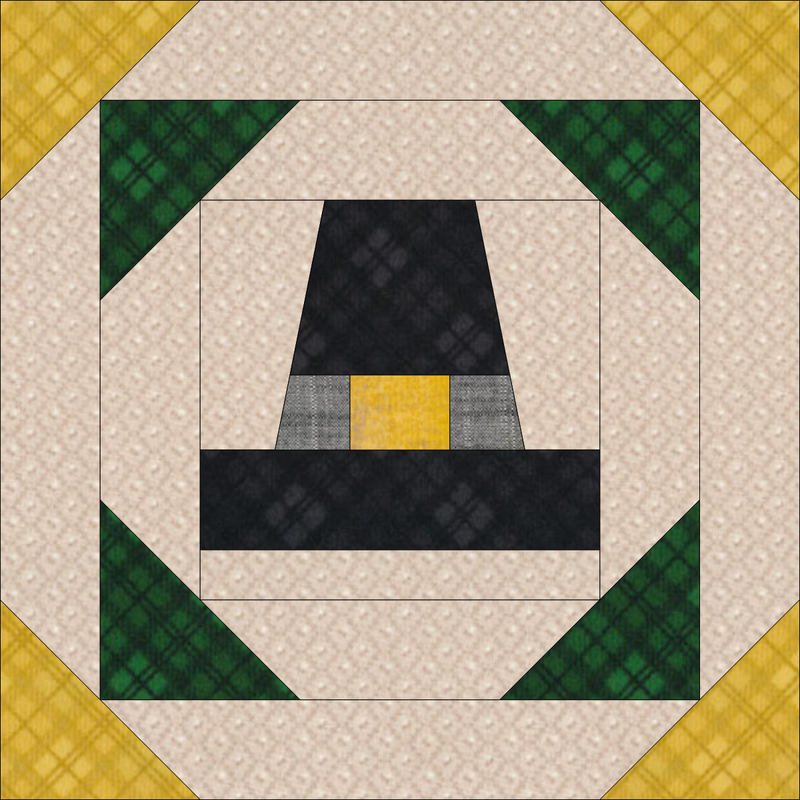
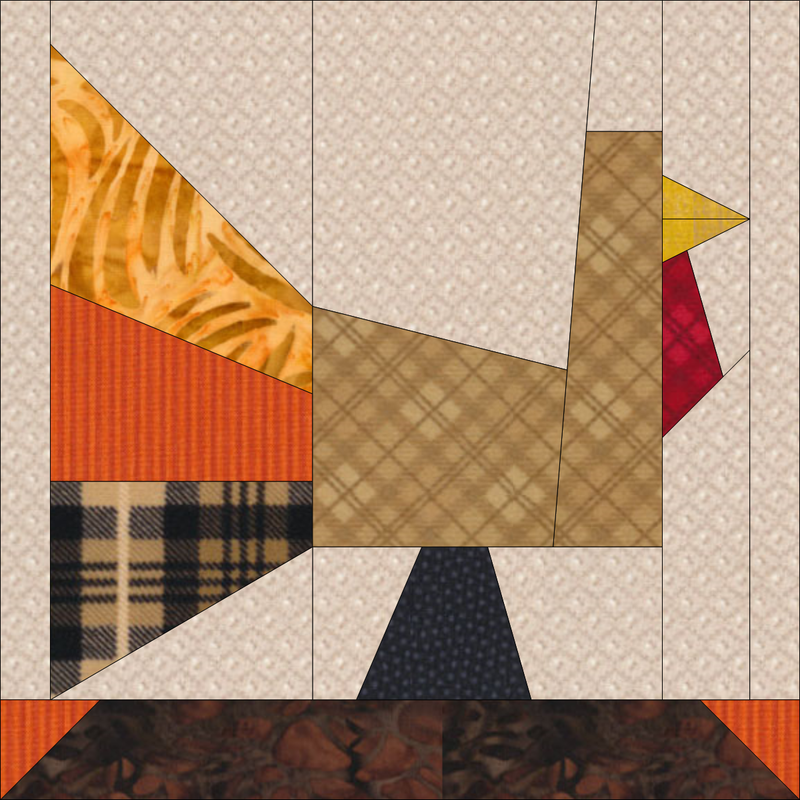
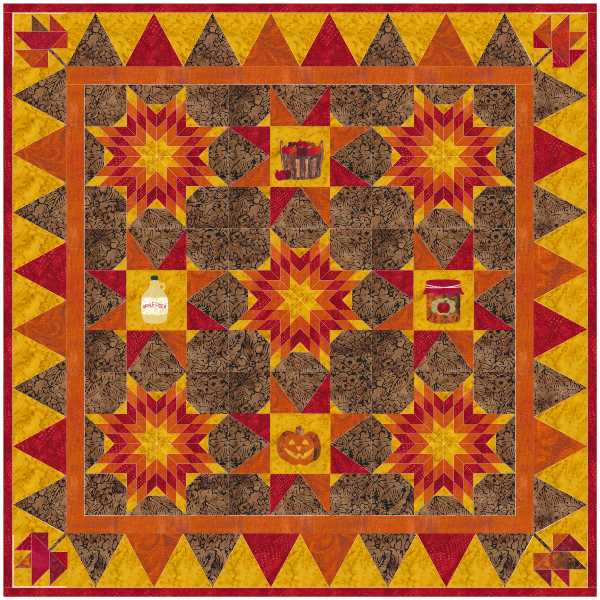
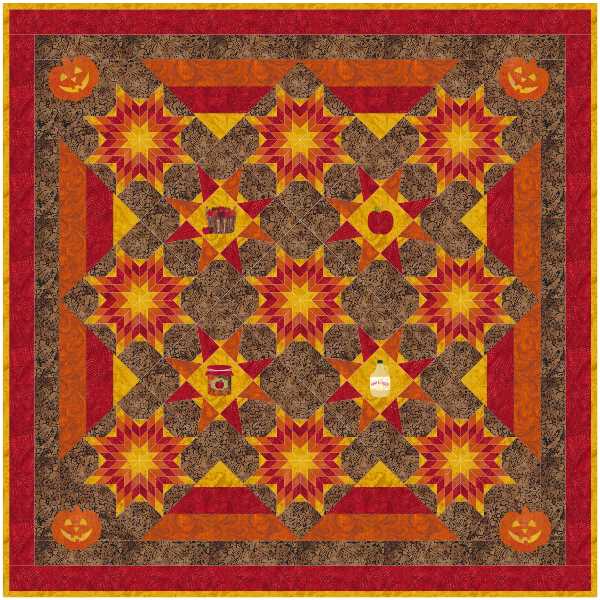
Turkey Celebration EQ8 Video Tutorial
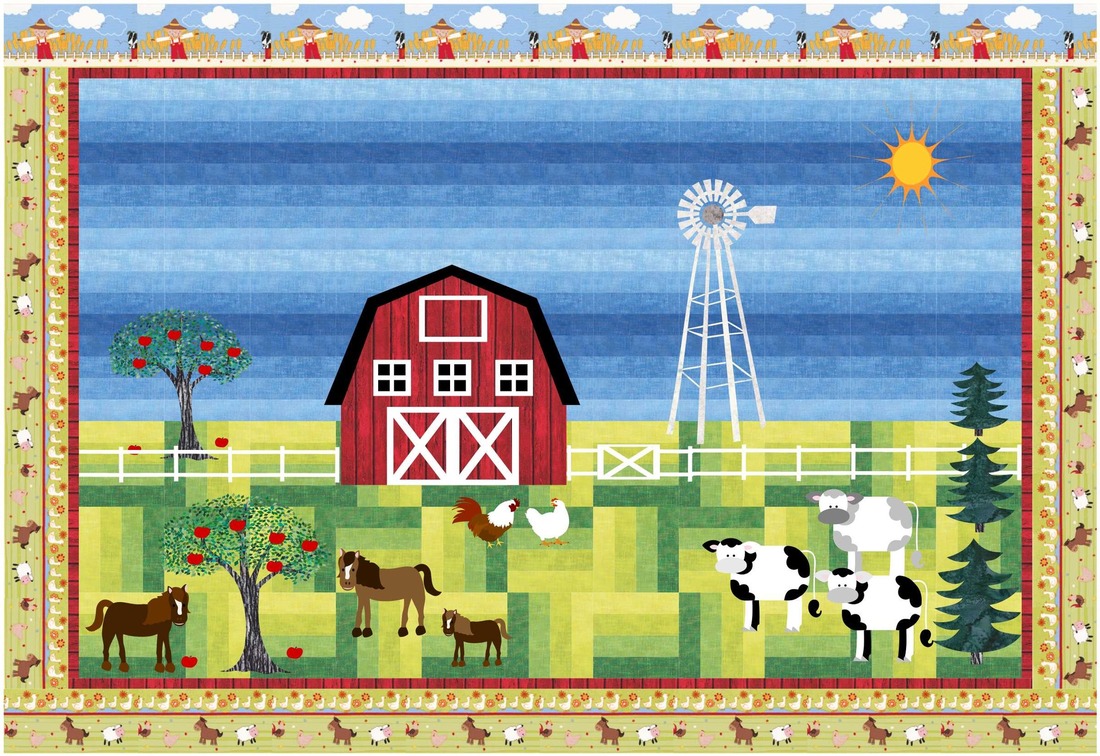
Last month I challenged the Tech Know Quilter Masters members to create a harvest themed quilt. You will definitely want to scroll down and check out their designs. They are super creative.
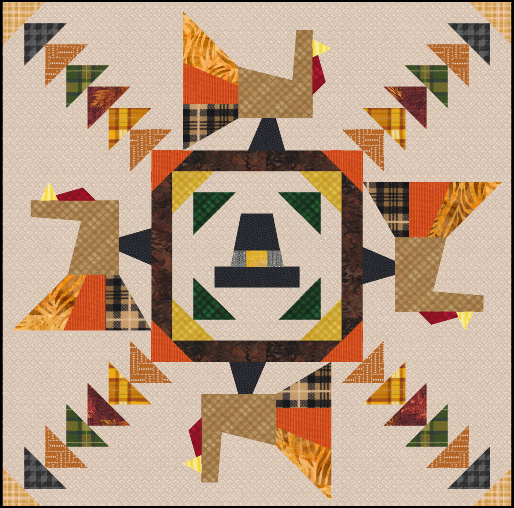
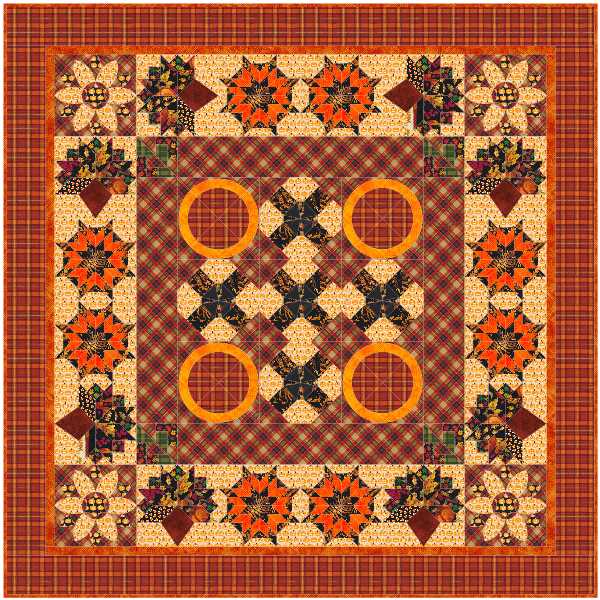
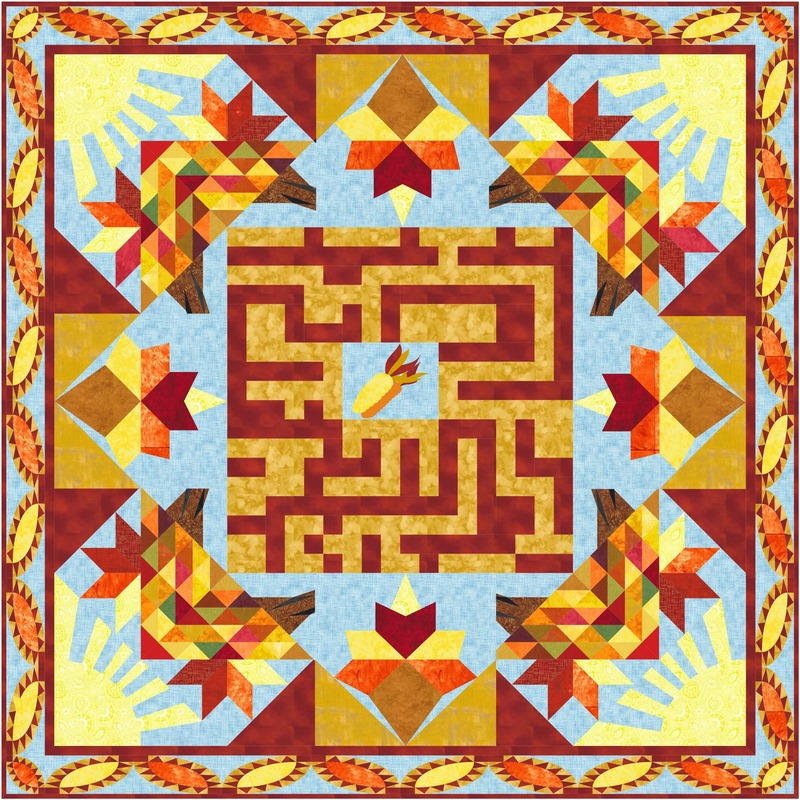
I decided to challenge myself to complete a harvest themed quilt myself. I will walk you through my process and share with you the blocks and quilts in this weeks video tutorial.
Draft three EasyDraw blocks. These are great beginner blocks to draft.
Use Serendipity>Merge Block for new blocks for the quilt center and for the Alternate Block Spaces.
For a different quilt, consider using different foundation blocks for the merge.
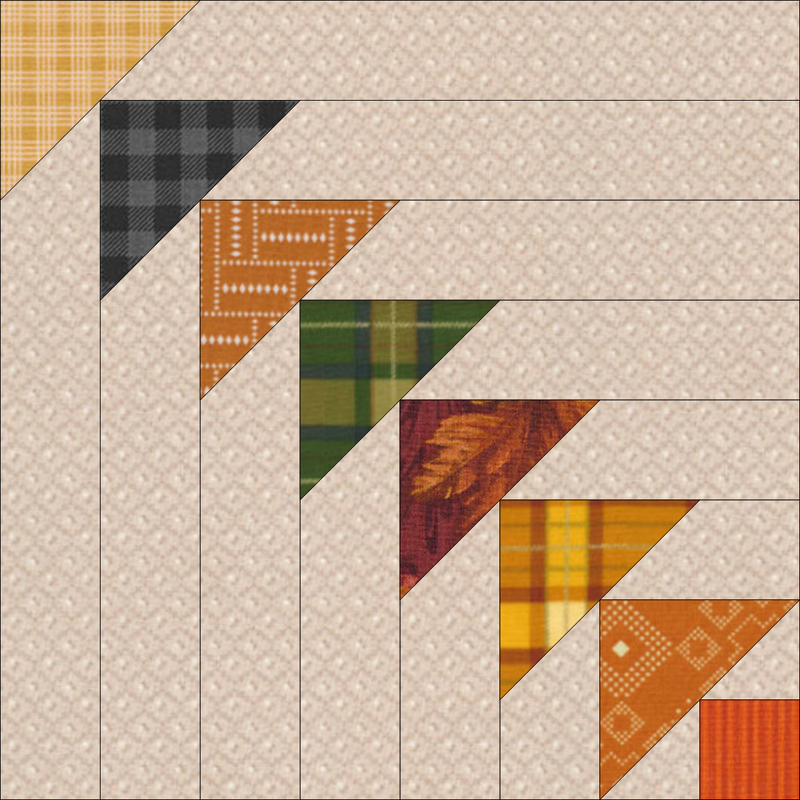
Note that the triangles in lower corners of the turkey block, will actually help us create a faux flying geese patch that will extend across three blocks.
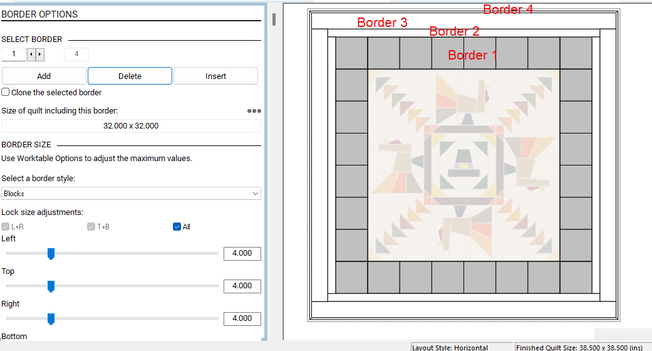
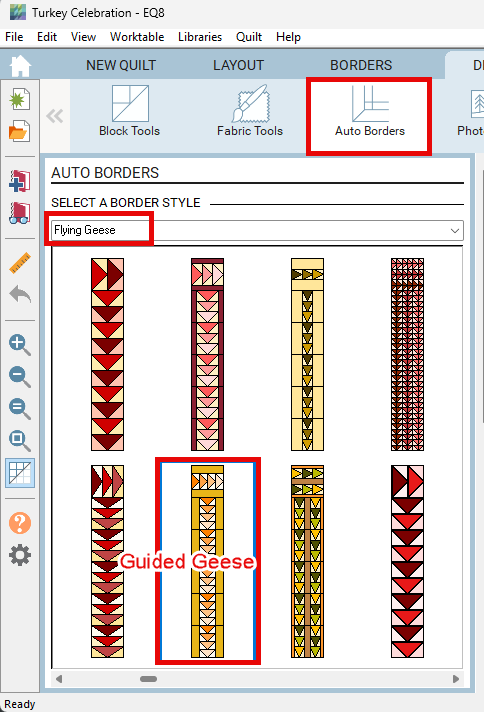
Finish off by coloring the blocks and remaining borders.
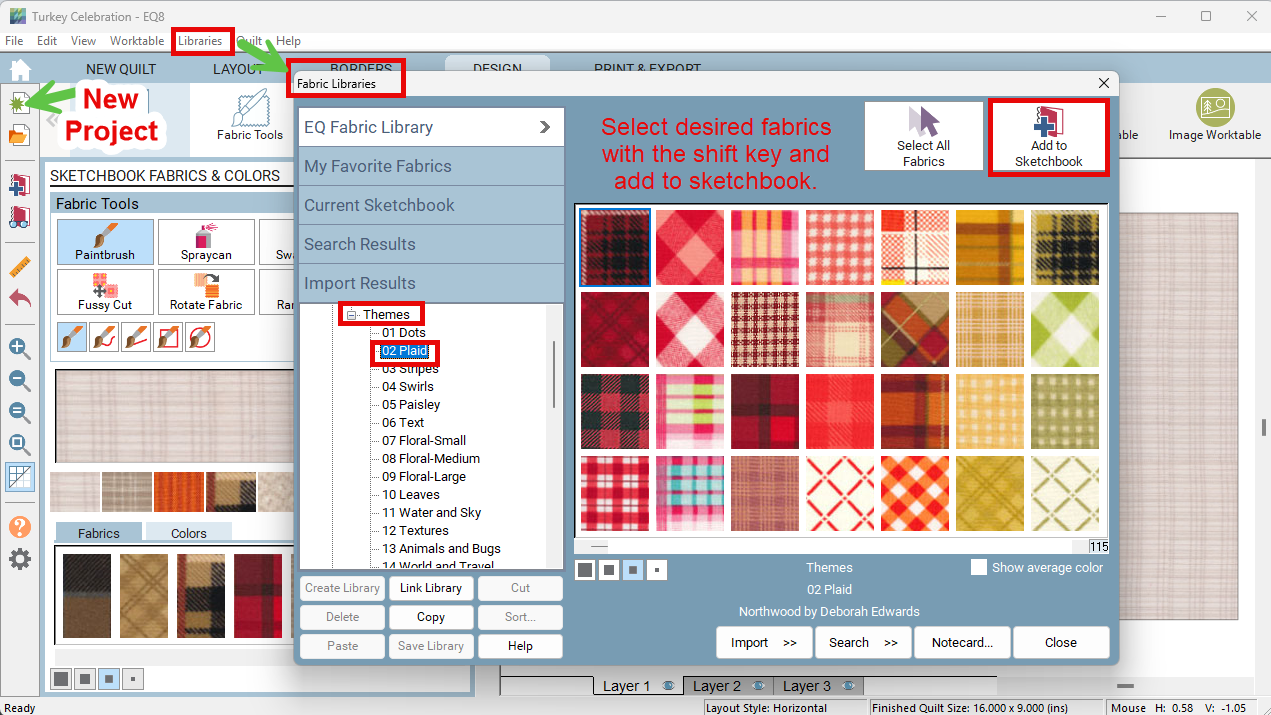
To save your work select "Add to Sketchbook". 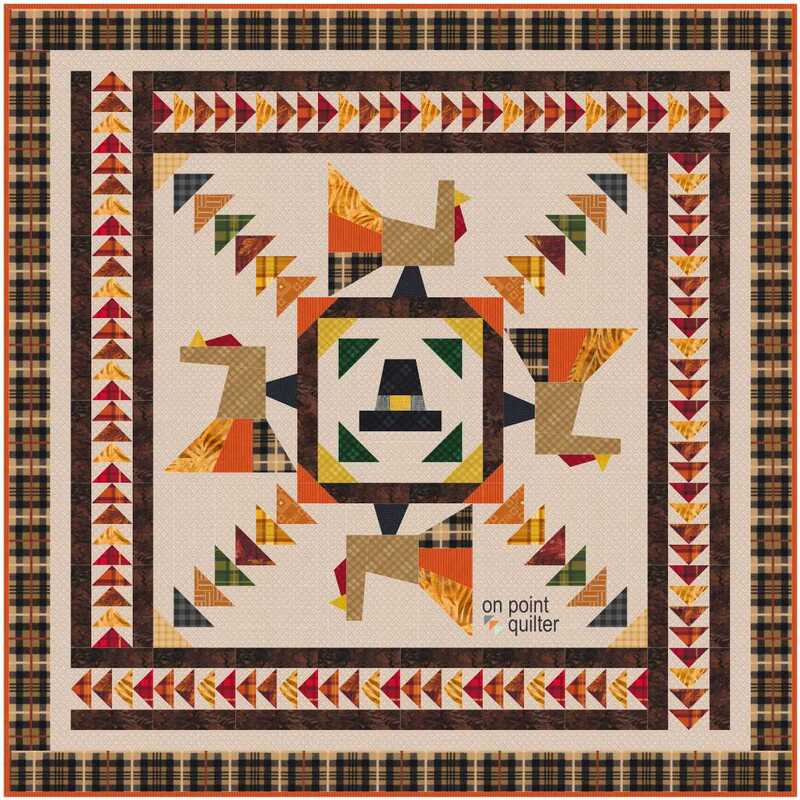
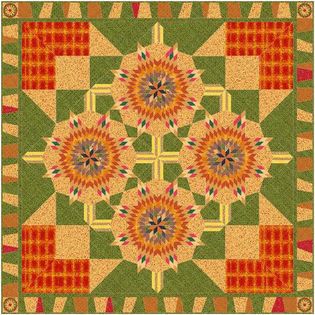
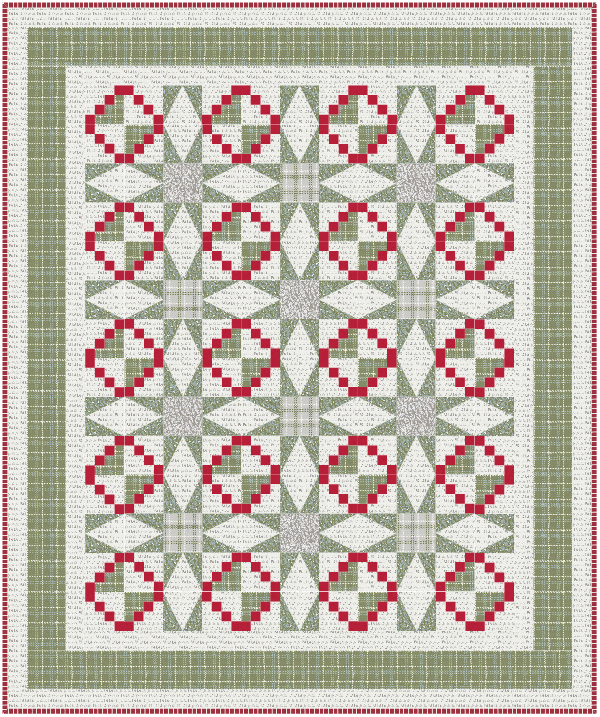
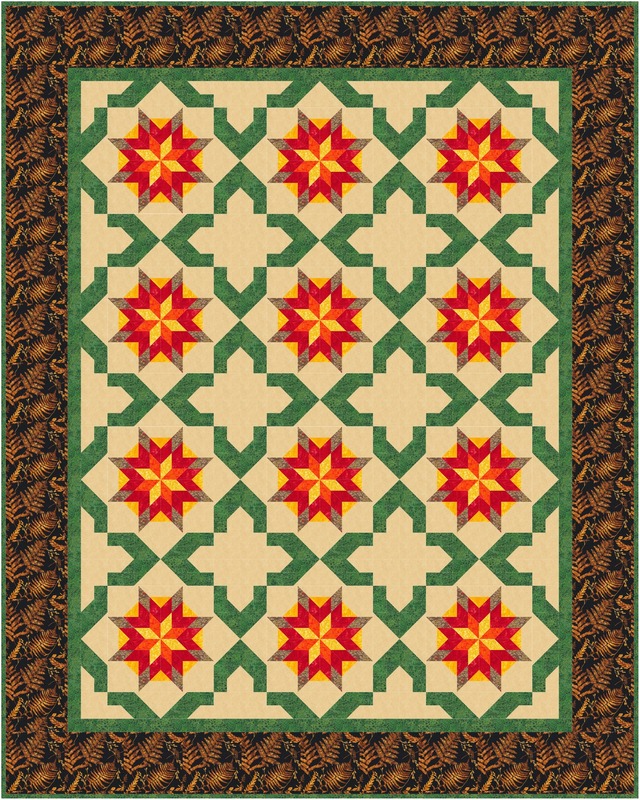
Turkey Celebration Designed by Kari Schell using EQ8
Check out the details in the video tutorial.
I look forward to seeing your version of this quilt. Please feel free to share your designs in the Learning EQ Facebook group.
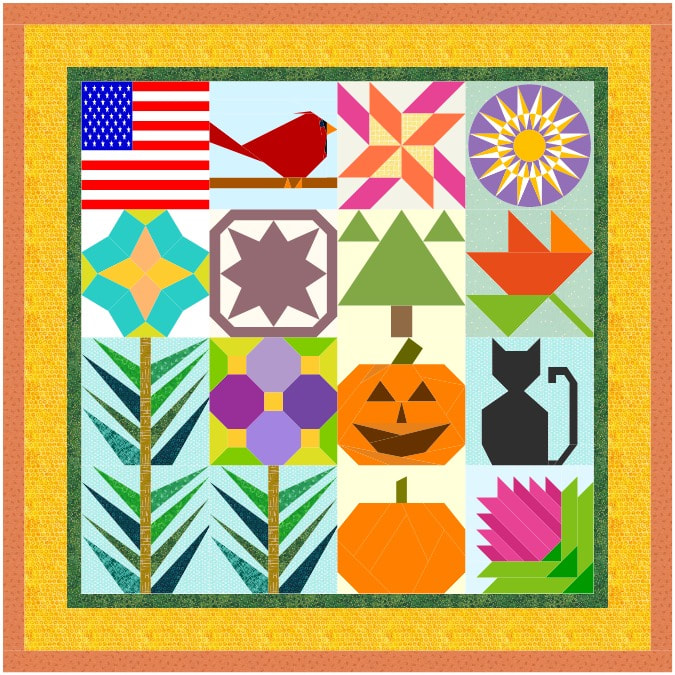
Harvest Time EQ8 Challenge Showcase
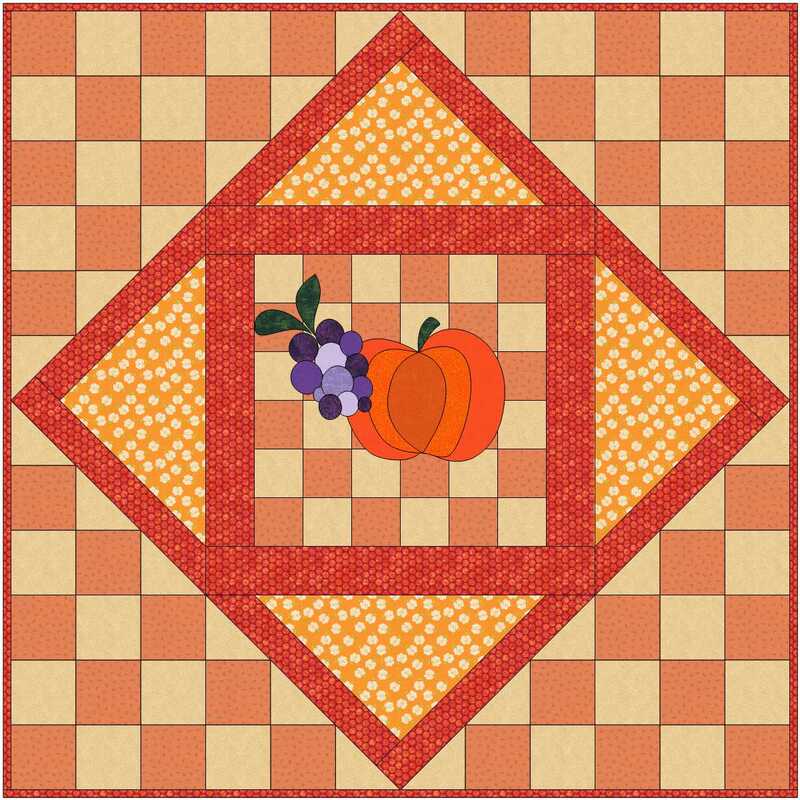
Each month, I provide a challenge to Tech Know Quilter Masters members. In October the challenge was to design a Harvest themed quilt. It is so amazing to see the creativity of this group of EQ8 users.
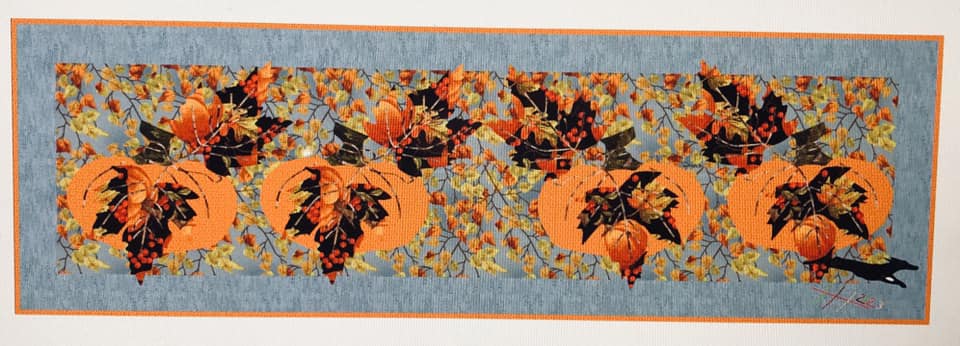
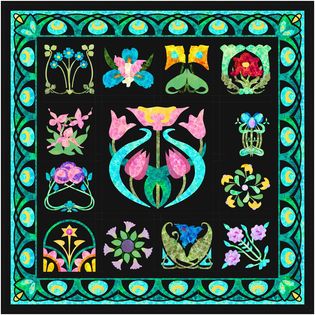
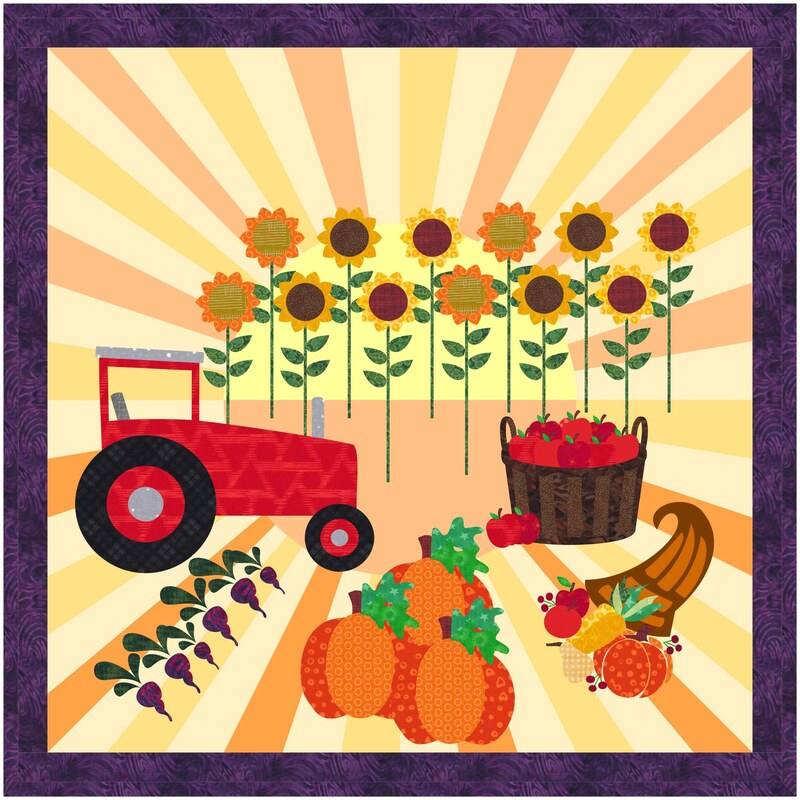
Helen Hicks Here’s my harvested pumpkin table runner truly had fun with this challenge
If you have completed twelve or more months of Tech Know Quilters, you are eligible to join Tech Know Quilters Masters. If this interests you, send me a note and I will provide you more information on the program.
I remember agonizing over my first purchase of Electric Quilt. I loved quilting and had a ton of patterns and books – more than I could ever use in my lifetime. Can you relate? I wasn’t completely convinced I needed the software. However, I also realized that those purchased patterns were not always accurate and there were quilts that I saw in magazines and at shows that did not have patterns. And I didn't necessarily want to make an exact replica of the quilts from patterns I had bought. Once I started using the software, I knew I couldn’t live without it. I quickly found that I recouped my investment in the software through significantly fewer PIGS (projects in grocery sacks). You know those quilts that you thought would be your next masterpiece. But as you got started piecing them, you realized something wasn’t quite right. I knew from my own struggles that the initial purchase of Electric Quilt 8 can be a challenging decision. As a result, I want to help you resolve whether the software will be useful for you. In this blog post I will be sharing with you:
Six Reasons to Purchase Electric Quilt 8 After purchasing Electric Quilt and working with it (and teaching others how to use it), I've come to realize that Electric Quilt 8 is hands down the best tool I have purchased for creating both blocks and quilts. Full disclosure. I use it personally, but I also teach people how to get the best use of the program. I am pretty sure you know which side of the fence I will come down on. But I want you to go into this with your eyes open. So I will also be sharing some of the objections to buying…to help you make the right decision for you. #1 - Audition Your Favorite Fabrics When is the last time you bought a pattern because you loved the quilt on the cover? And then realized that the fabric is no longer available. Or maybe it doesn't work well with the other colors in the room you are hoping to use the quilt in. If you have trouble visualizing what your favorite fabrics will look like in your quilt pattern, you are perfectly normal. Before Electric Quilt, I lost count of the number of times I purchased some fabulous fabrics, cut them up and realized (after the point of no return) they wouldn’t work with my selected quilt pattern. With Electric Quilt 8 you have the option to audition fabrics before your first cut. This can even be done before spending money on fabric.
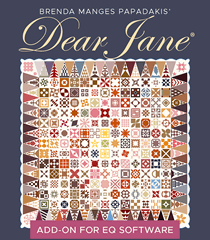
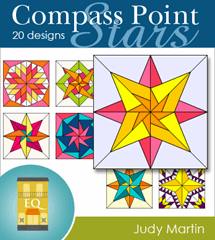
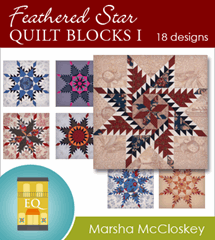
#2 - Never Manually Calculate Fabric Yardage Requirements Again One of my favorite features of Electric Quilt 8 is the ability to obtain fabric yardage requirements with a push of a button. If you use fabric from the Electric Quilt library, it even will provide you with a fabric reference number to assist you in purchasing the fabric at your favorite quilt shop. Bonus: A new feature in Electric Quilt 8 is the option of printing the number of Fat Quarters needed for your quilt. 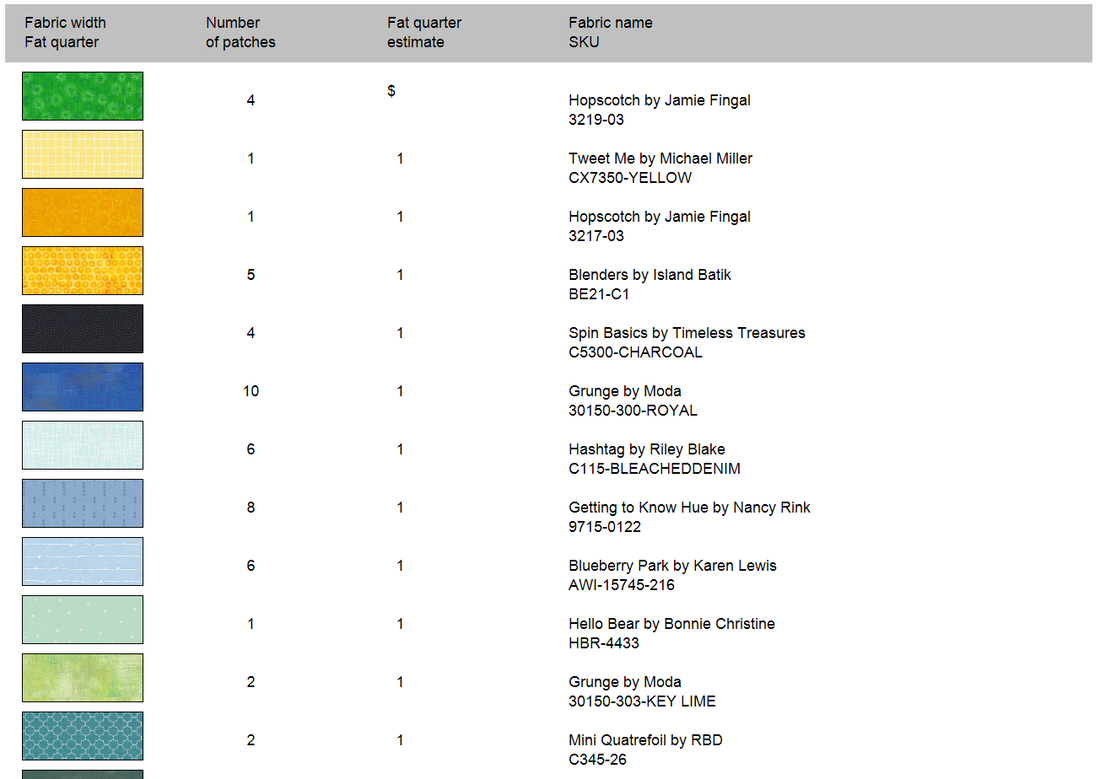 #3 - Modify Blocks and Quilts from Purchased Patterns Have you purchased a pattern and realized there are things you would like to change? Maybe the block needs to be tweaked to use your favorite ruler or die set. Or maybe the sizes or layout needs to be adjusted so the quilt can work for your bed -- and then of course you need to adjust the yardage requirements to accommodate the new size. Good news! Electric Quilt 8 has three different sets of tools for drawing your own blocks or redrafting a block from a picture. EasyDraw tools are similar to working with graph paper and pencil, just like you use to do.  And if you want to draw a more complex design, PolyDraw tools also allows you to create pieced blocks that are not based on a standard graph paper type of grid. Think circular or kaleidoscope types of designs.  If you are into hexagonal quilts, PolyDraw also provides us the ability to create interlocking blocks.  And if you love applique, you will definitely be interested in the applique toolkit. I have not found an applique project that cannot be drafting using Electric Quilt 8. 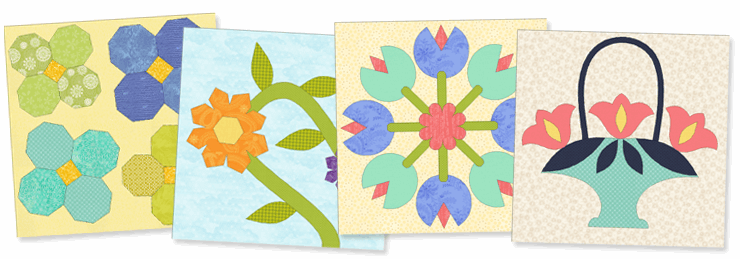 However, before starting to draft your own block, you may want to check if your block is in the Electric Quilt block library. With the release of EQ8, Electric Quilt added 1400 new bocks to their already extensive library. Giving us a total of 6500 blocks to choose from for starting our next quilt. But if you cannot locate your favorite block in the library, there is no need to worry. There is the option to import a picture of the block and trace it. This is probably my all time favorite feature of Electric Quilt 8. This is an area I love working with Electric Quilt users on and an area of focus in Tech Know Quilters - a paid membership program for Electric Quilt 8 users. There are also options to add more blocks to the library through collections such as as Block Base Plus based on Barbara Brackman's Encyclopedia of Pieced Quilt Patterns. Choose from collections by Judy Martin, Marsha McCloskey or even Dear Jane. And the beauty is that all of these blocks will be able to be modified by you within Electric Quilt 8.
Within Electric Quilt 8, they even have added a group of Serendipity tools that provides a fast way to create entirely new blocks based on a previously drafted block. I find this is a great option for creating brand new original quilt blocks on days I am not feeling super creative. 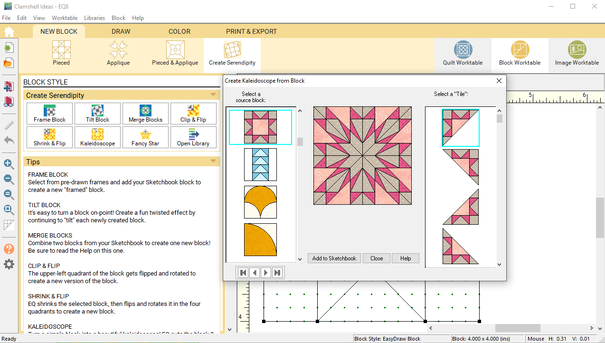 #4 - Select Your Favorite Construction MethodMany potential Electric Quilt 8 users wondering if the software will assist them in constructing their block. Electric Quilt does assume that users are familiar with basic quilt construction techniques. The software will not teach you how to applique, foundation piece or even piece together rotary cut patches. It will also not provide you step by step instructions typically found in a purchased quilt pattern. However it will provide you with a variety of tools to facilitate cutting fabric and even the foundations to paper piece your blocks. The method of construction is your choice.
#5 - Save Money |


 |  |
This bonus is only available if you purchase through the affiliate link.
Affiliate Link Bonus #2 Spring Fever Challenge Material
- Spring Fever Video Series – Video series covering creation of seven original foundation friendly blocks plus related quilt.
- Kari’s Spring Fever EQ8 project file.
 |  |
This bonus is only available if you purchase through the affiliate link.
Ready to Purchase Electric Quilt 8?
Just click on the picture, enter your name and email and you will receive my affiliate link to purchase Electric Quilt on the Electric Quilt website. Then watch for a follow up email from me where I will ask you for your purchase info.
Electric Quilt currently has a sale going on (25% off everything in their store). Now through November 30, 2023. So now is a great time to make the investment in EQ8.
Electric Quilt currently has a sale going on (25% off everything in their store). Now through November 30, 2023. So now is a great time to make the investment in EQ8.

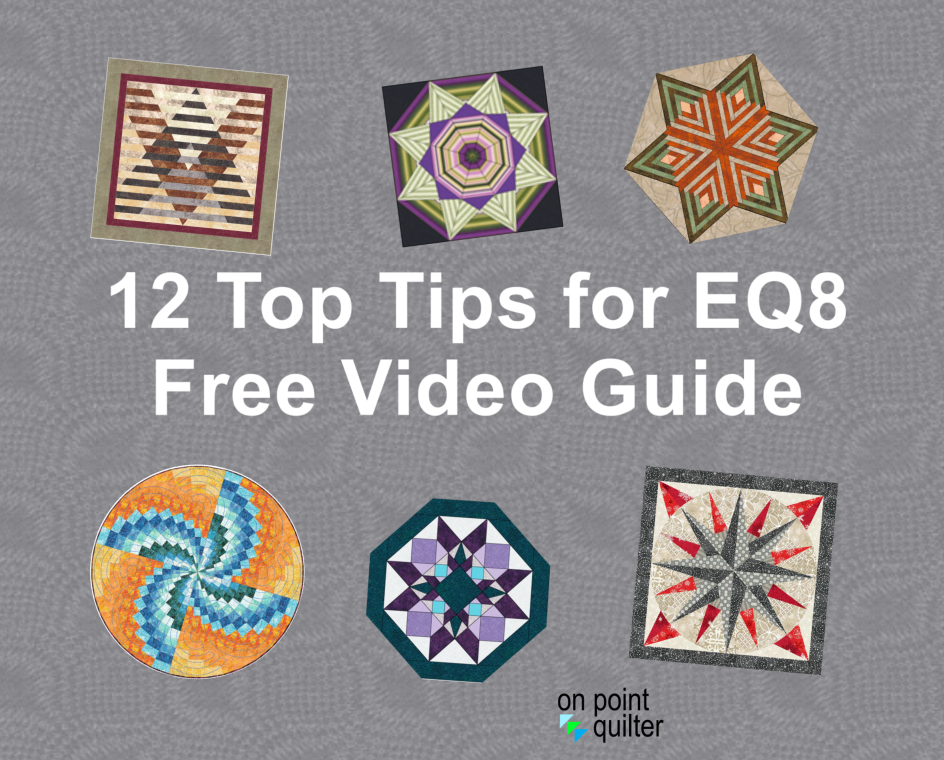
 | Kari Not quite ready to purchase. Join the On Point Quilter weekly newsletter and receive regular tips and inspiration on using Electric Quilt 8 along with the Free 12 Top Tips for EQ8 video guide.  |
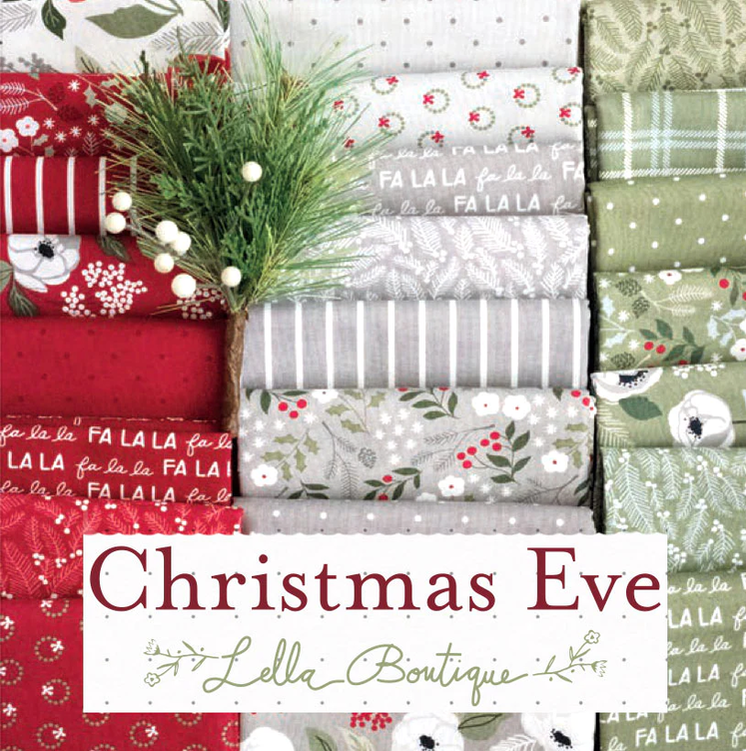
Background on Hawaiian Quilting
|
According to Wikipedia, a Hawaiian quilt is a distinctive quilting style of the Hawaiian Islands that uses large radially symmetric applique patterns. Motifs often include stylized botanical designs.
Hawaiian-style quilts typically use solid or near-solid fabrics in only two colors. These quilts were historically made from the fabrics that were most readily available (often red and white). |

Hawaiian Block from Letter I drafted in EQ by Kari Schell
|
|
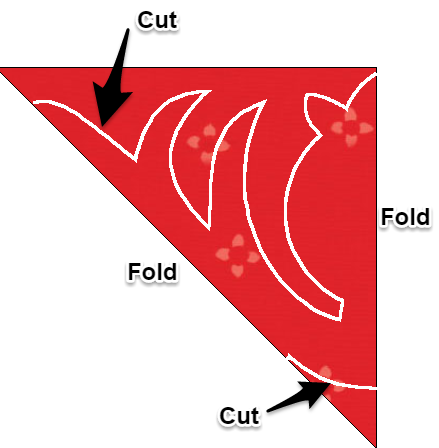
Hawaiian quilt applique is made from a single cut on folded fabric. The fabric is folded in quarters or eighths -- similar to how we may have done paper snowflakes back in grade school.
You could use an Electronic cutting machine, such as a Cricut, Silhouette or Brother Scan N Cut machine to cut out your final image. Alternatively you could go low-tech. Fold a piece of freezer paper in eighths and trace top section on the freezer paper. Cut out all your layers at once. You can then iron the freezer paper to your fabric and cut out your fabric. You can choose whether you wish to add seam allowances. |
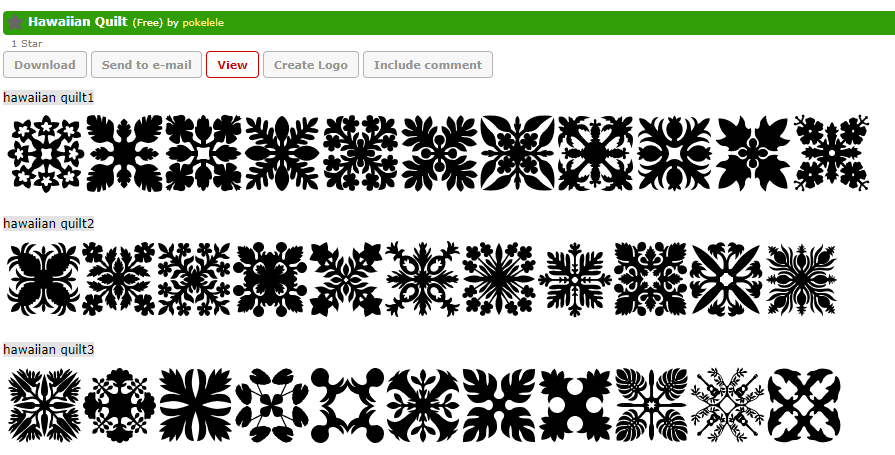
Hawaiian Quilt Font
A number of years ago, I discovered a Hawaiian quilt font. Each letter provided a Hawaiian applique quilt block. When I looked on the Internet today, I discovered three different Hawaiian quilt block fonts.
You can download the fonts for free from Netfontes.com The fonts were designed by Pokelele.
I decided that these "letters" would make great quilt blocks, and would also be good practice for learning to use the applique tools in Electric Quilt 8.
You can download the fonts for free from Netfontes.com The fonts were designed by Pokelele.
I decided that these "letters" would make great quilt blocks, and would also be good practice for learning to use the applique tools in Electric Quilt 8.
Once installed you can even use the alphabet on the quilt worktable. Make sure you are on Layer 2 and have a contrasting color from your background selected.
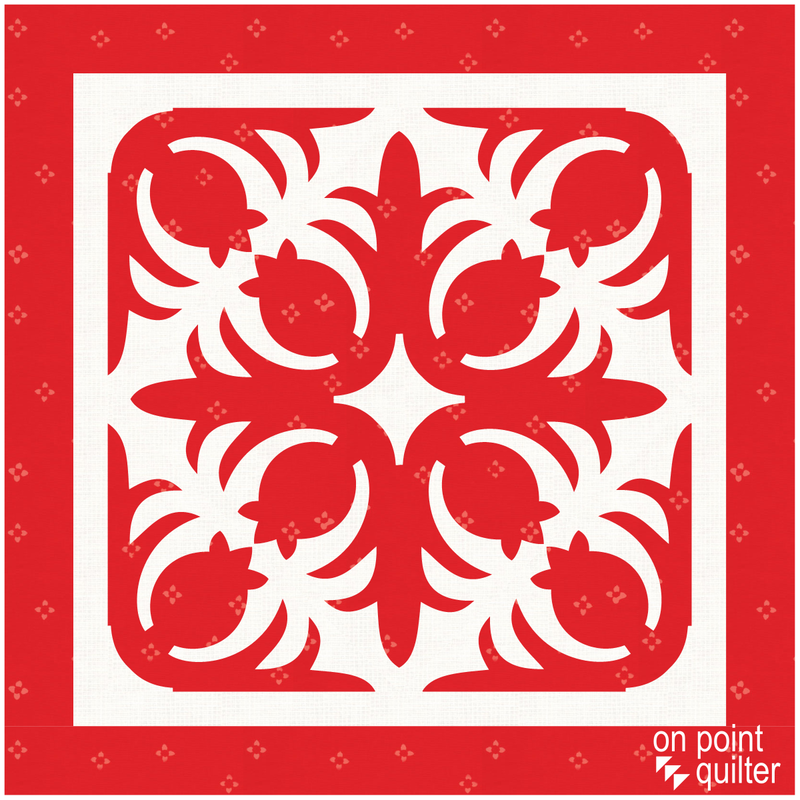
Drafting a Hawaiian Quilt Block using EQ8

Letter I in Hawaiian Quilt 1 font
|
In my tutorial this week, I will share with you how to draft a Hawaiian quilt block in Electric Quilt using a "letter" from the Hawaiian font as the starting point.
Here are the pdfs with images of the Hawaiian fonts I obtained from Netfontes.com. Feel free to use my pdf to select images for tracing a Hawaiian quilt block using Electric Quilt.. |
Here is the quilt from the video.
Hawaiian Quilt featuring the letter I designed by Kari Schell using EQ8
Letter Challenge
Are you ready to put on your detective hat? Here is a "letter" quilt I just designed in EQ8. Each letter was drafted as an applique block in EQ8. Can you decode it?
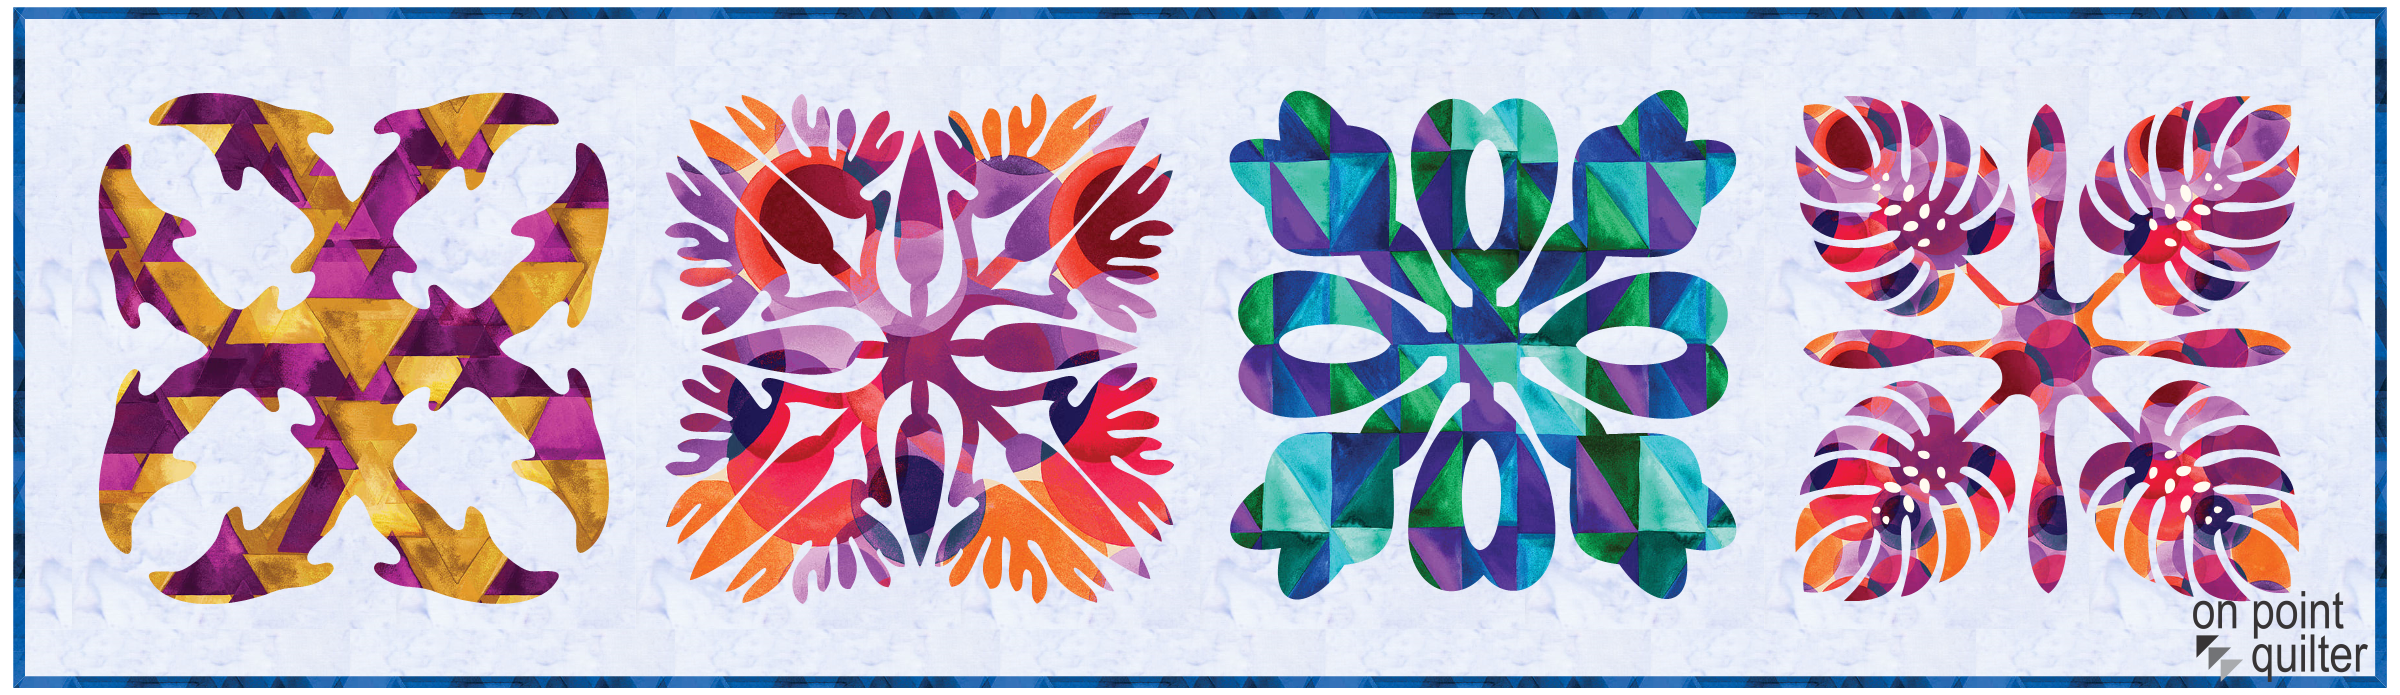
Hawaiian Code Quilt by Kari Schell using EQ8.
A challenge for you - Create your own Hawaiian code quilt. Post a picture in the Learning EQ Facebook group and let's have fun solving each others coded quilts. No requirements on number of letters (even one is ok). The idea is to have some fun playing with EQ.
Ready to Learn the Applique Tools in Electric Quilt 8?
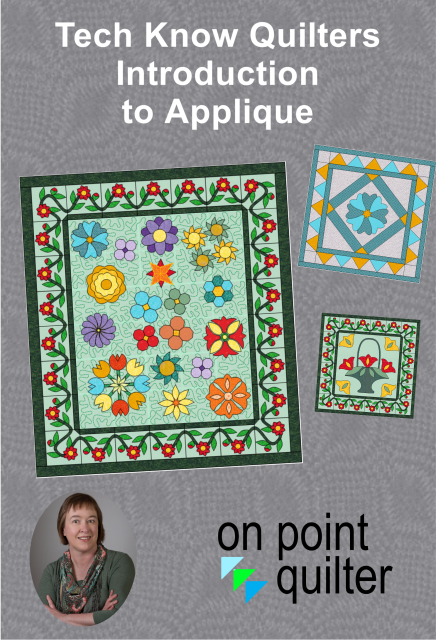
If you would like to expanding your applique drawing skills, I recommend my Tech Know Quilter class, Introduction to Applique. You will receive eleven 10 minute lessons (with videos along with written and illustrated tutorials) that will take you step by step through the applique toolkit as you draft a series of blocks and an applique quilt.
My plans are to open enrollment for Tech Know Quilters at the end of December. (The membership is a more economical way to take the class.)
Send me a note if you are a current member and would like to add this to you current class for November. I will send you a discount coupon for the class. |
If you are new to Applique (or would like to learn at a slower and more methodical approach), I offer an Introduction to Applique class. It is offered in Tech Know Quilters - a membership focused on mastery of Electric Quilt 8.
I have also included a few of the beginning Tech Know Quilter classes in my store -- for those that would like to try a class before joining the membership.
Introduction to Applique Agenda
|
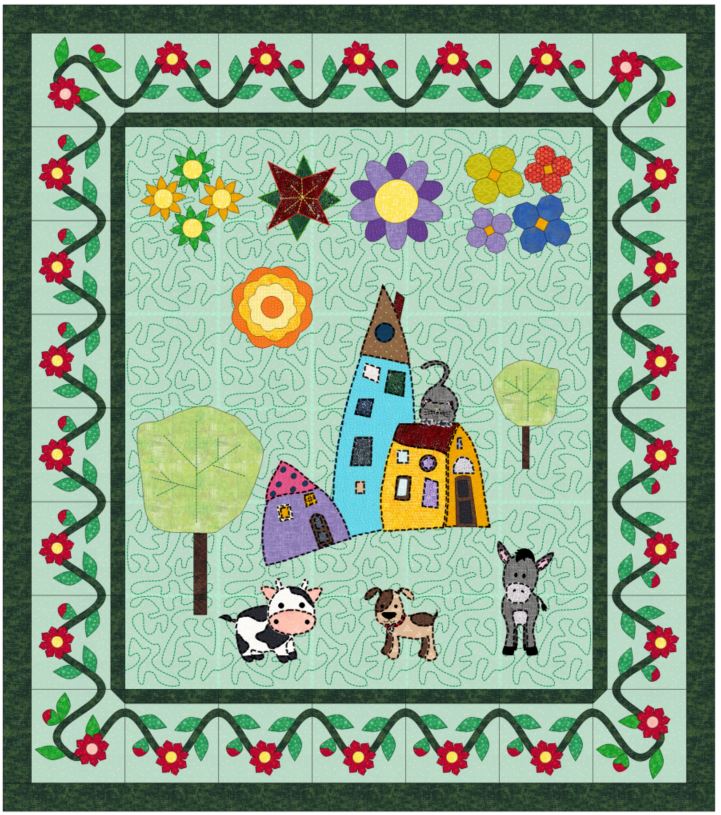
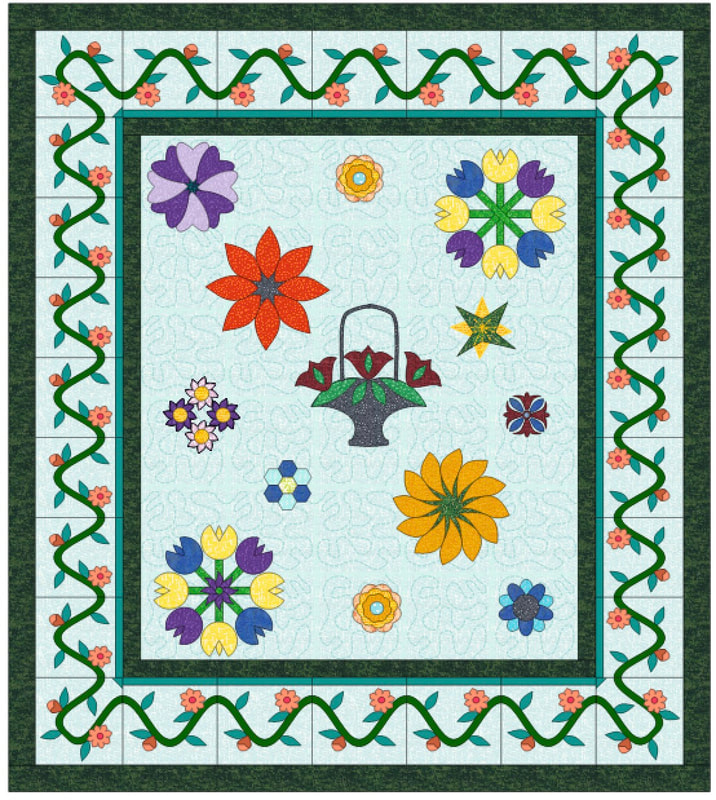
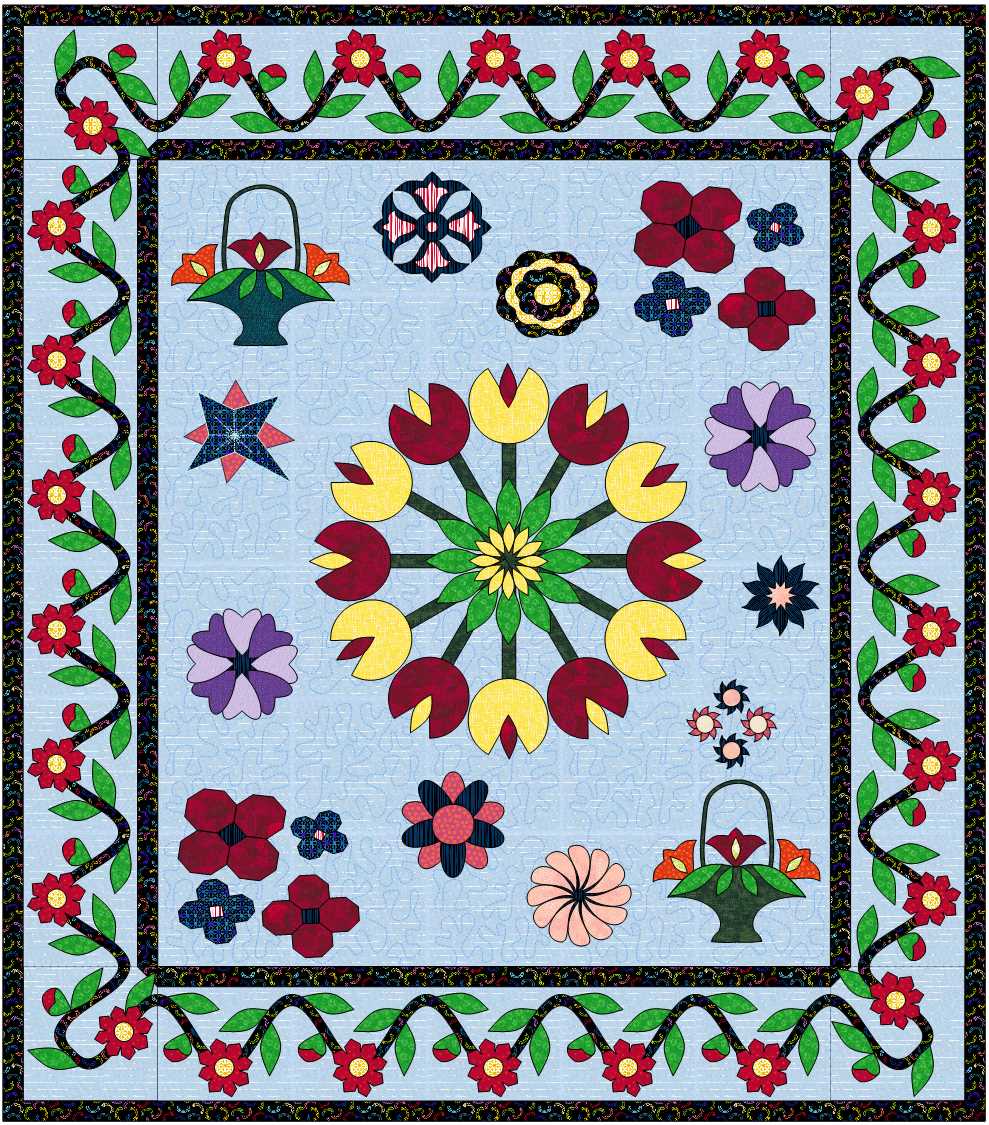
Here are a few images shared by Tech Know Quilter members after completing the Introduction to Applique class.
Nanne Panne (combined elements of the class with original applique)
|
Ad Sumida
|

Mary Groesbeck
|
Zdenka Nemethova
|

Dianna Carter said the class was so fun, she had to design an extra quilt. She never though she would love to do applique.
|
Linda Goldfarb
|

|
Happy quilting.
Kari Join the On Point Quilter weekly newsletter and receive regular tips and inspiration on using Electric Quilt 8 along with the Free 12 Top Tips for EQ8 video guide. 
|


Free guide available for newsletter subscribers


Kari Schell
Electric Quilt Expert and Educator and Pattern Designer.
Categories
All
Art And Stitch
Cricut Maker
Dear Jane
Electric Quilt 7
Electric Quilt 8
Goose Goose Duck Challenge
Inkscape
Longarm Quilting
Patterns
Silhouette Cameo
Stampin Up
Summer Games
Tips And Techniques
Tools And Rulers
Archives
April 2024
March 2024
February 2024
January 2024
December 2023
November 2023
October 2023
September 2023
August 2023
July 2023
June 2023
May 2023
April 2023
March 2023
February 2023
January 2023
December 2022
November 2022
October 2022
September 2022
August 2022
July 2022
June 2022
May 2022
April 2022
March 2022
February 2022
January 2022
December 2021
November 2021
October 2021
September 2021
August 2021
July 2021
June 2021
May 2021
April 2021
March 2021
February 2021
January 2021
December 2020
November 2020
October 2020
September 2020
August 2020
July 2020
June 2020
May 2020
April 2020
March 2020
February 2020
January 2020
December 2019
November 2019
October 2019
September 2019
August 2019
July 2019
June 2019
May 2019
April 2019
March 2019
February 2019
January 2019
December 2018
November 2018
October 2018
September 2018
August 2018
July 2018
June 2018
May 2018
April 2018
March 2018
February 2018
January 2018
December 2017
November 2017
October 2017
September 2017
August 2017
July 2017
June 2017
May 2017
April 2017
March 2017
February 2017
January 2017
December 2016
November 2016
October 2016
September 2016
August 2016
July 2016
June 2016
May 2016
April 2016
March 2016
February 2016
January 2016
December 2015
November 2015
October 2015
September 2015
August 2015
July 2015
June 2015
May 2015
April 2015
March 2015
February 2015
January 2015
December 2014
November 2014
October 2014
September 2014
July 2014
June 2014
May 2014
April 2014
March 2014
February 2014
January 2014
December 2013
November 2013
October 2013
September 2013
August 2013
 RSS Feed