
|
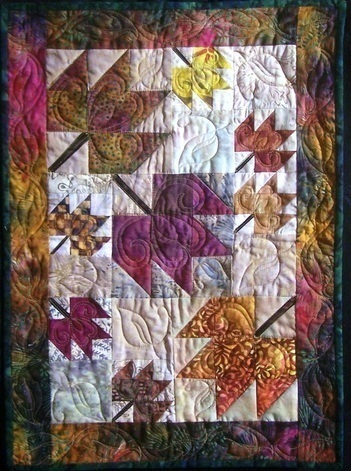
Cycling Quilt Block by Kari Schell Block #7 is Cycling. As I write this post, it is 75 degrees, a slight breeze and low humidity. The perfect weather for a bike ride. I've promised myself one as soon as I get this post done. There are actually four major categories of cycling in the Olympics. All events are speed races. Track cycling is usually held on specially built banked tracks or velodromes using track bicycles. Road bicycle racing is held on paved roads. Road racing is the most popular professional form of bicycle racing. Mountain bike racing is held on off-road terrain. BMX racing is a type of off road bicycle racing. The track usually consists of a starting gate for up to eight racers, a groomed, serpentine, dirt race course made of various jumps and rollers and a finish line. The course is usually flat, about 15 feet wide and has large banked corners that help the riders maintain speed. Do you like the wheels on the paper pieced bicycle? They will take a bit of time of piece -- but I think it is worth the extra effort. Click here to download the block pattern for paper piecing. (The free download period for this block has now expired.) Pattern includes over-sized cutting instructions and piecing diagram. Please make sure to verify that you are printing actual size (no scaling). In your options you may need to uncheck "print to page". Click here to purchase other block patterns. As a reminder, each day during the Olympics I will provide a free block for the quilt. The instructions for each block will be downloadable for 24 hours. Check in each day to get all the patterns at no charge. If you miss a pattern, you may purchase it in my store. Drafting the Cycling Block using Electric Quilt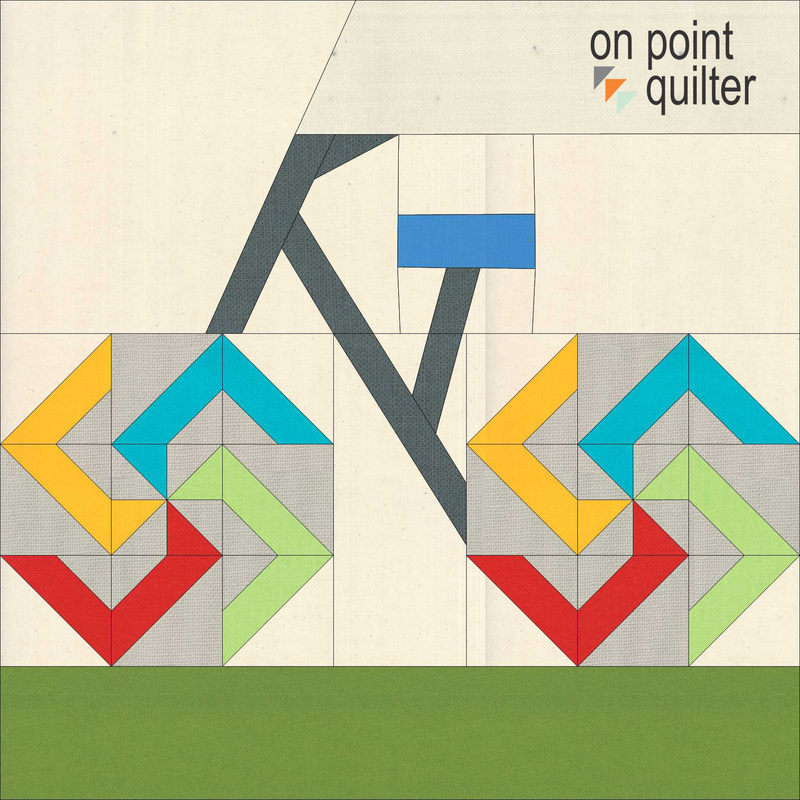 Cycling Block Drafted in Electric Quilt by Kari Schell Select Block>New Block>Easy Draw block. Import above image for tracing in the Tracing tab. Easy Draw Drawing Board Set-Up: Width/Height: 12 x 12 Snaps: 12 x 12 Snapping Options: Snap to Grid. Use your Line tool and draft the five major sections. Add to Sketchbook. Save. 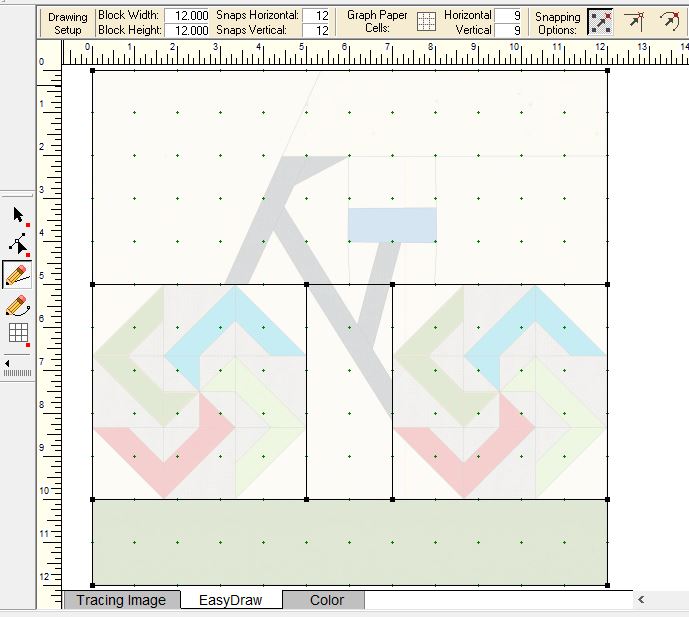 Segmenting Cycling Block in Electric Quilt for Foundation Sections Select the red dot on the Grid tool. Change Columns and Rows to 3 x 3. Drag grid in space for each of the two wheels. Add to Sketchbook. Save. 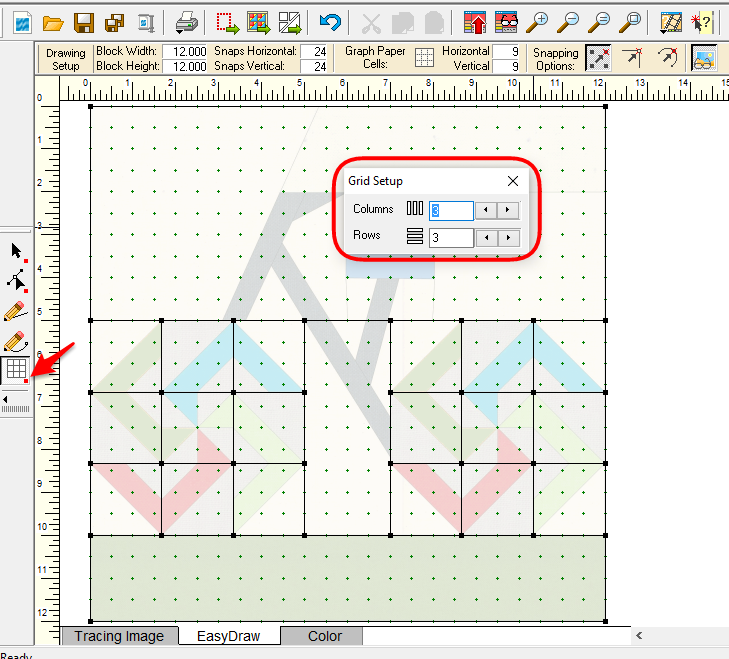 Creating the Wheels in Electric Quilt Change Snap Settings to Snap to Node. Select the red dot next to the shape tool. Select the inside line segments for each wheel and select Half. Select the Line tool and draw the lines to trace the spokes of the wheels. Add to Sketchbook. Save. 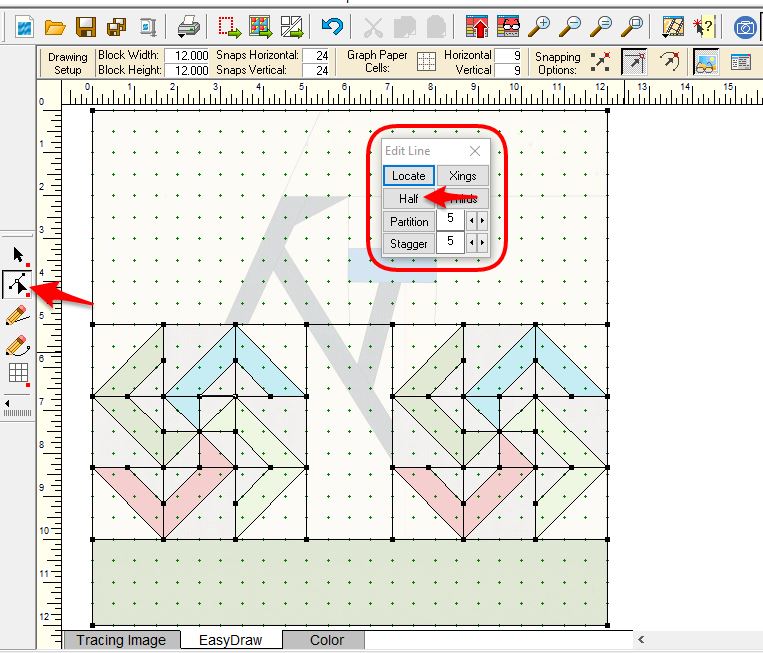 Creating the Wheel Spokes with the Edit Tool in Electric Quilt Change Snap Settings to Snap to Lines and Arcs of Drawing. Select the Line tool and trace the remaining lines. Add to Sketchbook. Save. 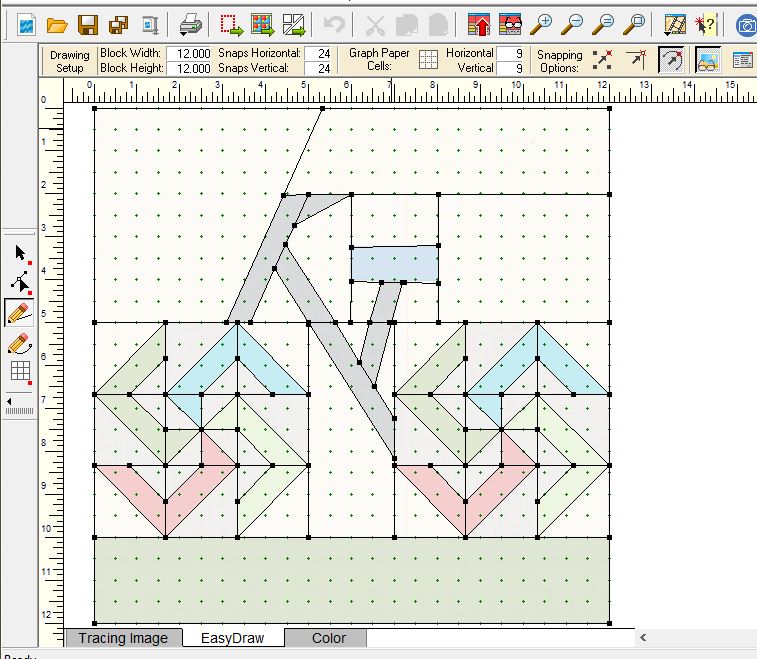 Finishing the Cycle Foundation Piecing in Electric Quilt
Cynthia WTson/Thompson
8/10/2016 06:51:40 am
This is very kind of you to draft this and give it to us. I very much appreciate this. Thank you
Monika
8/10/2016 07:41:09 am
Thanks for the tutorials, Kari. I always learn something. Had not come across the Half feature yet. Never know which snap to use, so that was helpful as well.
Cat
8/10/2016 09:11:42 am
Your blocks are very creative! Different than most would design, but still recognizable
Lilia
8/10/2016 10:11:49 am
The wheels are cleverly done. My first thought was just to make pinwheel blocks there but maybe that would be too big for the bike frame. The way you have done them gives more of the feel of a curve and a bike in motion.
Lilia
8/10/2016 11:51:47 am
Kari, is there a way to drop in a block into the area for wheels in the EQ7 block library if we wanted to do a different block in those areas for wheels? Just curious. I like 3874 - Calico compass but would rather not draft it out if I can drop it into the given perimeters of those square shapes. I've never thought of that before and just wondered since we are looking at wheels here
Kari
8/10/2016 08:12:53 pm
After the initial sectioning you can use Serendipity, Merge Block and put it in one of the Wheels. However that won't work for the second wheel. You can try copy/paste -- but it can be problematic to try to get all the nodes lined up, It is usually faster to just redraft the block from scratch. Sometimes in that situation (after the copy/paste) and I will convert the new lines to guidelines. Then it is easier to trace.
Tana
8/10/2016 08:57:38 pm
I am learning so much by following your tutorials, thanks Kari. Comments are closed.
|


Free guide available for newsletter subscribers


Kari SchellElectric Quilt Expert and Educator and Pattern Designer. Categories
All
Archives
April 2024
|
 RSS Feed