
|
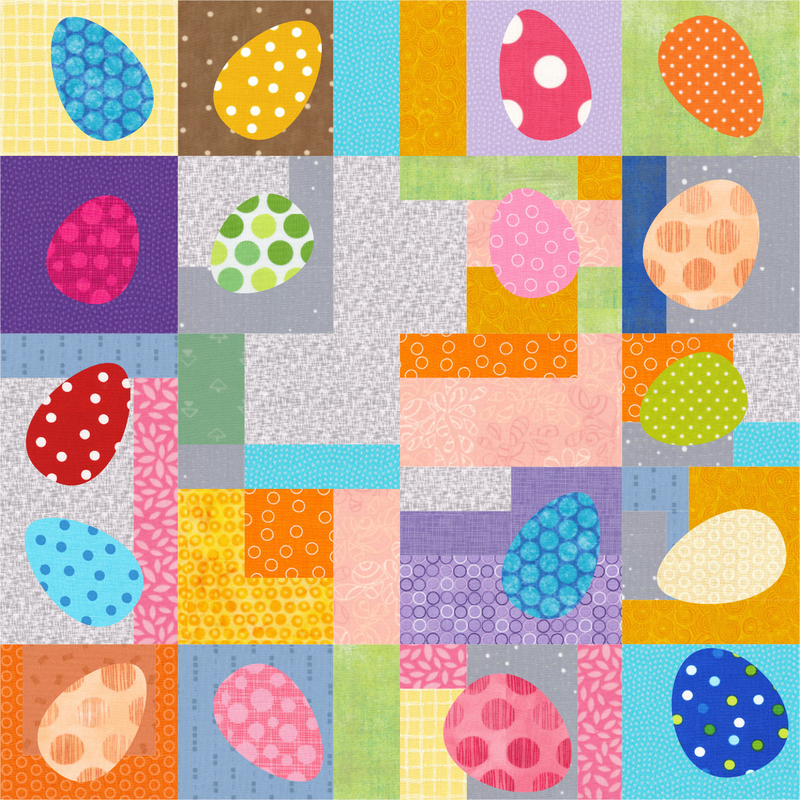
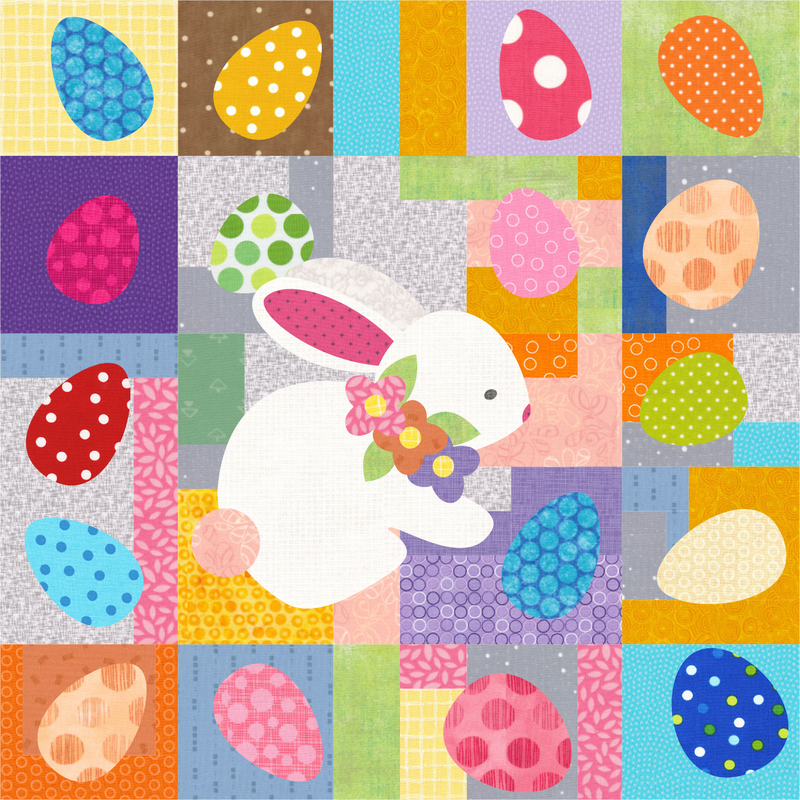
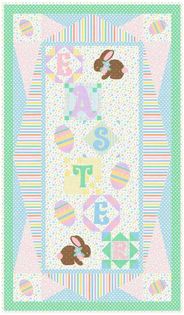
The weather is getting warmer. And spring is getting closer. I loved playing with some spring colored fabrics in creating this fun new block which has two quilt options.
There are three components to the whimsical/block:
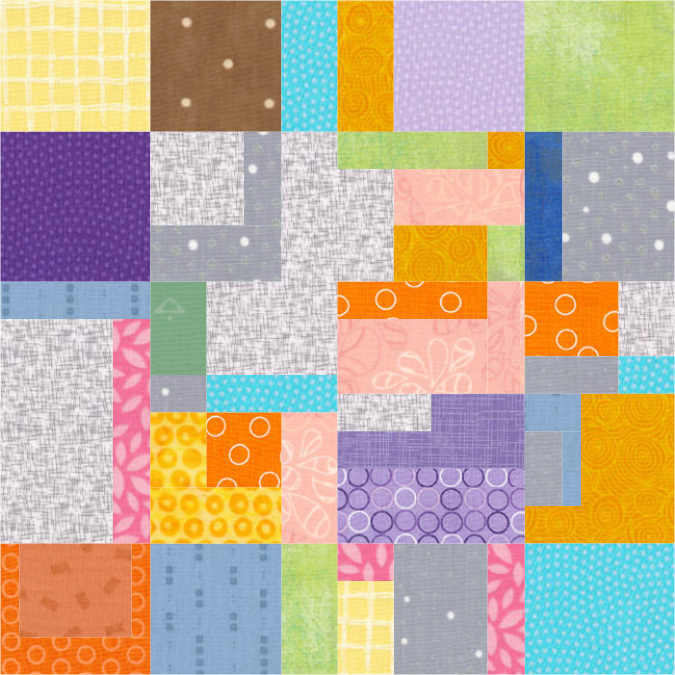
Easter Egg Hunt DesignPieced Background
Adding Applique Eggs
Blocks were colored with the default palette and Dots fabrics The Dots fabrics are available in the EQ8 Fabric library under Themes.
Adding the Bunny from the EQ8 Blocks Library
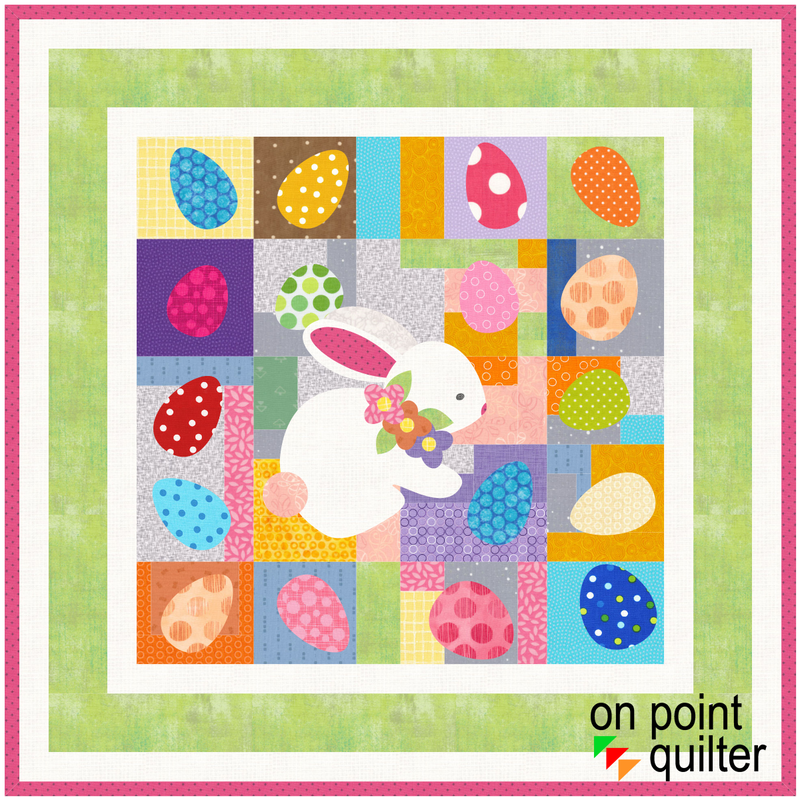
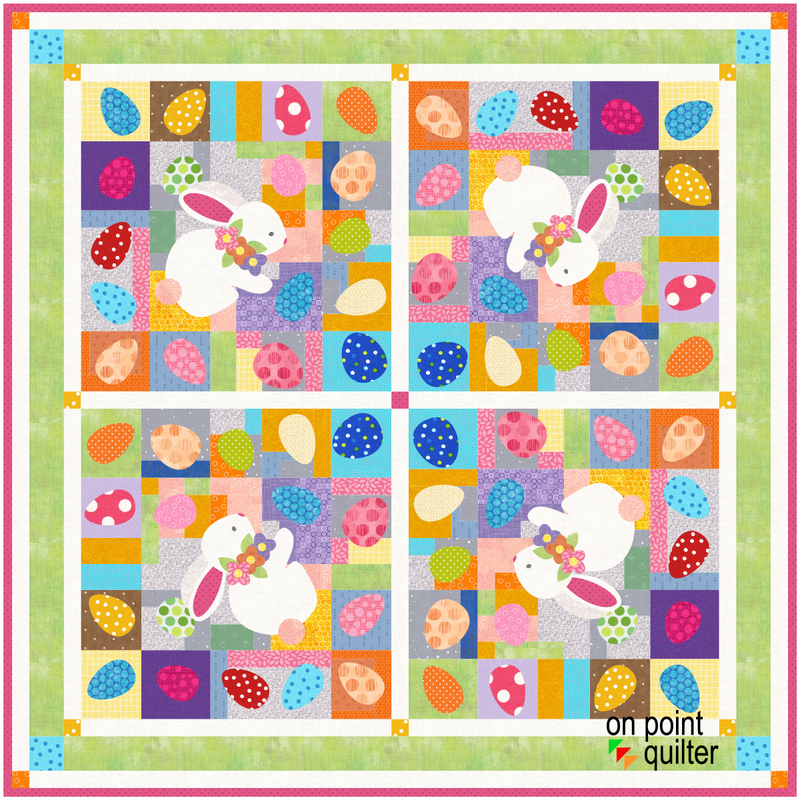
Draft the Quilt on the Quilt Worktable
I created two quilt options. One with one block and the other with four. Pick the option that appeals to you.
Check out the video for more details on creating the block and quilts.
There are so many ways you could personalize this design.
I would love to see what you do with the concept. Feel free to share you designs in the Learning EQ Facebook group.
0 Comments
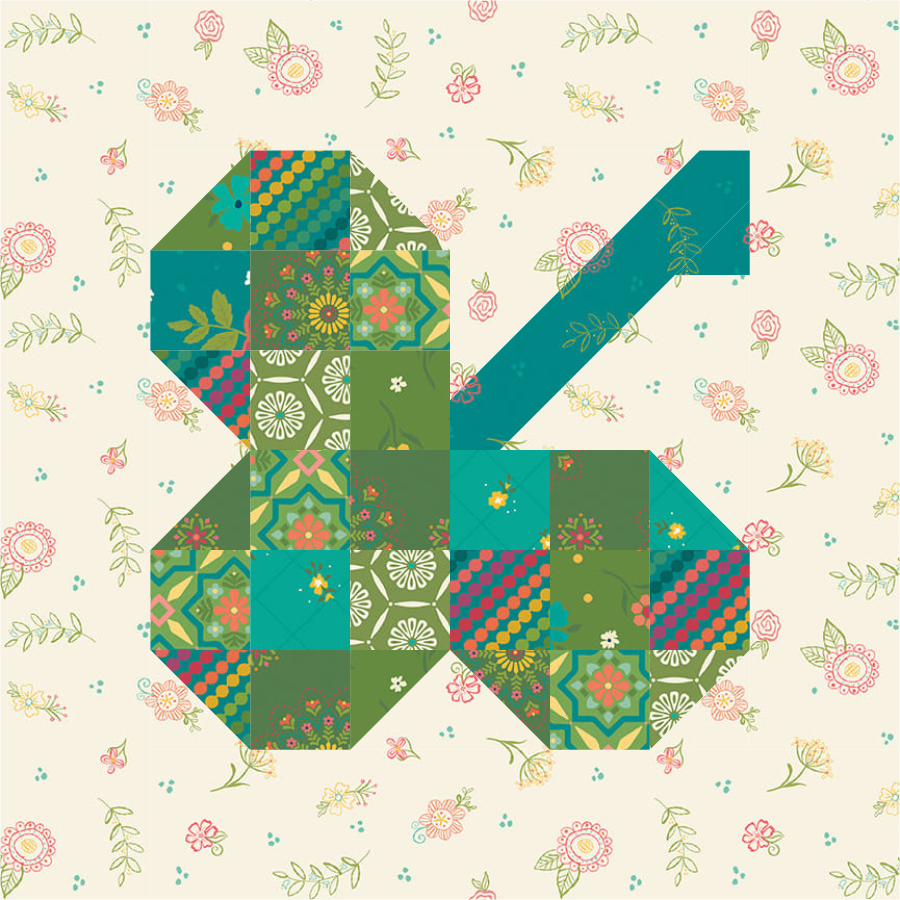
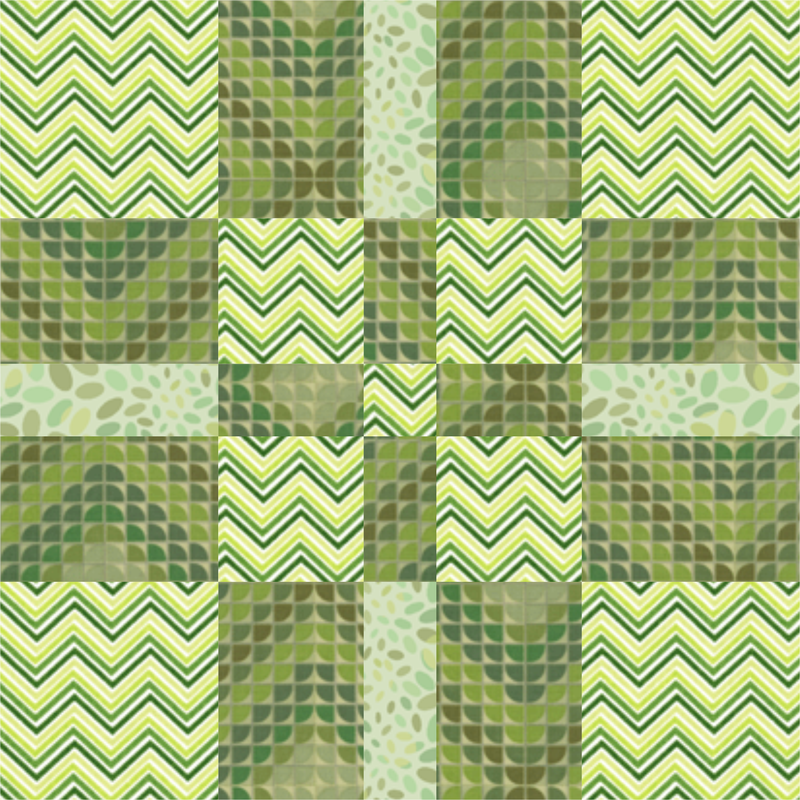
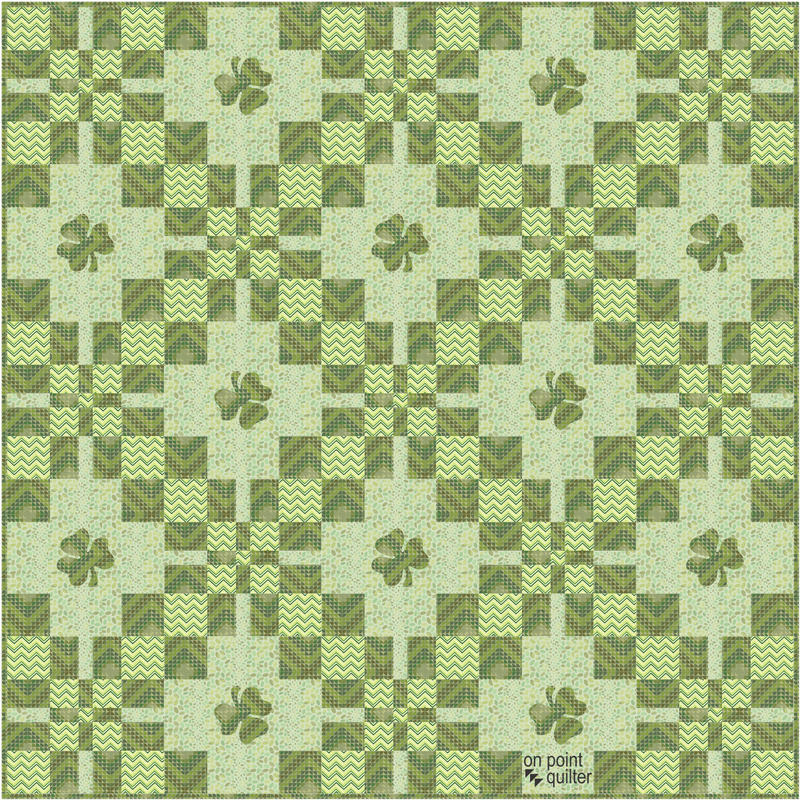
Learn my best tips for merging blocks in Electric Quilt as you learn how to create a Shamrock block and merge it into a frame and then merge both the original shamrock and the framed shamrock into a new block.
Use the blocks in a simple layout for your next St. Patrick's Day celebration. Lucky Shamrocks Quilt EQ8 Tutorial
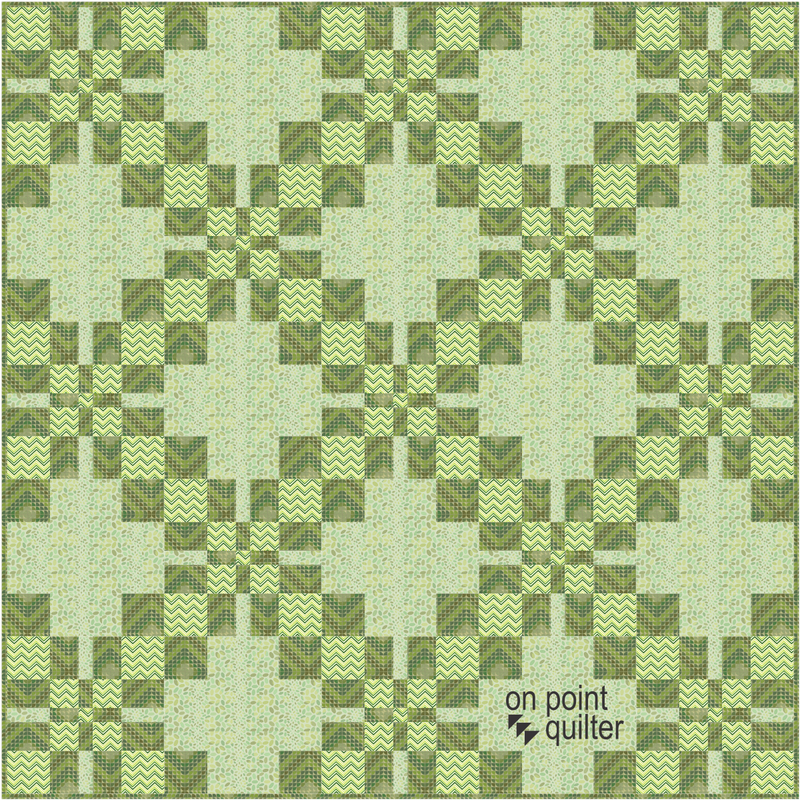
I reworked the Shamrock block from one of my patterns and will be sharing not only the drafting of the block, but a number of variations.
Shamrock Block 2
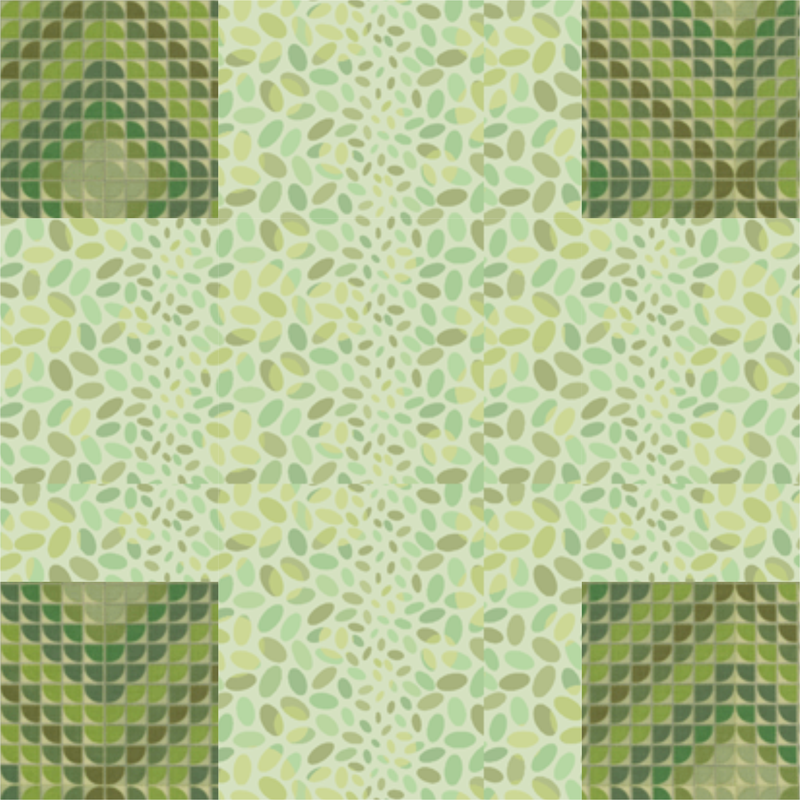
Using EasyDraw, create a simple frame. Start with a six inch block and add horizontal and vertical lines one inch from the edges. The square in the center will be 4" finished. Then merge the frame block with the shamrock block. Tip: Consider making the frame 3/4" on all four sides. Then the shamrock will be 9" x 9" in the 12" version of the block. Since the block is based on a 6 x 6 grid, the 9" size will be much more conducive to rotary cutting.
Check out the full video.

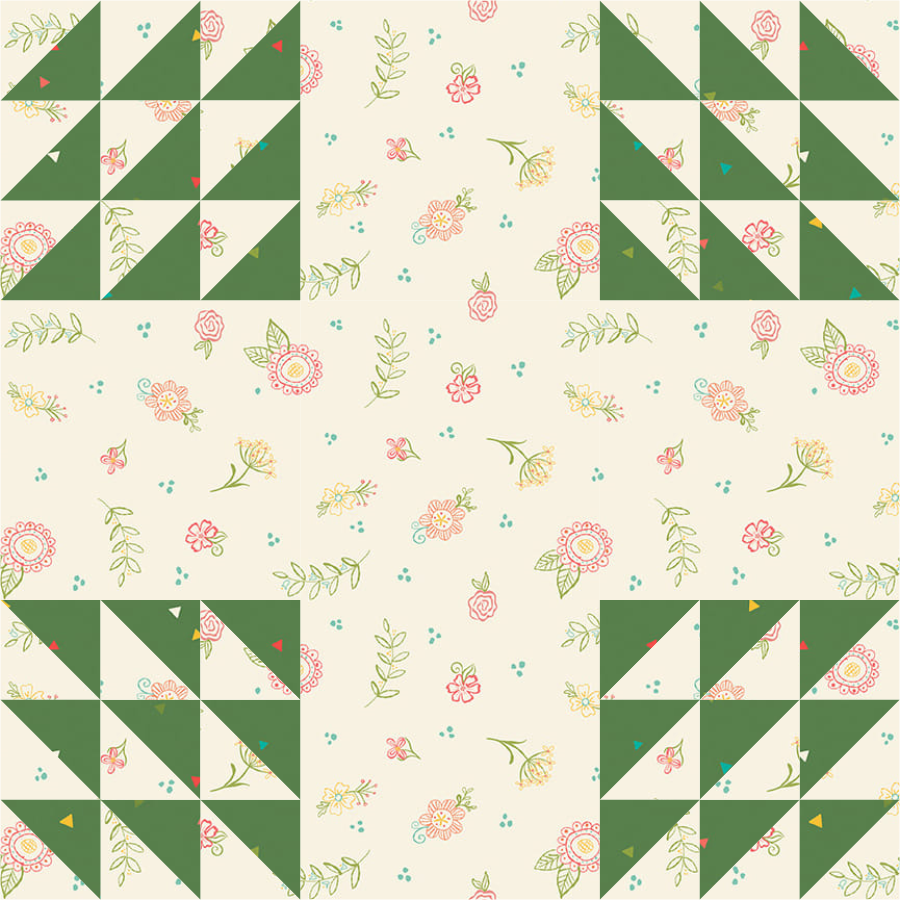
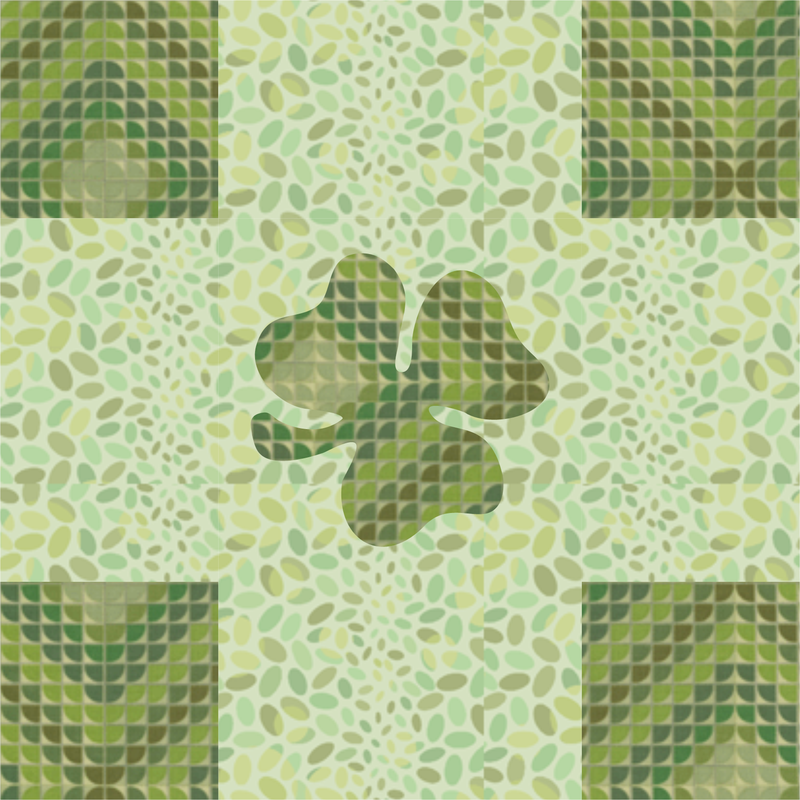
Lucky Shamrock Single Merged Block (with binding). Block measures 36" x 36".
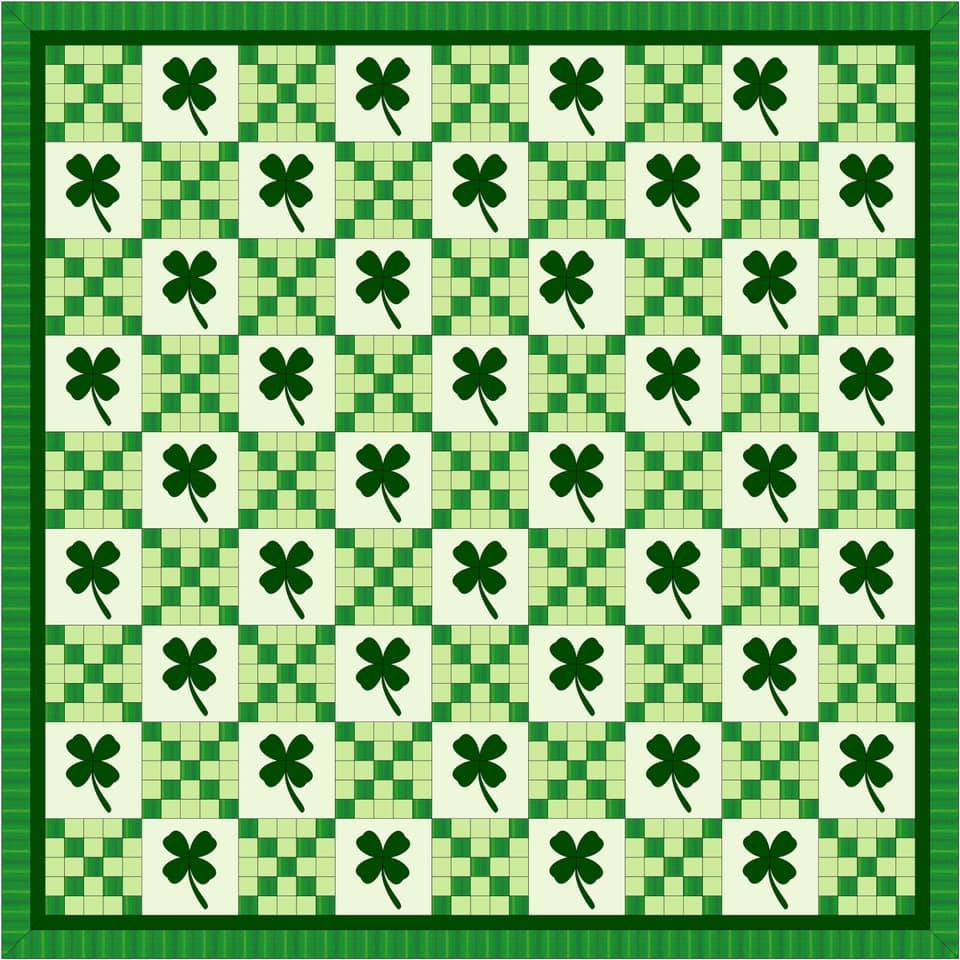
If you are more ambitious, consider combining four of the blocks in a two by two layout for a bed sized quilt.
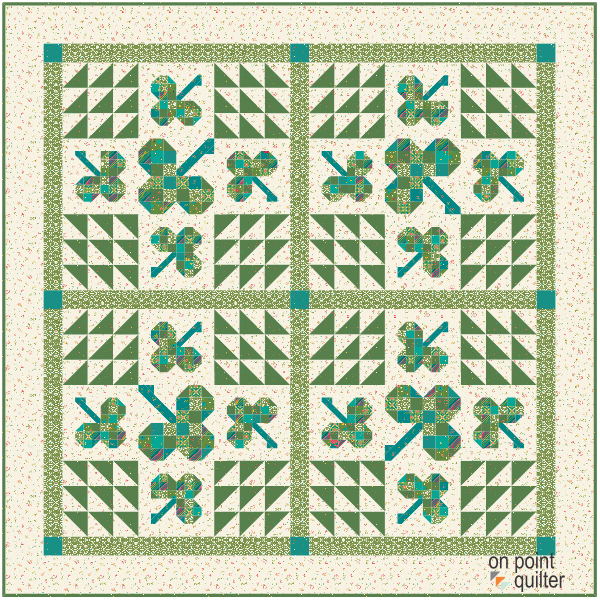
Lucky Shamrock Quilt in 2 x 2 Layout. Ending size of 94" x 94".
How will you celebrate St. Patrick's Day this year?
Share your Lucky Shamrock quilt -- or another favorite St. Patrick's Day quilt on the Learning EQ Facebook group.
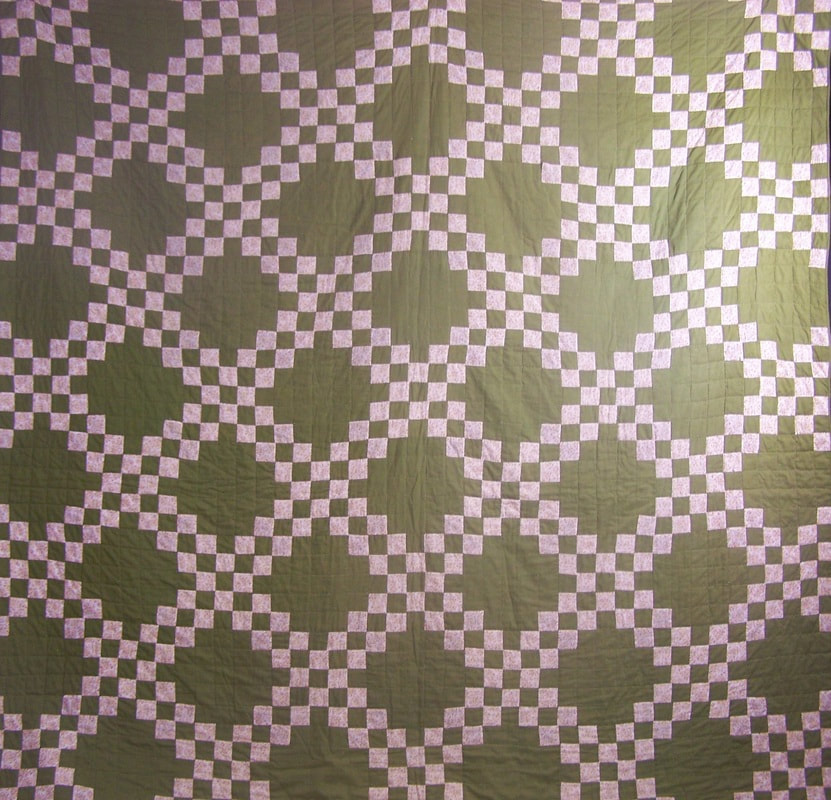
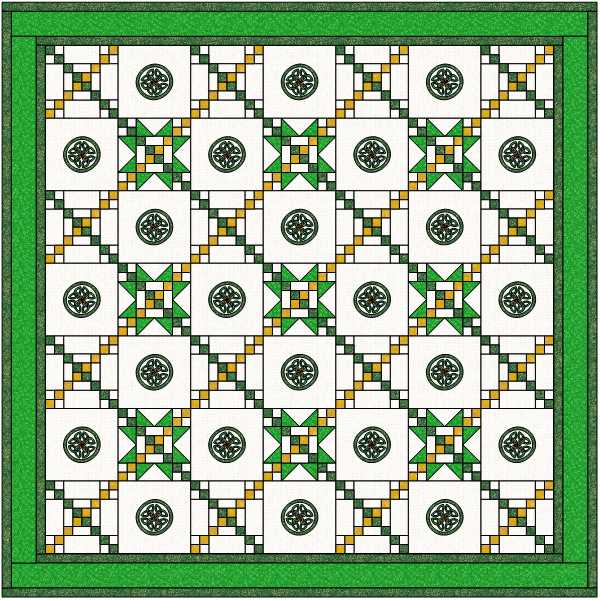
This traditional Irish Chain consisted of two blocks that would be super easy to draft in EasyDraw.
But I wanted to explore something more. What if we drafted a similar type of design but varied the distance between the lines?
In the video I explore what that would look like with columns and rows that are different sizes. And then add a touch of applique (from the EQ library) for the center.
If you use Symmetry you can also quickly rotate the blocks for a more random placement of those applique motifs.
Check out the video for more details on drafting these blocks and quilts.
As you work through the video, think through how you would modify the design. I would love to see what you do to my Grandmother's Irish Chain quilt.
I've set up a post in the Learning EQ Facebook group where you can share your ideas.
To inspire you, I though I would share a few chain designs by some Tech Know Quilter members. I loved seeing how they thought outside the box.
Tech Know Quilter's only opens enrollment to new members a few times a year. Send me a note if you would like more information on joining.
Note that Tech Know Quilter's classes are all virtual and can be completed at your convenience from the comfort of your own home.
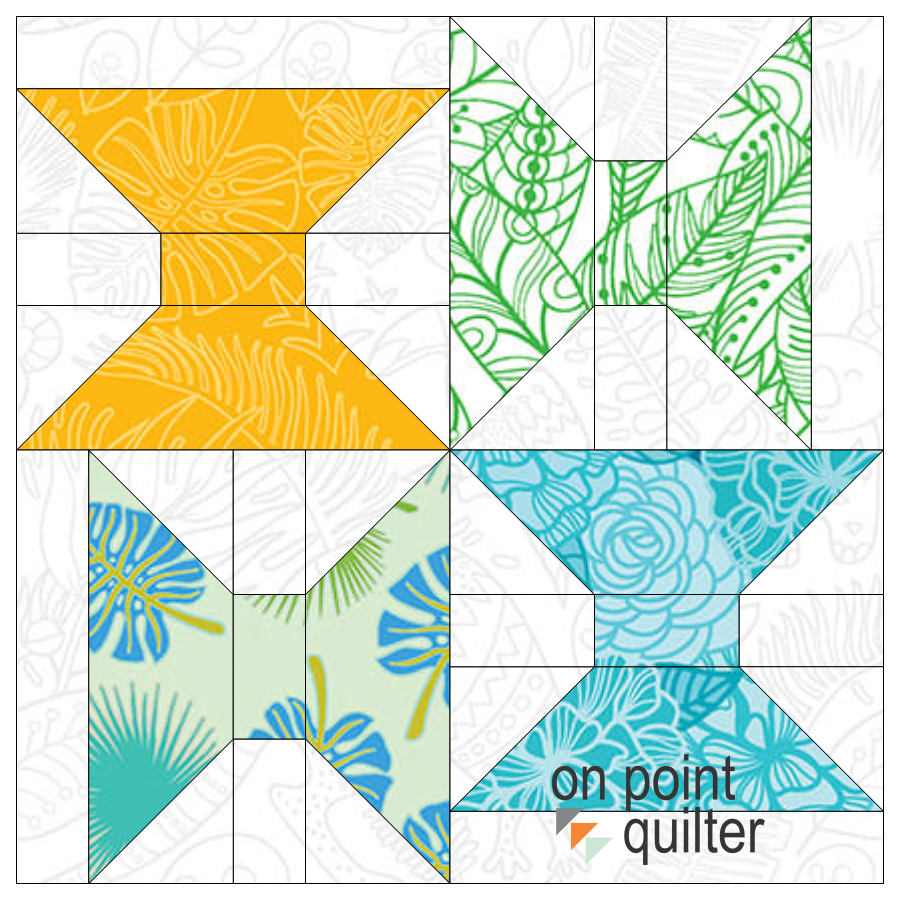
A new EQ8 tutorial for you today. I think you will enjoy this fun idea for a new block -- that looks much more complicated than it is.
Plus be inspired by the most recent designs from Tech Know Quilter members. Flutterby Blocks and Quilt
Did you know that Flutterby is another name for Butterfly? Which do you prefer?
For this project, I am using the Rooville fabric collection designed by Kimberly Einmo for Benartex. This was a free download from Electric Quilt for November 2023.
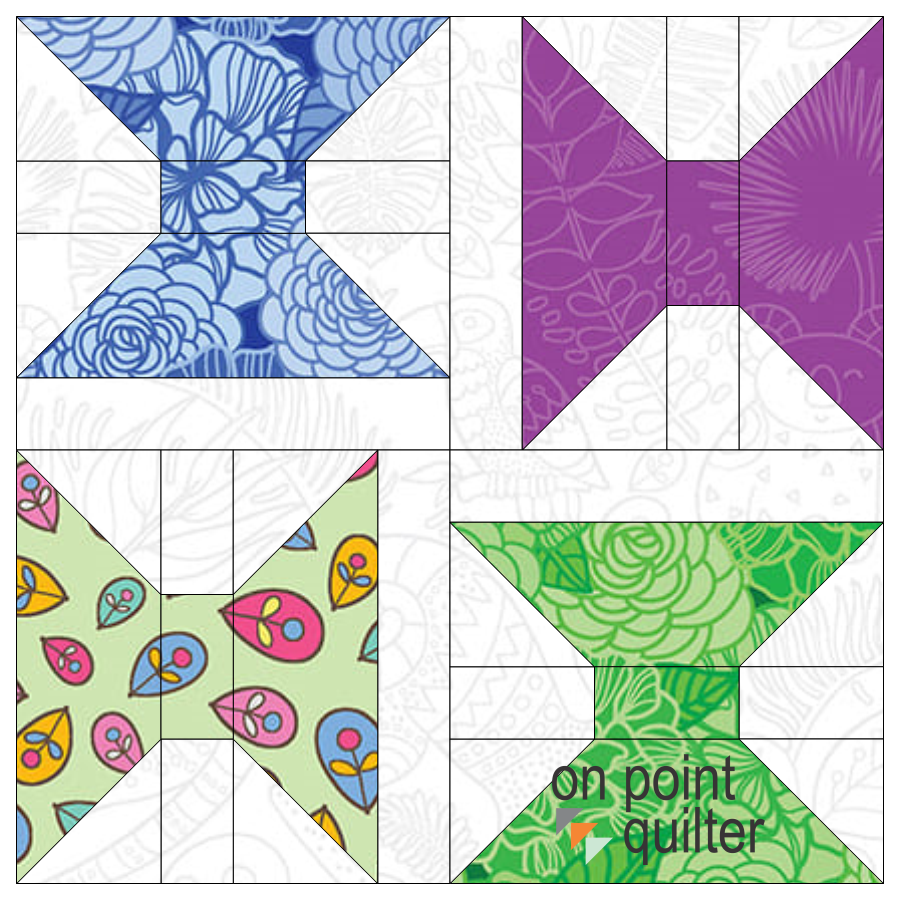
Use the Serendipity Feature to create multiple versions of the block. In Shrink and Flip, EQ shrinks the selected block, then flips and rotates it in the four quadrants to create a new block. Here were the two options I decided to use for my quilt.
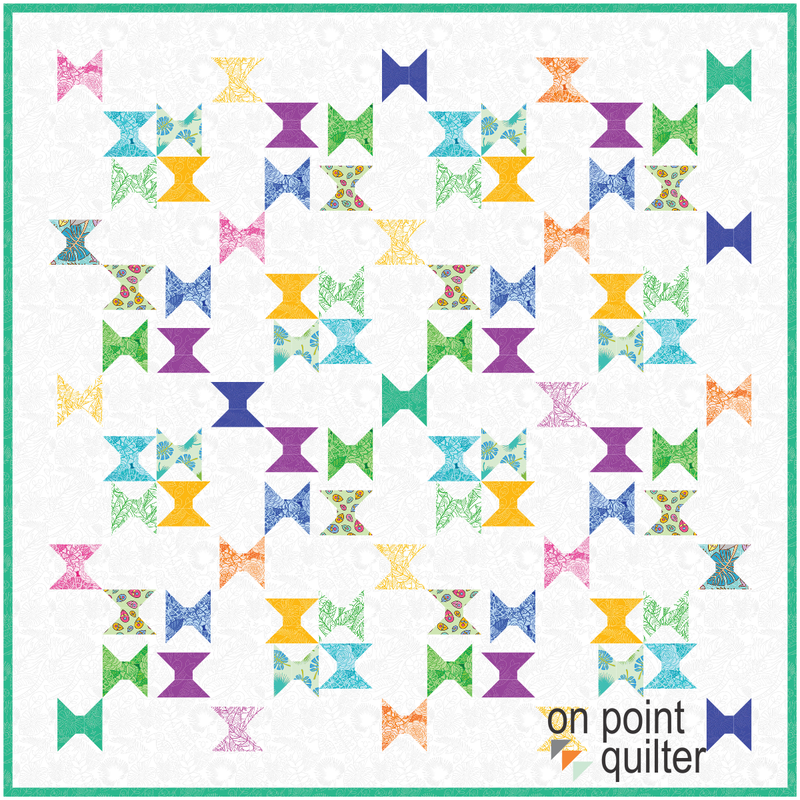
For the quilt, I suggest using a horizontal layout.
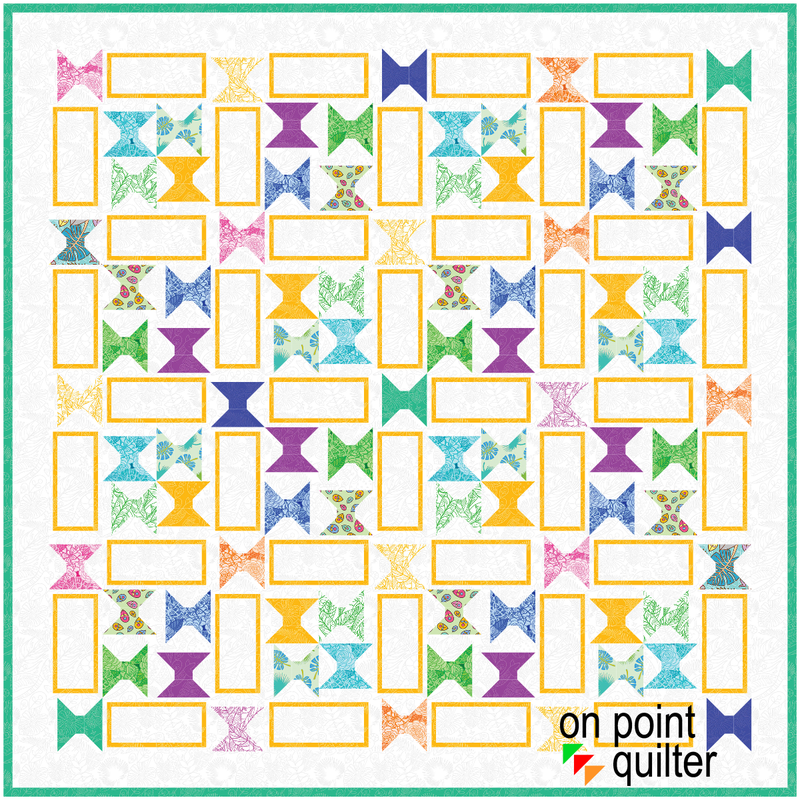
Set the number of blocks at 4 by 4 with a size of 6" for each block. Of course it would be easy to add more blocks or change the size of the blocks if you would like bigger Flutterbys. Under sashing, select a size of 3". This was the size of the original Flutterby block. Also select the option to include sashed borders.
Check out the video for all the details on creating the Flutterby blocks and quilt.
I would love to see your designs. Feel free to share pictures on the Learning EQ Facebook group. I've set up a dedicated spot for your pictures.
To personalize the project, swap out the Flutterby block with your own 3" block and use the same concepts to create a new quilt. Tech Know Quilters January Showcase
Every month I challenge Tech Know Quilter members to apply what they have been learning in the Tech Know Quilter classes. I am so proud of this group of quilters as they share their creativity with us.
Would you like to join this amazing group of designers and quilters? Click on the Learn More Image to find out about Tech Know Quilters.

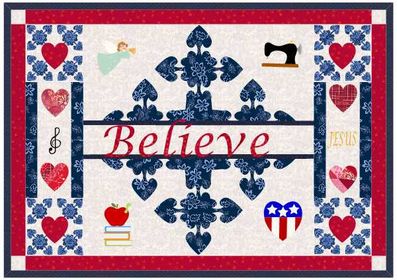
Word of the Year Challenge ShowcaseIn January I challenged Tech Know Quilter Masters members to come up with a word for 2024 and to create a quilt around that word. I have been in groups where selecting a word for the year was suggested (as opposed to New Years resolutions). Why do people choose a word for the New Year? A Word of the Year is your “mission statement” for the next 12 months. You use it to guide and inspire you when making decisions throughout the year. It's not a rigid rule to follow or a single goal to meet. As Elizabeth Rider put it, “it's a constant (but gentle) reminder to focus on creating positive change”. This one took a bit more work for the Masters members -- but I was so impressed with their challenge words along with the quilts reflecting their word. Enjoy this show of their quilts.
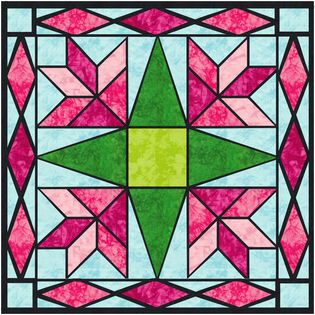
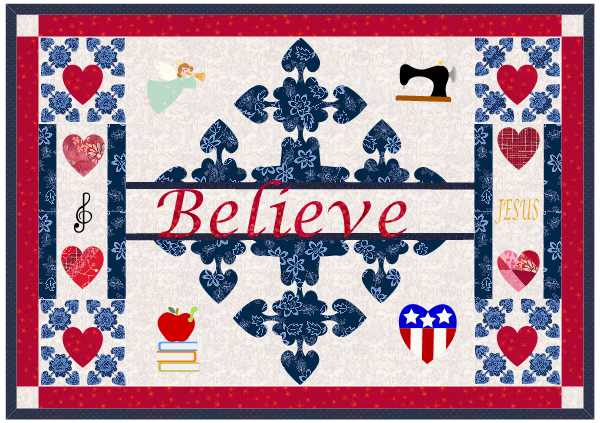
I decided to participate in the challenge as well. My word is JOY. 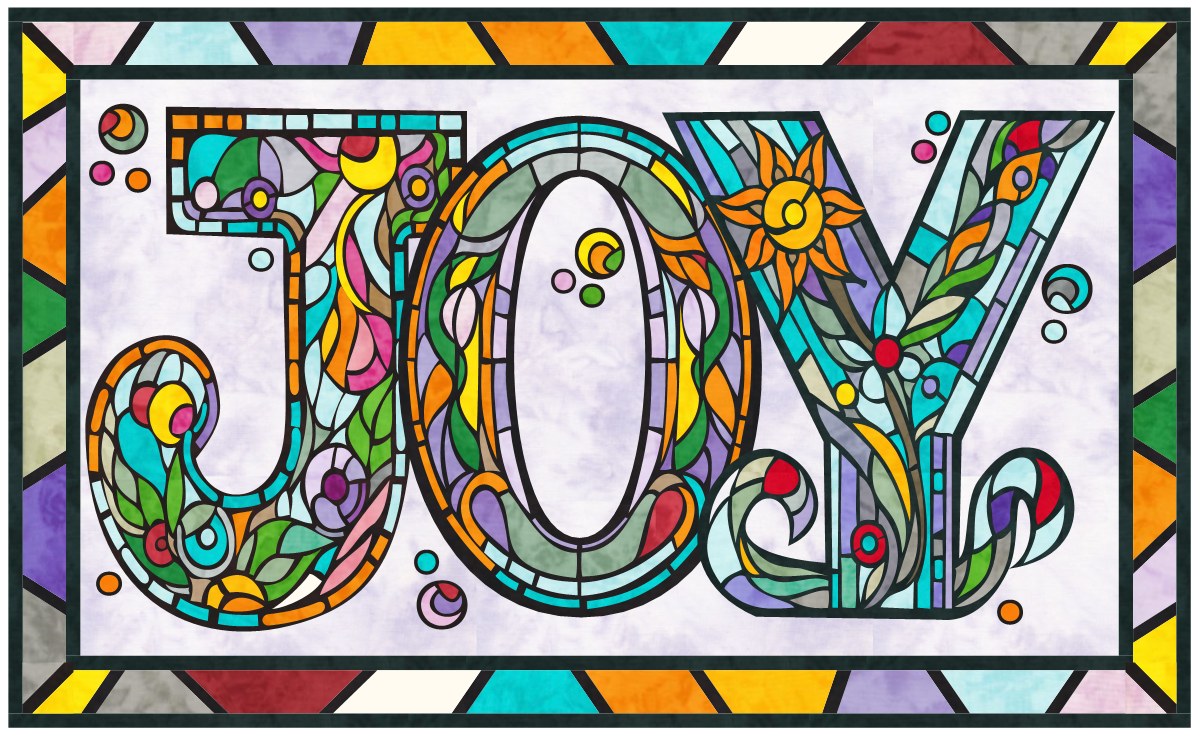 In Embracing Advent, Jen Ludwig states "Happiness is not the same as joy." "Our happiness is based on what is happening, but joy can be present regardless of the circumstances." I want to make a more conscious effort to see God at work in all aspects of my life and to chose joy in all situations. My design is a way to remind me of this on a regular basis. I decided to try a stained glass type of design. I used AI for inspiration for the various letters. Each letter was drawn in EQ and combined in a quilt -- with an added stained glass border. I am currently debating making the quilt -- maybe with some batiks. In the interim, I have put the design as wallpaper on my computer. Want to Know More about TKQ Masters? Tech Know Quilters members are eligible for the Masters program after completing 12 months of Tech Know Quilter classes. Masters members receive fewer lessons each month, with more time to devote to their own projects and challenges. Drop me a note if you have completed over 12 months of Tech Know Quilters and are interested in learning more about the Masters program. You can learn more about the regular Tech Know Quilters membership program and sign up for the wait list for the next open enrollment period here.
|


Free guide available for newsletter subscribers


Kari SchellElectric Quilt Expert and Educator and Pattern Designer. Categories
All
Archives
April 2024
|


 RSS Feed