
ANNOUNCEMENT: Registration now open for Signs of Spring Free EQ8 Live Webinar
|


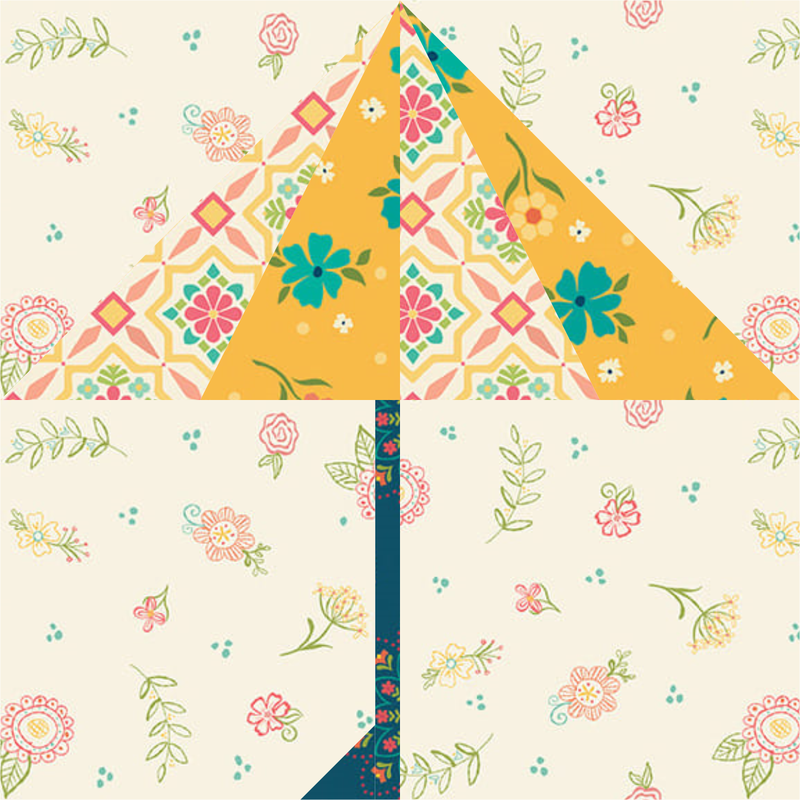
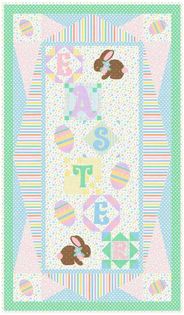
April Showers Umbrella Block 1
|

April Showers Umbrella Block 2
|

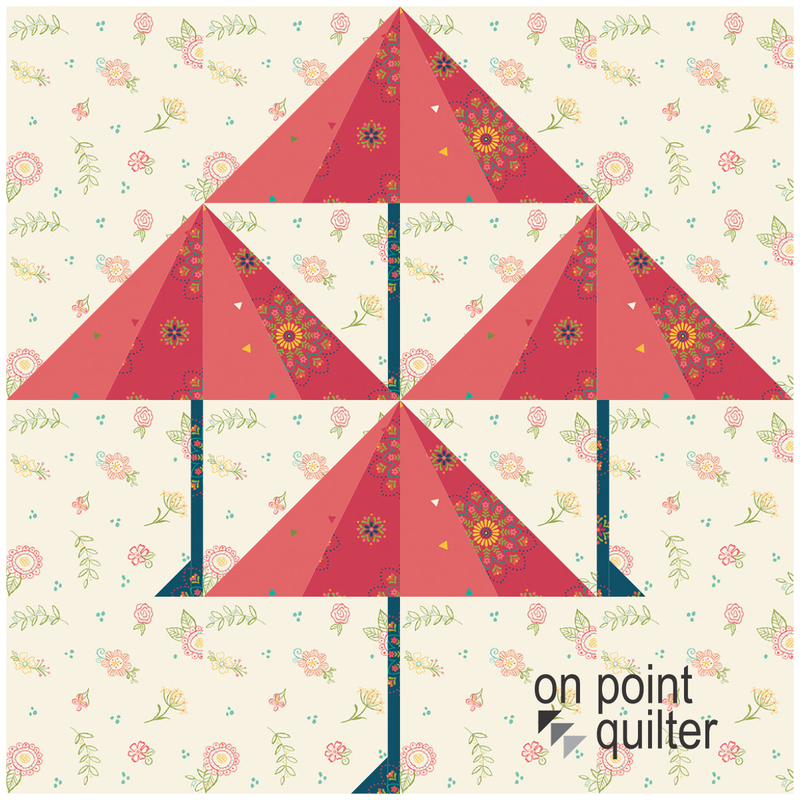
April Showers Umbrella Block 3
|
To color the blocks and quilt, I used the Market Street fabric collection.
This collection was created by Heather Peterson for Riley Blake.
It was the free fabric collection from Do You EQ in October 2023.
You can download the EQ fabric collection here.
This collection was created by Heather Peterson for Riley Blake.
It was the free fabric collection from Do You EQ in October 2023.
You can download the EQ fabric collection here.
In the video, I share a fourth block -- which is really a combination of the previous blocks. This block won't be in the final April Showers project. But I wanted to provide an alternate quilt that focuses just on the umbrella block.
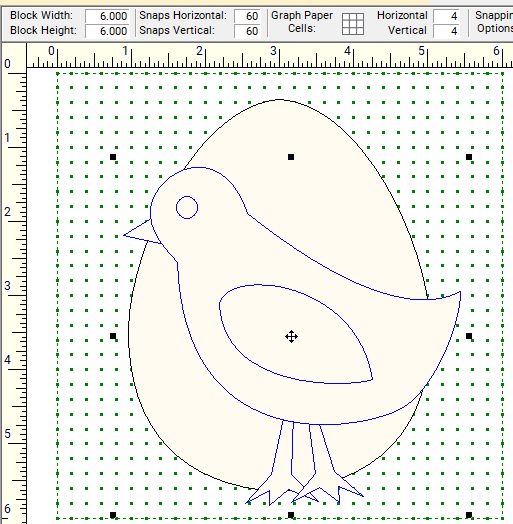
Umbrella 8" Block
In the video, check out how to draft each of the blocks along with two quilt options.
Here is the first quilt presented in the video.
In future blog posts, I will be added to this quilt with additional blocks and borders.
In future blog posts, I will be added to this quilt with additional blocks and borders.
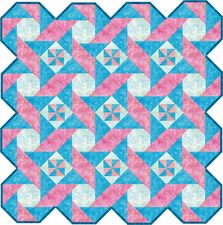
Start of April Showers Quilt (Week 1)
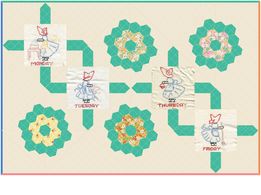
Here are umbrella blocks that were made by Tina Dillard of Quilting Affection Designs. Note that there are a few "holes". These will be filled with added blocks in the next couple of weeks.
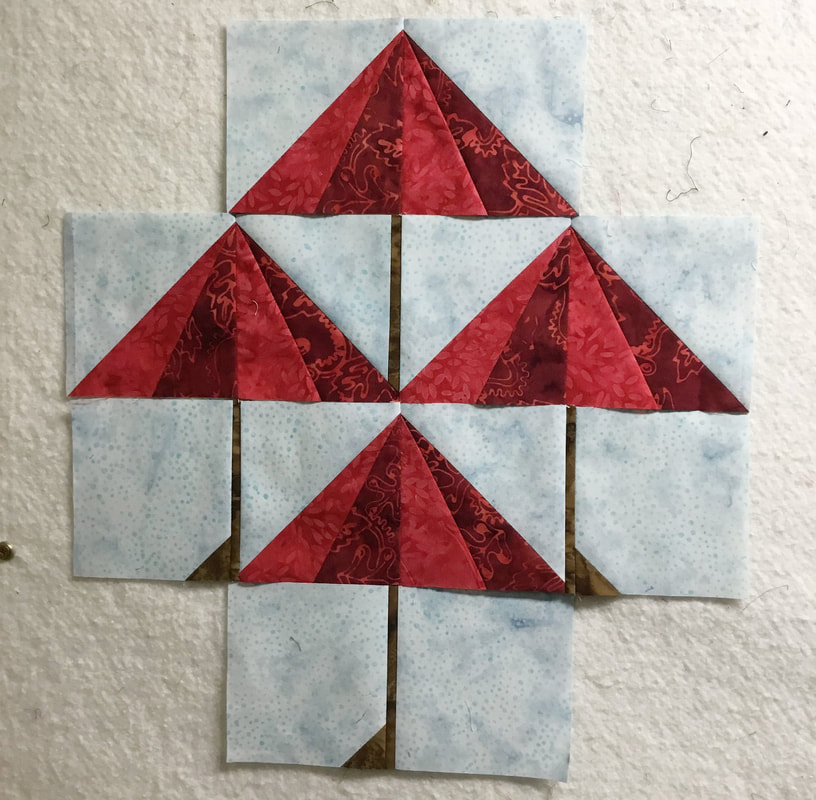
Umbrella Blocks Pieced by Tina Dillard
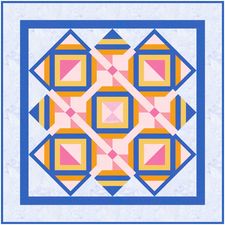
During the video, I also created an alternate quilt design that featured two of the umbrella blocks.
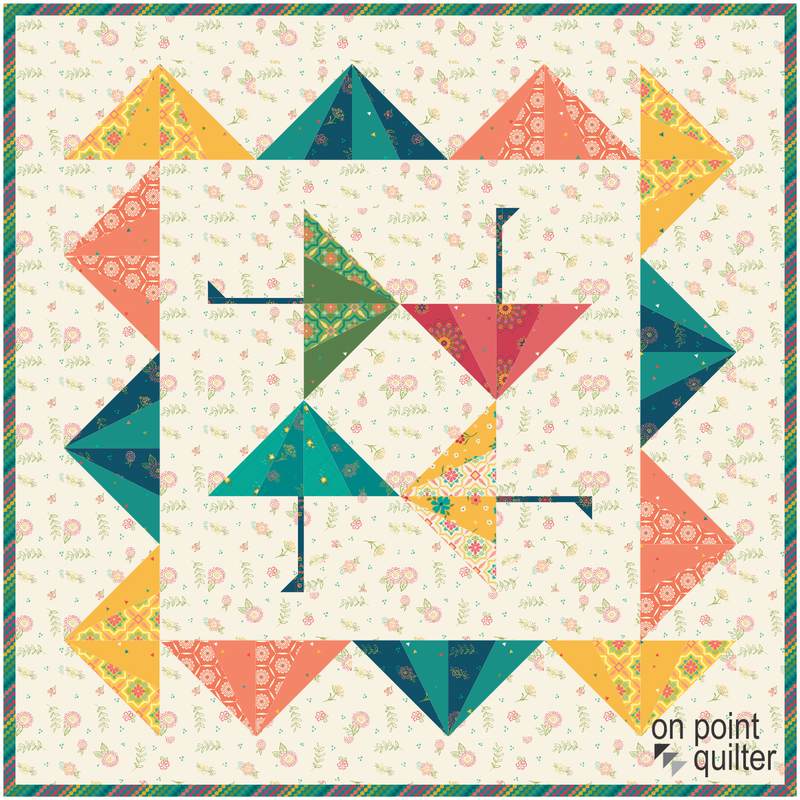
Umbrella Quilt Designed using EQ8
I look forward to seeing what you do with the umbrella blocks. Please feel free to share your designs on the Learning EQ Facebook group.

|
Happy quilting.
Kari Join the On Point Quilter weekly newsletter and receive regular tips and inspiration on using Electric Quilt 8 along with the Free 12 Top Tips for EQ8 video guide. 
|
0 Comments
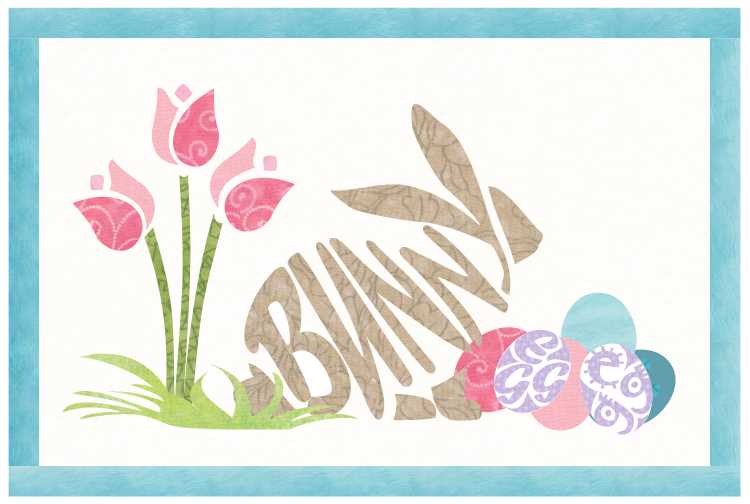
I promise -- this is the last egg-stranza post for the year. I have been a bit fixated on egg quilts. In case you missed it, you may want to check out the posts for the last two weeks:
The new one I will be sharing with you today is a circular design. Depending on the size you could turn it into a table topper for a round circular table. Or for those that are into working with wool and embroidery -- a candle mat.
- Easter Egg Hunt
- Foundation Pieced Applique Easter Egg
The new one I will be sharing with you today is a circular design. Depending on the size you could turn it into a table topper for a round circular table. Or for those that are into working with wool and embroidery -- a candle mat.
Easter Egg PosieMaker EQ8 Tutorial
- Start with three blocks from the EQ8 Library. These were all found in 05 Contemporary Applique>Holiday-Easter.

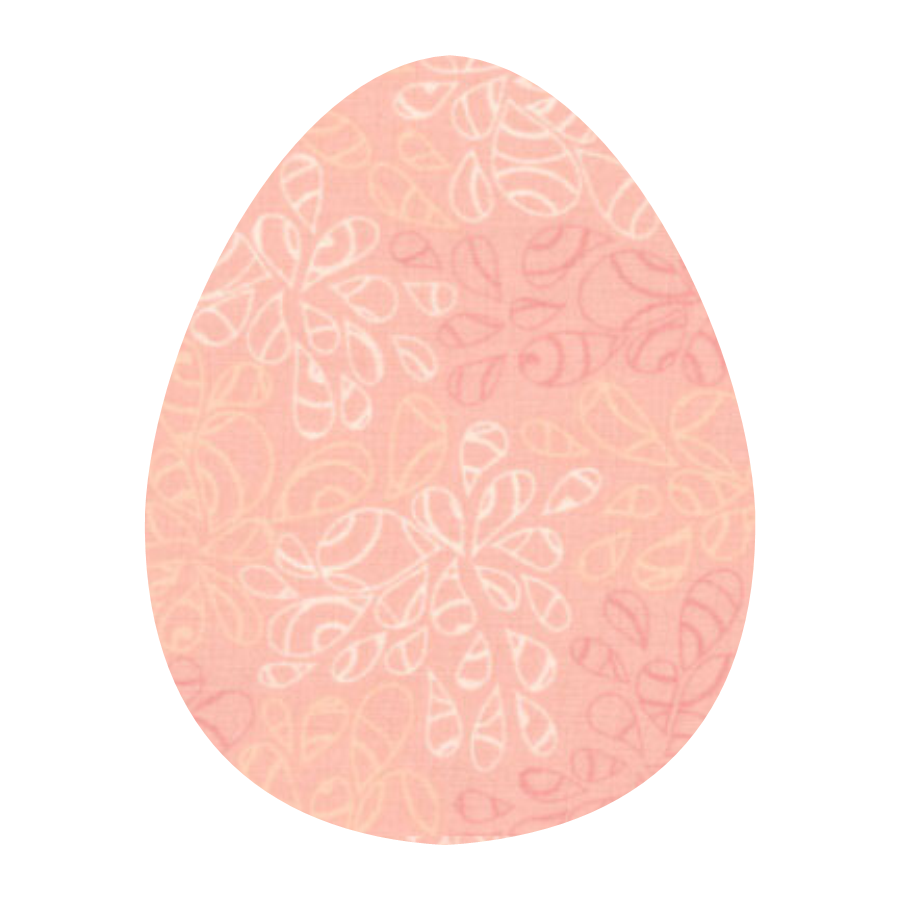
Decorative Easter Egg from the EQ8 Block Library
|
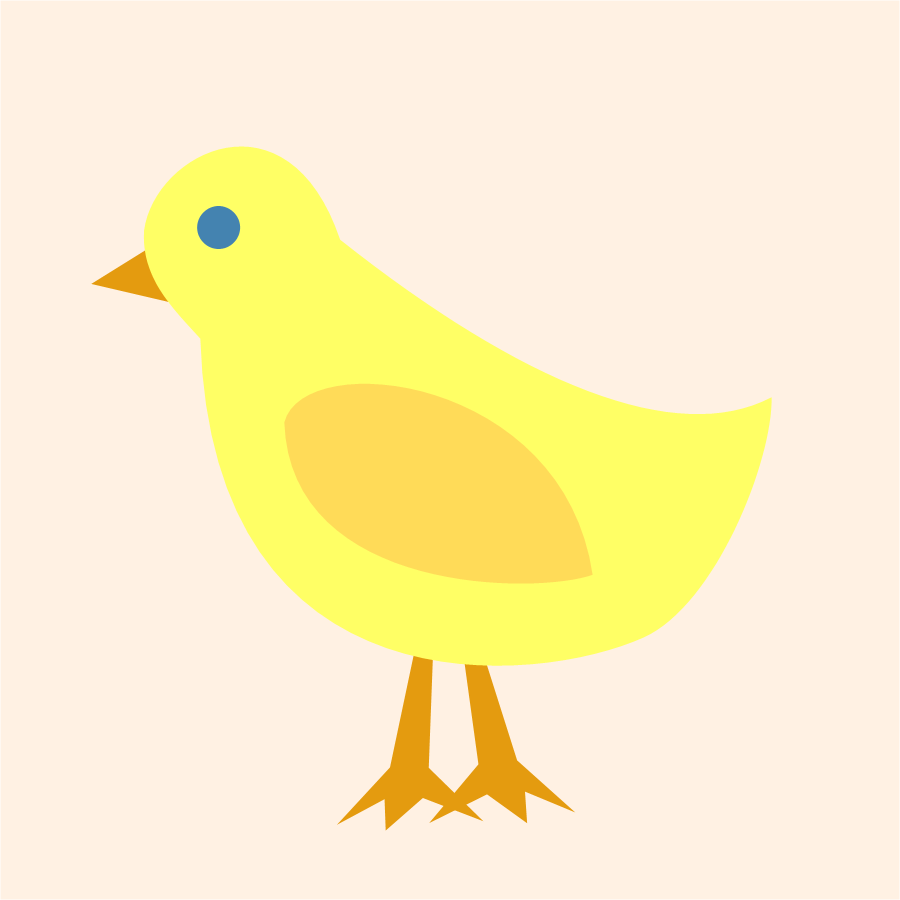
Baby Chick from the EQ8 Block Library
|

Chocolate Rabbit from the EQ8 Block Library
|
|
Easter Egg Motif
|
|
Baby Check and Egg Motif Combined in a New Motif
|
|
|
|
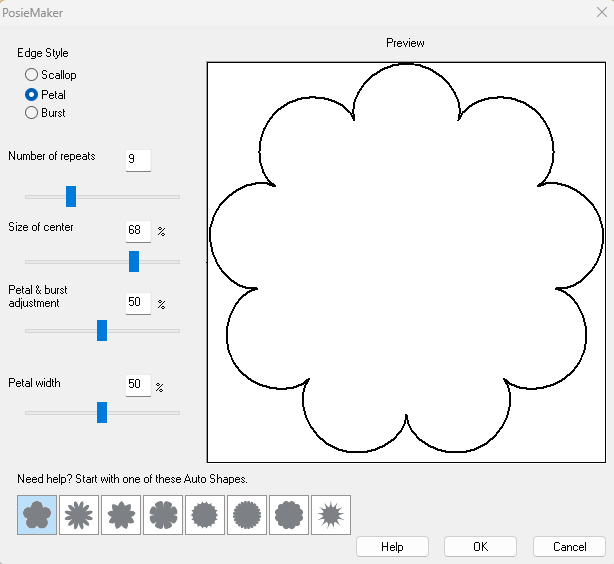
Posie Maker 1 Settings
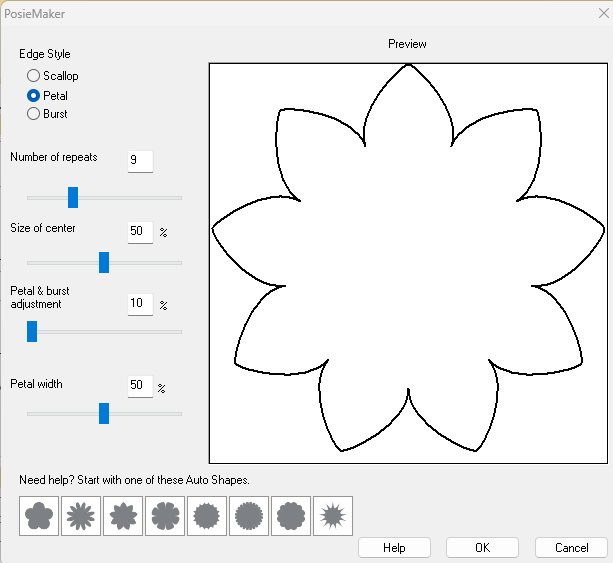
Posie Maker 2 Settings
|
|

PosieMaker Results
|
|
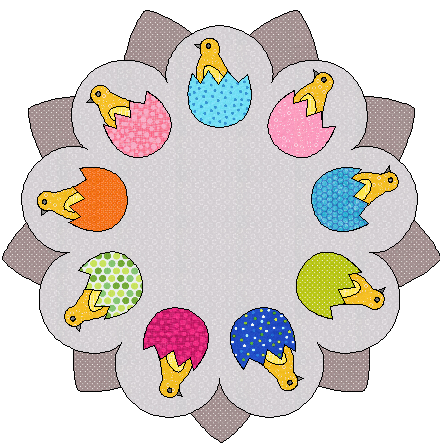
Baby Chicks with Eggshell Wreath on Posie Blocks
|
|
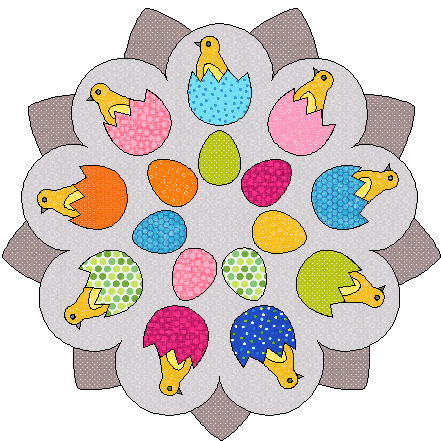
Posie Block with Added Egg Wreath
|
|
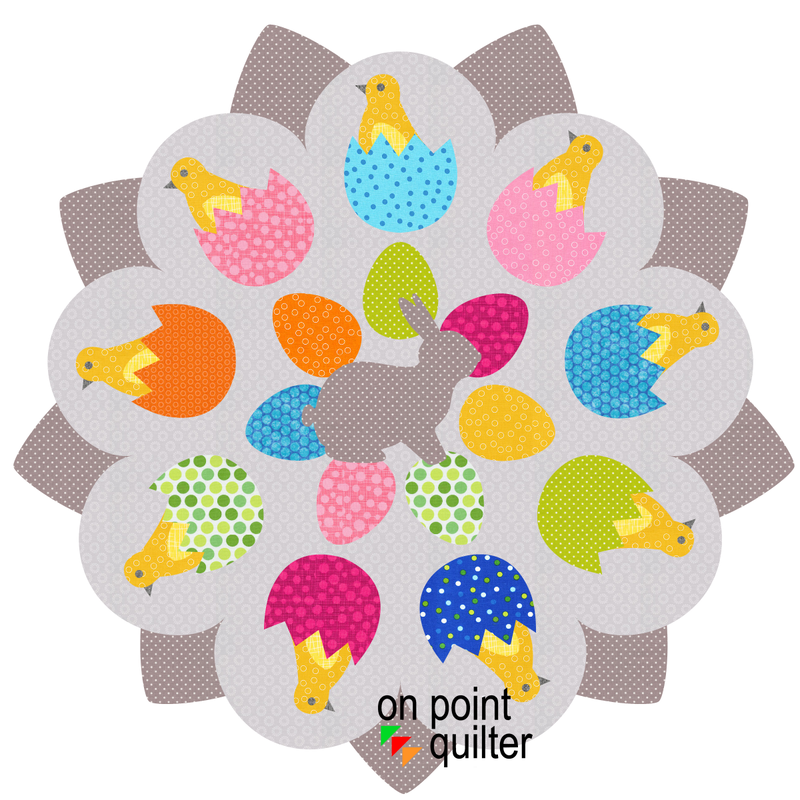
Easter Egg PosieMaker Block
|
- Select the Quilt worktable.
- Select New Quilt>Custom Set.
- Decide on the size of quilt you would like and change the dimensions on the Layout tab..
- On Layer 2, select Block>Set Block.
- Locate the final posie motif and drag it on the quilt worktable.
- Resize if necessary and make any final adjustments to coloring.
- Add to Sketchbook to save.
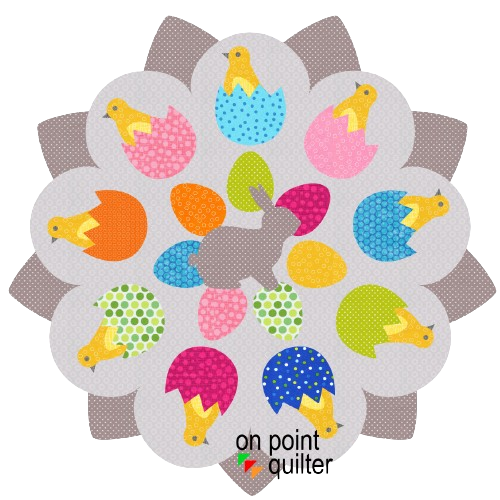
Easter Egg PosieMaker Quilt
Check out the video for more details on drafting the Easter Egg Posie Maker design.
There are so many ways to personalize this design. Here are a few.
- Use a different fabric collection.
- Change the number of repeats for the posies.
- Change up the motifs used with wreathmaker. This could easily be adapted for a different holiday or season of the year.
I would love to see your design. Feel free to share in the Learning EQ Facebook group.
Tech Know Quilter Month End Challenge
Each month I encourage Tech Know Quilter members to share favorite projects from their class for the month and applications of the concepts for their own quilts. Here are their submitted designs for the February Month-End Challenge.
I am so grateful to be able to assist an amazing group of quilters and designers in their Electric Quilt journey.
I am so grateful to be able to assist an amazing group of quilters and designers in their Electric Quilt journey.
Elly da Silva This quilt is a combination of all the blocks of this month
|
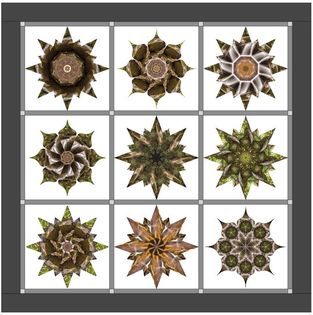
Narue Isabelle I designed this quick quilt yesterday using the blocks we worked on in Easy draw Kaleidoscopes class.
|
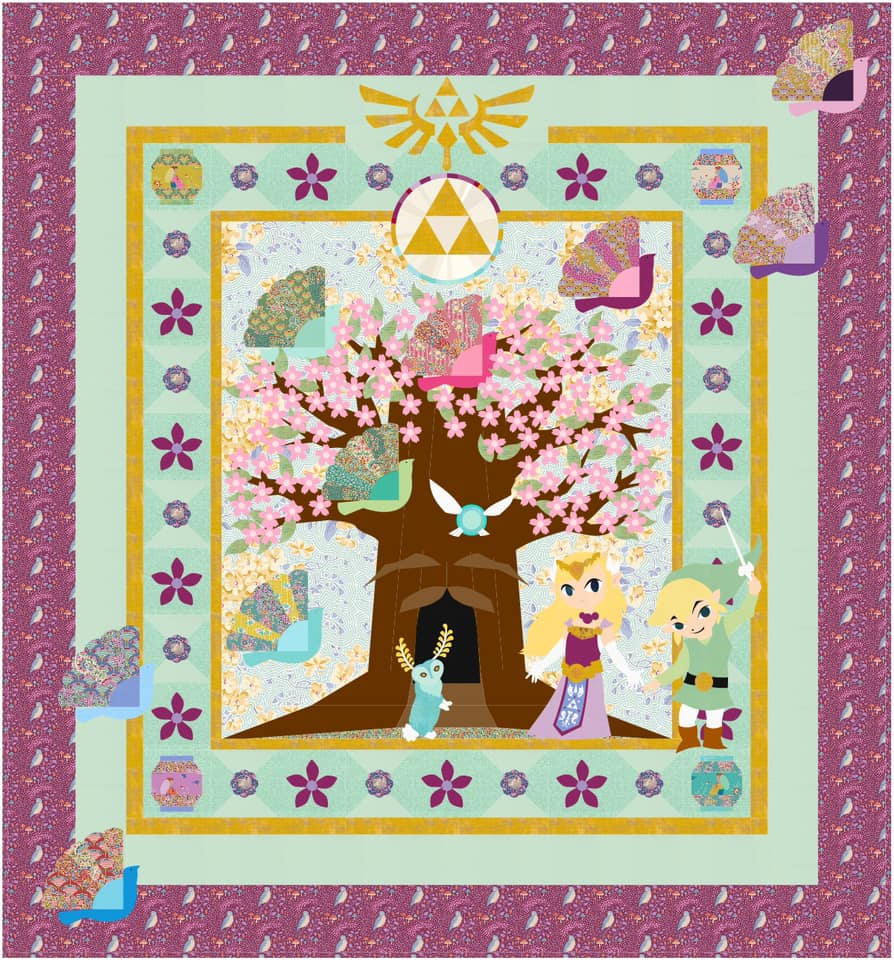
Narue Isabelle This has been my long-haul project of the past few months: a Zelda quilt for a friend’s daughter. I have traced and designed my appliqués and blocks , putting some of my Accuquilt dies to good use in the process. I’m halfway through piecing it and just about to tackle the 70-something cherry blossom flowers… wish me luck… and patience
|
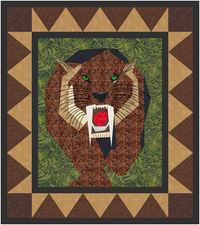
Margo Reppert Here's my favorite quilt from this month's lesson.
|
Kristy Goodin Soard My sewing related quilt was fun to design.
|

Denise Mohler February was packed full of learning for me. I was able to complete all the lessons for "2021" Here is January Lesson 1
|
Denise Mohler February 2021 Lesson 5
|

Denise Mohler March 2021 Lesson 6
|
Denise Mohler April 2021 Lesson 7
|
Denise Mohler May 2021 Lesson 6
|
Denise Mohler June 2021 Lesson 6
|

Denise Mohler July 2021 Lesson 7
|

Denise Mohler August 2021 Lesson 7
|

Denise Mohler September 2021 Lesson 2
|
Denise Mohler October 2021 Lesson 7
|
Denise Mohler November 2021 Lesson 6
|
Denise Mohler December 2021 Lesson 4
|
Terry McCaskey I'm finally binding a project based on Quiltworx charms class pieced over a year ago. EQ became my tool to both colorize the scrap placement and do a virtual "test-drive" of possible quilting designs. The free-motion outcome is different but the virtual EQ design skills learned in Kari's classes helped me along the way
|
Terry McCaskey's Finished Quilt
|
Zdenka Nemethova This month I really learned and practiced a lot in Masters "Letters & Text Class", e.g. how to generate and then use AI pictures in EQ, imports & exports between EQ and Inscape etc. Enjoyed every lesson
|
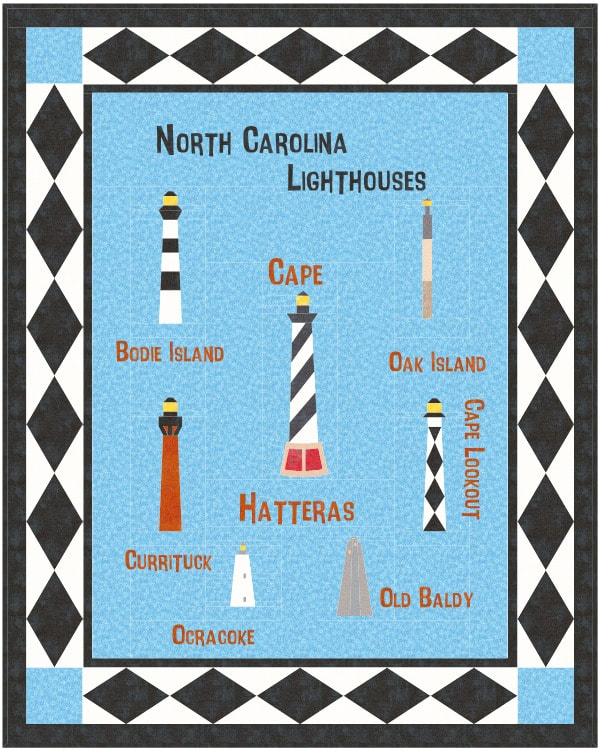
Edith Craig My class this month was Masters More Letters and Texts. I used the techniques to design this Lighthouse Quilt. I used Easy Draw (with photo images as guides) to draft the lighthouses. I then added the title and names of the lighthouses on Layer 2 using one of the fonts that we downloaded for the lessons this month. I used a border that reflected the same black and white pattern as shown on one of the lighthouses. Fun to play with.
|
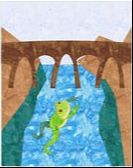
Jane Perri EQ Design
|
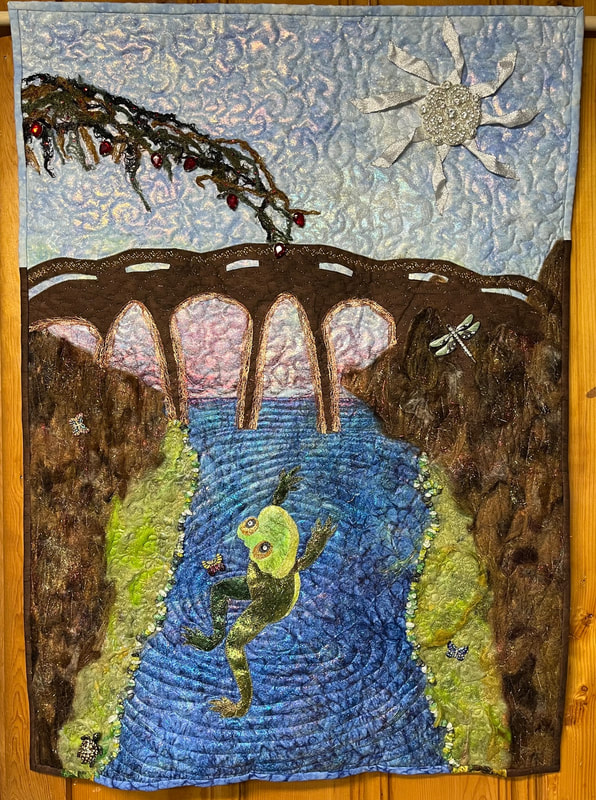
Jane Perri Quilt
|
Jane Perri Quilt
This is the finished quilt from the EQ8 design above. I was trying to see how far I could push Angelina fibers and other embellishments. The quilt was first made in cotton. The sky, water and frog are covered in Angelina which changed the colors. The "trees" and "riverbed marsh" is covered in natural wool with Angelina felted in. I dyed the green wool. The shorelines are glass bead chips. The tree branch overhanging the bridge is made from dyed cheese cloth, decorated with hot fix crystals and beads. The sun is a rhinestone patch with silver metallic ribbons radiating out for rays. The bridge is stitched in holographic threads and trimmed in copper metal ribbon. Pins of bugs and a turtle are attached. I bowed out and stuffed the lower center of the river to simulate a mouth of a river flowing into the sea. This was great fun to design and make!
This is the finished quilt from the EQ8 design above. I was trying to see how far I could push Angelina fibers and other embellishments. The quilt was first made in cotton. The sky, water and frog are covered in Angelina which changed the colors. The "trees" and "riverbed marsh" is covered in natural wool with Angelina felted in. I dyed the green wool. The shorelines are glass bead chips. The tree branch overhanging the bridge is made from dyed cheese cloth, decorated with hot fix crystals and beads. The sun is a rhinestone patch with silver metallic ribbons radiating out for rays. The bridge is stitched in holographic threads and trimmed in copper metal ribbon. Pins of bugs and a turtle are attached. I bowed out and stuffed the lower center of the river to simulate a mouth of a river flowing into the sea. This was great fun to design and make!
Fran Heisey There was so much to learn in Masters More Letters and Text this month. This was my favorite, but there were so many quilts I really liked, it was hard to choose.
|
Tech Know Quilters is a membership program focused on mastery of Electric Quilt 8. We have members at all stages of their Electric Quilt journey. Click here to learn more. |
Happy Easter!

|
Happy quilting.
Kari Join the On Point Quilter weekly newsletter and receive regular tips and inspiration on using Electric Quilt 8 along with the Free 12 Top Tips for EQ8 video guide. 
|
Continuing on with an egg-travaganza theme, I will be sharing a new way to add foundation piecing to your applique shapes. The only applique "drawing" in this tutorial is deleting a few patches from a block in the library and rotating the ending shape.
Super simple.
Super simple.
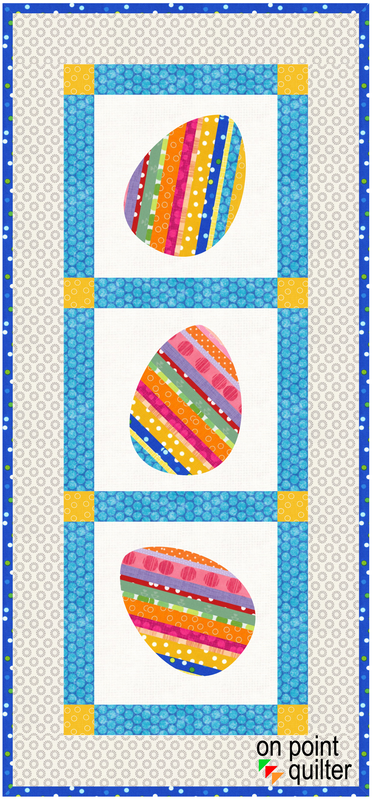
Foundation Pieced Applique Easter Eggs Tutorial
|
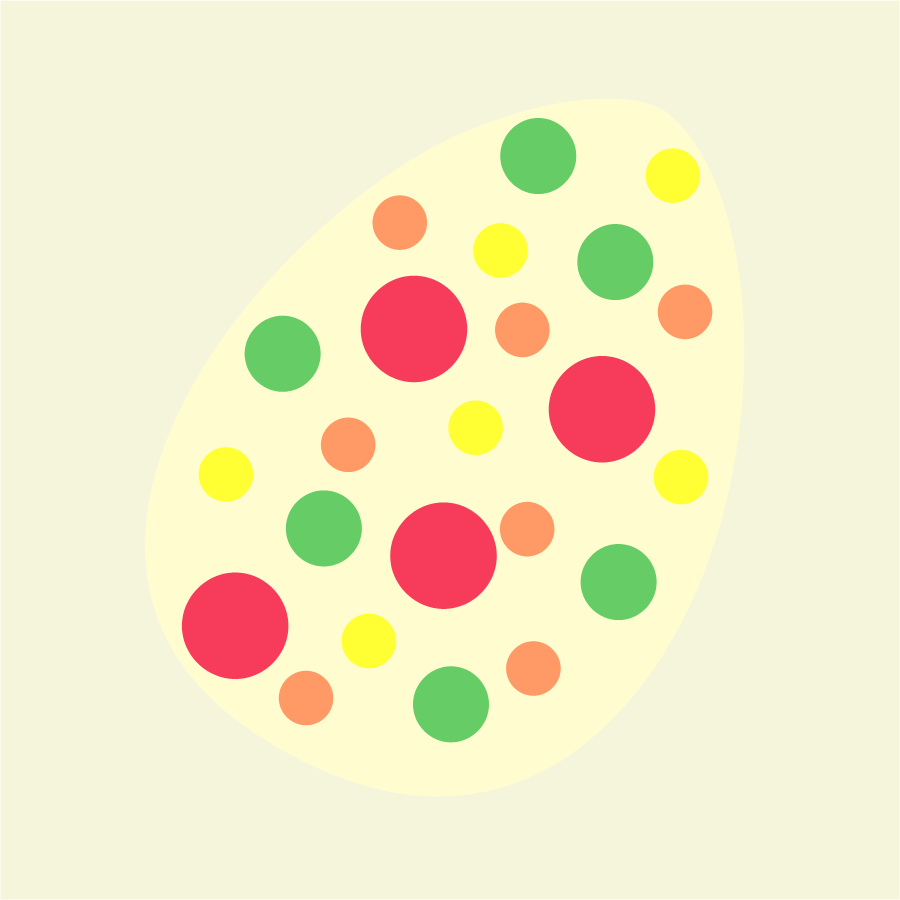
When I was working on the Easter Egg Hunt post, I found all these decorative eggs in the EQ8 Library. They are all under 05-Contemporary Applique>Holiday -Easter. While I loved the blocks, I wanted something simpler to work with.
So I deleted all the elements other than the Easter egg shape. Then rotated the shape, to have three different Easter eggs. |
Decorative Easter Egg from the Contemporary Applique library in EQ8
|
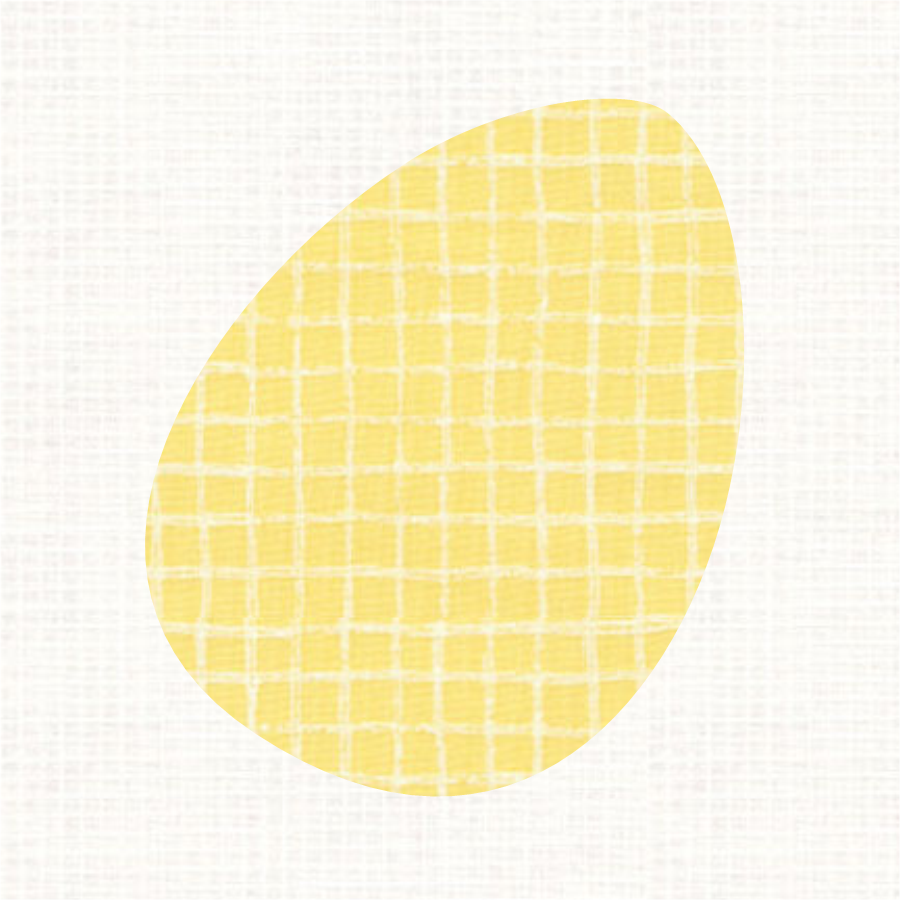
Easter Egg 1
|
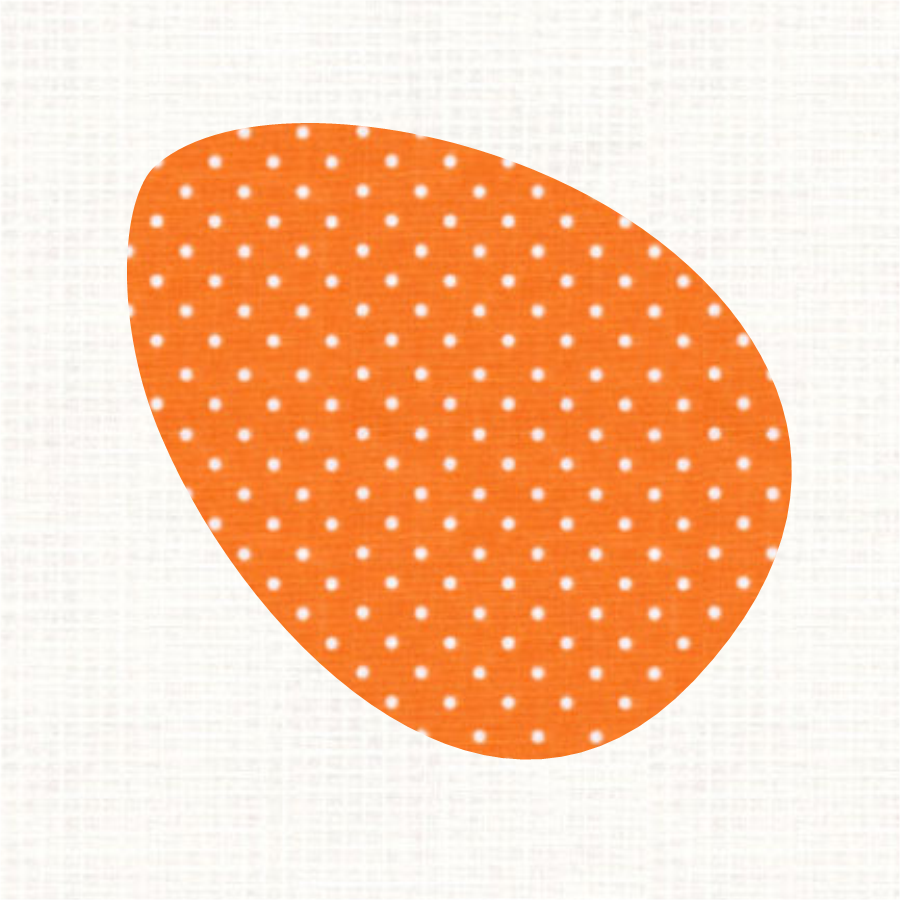
Easter Egg 2
|
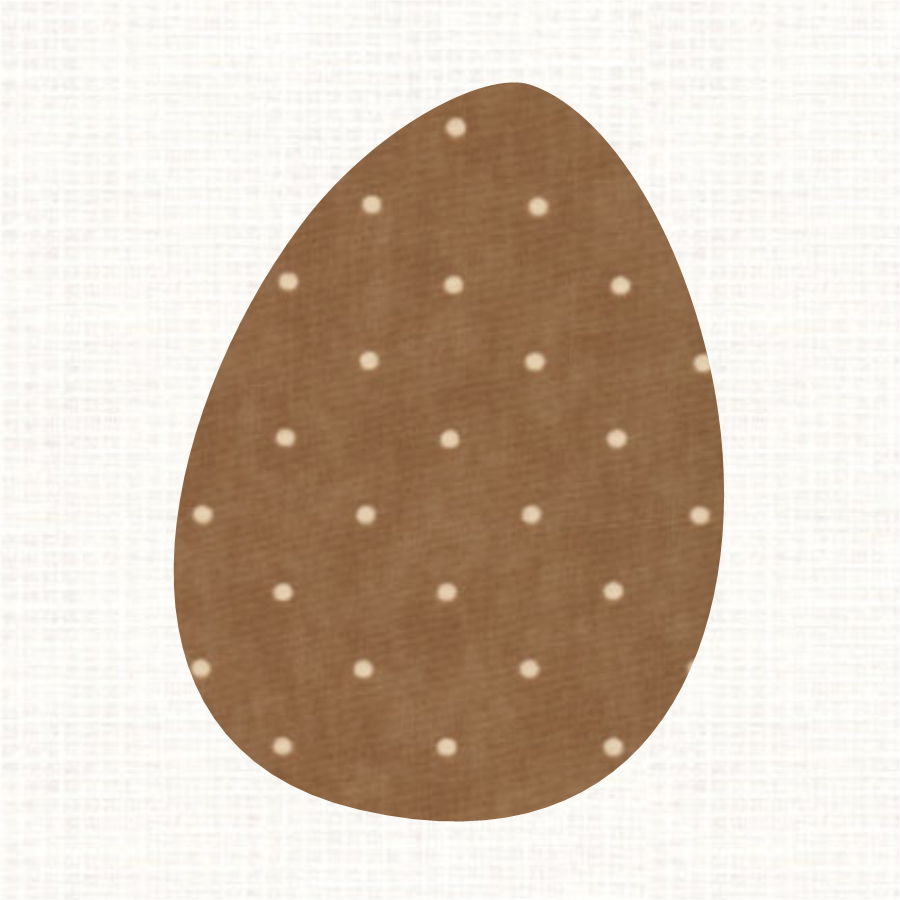
Easter Egg 3
|
|
I then created my quilt layout. I kept it simple.
Put the egg blocks in the quilt. Colored the quilt using the fabrics from last weeks video (a combination of default fabrics and those in Themes>Dots) in the EQ8 Fabric Library. |
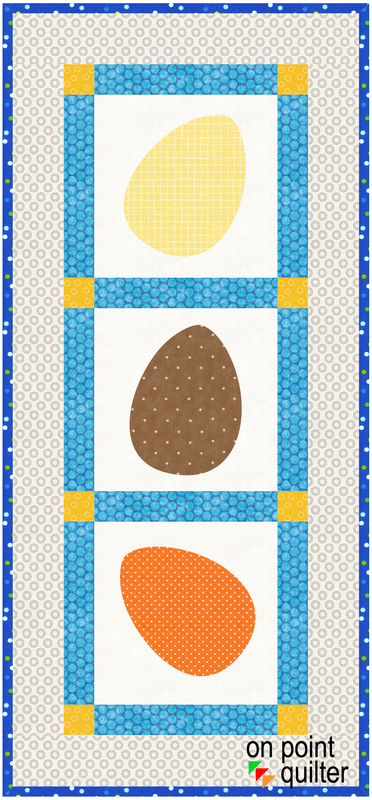
Foundation Pieced Applique Easter Egg -- Quilt Layout
|
|
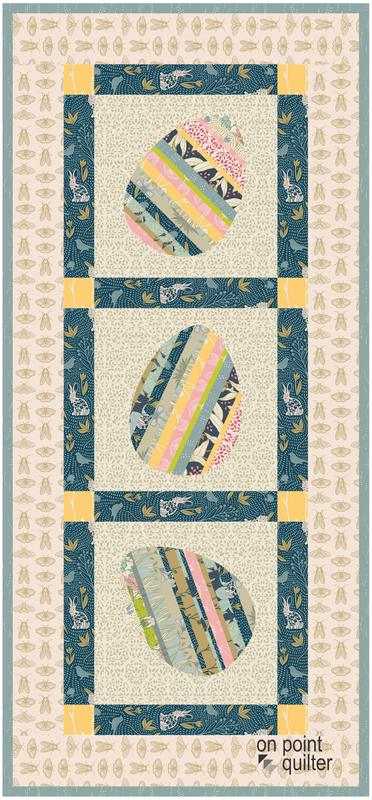
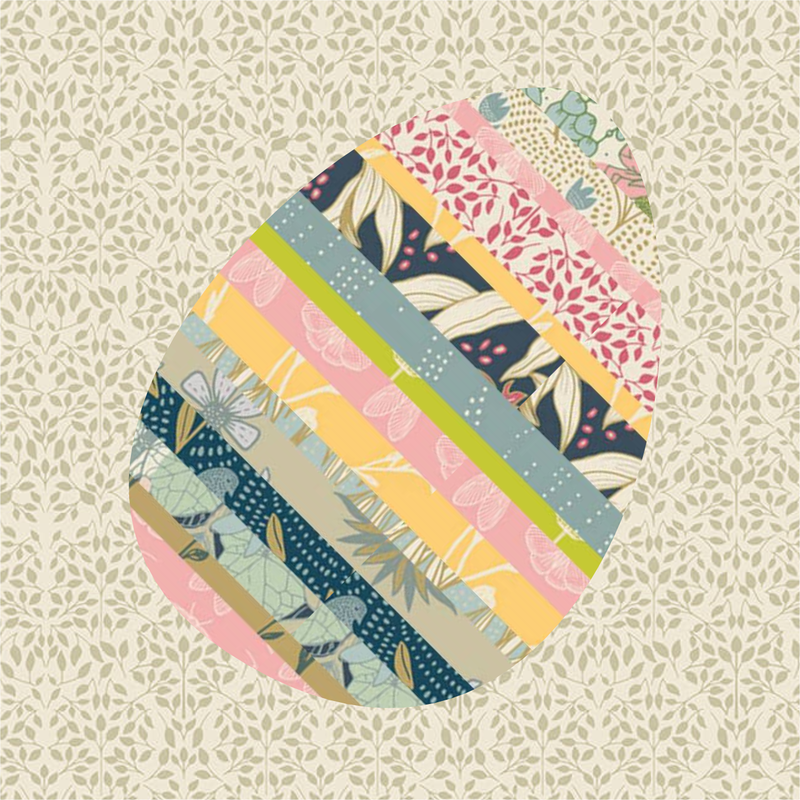
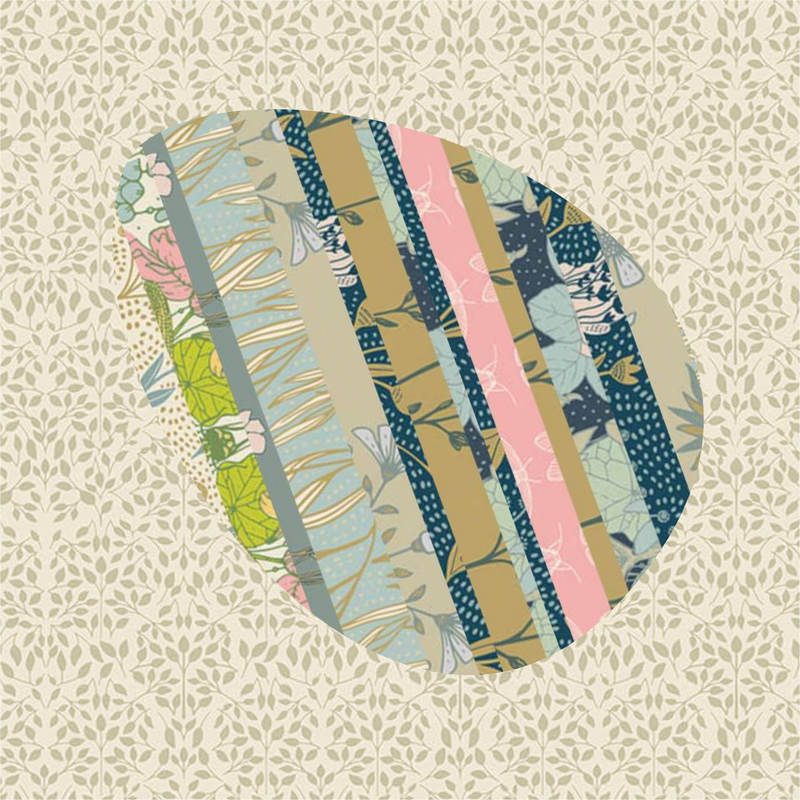
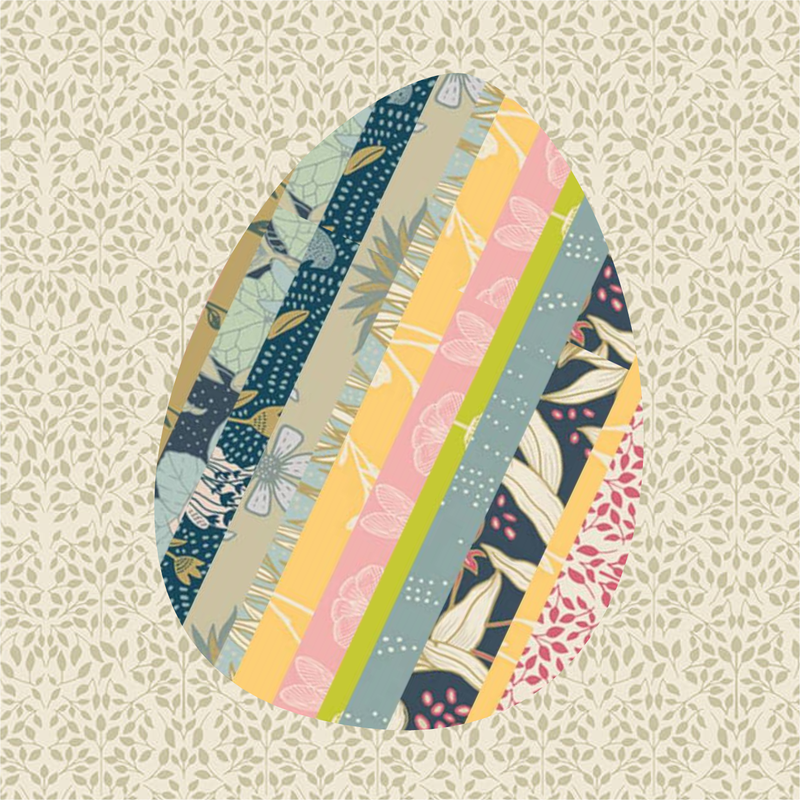
Super simple - but I promised you foundation pieced eggs. I decided to go with a strip set concept.
|
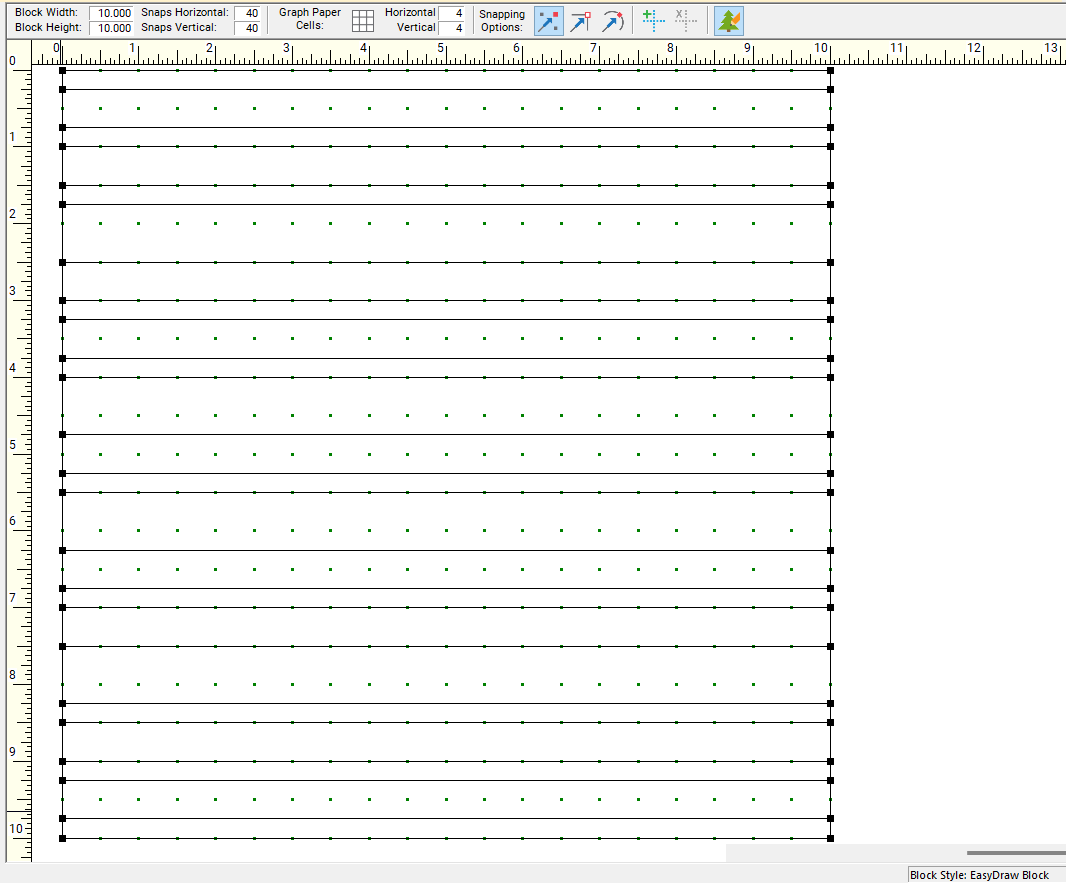
Strip Set Drawn in EasyDraw
|
Color your strip set with a favorite fabric collection. I used the fabric collection I had collated for last weeks blog post.
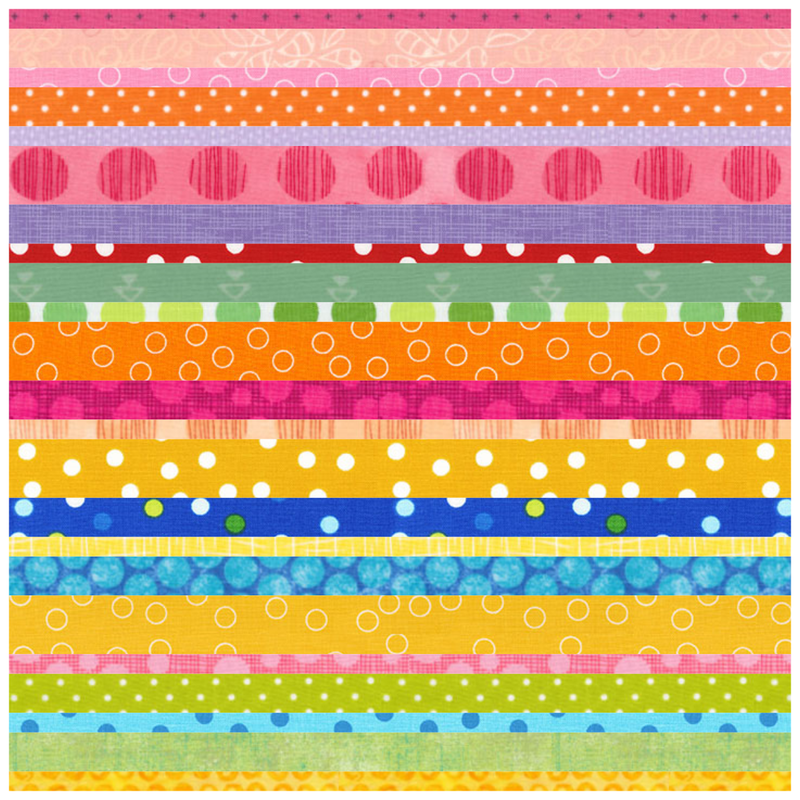
Strip Set Block Created in EasyDraw
|
Set your new block in a horizontal quilt with a 1 x 1 layout, 10" block, and no border.
Add your quilt to sketchbook as a photo. On the image worktable, edit and resize your image. Save as Fabric. |
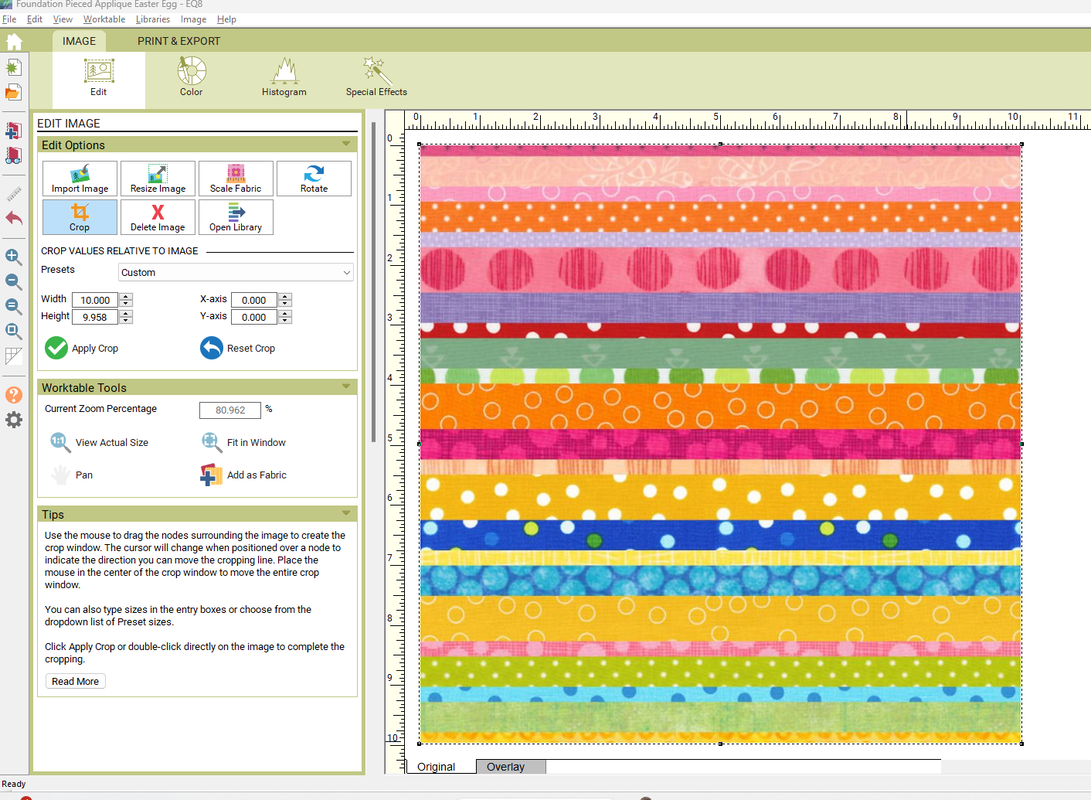
Editing the EasyDraw Block on the Image Worktable to convert to fabric
|
|
Locate the initial quilt (with the eggs) and edit.
Replace the fabric with the foundation fabric. Hint: It will be the last fabric on the palette. Use the Advanced Rotation option and Fussy Cut to finalize placement of the fabrics. Add to sketchbook. |
Foundation Friendly Egg Quilt in Default and Dots Fabrics in EQ8i
|
Here are the final foundation friendly blocks.
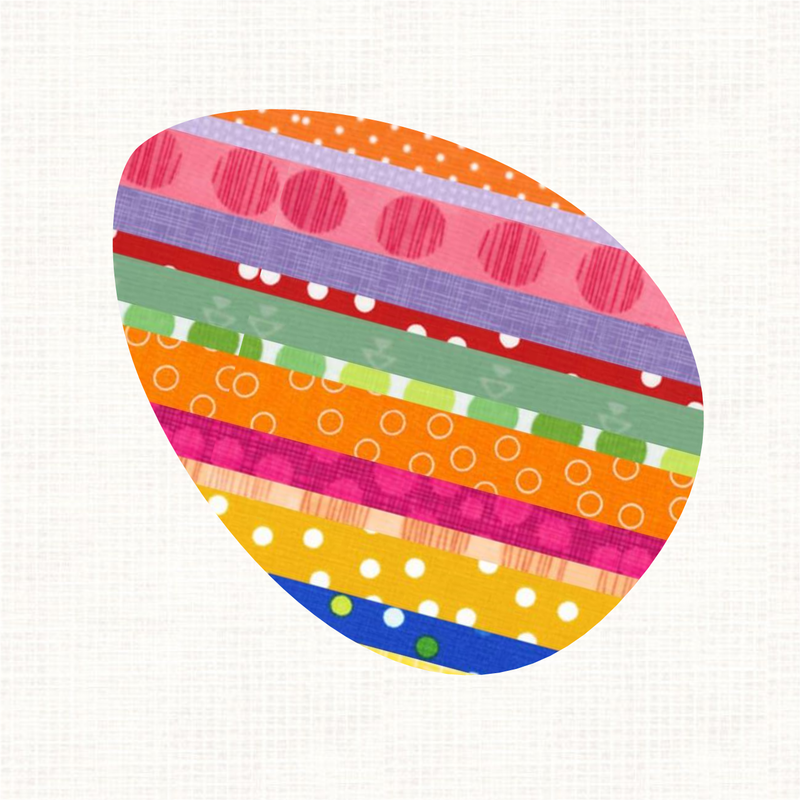
Foundation Egg #1
|
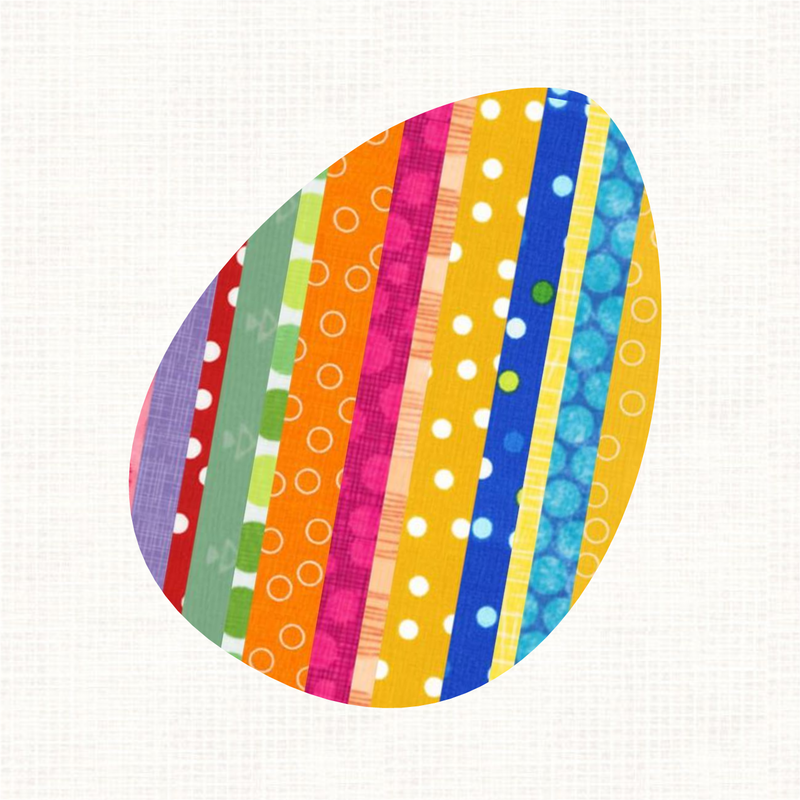
Foundation Egg #2
|
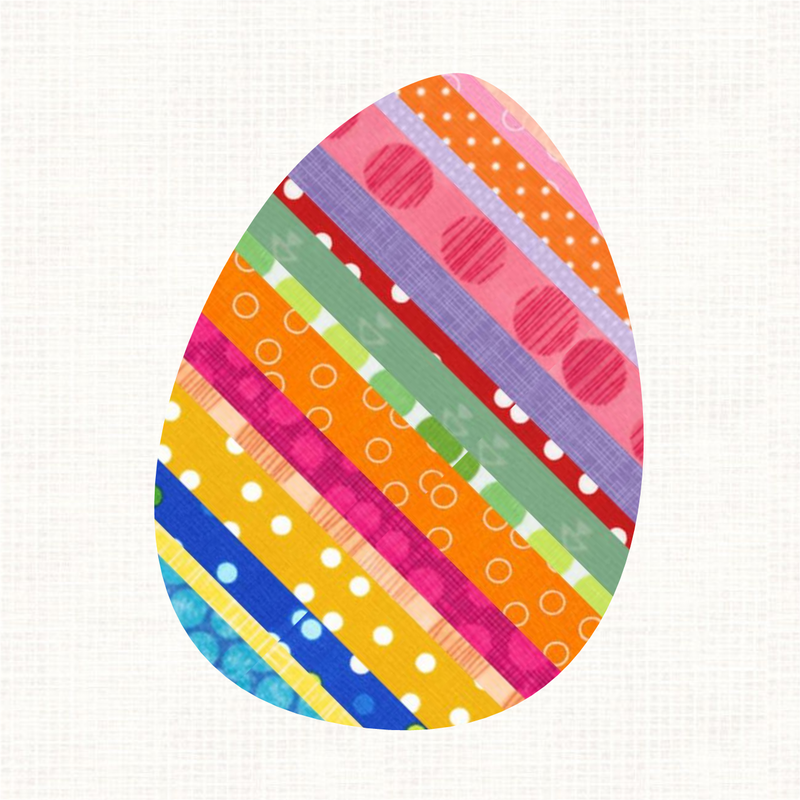
Foundation Egg #3
|
|
To print your foundation, print your block at 9 X 9.
Make sure to select Showing Fabrics. If you have a grey-scale option on your printer, select that. The lines between the fabric pieces will be your sewing lines for your eggs. You can also use this to cut out your final egg shape. Note that these will print without seam allowances. |
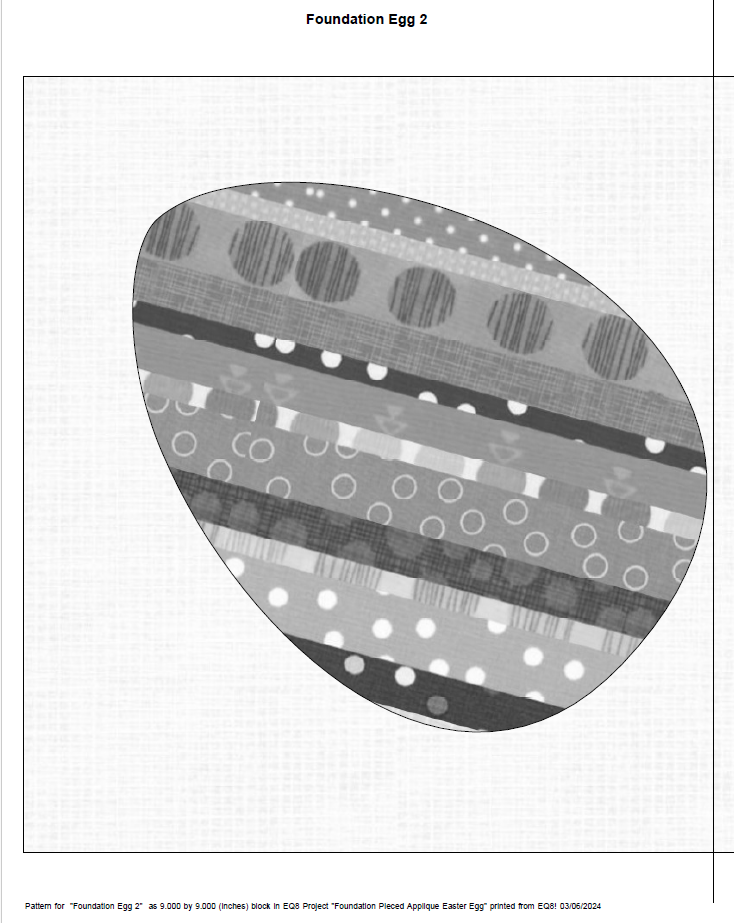
Applique Egg Foundation Printed from EQ
|
Check out the video for step by step instructions to create your own Foundation Friendly Easter Egg Applique blocks and quilt.
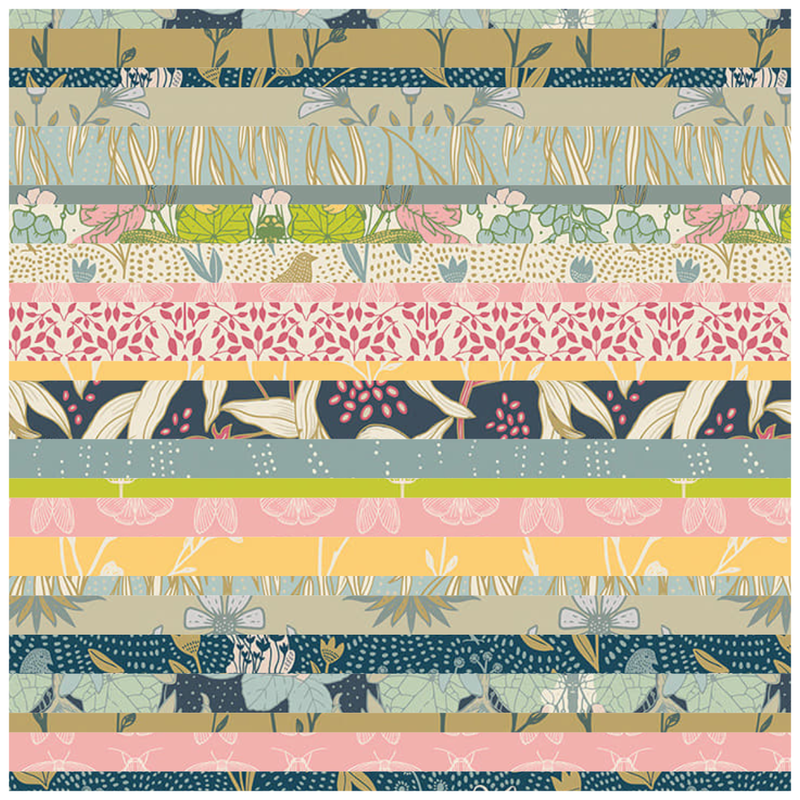
Just for fun, I decided to try the concept with a different fabric collection. I chose the Spring Equinox fabrics by Art Gallery. They were part of Stash Collection #1.
I think it gives the blocks and quilt a more elegant look.
I think it gives the blocks and quilt a more elegant look.
Spring Equinox from Art Gallery
Foundation Strip Set Block
|
Spring Equinox Egg Quilt
|
Spring Equinox Egg Block #1
|
Spring Equinox Egg Block #2
|
Spring Equinox Egg Block #3
|
I would love to see what you decide to work with when implementing the ideas from the video. Feel free to share your designs in the Learning EQ Facebook group. I've set up a dedicated post for your pictures.

|
Happy quilting.
Kari Join the On Point Quilter weekly newsletter and receive regular tips and inspiration on using Electric Quilt 8 along with the Free 12 Top Tips for EQ8 video guide. 
|
|
Do you have a quilt that got you interested in quilt making?
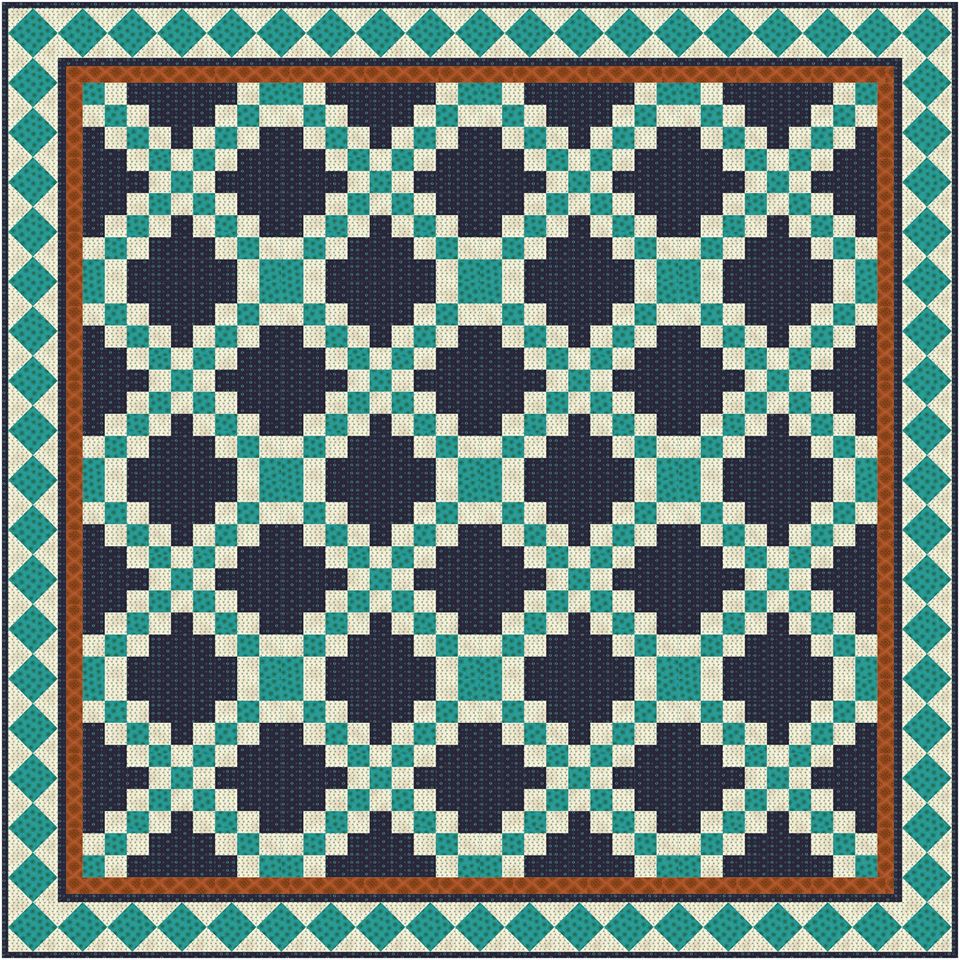
Here is mine. My grandmother made an Irish Chain quilt for me (probably in the late 60s or early 70s). I loved the quilt and when it began to wear out I wanted another one for my bed. This was a very traditional Irish chain -- which I now think is a bit boring. Our tastes change over the years -- and that can definitely be a good thing. |
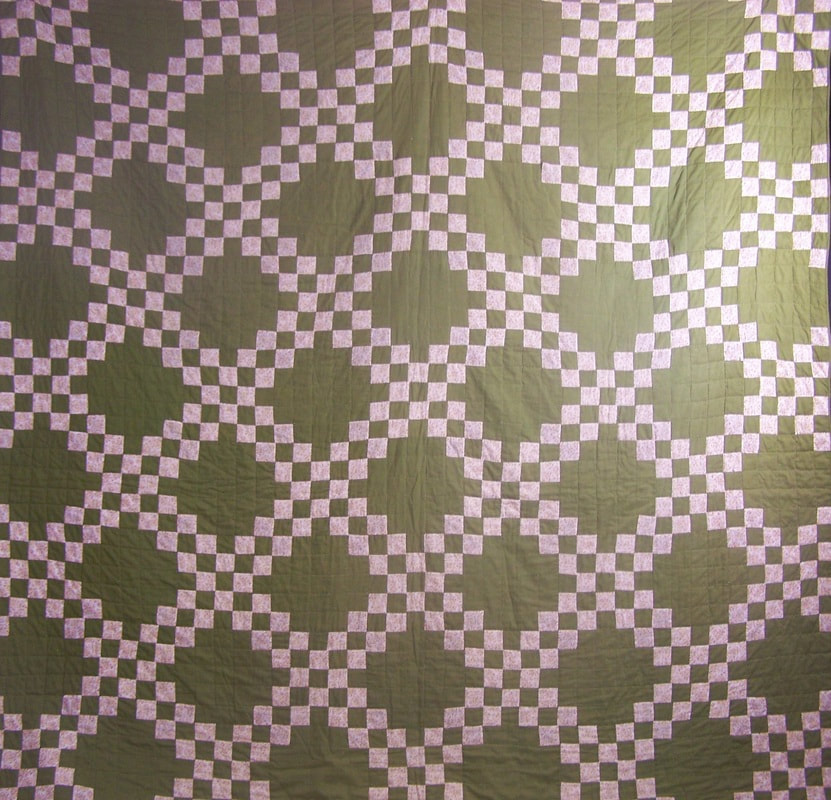
Traditional Irish Chain Quilt Made by Martha Keller (circa 1960s)
|
This traditional Irish Chain consisted of two blocks that would be super easy to draft in EasyDraw.
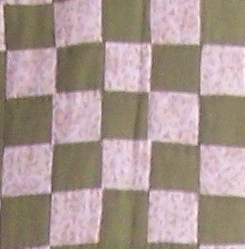
Irish Chain Block 1 - Five by Five Grid
|

Irish Chain Block 2 - Also drafted with 5 x 5 Snap Points. If you are replicating Martha's quilt, put applique squares in the corners.
|
But I wanted to explore something more. What if we drafted a similar type of design but varied the distance between the lines?
In the video I explore what that would look like with columns and rows that are different sizes.
And then add a touch of applique (from the EQ library) for the center.
In the video I explore what that would look like with columns and rows that are different sizes.
And then add a touch of applique (from the EQ library) for the center.
Irish Chain Block 1 Variation
|
Irish Chain Block 2 Variation 1
|
Irish Chain Block 2 Variation 2
|
If you use Symmetry you can also quickly rotate the blocks for a more random placement of those applique motifs.
Irish Chain Variation Option 1
|
Irish Chain Variation Option 2
|
Check out the video for more details on drafting these blocks and quilts.
As you work through the video, think through how you would modify the design. I would love to see what you do to my Grandmother's Irish Chain quilt.
I've set up a post in the Learning EQ Facebook group where you can share your ideas.
I've set up a post in the Learning EQ Facebook group where you can share your ideas.
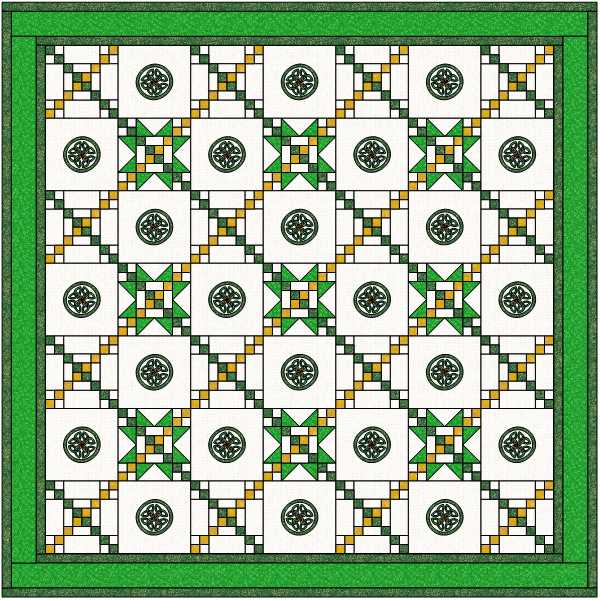
To inspire you, I though I would share a few chain designs by some Tech Know Quilter members. I loved seeing how they thought outside the box.
Pat Harkin
|
Rick Danner I immediately think of Beleek China. Clean minimalist design. For me, these quilts would get amped up with the quilting. I just got a huge set of asymmetrical curve long arm rulers that can create some delicious interlocking designs that would really set these quilts on fire.
|
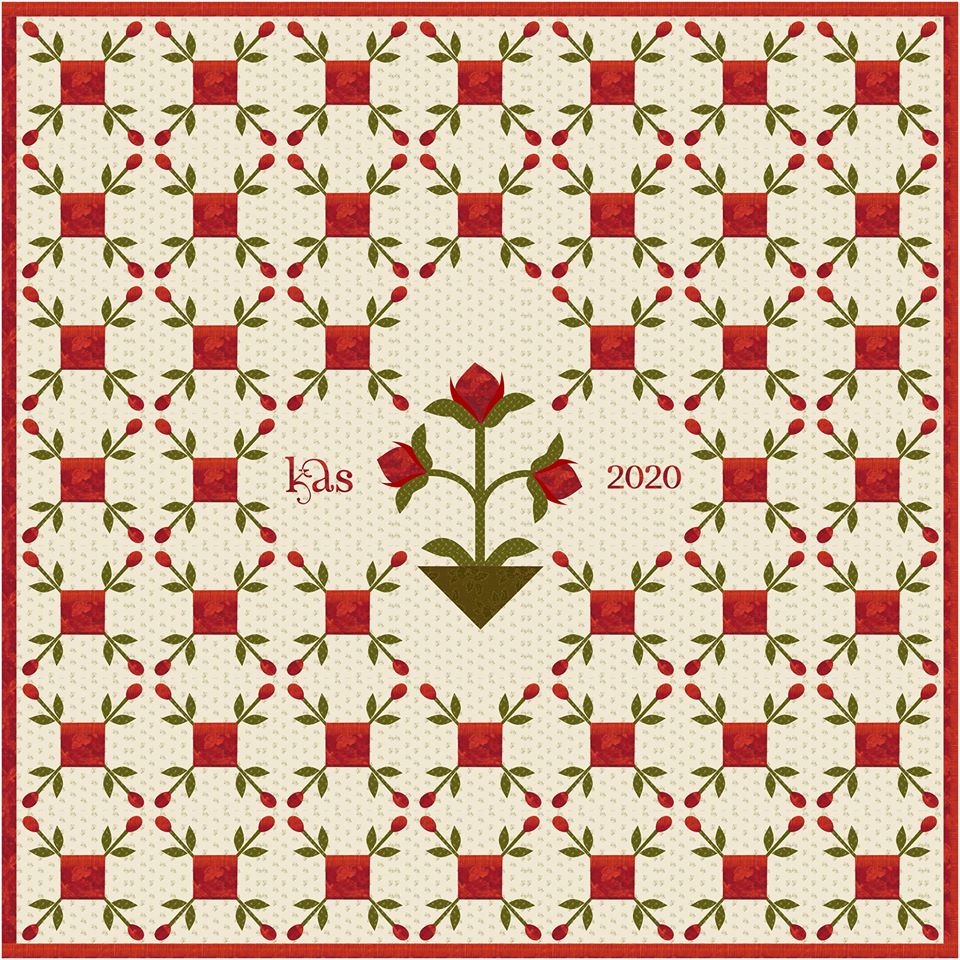
Kristy Goodin Soard when I read the words crossing blocks, my thoughts immediately went to a darling rosebud block I had seen on Pinterest.
|
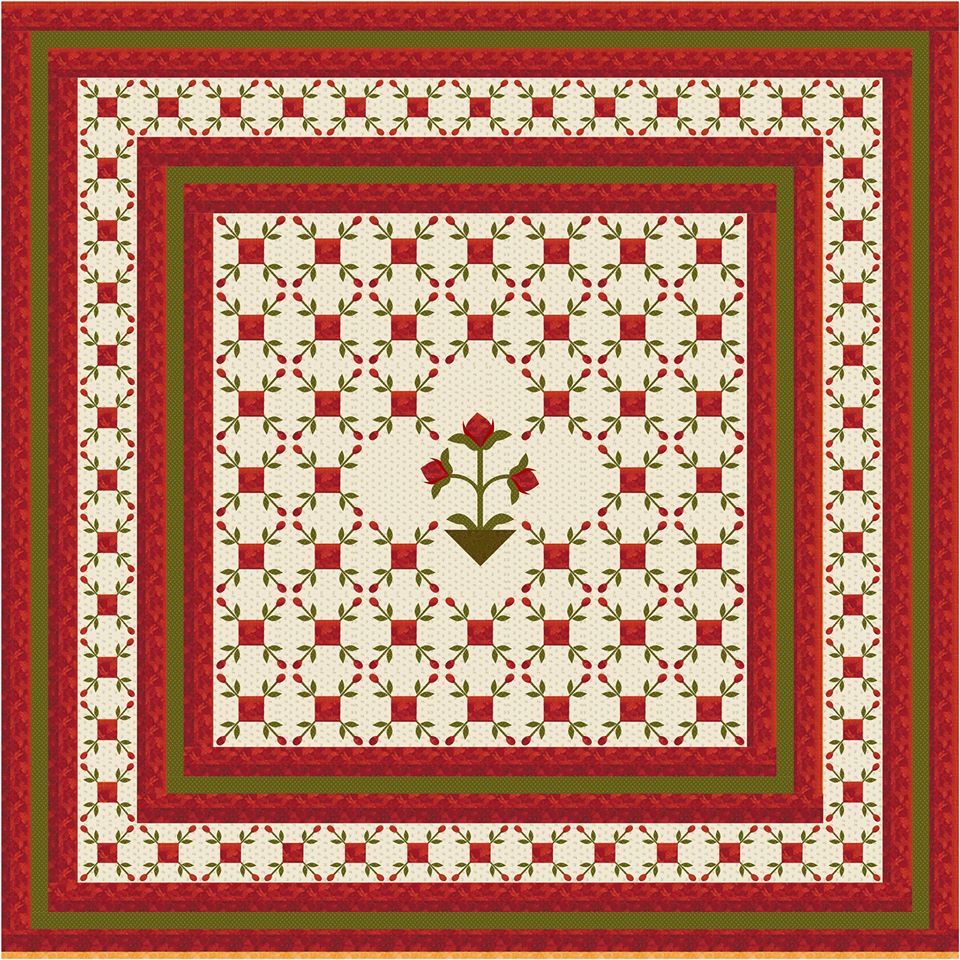
Kristy Goodin Soard
|
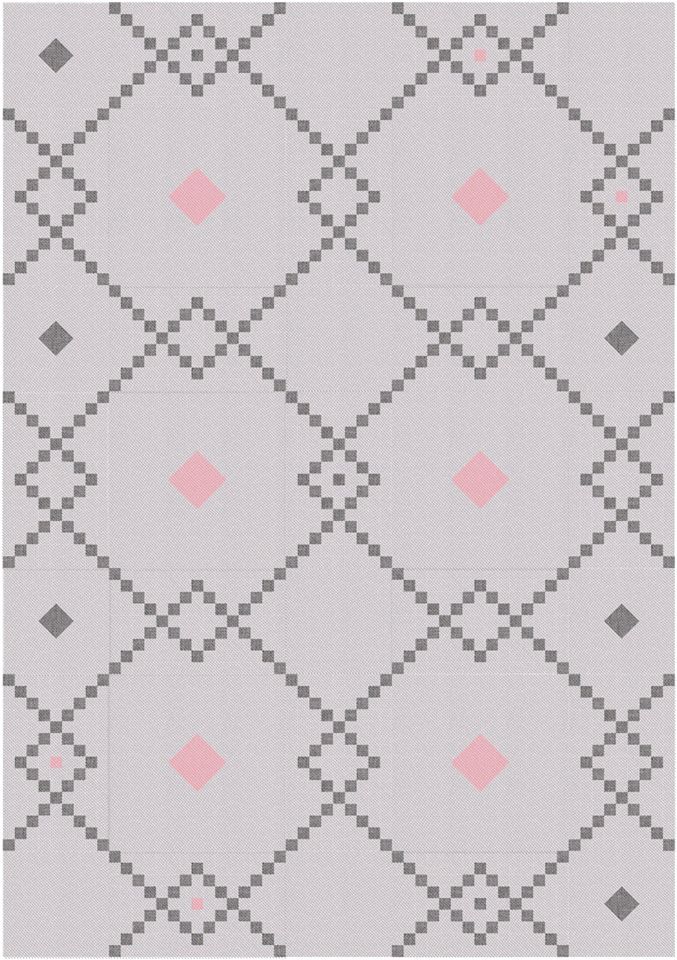
Joyce Drenth In browsing Pinterest, I happened upon an interesting crossover Irish Chain design and decided that I wanted to attempt to figure out its layout.
|
Suzanne Golden
|
Suzanne Golden
|
Barbara Bobbitt
|
Tech Know Quilter's only opens enrollment to new members a few times a year. Send me a note if you would like more information on joining.
Note that Tech Know Quilter's classes are all virtual and can be completed at your convenience from the comfort of your own home.
Note that Tech Know Quilter's classes are all virtual and can be completed at your convenience from the comfort of your own home.

|
Happy quilting.
Kari Join the On Point Quilter weekly newsletter and receive regular tips and inspiration on using Electric Quilt 8 along with the Free 12 Top Tips for EQ8 video guide. 
|
A new EQ8 tutorial for you today. I think you will enjoy this fun idea for a new block -- that looks much more complicated than it is.
Plus be inspired by the most recent designs from Tech Know Quilter members.
Plus be inspired by the most recent designs from Tech Know Quilter members.
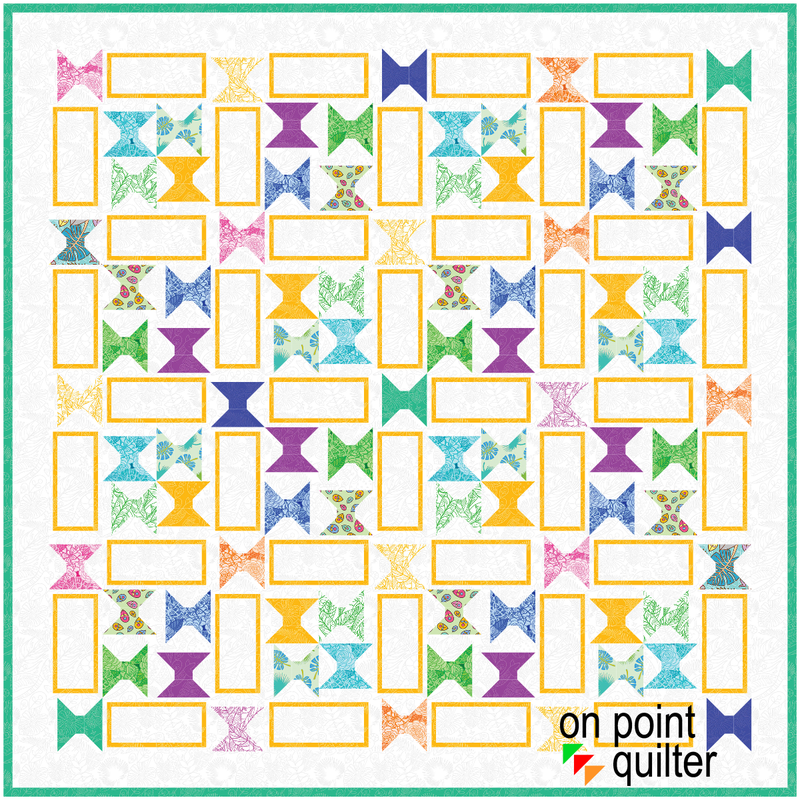
Flutterby Blocks and Quilt
Did you know that Flutterby is another name for Butterfly? Which do you prefer?
For this project, I am using the Rooville fabric collection designed by Kimberly Einmo for Benartex. This was a free download from Electric Quilt for November 2023.
For this project, I am using the Rooville fabric collection designed by Kimberly Einmo for Benartex. This was a free download from Electric Quilt for November 2023.
|
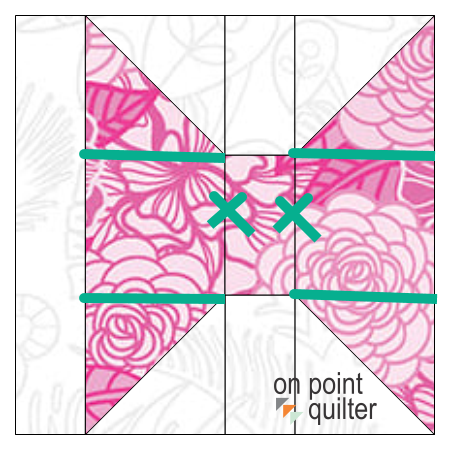
Start by drawing a 3" block using EasyDraw. EasyDraw is just like working with pencil and graph paper.
Notice the 1/2" strip on the left -- that simple strip is the magic that keeps this quilt from being boring |
Flutterby Single Block
|
|
I designed the block to be conducive to adding cheater corners on rectangle blocks -- which may be your preferred construction method for adding those triangles.
However the beauty of EQ is that this would be super easy to modify if that is not your favorite construction technique. Add four short lines -- delete two others and now you can used half square triangle units instead of cheater corners for your blocks. Which construction method do you prefer? |
Modifications for Half Square Triangle Friendly Units
|
Use the Serendipity Feature to create multiple versions of the block. In Shrink and Flip, EQ shrinks the selected block, then flips and rotates it in the four quadrants to create a new block. Here were the two options I decided to use for my quilt.
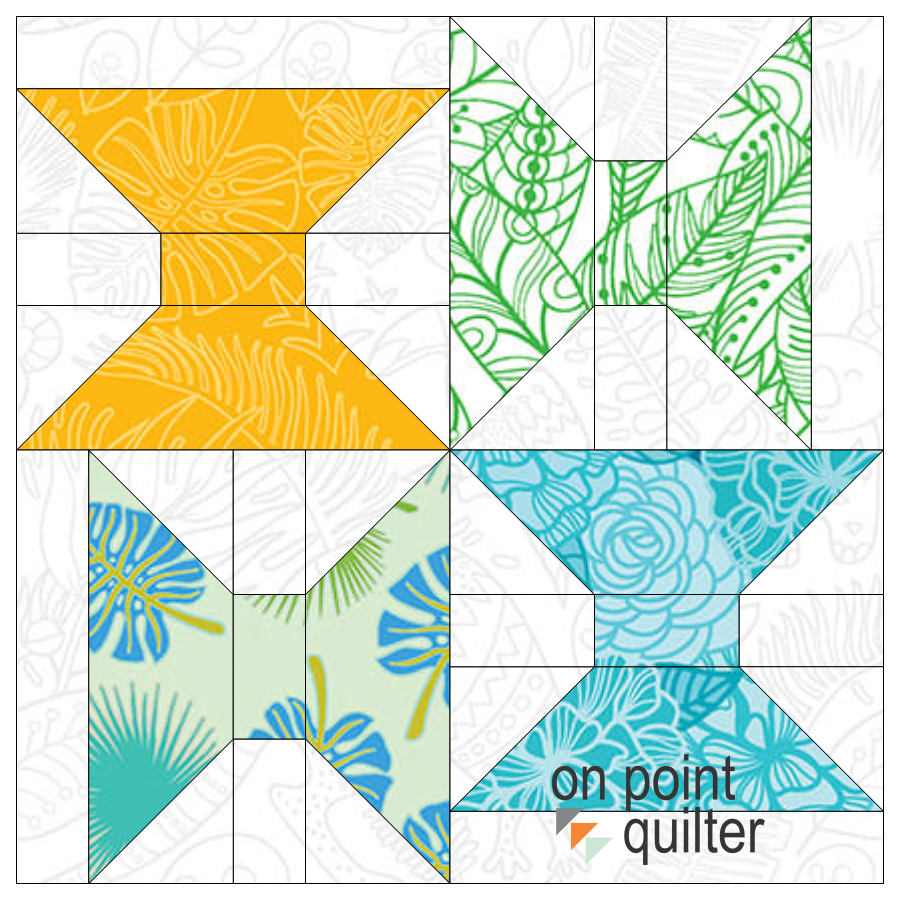
Flutterby Shrink and Flip Block 1
|
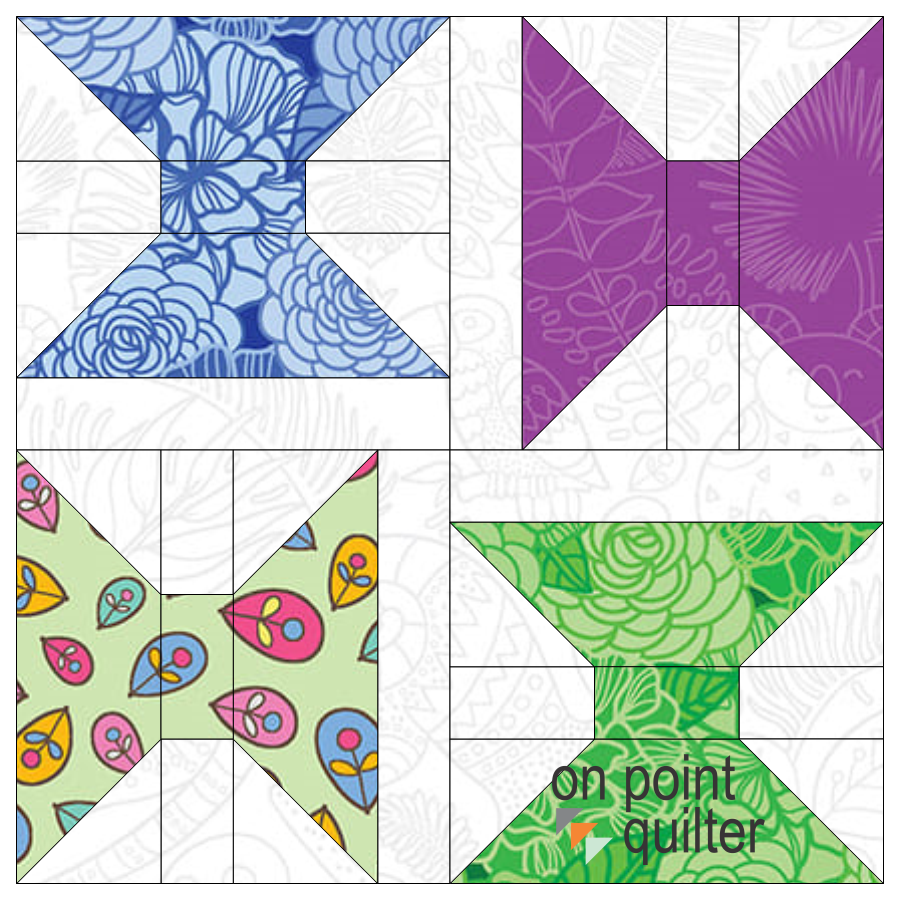
Flutterby Shrink and Flip Block 2
|
For the quilt, I suggest using a horizontal layout.
Set the number of blocks at 4 by 4 with a size of 6" for each block. Of course it would be easy to add more blocks or change the size of the blocks if you would like bigger Flutterbys.
Under sashing, select a size of 3". This was the size of the original Flutterby block. Also select the option to include sashed borders.
|
To create a more random look for the blocks:
|
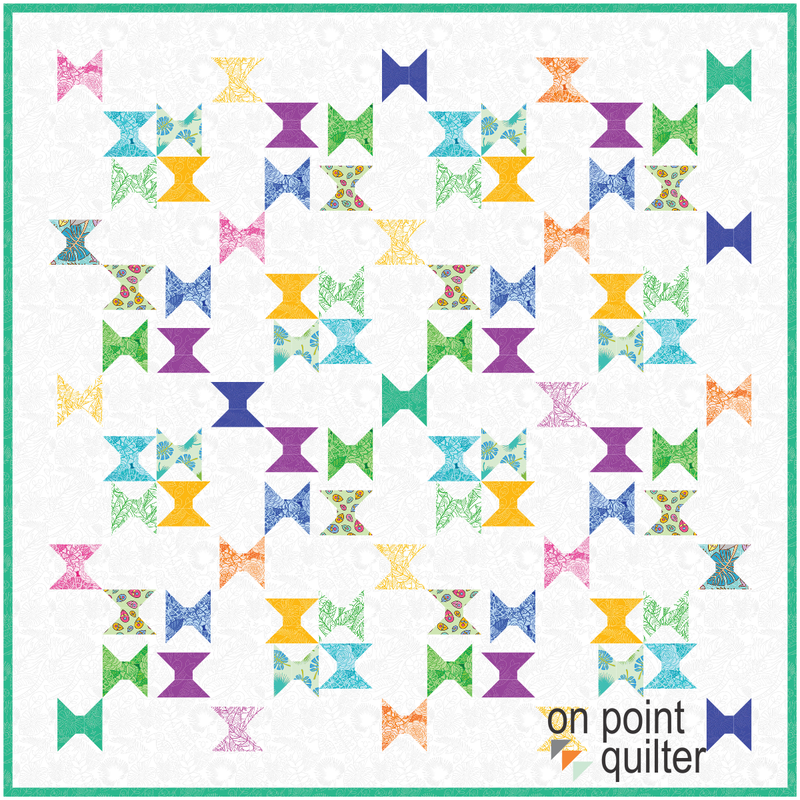
Flutterby Quilt designed in EQ8
|
|
When I am in design mode, I frequently create more than one variation on a quilt. As I make changes, I always come up with other ideas that I want to experiment with.
For this quilt, I decided to try a block in the sashing area. I made it an easy to piece block with only rectangle pieces. |
Flutterby Quilt with optional pieced borders.
|
Check out the video for all the details on creating the Flutterby blocks and quilt.
I would love to see your designs. Feel free to share pictures on the Learning EQ Facebook group. I've set up a dedicated spot for your pictures.
To personalize the project, swap out the Flutterby block with your own 3" block and use the same concepts to create a new quilt.
To personalize the project, swap out the Flutterby block with your own 3" block and use the same concepts to create a new quilt.
Tech Know Quilters January Showcase
Every month I challenge Tech Know Quilter members to apply what they have been learning in the Tech Know Quilter classes. I am so proud of this group of quilters as they share their creativity with us.
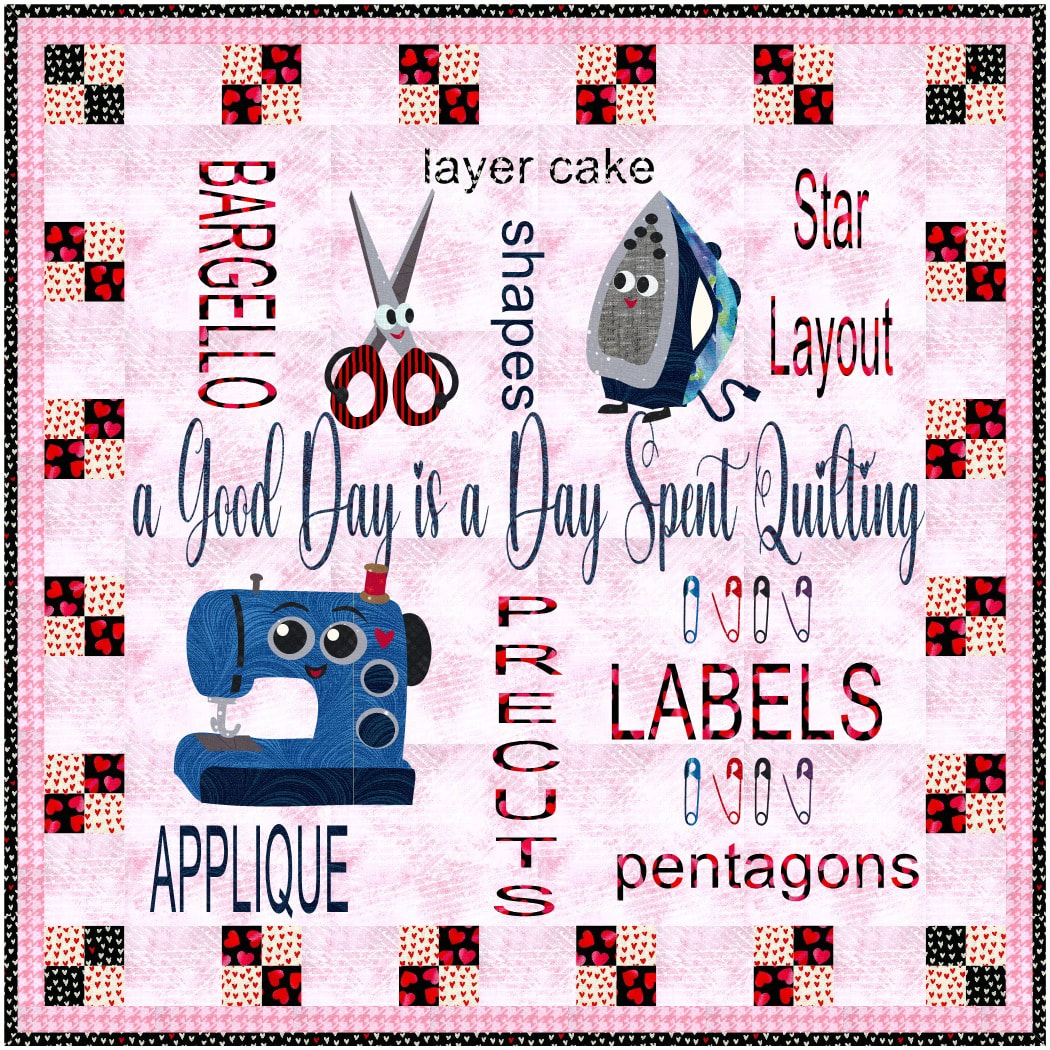
Eileen Dover I did the bargello class and loved creating the designs. This is my fave of the bunch
|
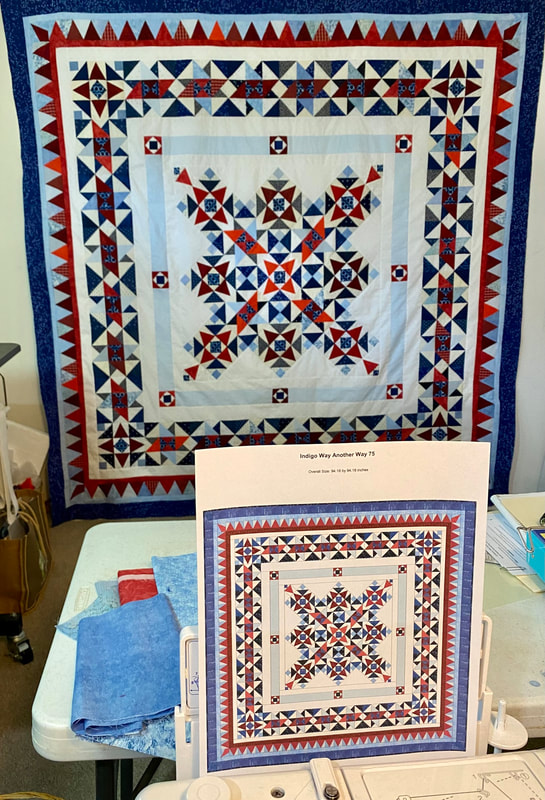
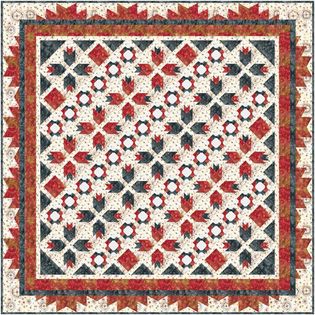
Terry McCaskey I finished piecing the re-design I created in EQ for the Bonnie Hunter Mystery Quilt "Indigo Way." This is "Indigo Way Another Way" thanks to EQ skills developed with Kari in TKQ.
|
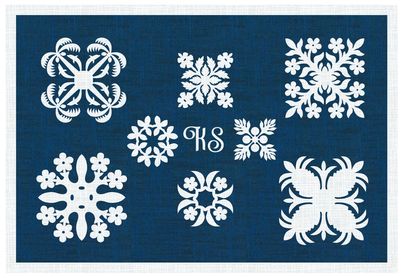
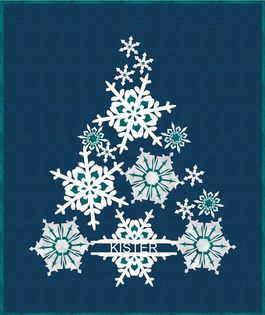
Kristy Goodin Soard My snowflake mug rug was a favorite from this month.
|
Rhonda Goss Letters and Text Masters Class
|
Beth Voss Ennis Here's a quilt I want to make for my son. I added (by photo and finding fabric image at manufacturer) my own fabric, along with the Hunter Star block to see what it will look like.
|
Beth Voss Ennis I feel like an over achiever, as I've created 2 quilts to make in the past week, and have another in mind. This one is for a great-nephew, and again, I added my own fabrics from the designers website, one had to be through a photo. Then I used a pattern from a 3 yard quilt book but used the rotate tool to come up with my own layout. I'm really loving what I've learned so far!
|
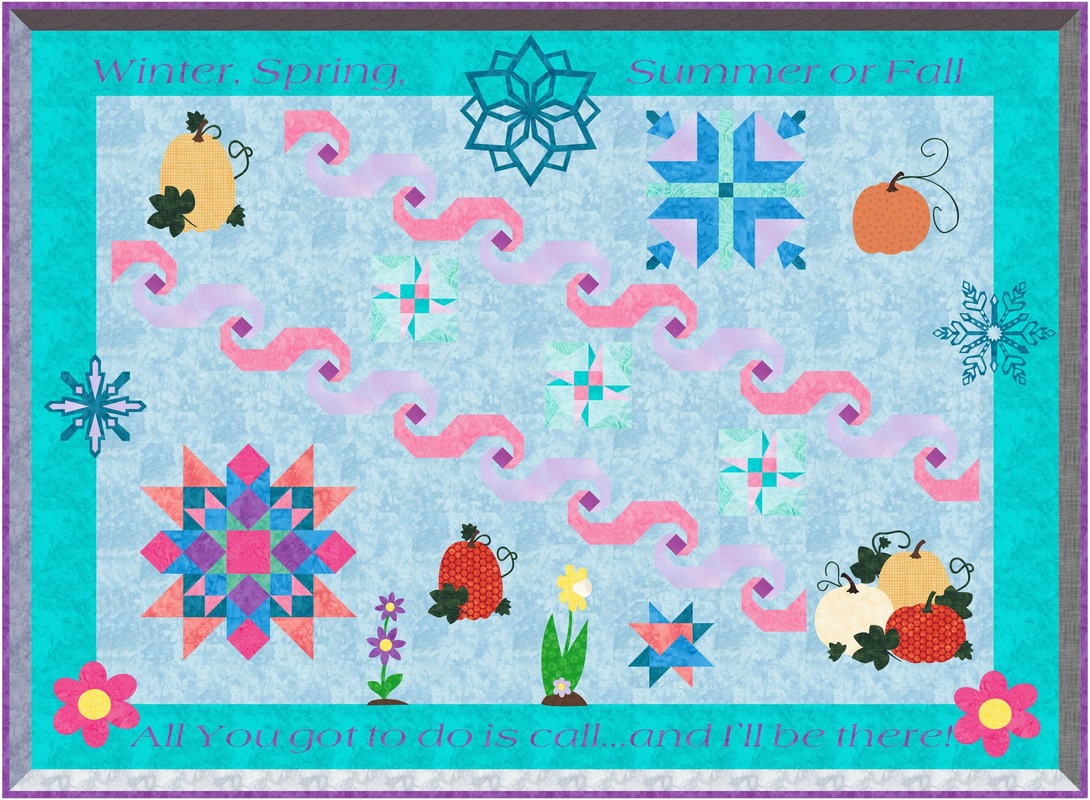
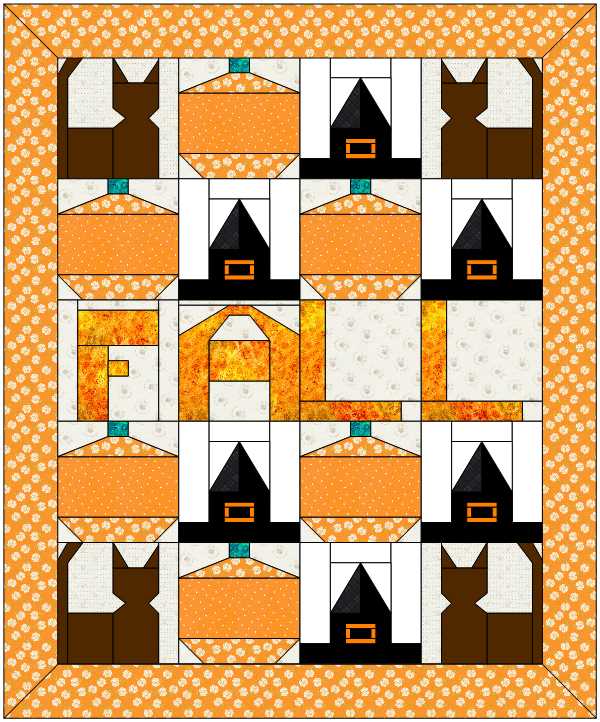
Julie Pedersen This month, I took the Masters Letters and Text class. For this challenge, I chose to use the custom layout and create a card for my school principal who is on medical leave. I used blocks from each of our seasonal quilts to create it...Winter, spring, summer and fall. Looking forward to next month's class to learn more about this topic.
|
Denise Mohler What did I learn in January? Well I am still playing catch-up so I have a list of completed lessons for this month..... so here we go!!!!!! TKQ Advanced Borders Lesson 10
|
Denise Mohler TKQ Reproduction Quilts 2 Lesson 5
|
Denise Mohler TKQ More Optical Illusions Lesson 13
|
Denise Mohler TKQ Masters Advanced Custom Set Lesson 5
|

Denise Mohler TKQ Masters Advanced Polydraw Lesson 3
|
Denise Mohler TKQ Masters Fabric From Photos Lesson 5
|
Denise Mohler TKQ Masters Folded Corner Holiday Quilts Lesson 7
|
Denise Mohler TKQ Masters Modern Dresden Blocks Lesson 7
|
Denise Mohler TKQ Masters Pictoral Foundation Lesson 2
|
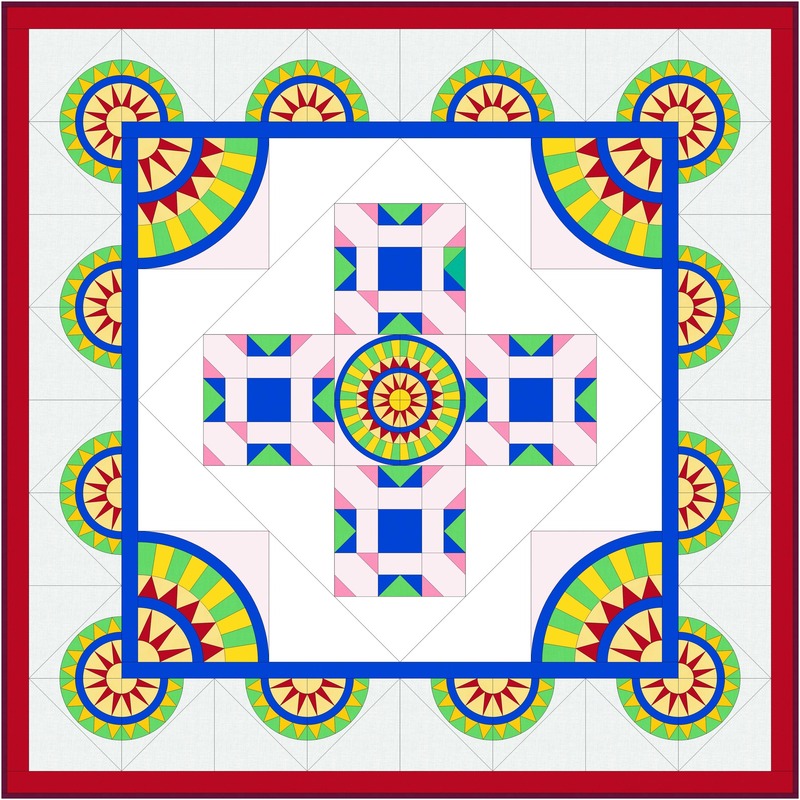
Denise Mohler TKQ Masters Design Your Own Medallion Quilt Lesson 5
|
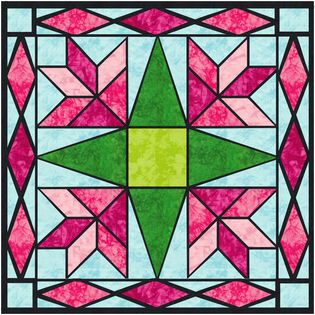
Denise Mohler TKQ Masters Stained Glass Quilts Lesson 2
|
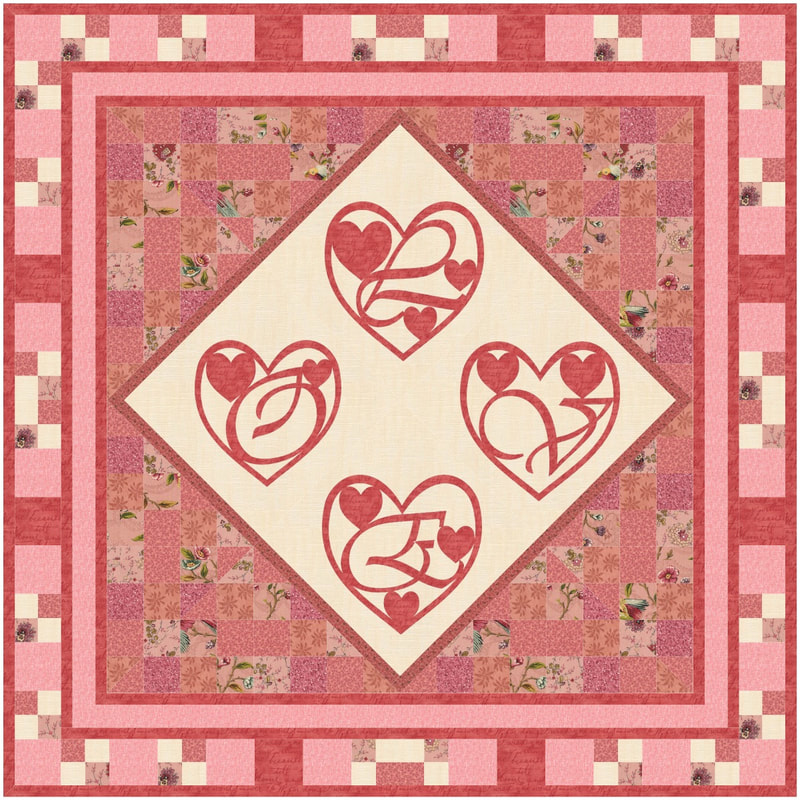
Connie Bradley Bobcik TKQ Masters Class January 2024, Letters and Text. I am using Topper Quilt I designed for my Word Challenge. I used skills we learned to split a design and add lettering to that. I also added applique motifs. I loved all of the lettering ideas we learned thru out the month.
|
Stella Shaffer Crutcher I used some new skills like merging blocks and the auto borders in making this. The new skills from the classes are valuable even when I am working on something completely different than the quilts we are doing in class.
|
Edith Craig My class this month was Masters Letters and Texts. This class has been a great way to practice drafting appliques and placing them on a quilt. I used some images from the EQ library as a starting point for some of my appliques, removing the backgrounds to make them motifs.
|
Fran Heisey TKQ Masters Letters and Text. This was my favorite class so far. The snow flakes were such fun.
|

Brigitte Lee I made the Queen-size quilt by redrawing all the different braid sizes. After the MTKQ Class Letter and Text, lesson 2. I changed my approach for the Sofa throw, by saving the largest braid as a photo and cropping the photos to the right length. There was some fine-tuning needed as the photo added a border. (Panels are from Kaufman Fabrics, Island Sanctuary)
|
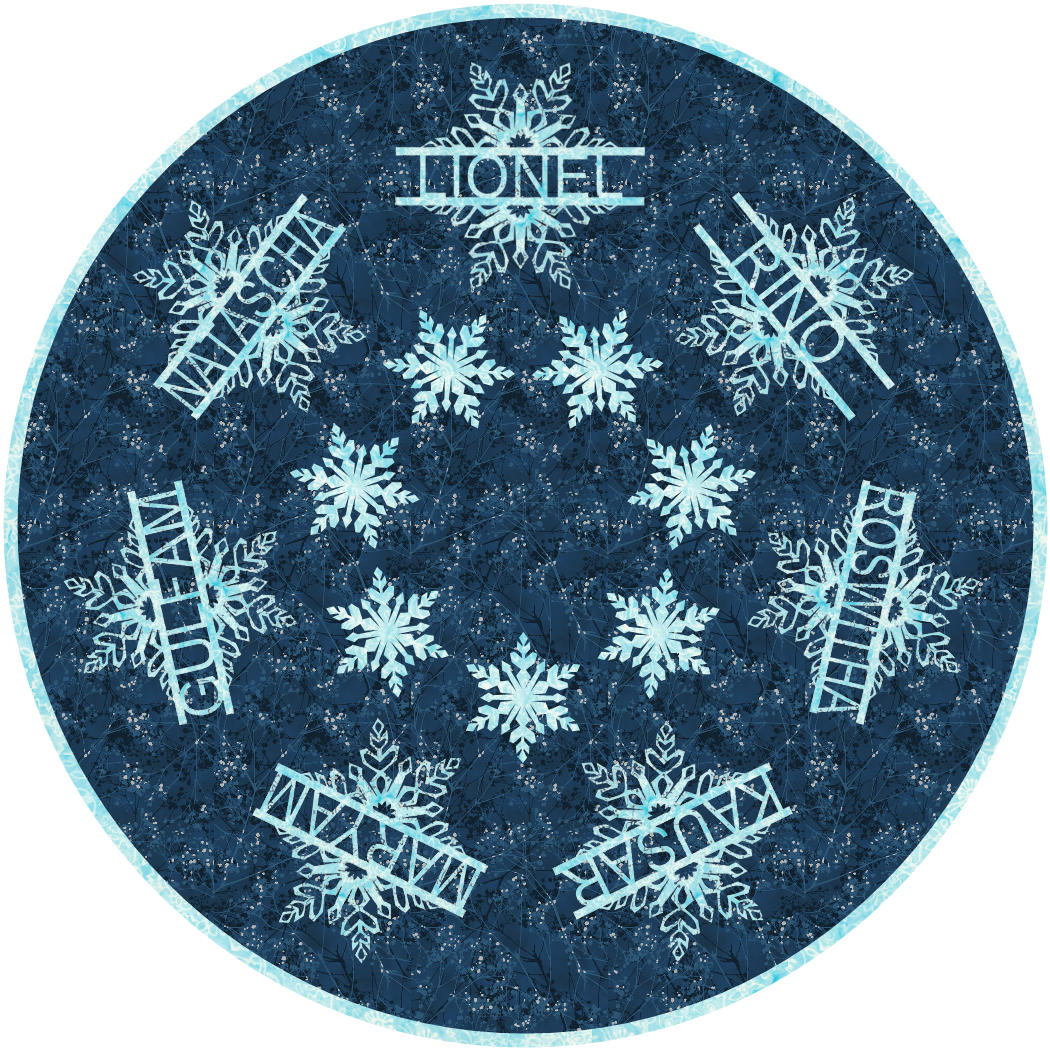
Roswitha Franz In January I took part in the Masters course “Letters and Text”. I was fascinated by the snowflakes and the possibility of adding text to them and using them to design a round quilt. I have included my family's names. It was a particular challenge to arrange 7 stars instead of the 5 in the course. In the 4 years that I have been attending Kari's courses, I have learned a tremendous amount. I never thought I'd get to the point of showing a design here. For me, Kari's courses are something like brain jogging, too. Implementing them keeps me mentally fit.
|
Would you like to join this amazing group of designers and quilters? Click on the Learn More Image to find out about Tech Know Quilters.


|
Happy quilting.
Kari Join the On Point Quilter weekly newsletter and receive regular tips and inspiration on using Electric Quilt 8 along with the Free 12 Top Tips for EQ8 video guide. 
|


Free guide available for newsletter subscribers


Kari Schell
Electric Quilt Expert and Educator and Pattern Designer.
Categories
All
Art And Stitch
Cricut Maker
Dear Jane
Electric Quilt 7
Electric Quilt 8
Goose Goose Duck Challenge
Inkscape
Longarm Quilting
Patterns
Silhouette Cameo
Stampin Up
Summer Games
Tips And Techniques
Tools And Rulers
Archives
April 2024
March 2024
February 2024
January 2024
December 2023
November 2023
October 2023
September 2023
August 2023
July 2023
June 2023
May 2023
April 2023
March 2023
February 2023
January 2023
December 2022
November 2022
October 2022
September 2022
August 2022
July 2022
June 2022
May 2022
April 2022
March 2022
February 2022
January 2022
December 2021
November 2021
October 2021
September 2021
August 2021
July 2021
June 2021
May 2021
April 2021
March 2021
February 2021
January 2021
December 2020
November 2020
October 2020
September 2020
August 2020
July 2020
June 2020
May 2020
April 2020
March 2020
February 2020
January 2020
December 2019
November 2019
October 2019
September 2019
August 2019
July 2019
June 2019
May 2019
April 2019
March 2019
February 2019
January 2019
December 2018
November 2018
October 2018
September 2018
August 2018
July 2018
June 2018
May 2018
April 2018
March 2018
February 2018
January 2018
December 2017
November 2017
October 2017
September 2017
August 2017
July 2017
June 2017
May 2017
April 2017
March 2017
February 2017
January 2017
December 2016
November 2016
October 2016
September 2016
August 2016
July 2016
June 2016
May 2016
April 2016
March 2016
February 2016
January 2016
December 2015
November 2015
October 2015
September 2015
August 2015
July 2015
June 2015
May 2015
April 2015
March 2015
February 2015
January 2015
December 2014
November 2014
October 2014
September 2014
July 2014
June 2014
May 2014
April 2014
March 2014
February 2014
January 2014
December 2013
November 2013
October 2013
September 2013
August 2013
 RSS Feed